Welcome to the official Janome.com Blog Page!

  • 8/16/2021

    Janome is excited to partner with the newest and most innovative show in designer reality competitions THE HYPE! 


    "The worlds of streetwear, business, and culture collide! THE HYPE features ten streetwear professionals who will compete in challenges to prove they can talk the talk and deliver the product. Every episode will offer unique tips and takeaways about the intricacies of designing, the business of fashion, and the savvy it takes to identify the latest trends. See which contestant can elevate their designs and entrepreneurial sense to avoid elimination — while still remaining authentic to their own style."

    Follow along as these talented designers create their one-of-a-kind looks on the Janome HD 3000 sewing machine, Air Thread 2000D, Memory Craft 550E, and Janome Artistic Digitizer software.


    THE HYPE studio was set up for success with the following Janome machines and instruction from our Janome Education Team:


    The HD-3000 is a heavy-duty machine, perfect for a beginner or sewist looking to do a wide range of sewing. A handy instructional guide is located in the top tray door of the machine, which indicates the feet and stitch settings for a variety of sewing tasks. Heavy-duty aluminum body and 18 stitches, including a one-step buttonhole, give you the tools you need to handle any kind of sewing project. Stitch length and width adjustment are conveniently located on the front of the machine, and a hardcover comes standard for easy storage.

    Serging Simplified. Every project is easier with the right tools for the job, and the AirThread 2000D provides all the tools you need to deliver professional quality finishing. With Janome's One-Push Air Threading System the tedious threading of upper and lower loopers is a thing of the past. The 8-Piece Feed Dog System will easily grab and feed your fabric, from slinky knits to denim, the AT2000D will meet the challenges of your sewing projects. 

    The Built-in One-step Converter makes changing from 3-thread to 2-thread applications easier than ever. And with a built-in needle threader, manually threading your serger needles becomes easier than ever. One unit provides threading of both the right and left position needles. 


    Janome's largest stand-alone embroidery machine, the Janome Memory Craft 550E is a perfect companion to your sewing machine. Personalizing your projects has never been easier or faster now that you can use the new RE36b hoop that provides an embroidery field of 7.9" x 14.2" with magnetic clips. Your built-in embroidery library contains 180 embroidery designs, that include classic designs, floral alphabets, in-the-hoop monsters, and Sashiko designs. Add in 6 fonts, and the possibilities are endless. The MC550E comes with an extra-wide extension table, four embroidery hoops, the already mentioned RE36b hoop, SQ20b 7.9" x 7.9", RE20b 5.5" x 7.9" and SQ14b 5.5" x 5.5". 

    Designs are easily imported through a USB and edited through the machine's advanced on-screen editing functions. Navigation through all of these features has become easier with the MC550E’s LCD color touchscreen.


     Meet the designers, the cosigners, and find out what THE HYPE is all about! 


    Watch the hottest competition this Summer, stream

    THE HYPE on HBO Max!


  • 8/13/2021


    Have you been sewing along with Natalie Santini for the Candy Crush Quilt Along?

    Natalie has been hosting Facebook Live events on the Janome Sewing Machines Page on Fridays at 3 pm ET to go over the current week's tasks and also provides tips and tricks for better results! 


    We are into Week 2 of the #candycrushQAL and Natalie is super excited!

    If you've already signed up, you'll be receiving your email Saturday morning with Zoom log-in info (if you want to join the Meet & Mingle happy hour). I'm hosting meetings weekly, it's a low-pressure atmosphere to answer questions or share motivation and progress. 

    This is an easy quilt to make. We basically are sewing squares or strips of squares together. You can DEFINITELY do this!

    To be eligible for the GRAND PRIZE of a Janome Sewist 721 sewing machine, post a photo of your finished quilt top (does not need to be quilted and bound) by September 4, 2021. 

    A random winner will be chosen from those who have finished the quilt top and share the finished quilt, it doesn't have to be quilted and bound. There will also be other fabulous giveaways for participating during the event! How cool is that news?

    (Entries for the machine are limited to U.S. residents only, 18 years of age or older, due to laws and restrictions)


    You can sign up at any time, the quilt along will be open through August.

    On September 5th, after the QAL is finished, we will be awarding the grand PRIZE of a Janome Sewist 721 sewing machine to one lucky winner!


    Whether you are just beginning your sewing journey or are an experienced sewing enthusiast, the Janome 721 mechanical sewing machine has features to enhance your sewing experience. The 19 built-in stitches offer everyday stitches including stretch stitches and a 4-step buttonhole. Features include Adjustable Foot Pressure, Built-in Needle Threader, Extra High Foot Lifter for thicker fabrics, Drop Feed plus a Hard Machine Cover for safe storage. Plus it is lightweight for easy transport to classes.


    I pieced my entire quilt on the Janome Skyline S7, then quilted straight lines diagonally over the whole quilt. It was so fun!


    Here's an introduction video if you'd like to see more!

    It feels like I harp about using quality machines and tools all the time, but there is something to be said about really understanding this. When I started sewing a long time ago I didn't have a quality machine, and EVERYTHING was so difficult to complete because of jams and problems. After my patience was worn out I called a local sewing shop and went to get the machine I truly needed. I've never looked back, and have had zero regrets for investing in ME.

    That's how it should be viewed- it's not just "buying a machine" -- it's investing in YOURSELF.

    We hope to see you on the quilt-along! Be sure to tag@sewhungryhippie and @janomeamerica in your posts and use the hashtags #candycrushQAL! If you are sewing along on a Janome please also use the #janomemakes hashtag!

    Sign up here.


    -Natalie AKA Sewhungryhippie

  • 8/3/2021

    Ah, the dreaded zipper! One of the most essential parts of creating bags, garments, cosplay, and home decor is also one of the most frightening for many sewing enthusiasts. We are here to say fear no more! Janome Maker Meredith Daniel from Olivia Jane Handcrafted is going to show you not only how easy it is to install a zipper by creating a zippered pocket in anything!!!  After you add zippered pouches to everything, you can use this skill builder to go forward adding zippers pillows, dresses, and so much more!


    hidden zipper pocket tutorial


    A zippered pocket is such a useful addition to any bag! Did you know they are also incredibly easy to insert? This tutorial will show you how to do just that, and you will be an expert in no time at all! 

    hidden zipper pocket tutorial


    You'll need just a couple of things:

    • the fabric you want to put a zipper pocket into
    • a zipper the length of you want your pocket opening (I'm using a 7" metal zipper)
    • a cut of fabric for your pocket (you'll need less than a fat quarter!)
    • a scrap of interfacing (I'm using SF 101)
    • a marking tool, ruler, and cutting tools

      hidden zipper pocket tutorial


    To demonstrate this technique, I'm installing a zipper on the front of my Basic Drawstring Bag. It would also make a great addition to my Mosaic Heart Tote, but you can use this to add a pocket to whatever you need! I am using my Janome Skyline S9 with a walking foot for the whole of this tutorial. That's right! You don't even need a zipper foot. Let's get started!


    Cut two pieces of interfacing 1.5"x 1" longer than your zipper. I cut a piece 1.5x8". Cut two matching pocket bags. They should be at least 1.5" longer than your zipper, and you will need at least 1" above wherever your zipper is at. I cut two pieces measuring 11x7.5".  Mark the placement of your zipper opening on the outer fabric. I find it useful to crease the fabric where I want the zipper to be, and then I have an accurate way to tell where to add interfacing.


           hidden zipper pocket tutorial   hidden zipper pocket tutorial

    Place one strip of interfacing on the wrong side of your outer fabric. Center it over where the zipper will be placed, and fuse according to the manufacturer's instructions. Repeat this on the wrong side of one pocket piece. The interfacing needs to be placed 1/2" under the top of the pocket piece. 


    **Tip: to help protect your iron and your ironing board cover, use a pressing cloth! 


      hidden zipper pocket tutorial


    Find the center of your interfaced section on the pocket piece and draw a line that is 1/4" longer than the teeth of your zipper. I marked a line 7 1/4" for my 7" zipper. Now mark two matching lines 1/4" above and below that line. You will now have three lines. Mark little triangles that reach from the outer corners to about 1/4" in on the centerline. Align your pocket piece and outer fabric right sides together so that the interfaced sections are at the same area since you will be sewing through all layers in the next step. I used clover clips to keep my fabrics still and in line. Sew around the outside rectangle that you drew, overlapping by several stitches once you reach the beginning. All the inner lines are cut lines.


                                 hidden zipper pocket tutorial     hidden zipper pocket tutorial    hidden zipper pocket tutorial


    Using very sharp scissors, cut through all layers along the centerline until you reach the triangle points, then very carefully clip along those diagonal lines to the corners. Do not clip your stitches. Turn your pocket pieces toward the inside through the hole you just cut, and press well.

                                 hidden zipper pocket tutorial


    Align your zipper within the rectangular opening, and begin stitching somewhere in the middle. You will want to use a 1/8" seam allowance since you are sewing close to the folded edge of the fabric. When you get close to the zipper pull, put your needle down, raise your presser foot, and carefully open the zipper so that you can stitch unencumbered by the bulk of the pull. You can then close it again when you need to.

                        hidden zipper pocket tutorial     hidden zipper pocket tutorial    hidden zipper pocket tutorial


    Place your remaining pocket piece right sides together with the sewn pocket piece, and pin the corners. You will now sew all the way around the pocket pieces with a 1/4" seam allowance. Move the main fabric out of the way as you sew. 

                            hidden zipper pocket tutorial    hidden zipper pocket tutorial


    You have now completed your hidden zipper pocket!

                                 hidden zipper pocket tutorial     hidden zipper pocket tutorial    hidden zipper pocket tutorial


    Give yourself a pat on the back for learning a new technique!  You can now include this skill in your sewing toolbox! 

    hidden zipper pocket tutorial  

  • 7/28/2021
    Are you ready for a fun and fast month-long Quilt Along?
    We have the perfect project for you to sew your way through the hottest days of summer with Janome Maker Natalie Santini from Sew Hungry Hippie! Natalie's very popular Candy Crush Quilt has been updated and is an easy patchwork quilt put together to create a fantastic colorful skull! This quilt is pre-cut friendly, so if you happen to have precut rolls on hand and weren't sure which project to use them in, this is the one! If you are a beginner, you will love this project! 

    The Candy Crush Quilt Along starts August 1st and runs through August 29th!  Nothing like a good project to get through the heat of August! To start off, you need to sign up for weekly updates from Natalie herself to prepare you each week with helpful tips and Zoom meet-ups! This quilt along has a community of over 300 already! You will have fun sewing along with and getting to know other quilters! So exciting! 

    Are you having doubts about being able to make this quilt? Not to worry! This is an easy quilt to make. You will be sewing squares or strips of squares together as easy a 1-2-3. You can DEFINITELY do this! The added support of the zoom meets and also weekly lives on both Facebook and Instagram will help you each week! 

    To receive emails and information about the Quilt Along:

    Sign up here.

    After you sign up, you will receive your first email Sunday morning with Zoom log-in info (if you want to join the Meet & Mingle happy hour). Natalie will also host meetings weekly, that will include special guests, prizes, as well as a low-pressure atmosphere to answer questions or share motivation and progress. Providing you with the support you need to finish this quilt in August! 

     To find the Candy Crush QAL community on Instagram, please share the graphic below and use the #candycrushQAL hashtag to help spread the word about the quilt-along. The more the merrier and people can sign up at any time, the sign-ups will be open through August! You do not have to own a Janome Sewing Machine to participate! All quilters are welcome! 


    On September 5th, after the QAL is finished, Natalie will be awarding the GRAND PRIZE of a Janome Sewist 721 sewing machine to one lucky winner!


    Whether you are just beginning your sewing journey or are an experienced sewing enthusiast, the Janome 721 mechanical sewing machine has features to enhance your sewing experience.  The 19 built-in stitches offer everyday stitches including stretch stitches and a 4-step buttonhole. Features include Adjustable Foot Pressure, Built-in Needle Threader, Extra High Foot Lifter for thicker fabrics, Drop Feed plus a Hard Machine Cover for safe storage. Plus it is lightweight for easy transport to classes.

    A random winner will be chosen from those who have finished the quilt top,  it doesn't have to be quilted and bound. There will also be other fabulous giveaways from brands like Oliso and Havel's for participating during the event! How cool is that news?

    (Entries for the machine are limited to US residents only, 18 years of age or older, due to laws and restrictions)


    Natalie pieced her entire quilt on the Janome Skyline S7, then quilted straight lines diagonally over the whole quilt! 


    Here's an introduction video if you'd like to see more!


    Below I'm sewing the binding on! The IG reel is here.


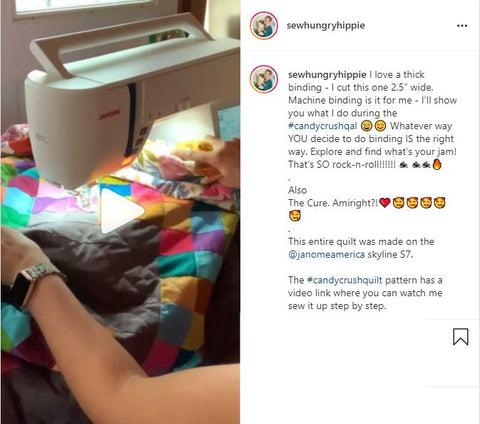
    "It feels like I harp about using quality machines and tools all the time, but there is something to be said about really understanding this. When I started sewing a long time ago I didn't have a quality machine, and EVERYTHING was so difficult to complete because of jams and problems. After my patience was worn out I called a local sewing shop and went to get the machine I truly needed. I've never looked back, and have had zero regrets for investing in ME!"

    That's how it should be viewed- it's not just "buying a machine" -- it's investing in YOURSELF.

    We hope to see you on the quilt-along! Be sure to tag @sewhungryhippie and  @janomeamerica in your posts and use the hashtags #candycrushQAL! If you are sewing along on a Janome please also use the #janomemakes hashtag! 


    Sign up here.


  • 7/28/2021

    Welcome back for the next step that will take you closer to finishing your Good Tidings Quilt designed by Janome Maker Melanie Call!  This week you will be sewing the Good Tidings Blocks together plus final quilt assembly with sashing and borders.  Soon your Good Tidings Quilt will be ready for snuggling or gift giving! Grab your fabrics for the race to the finish! Is there anything better to a quilter than a quilt finish? 


    Good Tidings Quilt Instructions (HERE) .


    It’s Melanie Call from A Bit of Scrap Stuff Blog https://abitofscrapstuff.blogspot.com . I hope you are ready to assemble your Good Tidings Blocks! 

    Don't forget to share your fabric selection, cutting, flying geese, patchwork squares, and Good Tidings Block, and Good Tidings Quilt top on Instagram with hashtag #GoodTidingsQAL


    My Good Tidings Quilt was pieced and machine quilted on my Janome M7. I love how well my Janome M7 perfectly pieces blocks AND is fabulous for free motion quilting!


    The Janome Continental M7 features:

    A speedy 1300 stitches per minute (faster finish anyone)

    Automatic Presser Foot Lift

    Independent Bobbin Winding Motor and so many other features to make your sewing and quilting effortless!


    Good Tidings Quilt    

    #GoodTidingsQAL     59.5" x 59.5"

    Fabric used in Good Tidings Quilt -  All About Christmas fabric designed by J.Wecker Frisch for Riley Blake Designs


    You can find the past Good Tidings Quilt Along Blog Posts  to make this full quilt by visiting:


    Don't forget to download the Good Tidings Quilt Flying Geese Instructions HERE. I can't wait to see your Good Tidings Quilt progress photos!!! #GoodTidingsQAL


    Be sure to follow me on Instagram @ABitofScrapStuff  https://www.instagram.com/abitofscrapstuff/ and on my A Bit of Scrap Stuff Blog https://abitofscrapstuff.blogspot.com  for more fabric fun! Also, be sure to follow Janome America on Instagram, and if you are creating on your Janome Sewing Machine, tag @janomeamerica and use the hashtag #janomemakes!  


    Have a great day and happy quilting! 

    Melanie Call


Prev 1 2 3 4 5 6 7 8 9 10  ... Next 

Tags

#freesewingtutorial 4th of July Applique Block of the Month Bunny Carolina Oneto Christmas Continental M7 Cosplay Cosplay Tutorial Costume Crafting Decorative Stitches DIY DIY Accessories DIY Father's Day Gift DIY skirt Embroidery Everyday Applique Father's Day Fiesta Weave Lunch Mats Fiesta! Four Fabric Quilted Project Bag Free Bag Pattern Free Pattern Free Quilt Pattern Free Sewing Free Sewing Pattern Free Sewing Tutorial free skirt tutorial Free tutorial Fun Projects Garment Sewing Good Tidings Quilt Along Green Goddess Dress Handmade Gifts Heidi Proffety Historical Costume Tutorial Holiday Sewing Home Decor How To How to Machine Bind How to Make a Quilt How to Make a Quilt. Free Quilt Pattern How to Make Panties How to Quilt How to Sew How to sew a top Janome Janome 9450 Janome AirThread2000D Janome Artisan Janome Artistic Digitizer Janome Conitential M7 Janome Continental M7 Janome HD3000 Janome Maker Janome MamoryCraft 15000 Janome MemoryCraft 15000 Janome MemoryCraft 6700p Janome S9 Janome Sewing Machine Janome Skyline S7 Janome Skyline S9 JanomeHD9 Lifestyle Machine Embroidery Maureen Cracknell MDW Melanie Call Memory Craft 15000 Moon Garden QAYG Quilt Block Mother's Day gift Napkins Patriotic Pattern Pillow Pillows Project QAYG Quilt Block Quilt Quilt As You Go Quilt Block Quilt Block Pattern Quilted Project Bag Quilting Quilting How to Quilt Rainbow Block of the Month Rainbow Quilt Block of the Month Rainbow Quilt BOM Reversible Zippered Pillow Rolled Hem Foot Scrappy Star Pillow Sew Sewing Sewing Machine Sewing Project Sewing Tutorial Skyline S9 SkylineS9 Stuffie Summer Sewing Project The Hype Tutorial Valentine's Day
DEALERS
The TWO Closest Dealers to you are:
1900 CENTRE ST , WEST ROXBURY MA, 02132
(617)323-6200
443 MOODY STREET , WALTHAM MA, 02453
781-893-3331
Find Additional Dealers