Projects

DIY "Red Lips" Welt Pocket

Created By:

Jacquline Terry

Skill Level: Intermediate

“Love a Classic Red Lip?” Did you know that you can turn any custom shape into a pocket? That is exactly what we are doing for this project tutorial. It is much easier than it looks and a perfect project to try for all of my applique fans out there.

Janome Supplies Required

You will need:

Garment or project to add pocket(s) to. (Or a practice fabric)

Facing fabric (To turn the design to the inside, I chose to use jean material so that folded back edge looks cleaner)

Welt fabric (here shown in red)

Pocket lining fabric

(Oh and obviously grab your sewing gear )

Instructions

First Pick Your Shape

The truth is you can pick any shape you’d like to make this project.


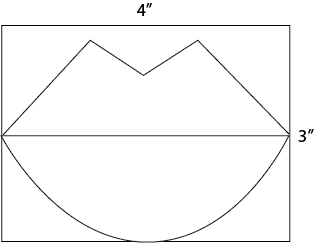
Here is a template for the pocket that I made. This size might not be “ideal” for a working pocket but it is the size I needed to fit my garment. Your pocket can be any width or shape as long as you modify the welts to fit the opening.


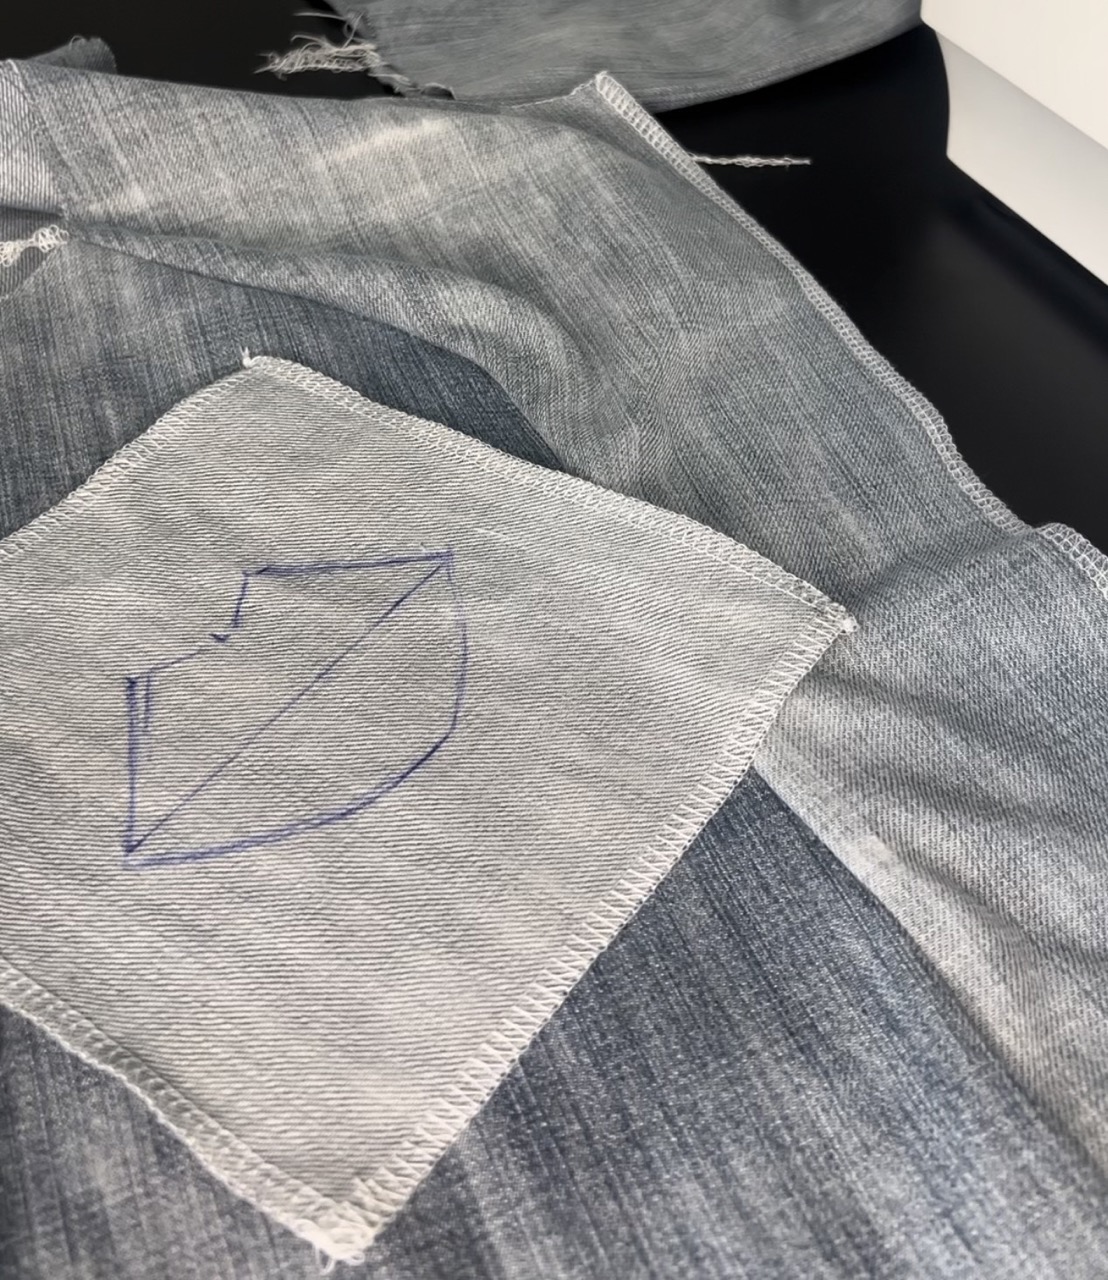
Trace out your shape on your Facing fabric and place it outside your garment with right sides together. Determine the right placement for your design. Tip for pockets. Pay attention to how wide the opening is if you plan to use it for your hands. Also look at the placement in terms of actual use, is it too high, too low, maybe too far forward? It needs to feel like a good place to rest your hand to be “useable”.


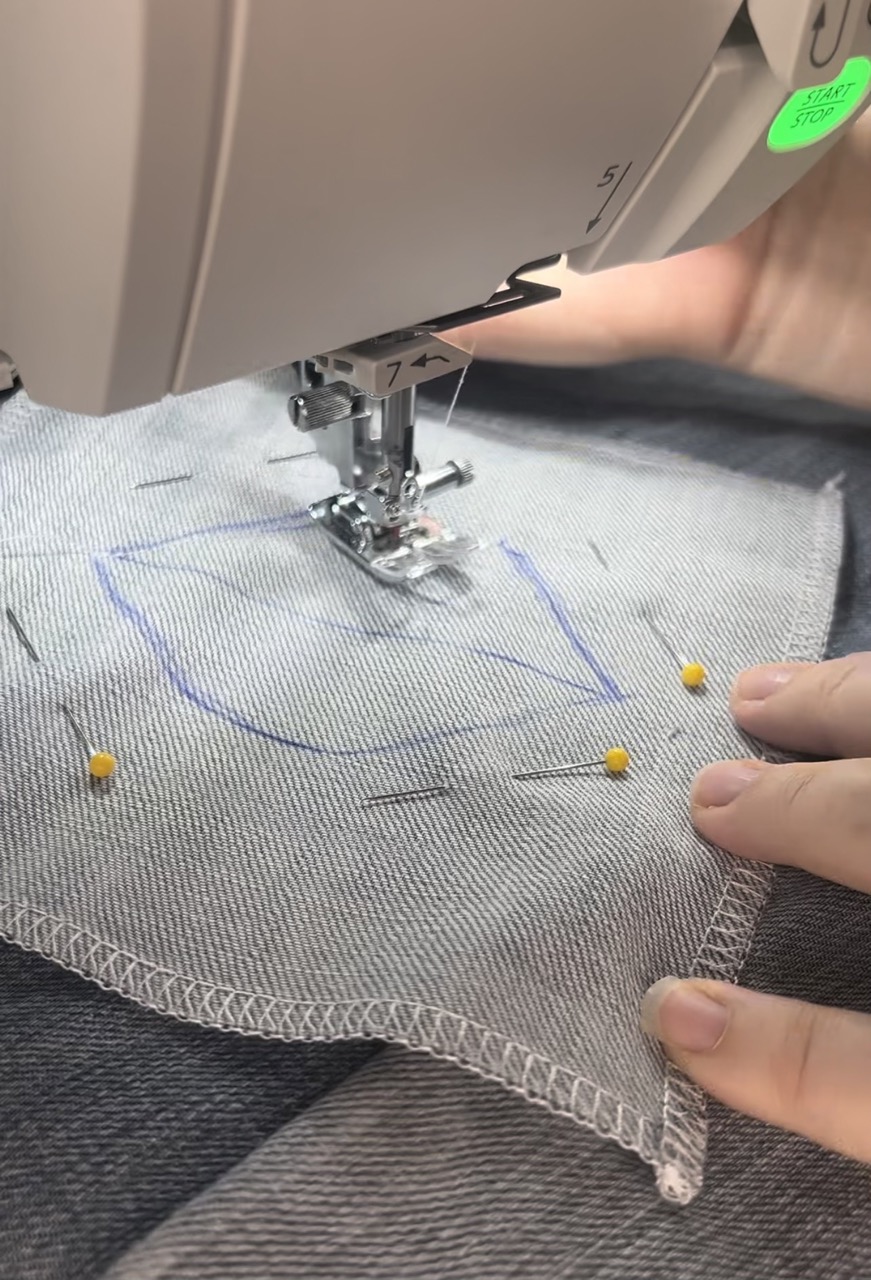
Secure your placement with pins. Then, stitch your shape on your facing piece. You may go around twice if your fabric may be prone to raveling.


Next, trim out the inside of your shape leaving up to max ¼” around the stitched line. If your design has hard edges or points you will need to clip them. Be careful not to clip through your stitching.


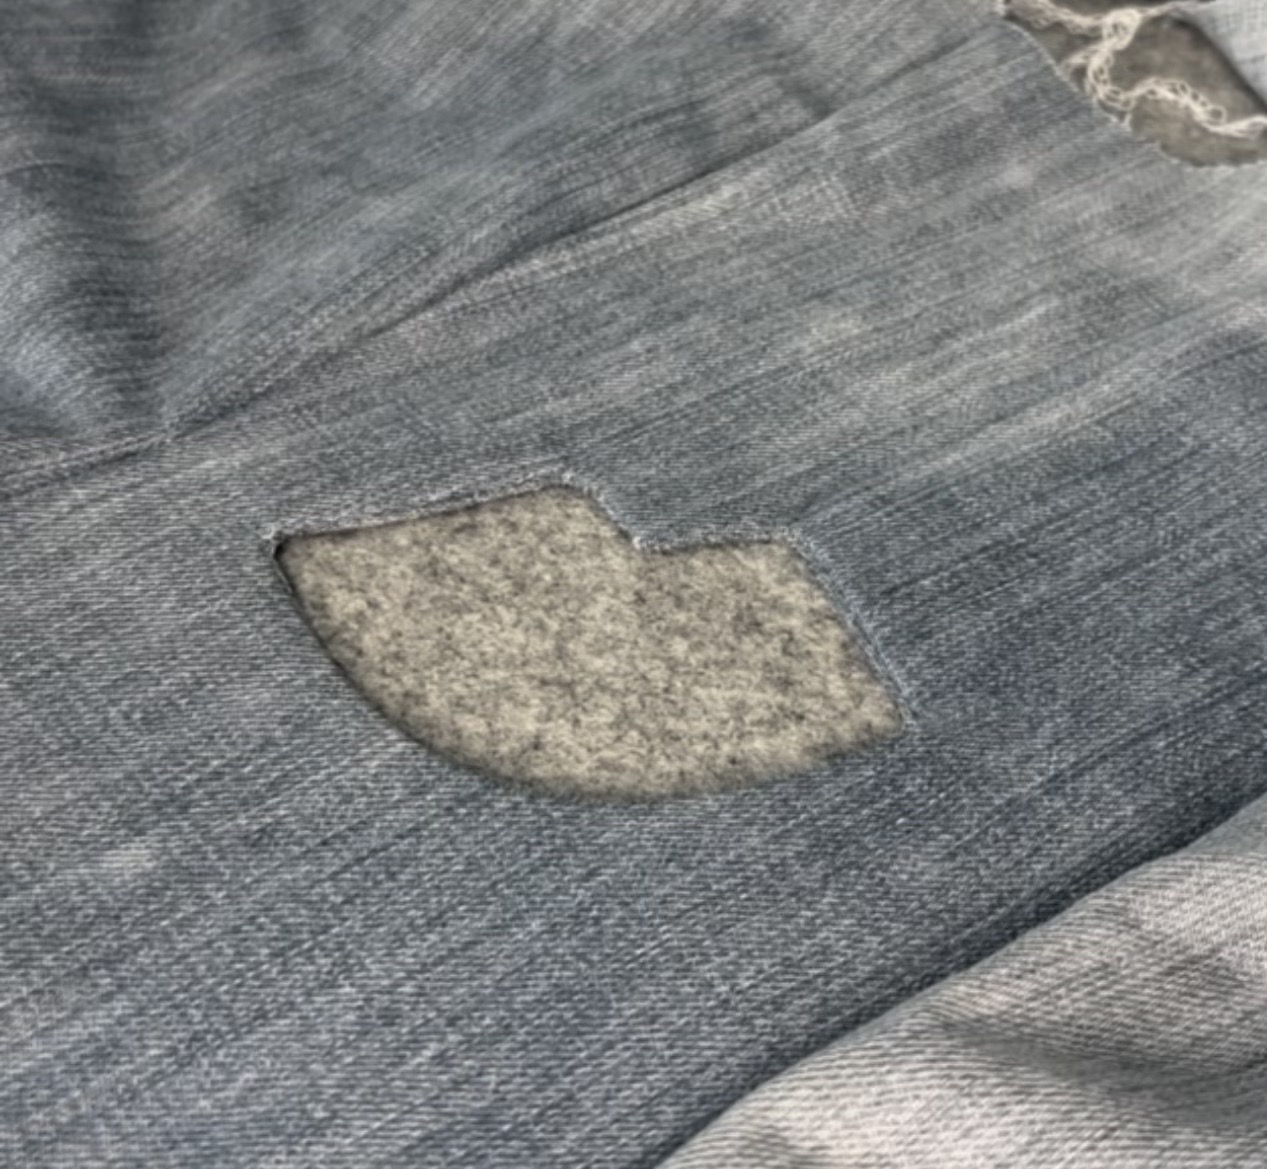
Now it Is time to flip the design right side out and give it a good press. TIP: look at the design from the inside and “favor” the edge to the inside. If you look right at the stitching line you will want it to not be rolling toward the right side of the garment, but rather towards the inside.


Your pressed opening should look crisp and clean from the right side of the garment.


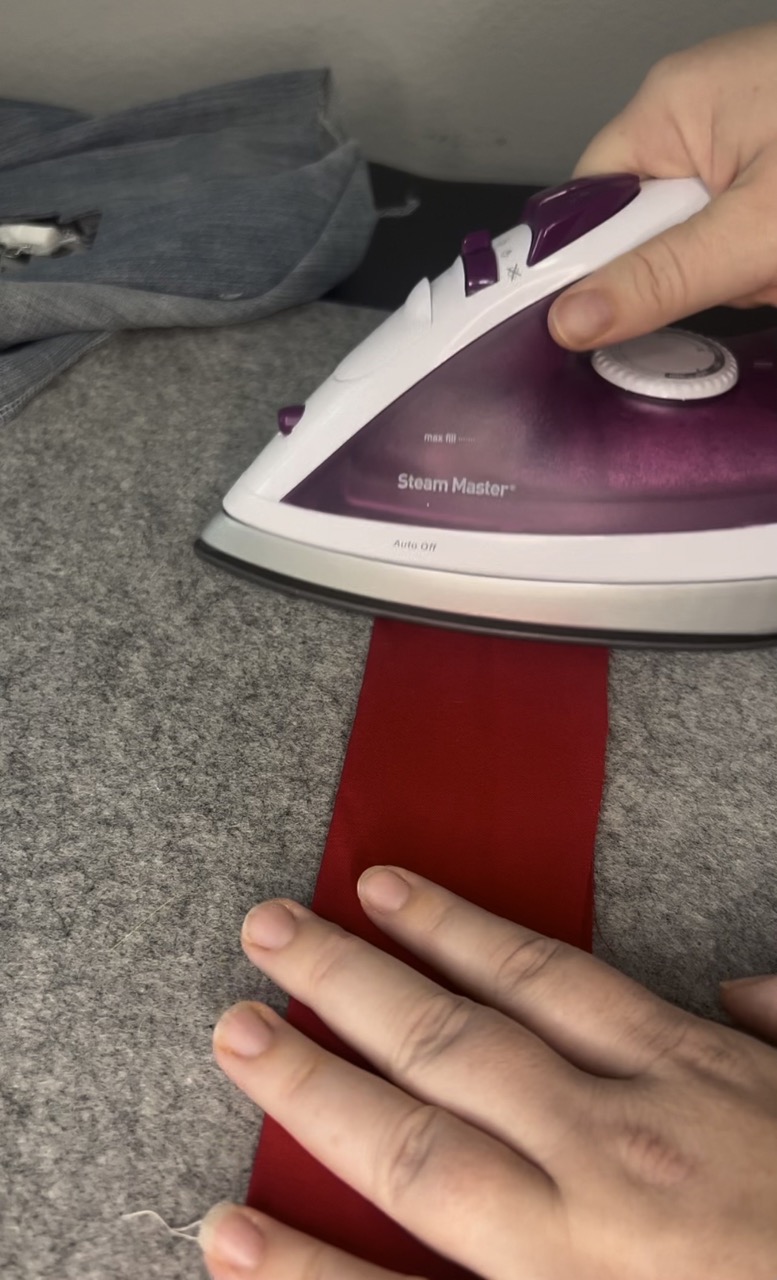
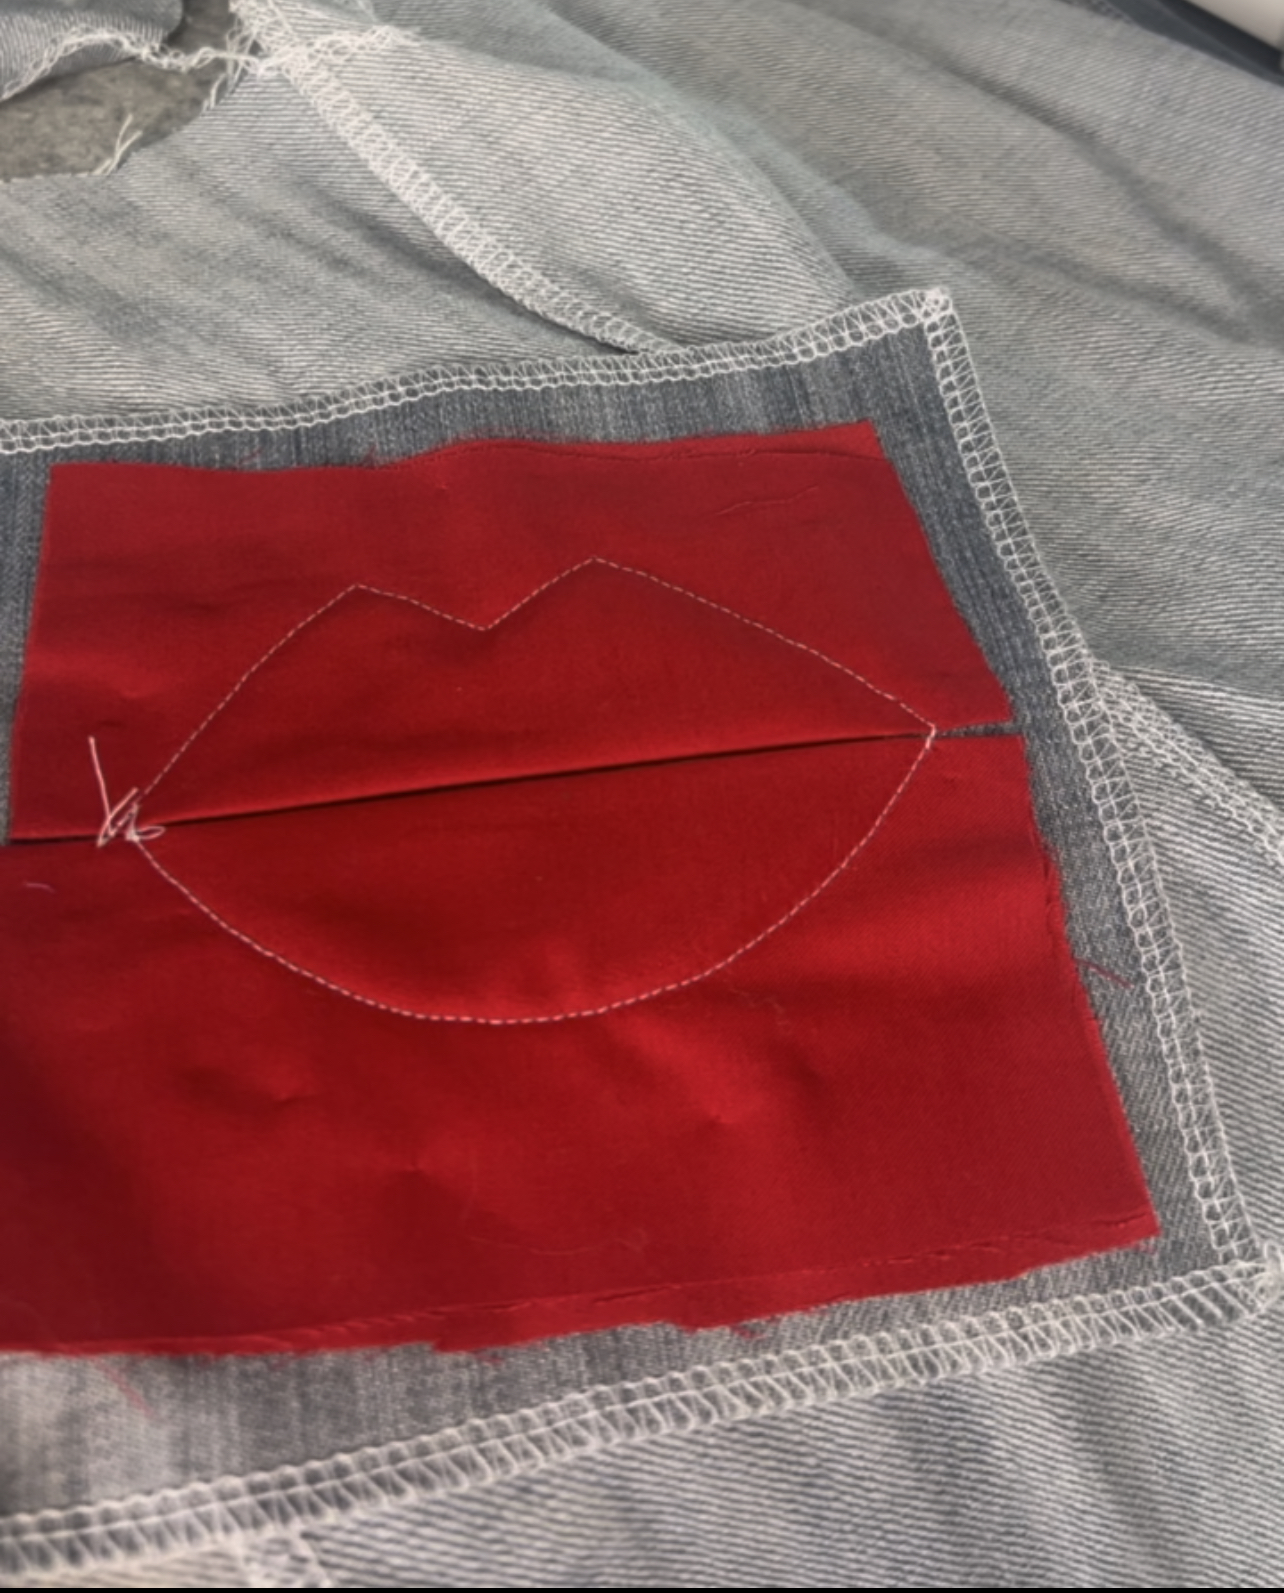
Here comes the fun part! Measure out welt (s) fold in half and press. This needs to be wide enough to clear your shape opening (I have two that meet in the middle). You will also need to account for your seam allowance. Just keep those in mind when cutting your strips. I have two separate folded edges meeting in the middle.

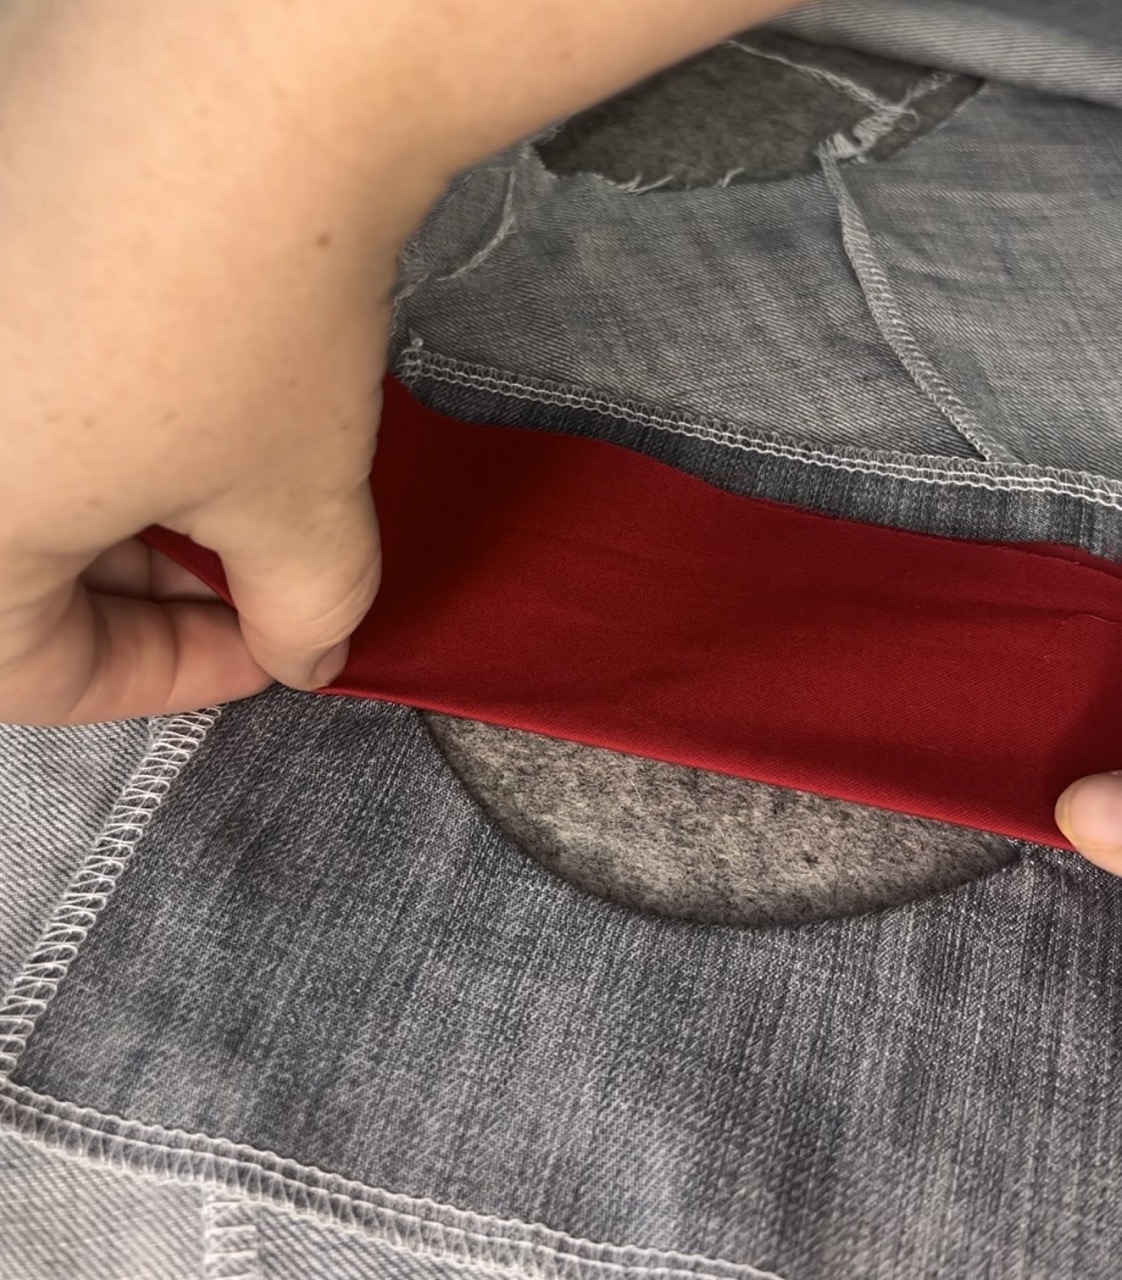
You need your welts to be visually pleasing on the outside so place them behind the garment as they will be seen and get an idea for how you need them to look.


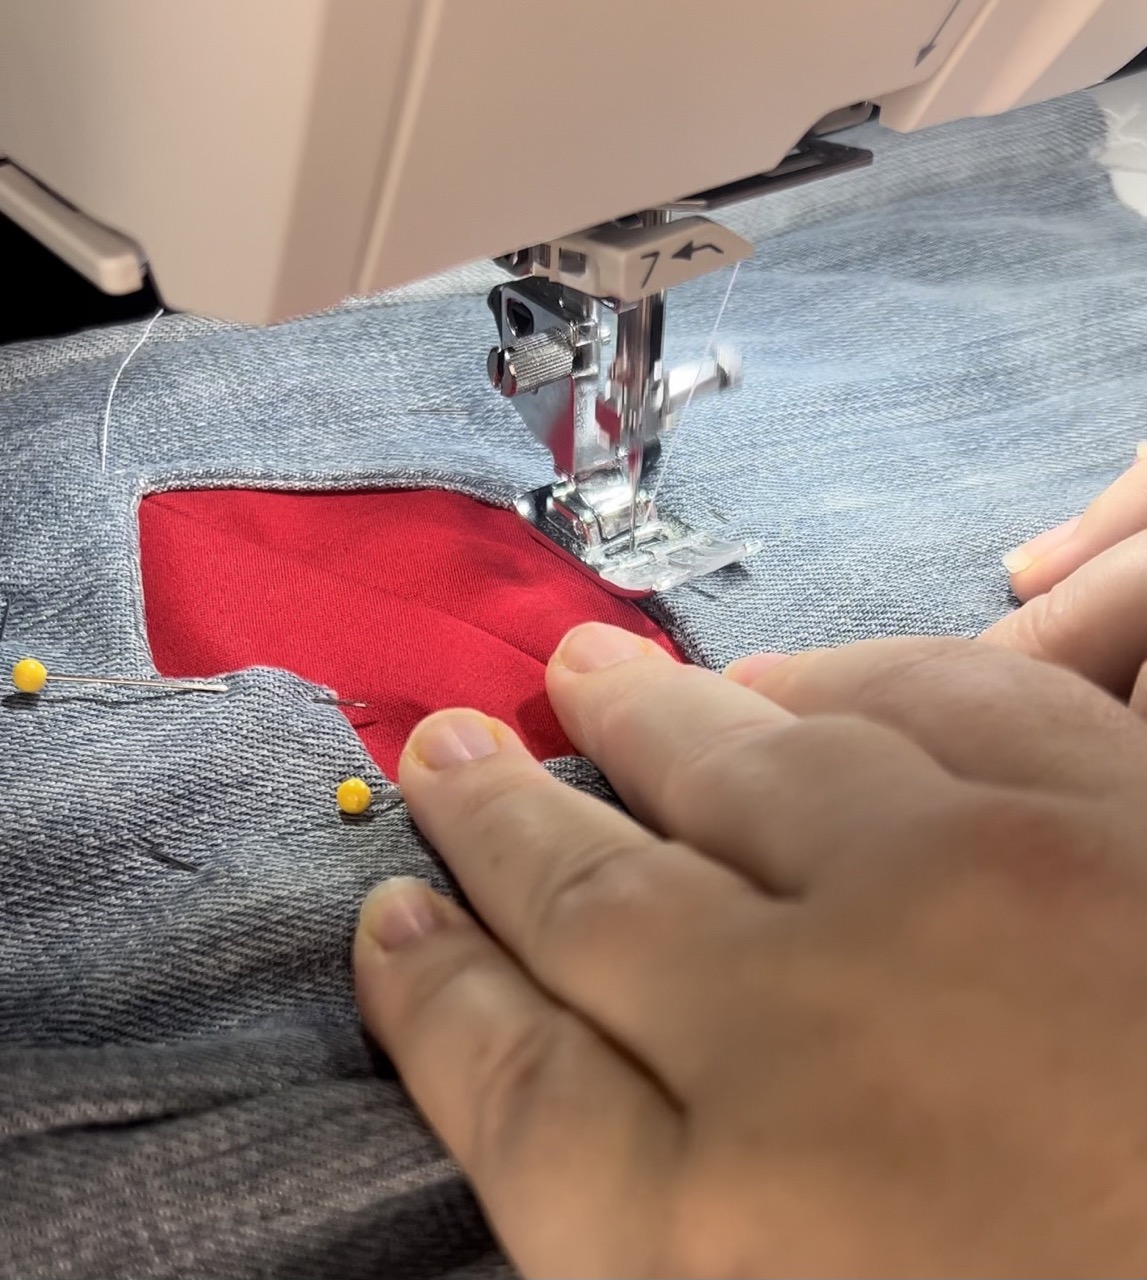
Secure and check your placement with pins.


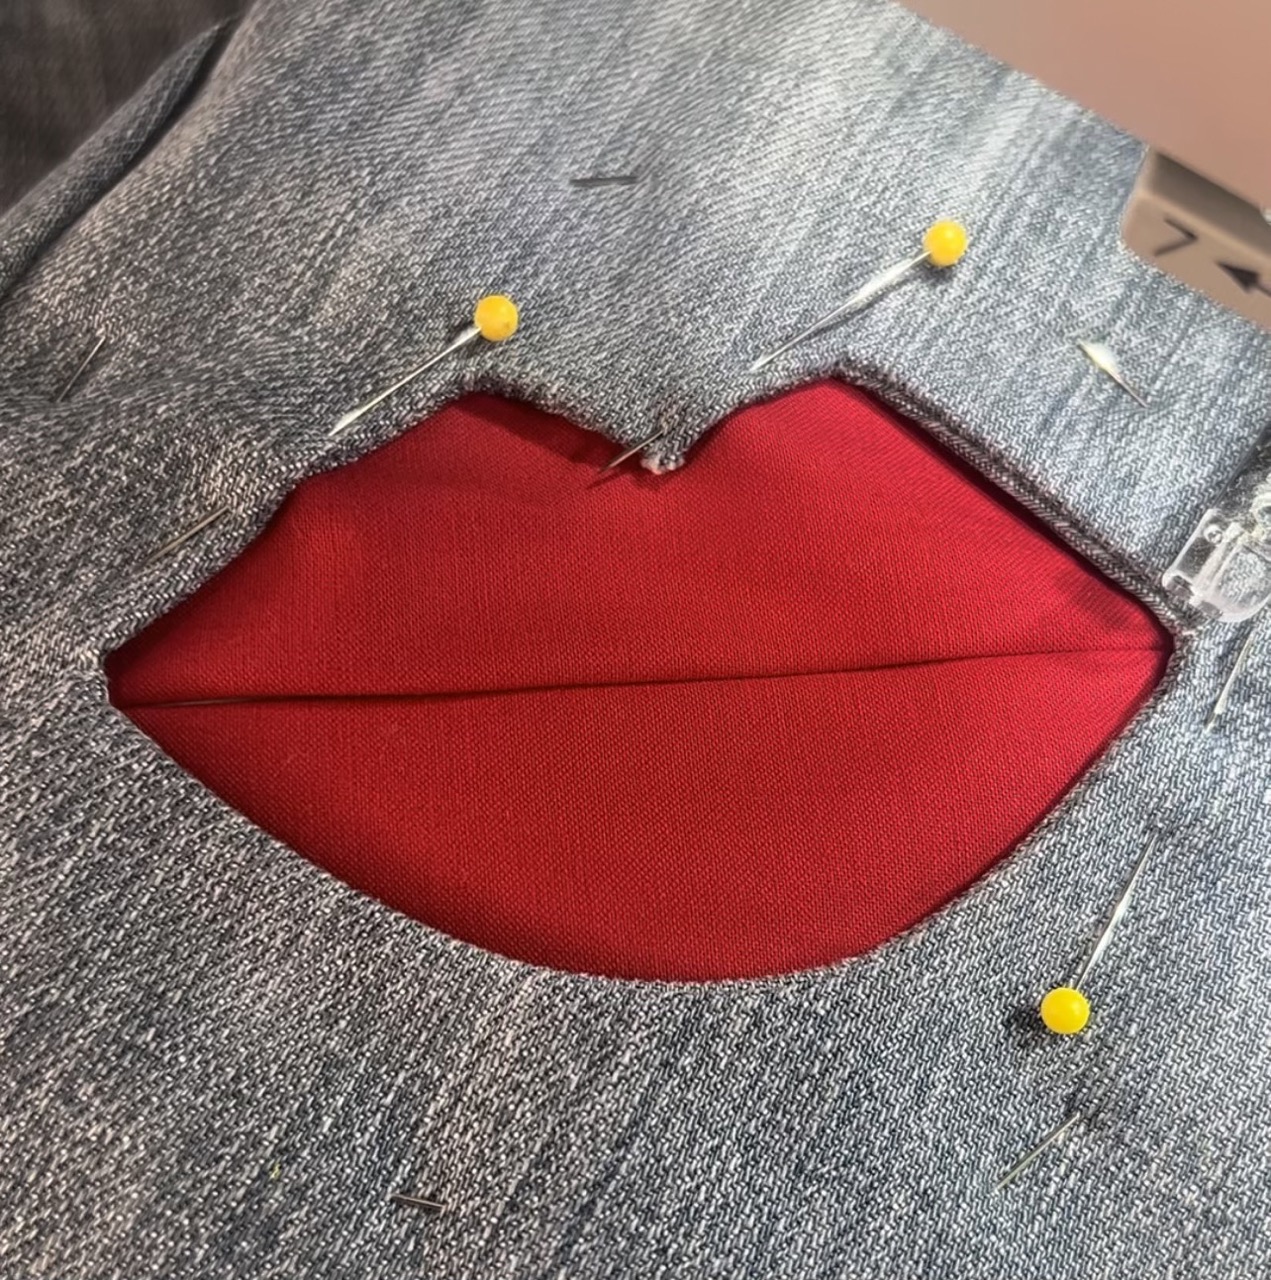
Now carefully stitch around your opening with 1/8” to ¼” accuracy. Keep it consistent whatever you choose. Pay attention during this step that all of your layers stay nice and flat and nothing folds up under on you while stitching around.


The project should look like this from the inside of the garment.


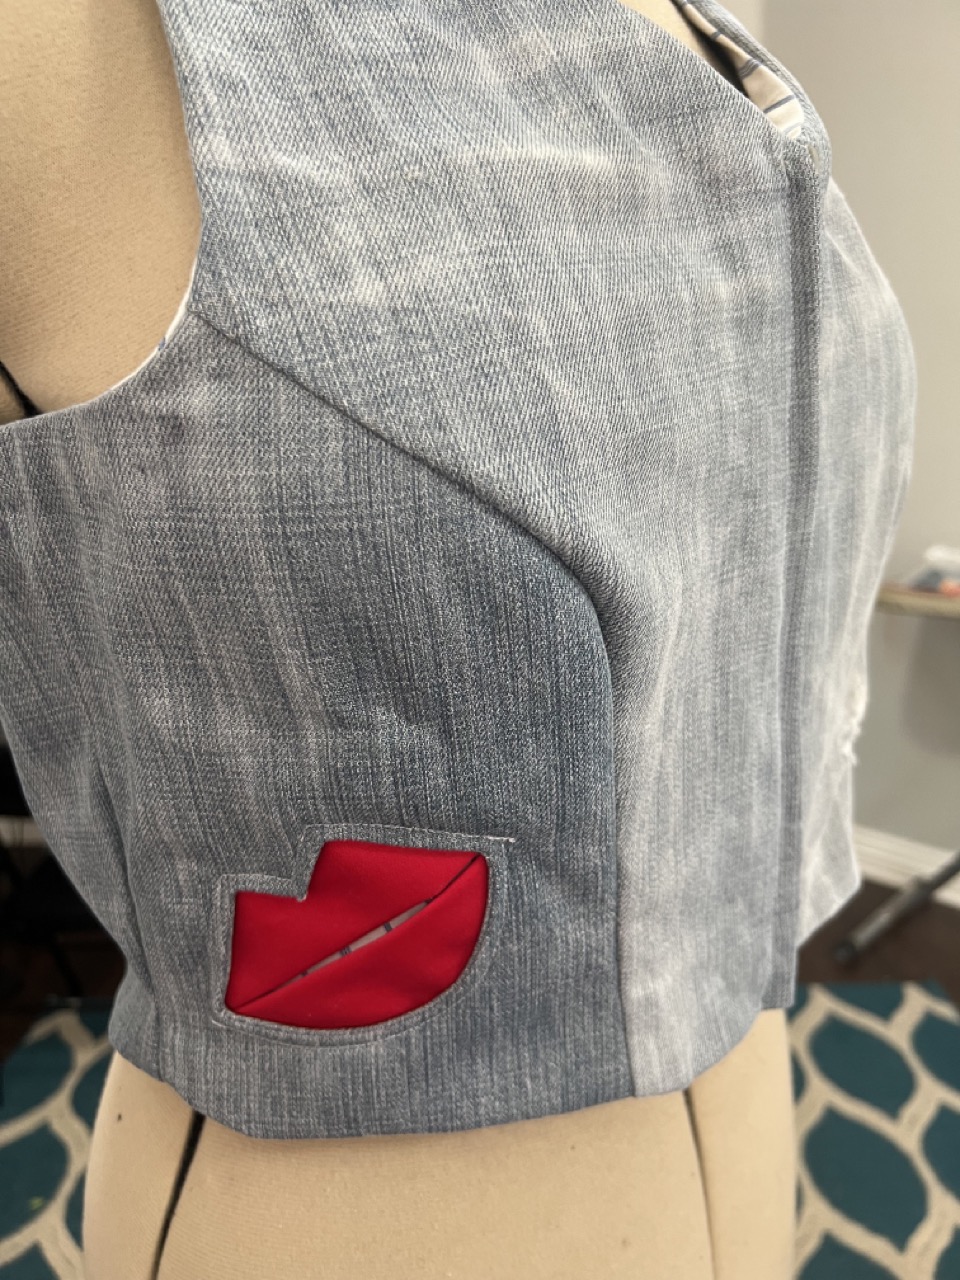
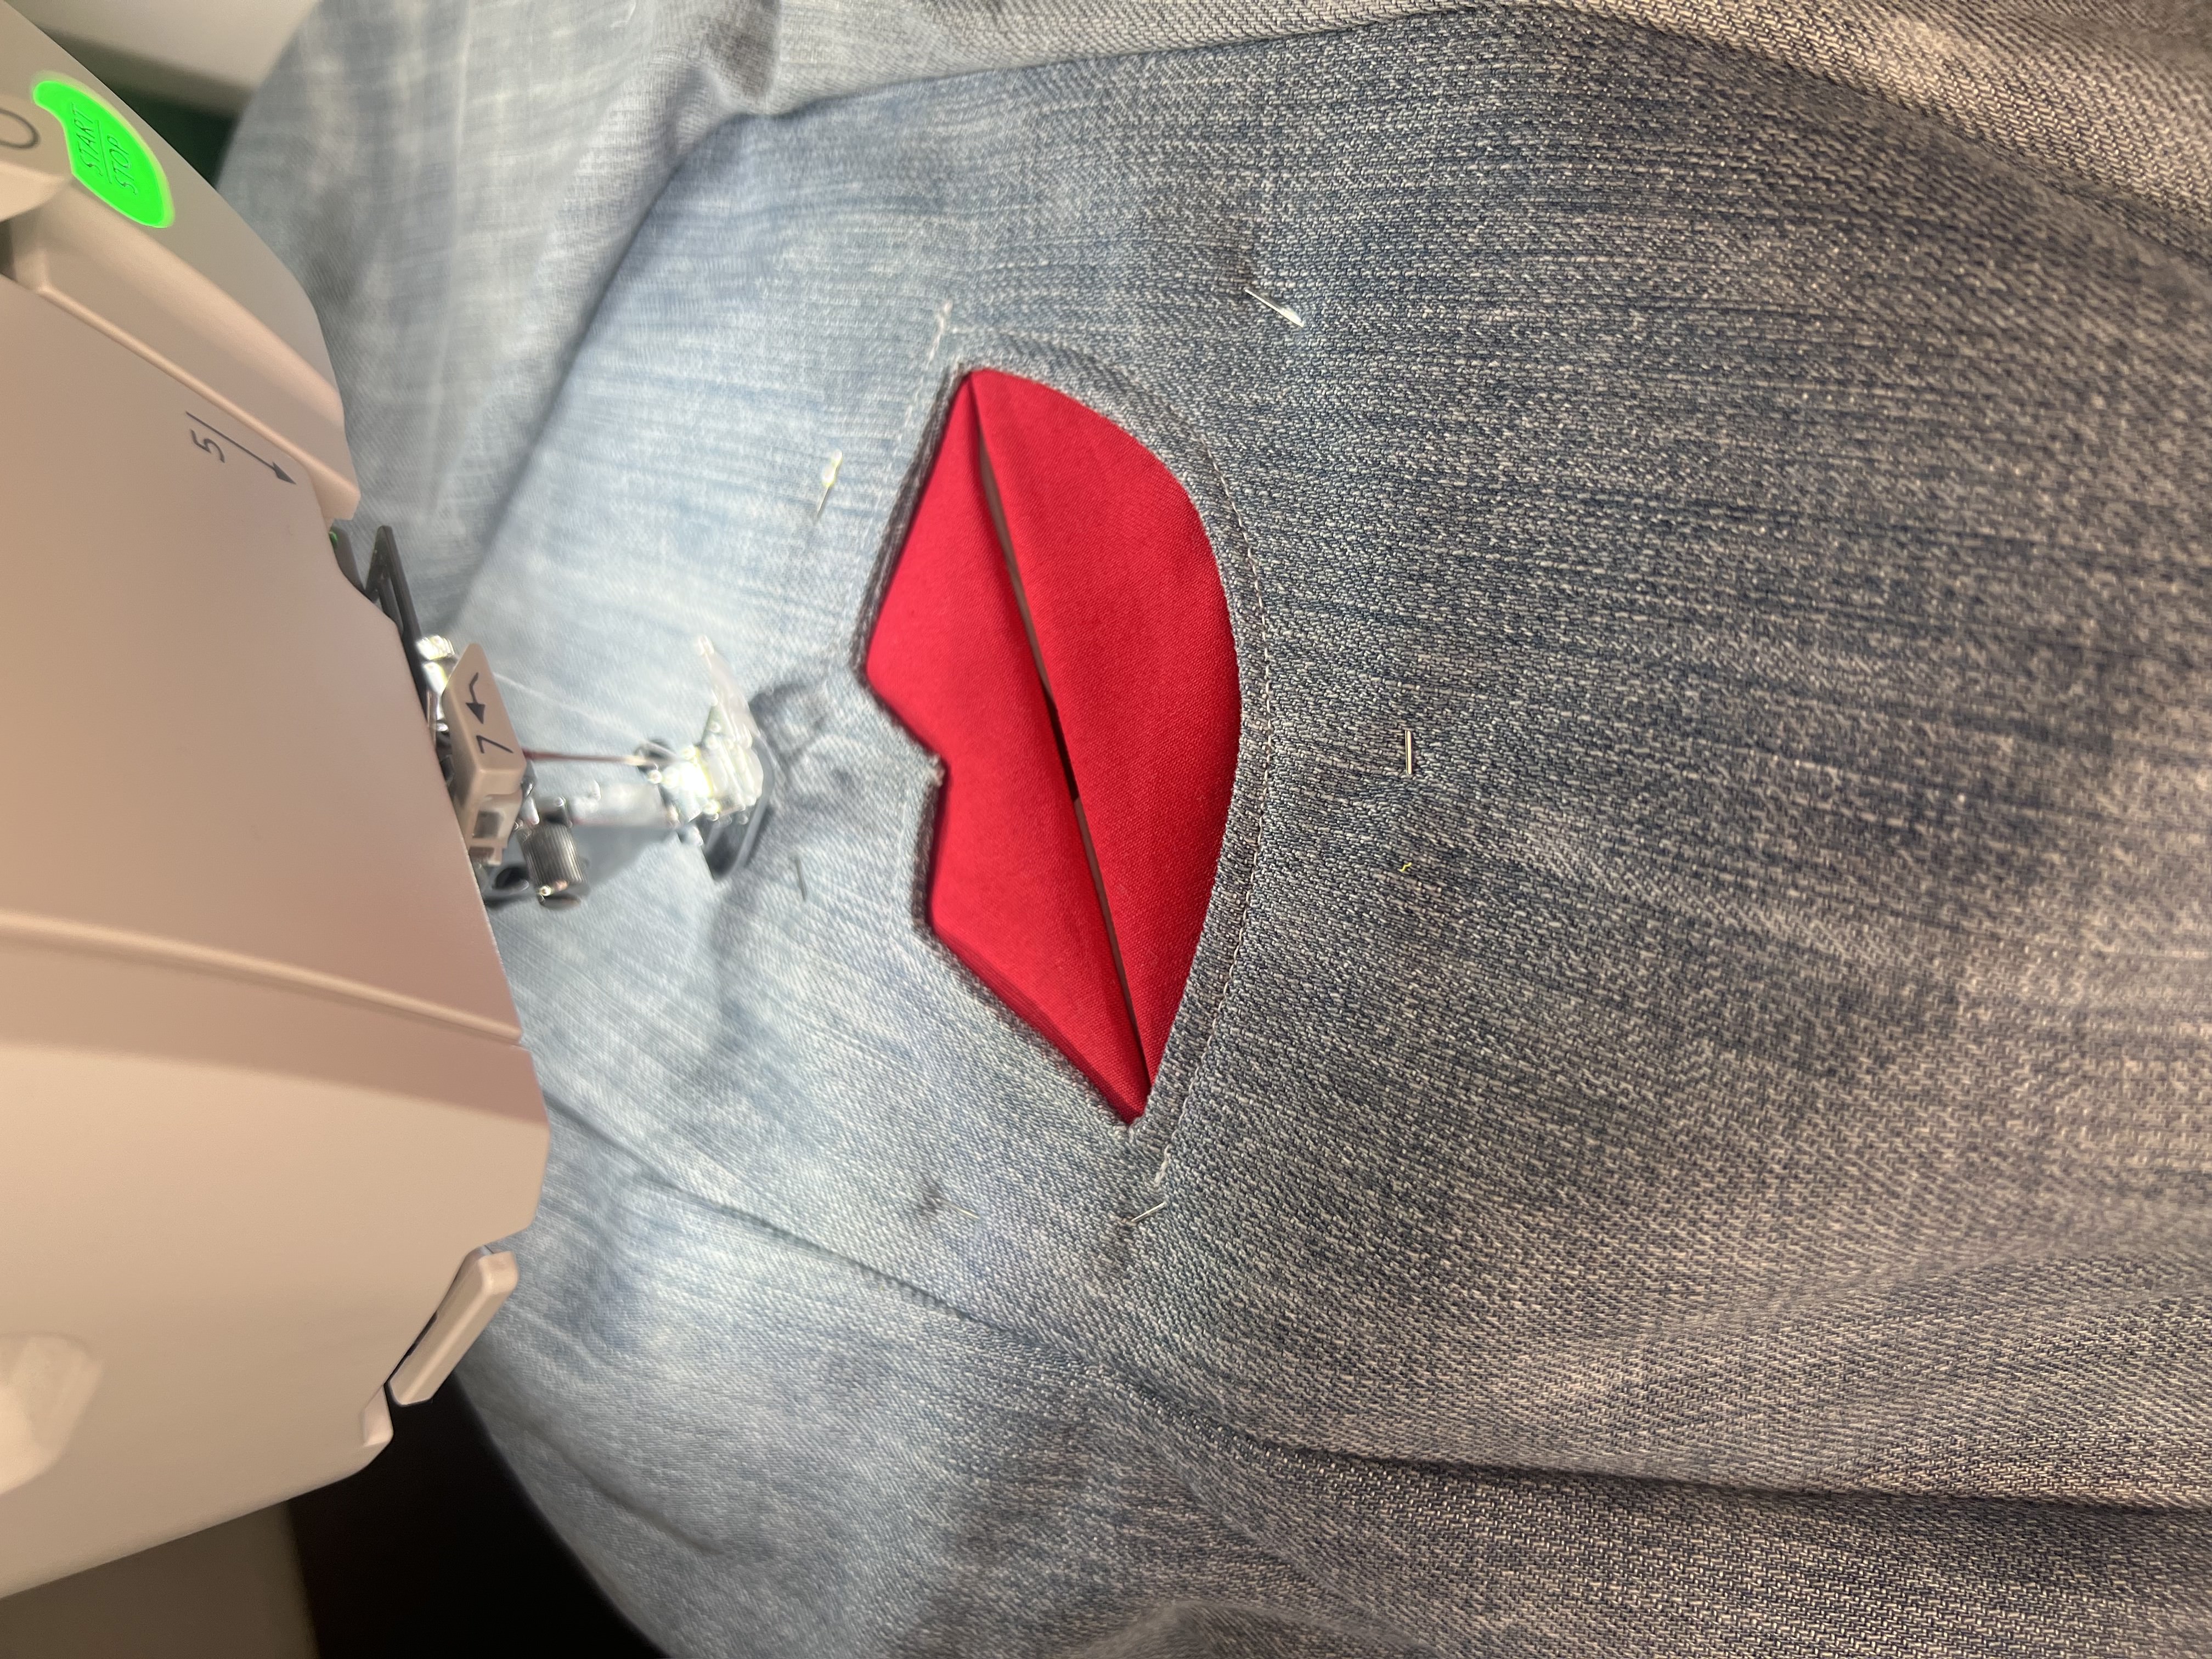
And this from the right side or outside of the garment.


To finish up the “pocket” you will need your pocket lining fabric. Start by using a long rectangle that is long enough to reach the top of the lips pocket, down to the fold and back up the bottom line of the welt (lips). Sew your bottom welt first (only to the facing fabric and welt fabric NOT to the outside garment) and then the top of the welt (lips). You will have a loop that’s open on each side. Next lay the garment down and press to see where the pocket folds flat (as shown). Then secure the sides of the pocket lining straight down. Make sure you are only sewing the pocket lining (sides only) so it is independent of the right side of the garment.


Time to enjoy and wear out your new garment. Best part, I can’t wait to tell everyone I MADE IT lol.

Everyone is Talking about DIY "Red Lips" Welt Pocket
Reviews


Tako
Beautiful
Wednesday, November 23, 2016

cpindzola
Around the Table Dresden Placemats
Saturday, December 17, 2016

I like the concept, but the directions are "sloppy." Nowhere in the supply list does it mention the felt or the batting (how much?). Also, I would never use a high loft batting in a placemat, or a table runner, as I think that it would be too unstable for a glass. The next time I make these, I will cut out the batting (I use flannel) and spray baste it to the wrong side of the Dresden plate before I put the Dresden plate on the felt to cut out. I have not yet washed the finished placemat, and am hoping that the single layer of felt does not curl up, or become distorted after washing/drying.
Txmaid
Fun Great Gift!
Tuesday, February 21, 2017

MargieARK
Teatime Quilted Tablecloth
Friday, February 24, 2017

I made this today but your cutting directions need to be changed. You only need 4 of color 1 and color 3 4.5 squares for the triangles. Also the inner border, you only need 2 cuts as WOF is long enough to cut each in half to fit the sides.
MickelSews
Great Machine
Wednesday, August 30, 2017

I've had this machine for only a week now. I bought it used from a lady who makes her own clothes, but she no longer needed the machine. During the purchase, she noted that she is almost sad that it's better to give it away because of how well the machine performed. (I also bought it along side a computerized machine of another brand.} She demoed the machine for us, showing it worked and gave us everything (including the box it came in!) She took amazing care of this machine. I have used it a few times now, and the directions for threading were easy to follow (albeit my hands are quite large so the lower looper was a pain, but that is no fault to the machine or brand.) And I recommend this machine to anyone who wants to learn to serge and wants a machine that can grow with them. I will happily use this machine time and time again.
rvstan
S9 Review
Sunday, February 25, 2018

I love, love, love my S9! It's sews and embroiders beautifully and it's simplicity of use amazes me. I would recommend this machine for both a beginner and an experienced seamstress. If I would ask anything of Janome it would be to upgrade the programming to run a larger hoop size. I understand that it can't get much wider but there is most definitely room for it to go longer. That is the only limitation of this machine.
pjmnana
PJMNana
Monday, February 26, 2018

I purchased a Memorycraft 15000 a few years ago and it was the best purchase I ever made! This machine can do just about anything you would would ever want! I love the capability of using the Acuedit app to set up my embroidery pattern on my Ipad and then download it to the machine! I love how my embroidery looks upon completion and I love all the good lighting it has to light up your workspace. That way you don’t need to worry about where to set up your machine. It also has plenty of room to do machine embroidery on any size quilts! There are many decorative stitches from which to choose that are outstanding! It’s hard to choose which one to use! There are so many great features it is hard to decide what I love the most. If you want to buy only one machine to last a lifetime, I would recommend this one!
KLWash
S9 Review
Sunday, February 24, 2019

The S9 is amazing. I learned to sew by hand when I was just 5 and in my grandmothers way as she was quilting. I took seeing classes in high school until they would no longer let me sign up. The S9 makes me appreciate my current skills as well as motivate me to want to learn more. This machine is awesome.
SewSueMe2002
Horizon Memory Craft 15000
Thursday, November 19, 2020

My Janome Horizon Memory Craft 15000 is fantastic! I love, love, love this machine! When I came across the Eye for and Eye embroidery design today, I wanted to make it. However, the embroidery file is missing. Nothing downloads when I select the download button. Please help!
Jillfmischo
Treat Bag fun!
Monday, August 16, 2021

I made the Halloween treat bag for my new granddaughter and I’m sure it will last for years. No embroidery machine so I appliquéd the lettering. Need a little more skirt fabric for a better gathered look, and I used thin double-bias tape for the skirt hem, over edge stitch on skirt sides. I’m pleased with my results!
elenaz
Very helpful tutorial
Wednesday, October 25, 2023

I want to say thank you for teaching me this method of applique. I was able to do it with a small letters. This method is the best so far from all of those I've seen and tried.
plonkar
So useful
Thursday, November 30, 2023

I'd like to express my gratitude for teaching me this appliqué method. I successfully applied it with small letters, and, so far, it's the most effective among all the methods I've seen and tried.

DEALERS
The TWO Closest Dealers to you are:
196 Boston Post Road , Orange CT, 06477
203-878-1654
19 PUTNAM AVENUE , PORT CHESTER NY, 10573
914-934-2934
Find Additional Dealers