Projects

A Simple Summer Maxi Skirt

Created By:

Carolyn Norman

Skill Level: Intermediate

Are you looking for that simple-to-sew garment with a lot of style?  One that's easy to make at the last minute for a holiday?  Or one that dresses up and down for any occasion?  Well, I've been making a version of this simple-to-sew summer maxi skirt for years. 

Janome Supplies Required
  • 1 to 2 yards of fabric of 45" wide or 60" wide fabric based upon your measurements.
  • A tape measure, tracing paper, pencil
  • A yard or two of 1" wide elastic based upon your waist measurement

Instructions

Prep ~

Fabric:

Please wash and dry your fabric before starting this project. This skirt is perfect for any fabric type you want or have on hand. A knit, a stable ponte, a woven, silk or cotton. Whatever you want to use is fine. 

Measurements:

1. Take your waist and hip measurements and record them. 

I'm going to emphasize making this for a plus size sewist. When taking your measurements, take them sitting down. You will notice a difference of 1" to 5" because the larger we are the more we spread. I'm strongly suggesting that you use the sitting measurements to make the skirt.

2. The next measurement you should take is a waist to floor measurement or waist to ankle measurement if you want an ankle length skirt.

Again, this skirt can be any length you want. Mini, knee-length, calf-length, tea length or maxi. I've made a maxi skirt because that's my jam now.

3. Make a pattern using your measurements or trace them right onto the fabric.  


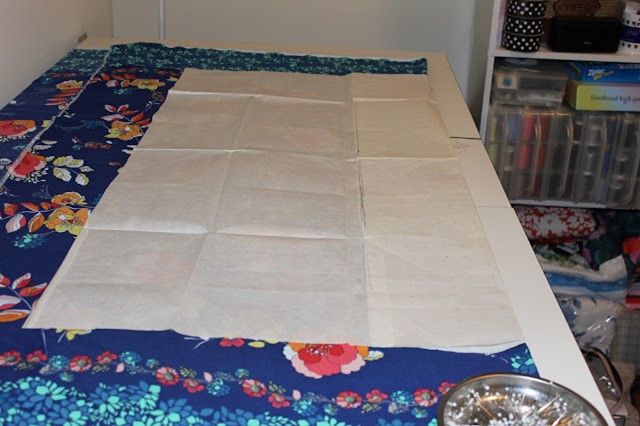
I usually make a large square (pictured above) using my hip measurement and the length I want for the pattern.

- I add 5" of ease and 2.5" for seam allowances for 5/8" wide seams.

- To finish the square I add the length measurement plus 2.5 inches for the elastic casing at the waist. 

- You can change the amount of ease you want on the sides if you want it a tighter fit by adding less ease. You can also do this after you've cut the skirt out and tried it on.  Make larger seams if you want a tighter fight or smaller seams if you want your skirt a little looser.

- If you're in a hurry and need this quickly by all means trace your measurements onto the fabric and then cut. However, I suggest making a pattern because once you see how easy this to make you will want to make more.

Construction ~

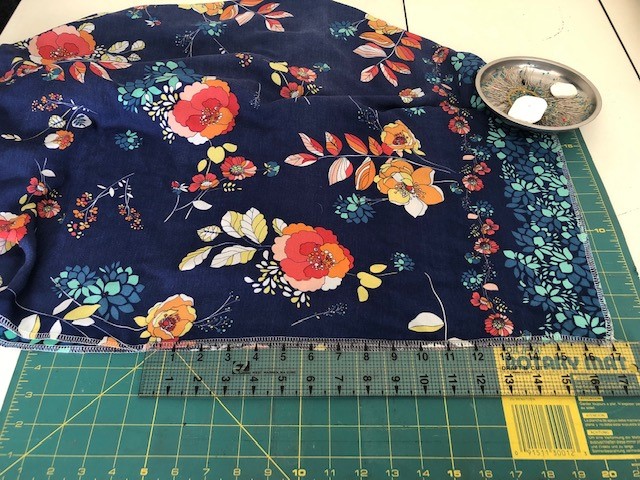
o  After the fabric squares are cut out mark the front/back and top/bottom of the squares.

o  I like to finish all of the seams using my serger prior to constructing the skirt. 

o  Pin the side seams together.

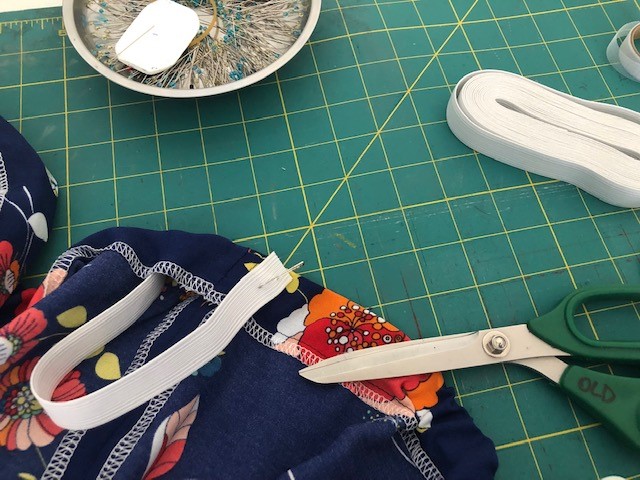
o  Hold up the skirt to you to determine where you want the side seam slits to begin.  Mark and pin that.


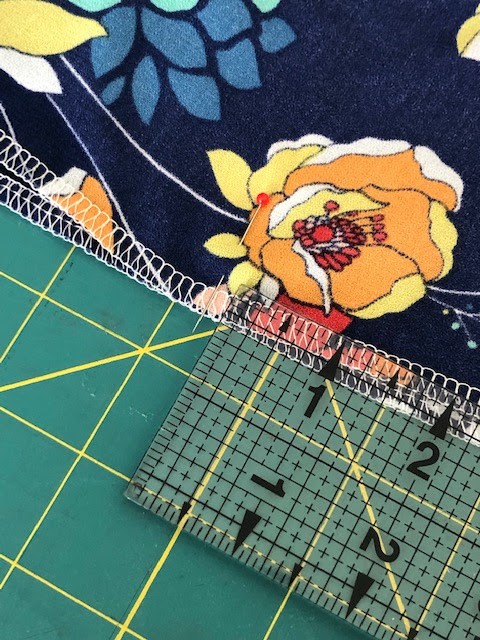
o  I use a pin with a different colored head, so I know to stop stitching right there when sewing the seam.


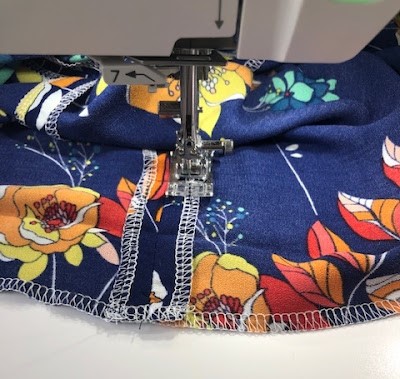
o
  Sew the skirt using a 2.8 straight stitch on your sewing machine and an 80 universal needle.

o  When you sew the side seams, stitch in a piece of stabilizer. It can be seam tape, twill tape, or selvage edge piece to prevent the seam from tearing when you walk.

o  Press seams open making sure to press the side seams flat below the slits too.

o  Turn down 1.5" for waistline casing.  Press.  A tip, stitch the side seams flat prior to stitching the waistline casing. The thread will melt into the casing and it will make it easier to pull the elastic through the casing.


o  Stitch waistline casing flat leaving a 2" opening in the side seam.

o  Measure the elastic to fit your waist.  Subtract 2-3" depending on how tight you want the elastic to be then cut it.

o  When inserting the elastic into the casing, I use an extra large safety pin at the end of the elastic.  However, you can also use a bodkin to do this. 

o  I also pin the end of elastic to the casing so I don't accidentally pull it into the skirt.


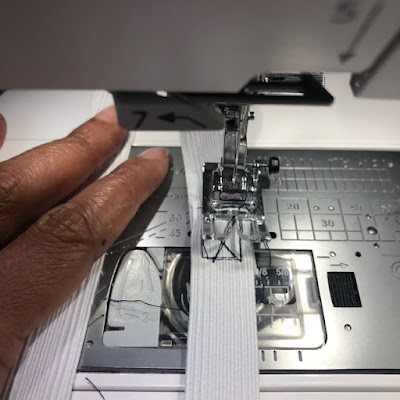
o  Once the elastic is inserted, layer the elastic 1" over each other and stitch down. I use a lot of stitching on this piece because I don't want it separating during wearing.


o  After you've stitched the elastic together, distribute the gathers around the skirt. Another tip, if you're plus size and carry your weight in the front like I do, put less gathers there.

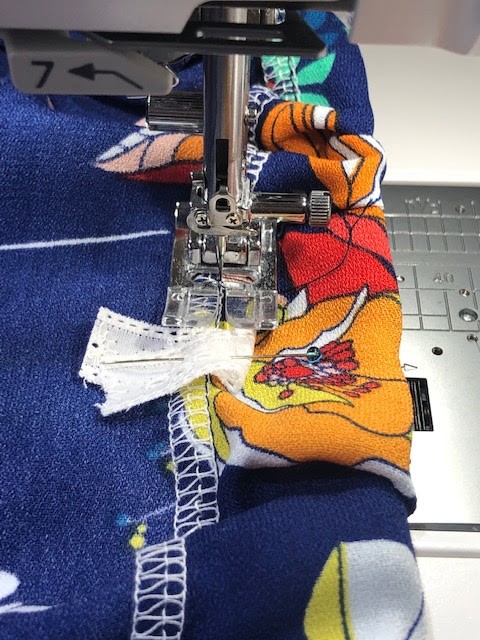
o  Next stitch the elastic down in the ditch of the side seams. This will prevent the elastic from moving around in the waistline casing.

o  Add a piece of ribbon or a tag to the back of the skirt so you know the front from the back.


Finally, press up a 1" hem and machine stitch the hem and side slits flat...and you're DONE!

In 2-3 hours, depending on how quickly you sew, you will have a fun and flirty skirt.

Wanna see my version ~


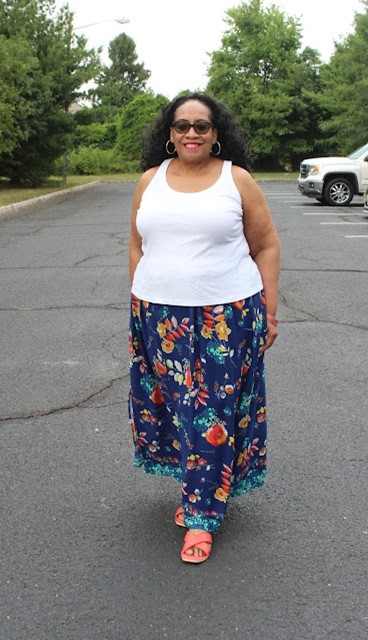
I used a crepey rayon border print to give the skirt so oomph and paired it with a tank top and cardigan. Perfect for work, dinner with friends, or a casual date. I hope you will give this a try because it's a lot of bang for the buck and a quick and easy sew! 


Everyone is Talking about A Simple Summer Maxi Skirt
Reviews


Tako
Beautiful
Wednesday, November 23, 2016

cpindzola
Around the Table Dresden Placemats
Saturday, December 17, 2016

I like the concept, but the directions are "sloppy." Nowhere in the supply list does it mention the felt or the batting (how much?). Also, I would never use a high loft batting in a placemat, or a table runner, as I think that it would be too unstable for a glass. The next time I make these, I will cut out the batting (I use flannel) and spray baste it to the wrong side of the Dresden plate before I put the Dresden plate on the felt to cut out. I have not yet washed the finished placemat, and am hoping that the single layer of felt does not curl up, or become distorted after washing/drying.
Txmaid
Fun Great Gift!
Tuesday, February 21, 2017

MargieARK
Teatime Quilted Tablecloth
Friday, February 24, 2017

I made this today but your cutting directions need to be changed. You only need 4 of color 1 and color 3 4.5 squares for the triangles. Also the inner border, you only need 2 cuts as WOF is long enough to cut each in half to fit the sides.
MickelSews
Great Machine
Wednesday, August 30, 2017

I've had this machine for only a week now. I bought it used from a lady who makes her own clothes, but she no longer needed the machine. During the purchase, she noted that she is almost sad that it's better to give it away because of how well the machine performed. (I also bought it along side a computerized machine of another brand.} She demoed the machine for us, showing it worked and gave us everything (including the box it came in!) She took amazing care of this machine. I have used it a few times now, and the directions for threading were easy to follow (albeit my hands are quite large so the lower looper was a pain, but that is no fault to the machine or brand.) And I recommend this machine to anyone who wants to learn to serge and wants a machine that can grow with them. I will happily use this machine time and time again.
rvstan
S9 Review
Sunday, February 25, 2018

I love, love, love my S9! It's sews and embroiders beautifully and it's simplicity of use amazes me. I would recommend this machine for both a beginner and an experienced seamstress. If I would ask anything of Janome it would be to upgrade the programming to run a larger hoop size. I understand that it can't get much wider but there is most definitely room for it to go longer. That is the only limitation of this machine.
pjmnana
PJMNana
Monday, February 26, 2018

I purchased a Memorycraft 15000 a few years ago and it was the best purchase I ever made! This machine can do just about anything you would would ever want! I love the capability of using the Acuedit app to set up my embroidery pattern on my Ipad and then download it to the machine! I love how my embroidery looks upon completion and I love all the good lighting it has to light up your workspace. That way you don’t need to worry about where to set up your machine. It also has plenty of room to do machine embroidery on any size quilts! There are many decorative stitches from which to choose that are outstanding! It’s hard to choose which one to use! There are so many great features it is hard to decide what I love the most. If you want to buy only one machine to last a lifetime, I would recommend this one!
KLWash
S9 Review
Sunday, February 24, 2019

The S9 is amazing. I learned to sew by hand when I was just 5 and in my grandmothers way as she was quilting. I took seeing classes in high school until they would no longer let me sign up. The S9 makes me appreciate my current skills as well as motivate me to want to learn more. This machine is awesome.
SewSueMe2002
Horizon Memory Craft 15000
Thursday, November 19, 2020

My Janome Horizon Memory Craft 15000 is fantastic! I love, love, love this machine! When I came across the Eye for and Eye embroidery design today, I wanted to make it. However, the embroidery file is missing. Nothing downloads when I select the download button. Please help!
Jillfmischo
Treat Bag fun!
Monday, August 16, 2021

I made the Halloween treat bag for my new granddaughter and I’m sure it will last for years. No embroidery machine so I appliquéd the lettering. Need a little more skirt fabric for a better gathered look, and I used thin double-bias tape for the skirt hem, over edge stitch on skirt sides. I’m pleased with my results!
elenaz
Very helpful tutorial
Wednesday, October 25, 2023

I want to say thank you for teaching me this method of applique. I was able to do it with a small letters. This method is the best so far from all of those I've seen and tried.
plonkar
So useful
Thursday, November 30, 2023

I'd like to express my gratitude for teaching me this appliqué method. I successfully applied it with small letters, and, so far, it's the most effective among all the methods I've seen and tried.

DEALERS
The TWO Closest Dealers to you are:
196 Boston Post Road , Orange CT, 06477
203-878-1654
19 PUTNAM AVENUE , PORT CHESTER NY, 10573
914-934-2934
Find Additional Dealers