Projects

Fabric Markers & Sashiko Machine Embroidery

Created By:

Maday Delgado

Skill Level: Intermediate

It is back to school time and what better opportunity to give our current wardrobe a little update!
This project is for anyone looking to freshen up a favorite jacket, t-shirt and/or home décor; it’s
also one of the best ways to cover up blemishes, garments have collected along the way. The best
part? It can be a family project. As always, making projects a collaborative initiative is my
passion. My teenager assisted me on the coloring portion of this project, making it the perfect
“no screen,” creative outlet while giving this thrifted jacket a great makeover! Bring out the
fabric markers and let’s get started.

Janome Supplies Required

Supplies:

Sticky+ Self Adhesive tear away stabilizer

Permanent fabric markers (tulip)

Photo Fabric sheets with paper backing, cotton (please follow printing directions on the packet)

Coordinating embroidery thread

Coordinating 50wt thread

organ needle 14

Ruler

Rotary cutter

Cutting mat

Iron/ironing board

Pins

Printer

9”x12” coordinating fabric

Machine

Janome Skyline 9, Embroidery foot, A foot, zig zag plate, RE20 Embroidery hoop


Instructions

Helpful Hint: Make sure that your printer has a good ink supply and follow the directions on the back of the printable fabric packet for best results.


  1. Select an image that you would like to print. Hint: Etsy is a good place to find and purchase lovely images for personal use. The best images are those that are black and white so that your printer does not use up a lot of ink and you can color with fabric markers afterwards. Hint: Tulip markers are affordable and long lasting.


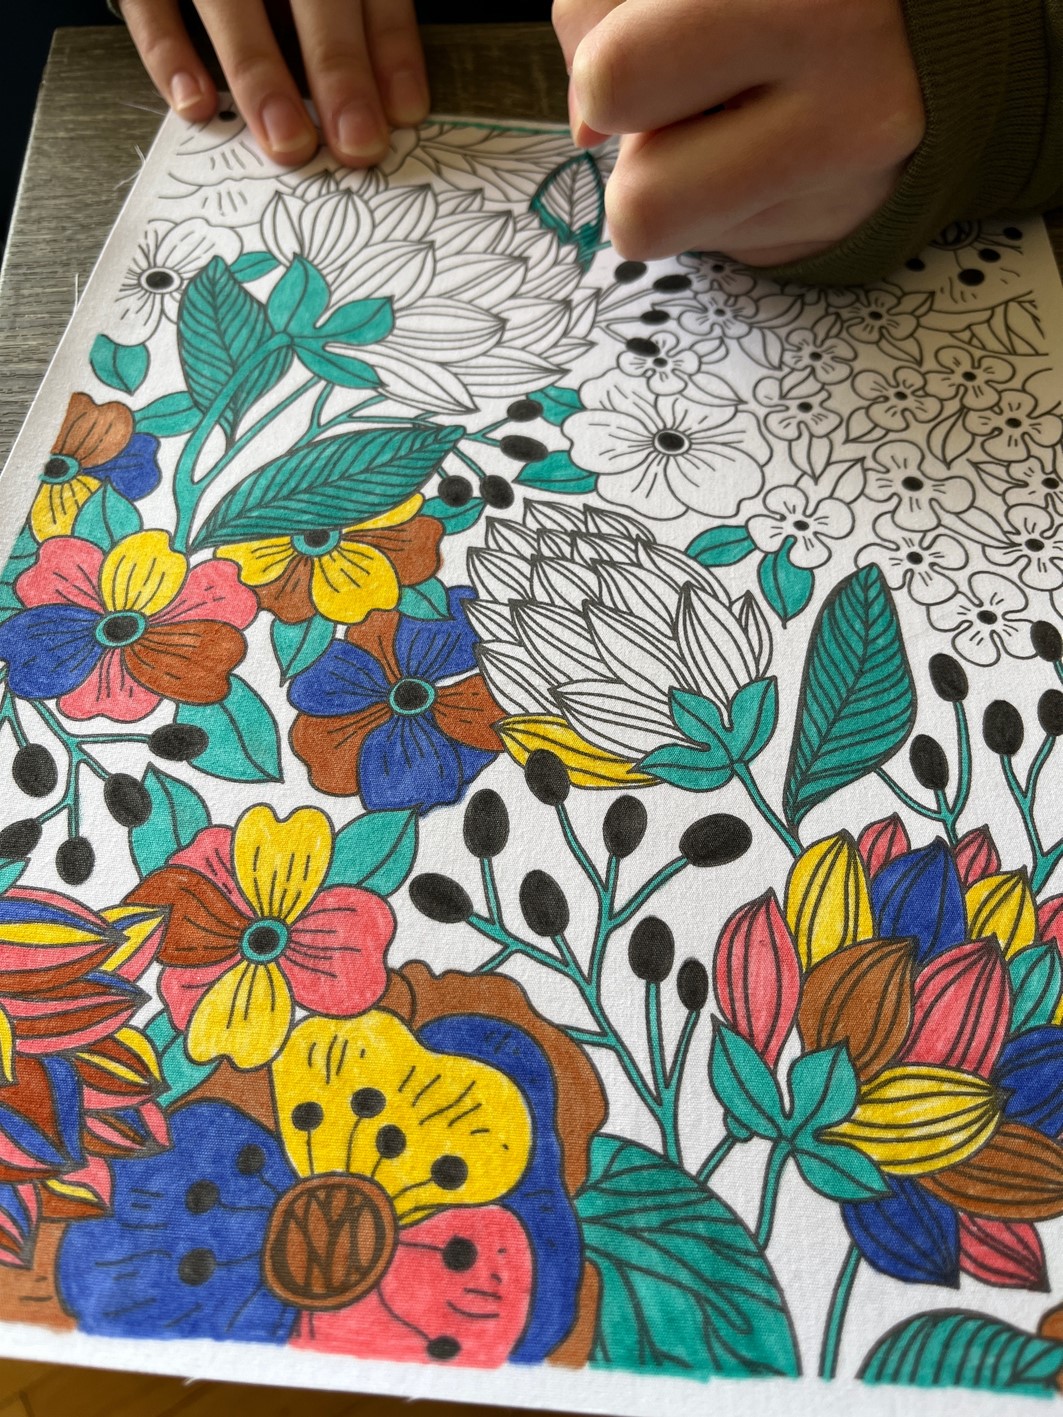
2. Color the image with fabric markers before removing the paper backing.


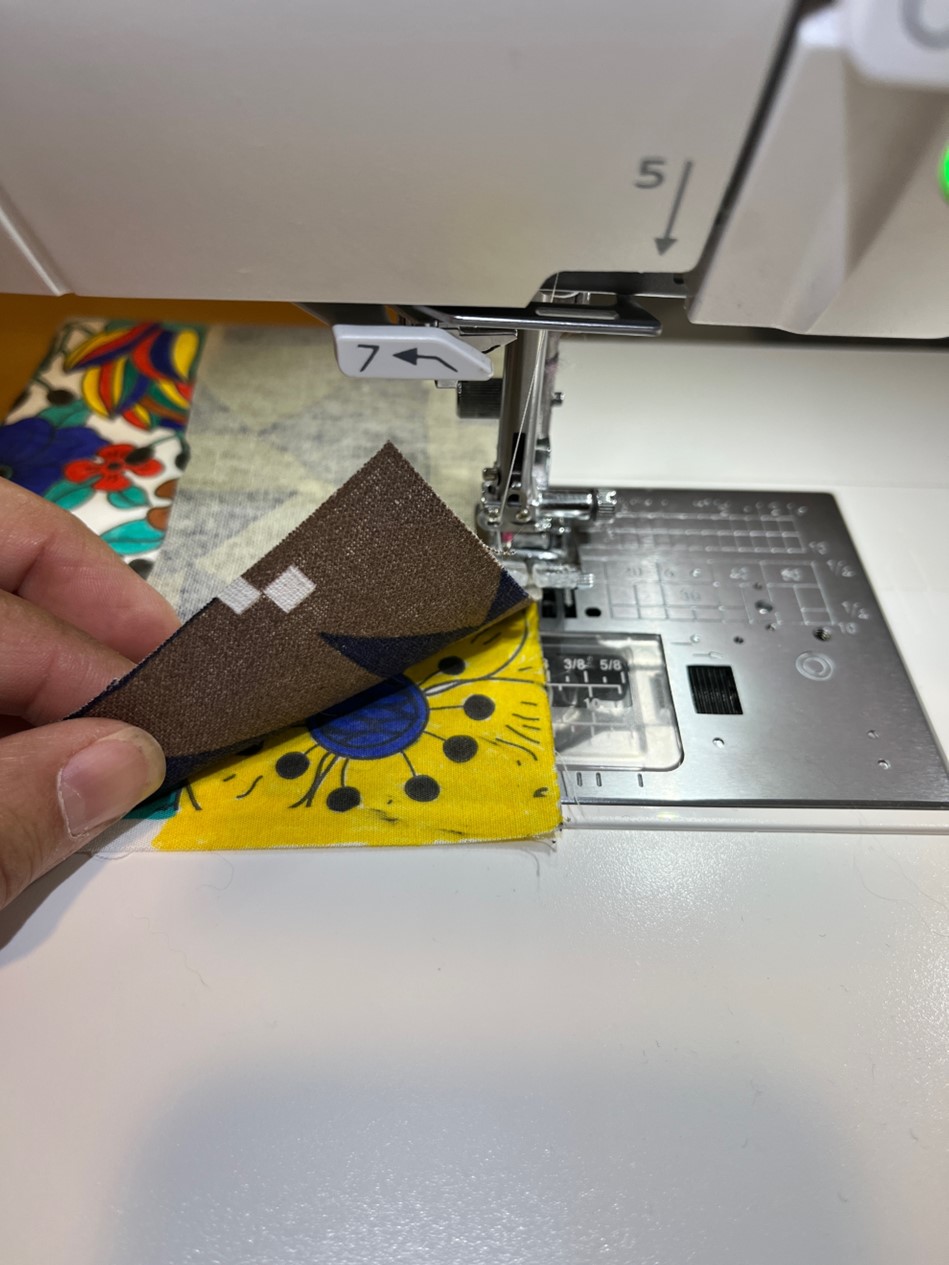
3. Prepare photo panel: Cut 4-1.5”x9” strips. Sew strips to all sides using ¼” seam.


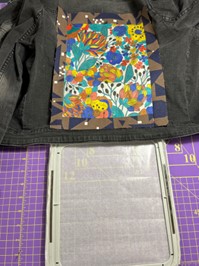
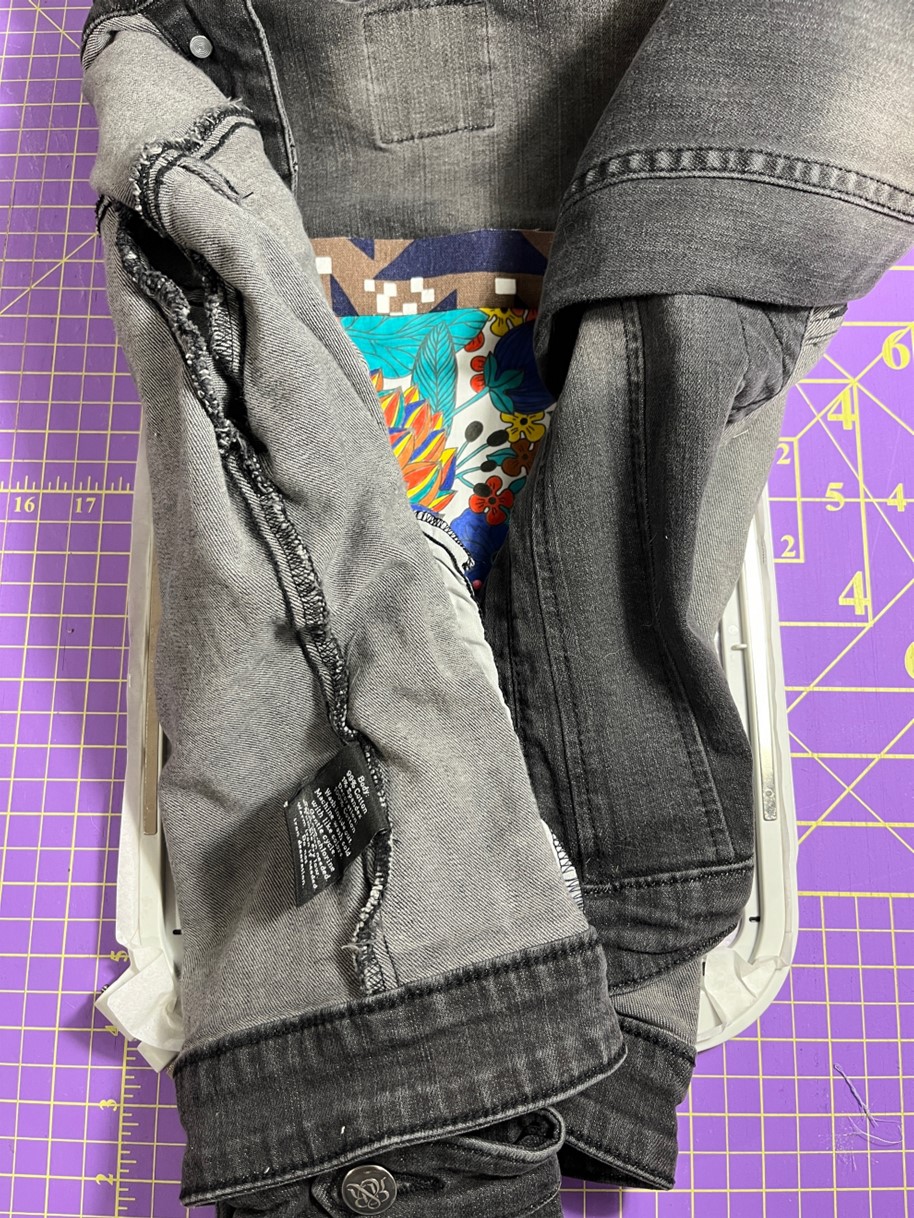
4. Pin colorful panel to the jacket sparingly (remove pins before embroidering each section). Hint: Avoid embroidering through bulky seams. Load sticky+ stabilizer on your hoop. Position jacket in the center and load hoop.

5. Switching to embroidery mode, make your selection from the built-in Sashiko stitches (flower icon). You will copy the same design 3-4 times depending on your selection and design size. In the edit window (grid selected below), you have the option to resize, copy, rotate, reduce pattern, and change hoop size.

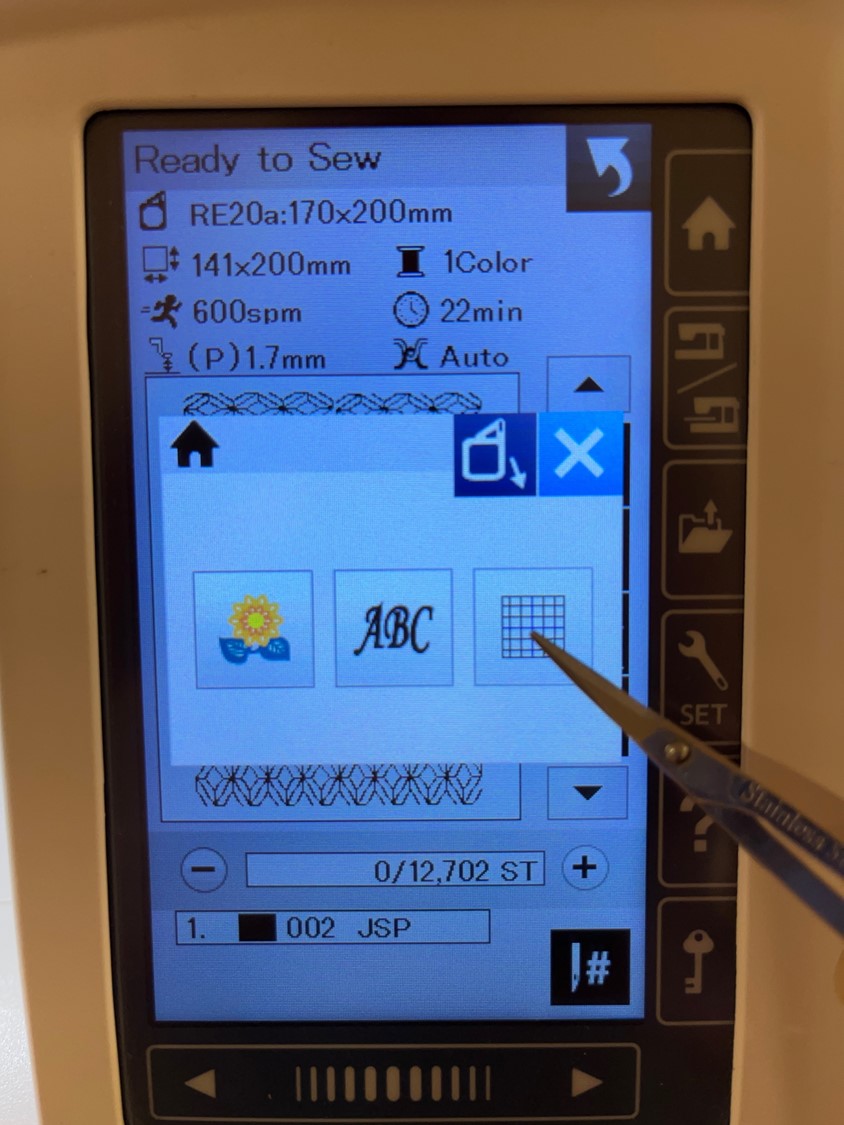
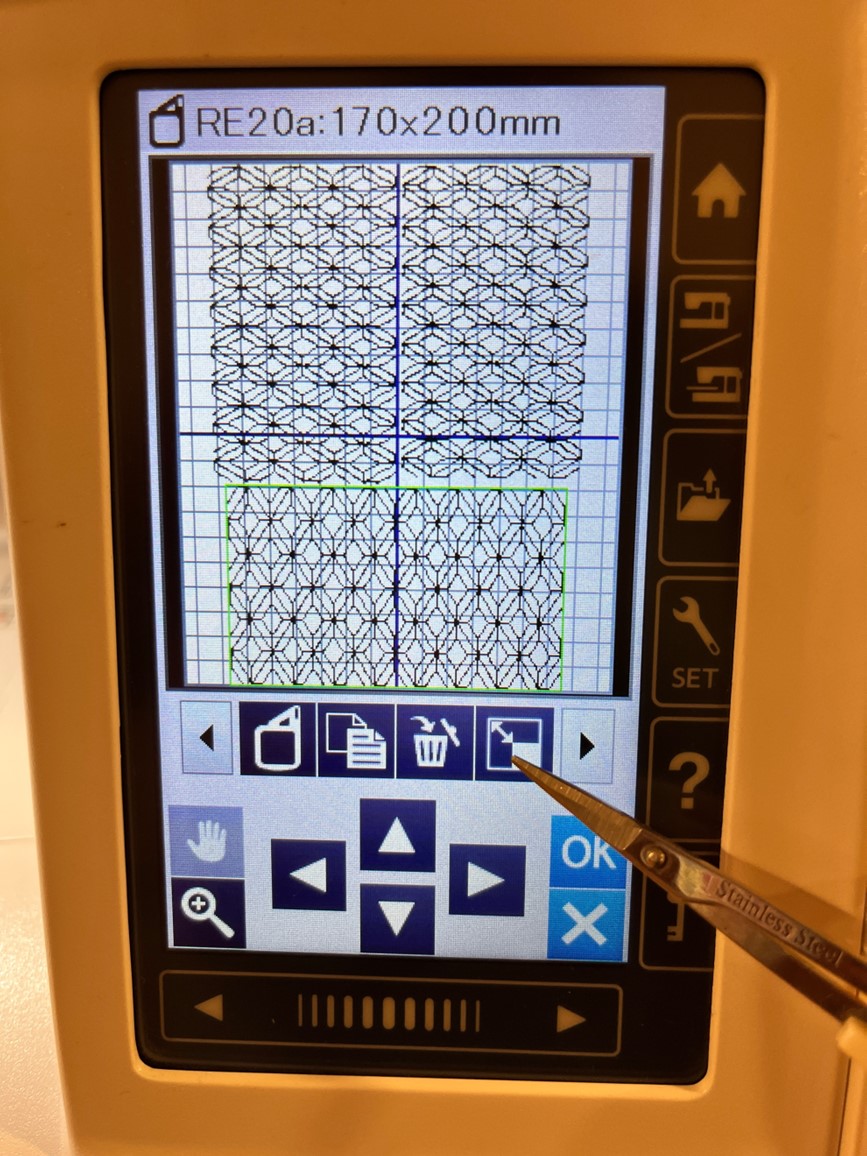
6. After selecting the pattern, choose the largest hoop, RE20. Copy and paste the design. Please note: the icon to the right of the hoop icon, allows you to make additional copies of the pattern. I copied the pattern 2 additional times.


7. The icon to the right of the “trash can” icon, allows you to reduce or enlarge pattern sizes. I selected each design (below) until two fit vertically and the third horizontally. Use the up/down, side to side arrows to line up the patterns.


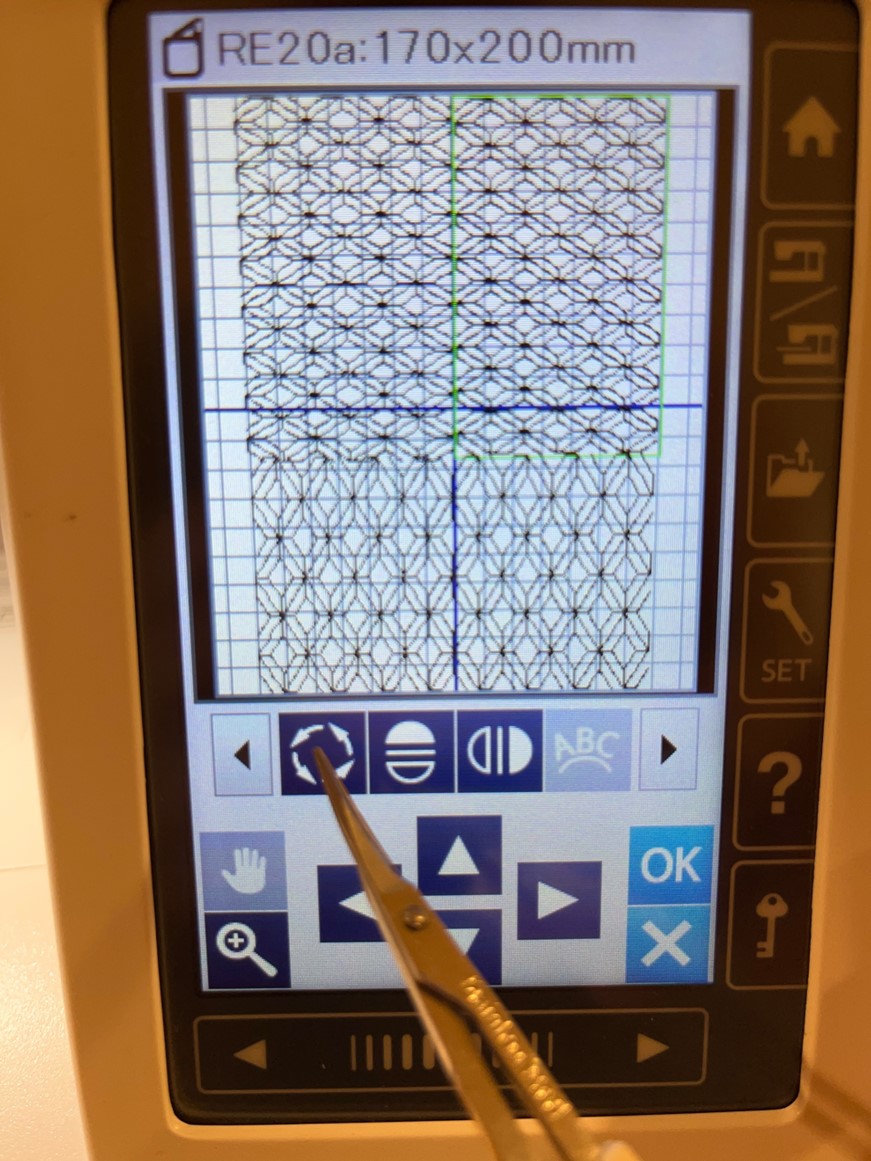
8. The horizontal pattern will be rotated using this icon (see below).

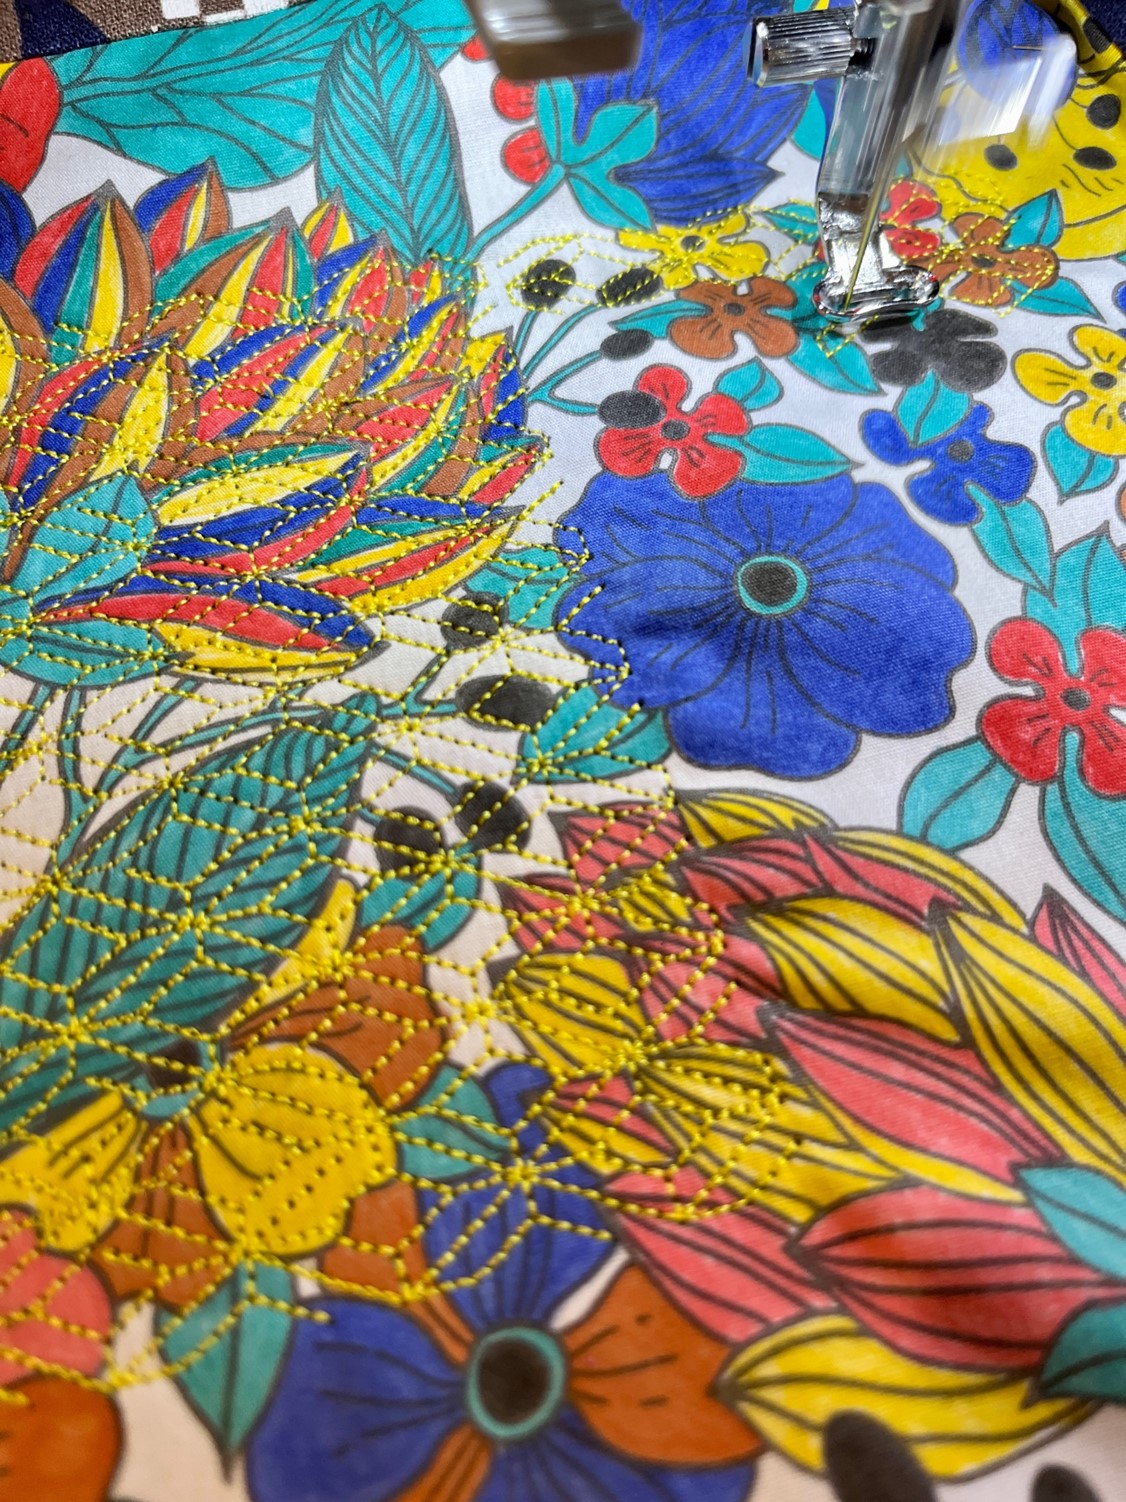
9. Ready to embroider!  Hint: Be prepared to stop often to remove pins out of the way as the embroidery progresses.

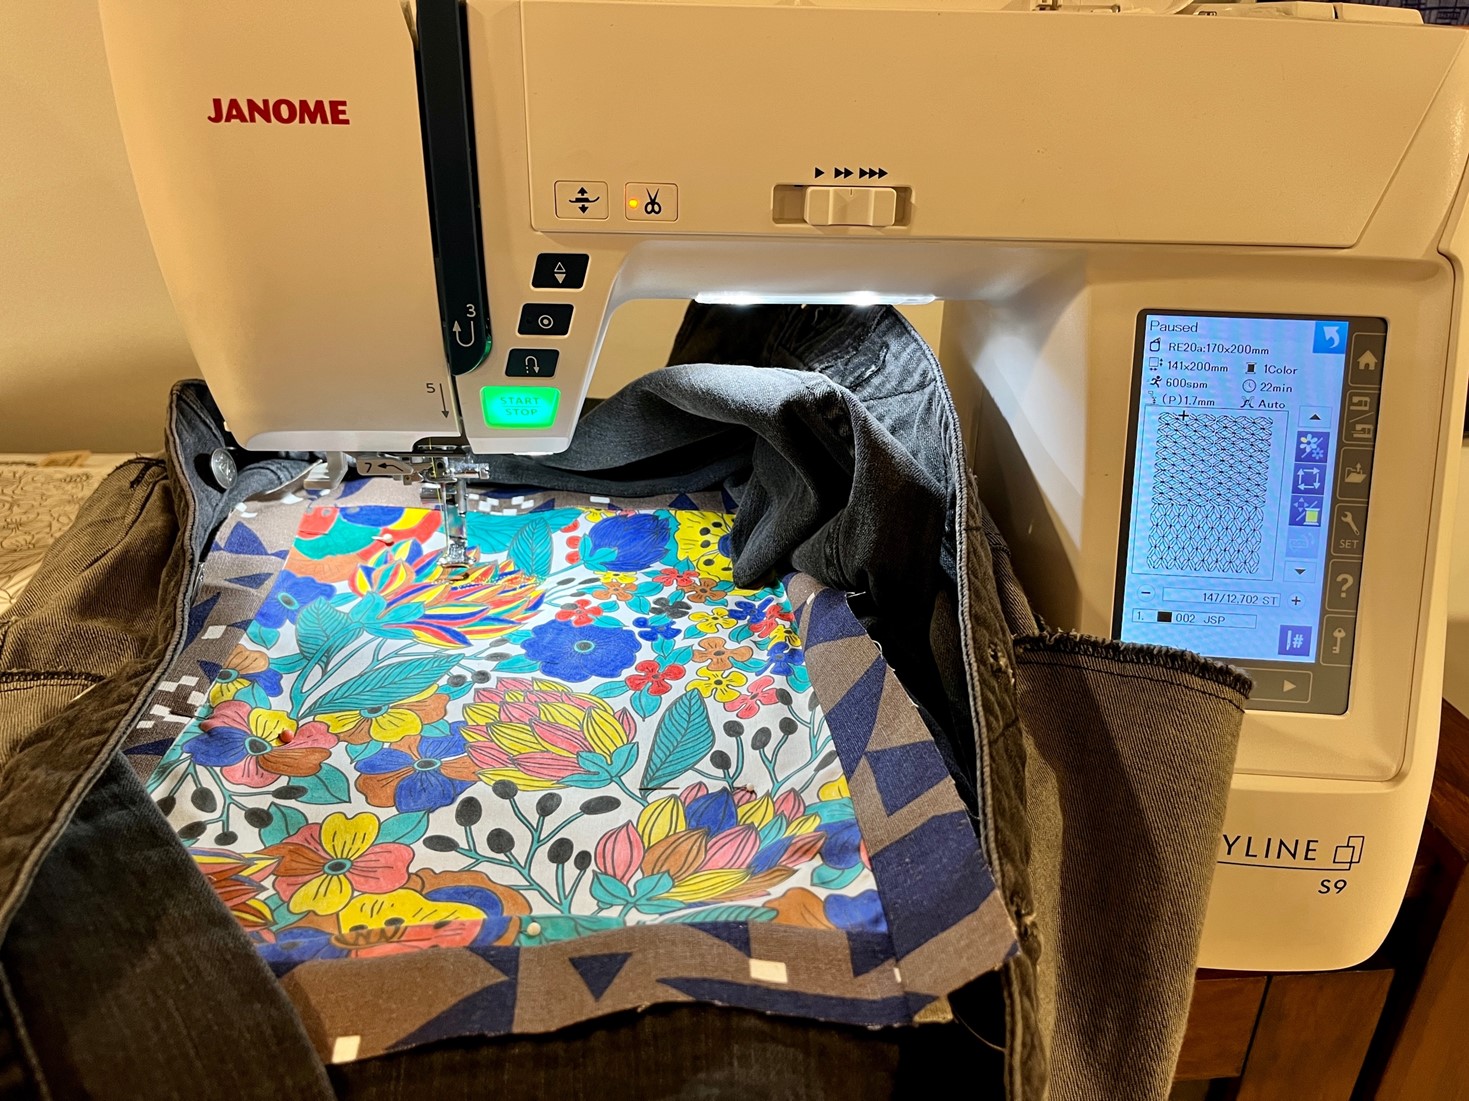
10. Yellow embroidery thread complements the yellow markers on the photo fabric.

11.  Once the embroidery is complete, switch to ordinary sewing and stitch in the ditch around the borders, to attach to the jacket for a polished finish.

12. Fold edges under ¼” all around and topstitch by machine or hand-stitch. Press well.

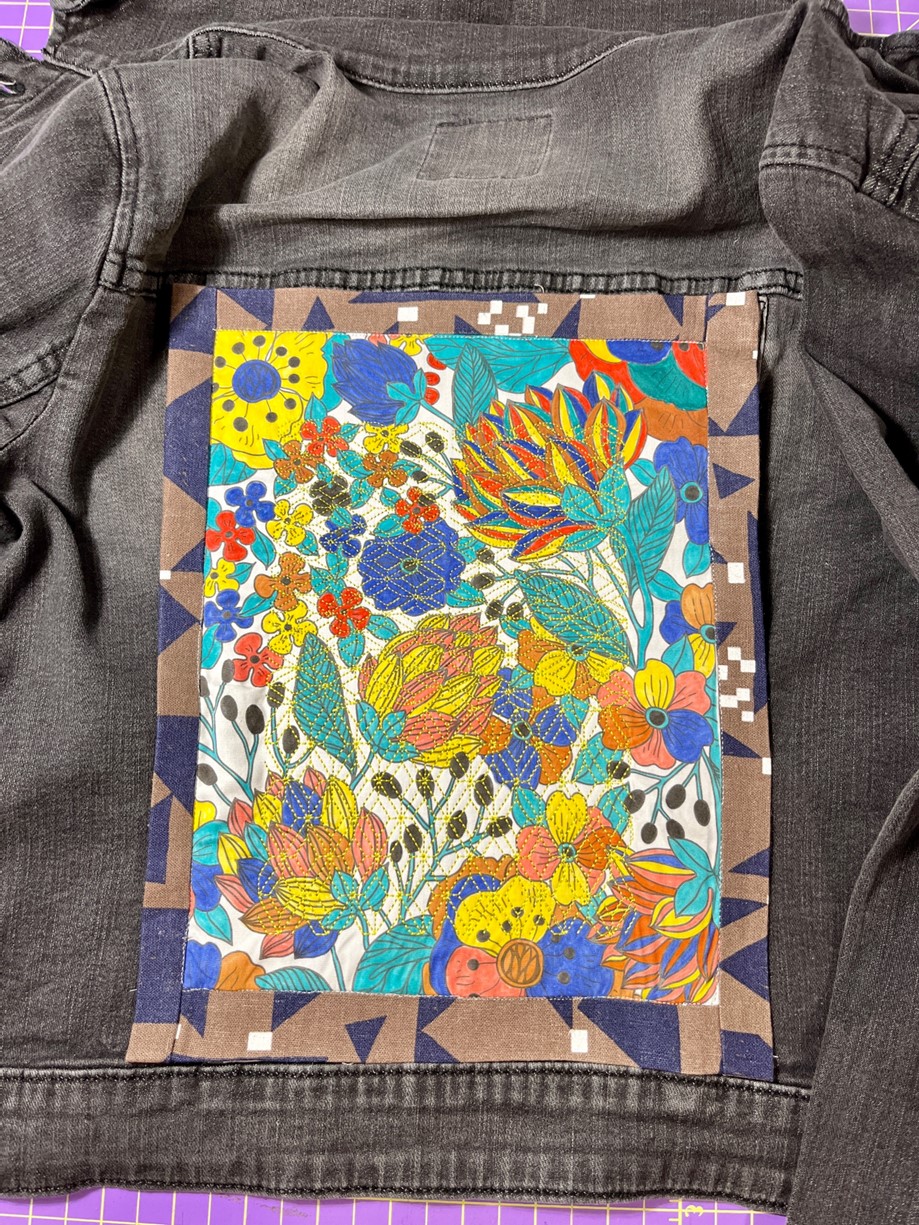
13. Viola!  The jacket is ready to wear.

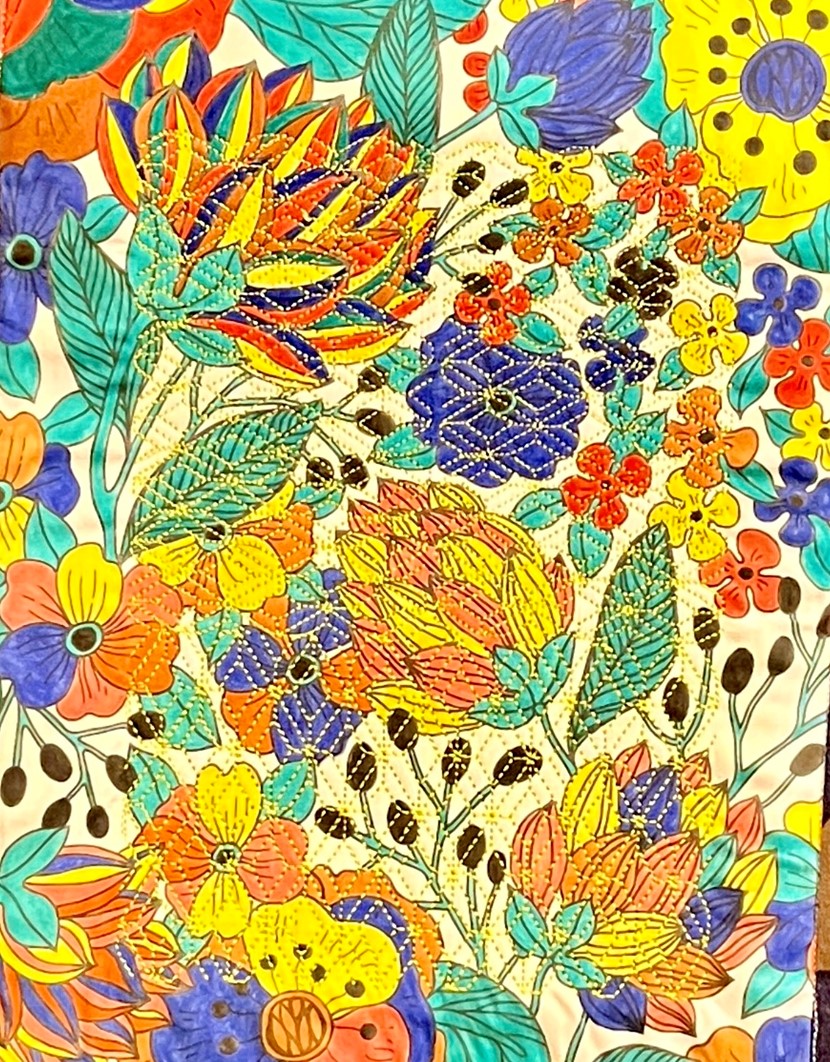
Who knew that printing on fabric, coloring with permanent fabric markers and machine embroidering with built-in Sashiko stitches, could create such beautiful, wearable art! The flowers jump off the page, don’t they?


I hope you enjoy, try out these techniques and/or share with your friends and family. Machine embroidery can make any project come to life.


Happy Autumn, Everyone!


Maday

www.sustainabletextiledesign.com

Everyone is Talking about Fabric Markers & Sashiko Machine Embroidery
Reviews


Tako
Beautiful
Wednesday, November 23, 2016

cpindzola
Around the Table Dresden Placemats
Saturday, December 17, 2016

I like the concept, but the directions are "sloppy." Nowhere in the supply list does it mention the felt or the batting (how much?). Also, I would never use a high loft batting in a placemat, or a table runner, as I think that it would be too unstable for a glass. The next time I make these, I will cut out the batting (I use flannel) and spray baste it to the wrong side of the Dresden plate before I put the Dresden plate on the felt to cut out. I have not yet washed the finished placemat, and am hoping that the single layer of felt does not curl up, or become distorted after washing/drying.
Txmaid
Fun Great Gift!
Tuesday, February 21, 2017

MargieARK
Teatime Quilted Tablecloth
Friday, February 24, 2017

I made this today but your cutting directions need to be changed. You only need 4 of color 1 and color 3 4.5 squares for the triangles. Also the inner border, you only need 2 cuts as WOF is long enough to cut each in half to fit the sides.
MickelSews
Great Machine
Wednesday, August 30, 2017

I've had this machine for only a week now. I bought it used from a lady who makes her own clothes, but she no longer needed the machine. During the purchase, she noted that she is almost sad that it's better to give it away because of how well the machine performed. (I also bought it along side a computerized machine of another brand.} She demoed the machine for us, showing it worked and gave us everything (including the box it came in!) She took amazing care of this machine. I have used it a few times now, and the directions for threading were easy to follow (albeit my hands are quite large so the lower looper was a pain, but that is no fault to the machine or brand.) And I recommend this machine to anyone who wants to learn to serge and wants a machine that can grow with them. I will happily use this machine time and time again.
rvstan
S9 Review
Sunday, February 25, 2018

I love, love, love my S9! It's sews and embroiders beautifully and it's simplicity of use amazes me. I would recommend this machine for both a beginner and an experienced seamstress. If I would ask anything of Janome it would be to upgrade the programming to run a larger hoop size. I understand that it can't get much wider but there is most definitely room for it to go longer. That is the only limitation of this machine.
pjmnana
PJMNana
Monday, February 26, 2018

I purchased a Memorycraft 15000 a few years ago and it was the best purchase I ever made! This machine can do just about anything you would would ever want! I love the capability of using the Acuedit app to set up my embroidery pattern on my Ipad and then download it to the machine! I love how my embroidery looks upon completion and I love all the good lighting it has to light up your workspace. That way you don’t need to worry about where to set up your machine. It also has plenty of room to do machine embroidery on any size quilts! There are many decorative stitches from which to choose that are outstanding! It’s hard to choose which one to use! There are so many great features it is hard to decide what I love the most. If you want to buy only one machine to last a lifetime, I would recommend this one!
KLWash
S9 Review
Sunday, February 24, 2019

The S9 is amazing. I learned to sew by hand when I was just 5 and in my grandmothers way as she was quilting. I took seeing classes in high school until they would no longer let me sign up. The S9 makes me appreciate my current skills as well as motivate me to want to learn more. This machine is awesome.
SewSueMe2002
Horizon Memory Craft 15000
Thursday, November 19, 2020

My Janome Horizon Memory Craft 15000 is fantastic! I love, love, love this machine! When I came across the Eye for and Eye embroidery design today, I wanted to make it. However, the embroidery file is missing. Nothing downloads when I select the download button. Please help!
Jillfmischo
Treat Bag fun!
Monday, August 16, 2021

I made the Halloween treat bag for my new granddaughter and I’m sure it will last for years. No embroidery machine so I appliquéd the lettering. Need a little more skirt fabric for a better gathered look, and I used thin double-bias tape for the skirt hem, over edge stitch on skirt sides. I’m pleased with my results!
elenaz
Very helpful tutorial
Wednesday, October 25, 2023

I want to say thank you for teaching me this method of applique. I was able to do it with a small letters. This method is the best so far from all of those I've seen and tried.
plonkar
So useful
Thursday, November 30, 2023

I'd like to express my gratitude for teaching me this appliqué method. I successfully applied it with small letters, and, so far, it's the most effective among all the methods I've seen and tried.

DEALERS
The TWO Closest Dealers to you are:
1900 CENTRE ST , WEST ROXBURY MA, 02132
(617)323-6200
443 MOODY STREET , WALTHAM MA, 02453
781-893-3331
Find Additional Dealers