Projects

How to Make Beaded Tudor Inspired Sleeves

Created By:

Duy Truong 

Skill Level: Advanced

Hello everyone, this is Duy back again with another portion of my Her Universe design. One of the notable parts of my Her Universe design this year was the sleeves. Today, we’re going to talk about how to approach your version of the sleeves. The sleeves were directly inspired by Jimmy Choo’s “Victorian Poetry” collection, but also inspired by the Tudor Era.

Heads up, majority of this project is hand stitching, but your Janome machine will handle all the parts that you don’t need to do by hand.

Janome Supplies Required
Instructions

1. SLEEVE PATTERNING

The pattern for this was easy and hardest at the same time. The concept is clear as day in my head, but physically, it could be more complicated than it should be.

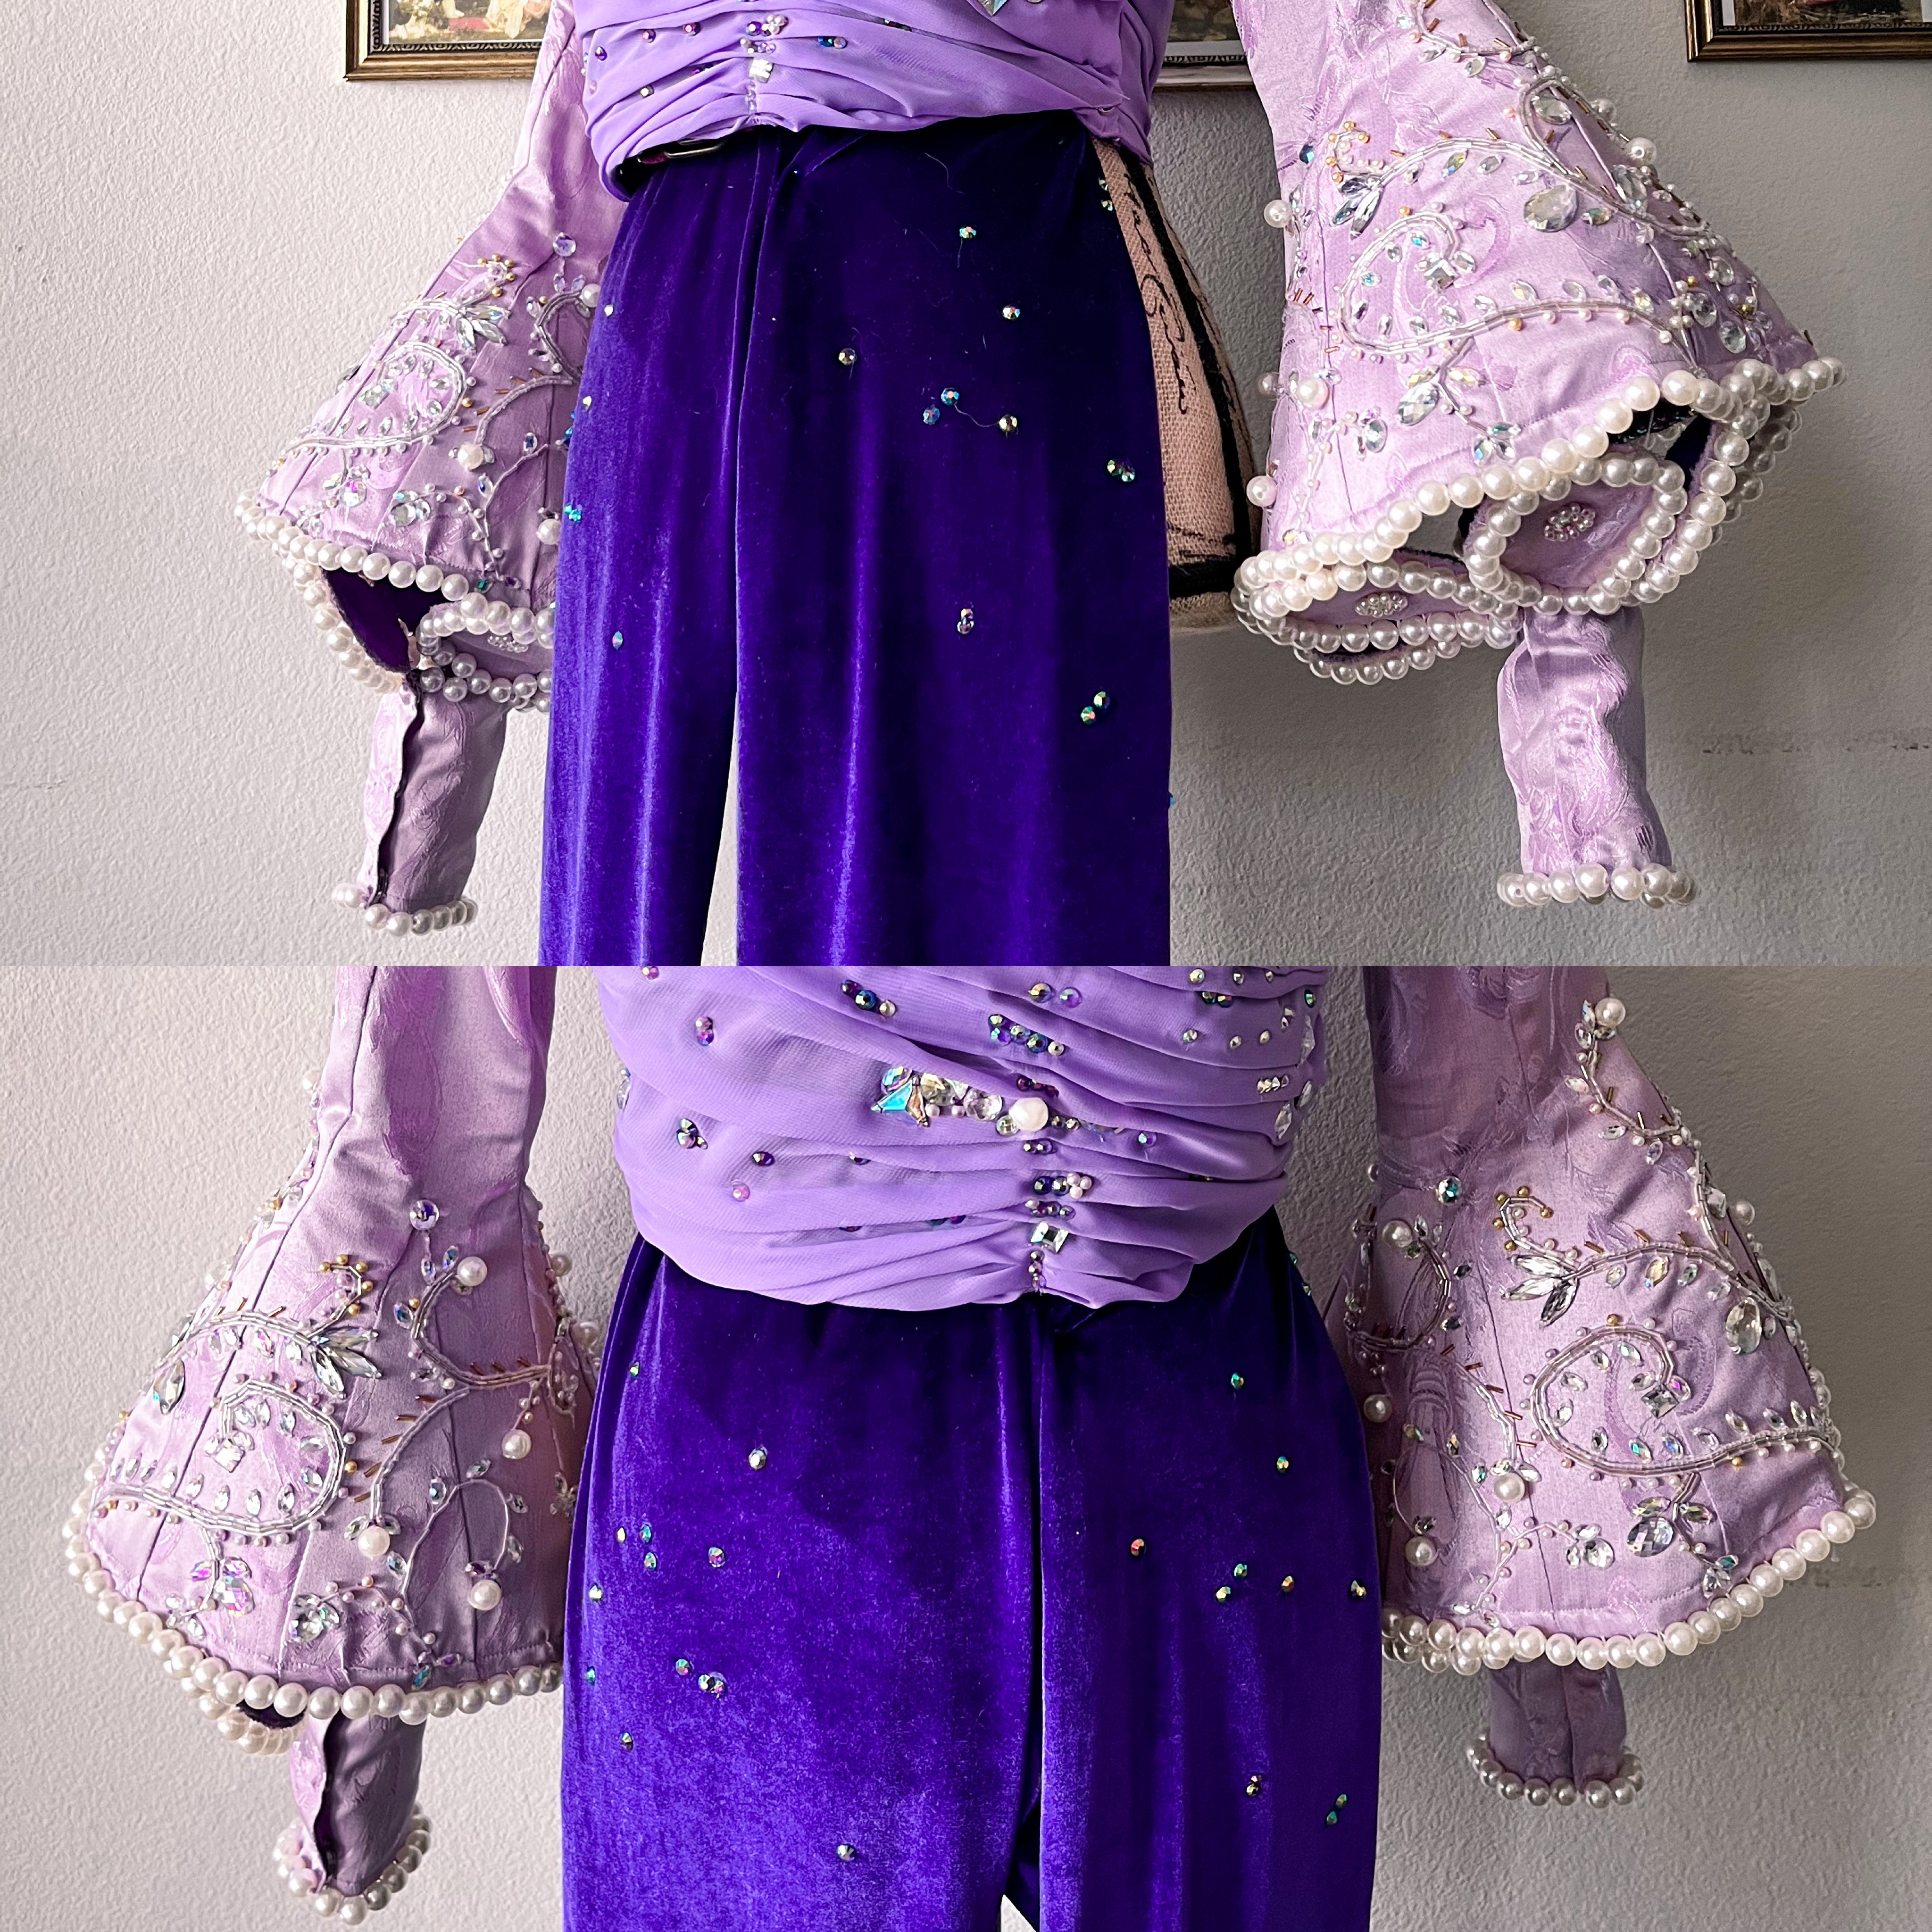
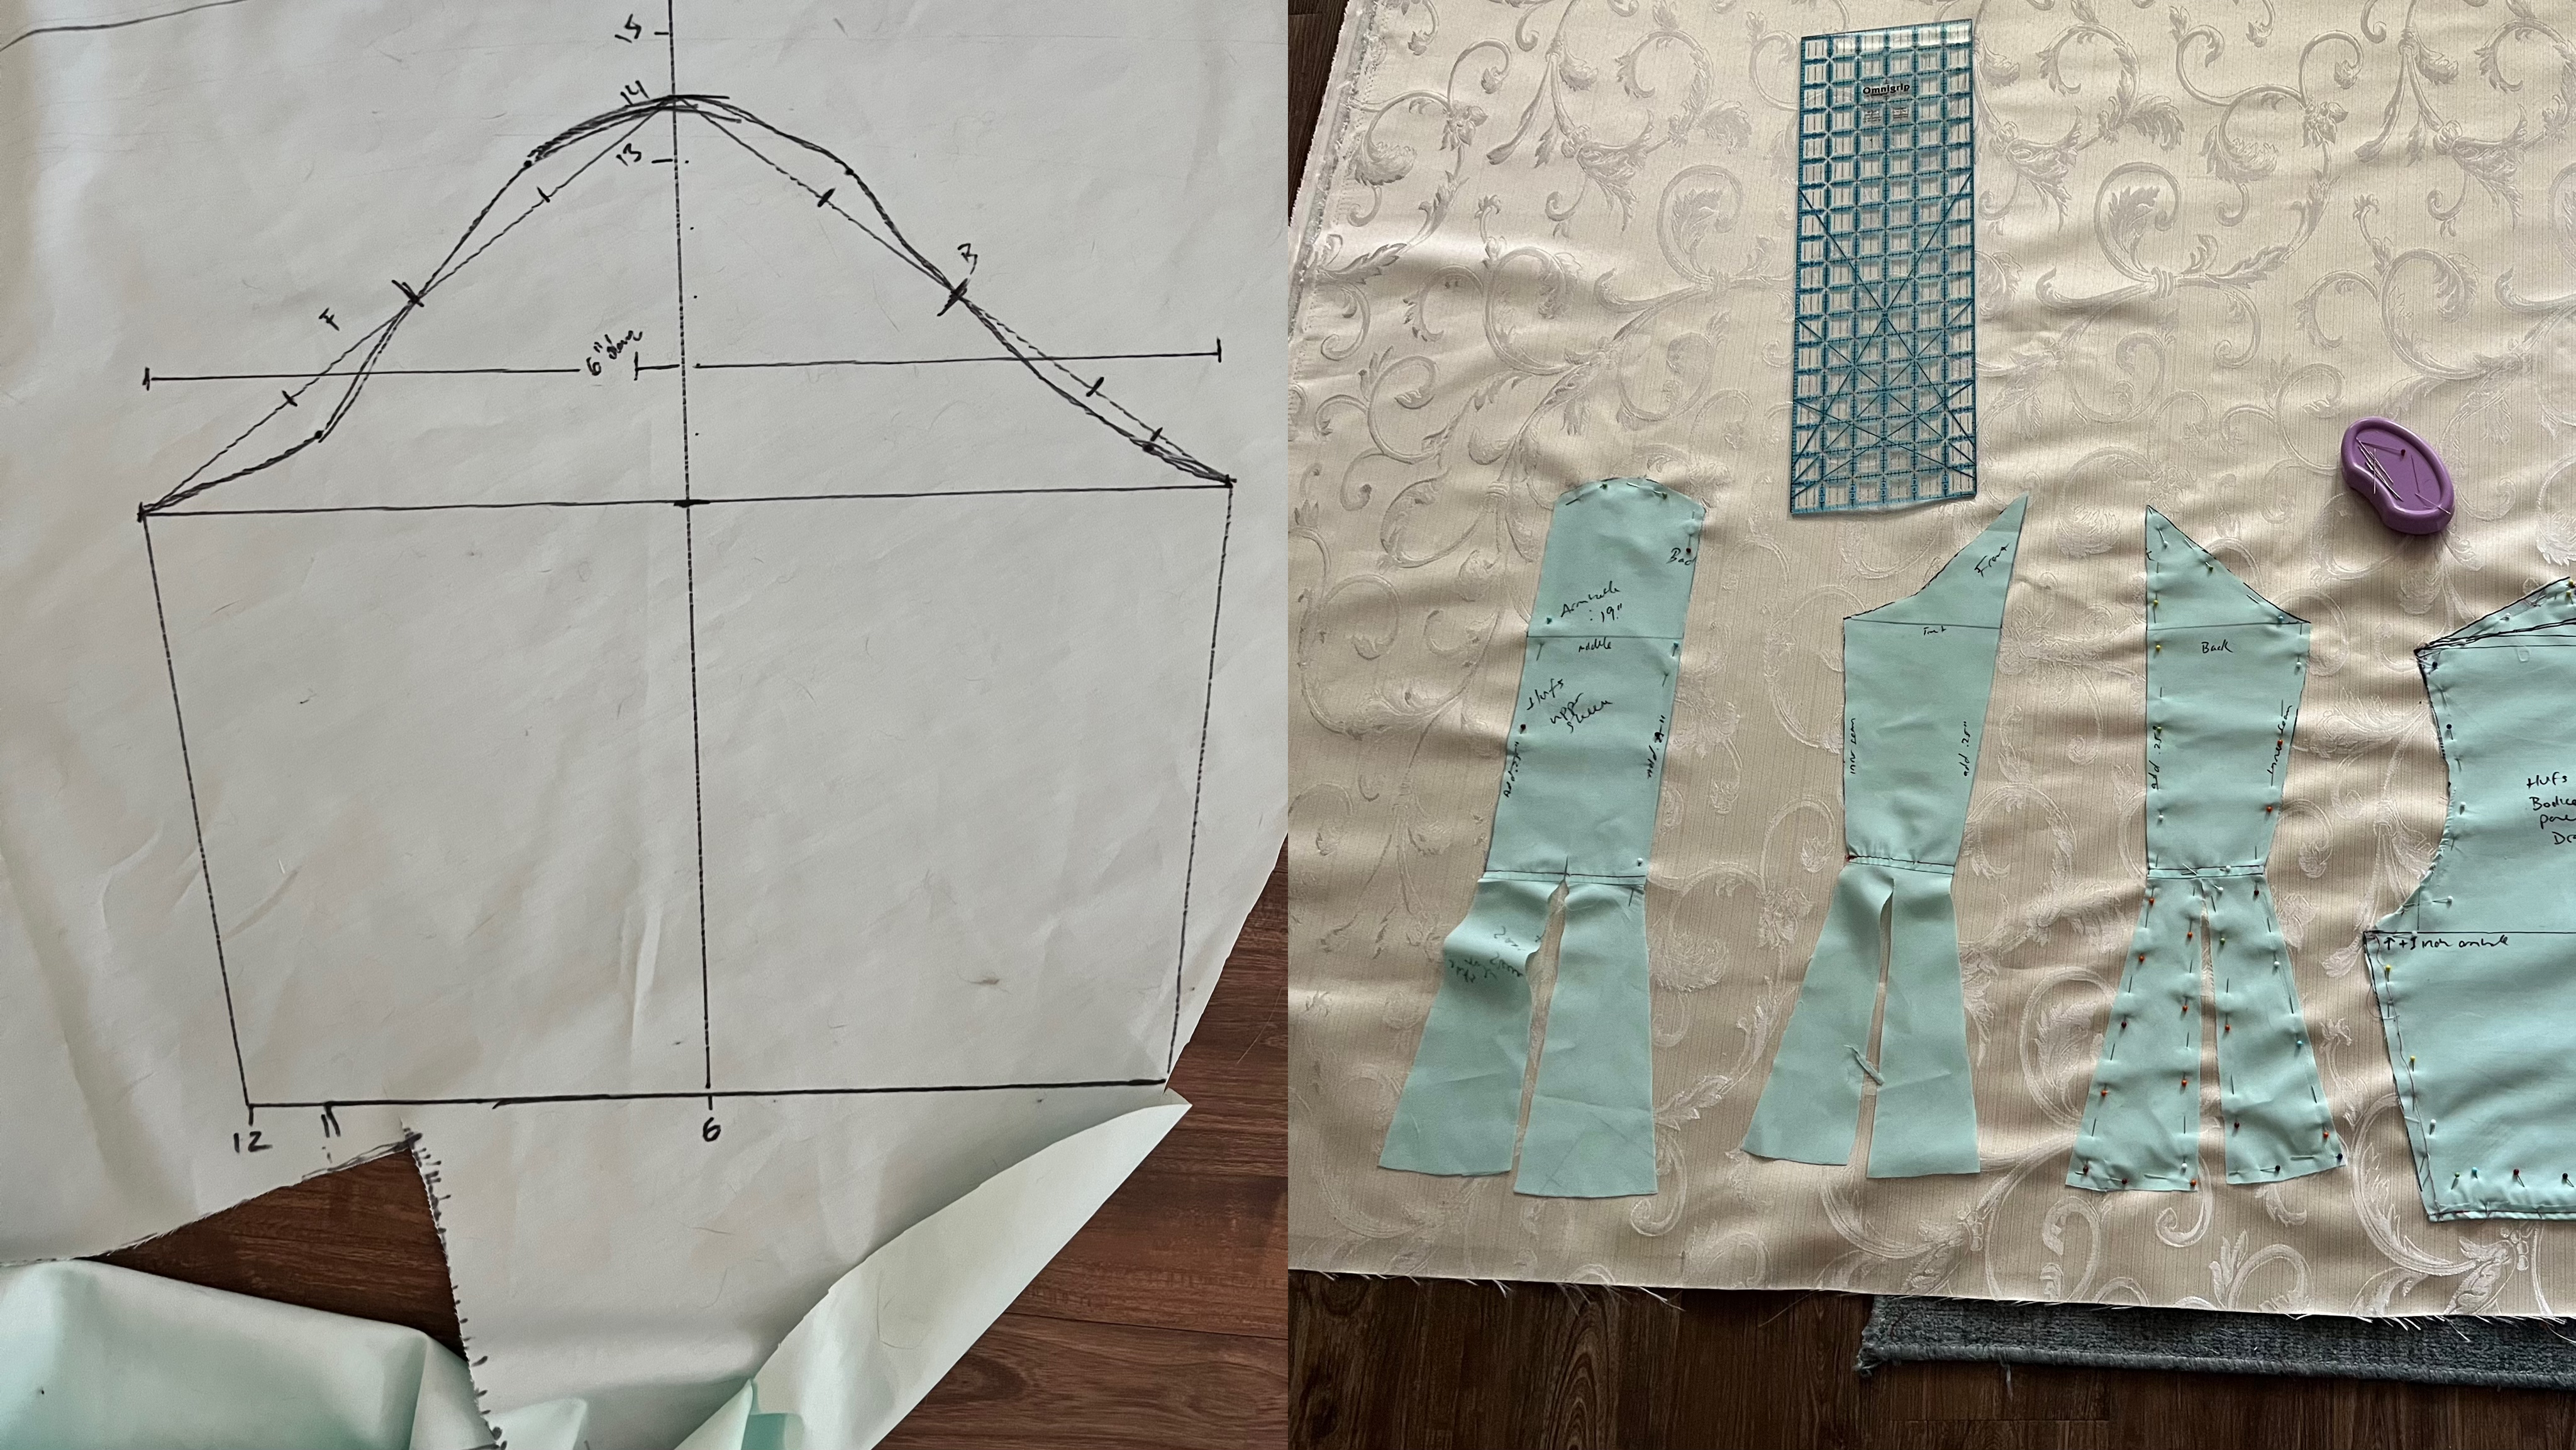
The general shape you want to aim for is a straight sleeve that ends around the elbow area and then an 80% circle at the end (imagine a circle skirt for your elbow).

The complicated part is whether you decide if you want a horizontal seam or not.

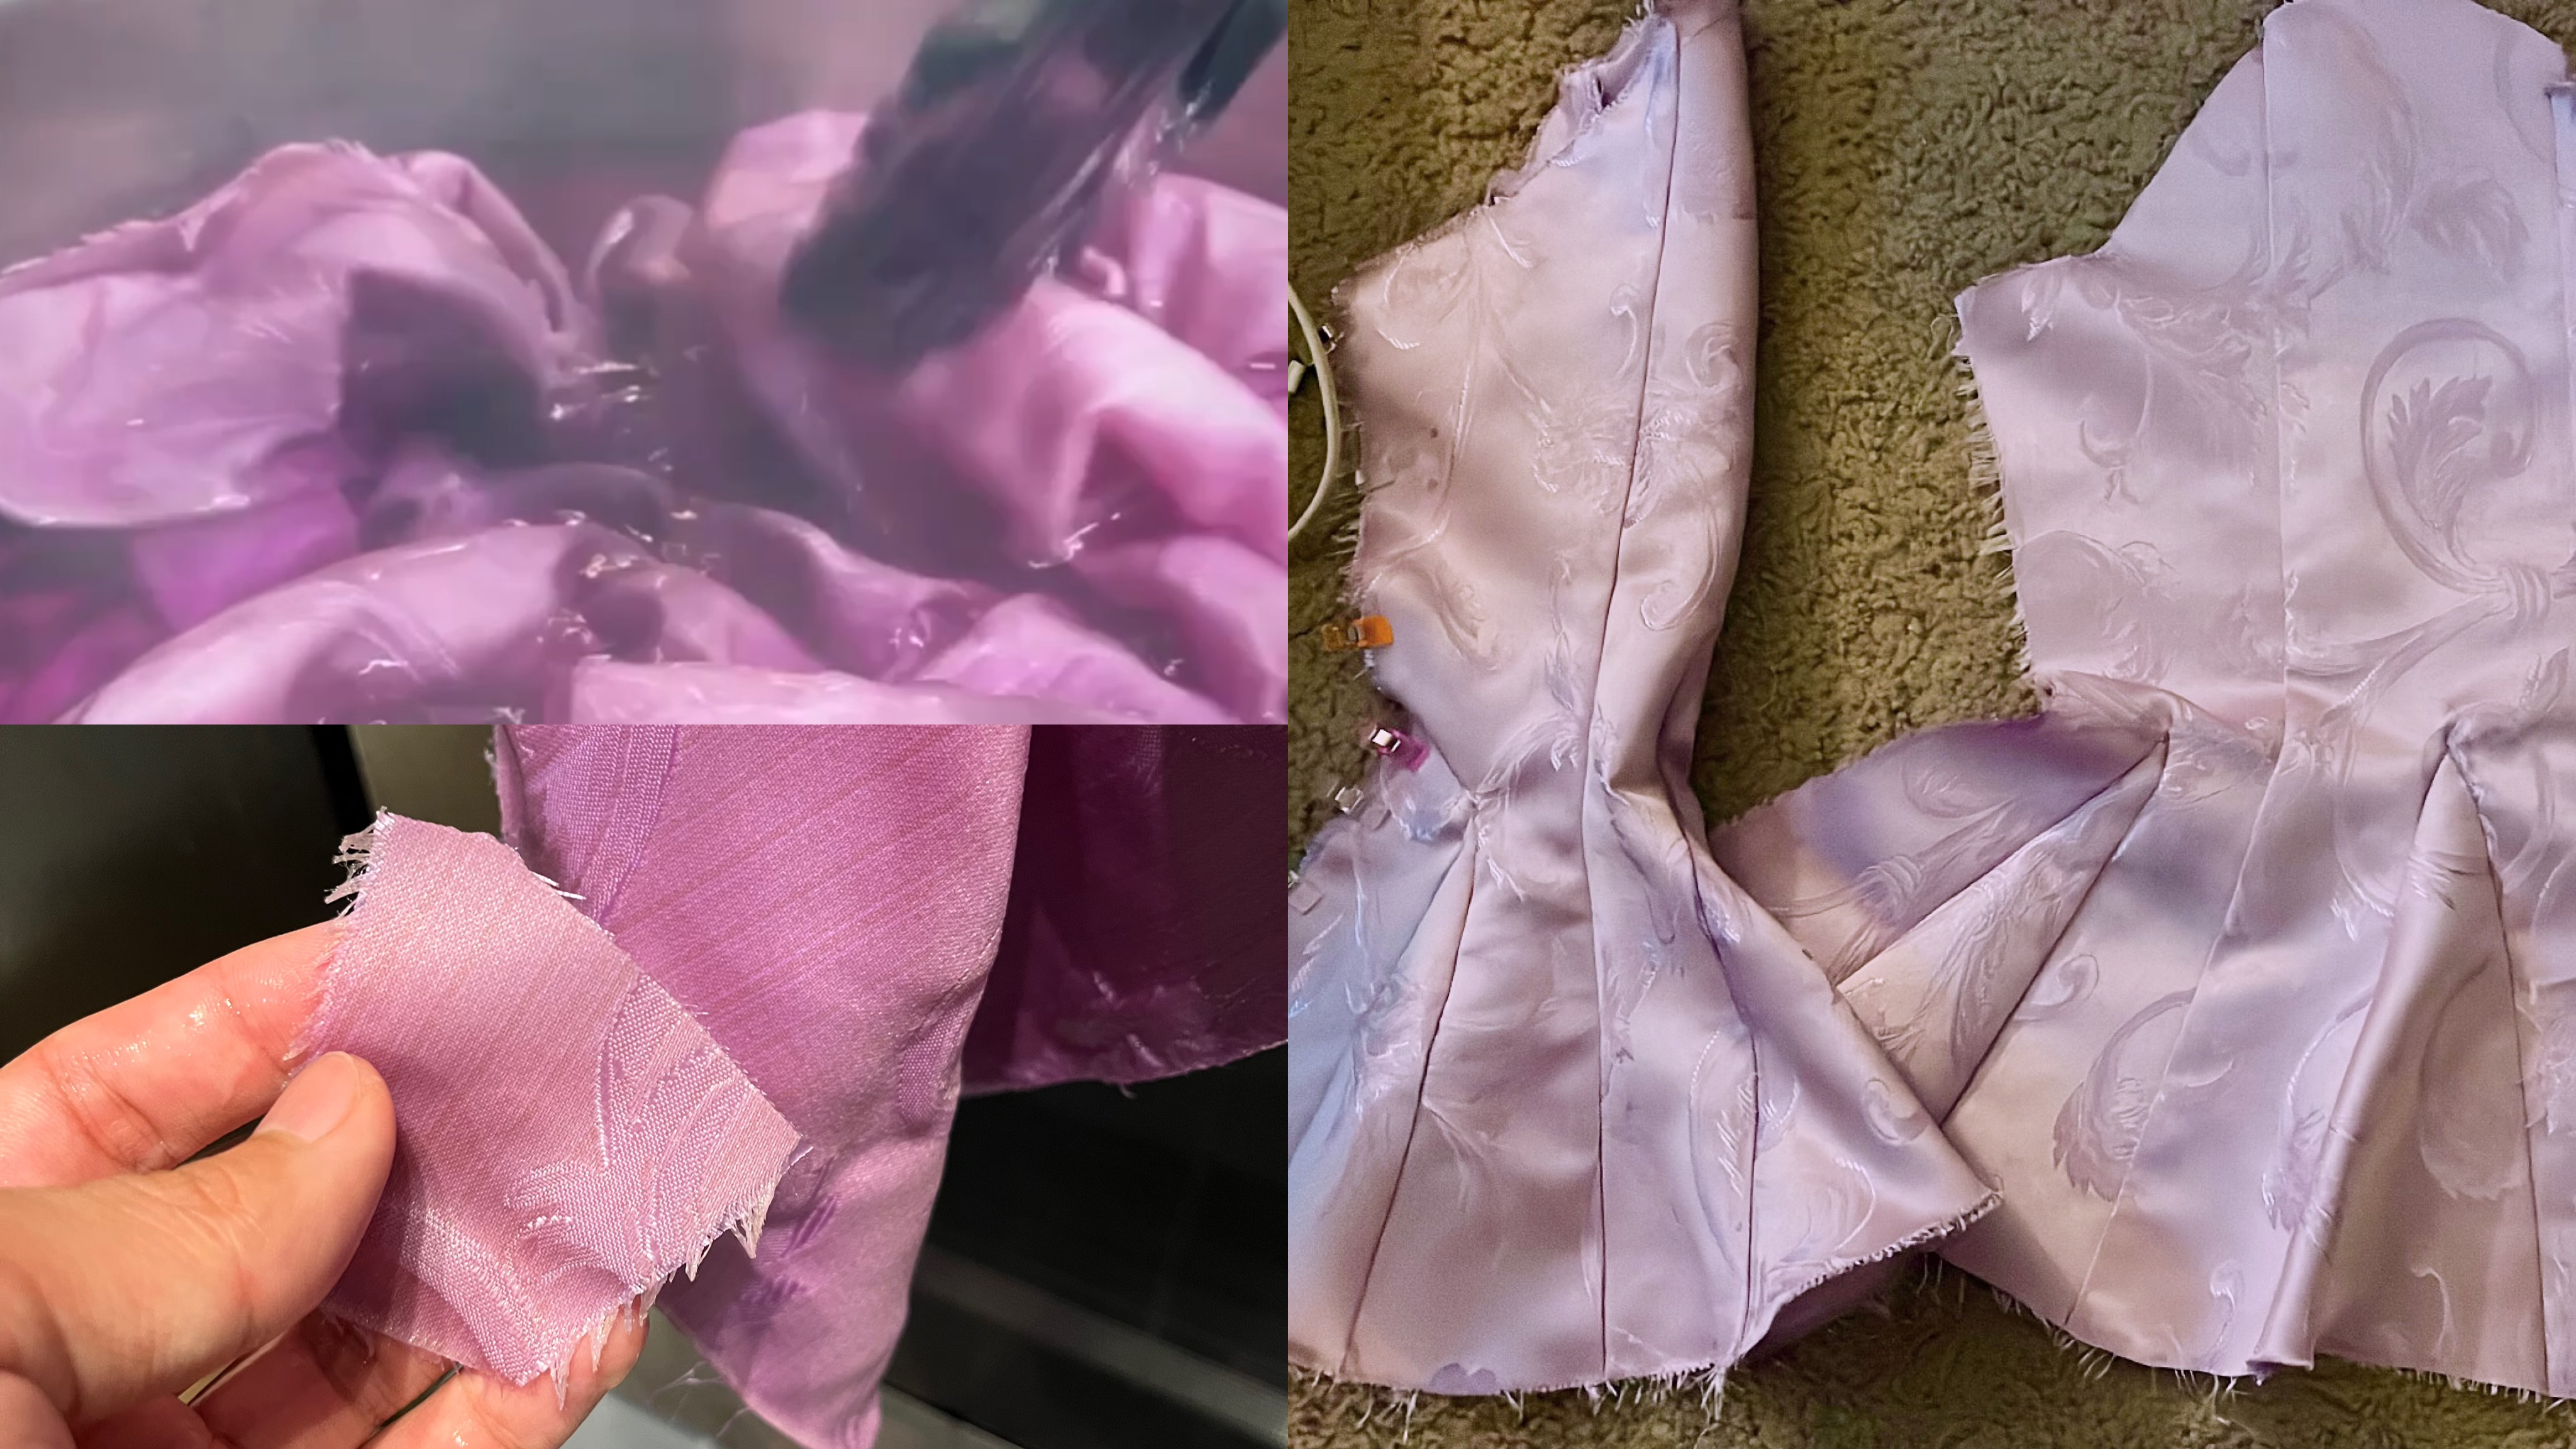
Make sure you save every part of your patterns, from the circle portion to the straight sleeve. It might come in handy for any of the process. This is also a good time to dye your panels as needed.

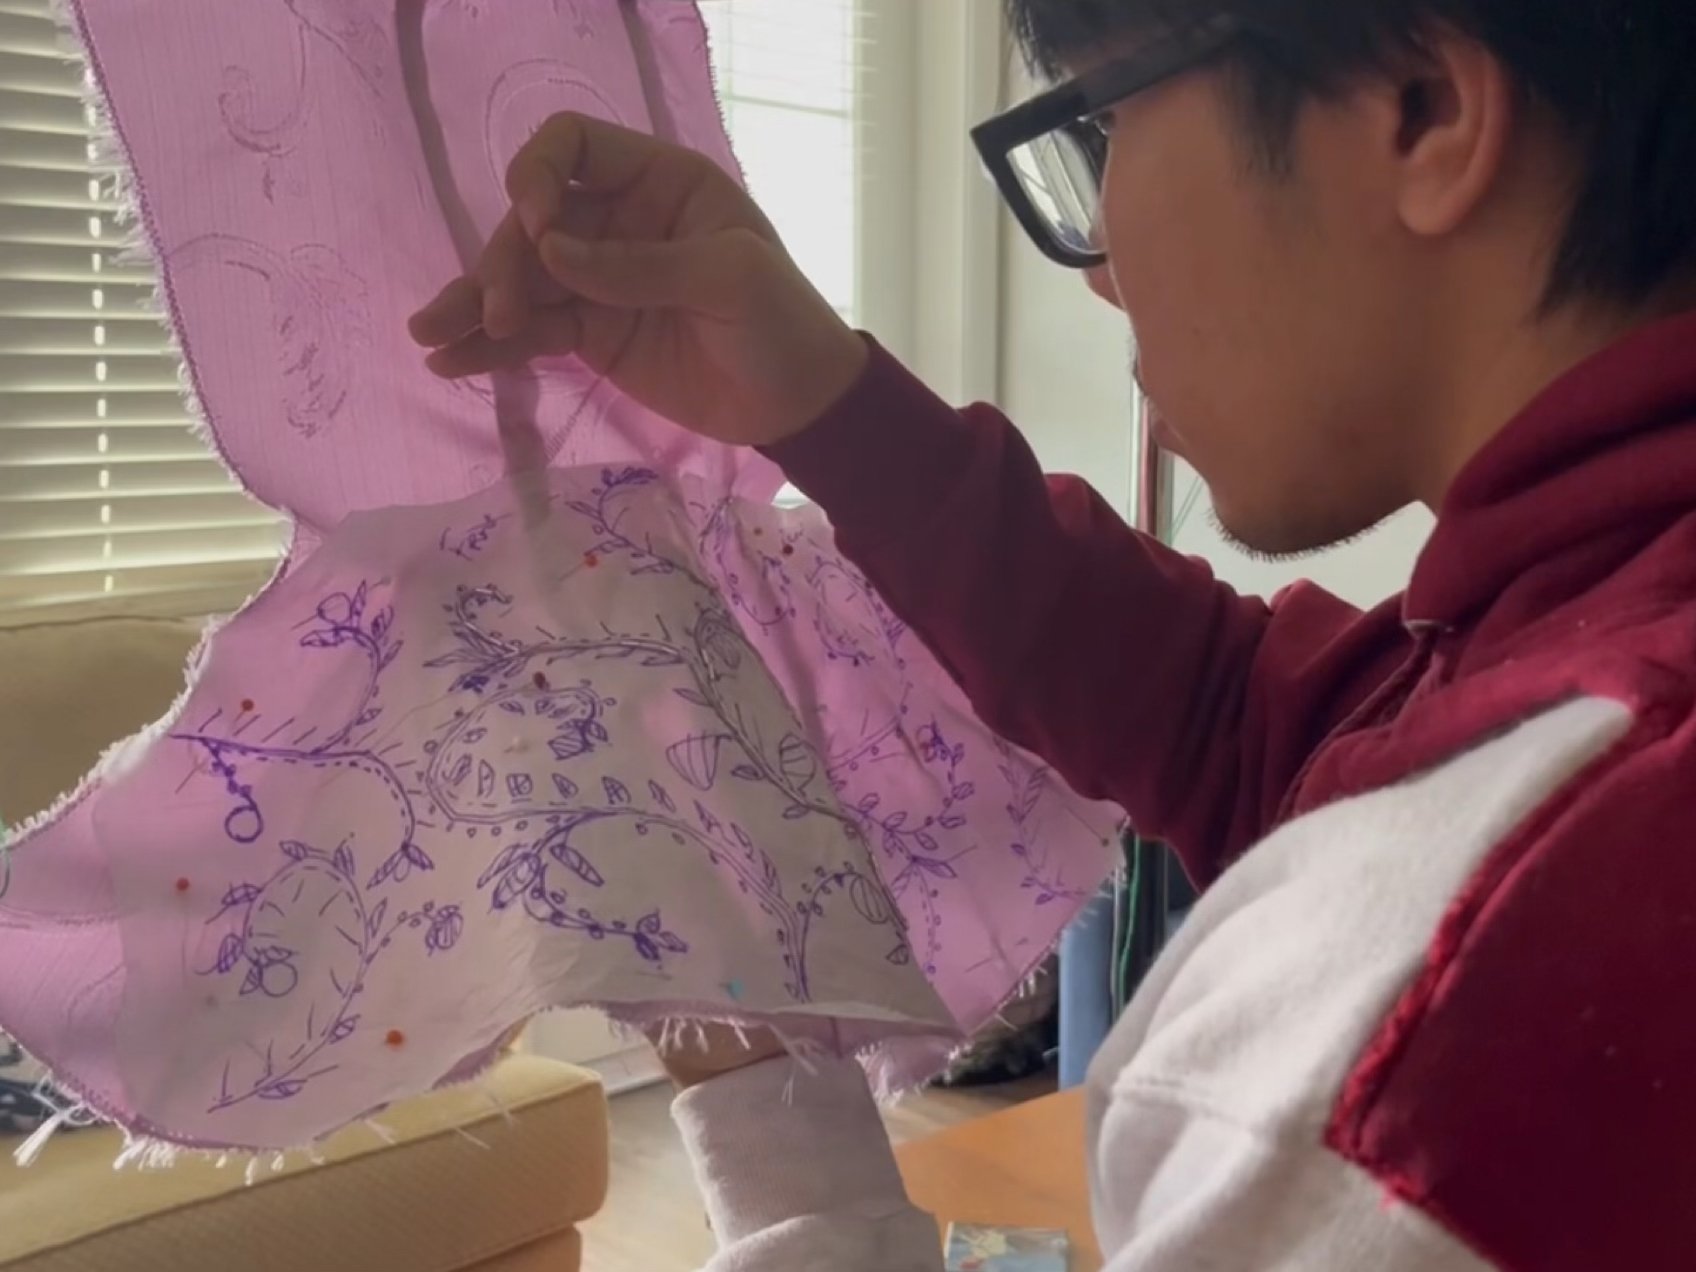
2. BEADING (part one)

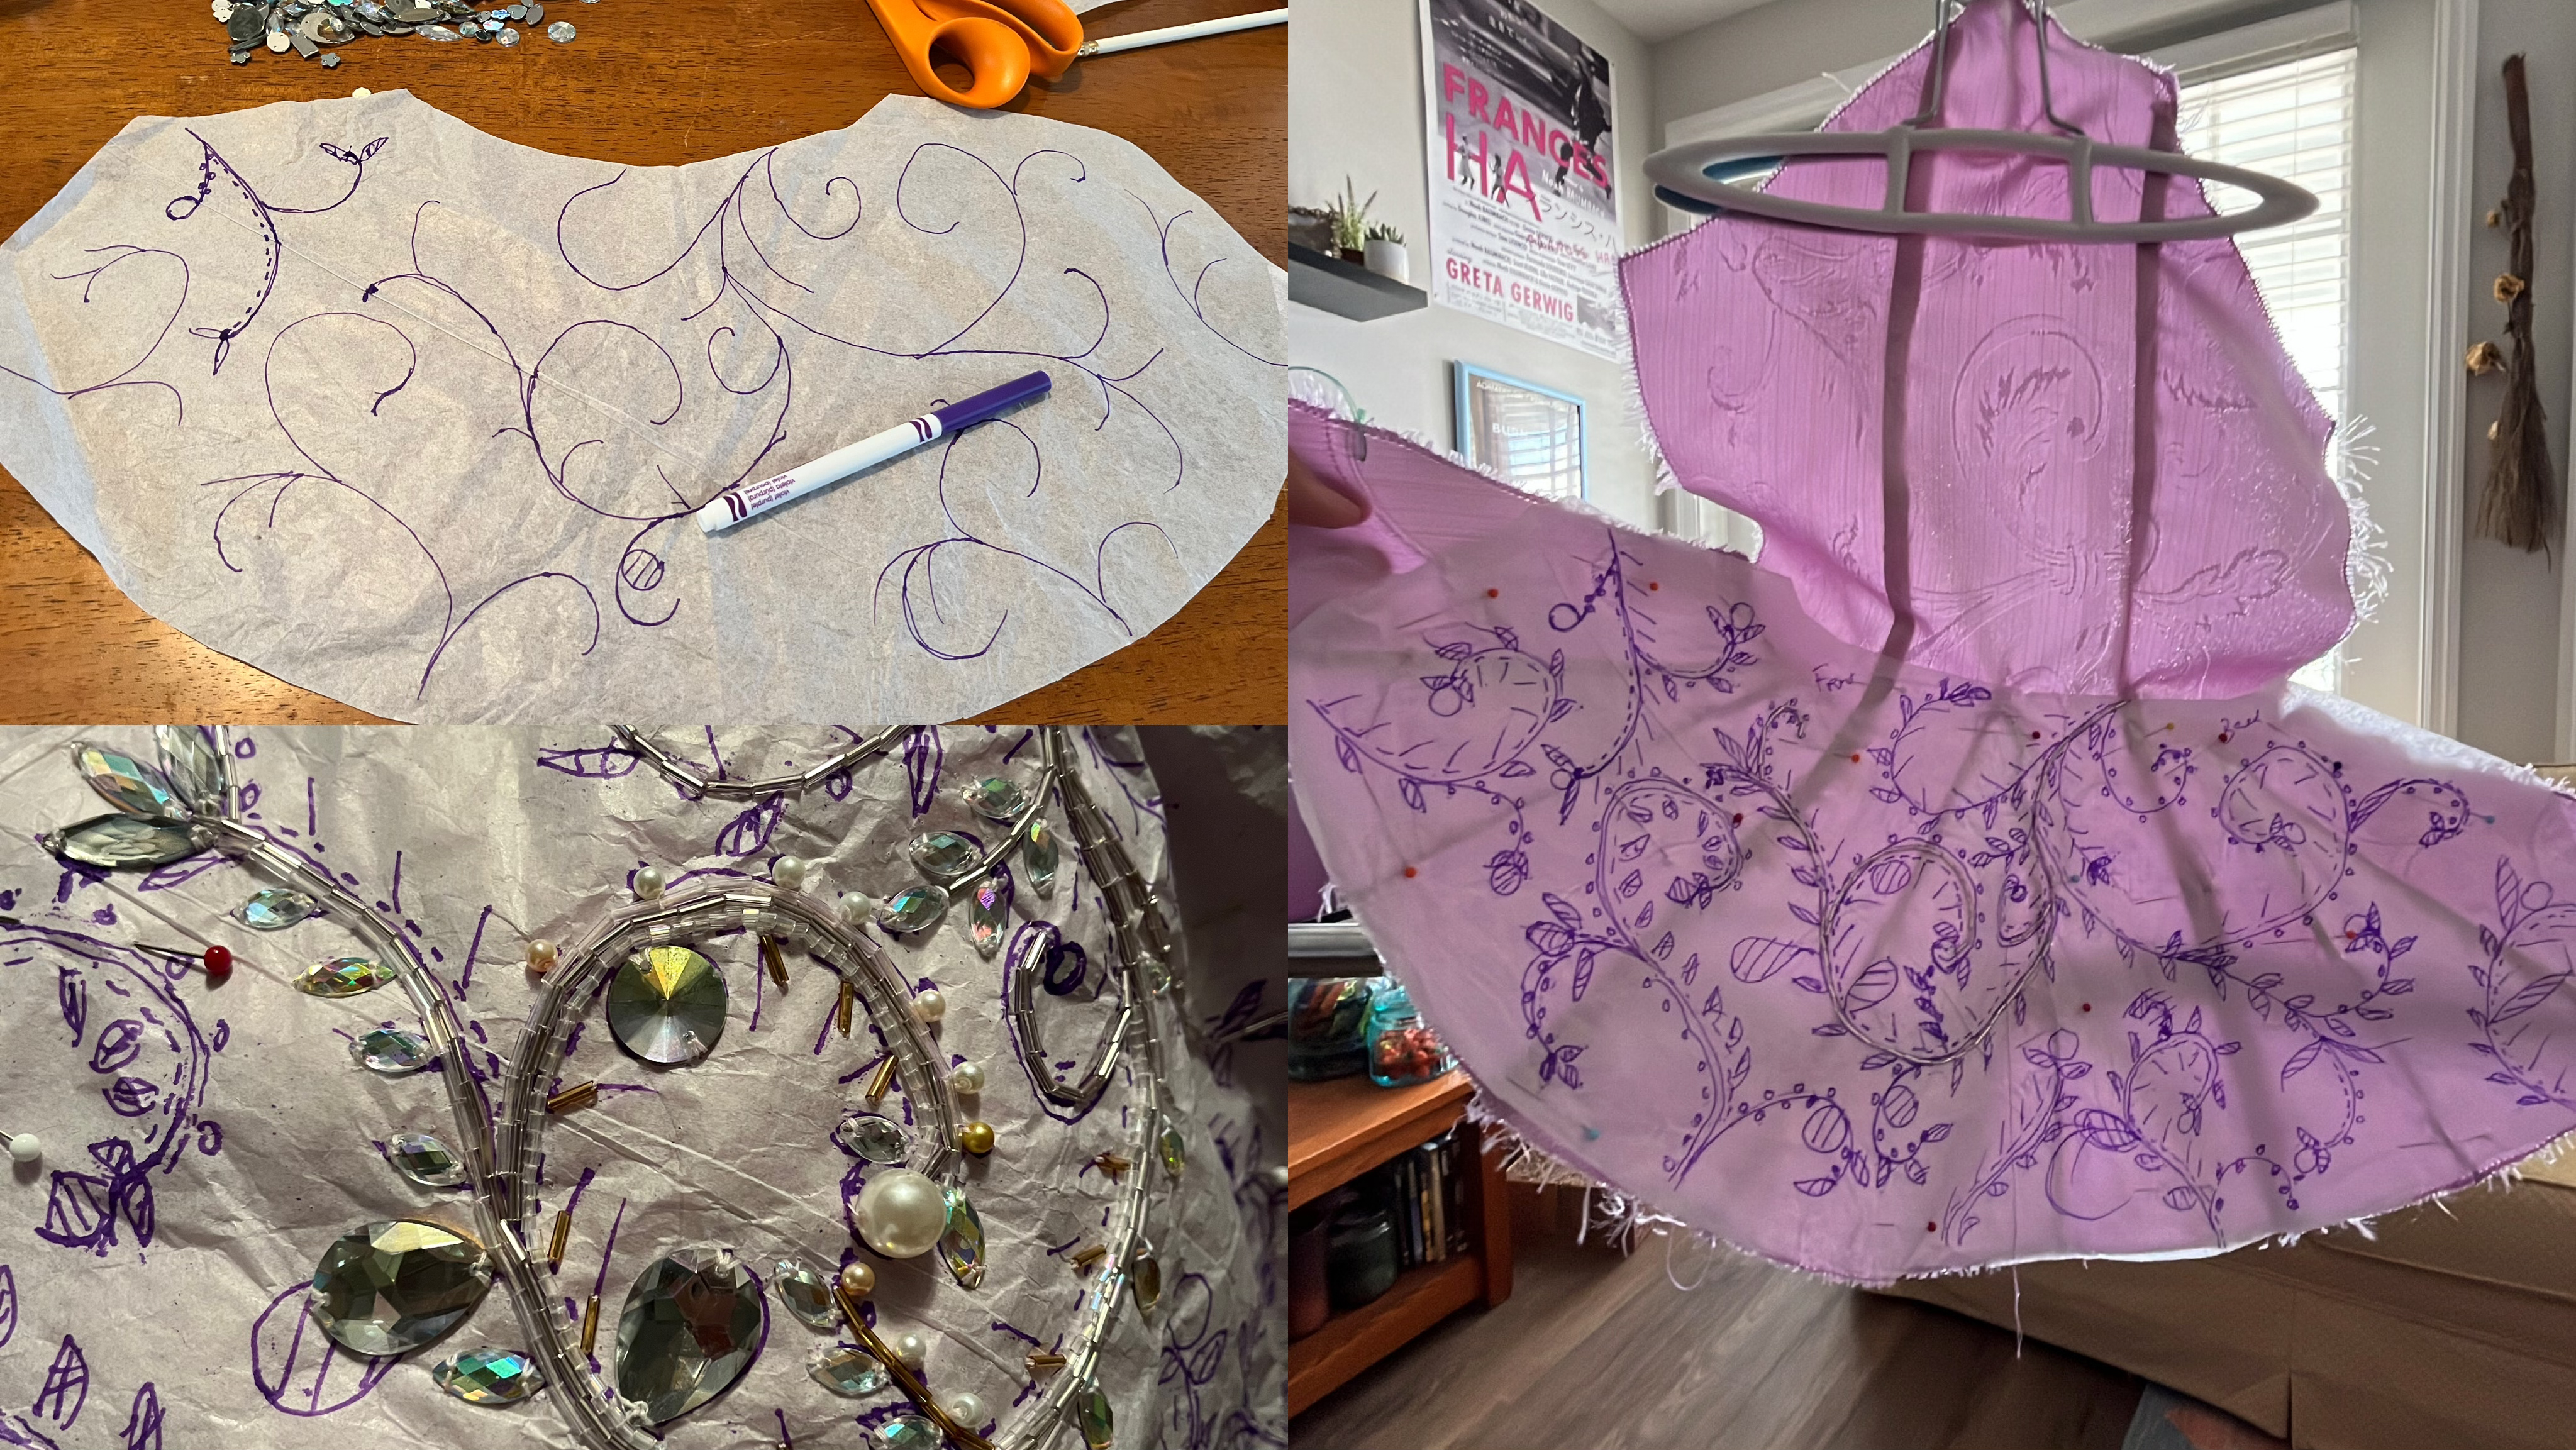
Before you line your sleeve, we’re going to bead it. That way, all of the threads from the beading will be hidden. Draft out a beading design you want on your sleeve. If you choose to design on tissue paper like I did, make sure to use your pattern to have an accurate cut of the paper. My designs as inspired by Arabic gardens and artwork.

The beading is the longest portion of making the sleeves. If you feel like you’re not making any progress, you definitely are; beading just takes a long time.

Make sure you leave the edges free of any beads as you need to line the sleeves too.

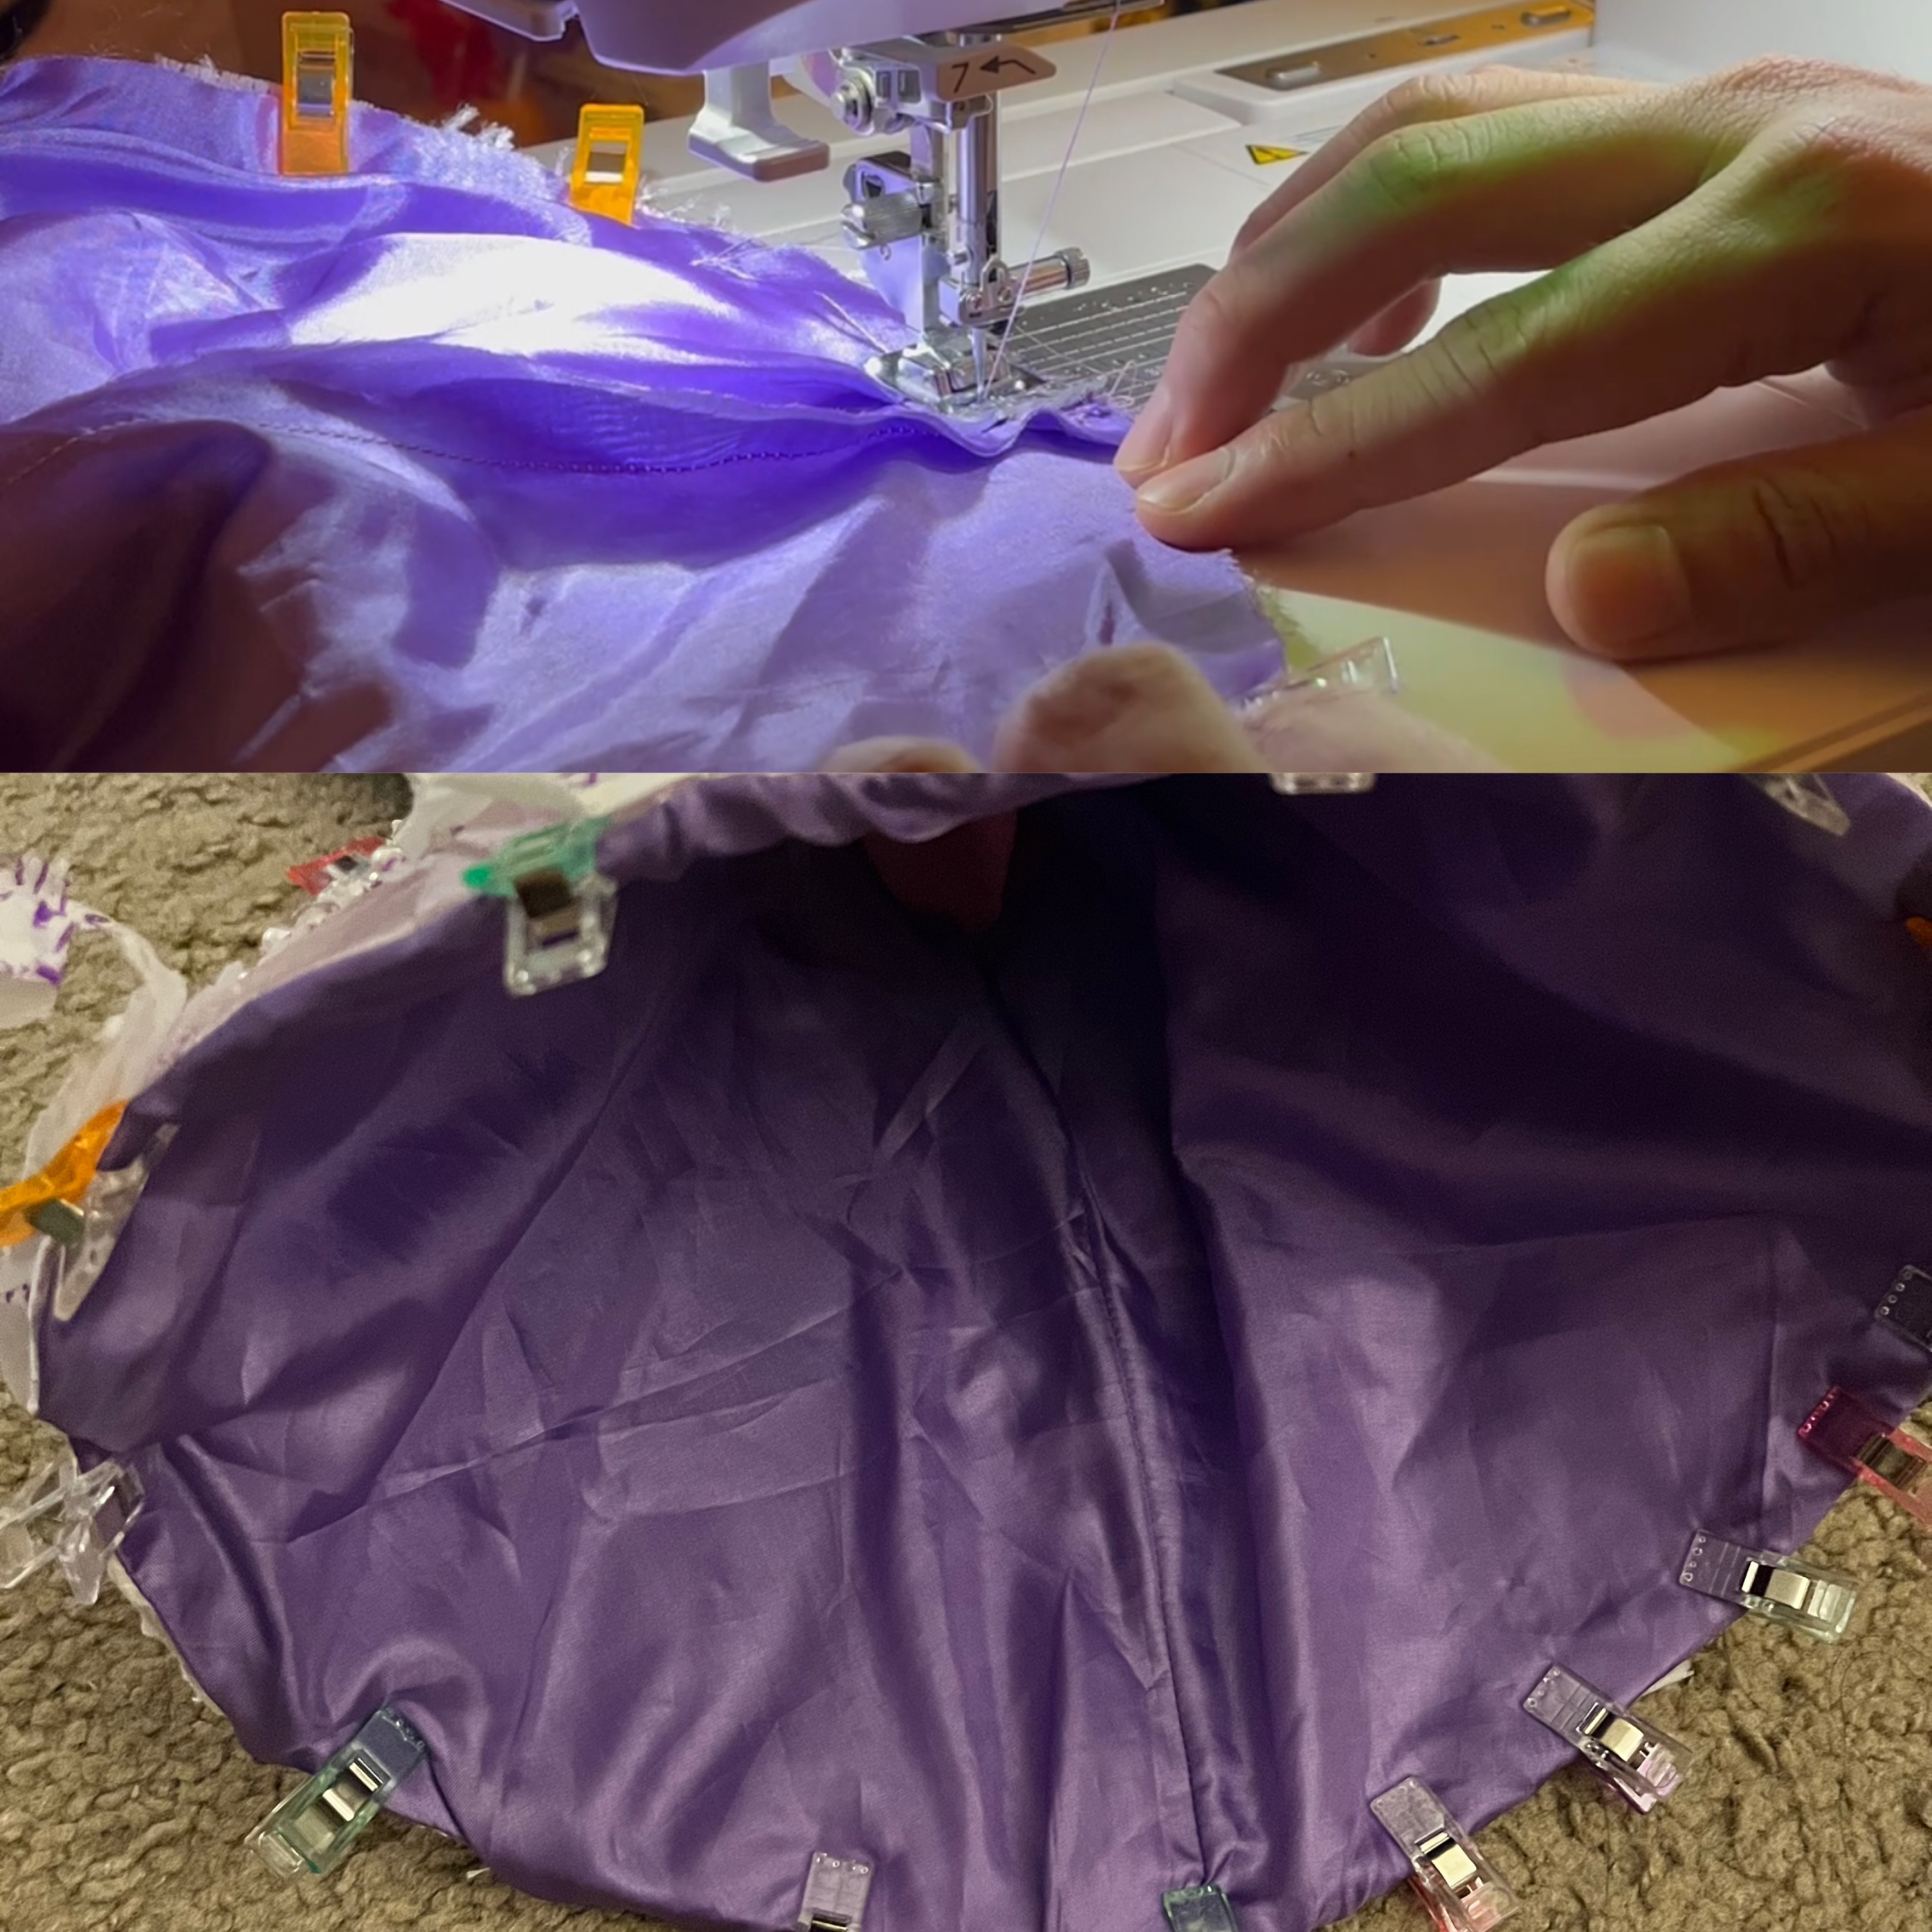
3. LINING & INTERFACE

For the lining, you want to be precise as much as possible for the sake of how the shapes line up. Seal the wrist end of the sleeve and leave the opposite end open. Insert your interface into the sleeve, between both fabrics. Your interface should be the exact same shape as the circle, possibly .25” lesser in size depending on your seam allowance. After the interface is inserted and properly position, top-stitch your hem and closing the lining via hand stitching.

For this part, you would want to use your Janome HD9 (Heavy Duty) because the interface with all of the layers are extremely thick, and the HD9 is designed to handle such thick layers.

I also want to note that if you feel like nothing is going right and everything is taking a very long time, it’s because it absolutely is. It is perfectly okay to feel like you want to give up because it is taking forever. But please know that you are doing it absolutely correct, it’s just the hand beading, making sure everything fits, and geometry is just a lot of work.

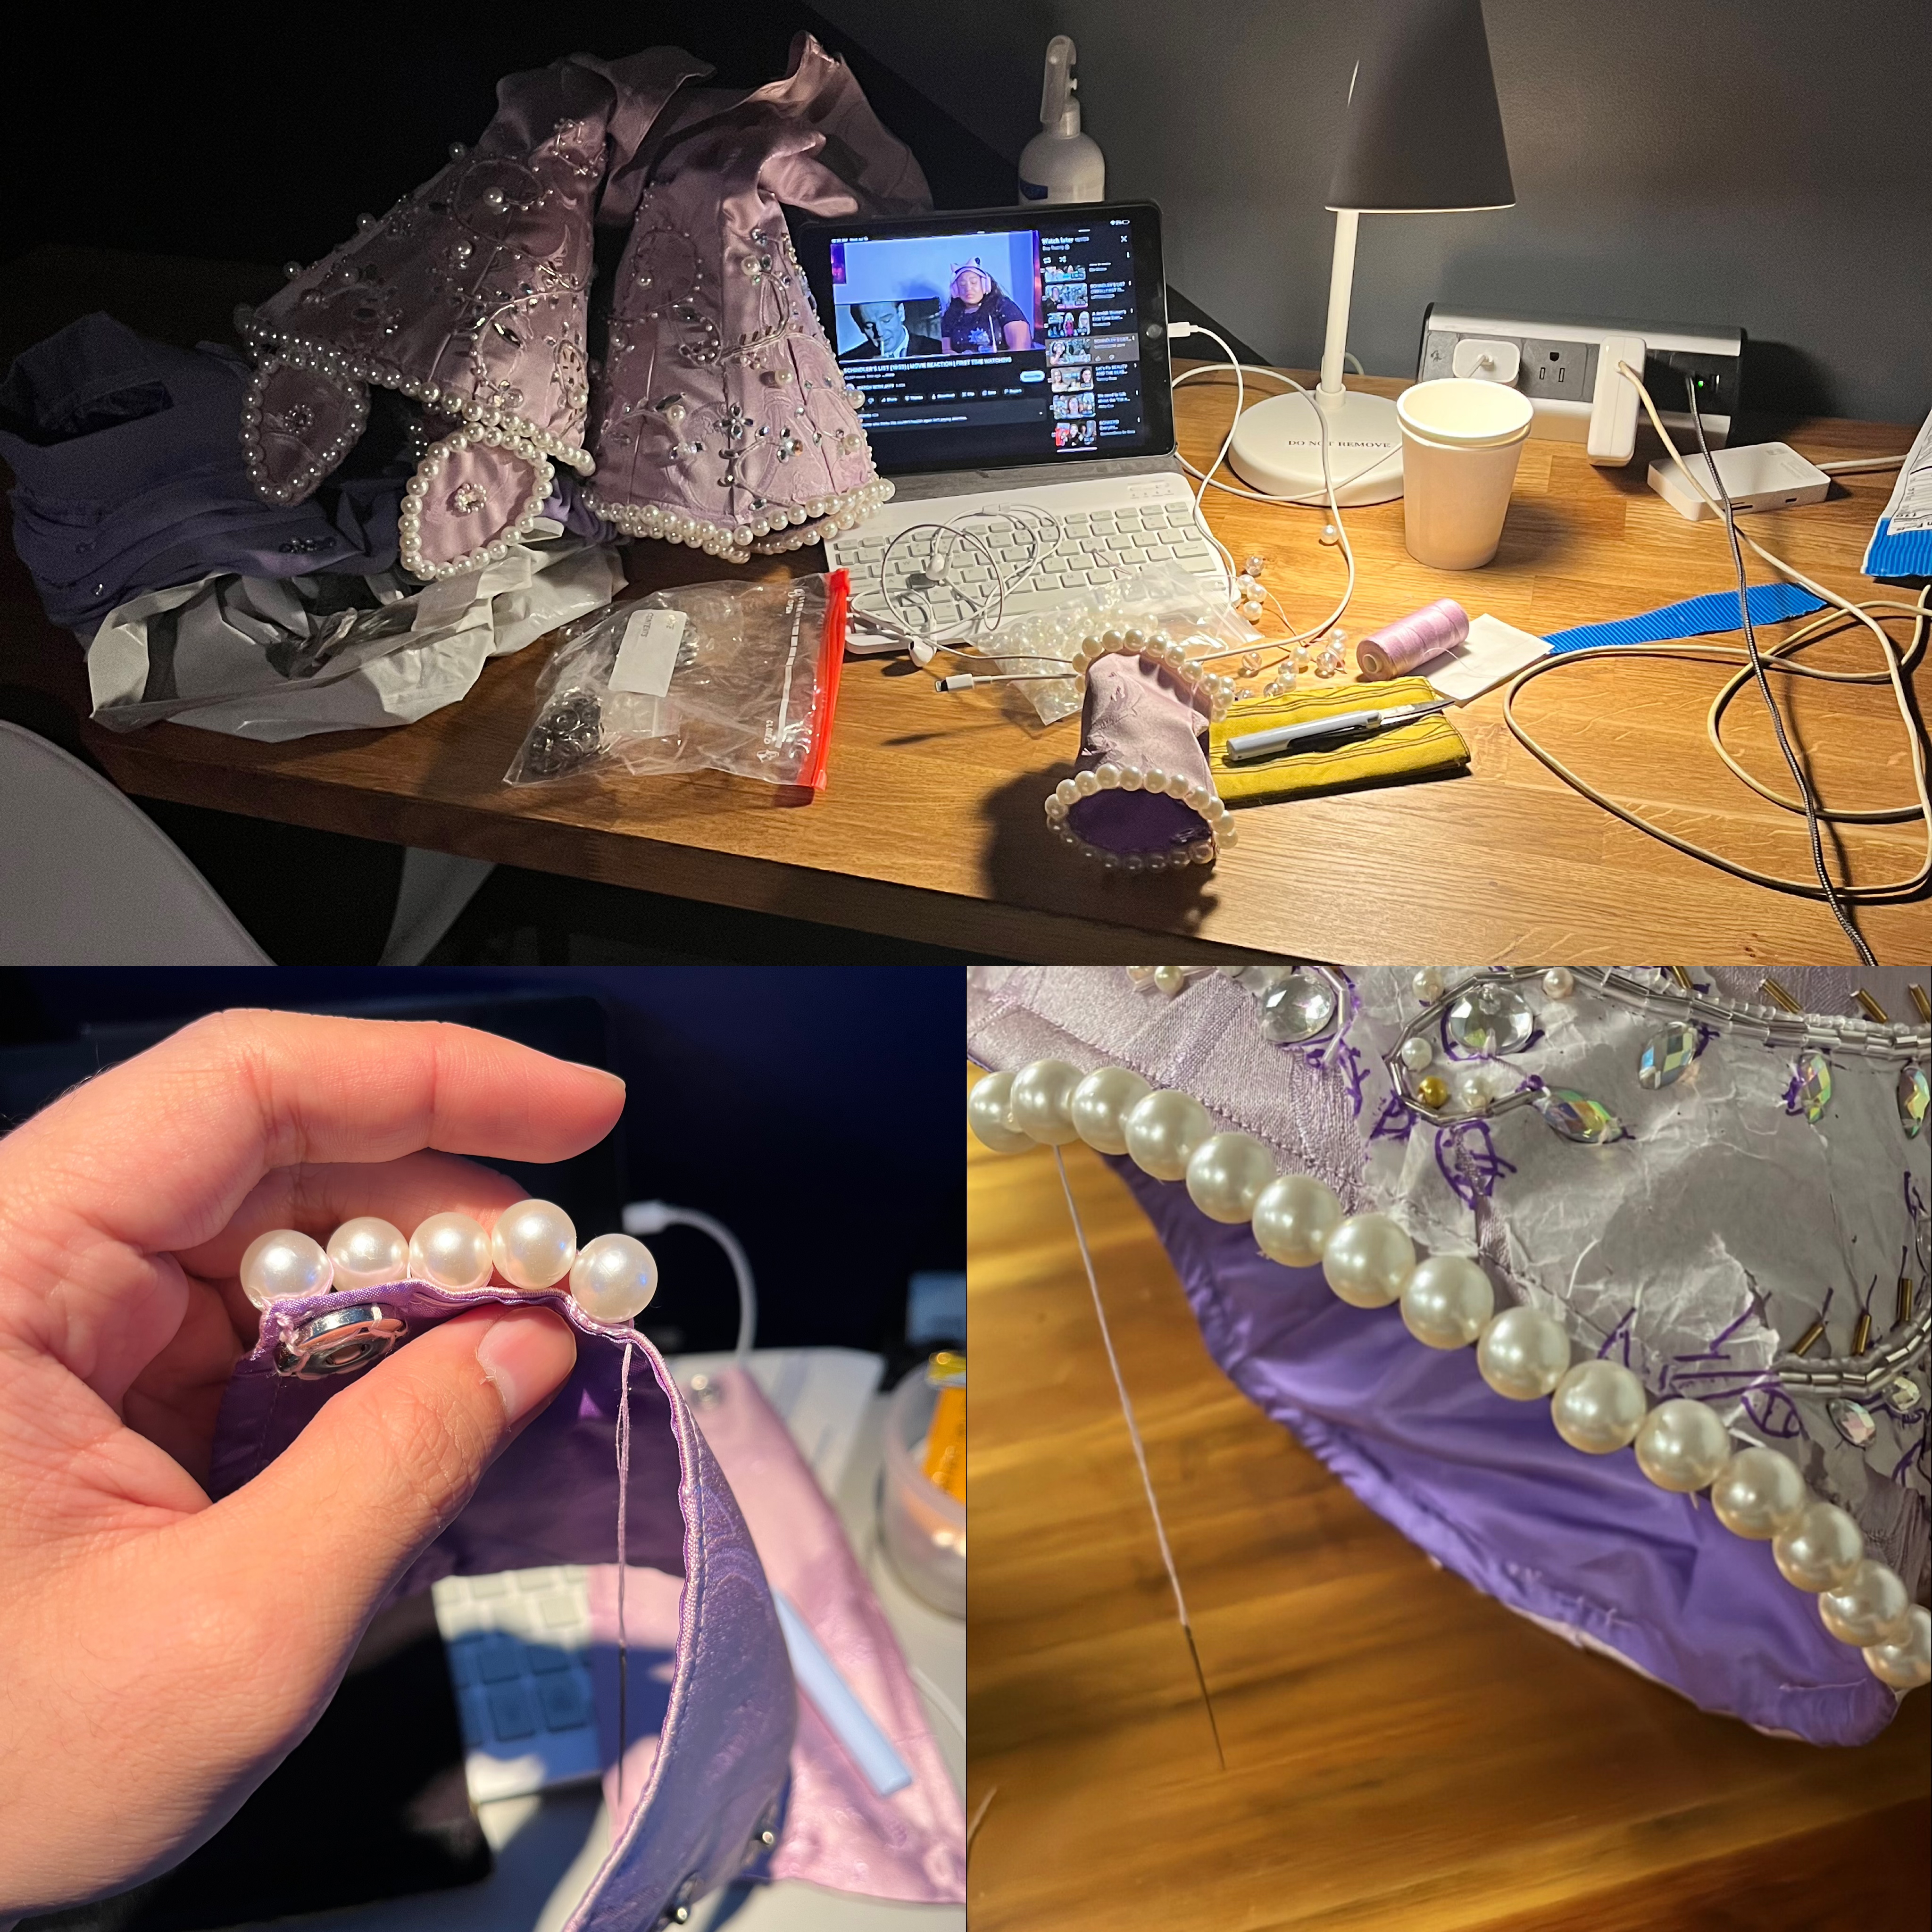
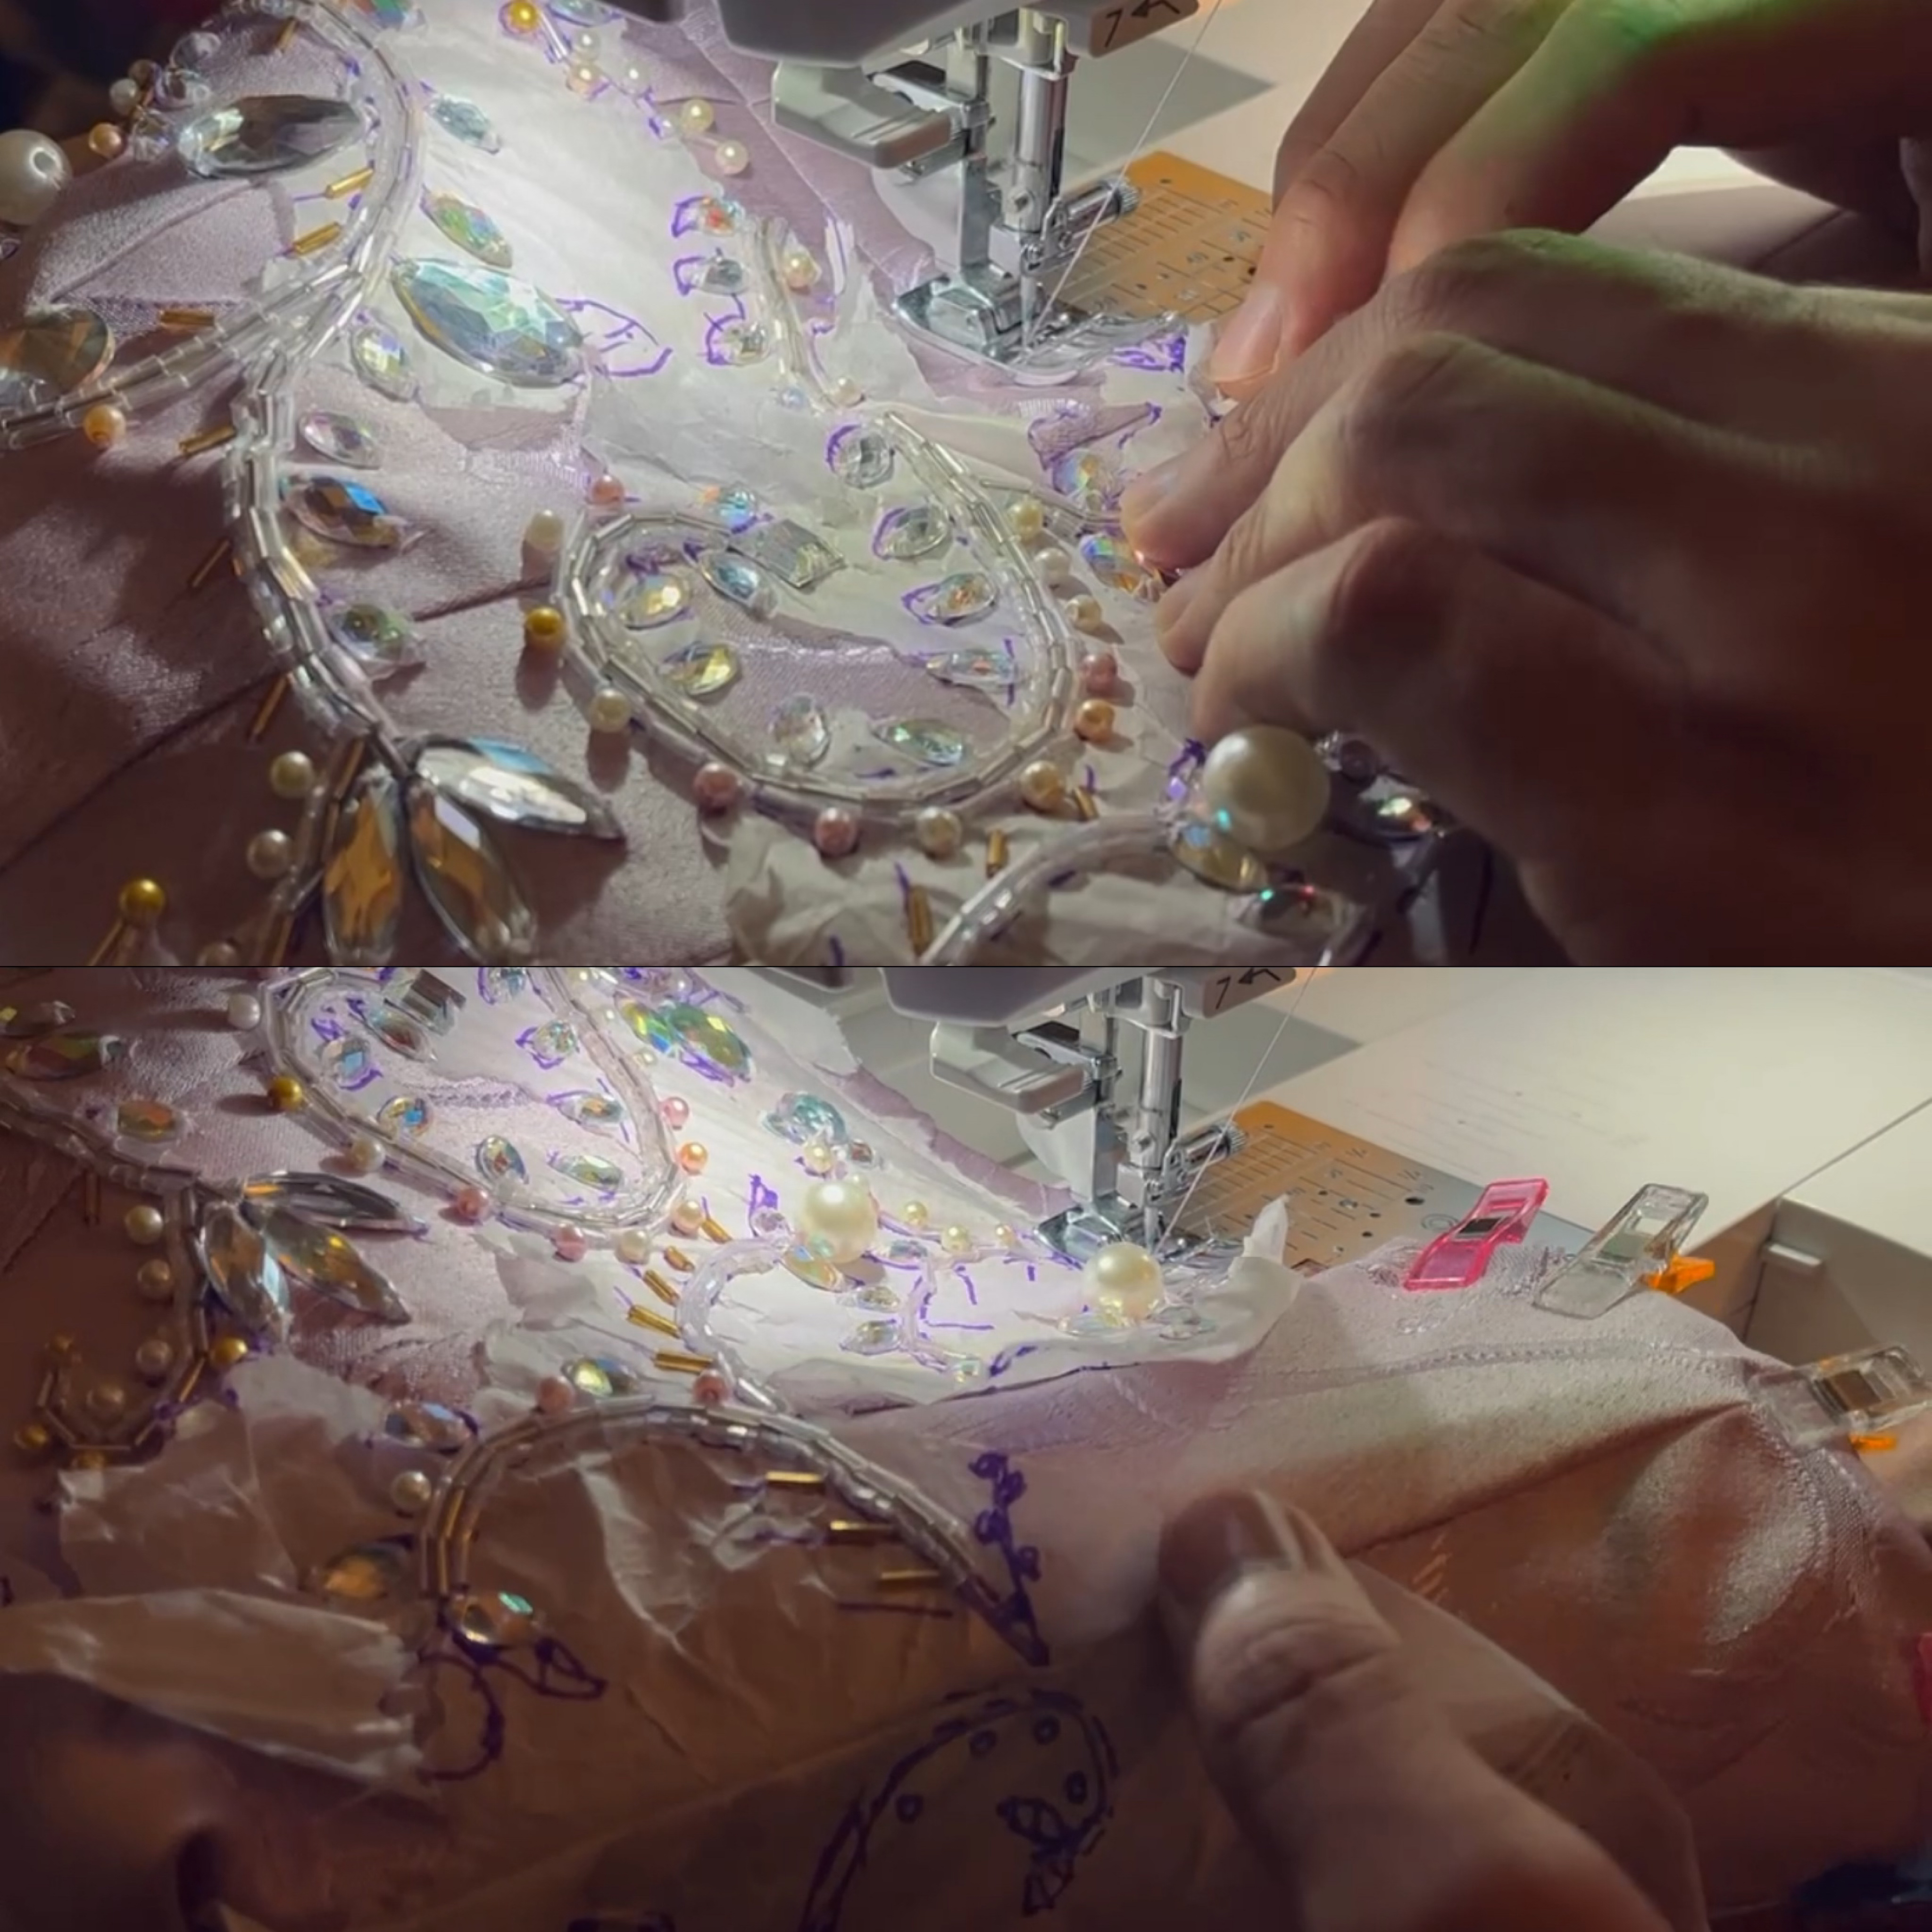
4. FINISHING EMBELLISHMENTS (beading part two)

For the little “petals” and cuffs of the sleeve ends, I combined interface and fabric so it would be consistent with the structure of my design, but you can choose to omit the structure or the entirety of the wrist area if you want. But what you want to finish is the beading. Finish your beading design around the seams of the sleeves. I also recommend beading around the edges so the top-stitching can be hidden as the top-stitch can be prominent with the interface.

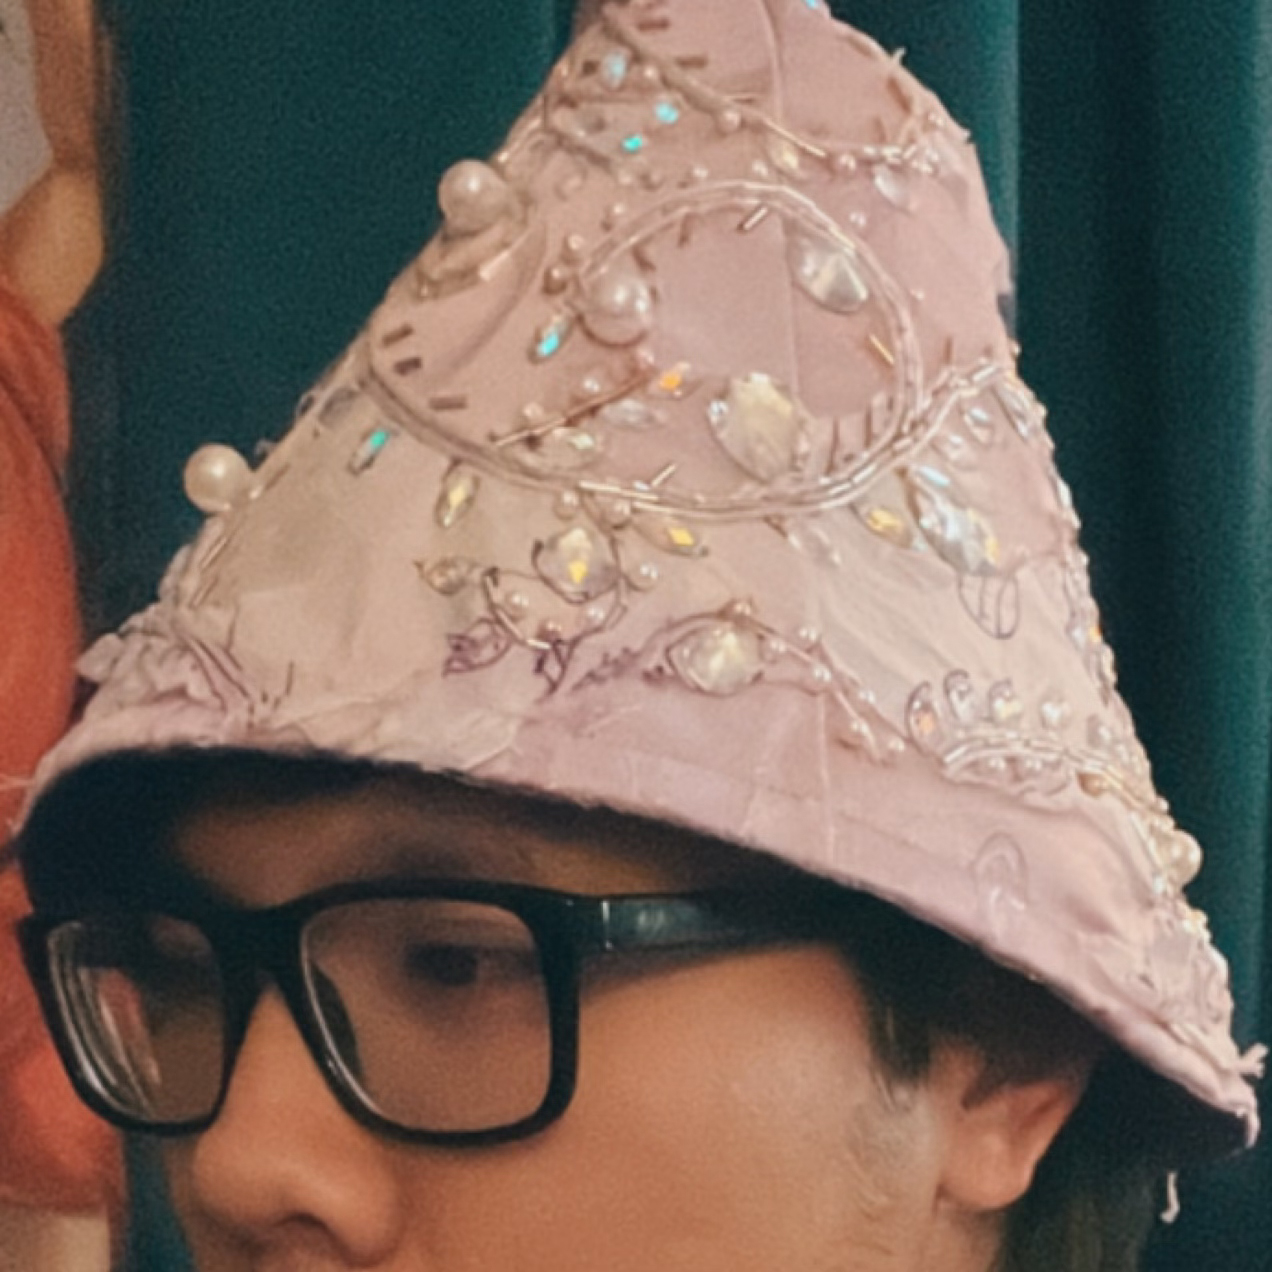
After you finish your sleeves, sew them to your shirt body. Any Janome machine will be able to handle this part. And there you have it, sleeves to capture the attention of everyone in the room!

Everyone is Talking about How to Make Beaded Tudor Inspired Sleeves
Reviews


Tako
Beautiful
Wednesday, November 23, 2016

cpindzola
Around the Table Dresden Placemats
Saturday, December 17, 2016

I like the concept, but the directions are "sloppy." Nowhere in the supply list does it mention the felt or the batting (how much?). Also, I would never use a high loft batting in a placemat, or a table runner, as I think that it would be too unstable for a glass. The next time I make these, I will cut out the batting (I use flannel) and spray baste it to the wrong side of the Dresden plate before I put the Dresden plate on the felt to cut out. I have not yet washed the finished placemat, and am hoping that the single layer of felt does not curl up, or become distorted after washing/drying.
Txmaid
Fun Great Gift!
Tuesday, February 21, 2017

MargieARK
Teatime Quilted Tablecloth
Friday, February 24, 2017

I made this today but your cutting directions need to be changed. You only need 4 of color 1 and color 3 4.5 squares for the triangles. Also the inner border, you only need 2 cuts as WOF is long enough to cut each in half to fit the sides.
MickelSews
Great Machine
Wednesday, August 30, 2017

I've had this machine for only a week now. I bought it used from a lady who makes her own clothes, but she no longer needed the machine. During the purchase, she noted that she is almost sad that it's better to give it away because of how well the machine performed. (I also bought it along side a computerized machine of another brand.} She demoed the machine for us, showing it worked and gave us everything (including the box it came in!) She took amazing care of this machine. I have used it a few times now, and the directions for threading were easy to follow (albeit my hands are quite large so the lower looper was a pain, but that is no fault to the machine or brand.) And I recommend this machine to anyone who wants to learn to serge and wants a machine that can grow with them. I will happily use this machine time and time again.
rvstan
S9 Review
Sunday, February 25, 2018

I love, love, love my S9! It's sews and embroiders beautifully and it's simplicity of use amazes me. I would recommend this machine for both a beginner and an experienced seamstress. If I would ask anything of Janome it would be to upgrade the programming to run a larger hoop size. I understand that it can't get much wider but there is most definitely room for it to go longer. That is the only limitation of this machine.
pjmnana
PJMNana
Monday, February 26, 2018

I purchased a Memorycraft 15000 a few years ago and it was the best purchase I ever made! This machine can do just about anything you would would ever want! I love the capability of using the Acuedit app to set up my embroidery pattern on my Ipad and then download it to the machine! I love how my embroidery looks upon completion and I love all the good lighting it has to light up your workspace. That way you don’t need to worry about where to set up your machine. It also has plenty of room to do machine embroidery on any size quilts! There are many decorative stitches from which to choose that are outstanding! It’s hard to choose which one to use! There are so many great features it is hard to decide what I love the most. If you want to buy only one machine to last a lifetime, I would recommend this one!
KLWash
S9 Review
Sunday, February 24, 2019

The S9 is amazing. I learned to sew by hand when I was just 5 and in my grandmothers way as she was quilting. I took seeing classes in high school until they would no longer let me sign up. The S9 makes me appreciate my current skills as well as motivate me to want to learn more. This machine is awesome.
SewSueMe2002
Horizon Memory Craft 15000
Thursday, November 19, 2020

My Janome Horizon Memory Craft 15000 is fantastic! I love, love, love this machine! When I came across the Eye for and Eye embroidery design today, I wanted to make it. However, the embroidery file is missing. Nothing downloads when I select the download button. Please help!
Jillfmischo
Treat Bag fun!
Monday, August 16, 2021

I made the Halloween treat bag for my new granddaughter and I’m sure it will last for years. No embroidery machine so I appliquéd the lettering. Need a little more skirt fabric for a better gathered look, and I used thin double-bias tape for the skirt hem, over edge stitch on skirt sides. I’m pleased with my results!
elenaz
Very helpful tutorial
Wednesday, October 25, 2023

I want to say thank you for teaching me this method of applique. I was able to do it with a small letters. This method is the best so far from all of those I've seen and tried.
plonkar
So useful
Thursday, November 30, 2023

I'd like to express my gratitude for teaching me this appliqué method. I successfully applied it with small letters, and, so far, it's the most effective among all the methods I've seen and tried.

DEALERS
The TWO Closest Dealers to you are:
196 Boston Post Road , Orange CT, 06477
203-878-1654
19 PUTNAM AVENUE , PORT CHESTER NY, 10573
914-934-2934
Find Additional Dealers