Projects

Milkmaid Dress Tutorial

Created By:

Vivien Lee

Skill Level: Intermediate

Warm weather means pretty cotton frocks to me so I just recently completed this yellow floral dress, inspired by the cute "milkmaid" style dresses. A lot of cotton prints are a bit thin and require some lining, and I have a special trick to save time by using my serger instead of cutting out the lining twice (later in this post).

Note: I am a member of the Janome Maker program and this skirt is sewn on a Janome Skyline S9 and a Janome FA4 serger. (This post is sponsored by Janome but all content and opinions are mine).

Instructions

The dress is made of 100% cotton and the yellow print has white and gray flowers and foliage. (I bought 3 yards of a 58" wide fabric and had some left over). I did not want the top to be see-through so I needed to line it. For this particular dress I decided to flat-line it, which means each individual lining piece is attached to the fashion fabric before the garment is assembled. (This is different from the approach of constructing the fashion and lining layers separately, then putting them together).


The classic method of flat-lining is to cut out the lining and fashion pieces and stitch them together, but I have a time-saving hack using my Janome FA4 serger! First, I put the fashion layer on top of the lining fabric, put in a few pins to keep it from shifting, and cut it out roughly with my rotary cutter.


Then I serge the edges of the fashion fabric, while using the built-in blade of my serger to trim away the excess lining. This saves me the trouble of carefully cutting out the lining and making sure all the edges line up perfectly before sewing!


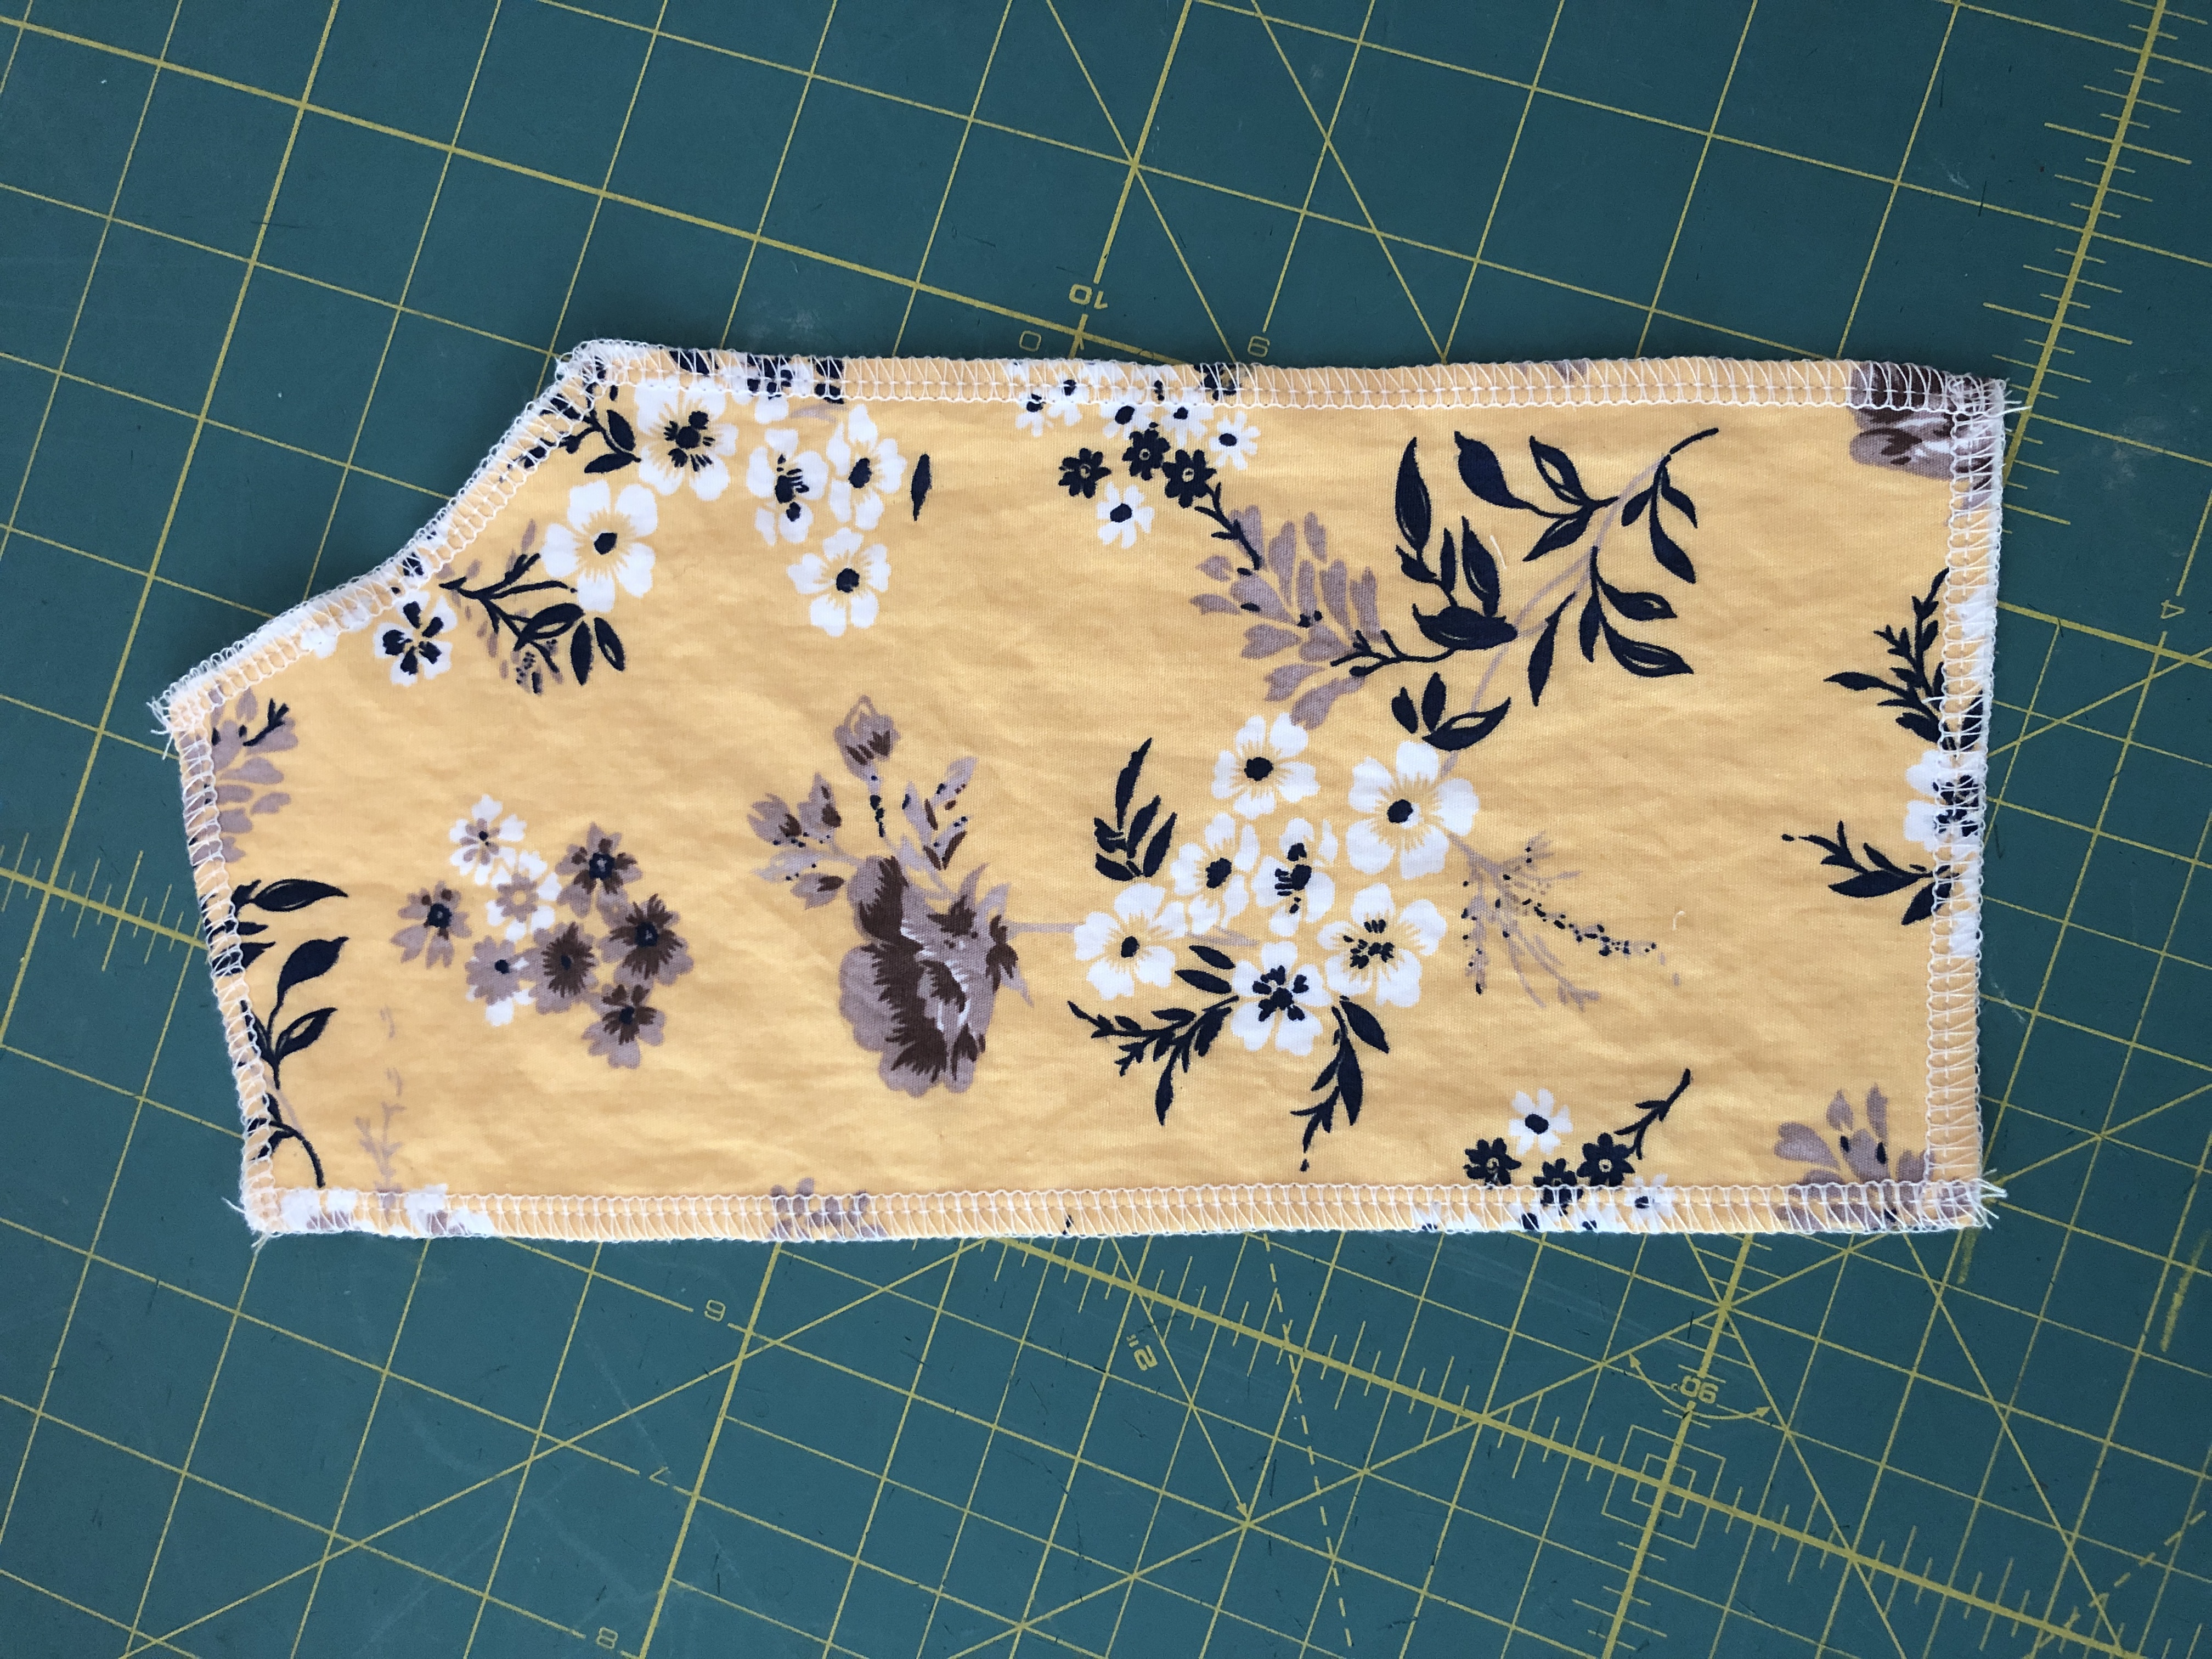
After serging/flat-lining all the pieces I sewed the seams together normally. This is the bodice without the bust cups:


The bust cups are oval pieces of fabric that are gathered at the top and bottom to fit into the U shapes of the bodice. (The top is folded down to make a drawstring channel for the ribbons, which meet in the middle to make the top adjustable).


The sleeves have channels on both the top and bottom for elastic to gather it into a puffed sleeve. The underarm of the sleeve is sewn directly to the underarm of the dress while the top of the elasticated sleeve turns into the shoulder of the dress. A few tips I have for sewing this kind of style sleeve: (1) Finish off the top of the back bodice by folding down the serged edges before you attach the sleeve, otherwise you will end up with an odd corner in the back where some serging is visible. (2) Anchor one end of the elastic by sewing it down in the channel where the sleeve attaches to the back of the dress. Use a safety pin to keep the other end of the elastic from sliding back in the channel. Try on the dress, unpin the elastic and pull it tight until the sleeve fits you over the shoulders, then pin it back until you sew it down permanently. Tip #2 is especially important if you don't have a helper; you can fit the sleeves yourself in a mirror because the loose elastic is in front!


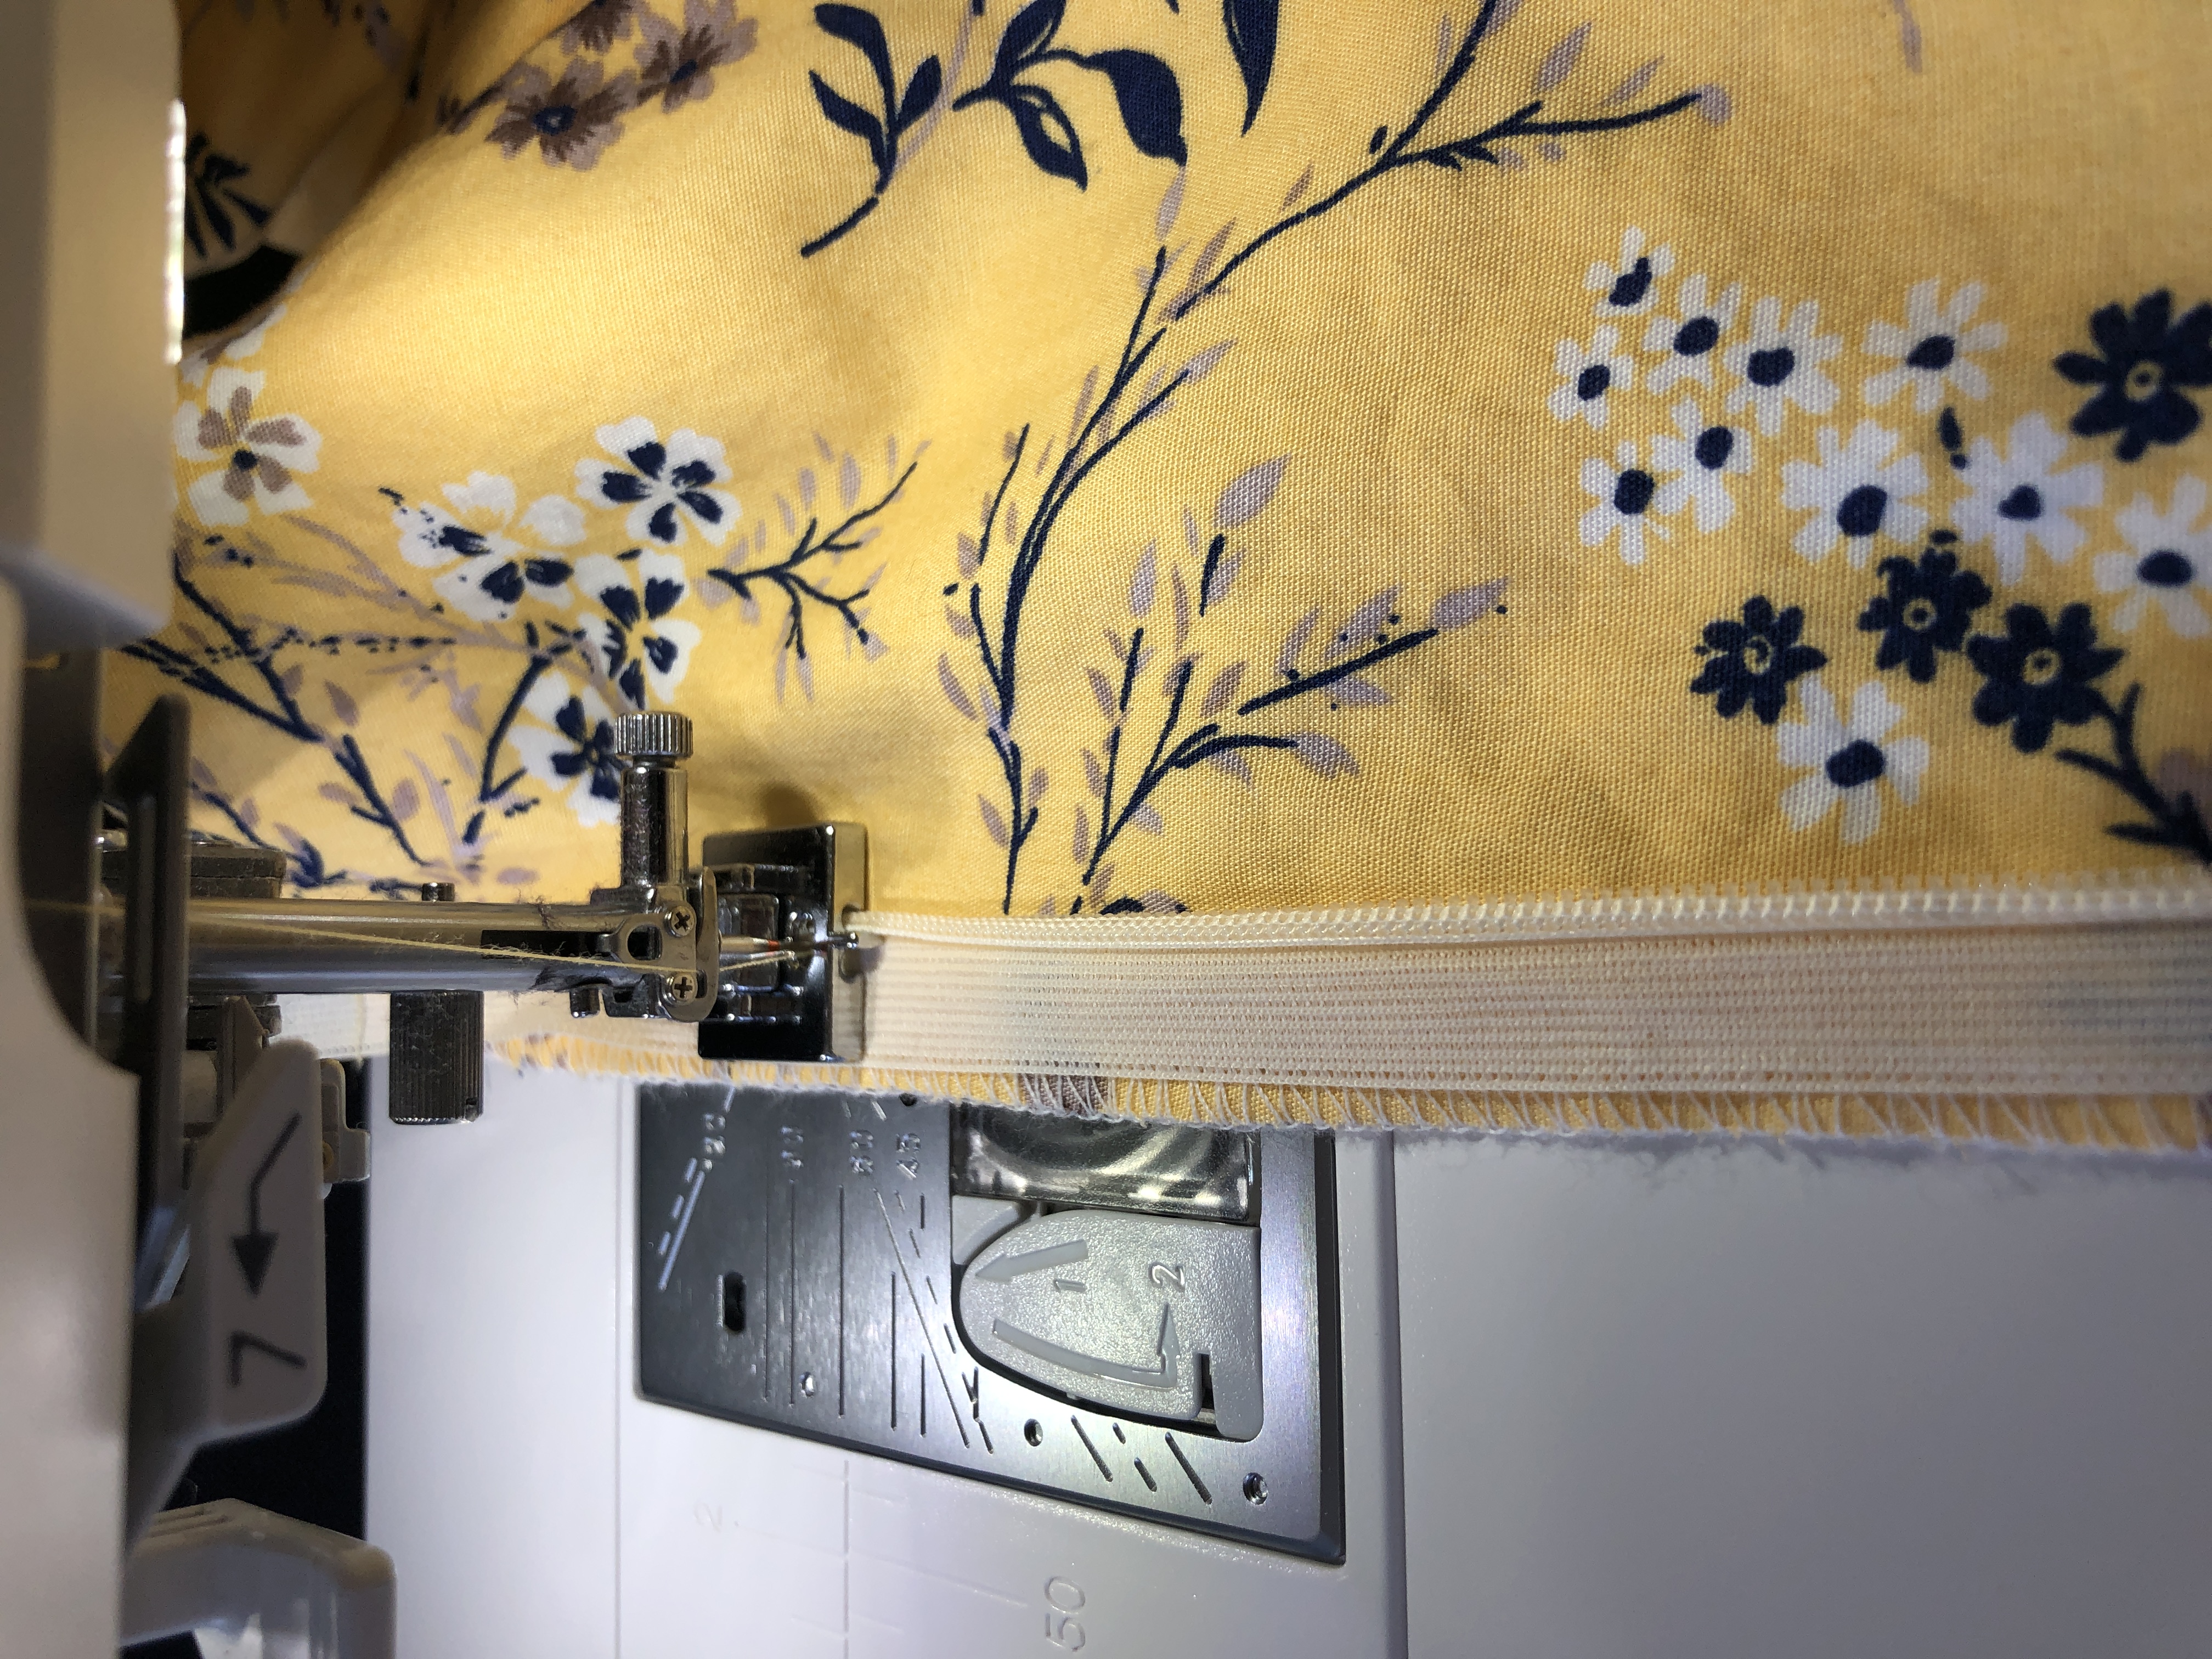
The dress closes in the center back with an invisible zipper. Janome makes a concealed zipper foot (Z) that makes it easy to install one!


I am looking forward to wearing this dress this summer!


Thank you for reading!

For more from Vivien Lee check out her page by clicking HERE


Everyone is Talking about Milkmaid Dress Tutorial
Reviews


Tako
Beautiful
Wednesday, November 23, 2016

cpindzola
Around the Table Dresden Placemats
Saturday, December 17, 2016

I like the concept, but the directions are "sloppy." Nowhere in the supply list does it mention the felt or the batting (how much?). Also, I would never use a high loft batting in a placemat, or a table runner, as I think that it would be too unstable for a glass. The next time I make these, I will cut out the batting (I use flannel) and spray baste it to the wrong side of the Dresden plate before I put the Dresden plate on the felt to cut out. I have not yet washed the finished placemat, and am hoping that the single layer of felt does not curl up, or become distorted after washing/drying.
Txmaid
Fun Great Gift!
Tuesday, February 21, 2017

MargieARK
Teatime Quilted Tablecloth
Friday, February 24, 2017

I made this today but your cutting directions need to be changed. You only need 4 of color 1 and color 3 4.5 squares for the triangles. Also the inner border, you only need 2 cuts as WOF is long enough to cut each in half to fit the sides.
MickelSews
Great Machine
Wednesday, August 30, 2017

I've had this machine for only a week now. I bought it used from a lady who makes her own clothes, but she no longer needed the machine. During the purchase, she noted that she is almost sad that it's better to give it away because of how well the machine performed. (I also bought it along side a computerized machine of another brand.} She demoed the machine for us, showing it worked and gave us everything (including the box it came in!) She took amazing care of this machine. I have used it a few times now, and the directions for threading were easy to follow (albeit my hands are quite large so the lower looper was a pain, but that is no fault to the machine or brand.) And I recommend this machine to anyone who wants to learn to serge and wants a machine that can grow with them. I will happily use this machine time and time again.
rvstan
S9 Review
Sunday, February 25, 2018

I love, love, love my S9! It's sews and embroiders beautifully and it's simplicity of use amazes me. I would recommend this machine for both a beginner and an experienced seamstress. If I would ask anything of Janome it would be to upgrade the programming to run a larger hoop size. I understand that it can't get much wider but there is most definitely room for it to go longer. That is the only limitation of this machine.
pjmnana
PJMNana
Monday, February 26, 2018

I purchased a Memorycraft 15000 a few years ago and it was the best purchase I ever made! This machine can do just about anything you would would ever want! I love the capability of using the Acuedit app to set up my embroidery pattern on my Ipad and then download it to the machine! I love how my embroidery looks upon completion and I love all the good lighting it has to light up your workspace. That way you don’t need to worry about where to set up your machine. It also has plenty of room to do machine embroidery on any size quilts! There are many decorative stitches from which to choose that are outstanding! It’s hard to choose which one to use! There are so many great features it is hard to decide what I love the most. If you want to buy only one machine to last a lifetime, I would recommend this one!
KLWash
S9 Review
Sunday, February 24, 2019

The S9 is amazing. I learned to sew by hand when I was just 5 and in my grandmothers way as she was quilting. I took seeing classes in high school until they would no longer let me sign up. The S9 makes me appreciate my current skills as well as motivate me to want to learn more. This machine is awesome.
SewSueMe2002
Horizon Memory Craft 15000
Thursday, November 19, 2020

My Janome Horizon Memory Craft 15000 is fantastic! I love, love, love this machine! When I came across the Eye for and Eye embroidery design today, I wanted to make it. However, the embroidery file is missing. Nothing downloads when I select the download button. Please help!
Jillfmischo
Treat Bag fun!
Monday, August 16, 2021

I made the Halloween treat bag for my new granddaughter and I’m sure it will last for years. No embroidery machine so I appliquéd the lettering. Need a little more skirt fabric for a better gathered look, and I used thin double-bias tape for the skirt hem, over edge stitch on skirt sides. I’m pleased with my results!
elenaz
Very helpful tutorial
Wednesday, October 25, 2023

I want to say thank you for teaching me this method of applique. I was able to do it with a small letters. This method is the best so far from all of those I've seen and tried.
plonkar
So useful
Thursday, November 30, 2023

I'd like to express my gratitude for teaching me this appliqué method. I successfully applied it with small letters, and, so far, it's the most effective among all the methods I've seen and tried.

DEALERS
The TWO Closest Dealers to you are:
196 Boston Post Road , Orange CT, 06477
203-878-1654
19 PUTNAM AVENUE , PORT CHESTER NY, 10573
914-934-2934
Find Additional Dealers