Projects

Tiered Ruffle Skirt

Created By:

Meredith Daniel

Skill Level: Beginner

Add some flair to your wardrobe this summer with this Tiered Ruffle Skirt. Easy to make in any size, this project is the perfect foray into garment sewing. It can be made with a variety of fabrics, and you can even choose different fabrics for each tier, so with this project, your imagination is your only limitation!

Janome Supplies Required
Fabric and Notions Required
  • 1+ yards of main fabric
  • 1/2 yard plain lining fabric, 1/4” yard interfacing
  • 7-10” invisible zipper
  • straight pins
  • ruler
  • cutting mat
  • rotary cutter
Instructions

Beginner friendly, can be made in 1-2 hours

To begin, you will want to take a few measurements: Waist, Hip, and desired Length

For my daughter, this was: Waist 25”, Hip 32”, and Length 16”


We decided to make two tiers, so we cut our top tier at 9” and our bottom tier at 11” because there is a 2” overlap at each tier, plus a 1/2” hem allowance at the bottom, and another 3/8-1/2” seam allowance at the top. Keep reading this example and it’ll make more sense…


Cut the following from your main fabric:

  • 3.5”x waist measurement+.75” for waistband
  • half your length+1” x 1.5x waist measurement for top tier
  • half your length+3” x 1.5x hip measurement for bottom tier

Cut the following from your lining fabric:

  • half your length-1.5” x hip measurement+4”

Cut the following from your interfacing:       

  • 3” x waist measurement+.75”


So I cut the following based on my daughter’s measurements: W 25” H 32” L 16”

Main fabric:

  • Waistband: 25.75 x 3.5”
  • Top Tier: 9” x 37.5”
  • Bottom Tier: 11 x 48”

 Lining fabric:

  • 6.5 x 36”

Interfacing:

  • 3 x 25.75”

 If you wanted to make 3 tiers, or add length, simply divide your length by the number of tiers you want and then add hem allowance, seam allowance, and 2” to each tier after the top tier.


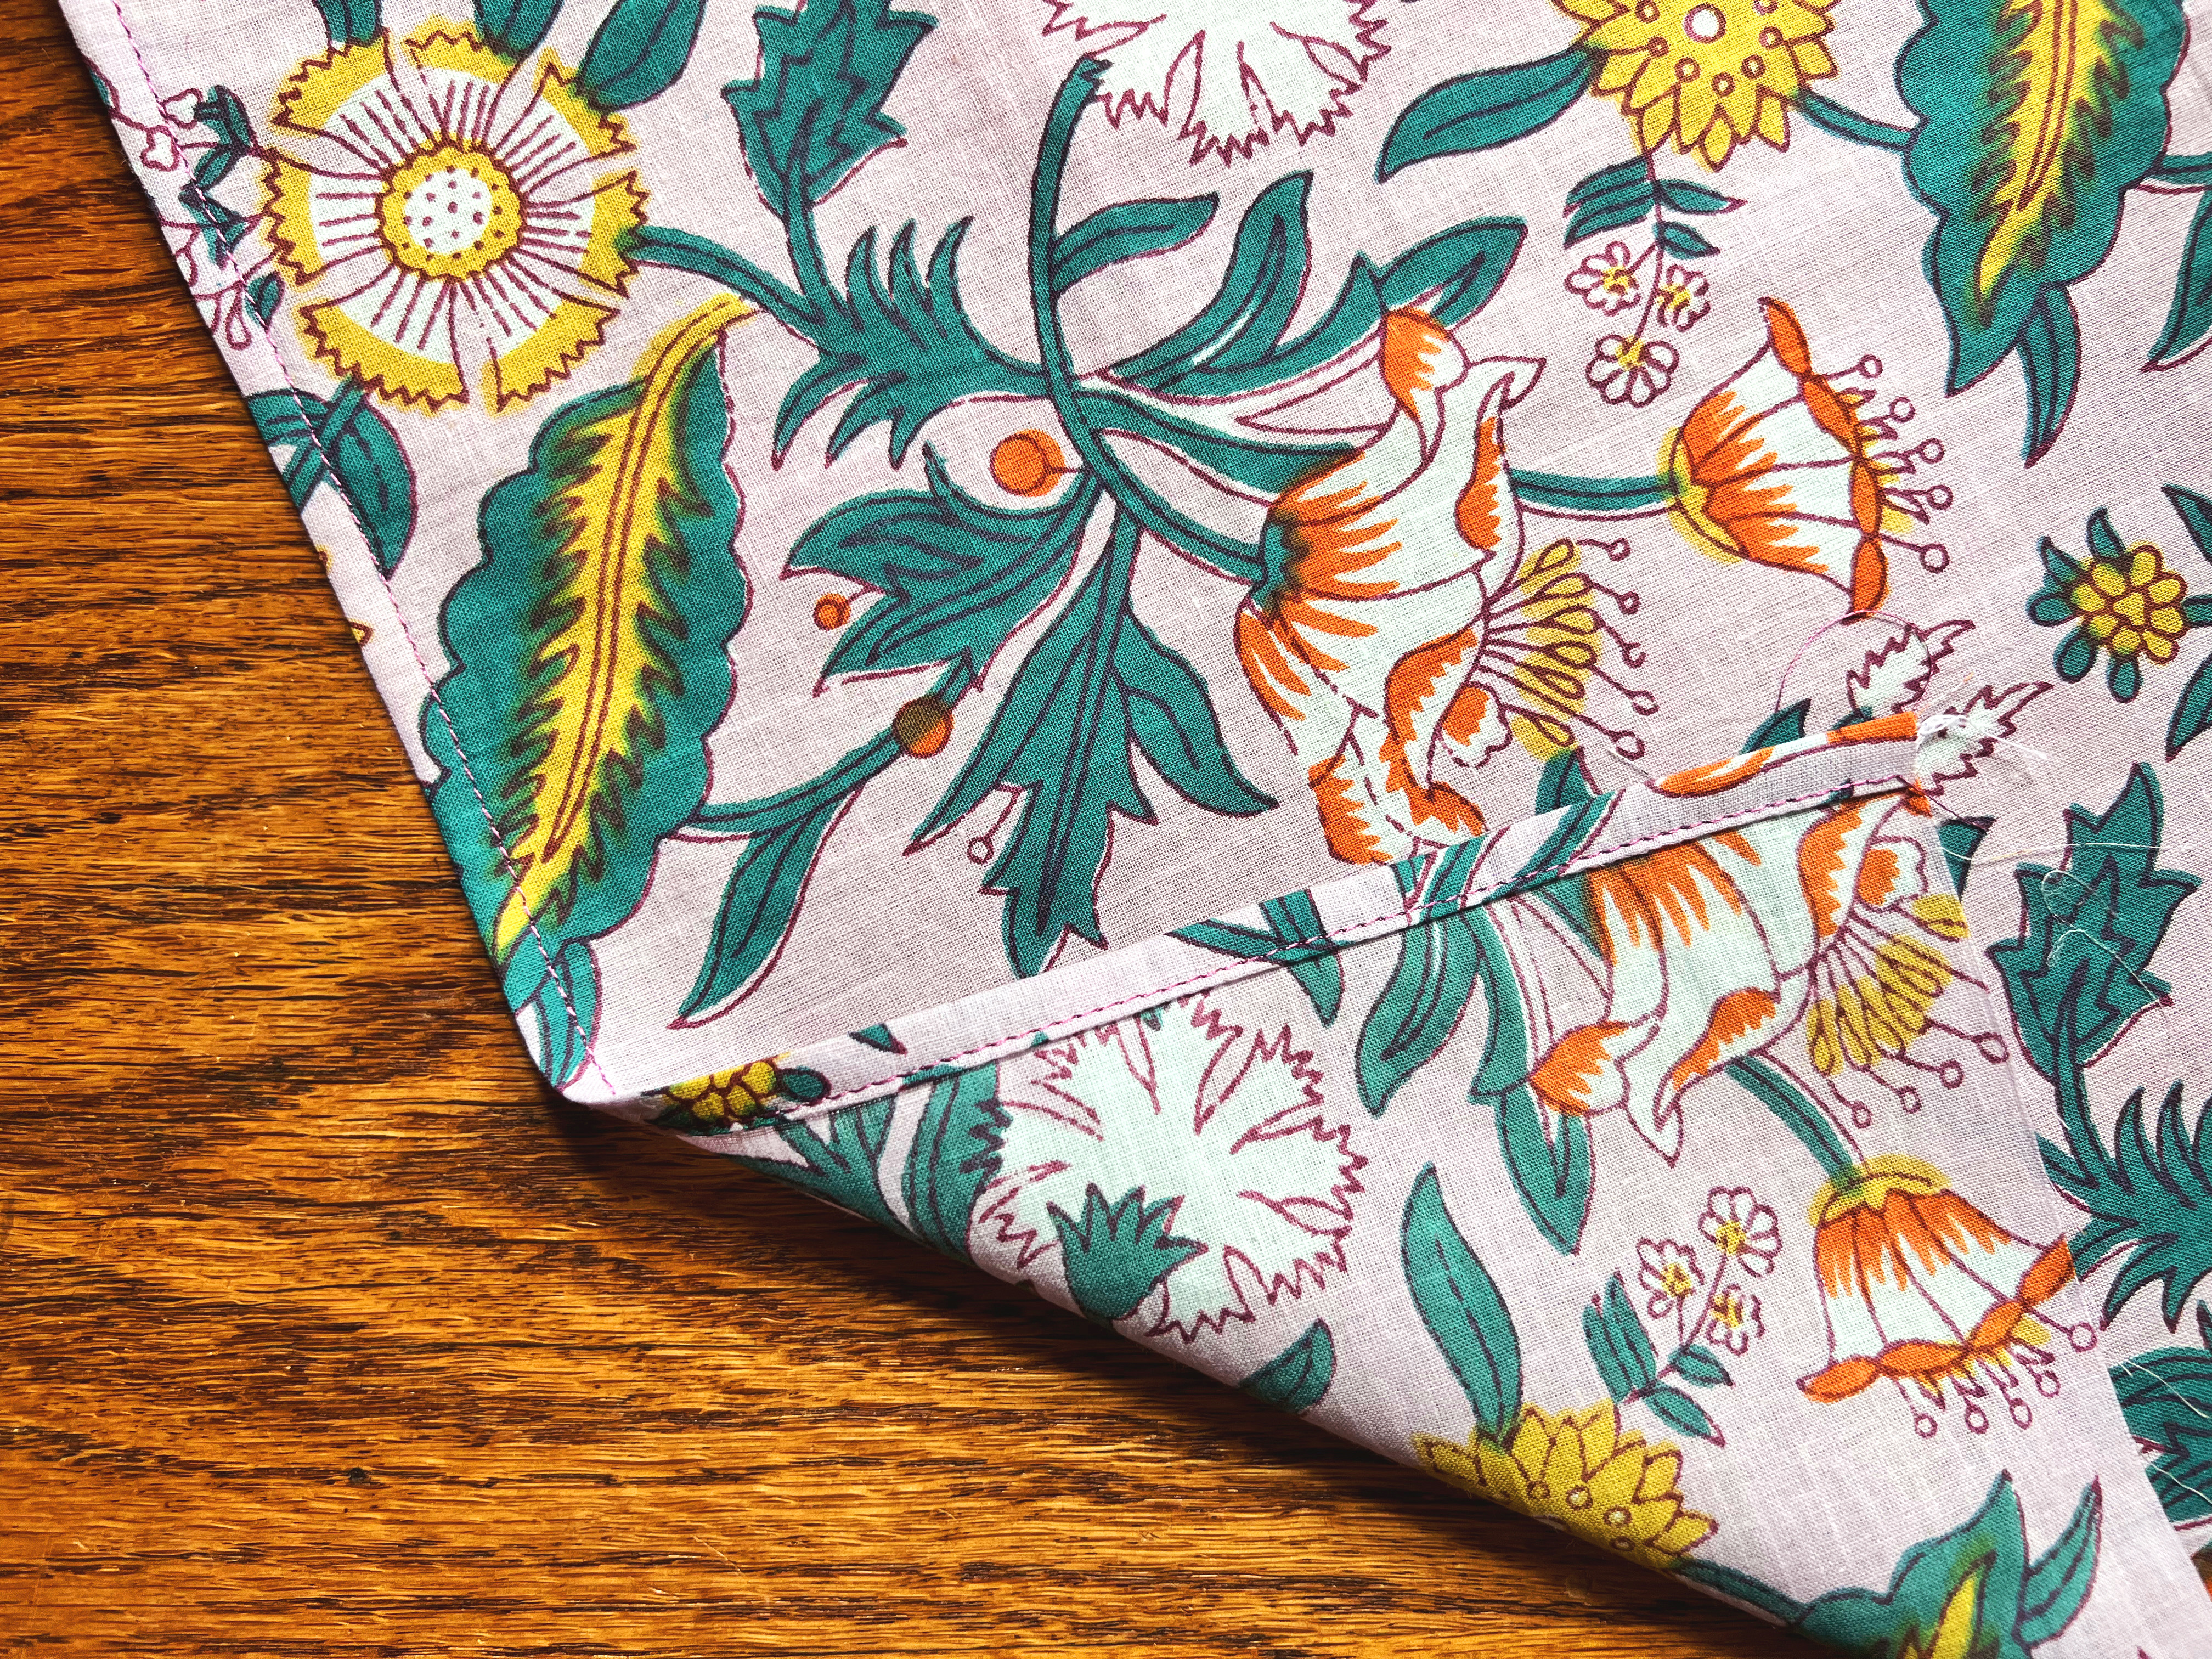
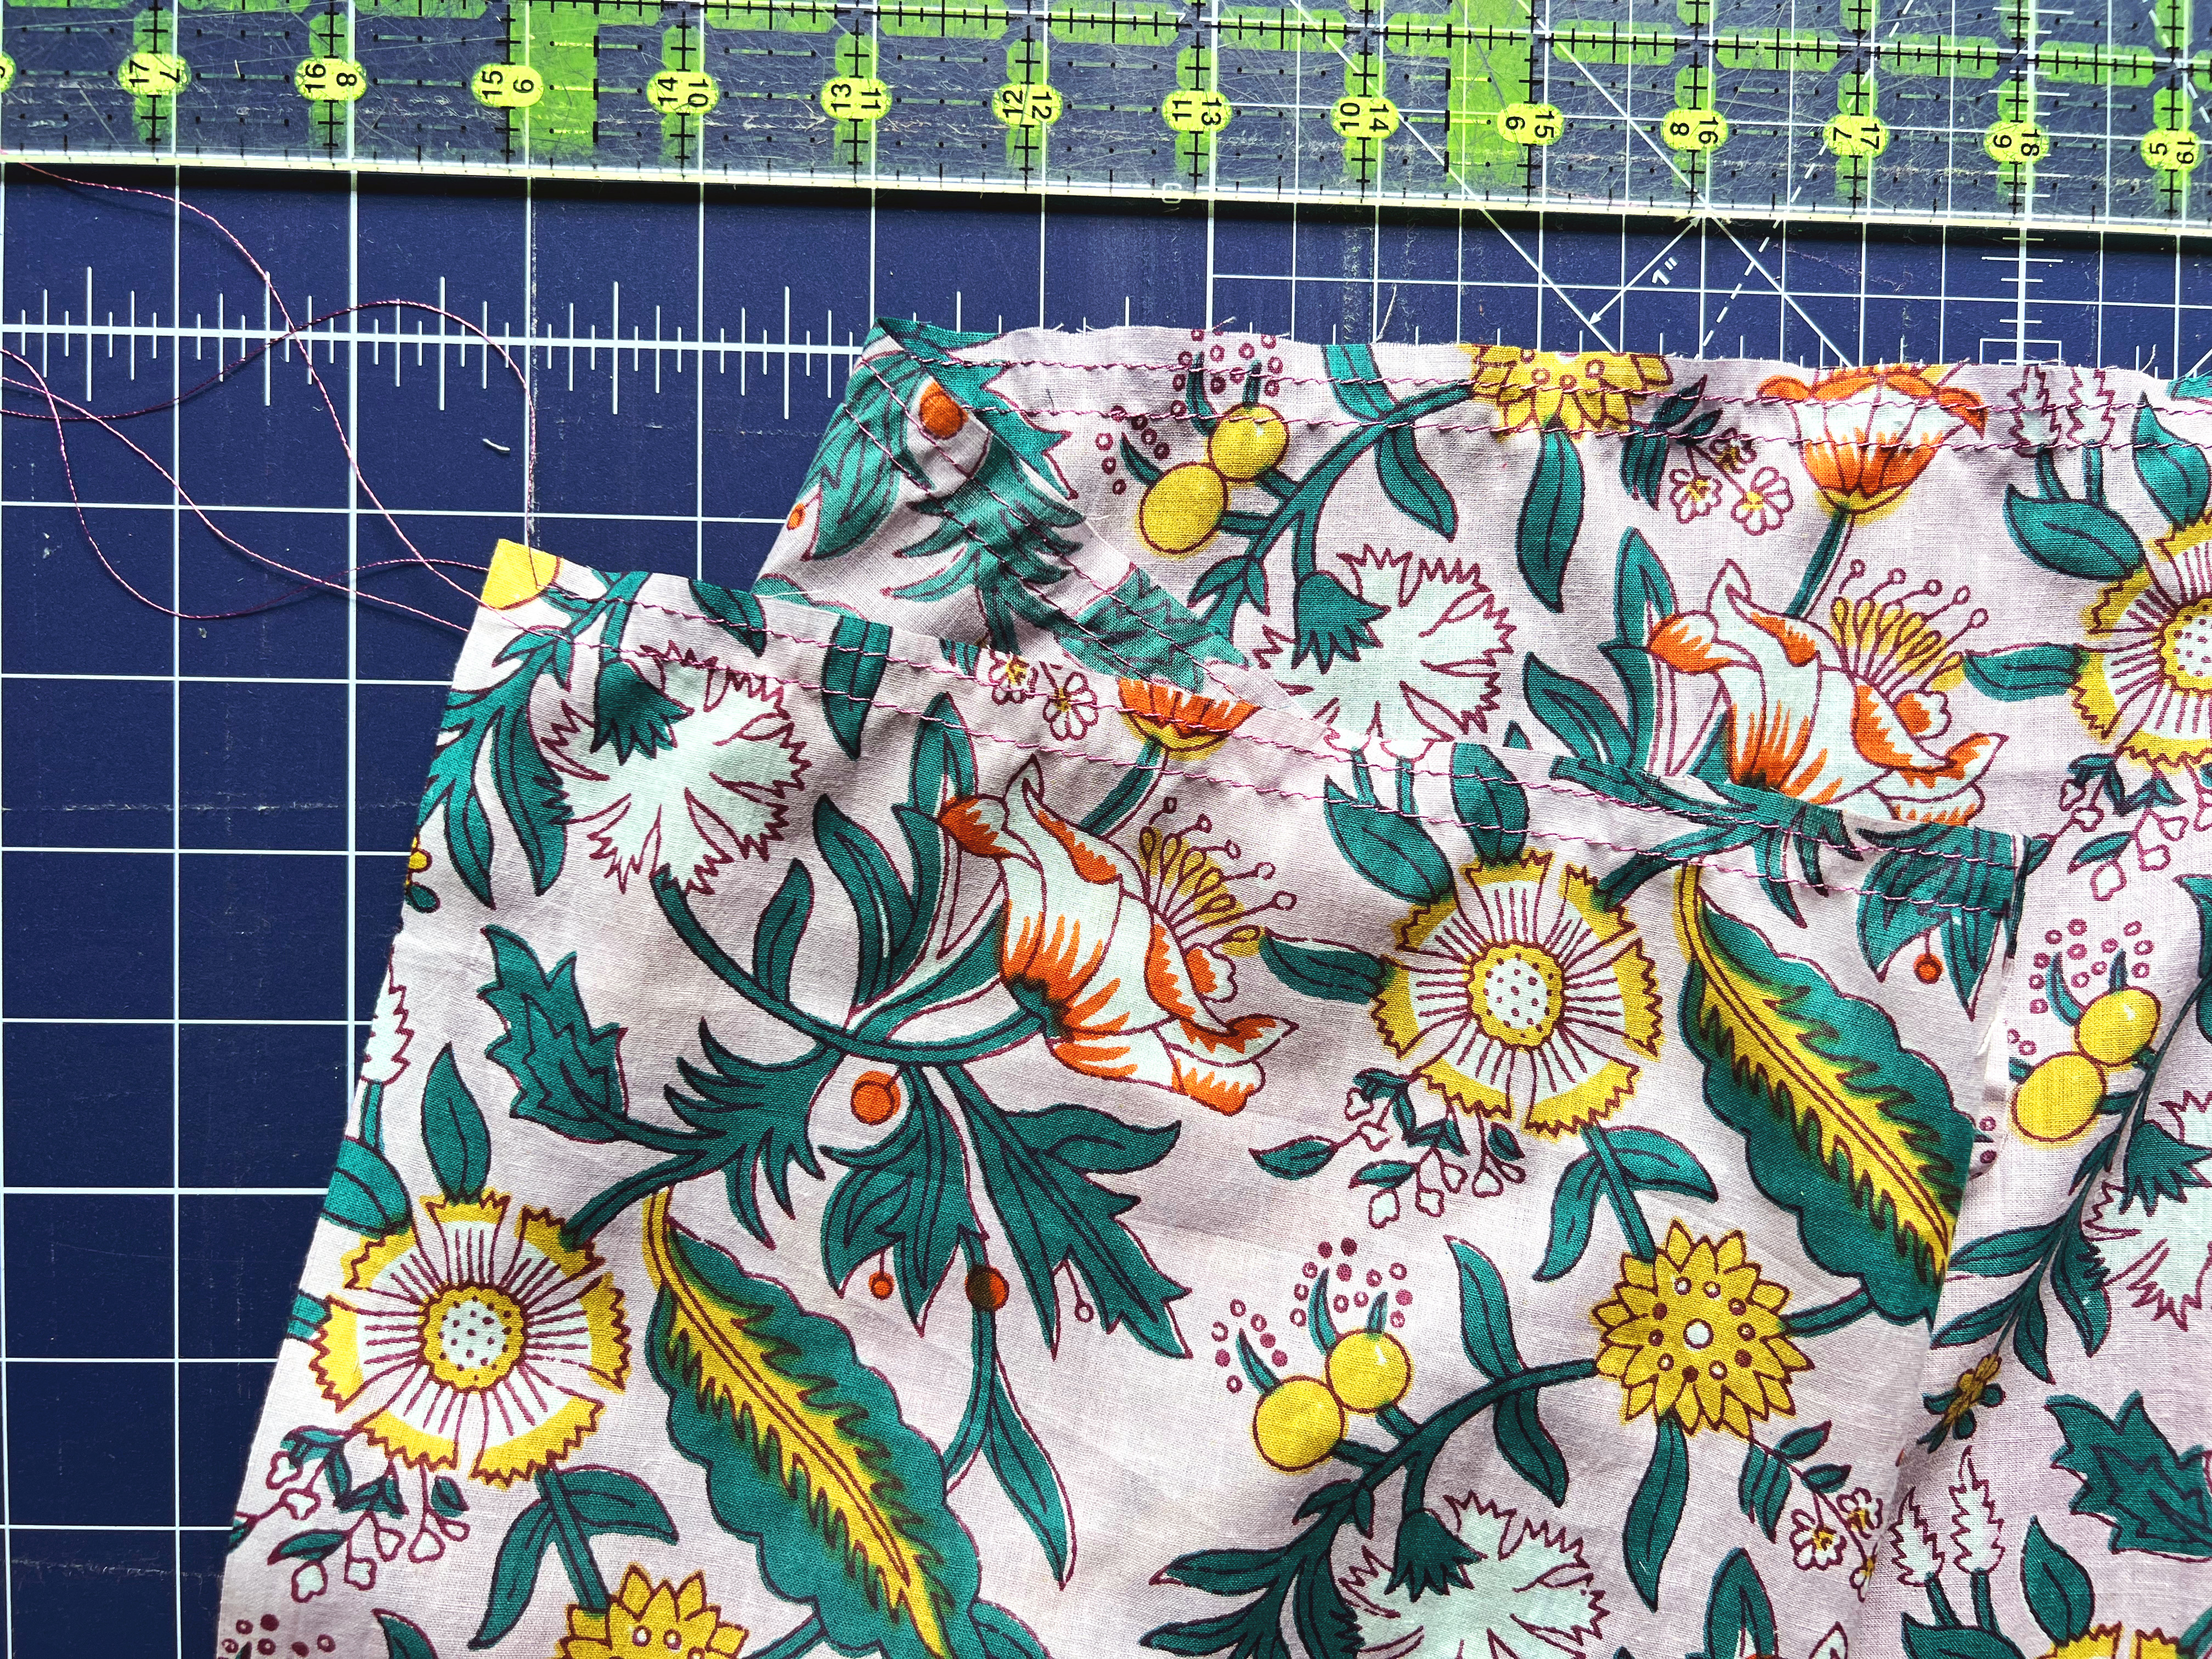
Begin by hemming both tiers of your skirt. My favorite trick for quick hemming is to serge along the bottom, and then fold twice and press before stitching with my sewing machine. If you don’t have a serger, simply sew a line of stitches 1/4” from the raw edge and then fold along the line once and press, and then again to enclose the raw edges and press again.


Finally, sew a line of stitches 1/4” from the folded edge to enclose your hems.


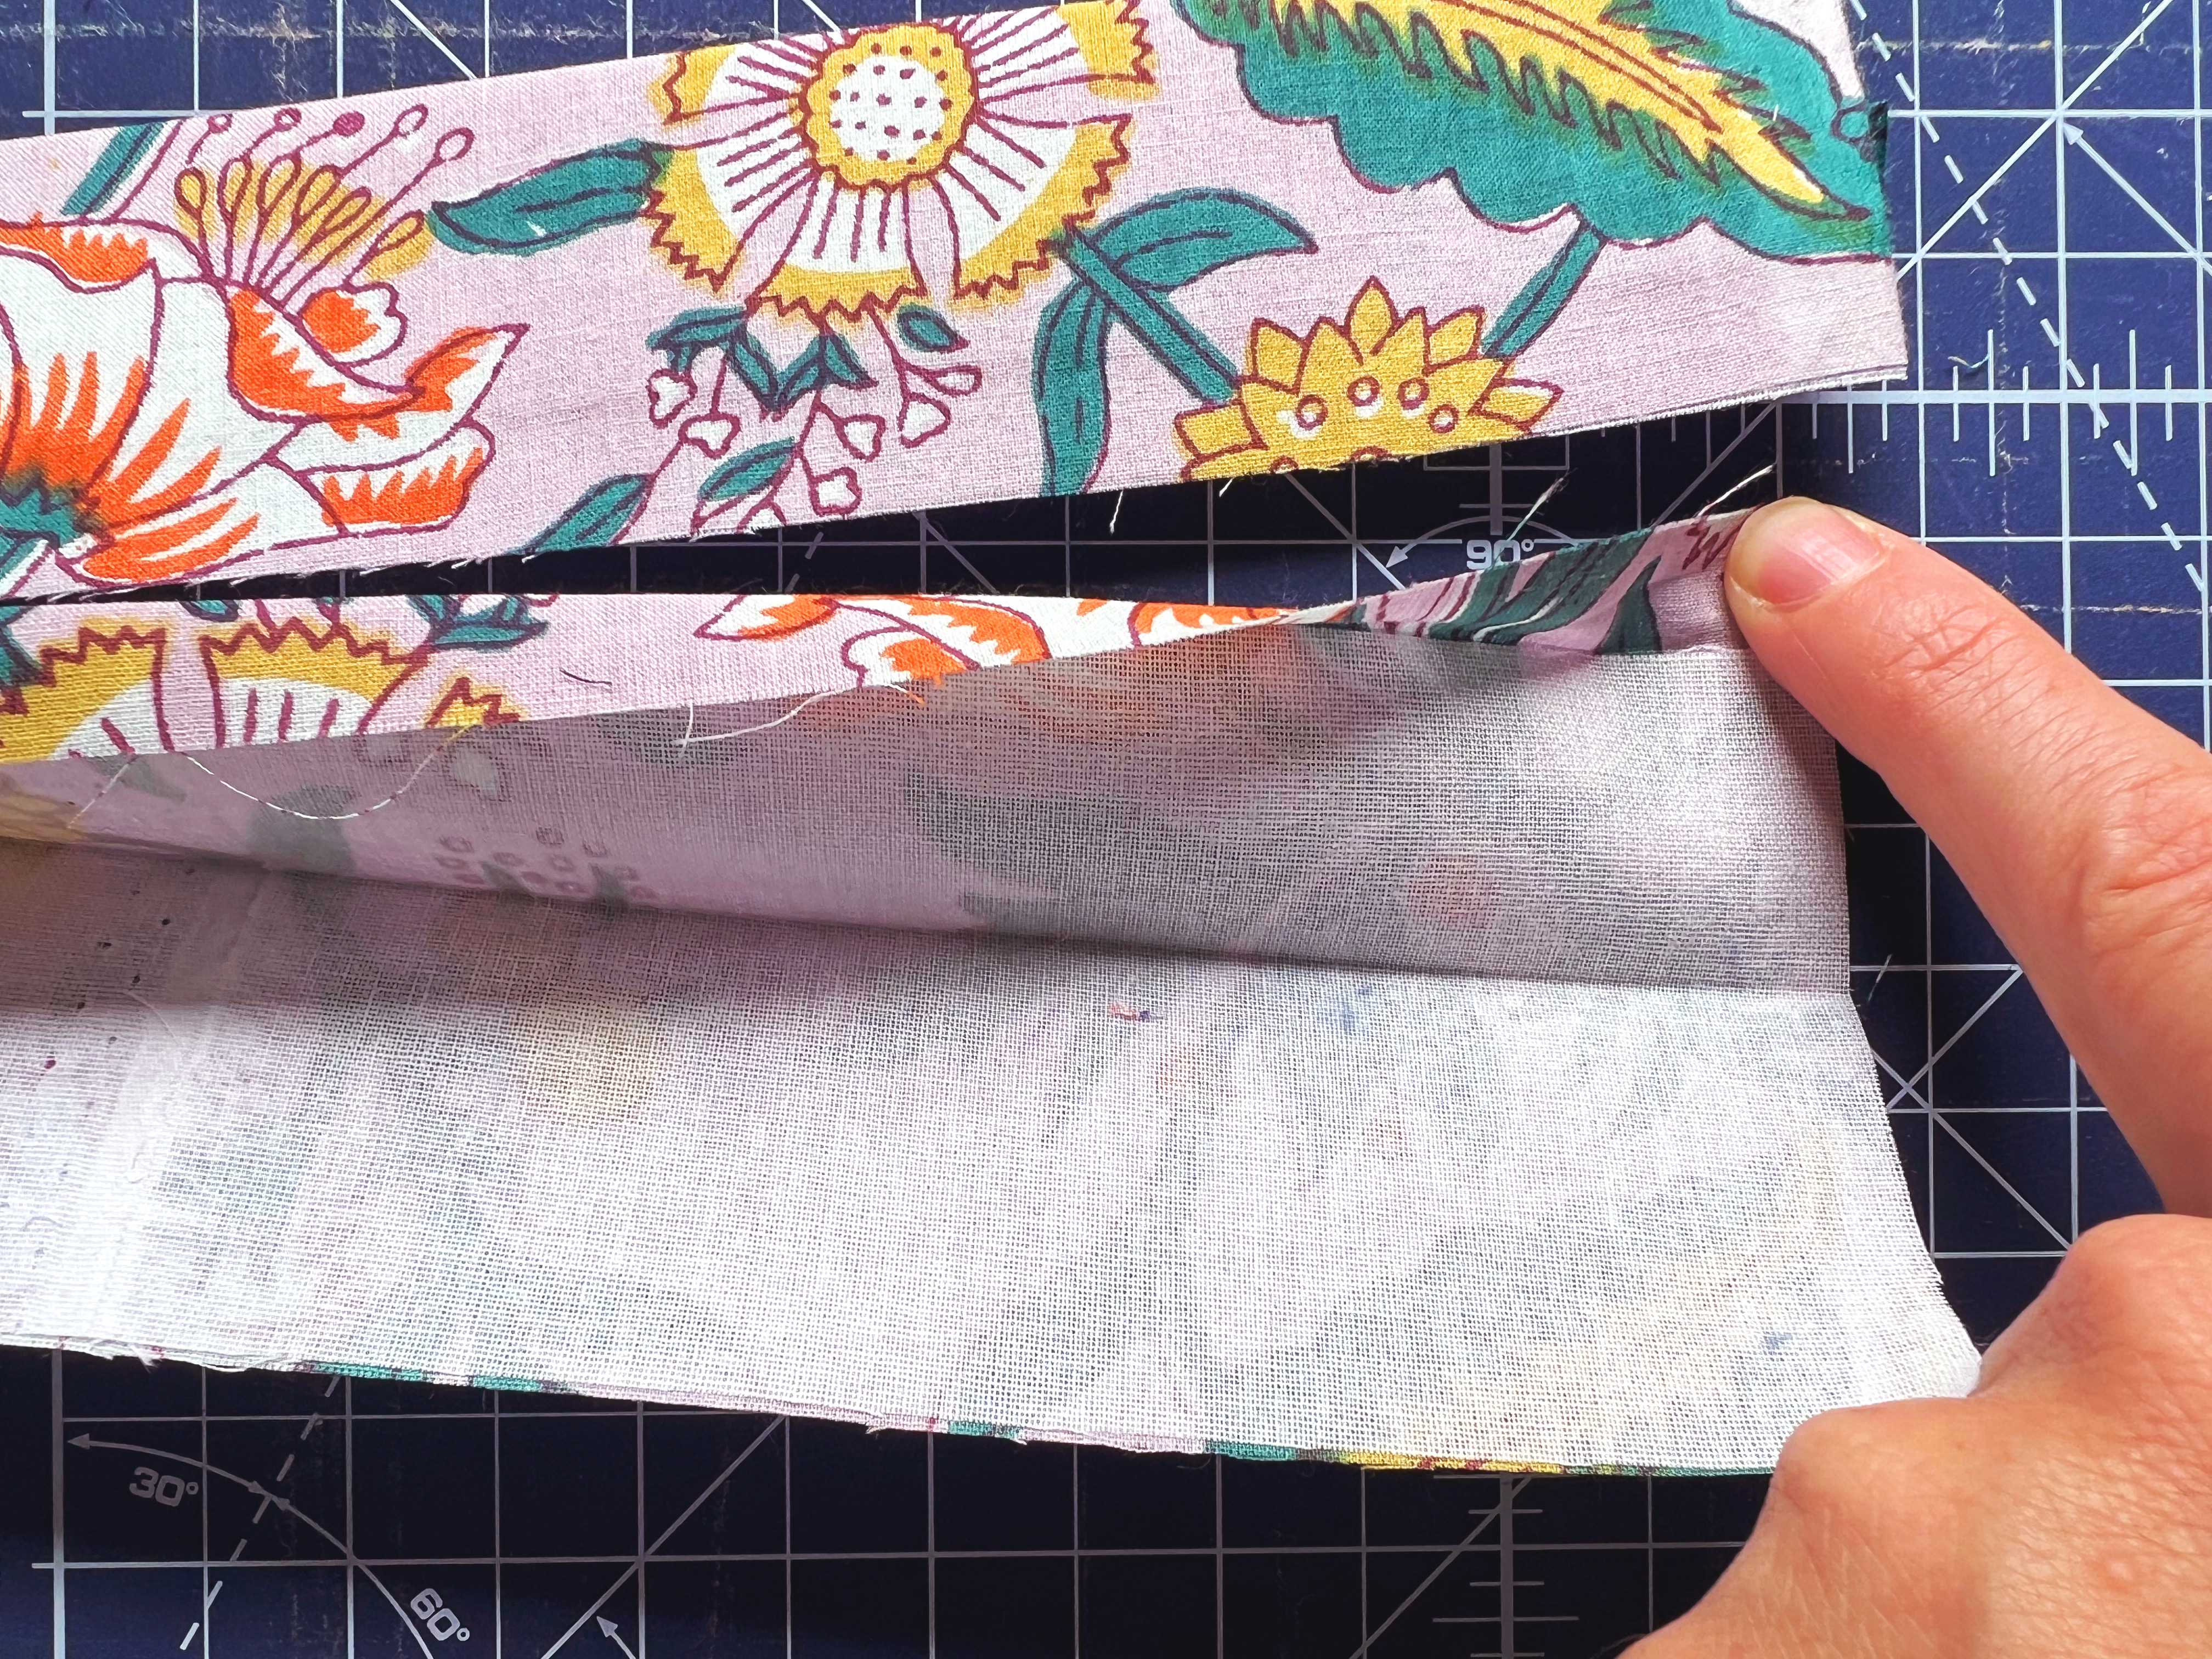
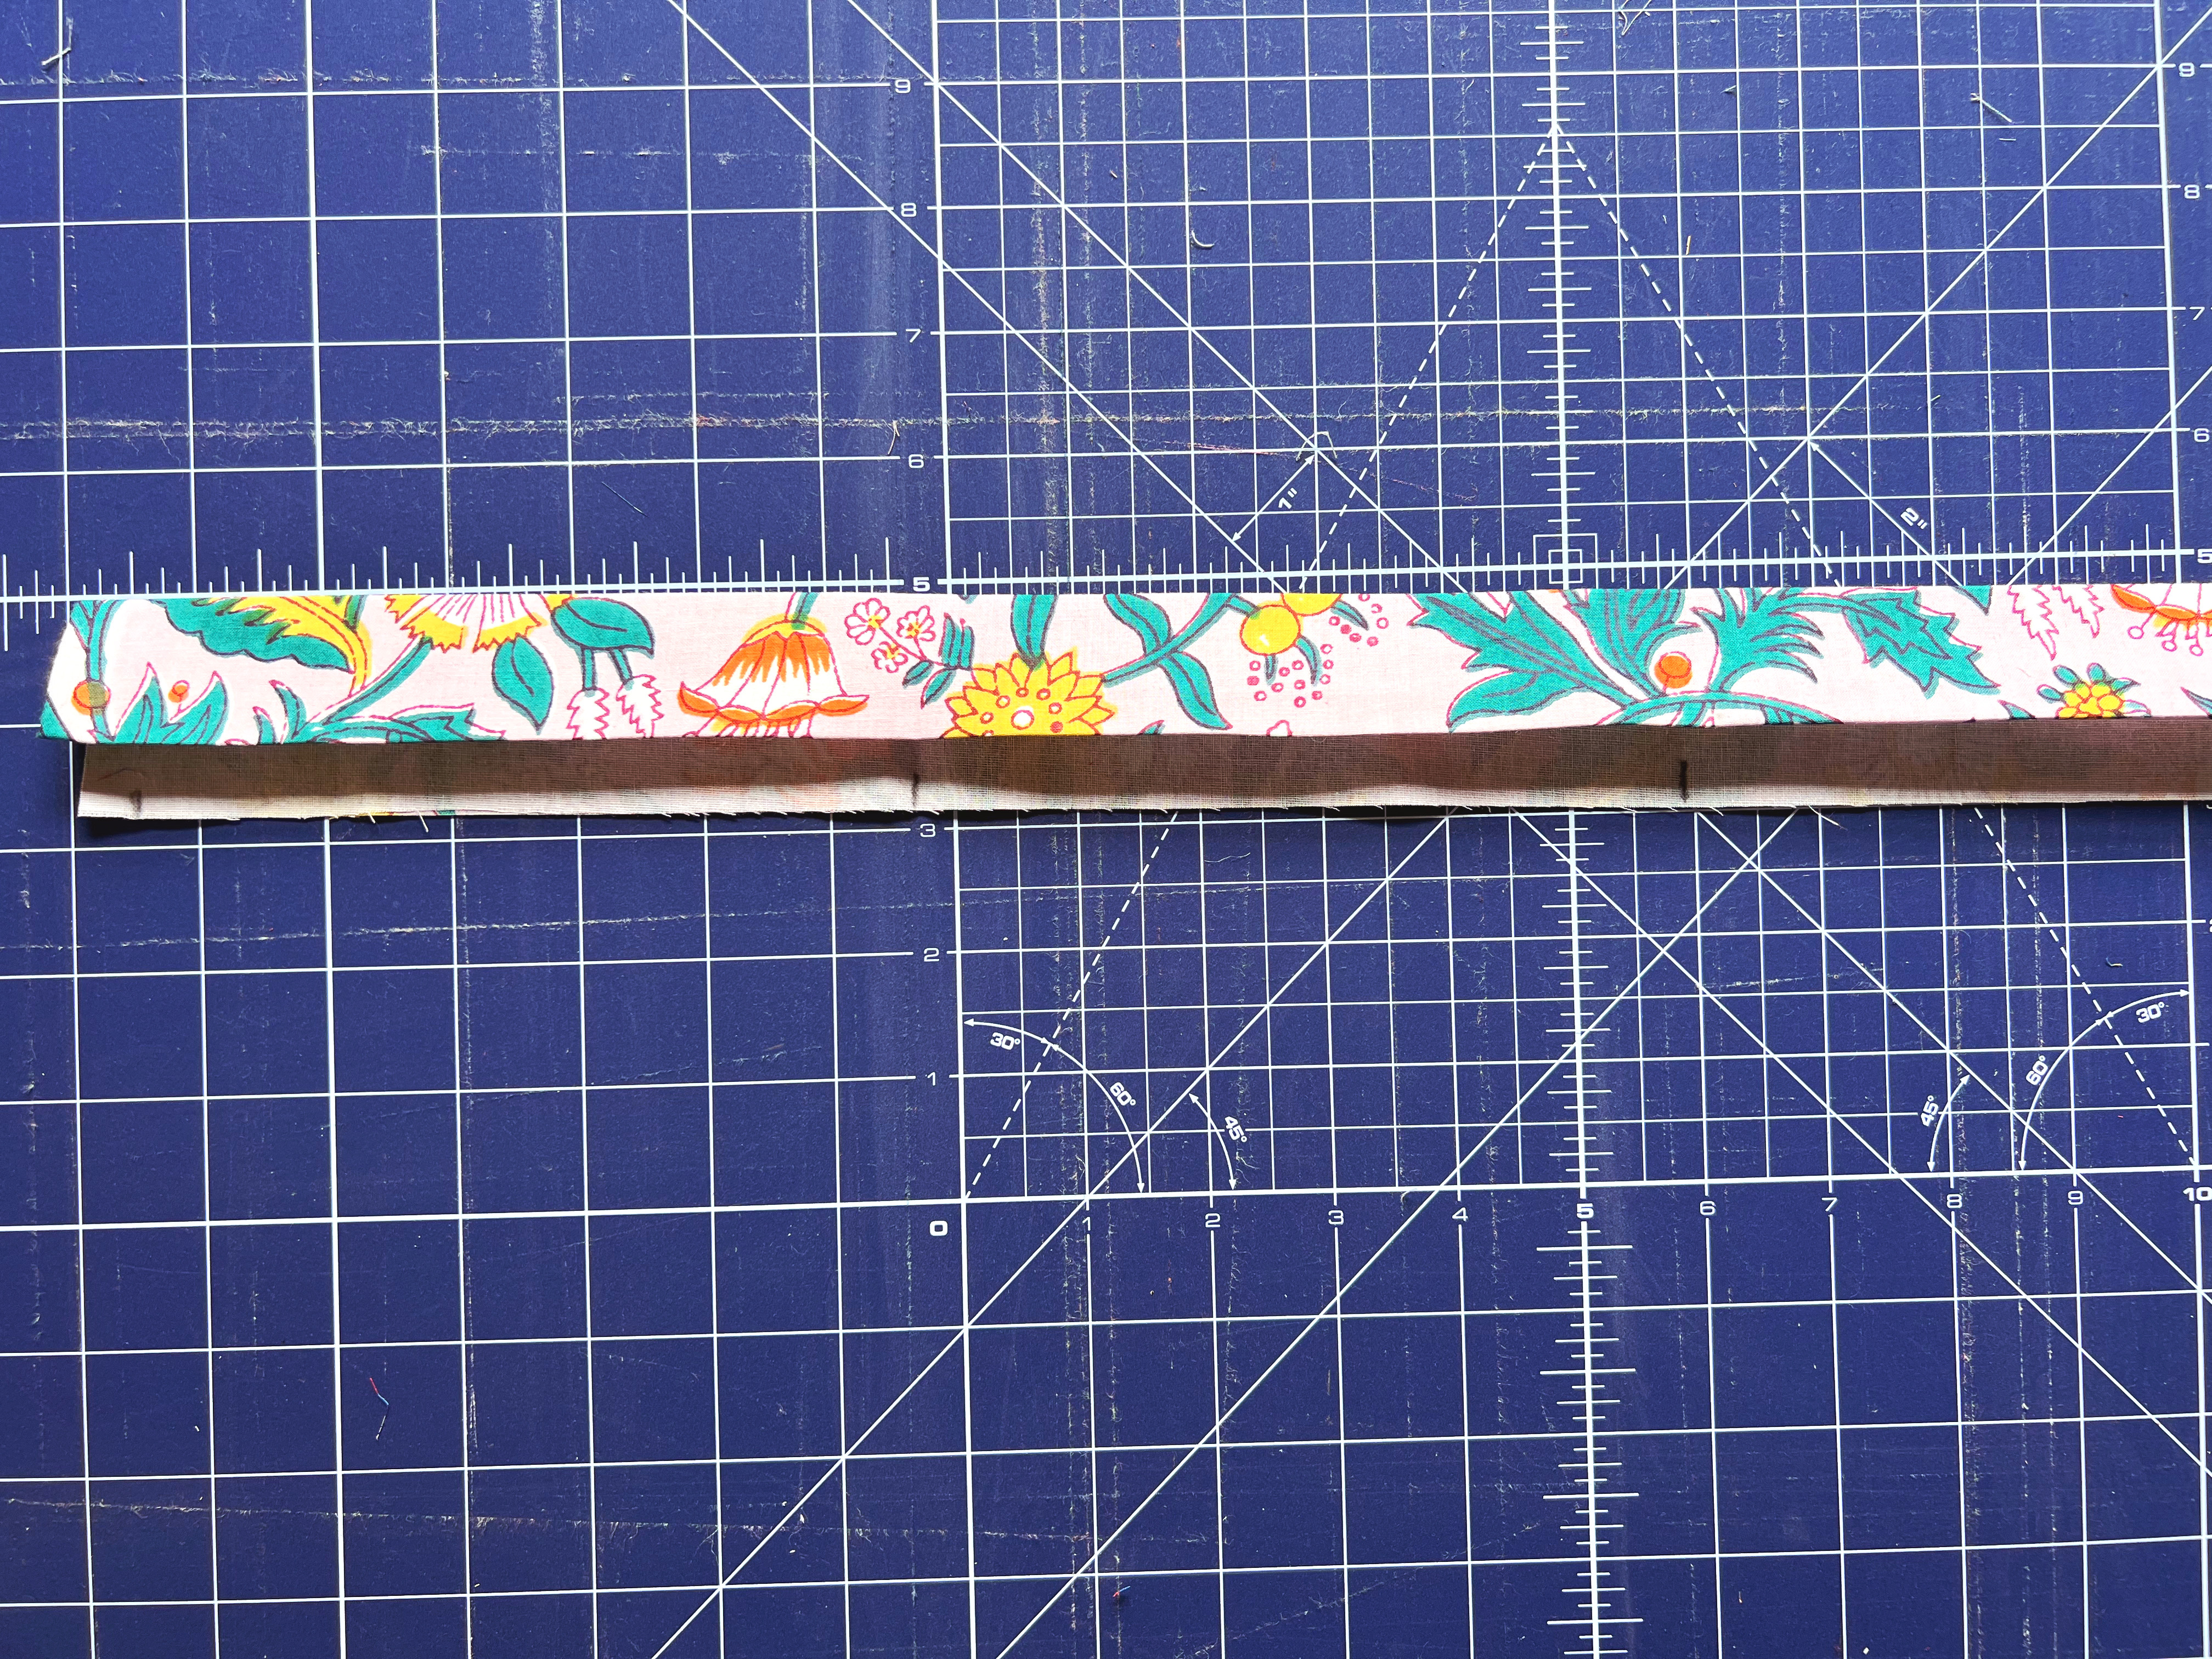
To prepare the waistband, attach the interfacing to the wrong side of your main fabric following the manufacturer’s instructions. Leave 1/2” on the top free of interfacing. Fold the waistband in half lengthwise and press. Fold the top raw edge of fabric in by 1/2” using the edge of the interfacing as a fold guide. Press again.


Mark wrong side of waistband as follows: seam allowance at 3/8” from either short end, center of waistband, and halfway from center to outer seam allowance marks on either side (so mine are about 6.25” inches from the 3.8” marks).


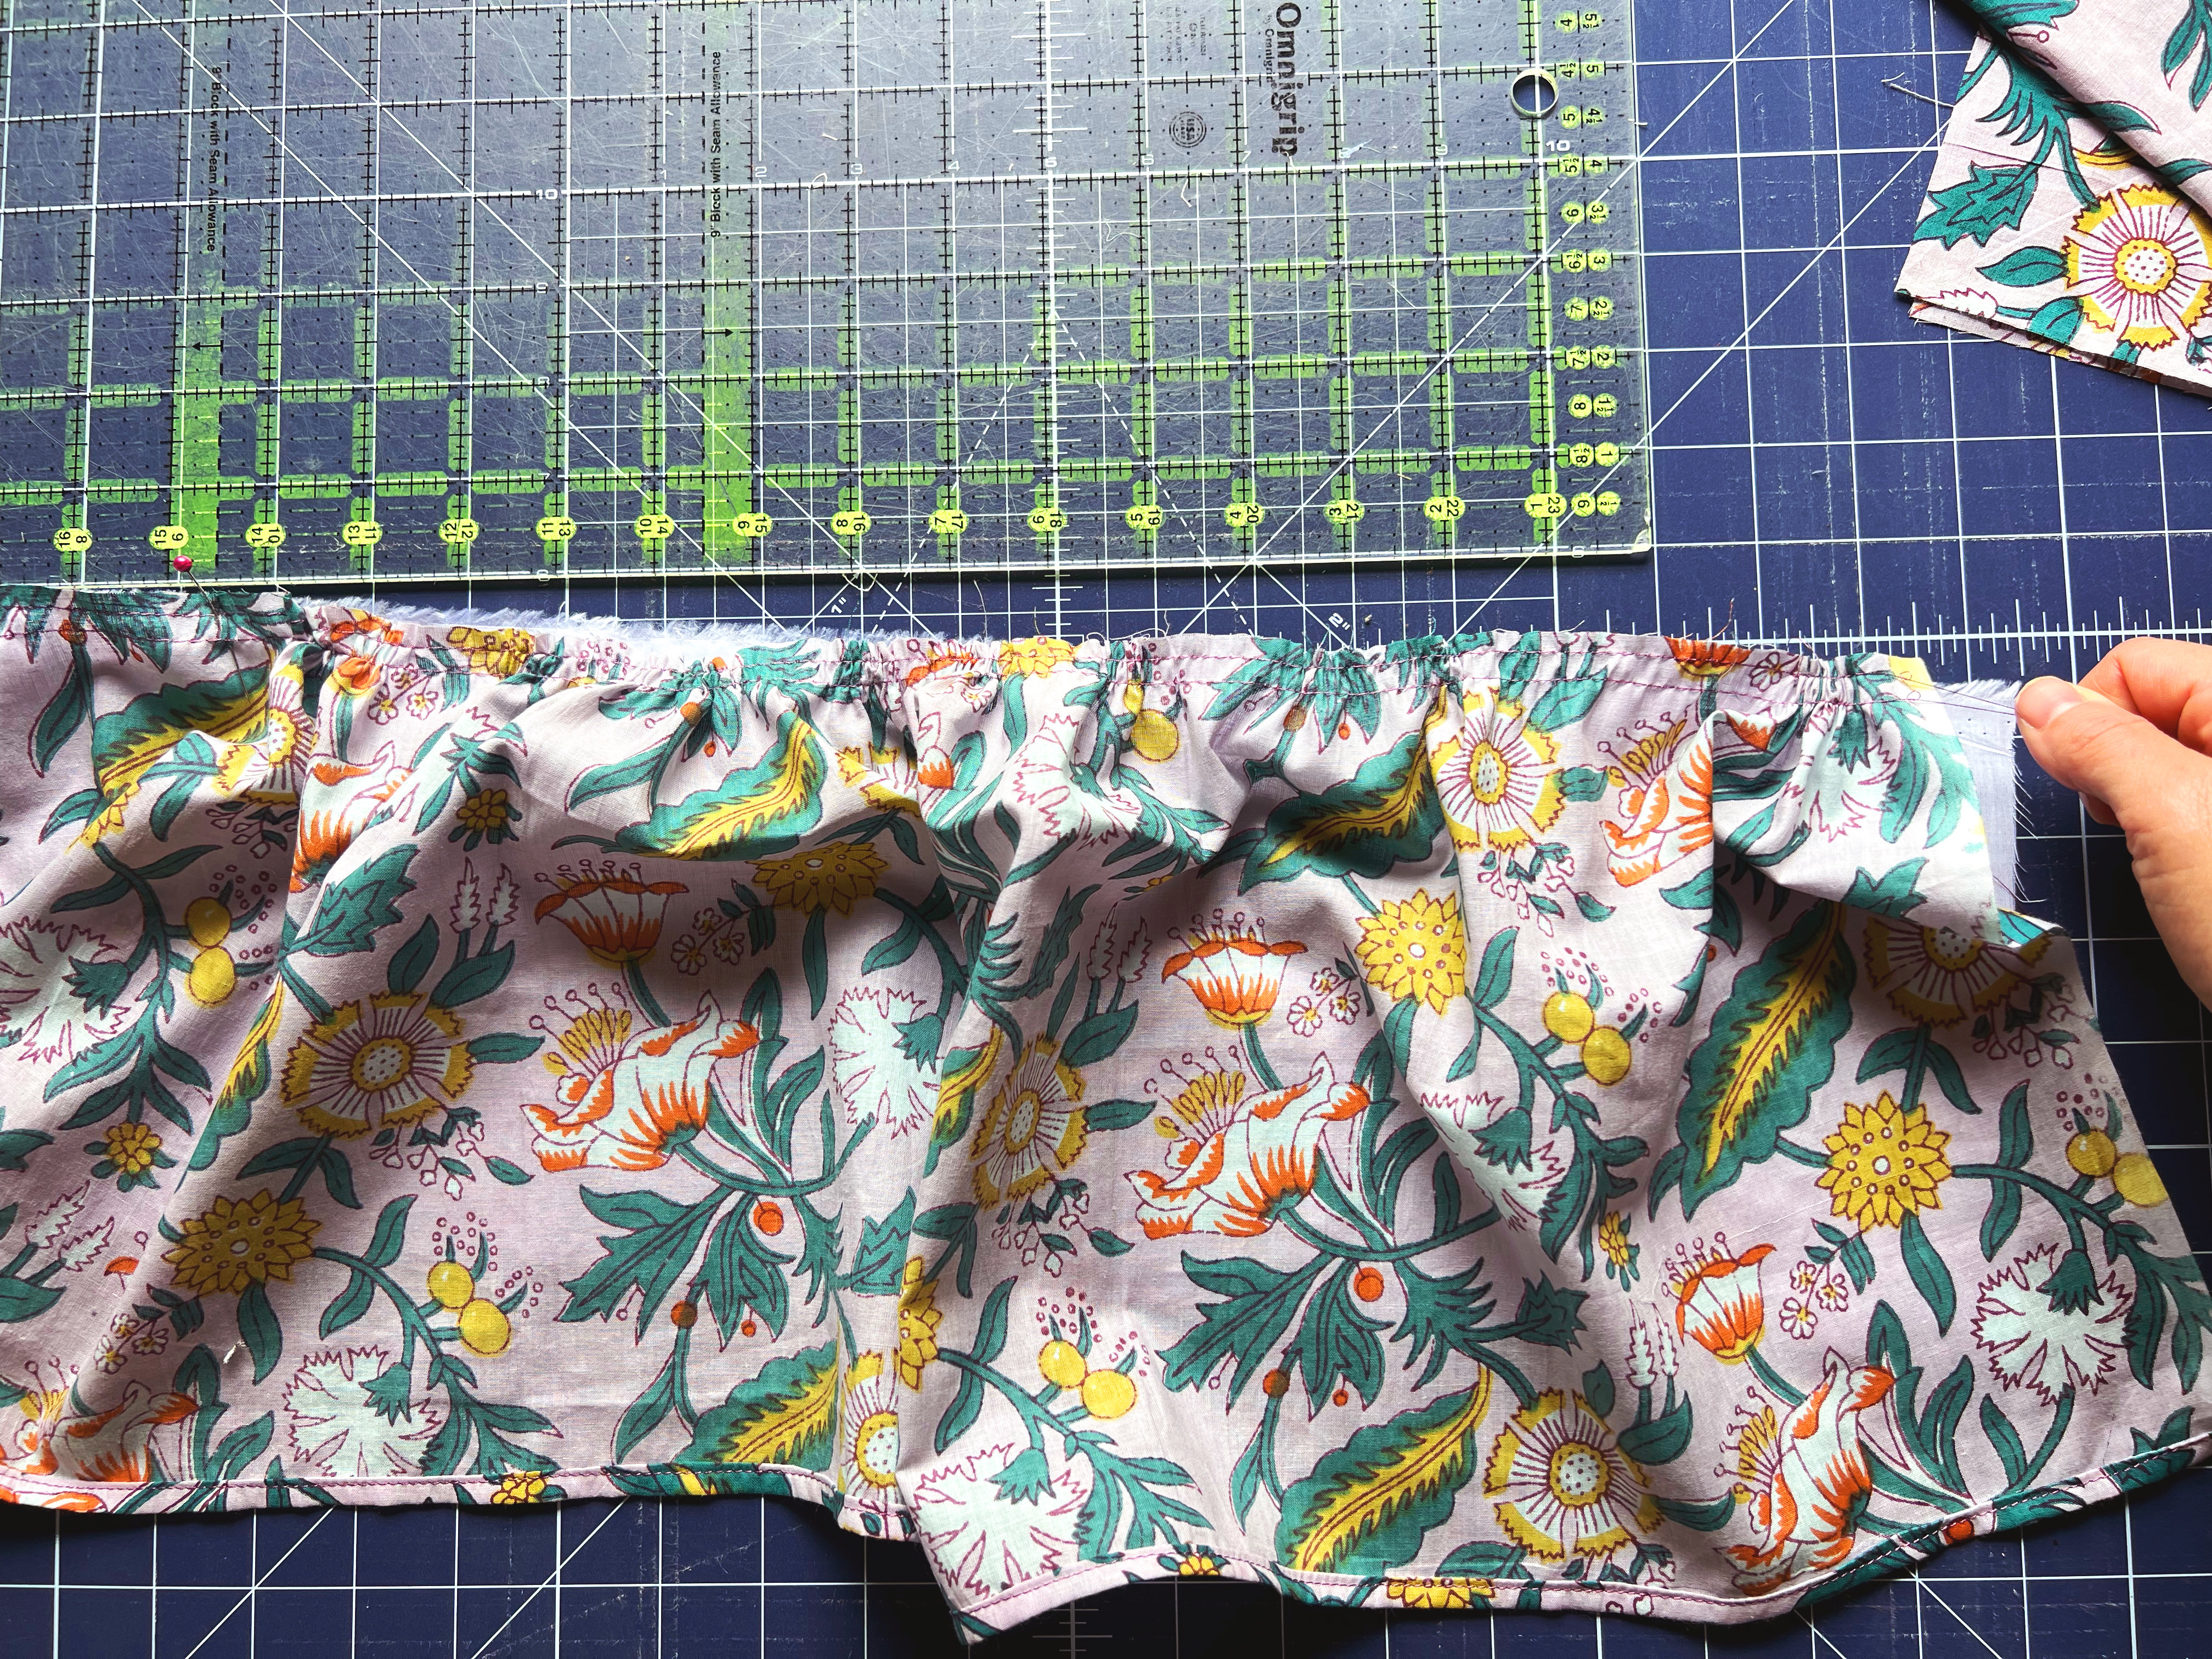
Next, sew two lines of gathering stitches on the top of each tier and the top of your lining fabric by doing the following: Extend your stitch length to 4, and pull a bit of thread from the bobbin and the top needle so that you are starting with a few inches of excess. On your main fabric, sew two lines of stitches 1/4” and 1/2” away from the top edge of the fabric, leaving thread tails at the beginning and end of each line. On the lining, stitch your two lines at 3/8” and 5/8” from the top edge. Return your stitch length to a normal setting of about 2.5.


Mark your fabric to show the length broken up into fourths along the top of each tier and the lining fabric on the top and the bottom. My lining fabric is 36”, so I marked at 9”, 18”, and 27”. These little marks will help us to distribute all the gathers evenly.


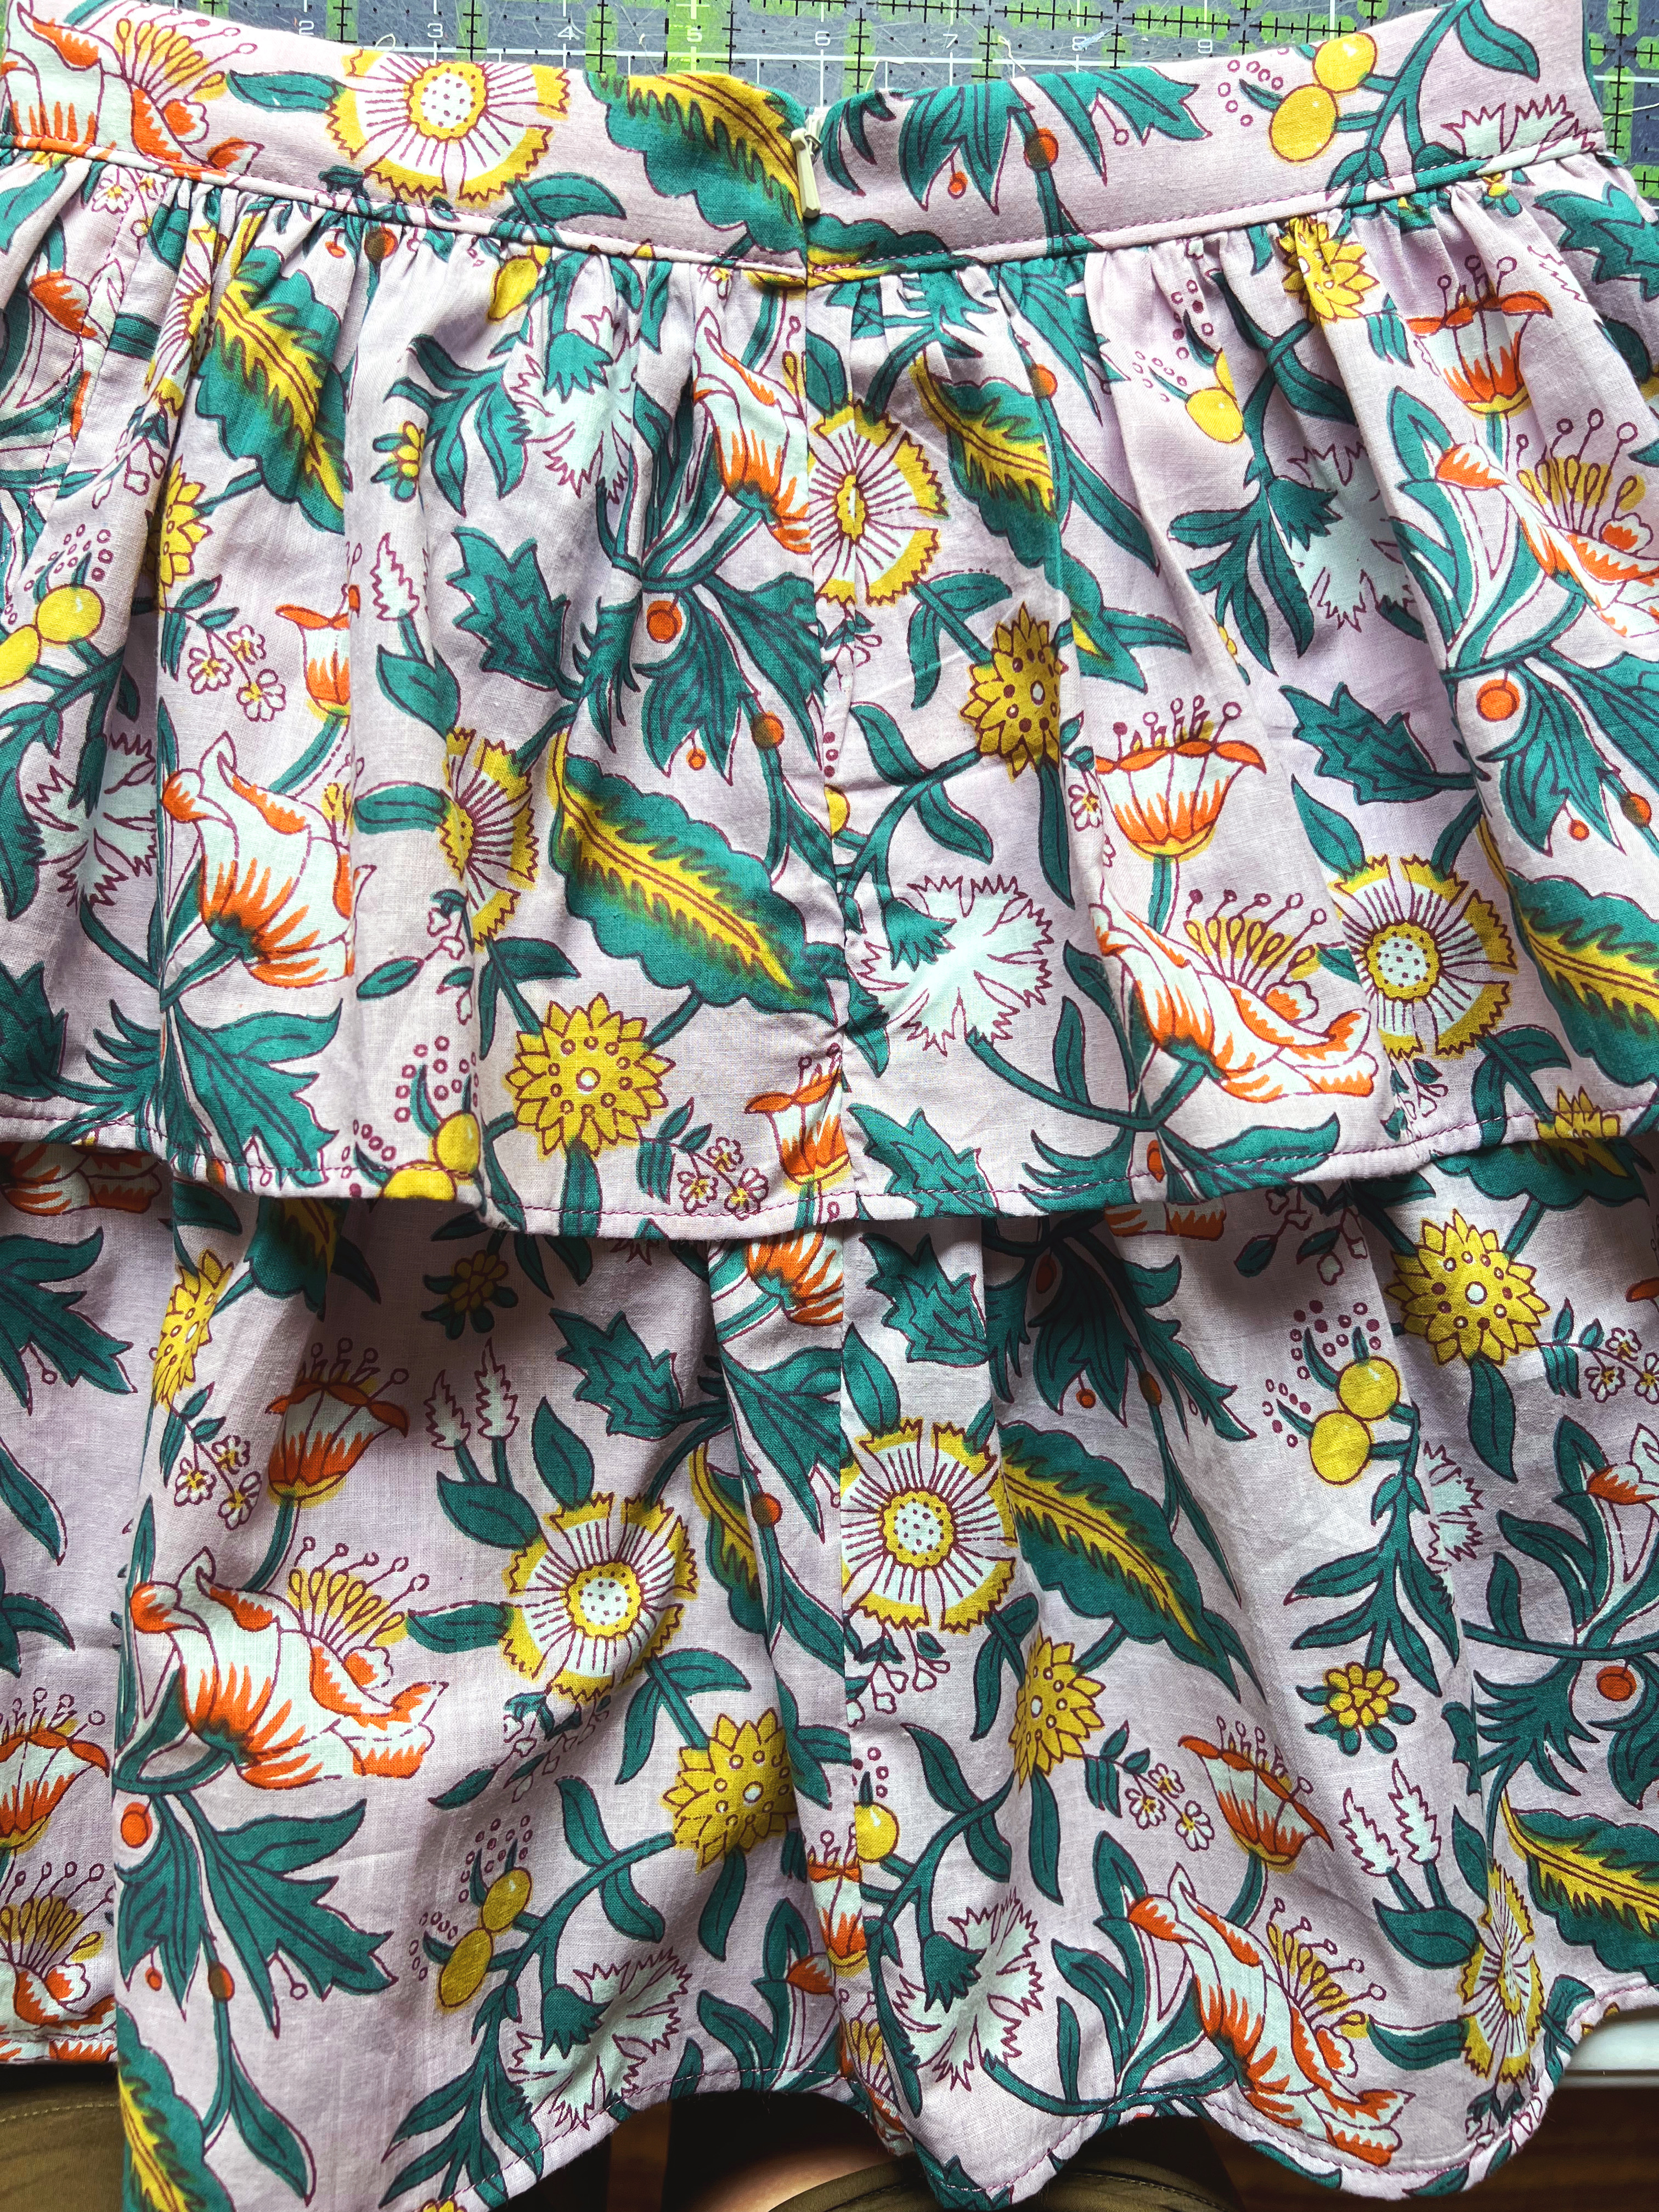
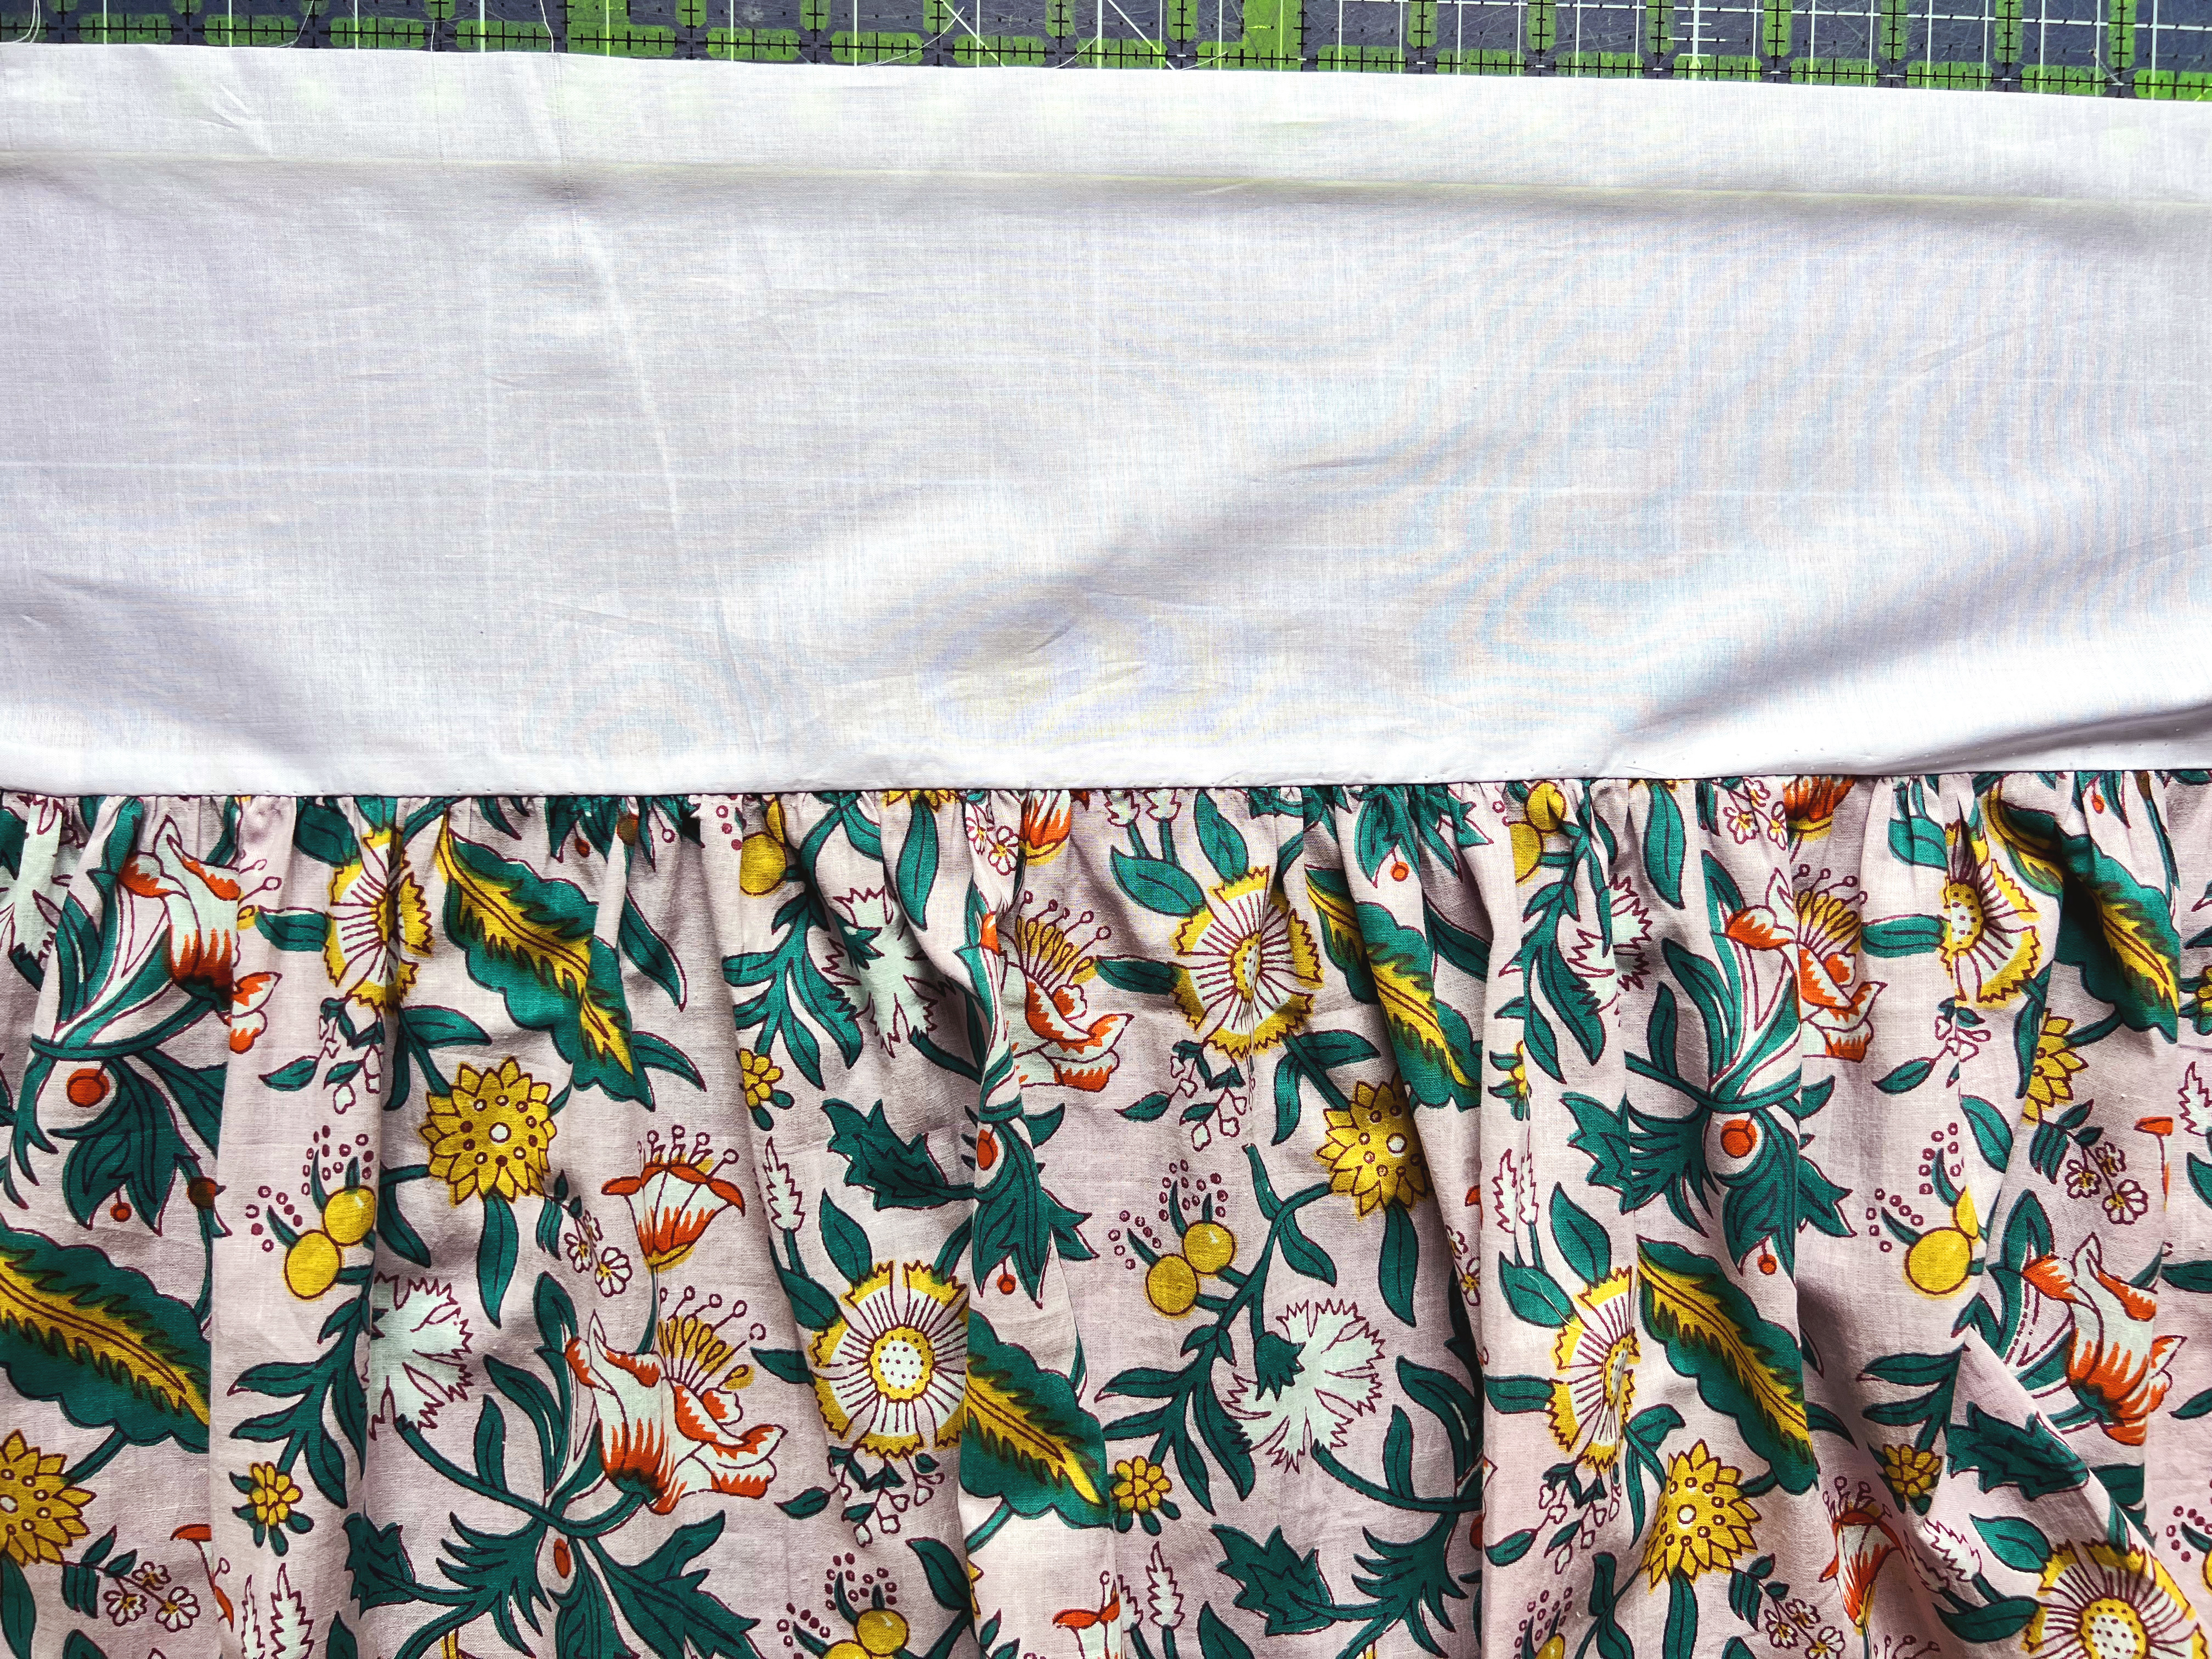
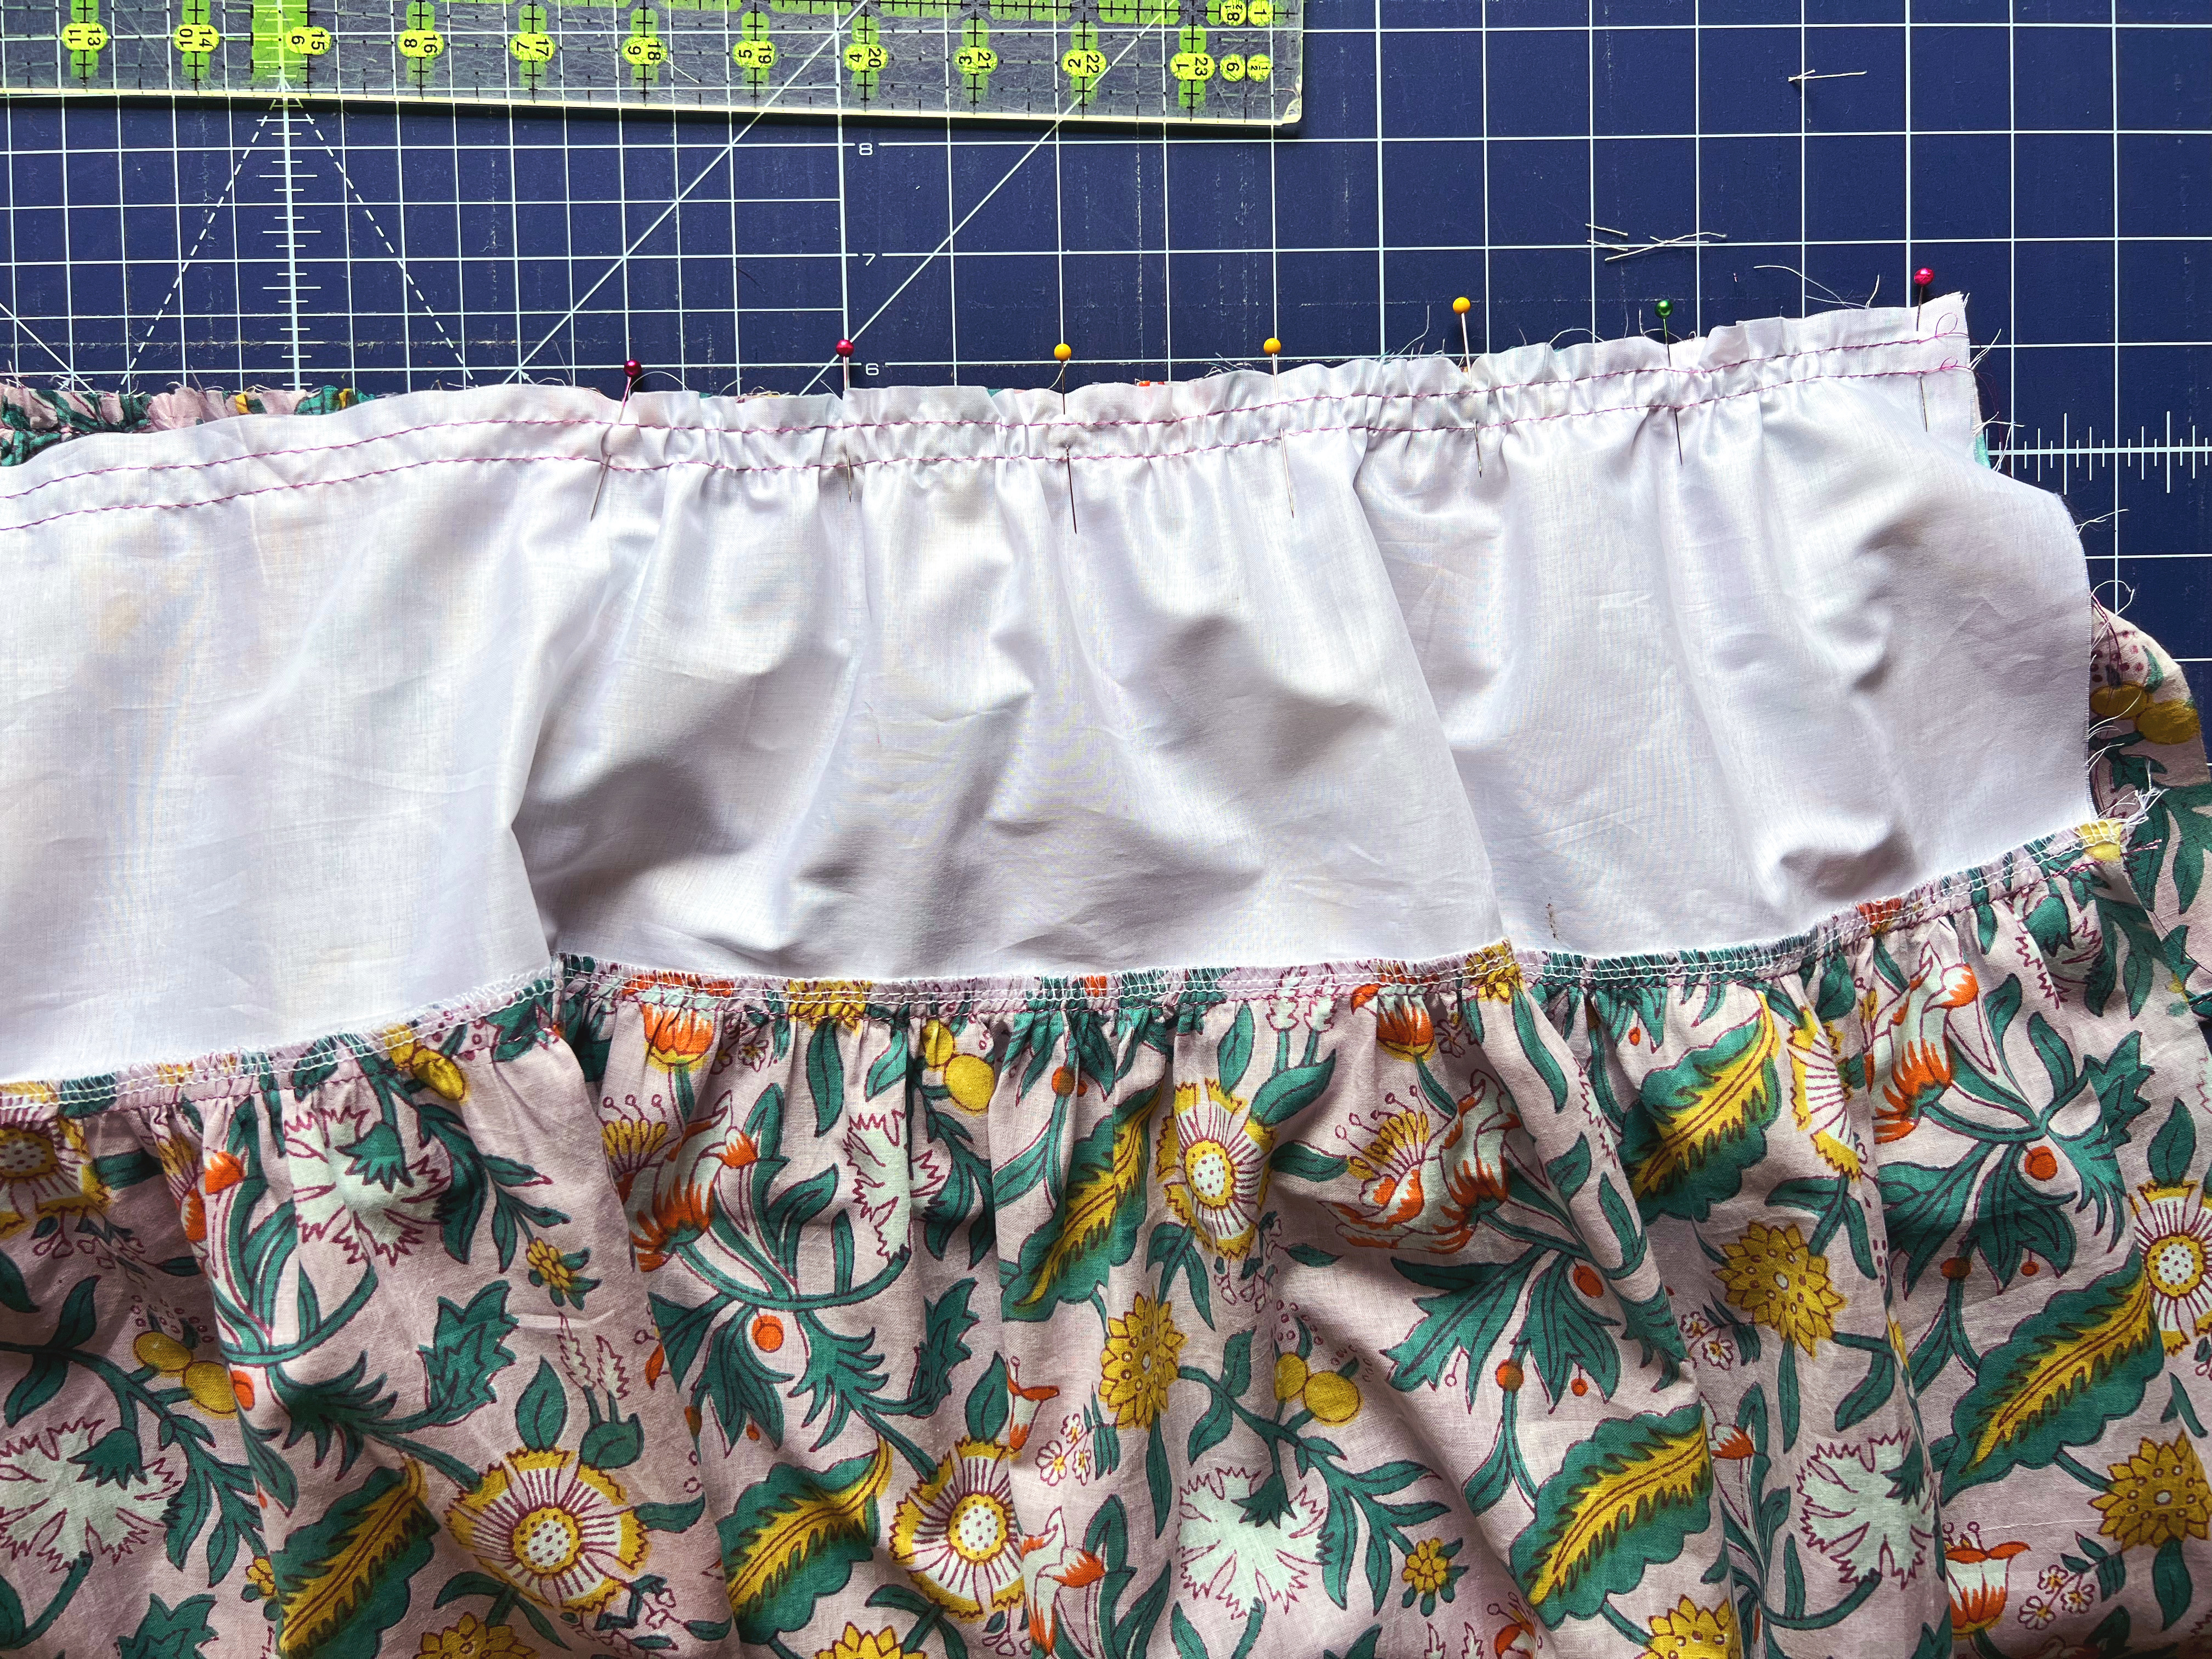
Place your bottom tier on the bottom of the lining. First pin your fabrics together at your center marks. You will then work from one side at a time, and gather the bottom tier fabric until it is the same size as the lining fabric. To gather, simply hold the thread tails on the back side of the main fabric, and gently pull the fabric toward the center. As you gather the fabric match up the the remaining two tick marks, and pin every few inches.


Once your fabric is gathered and pinned, stitch the bottom tier to the lining fabric with a 3/8” seam allowance. Pull gently on the gathering threads to remove them. Finish the seam allowance with a serger or zigzag stitch and press seam allowance toward lining fabric.


Next, gather and pin your top tier to the unfolded edge of the waistband (right sides together) in the same way you just attached the bottom tier to the lining. Use a 3/8” seam allowance to stitch them together. Remove gathering threads.


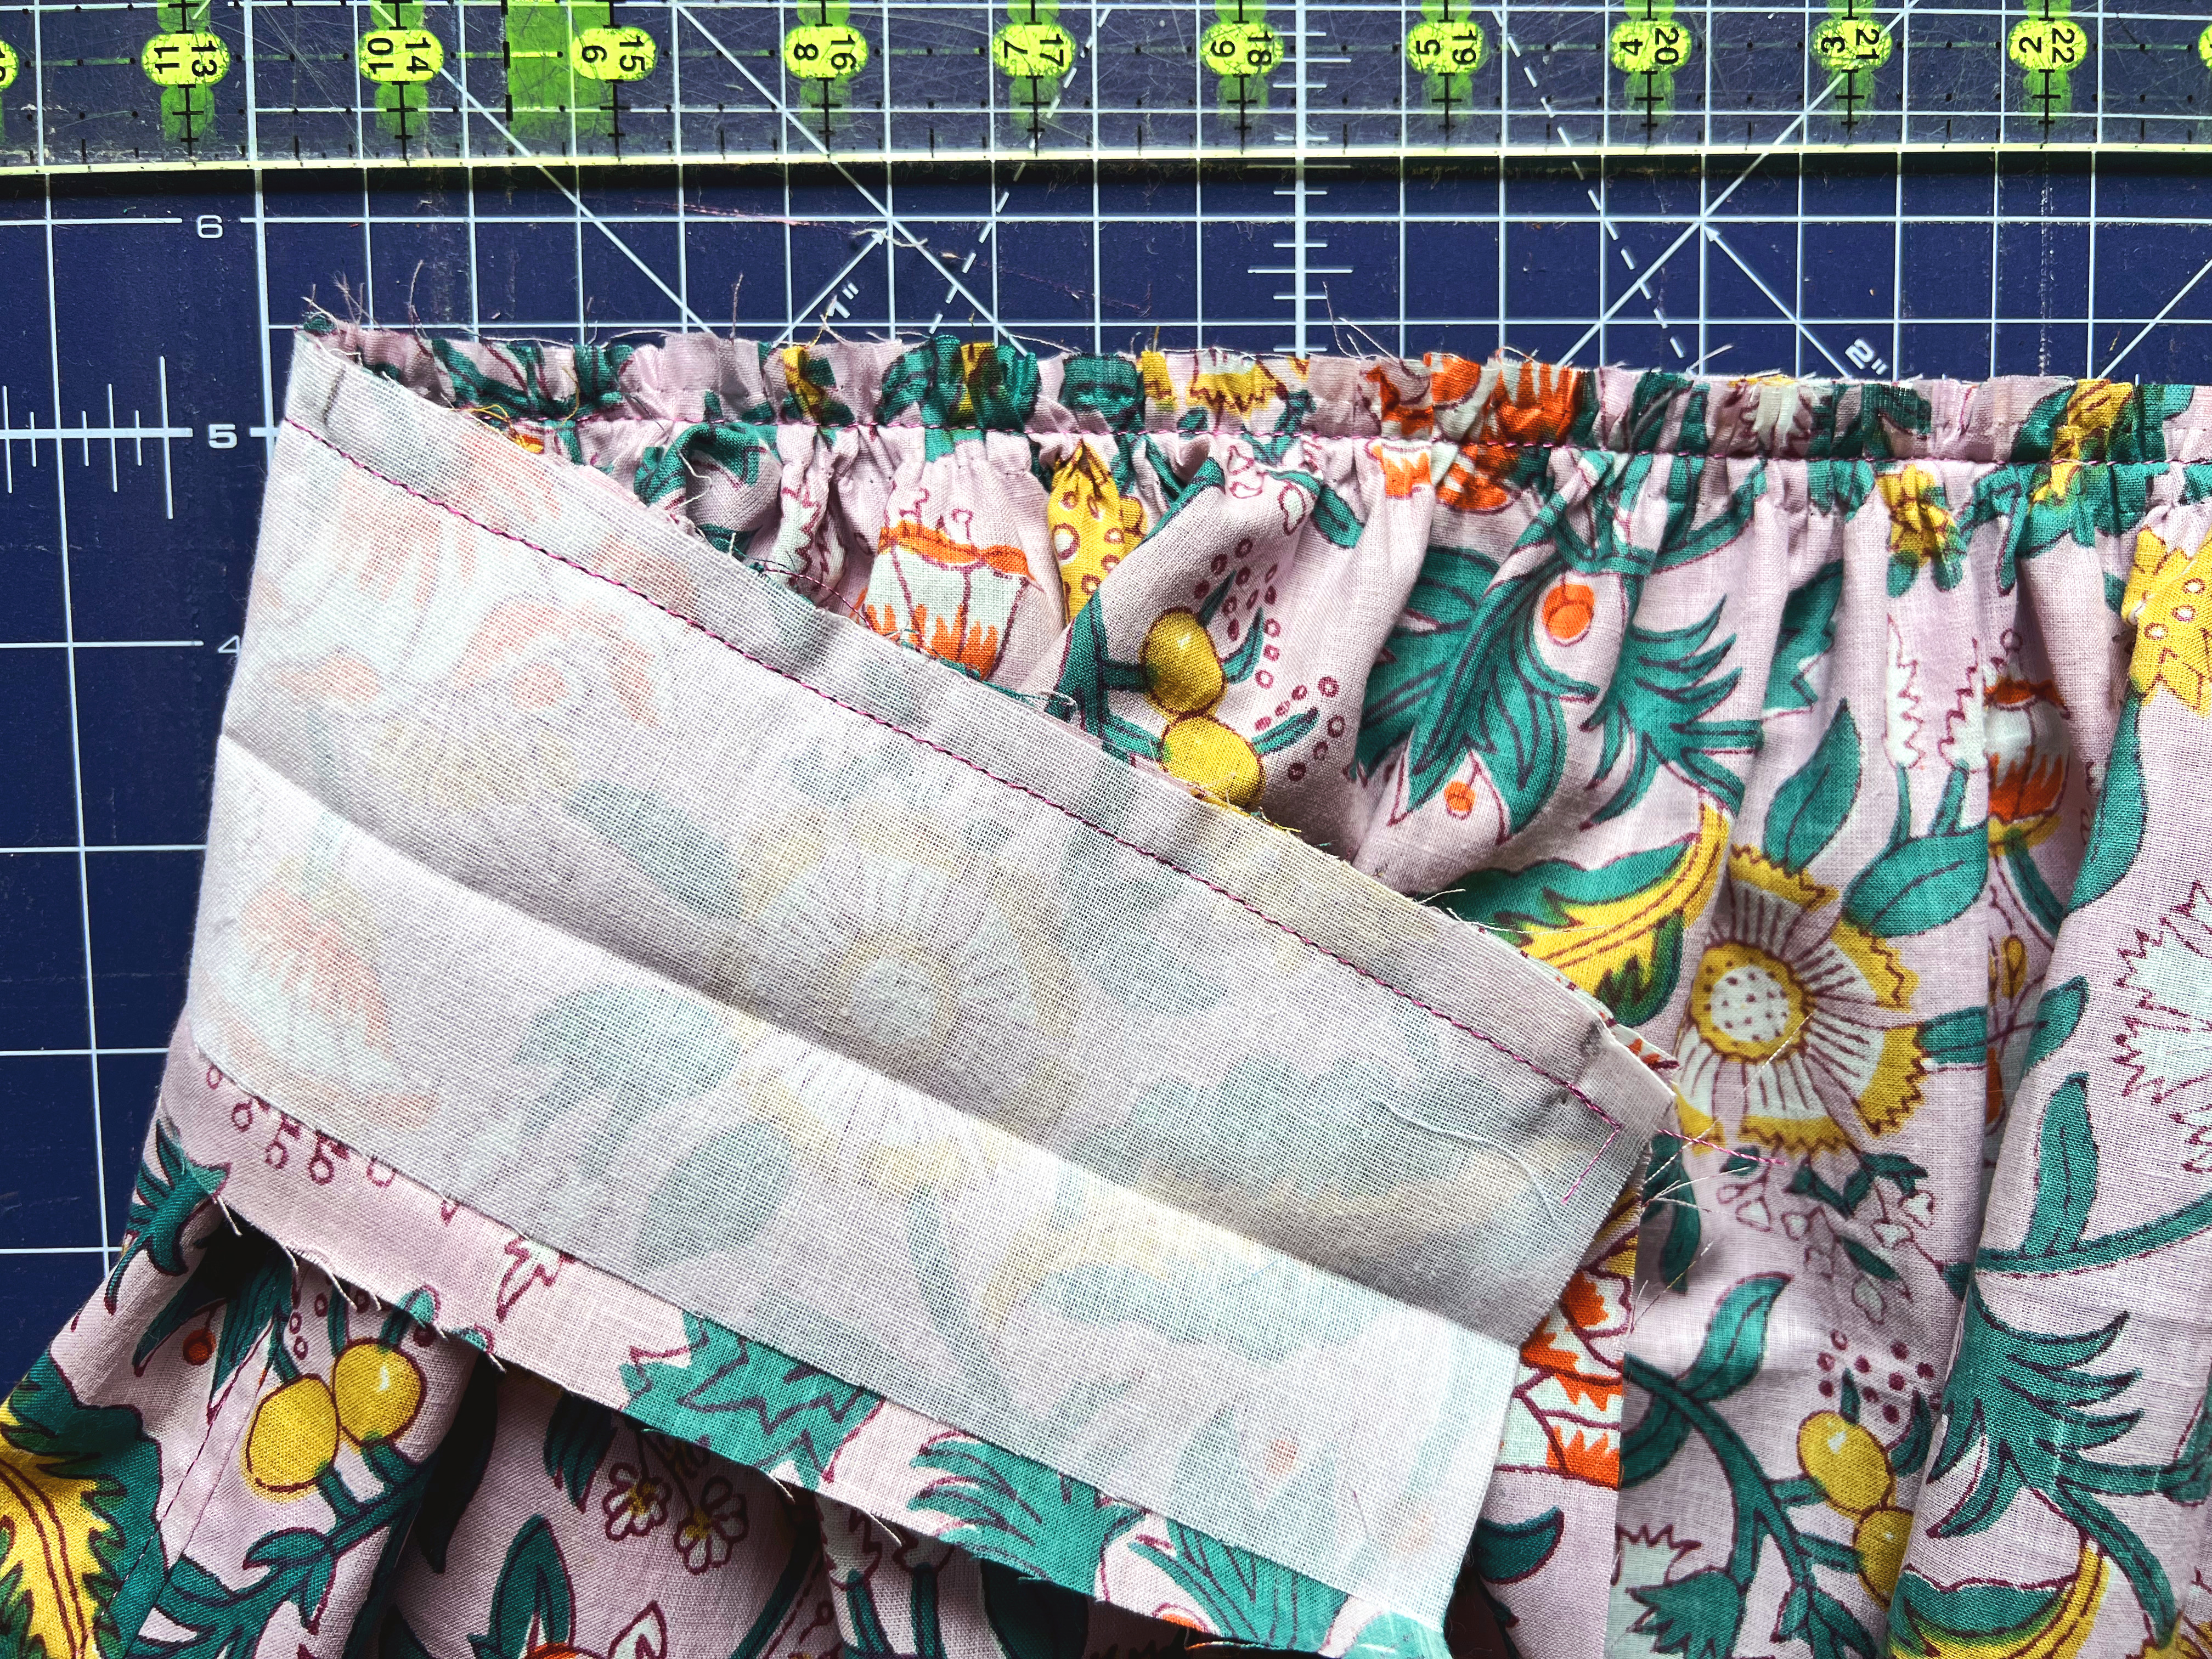
Now gather the top edge of the lining right side onto the top tier. You will be pinning and stitching this directly on top of the top tier, so that when finished, you will have three layers stitched together. Stitch this layer to the other two with a 1/2” seam allowance. Yes, this is intentionally larger than the previous seam allowance. Remove gathering threads.


Finish seam allowances on either side with a serger or zigzag stitch.


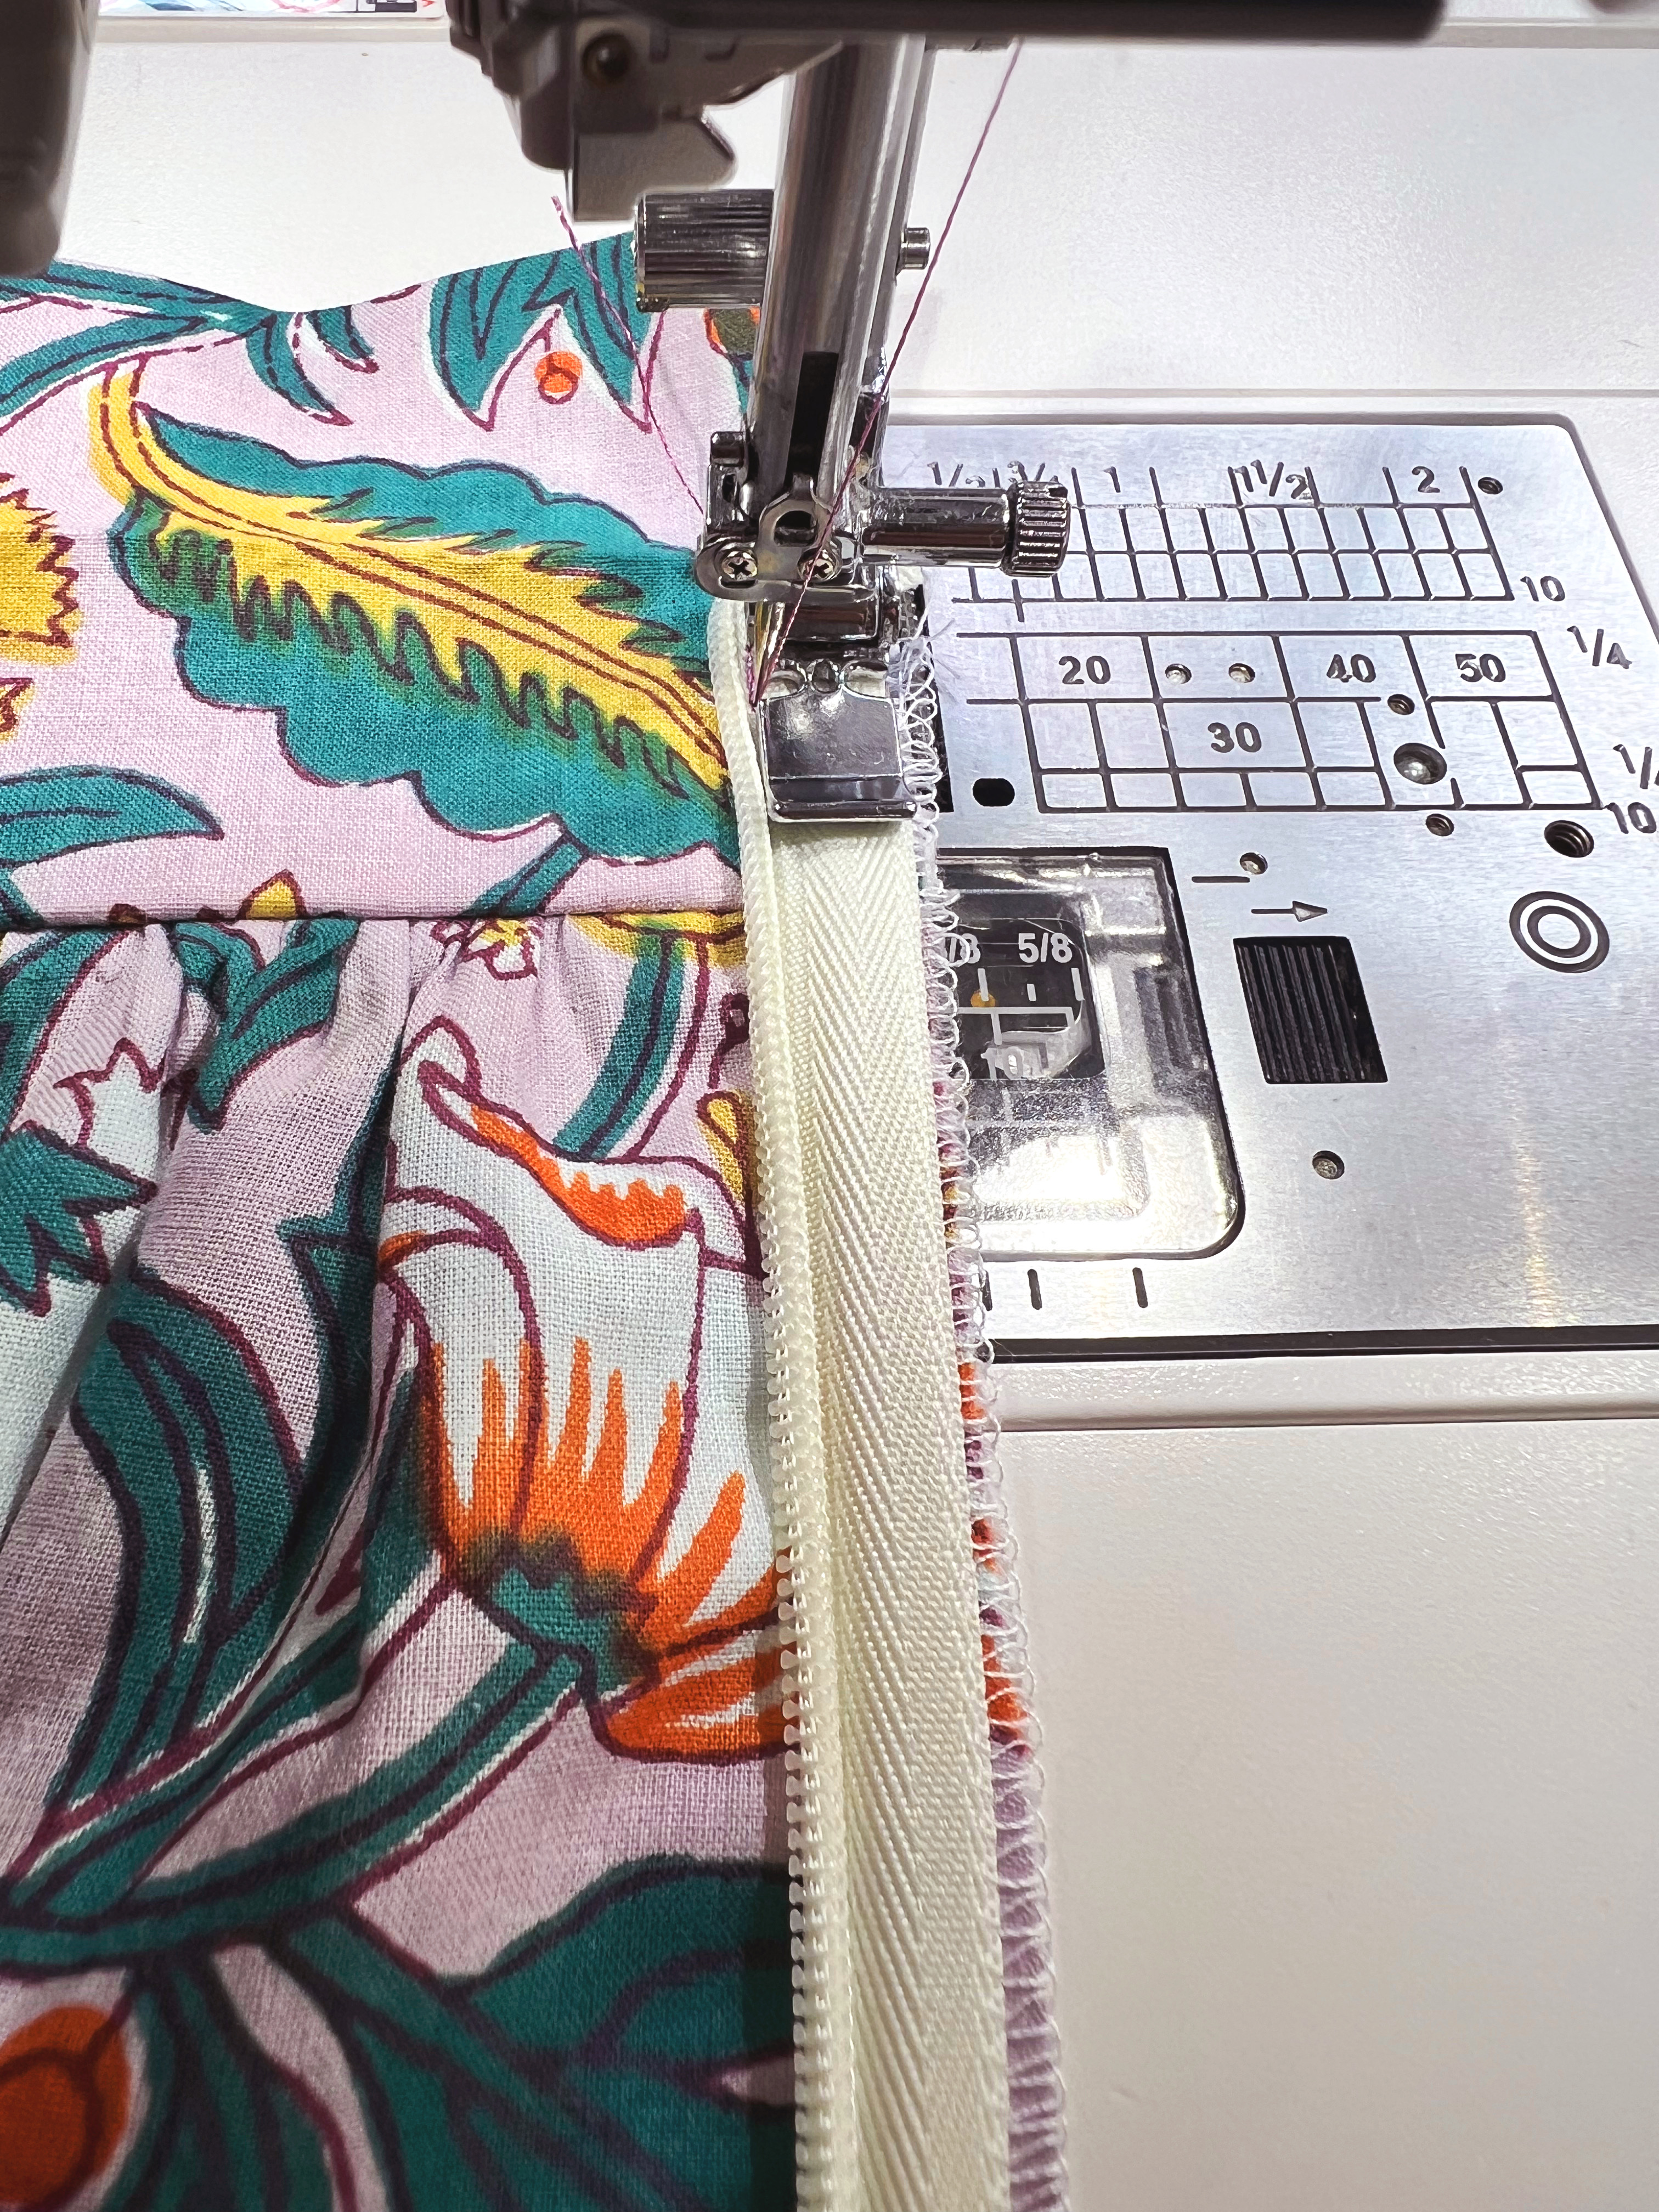
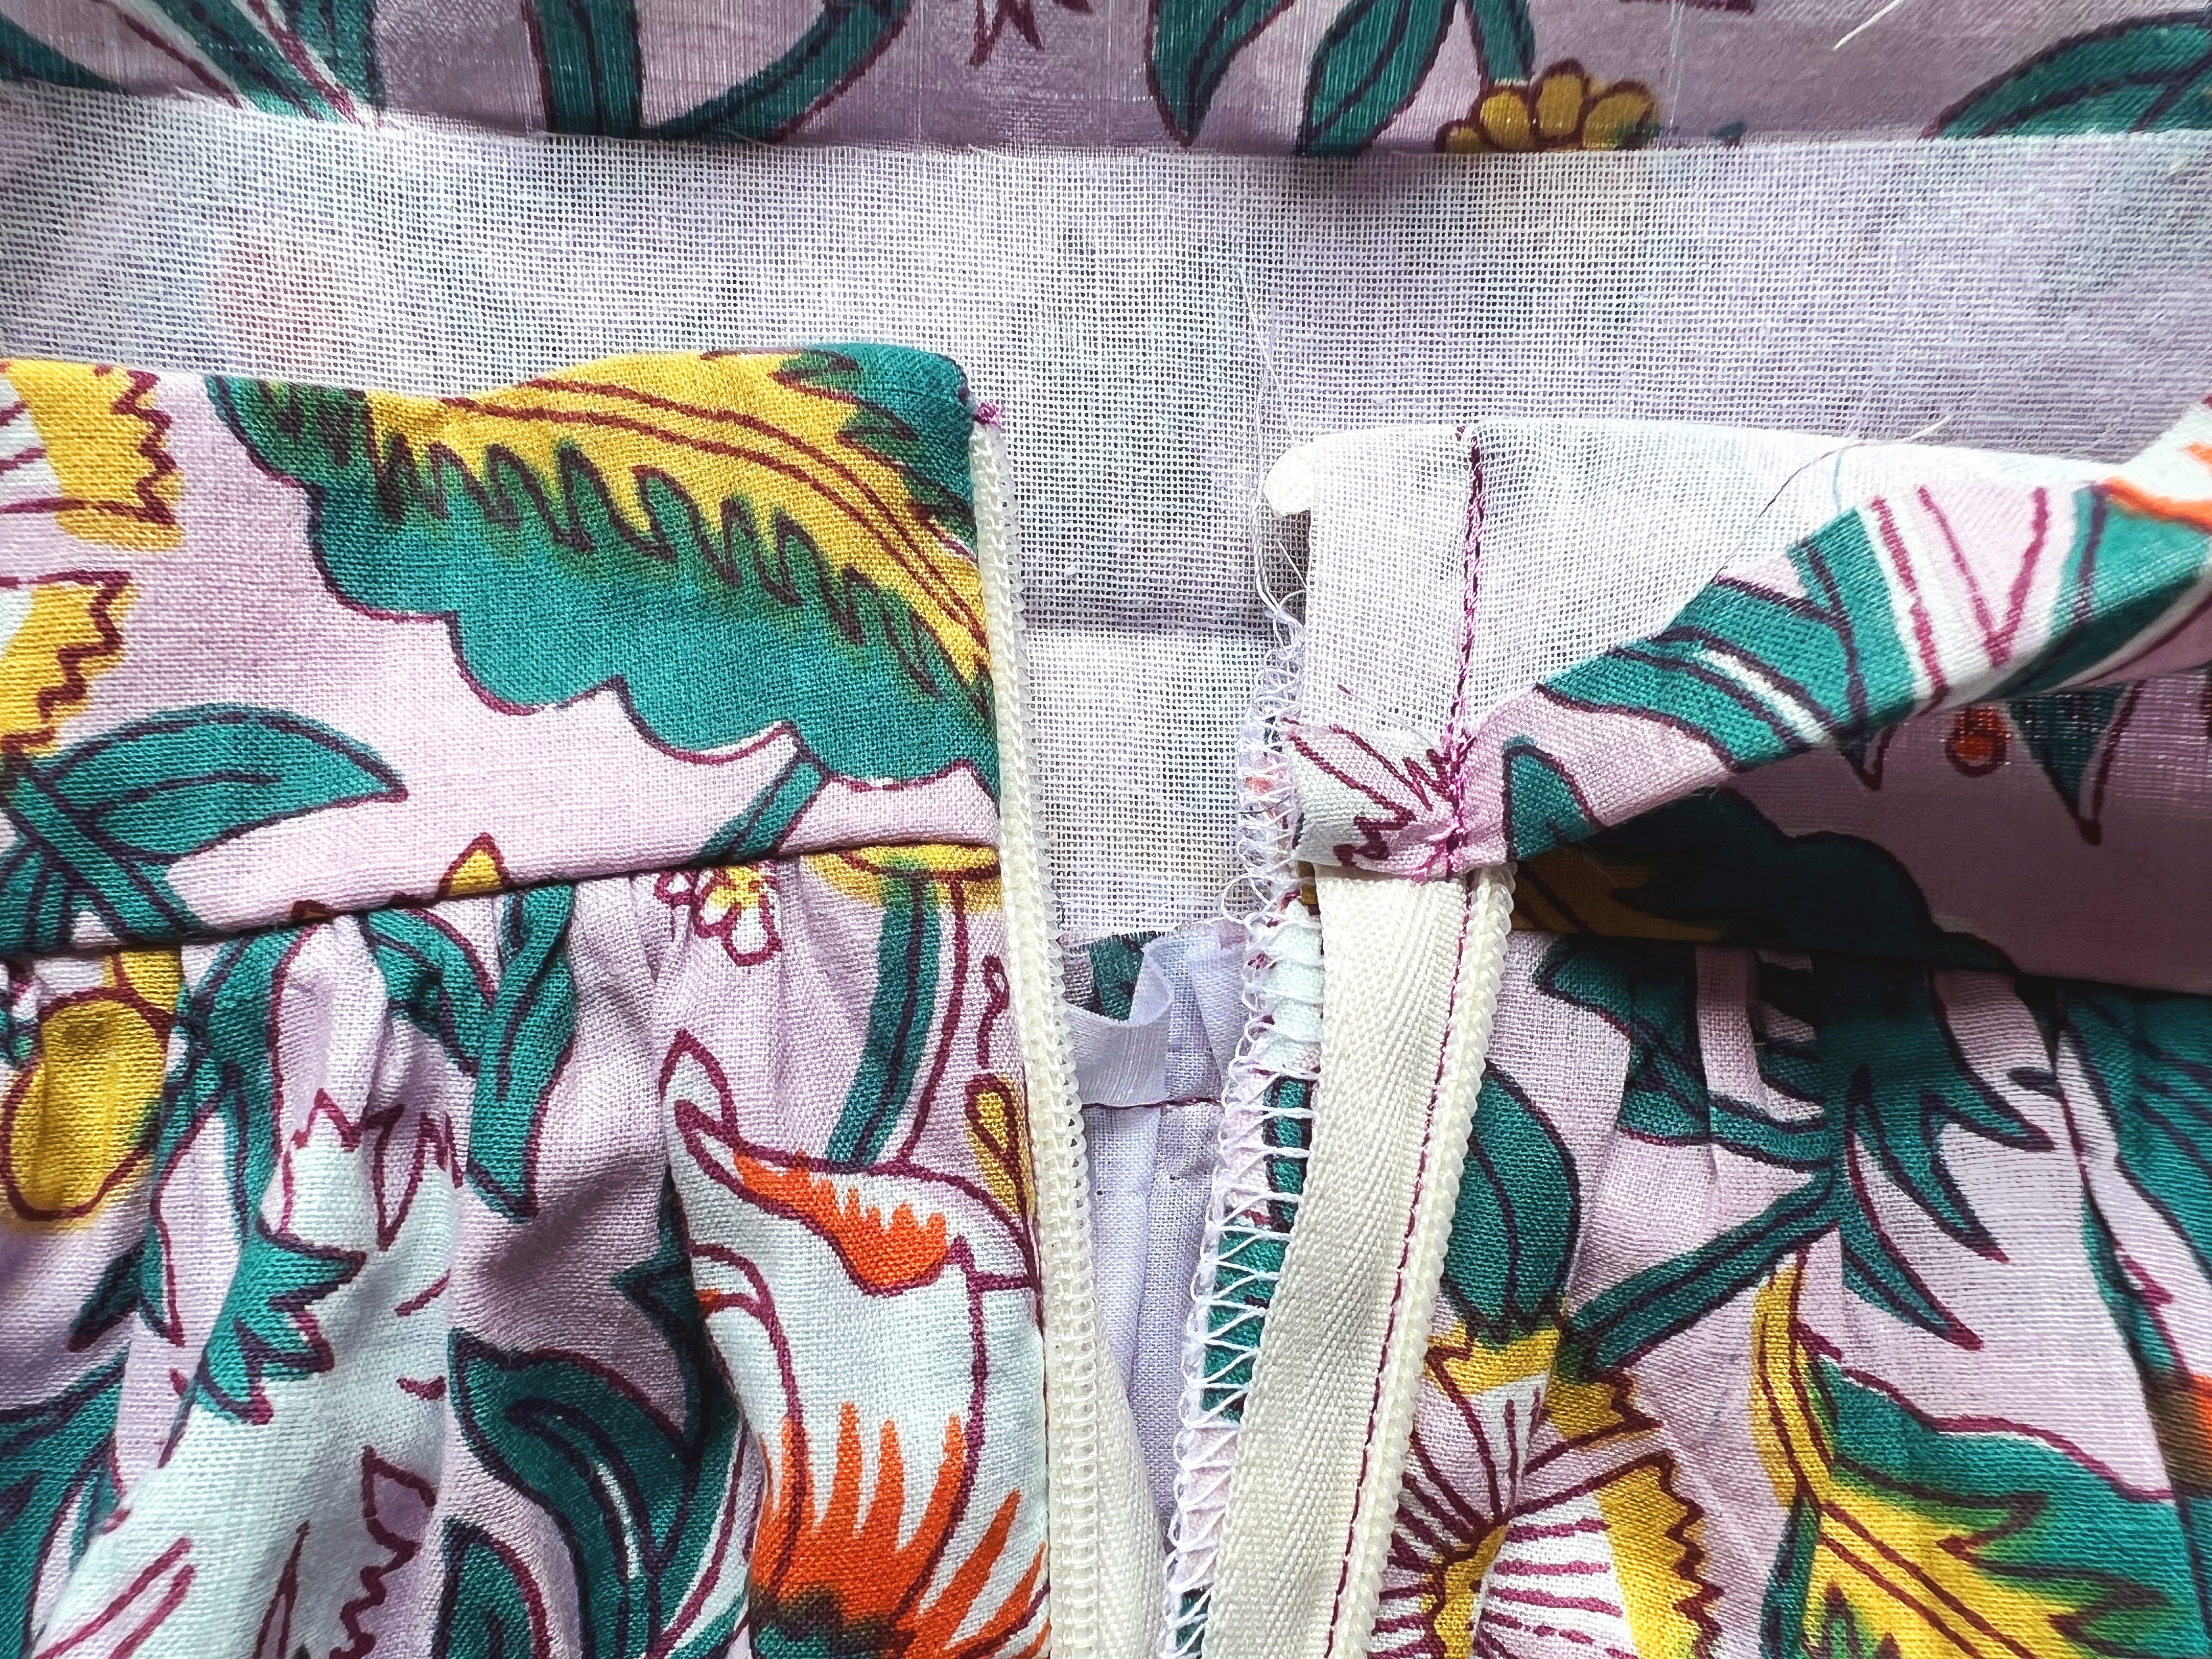
Attach zipper foot to machine. Align invisible zipper so that the top of zipper teeth is at the fold of the waistband. Stitch zipper to the left side.


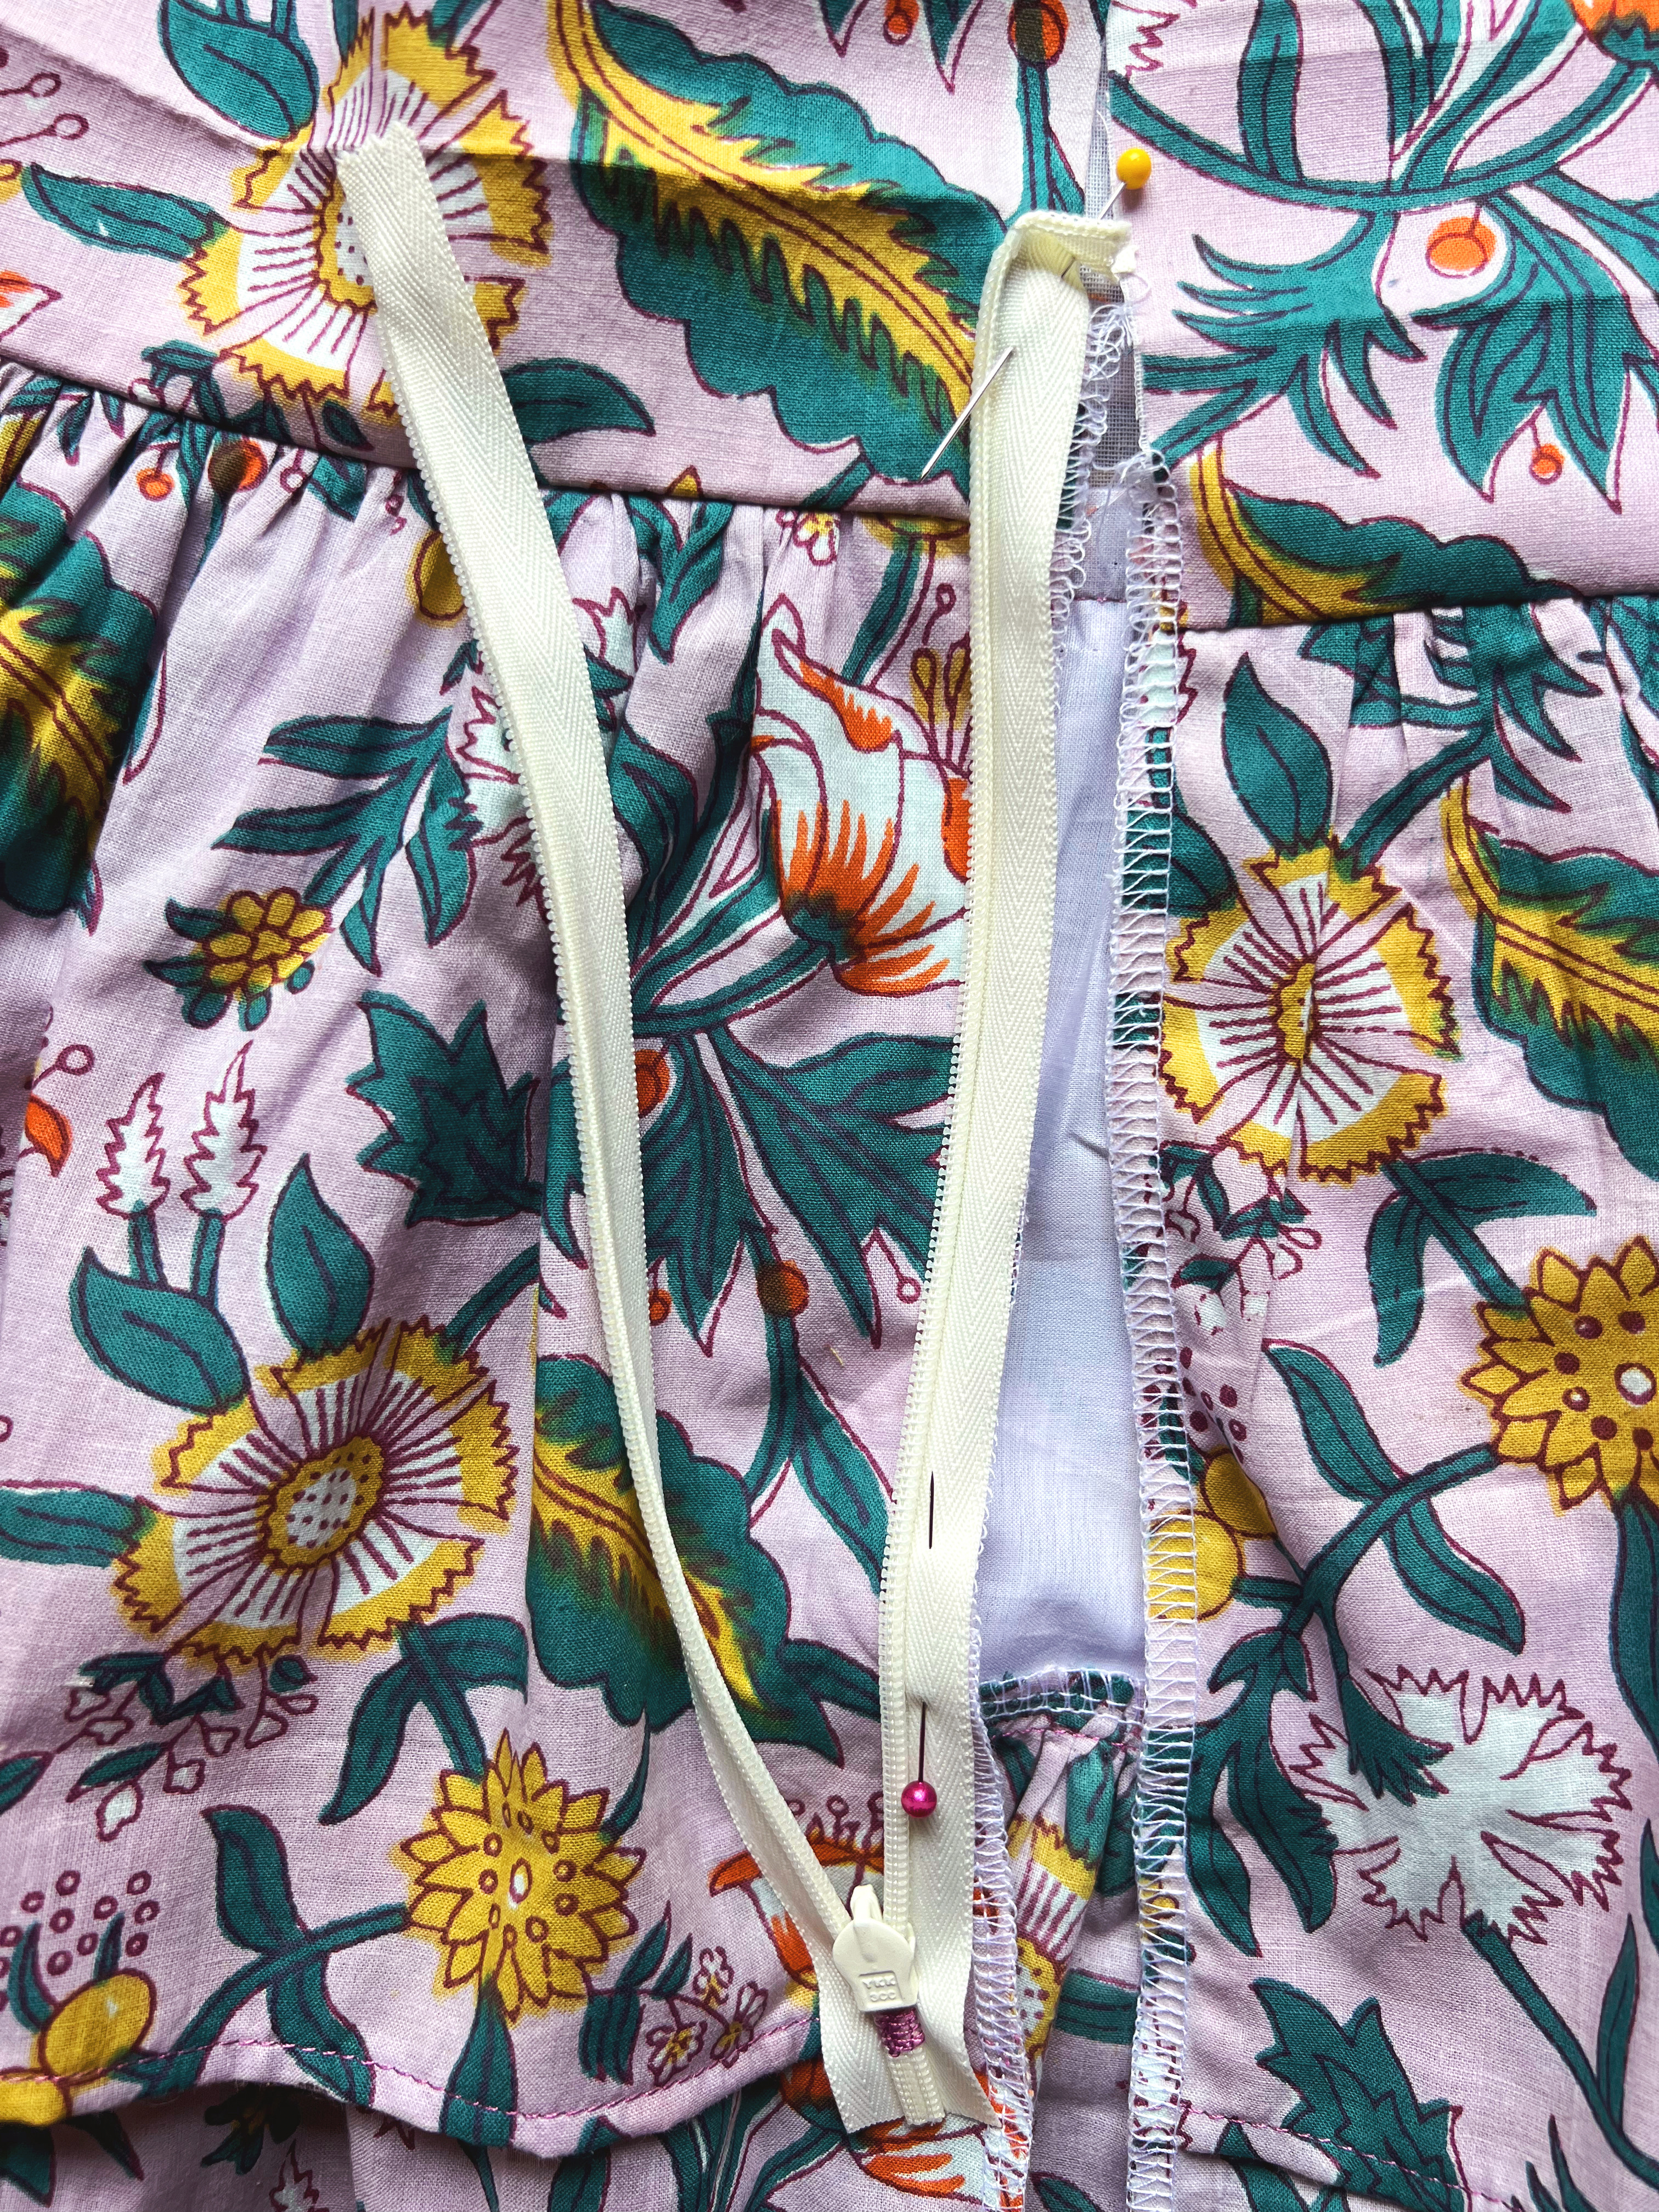
Pin at the top, bottom of waistband, and bottom of stitching in order to keep zipper aligned, then stitch right side of zipper.


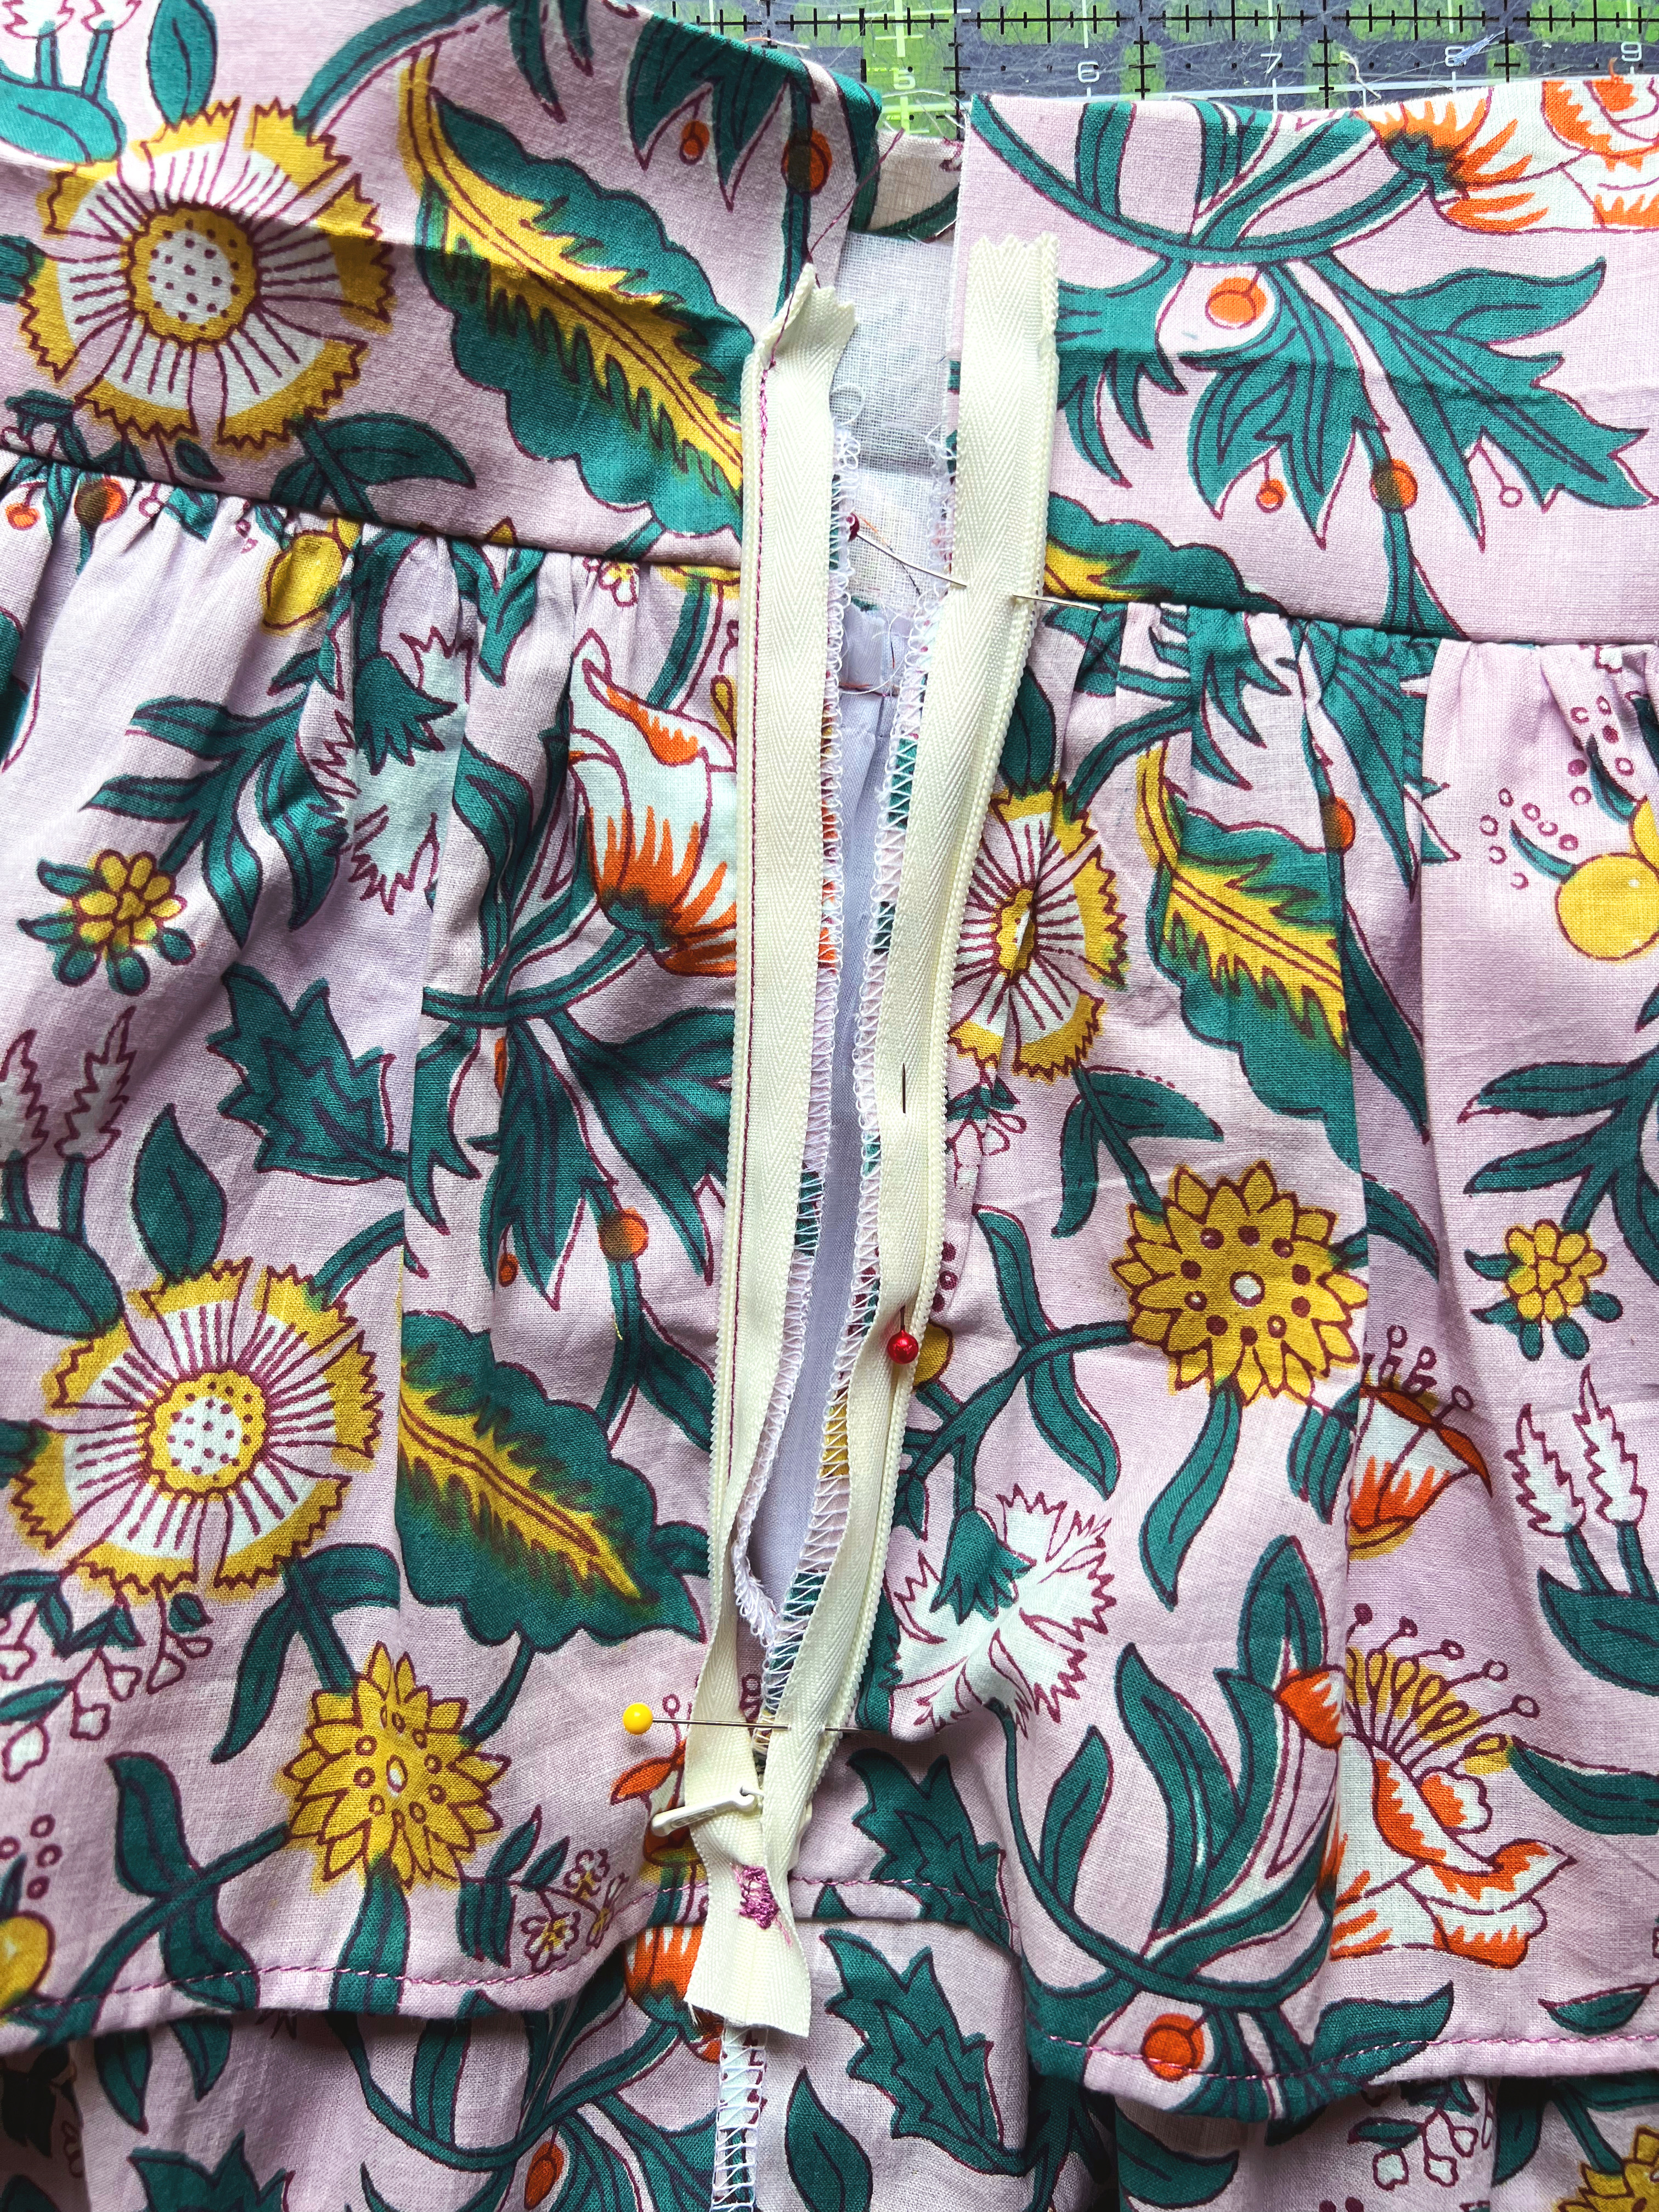
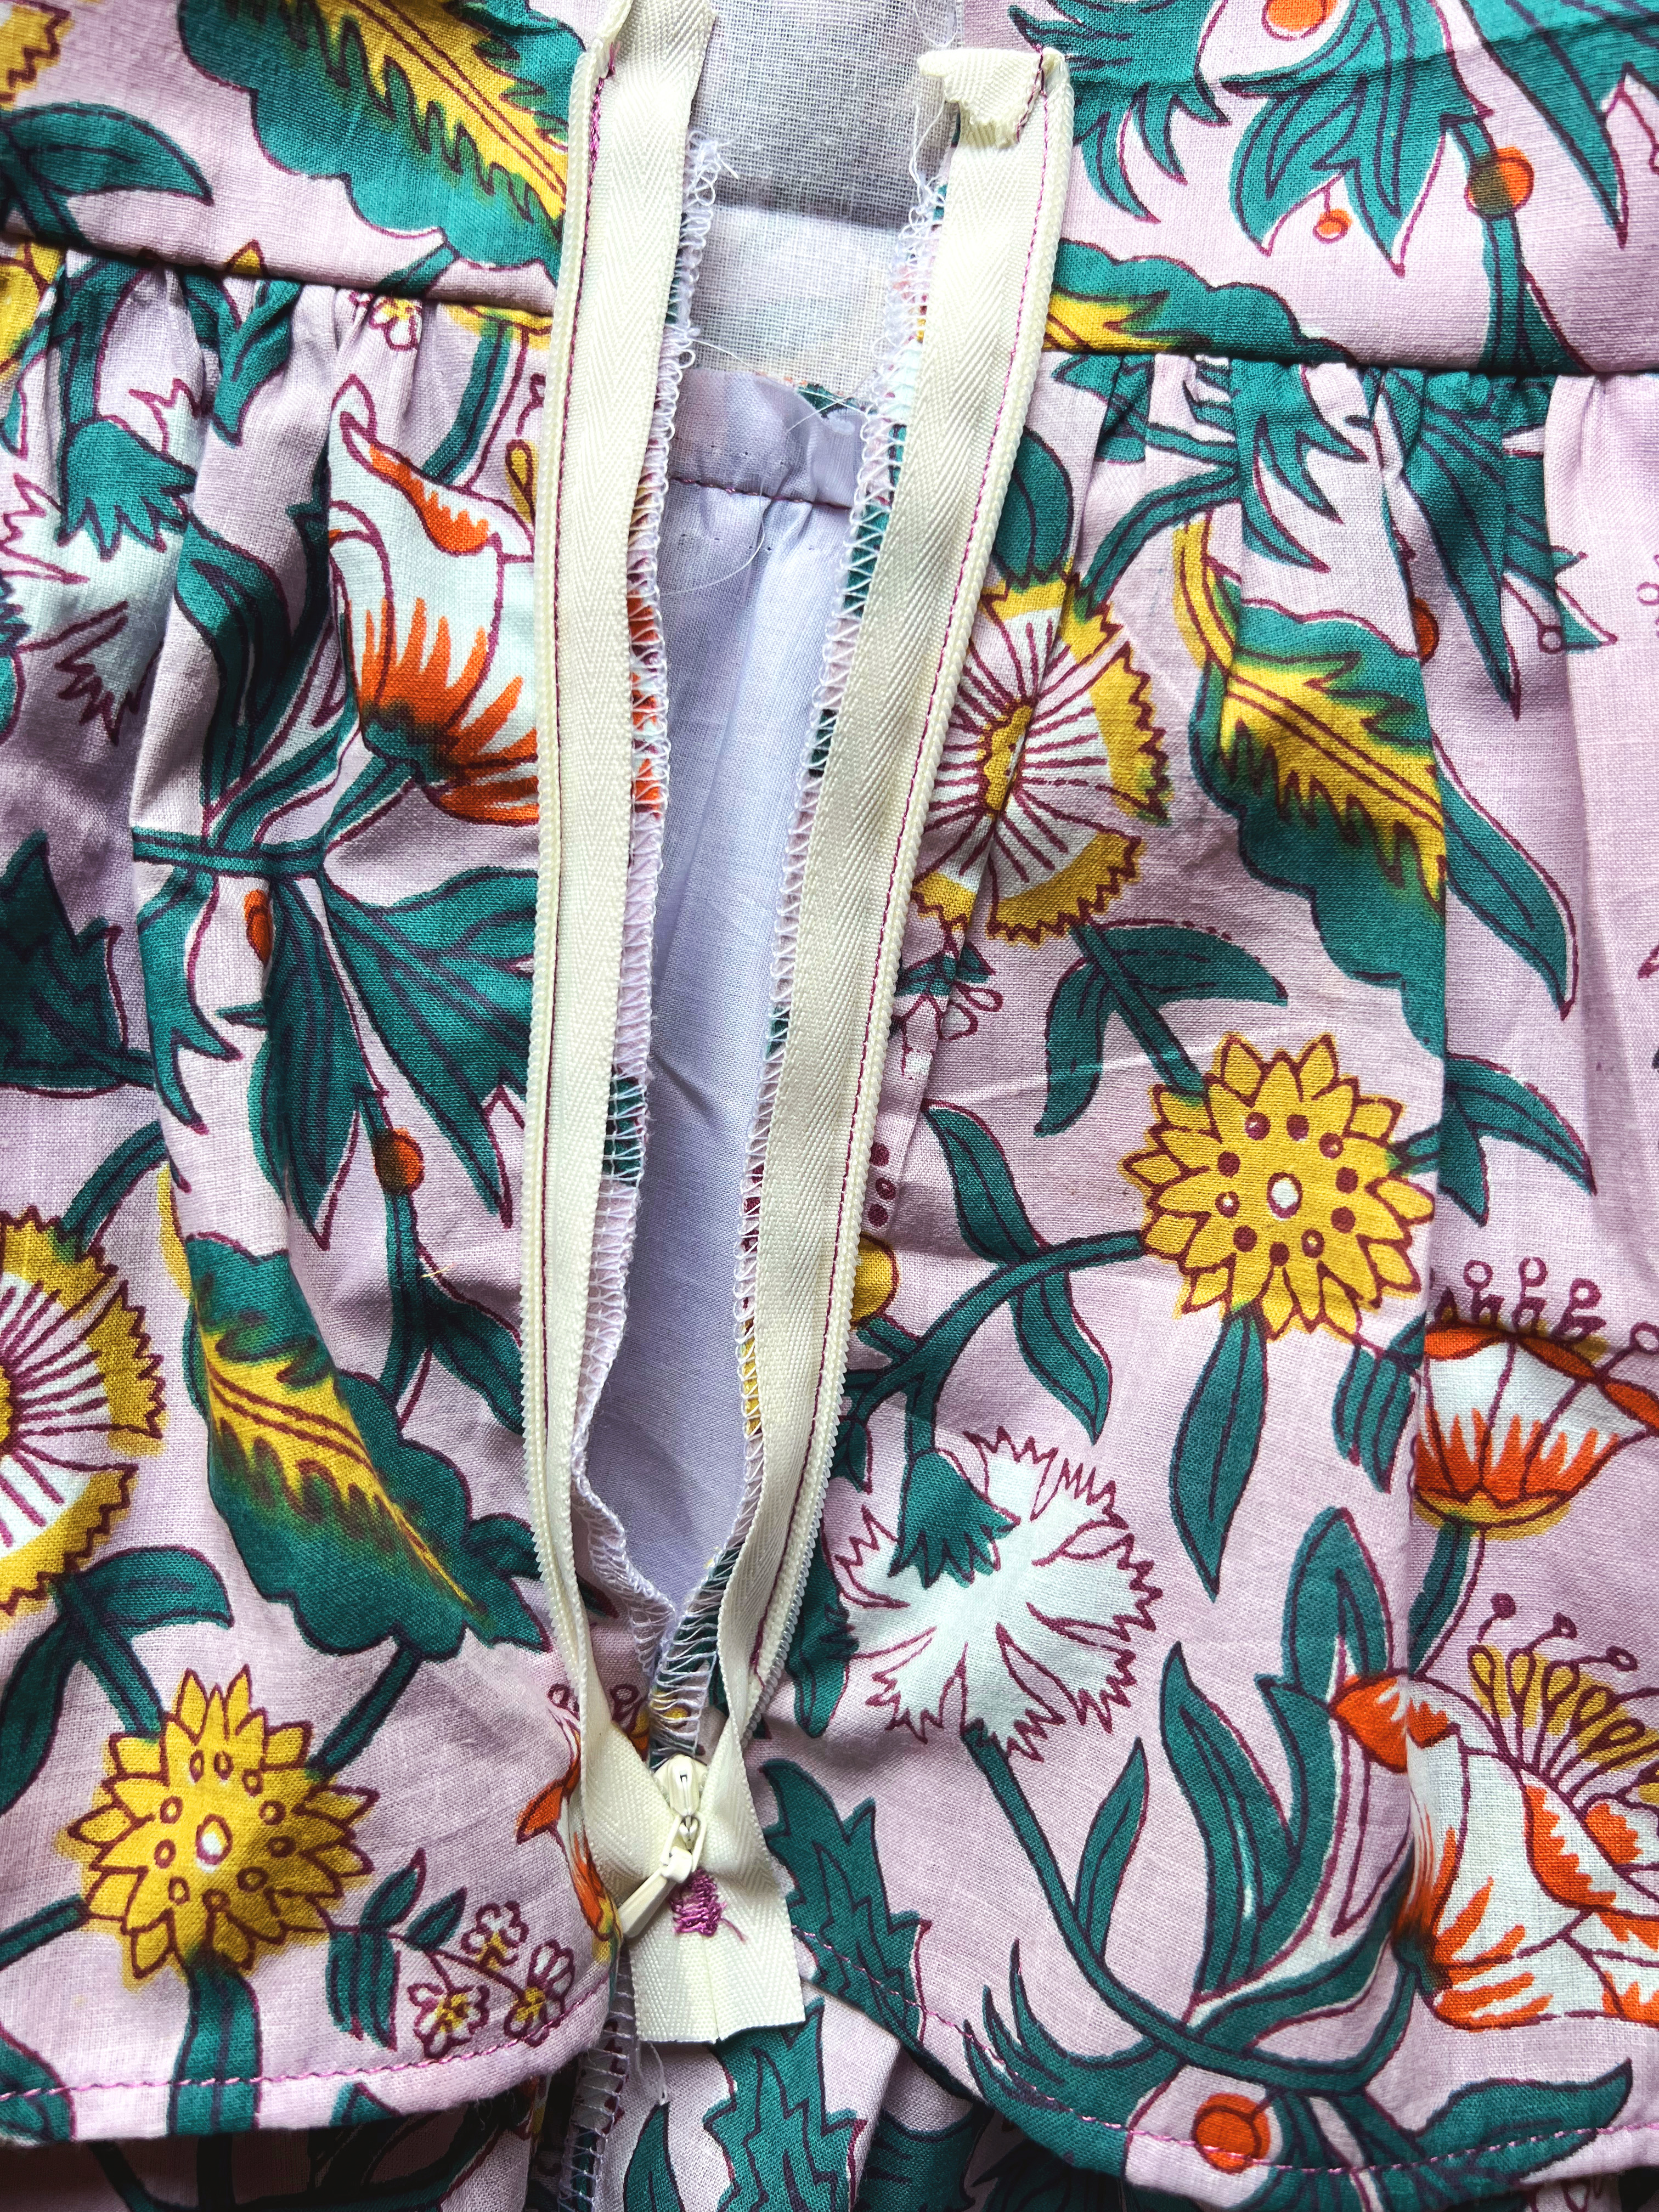
While zipper foot is still attached, finish sewing down the back of the skirt with a 3/8” seam allowance.


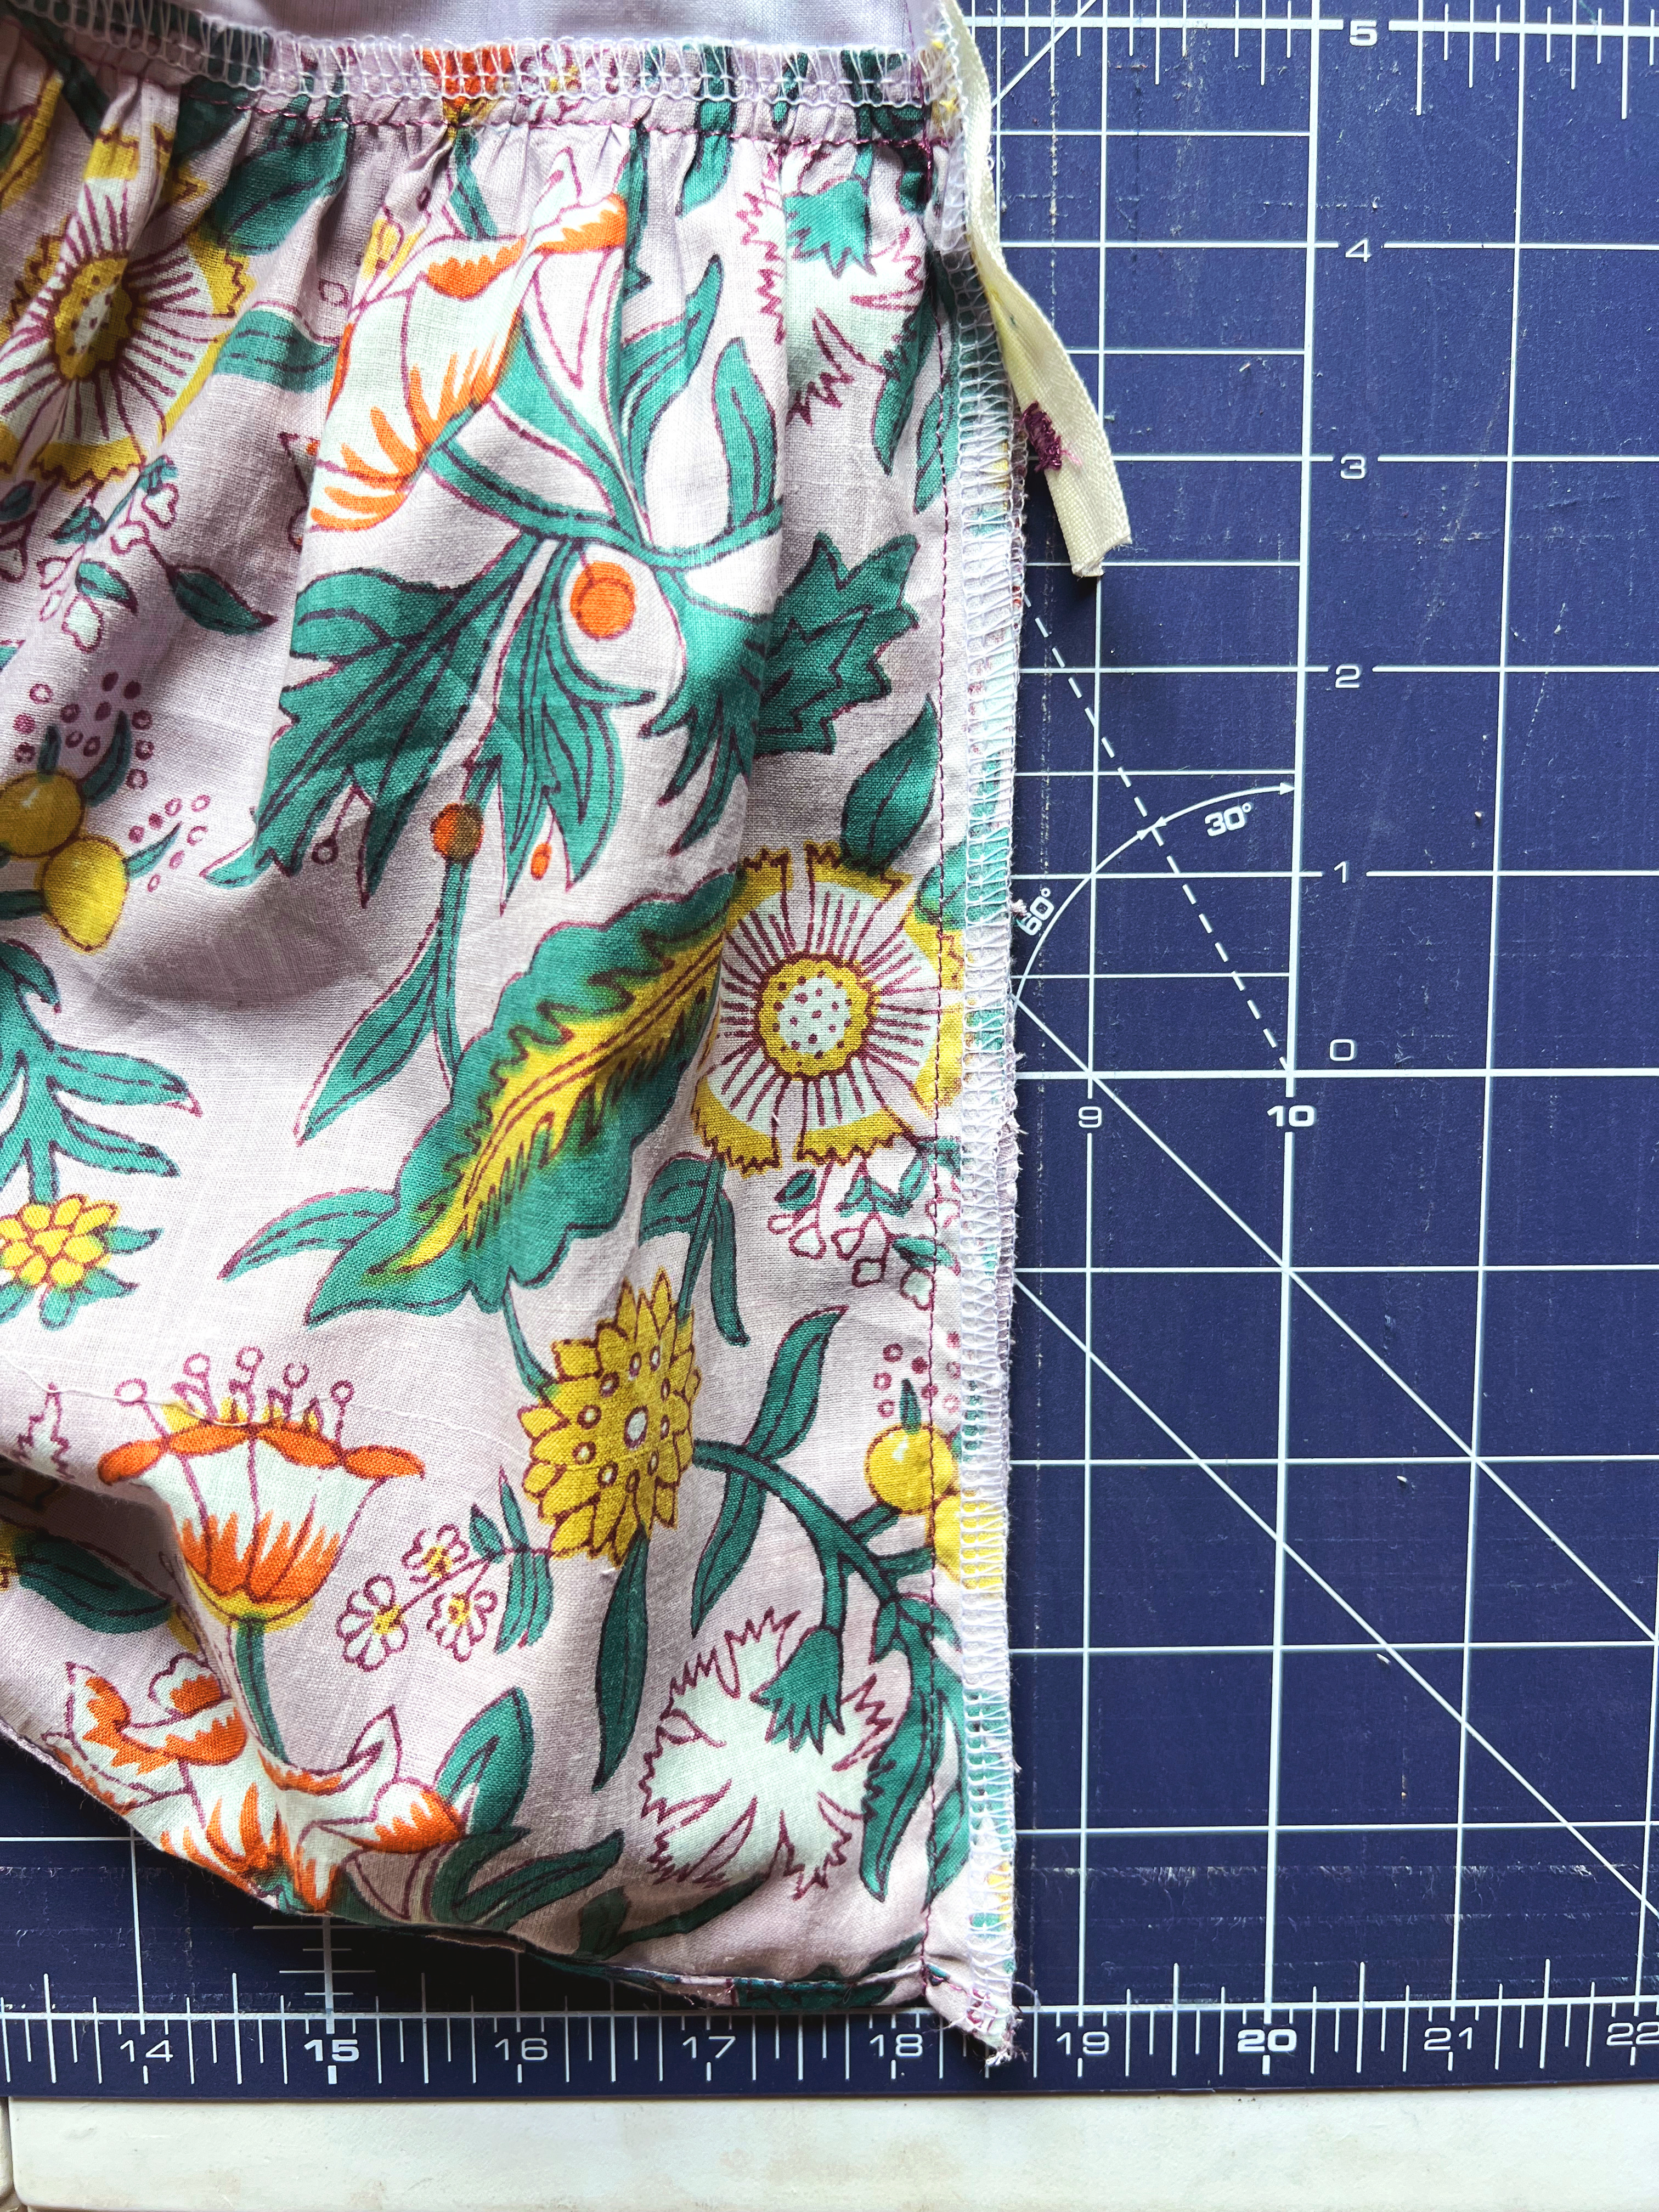
Press open back seam


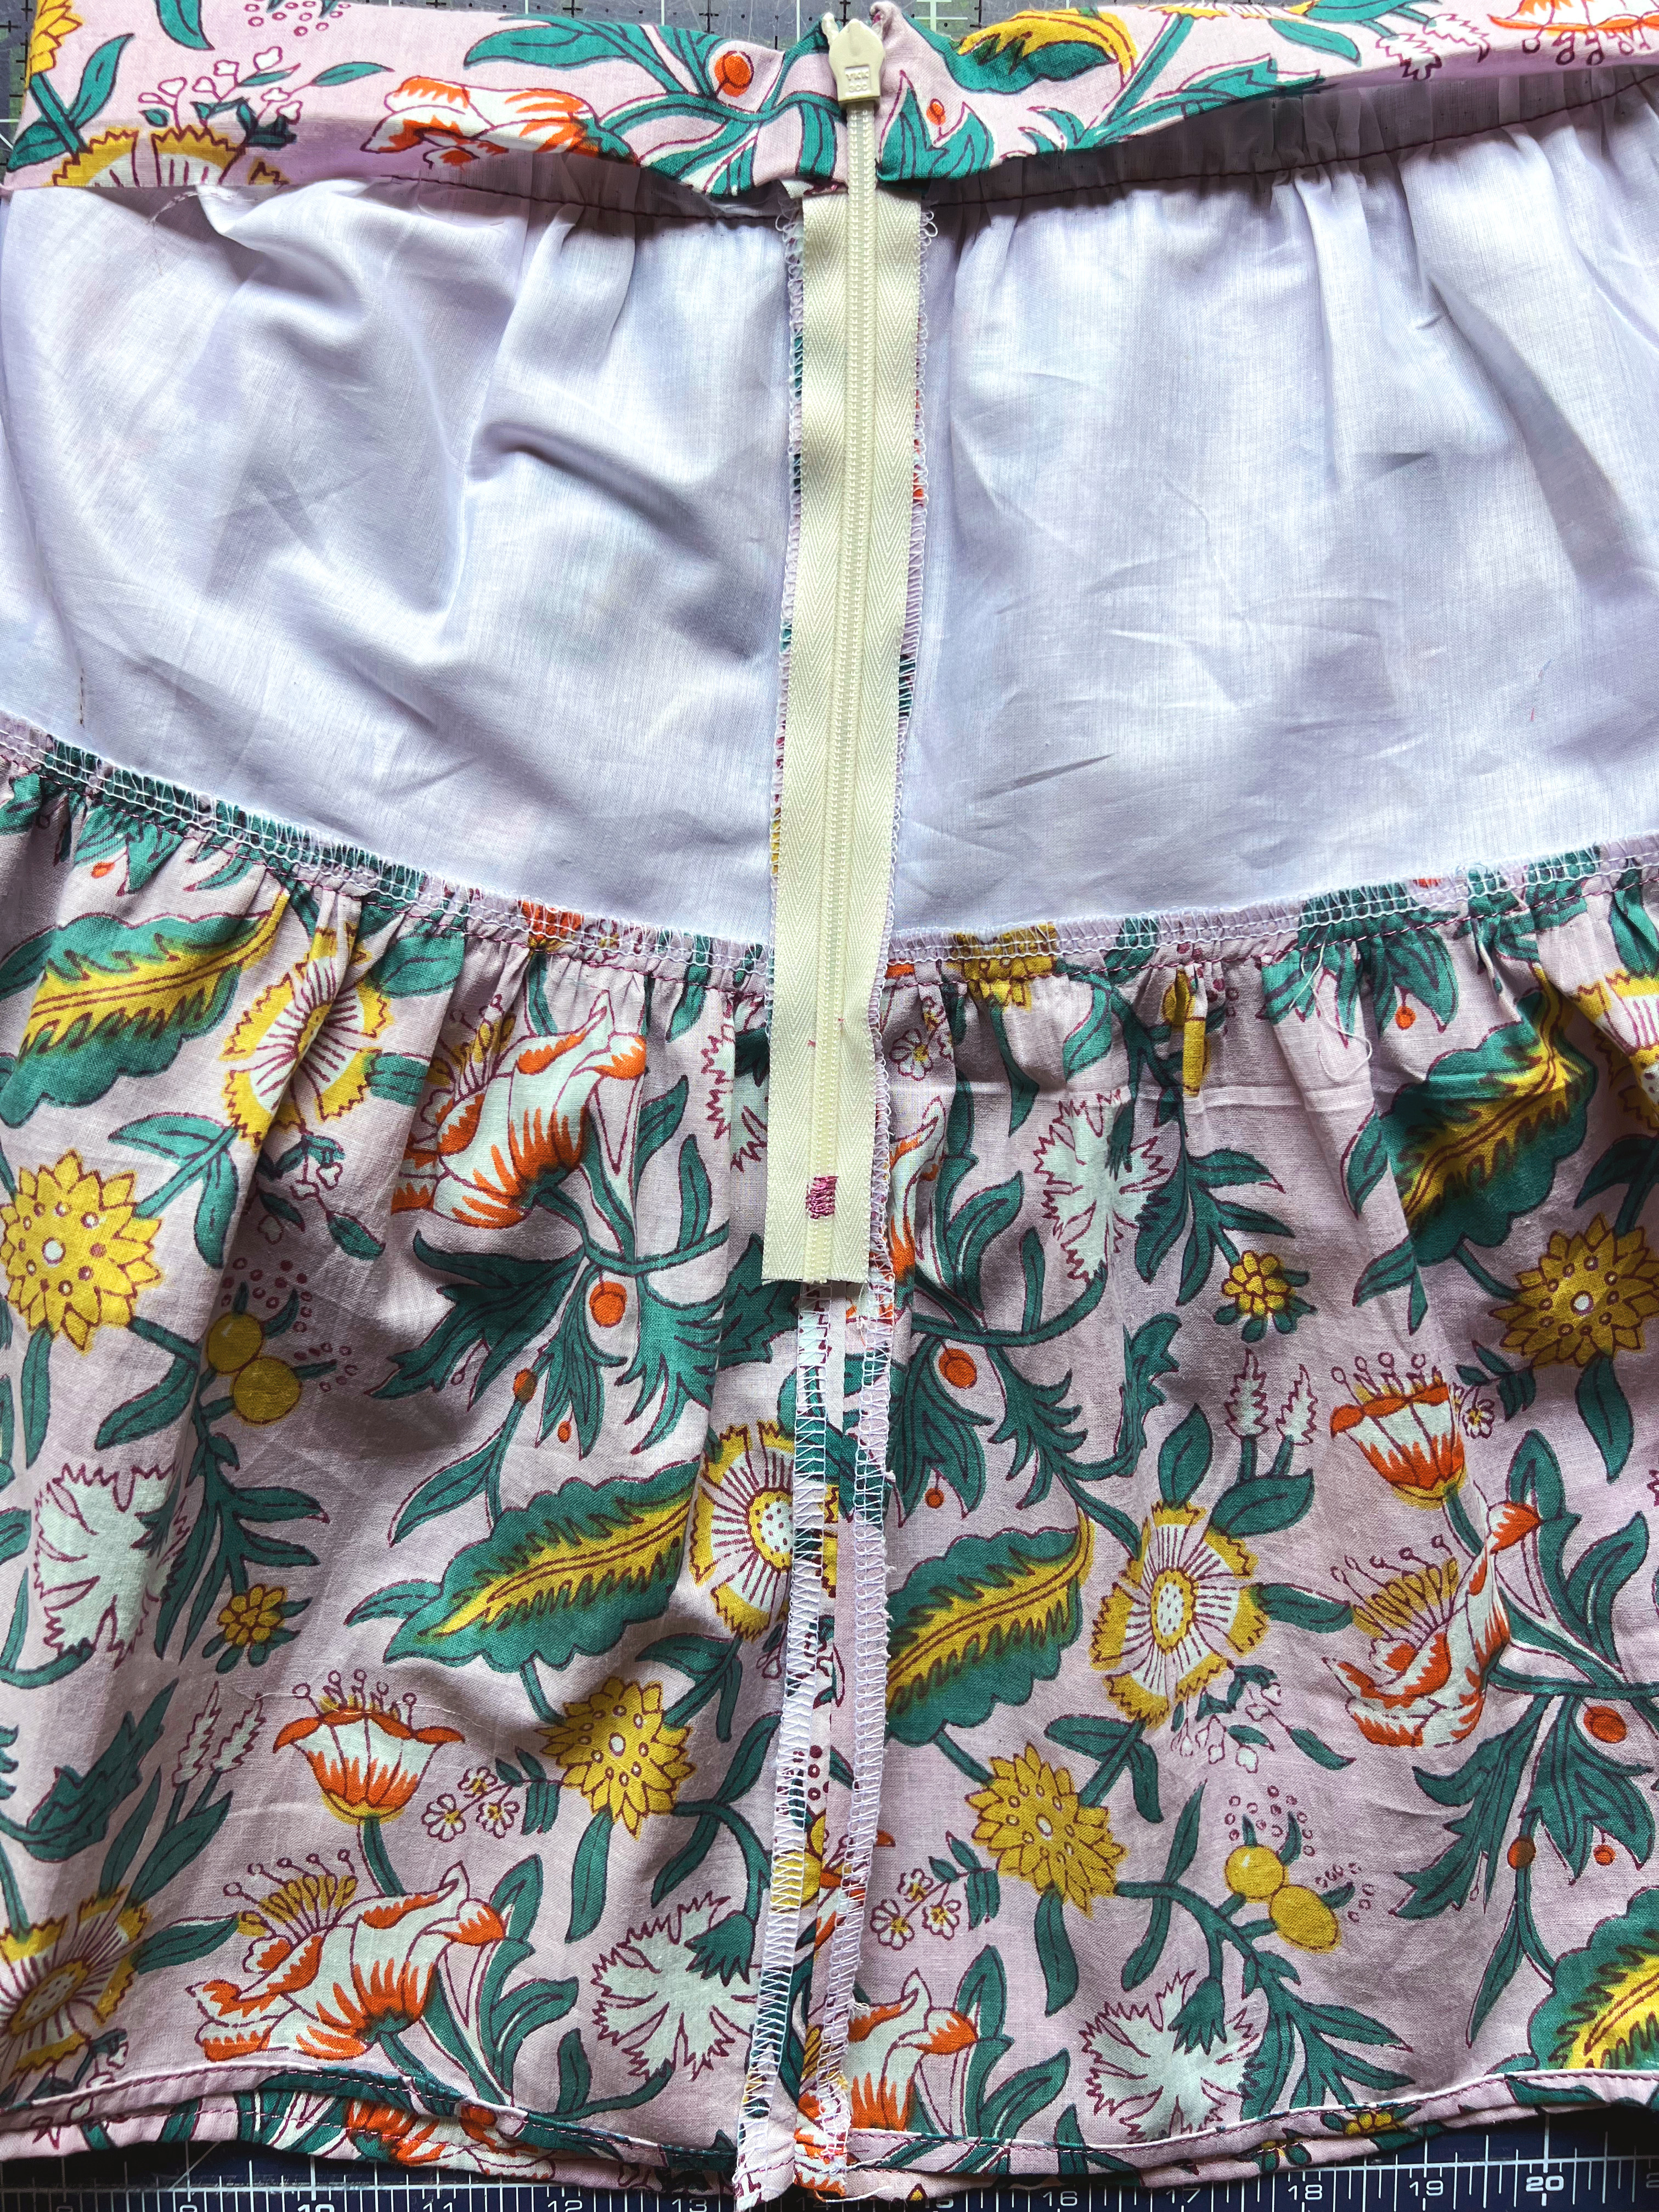
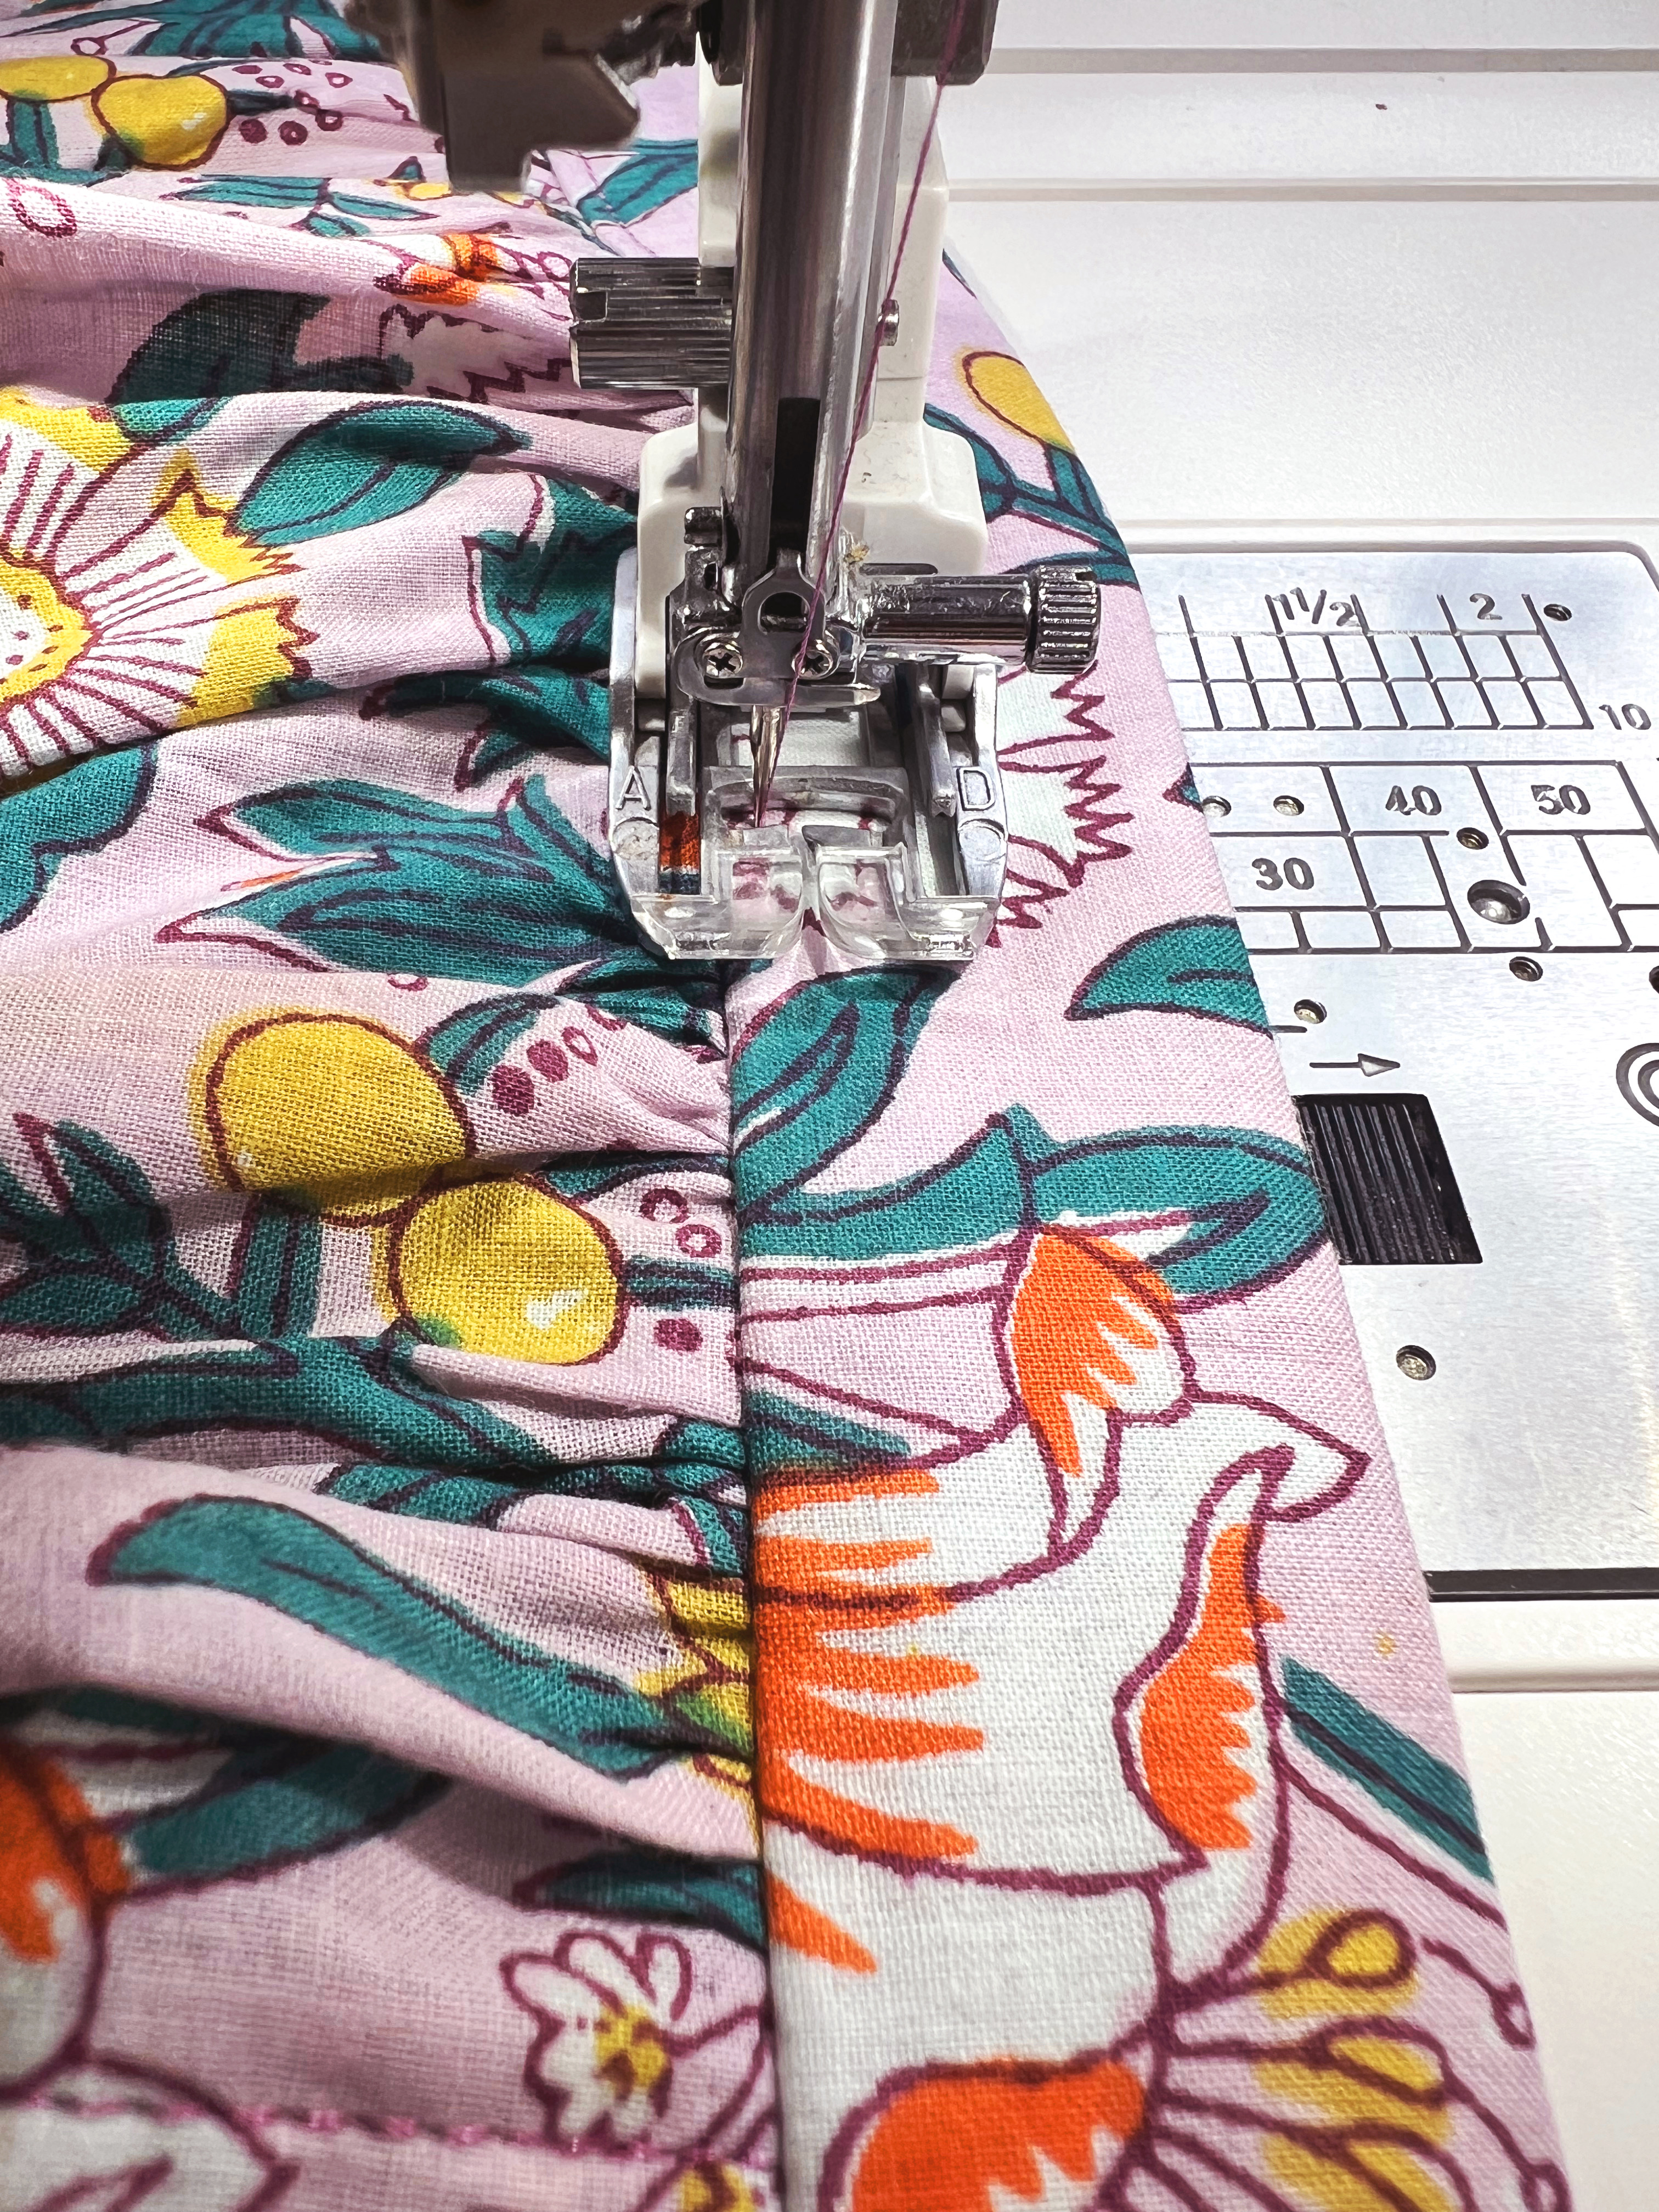
Attach walking foot or A foot to your machine. Fold waistband over zipper with the WRONG side showing, and sew close to the inside of the zipper teeth. Repeat on the other end.


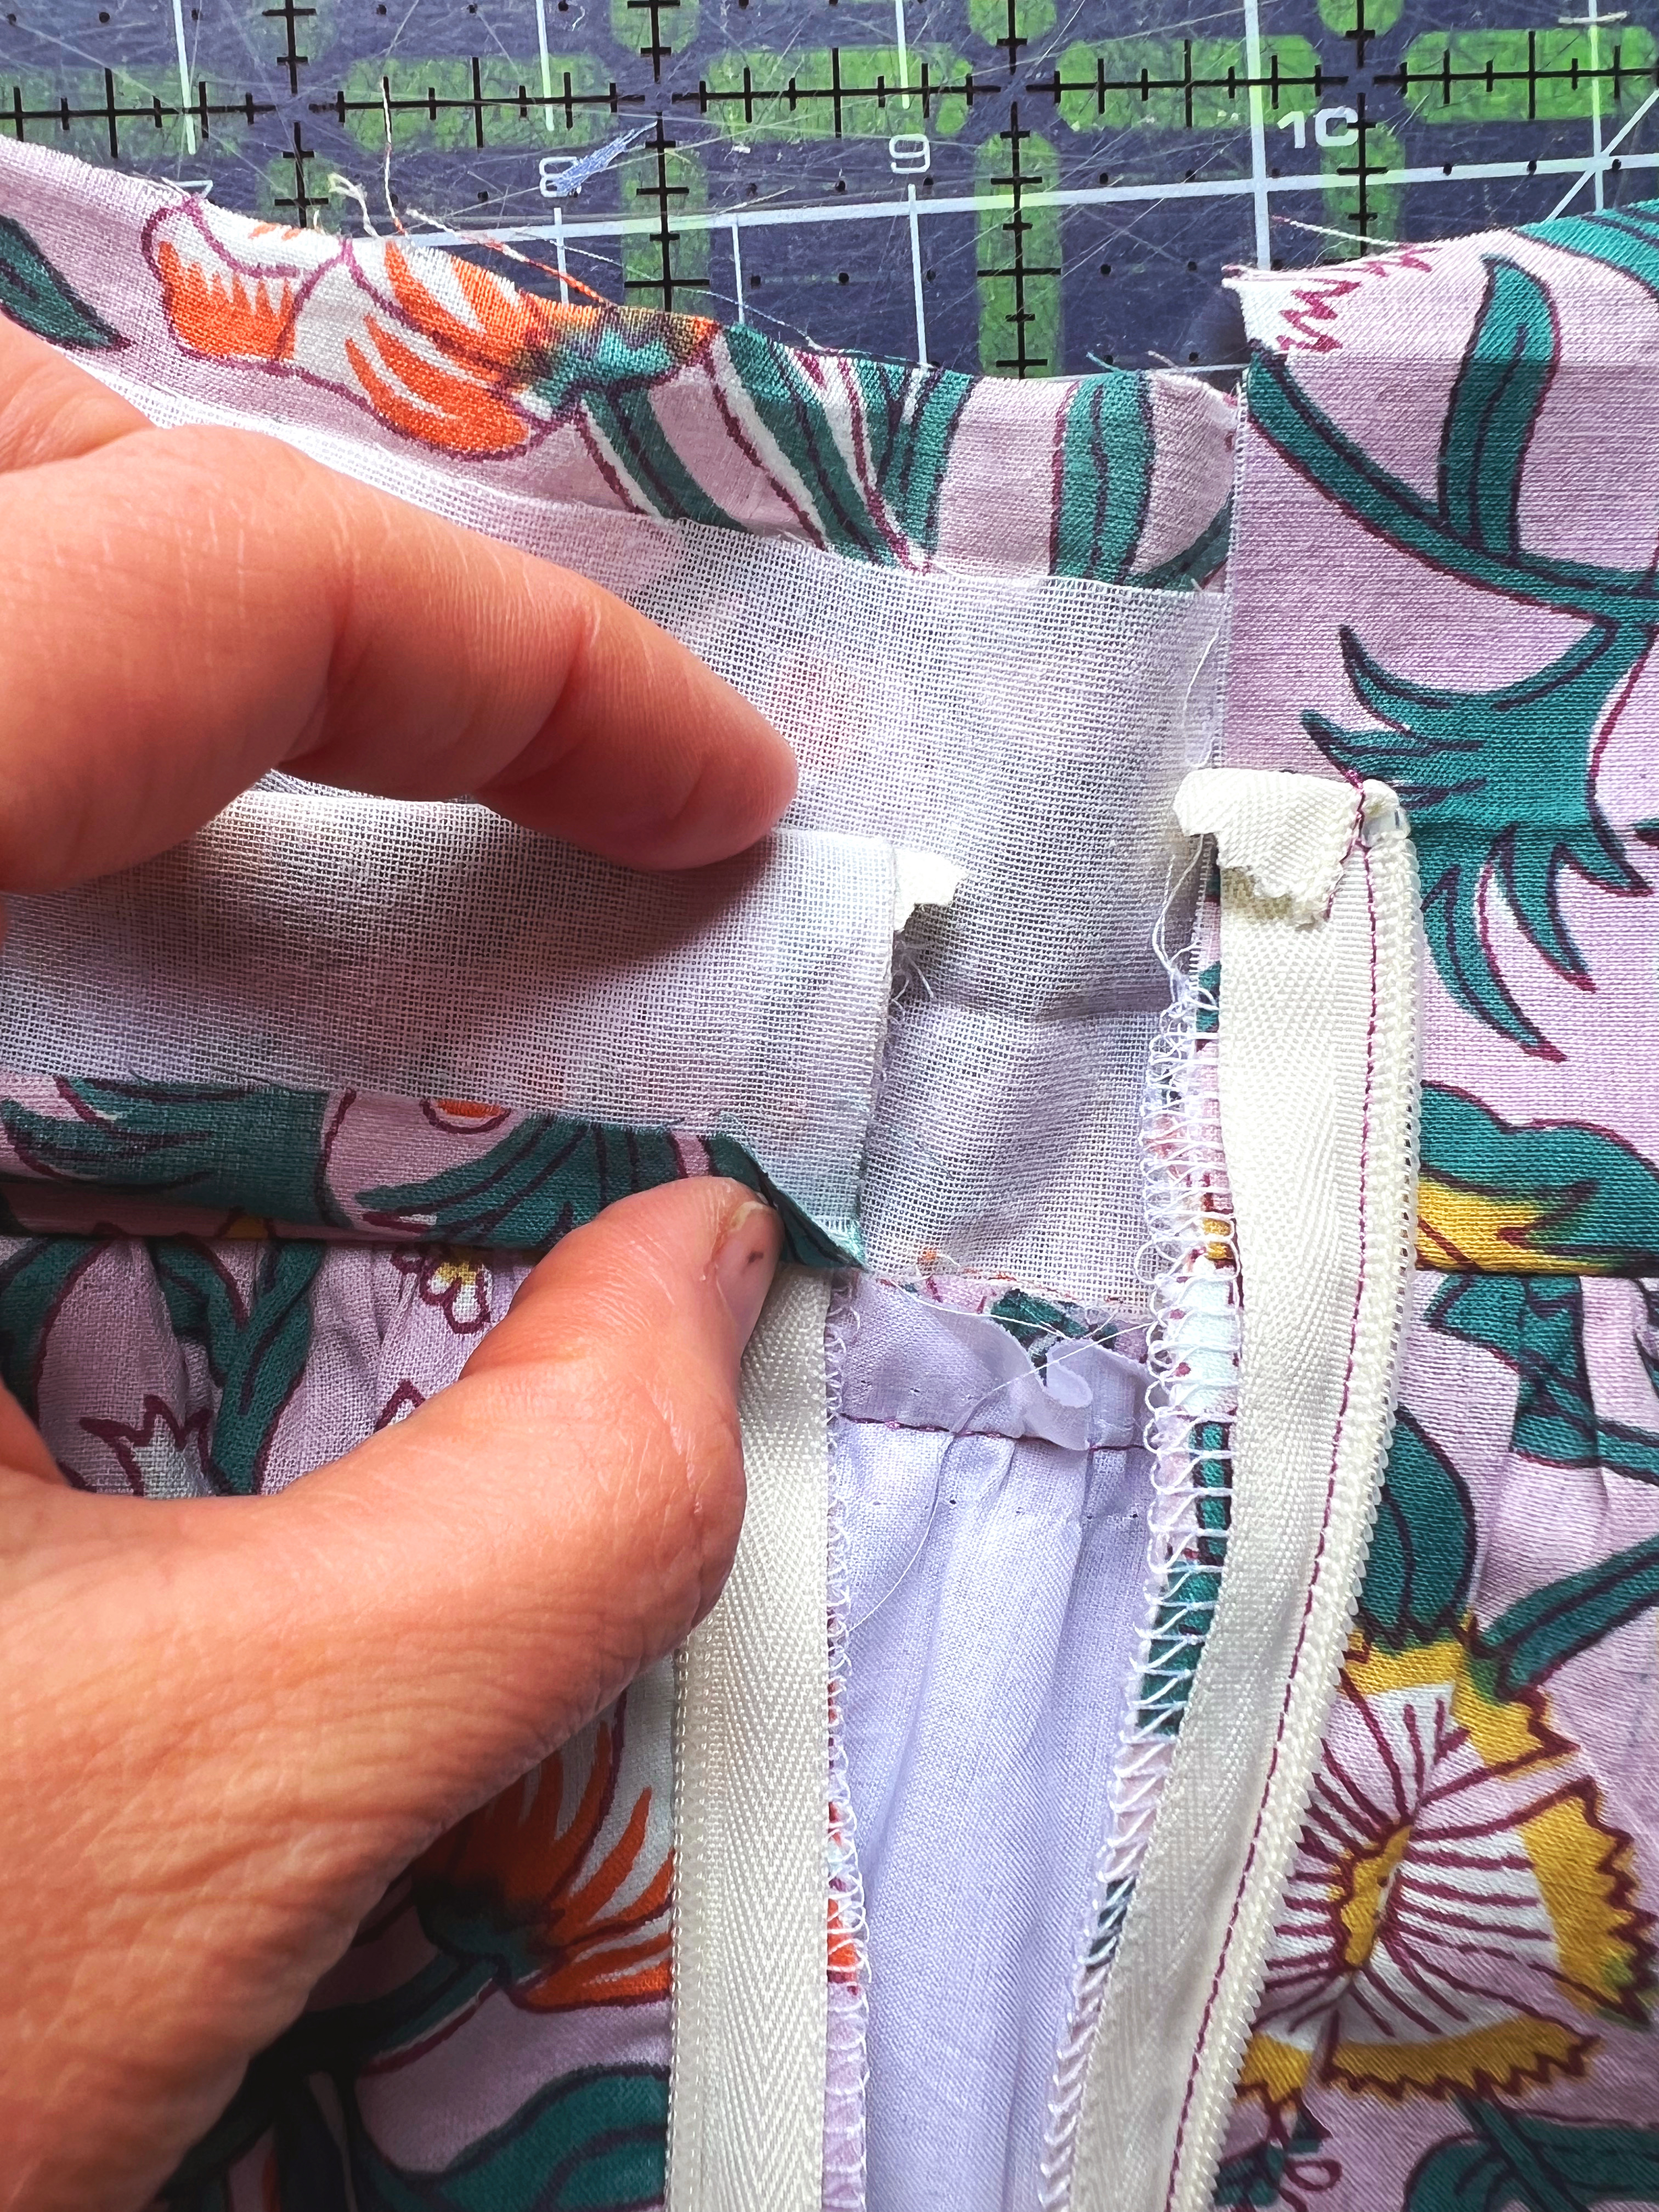
Fold waistband along the center crease, and press in place. Using a 1/8” seam allowance, sew around the outside of the waistband, catching the folded inside edge to finish the skirt. Backstitch at the beginning and end.


That’s it! You’ve made a completely adorable tiered ruffle skirt!


Everyone is Talking about Tiered Ruffle Skirt
Reviews


Tako
Beautiful
Wednesday, November 23, 2016

cpindzola
Around the Table Dresden Placemats
Saturday, December 17, 2016

I like the concept, but the directions are "sloppy." Nowhere in the supply list does it mention the felt or the batting (how much?). Also, I would never use a high loft batting in a placemat, or a table runner, as I think that it would be too unstable for a glass. The next time I make these, I will cut out the batting (I use flannel) and spray baste it to the wrong side of the Dresden plate before I put the Dresden plate on the felt to cut out. I have not yet washed the finished placemat, and am hoping that the single layer of felt does not curl up, or become distorted after washing/drying.
Txmaid
Fun Great Gift!
Tuesday, February 21, 2017

MargieARK
Teatime Quilted Tablecloth
Friday, February 24, 2017

I made this today but your cutting directions need to be changed. You only need 4 of color 1 and color 3 4.5 squares for the triangles. Also the inner border, you only need 2 cuts as WOF is long enough to cut each in half to fit the sides.
MickelSews
Great Machine
Wednesday, August 30, 2017

I've had this machine for only a week now. I bought it used from a lady who makes her own clothes, but she no longer needed the machine. During the purchase, she noted that she is almost sad that it's better to give it away because of how well the machine performed. (I also bought it along side a computerized machine of another brand.} She demoed the machine for us, showing it worked and gave us everything (including the box it came in!) She took amazing care of this machine. I have used it a few times now, and the directions for threading were easy to follow (albeit my hands are quite large so the lower looper was a pain, but that is no fault to the machine or brand.) And I recommend this machine to anyone who wants to learn to serge and wants a machine that can grow with them. I will happily use this machine time and time again.
rvstan
S9 Review
Sunday, February 25, 2018

I love, love, love my S9! It's sews and embroiders beautifully and it's simplicity of use amazes me. I would recommend this machine for both a beginner and an experienced seamstress. If I would ask anything of Janome it would be to upgrade the programming to run a larger hoop size. I understand that it can't get much wider but there is most definitely room for it to go longer. That is the only limitation of this machine.
pjmnana
PJMNana
Monday, February 26, 2018

I purchased a Memorycraft 15000 a few years ago and it was the best purchase I ever made! This machine can do just about anything you would would ever want! I love the capability of using the Acuedit app to set up my embroidery pattern on my Ipad and then download it to the machine! I love how my embroidery looks upon completion and I love all the good lighting it has to light up your workspace. That way you don’t need to worry about where to set up your machine. It also has plenty of room to do machine embroidery on any size quilts! There are many decorative stitches from which to choose that are outstanding! It’s hard to choose which one to use! There are so many great features it is hard to decide what I love the most. If you want to buy only one machine to last a lifetime, I would recommend this one!
KLWash
S9 Review
Sunday, February 24, 2019

The S9 is amazing. I learned to sew by hand when I was just 5 and in my grandmothers way as she was quilting. I took seeing classes in high school until they would no longer let me sign up. The S9 makes me appreciate my current skills as well as motivate me to want to learn more. This machine is awesome.
SewSueMe2002
Horizon Memory Craft 15000
Thursday, November 19, 2020

My Janome Horizon Memory Craft 15000 is fantastic! I love, love, love this machine! When I came across the Eye for and Eye embroidery design today, I wanted to make it. However, the embroidery file is missing. Nothing downloads when I select the download button. Please help!
Jillfmischo
Treat Bag fun!
Monday, August 16, 2021

I made the Halloween treat bag for my new granddaughter and I’m sure it will last for years. No embroidery machine so I appliquéd the lettering. Need a little more skirt fabric for a better gathered look, and I used thin double-bias tape for the skirt hem, over edge stitch on skirt sides. I’m pleased with my results!
elenaz
Very helpful tutorial
Wednesday, October 25, 2023

I want to say thank you for teaching me this method of applique. I was able to do it with a small letters. This method is the best so far from all of those I've seen and tried.
plonkar
So useful
Thursday, November 30, 2023

I'd like to express my gratitude for teaching me this appliqué method. I successfully applied it with small letters, and, so far, it's the most effective among all the methods I've seen and tried.

DEALERS
The TWO Closest Dealers to you are:
705 Interchange Blvd , Newark DE, 19711
302-533-5215
http://www.bluehenquiltshop.com/
1716 SOUTH GOVERNERS AVENUE , DOVER DE, 19904
Find Additional Dealers