Projects

Candy Cane Pillow Using the Couching Foot

Created By:

Emily Steffen

Skill Level: Advanced

OK! If you’ve been around lately, you know that I am singing the praises of my most A recent accessory for my Janome sewing machine is the free-motion couching foot. 

I *KNEW* I wanted to make some new holiday pillows, and I also knew that I wanted to make these soft and plush and cuddly - sooooooooo enter in some chenille yarn to make the yummiest looking candy cane pillows for your holiday home decor! :) WEEEEE!

Fabric and Notions Required

Yarn in your fave candy cane colors

Coordinating thread

Your fave Janome sewing machine and Janome free motion couching foot

1/4 yard of a “heftier” fabric - I used some white thinner canvas material

Fabric marker or pencil

Scissors

Claw clips or straight sewing pins

A bag of poly-fil or your fave stuffing

**Just a note about your fabric - I am using a thinner canvas material, as noted above. This exact fabric isn’t necessary, but you will want to choose something that has enough thickness that can withstand the “weight” of the yarn + thread as it gets sewn to the fabric. I have found that regular cotton fabric isn’t heavy enough to support the weight!!!

Instructions

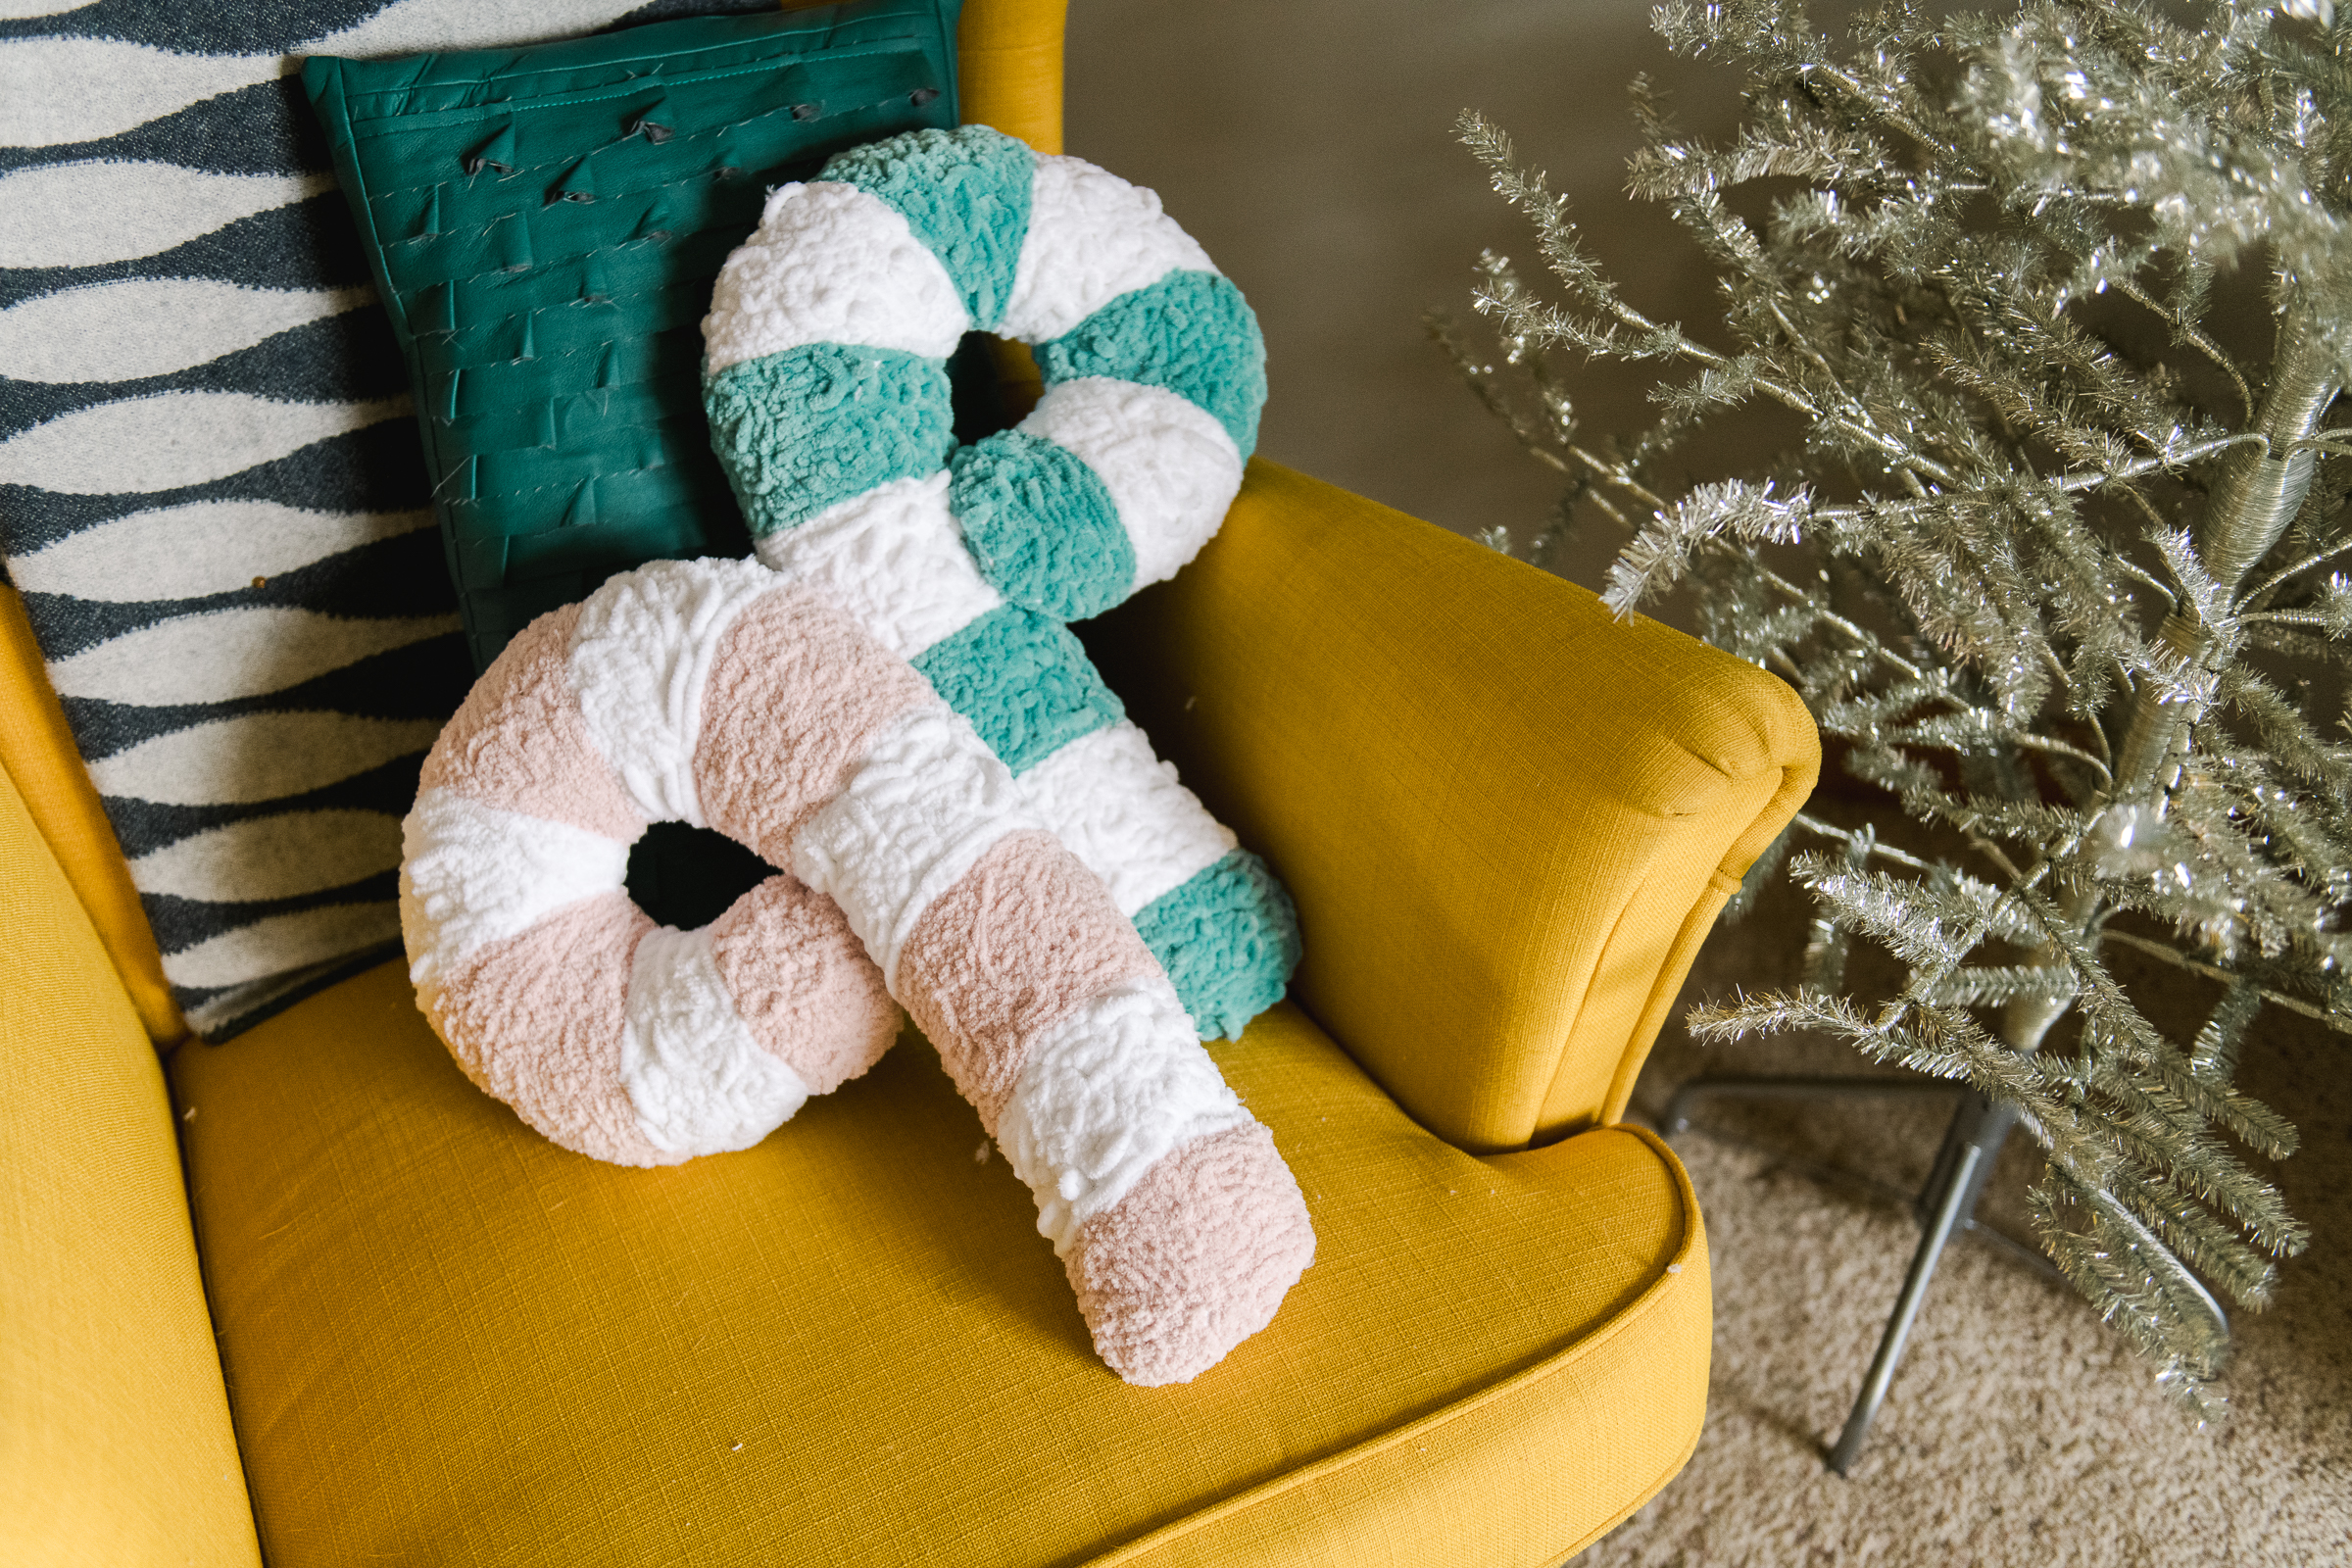
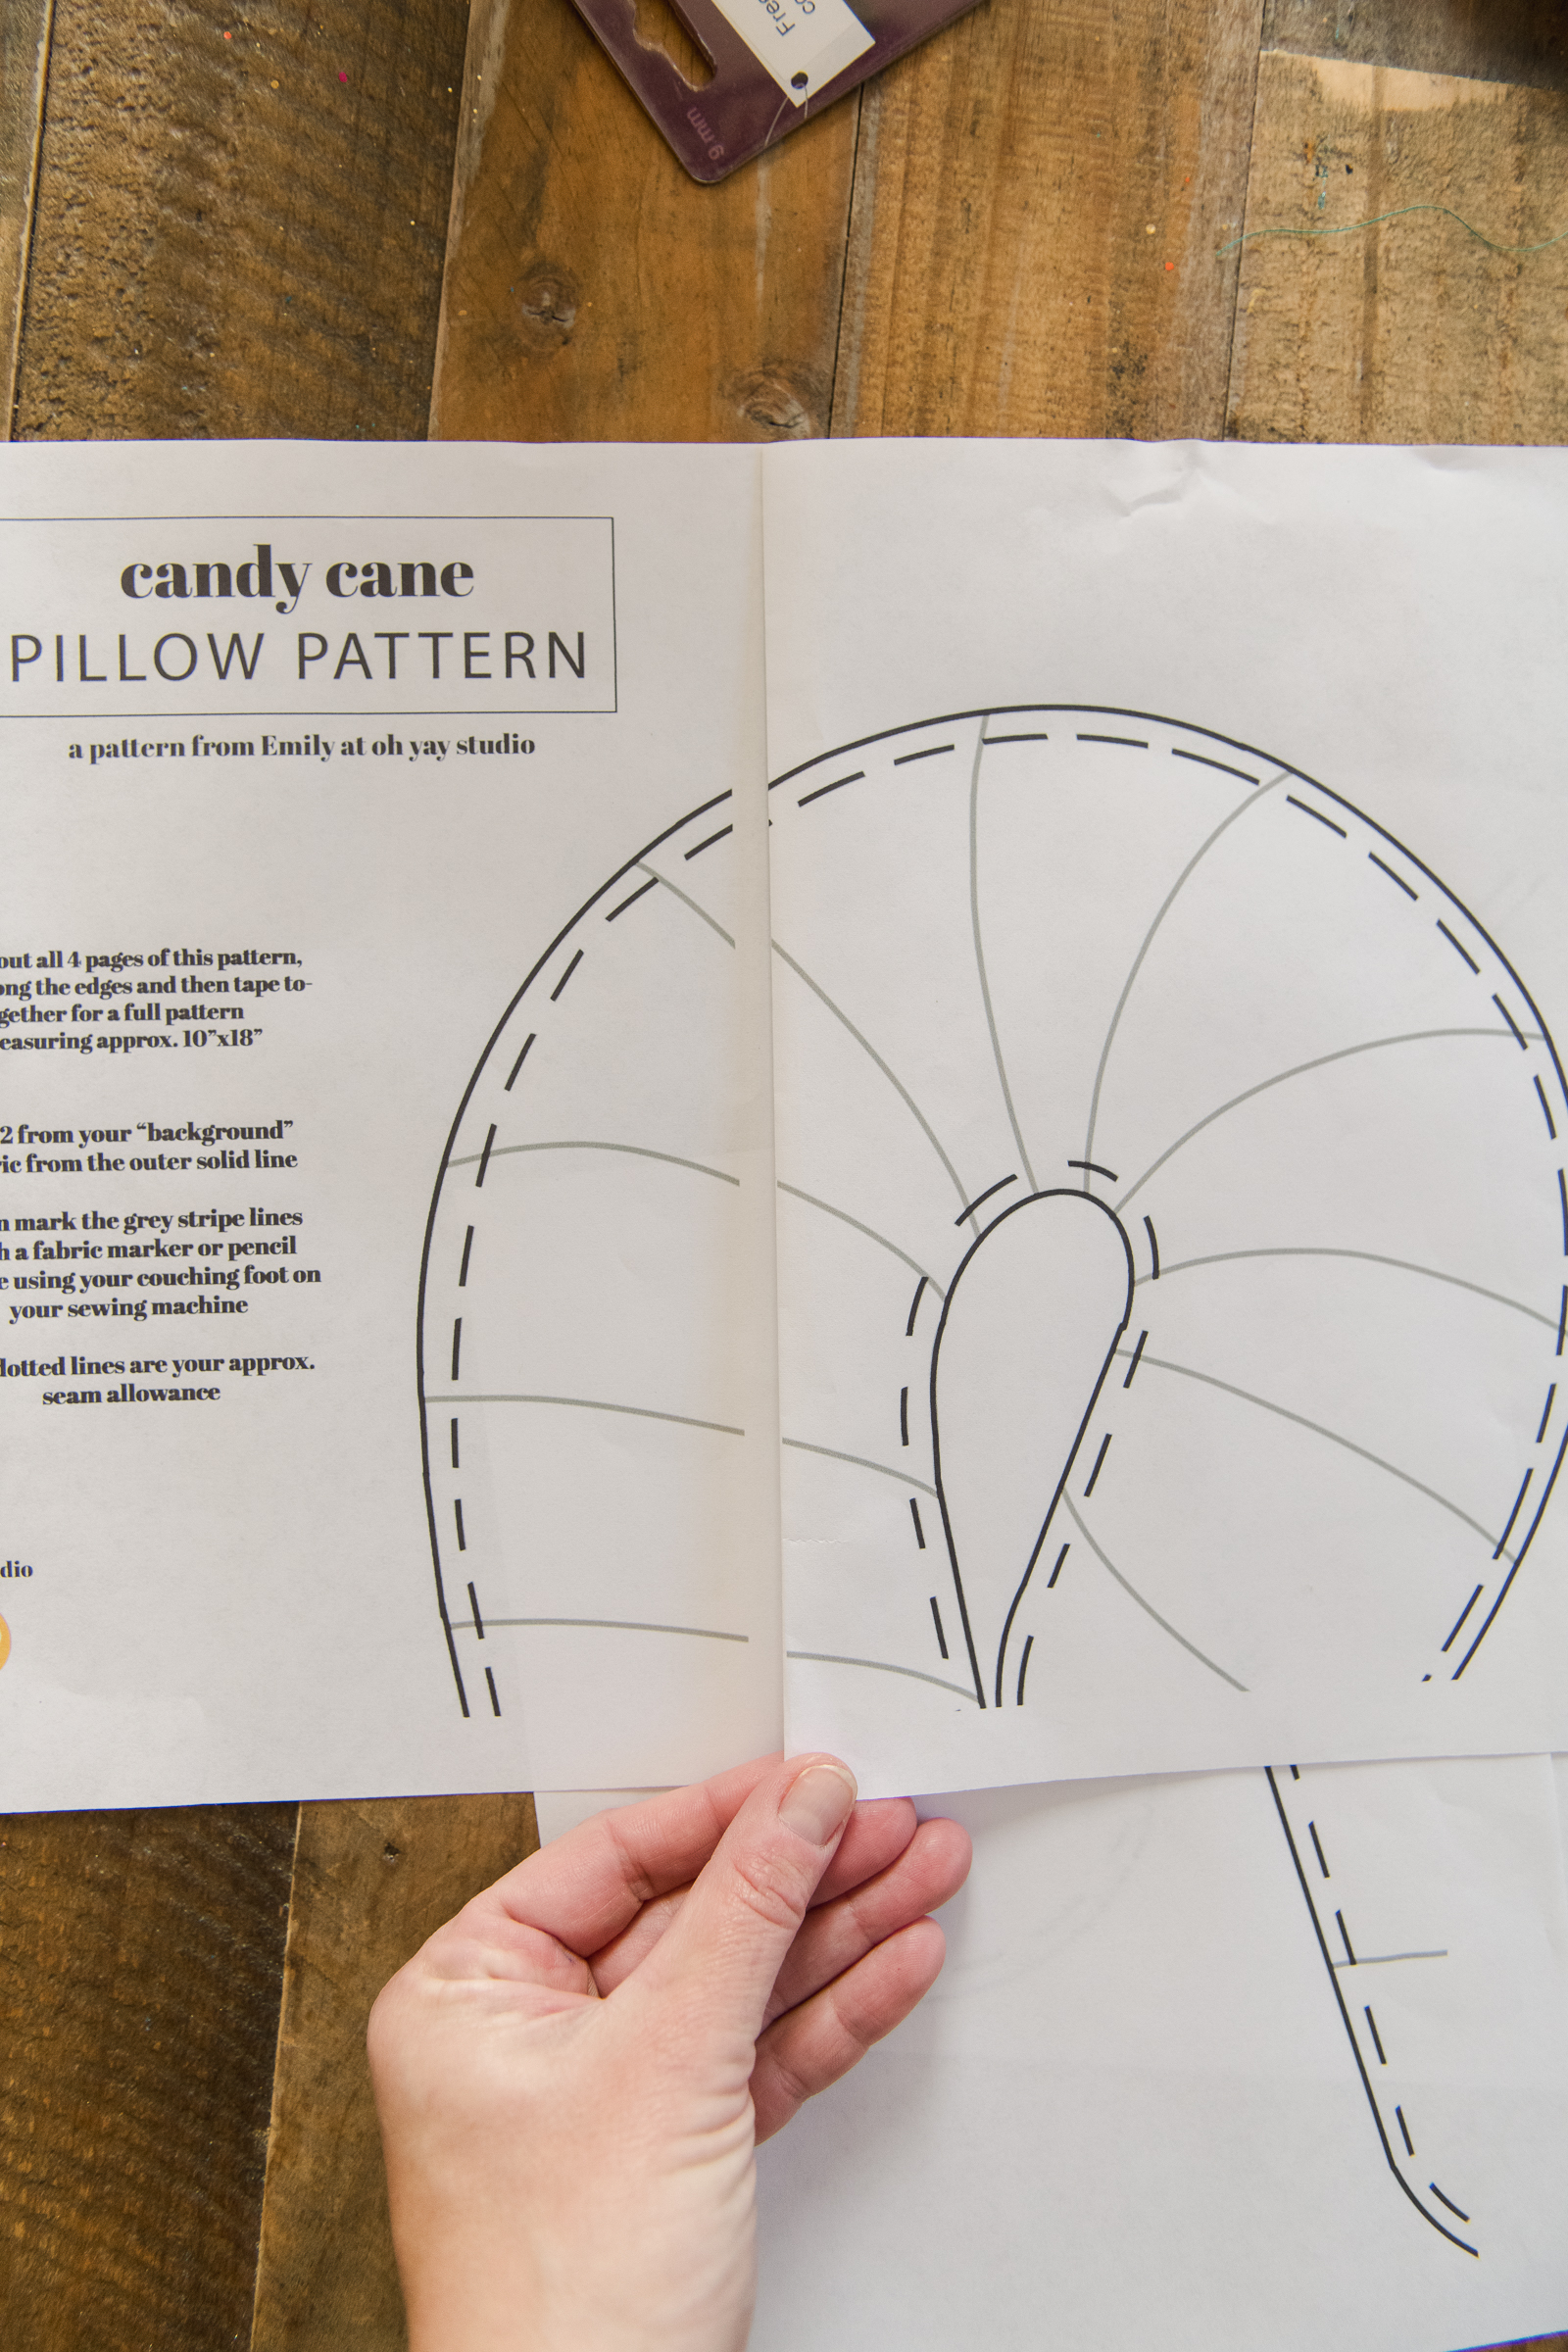
1. Download + print your pattern HERE!

A note about the pattern: feel free to enlarge or shrink your pattern depending on your desired size of your pillow! You will tape your 4 pages together to make one larger pattern. I also decided to number the stripes so that it was easy to see the order without having to guess before cutting the stripes apart.

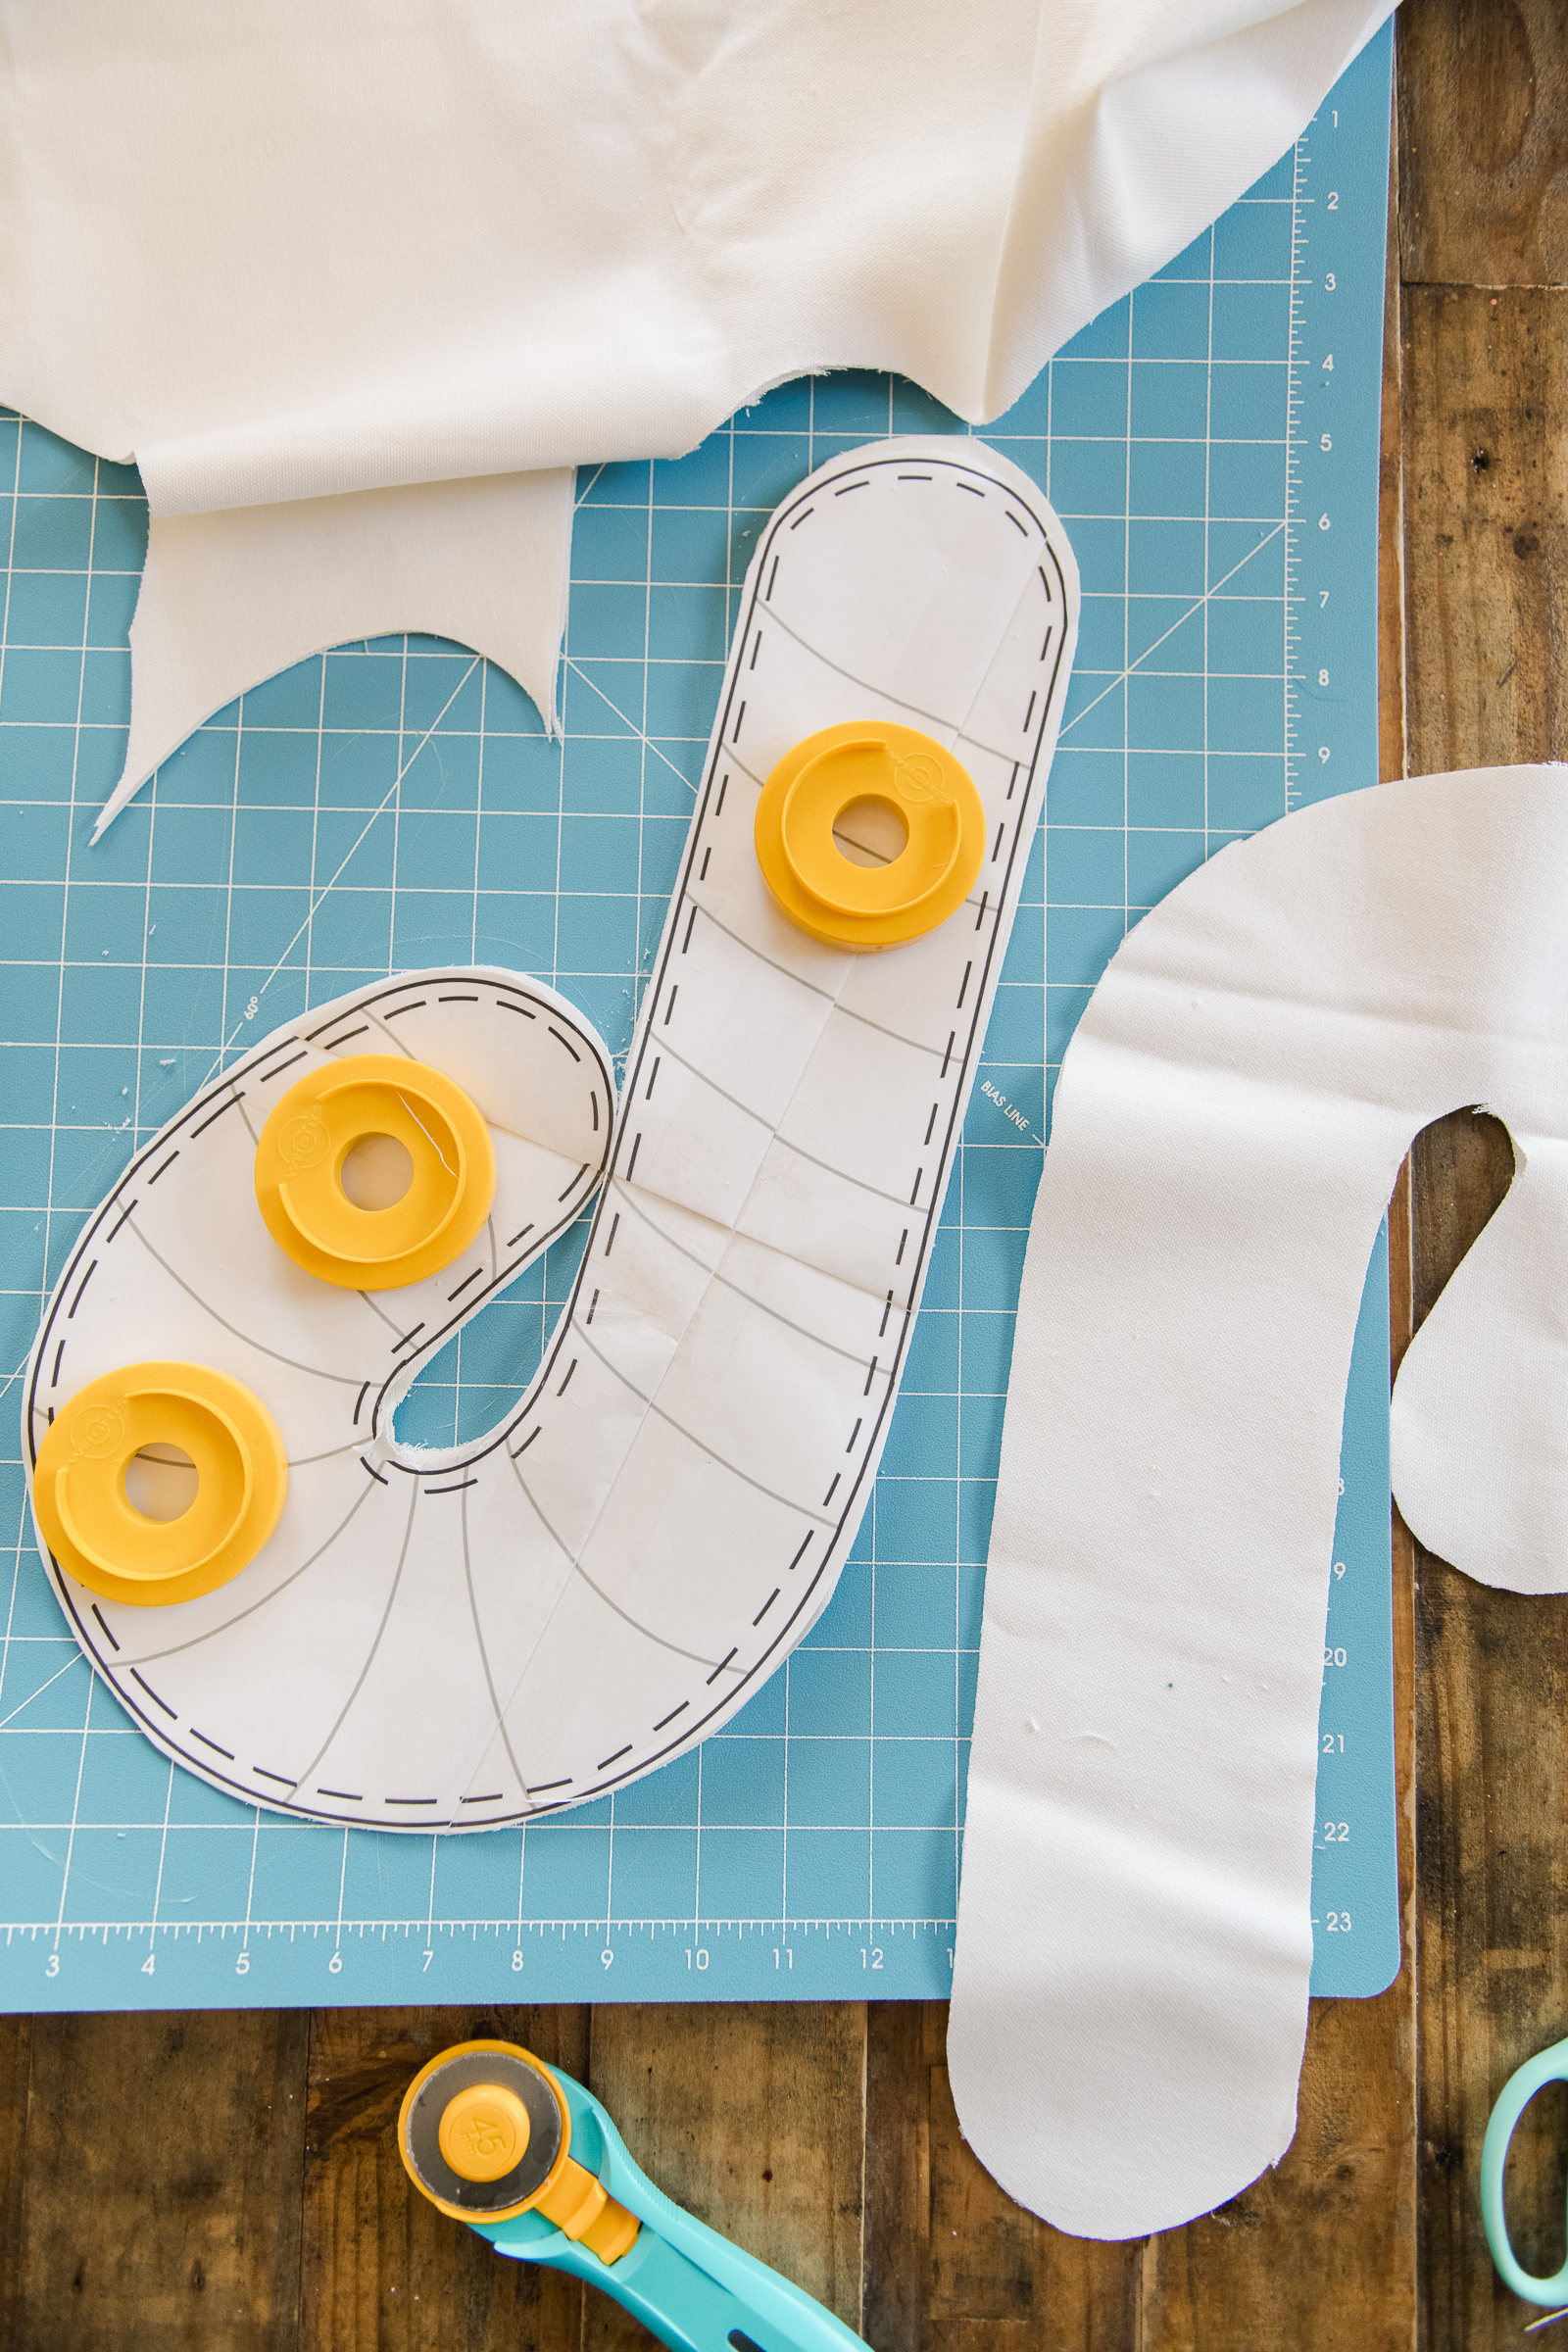
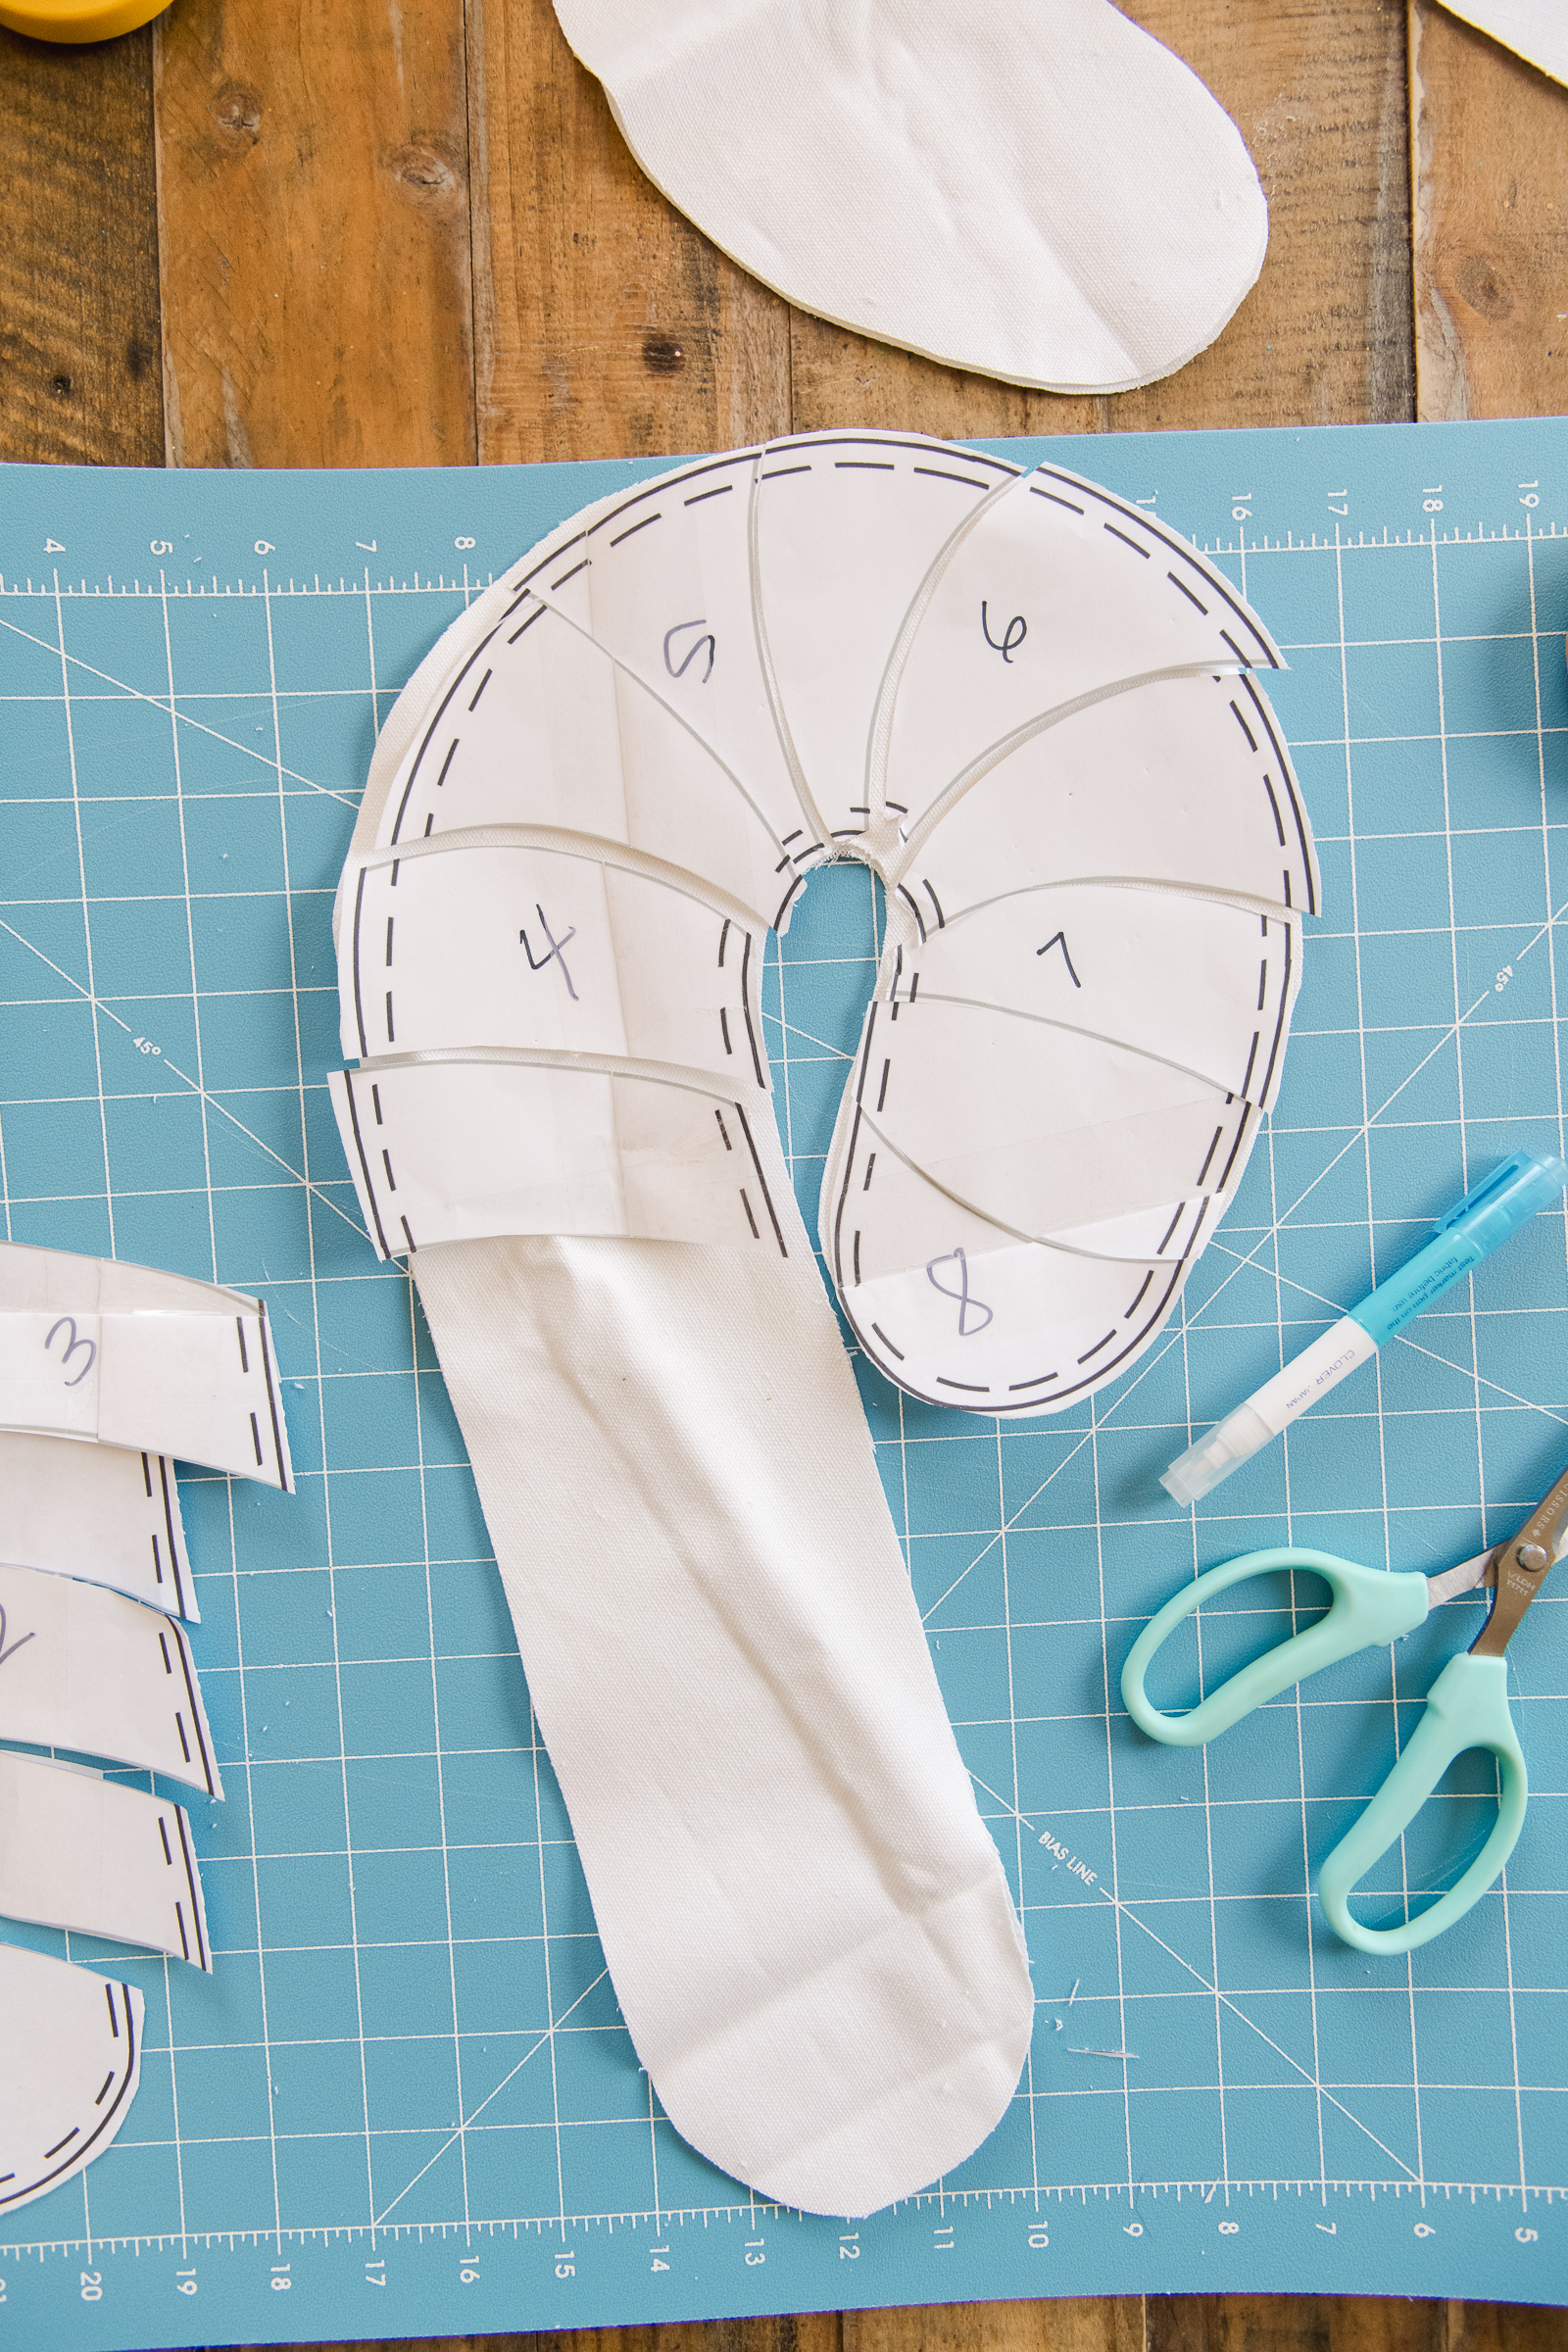
2. Cut out 2 of your candy canes from your main fabric (the heftier fabric). Then mark off your striped area (these are to give you guidelines on where to sew the stripes with the yarn)….I did this by cutting apart the stripes (numbered so that I didn’t get them out of order) and then tracing the stripe lines onto the cutout candy cane shapes!

3. Begin sewing with your couching foot! You will first want to prep your machine by replacing your “regular foot” with your couching foot! First, make sure that you have already attached the plastic #1 or #2 to the couching foot Holder, depending on the weight of your yarn. (You can reference your enclosed instructions - I used the larger one, #2) Lower the feed dogs - you can consult your manual or google your exact Janome machine to get the manual. There should be a bar on the right side of the machine by the on/off button that lowers and raises the feed dogs. Turn your machine on :)

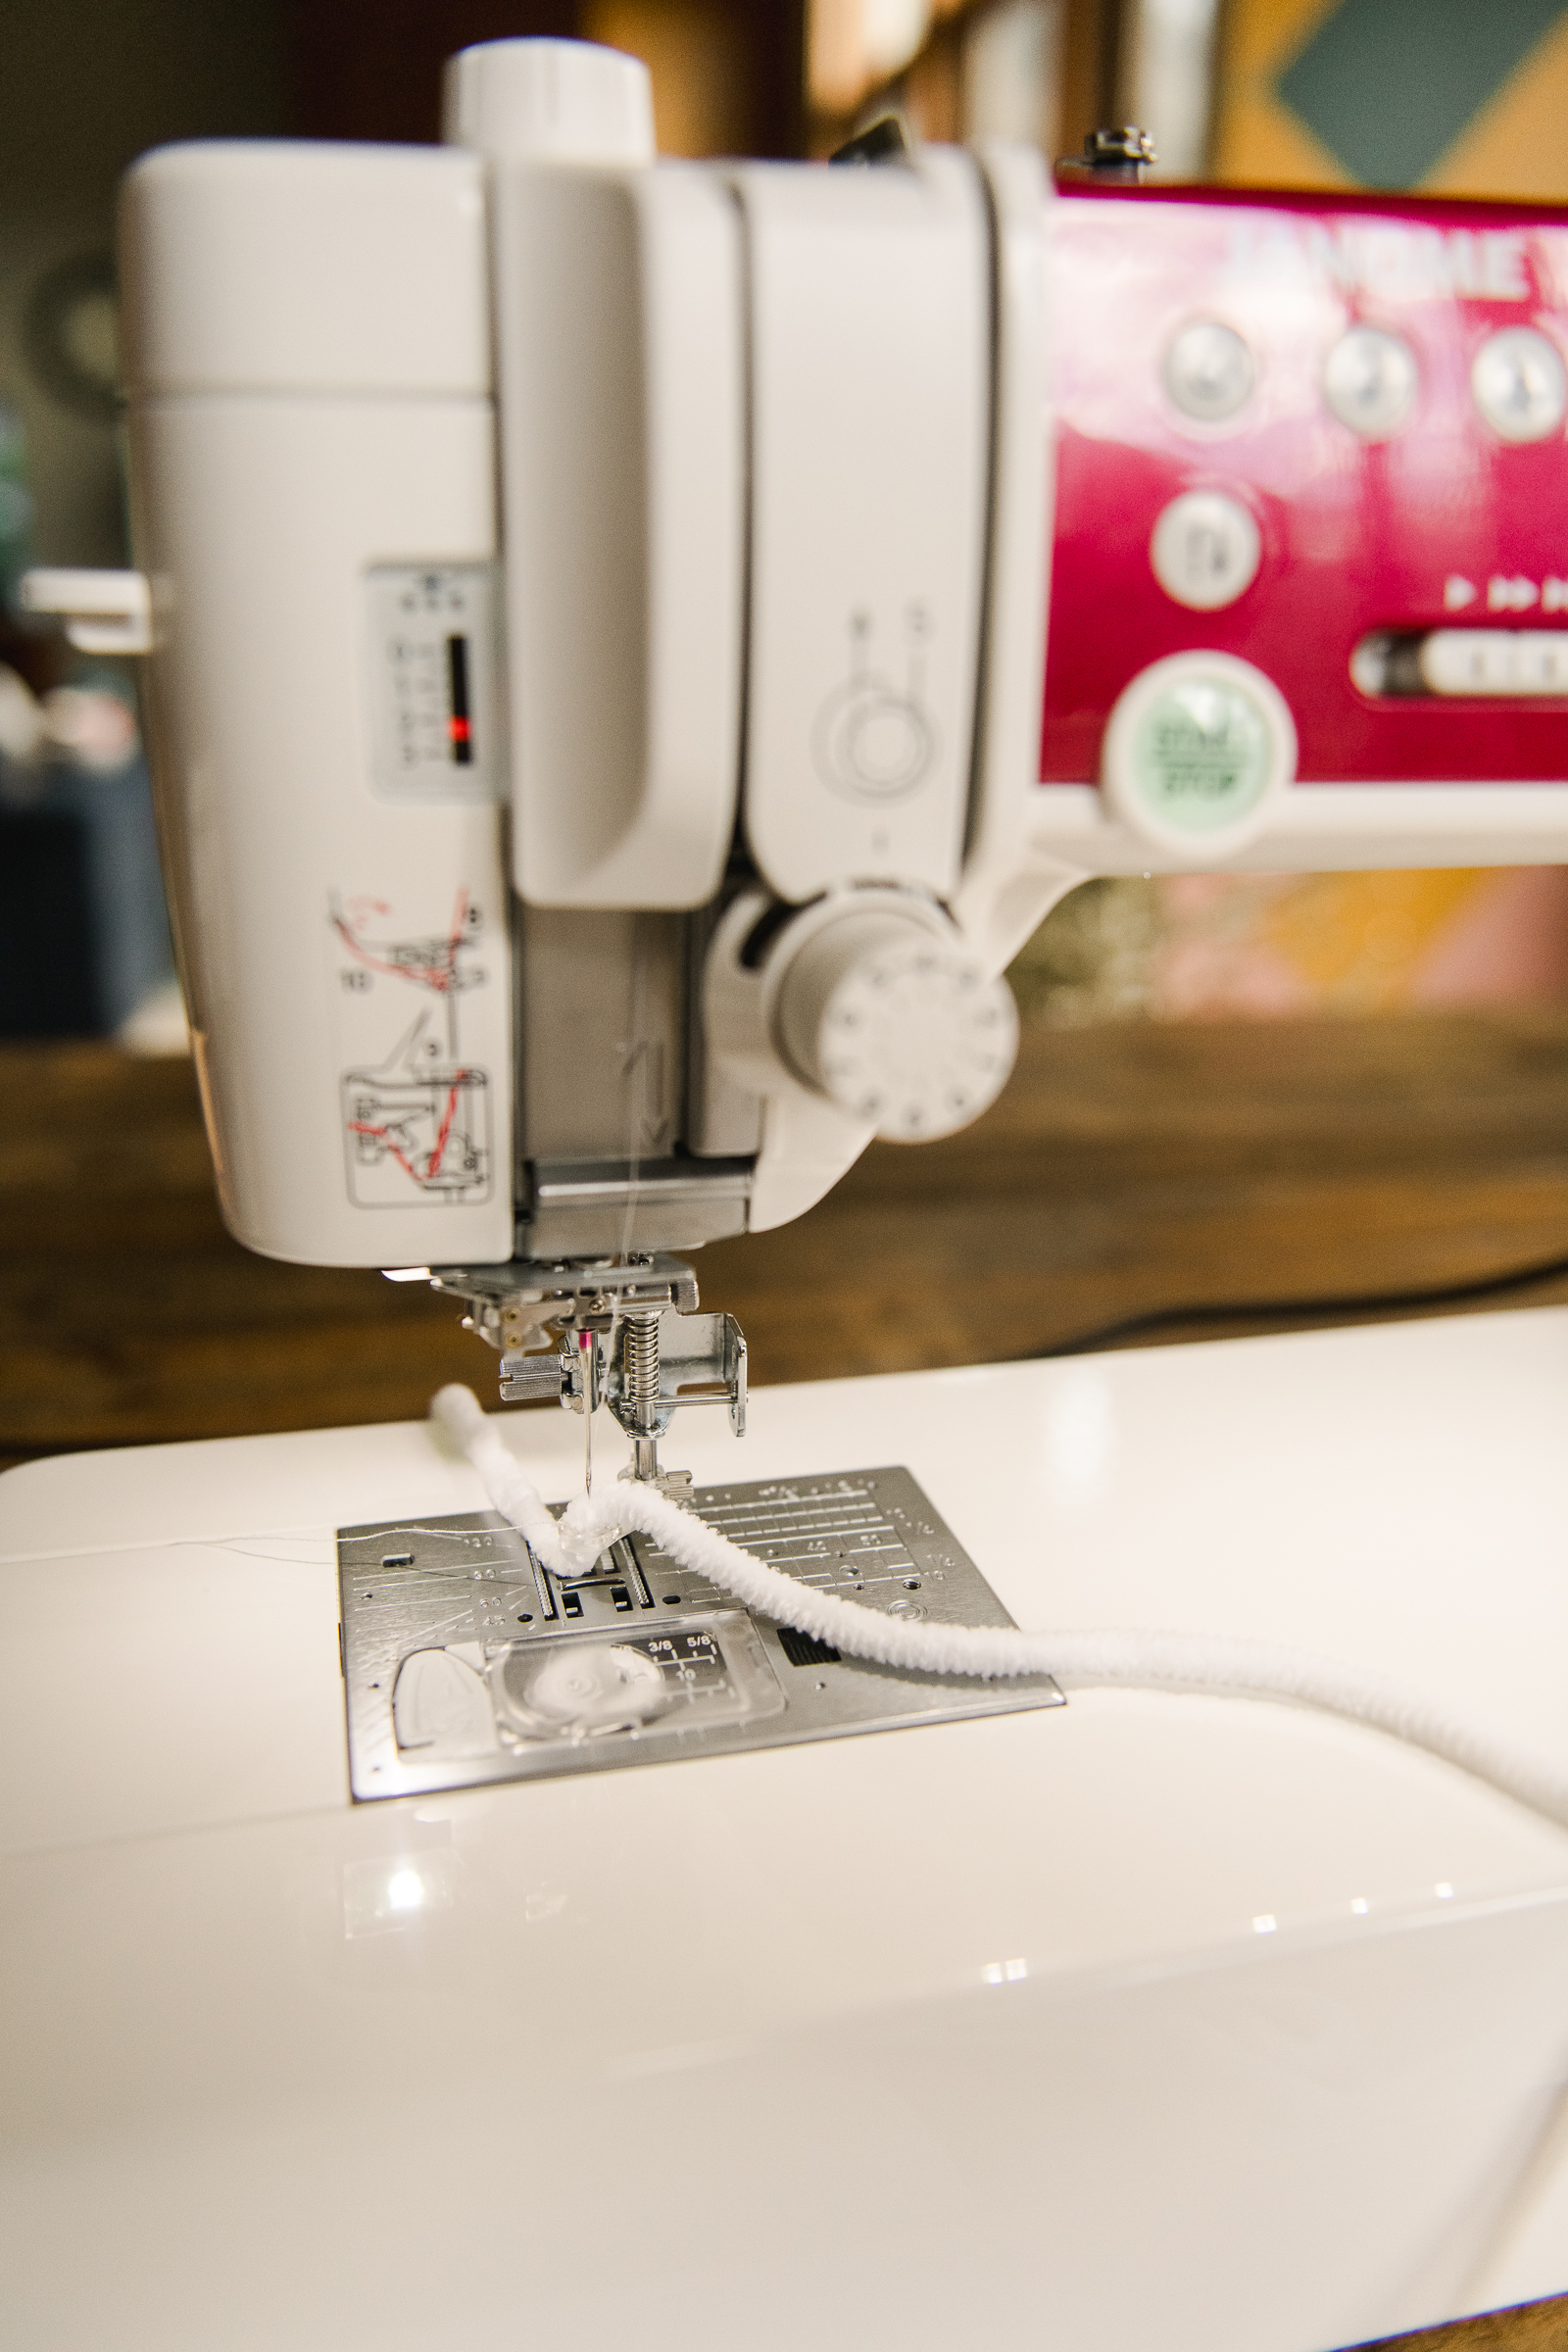
4. Set your stitch to zig-zag stitch (you may notice with your machine that it does with mine……that the “kind” of footholder is already recognized since you’ve already installed it, so only a few options for stitching are available with the feed dogs lowered. Either way, choose your zig-zag stitch on your machine.

TIP: Make sure that your zig-zag stitch isn’t set to any wider than 1.5mm (this is in the display screen or by lowering/raising the numbers) :)

Run your yarn into the small hole of the couching foot to get started. Give your couching a test on a test scrap of fabric to be sure it’s ready to go! :)

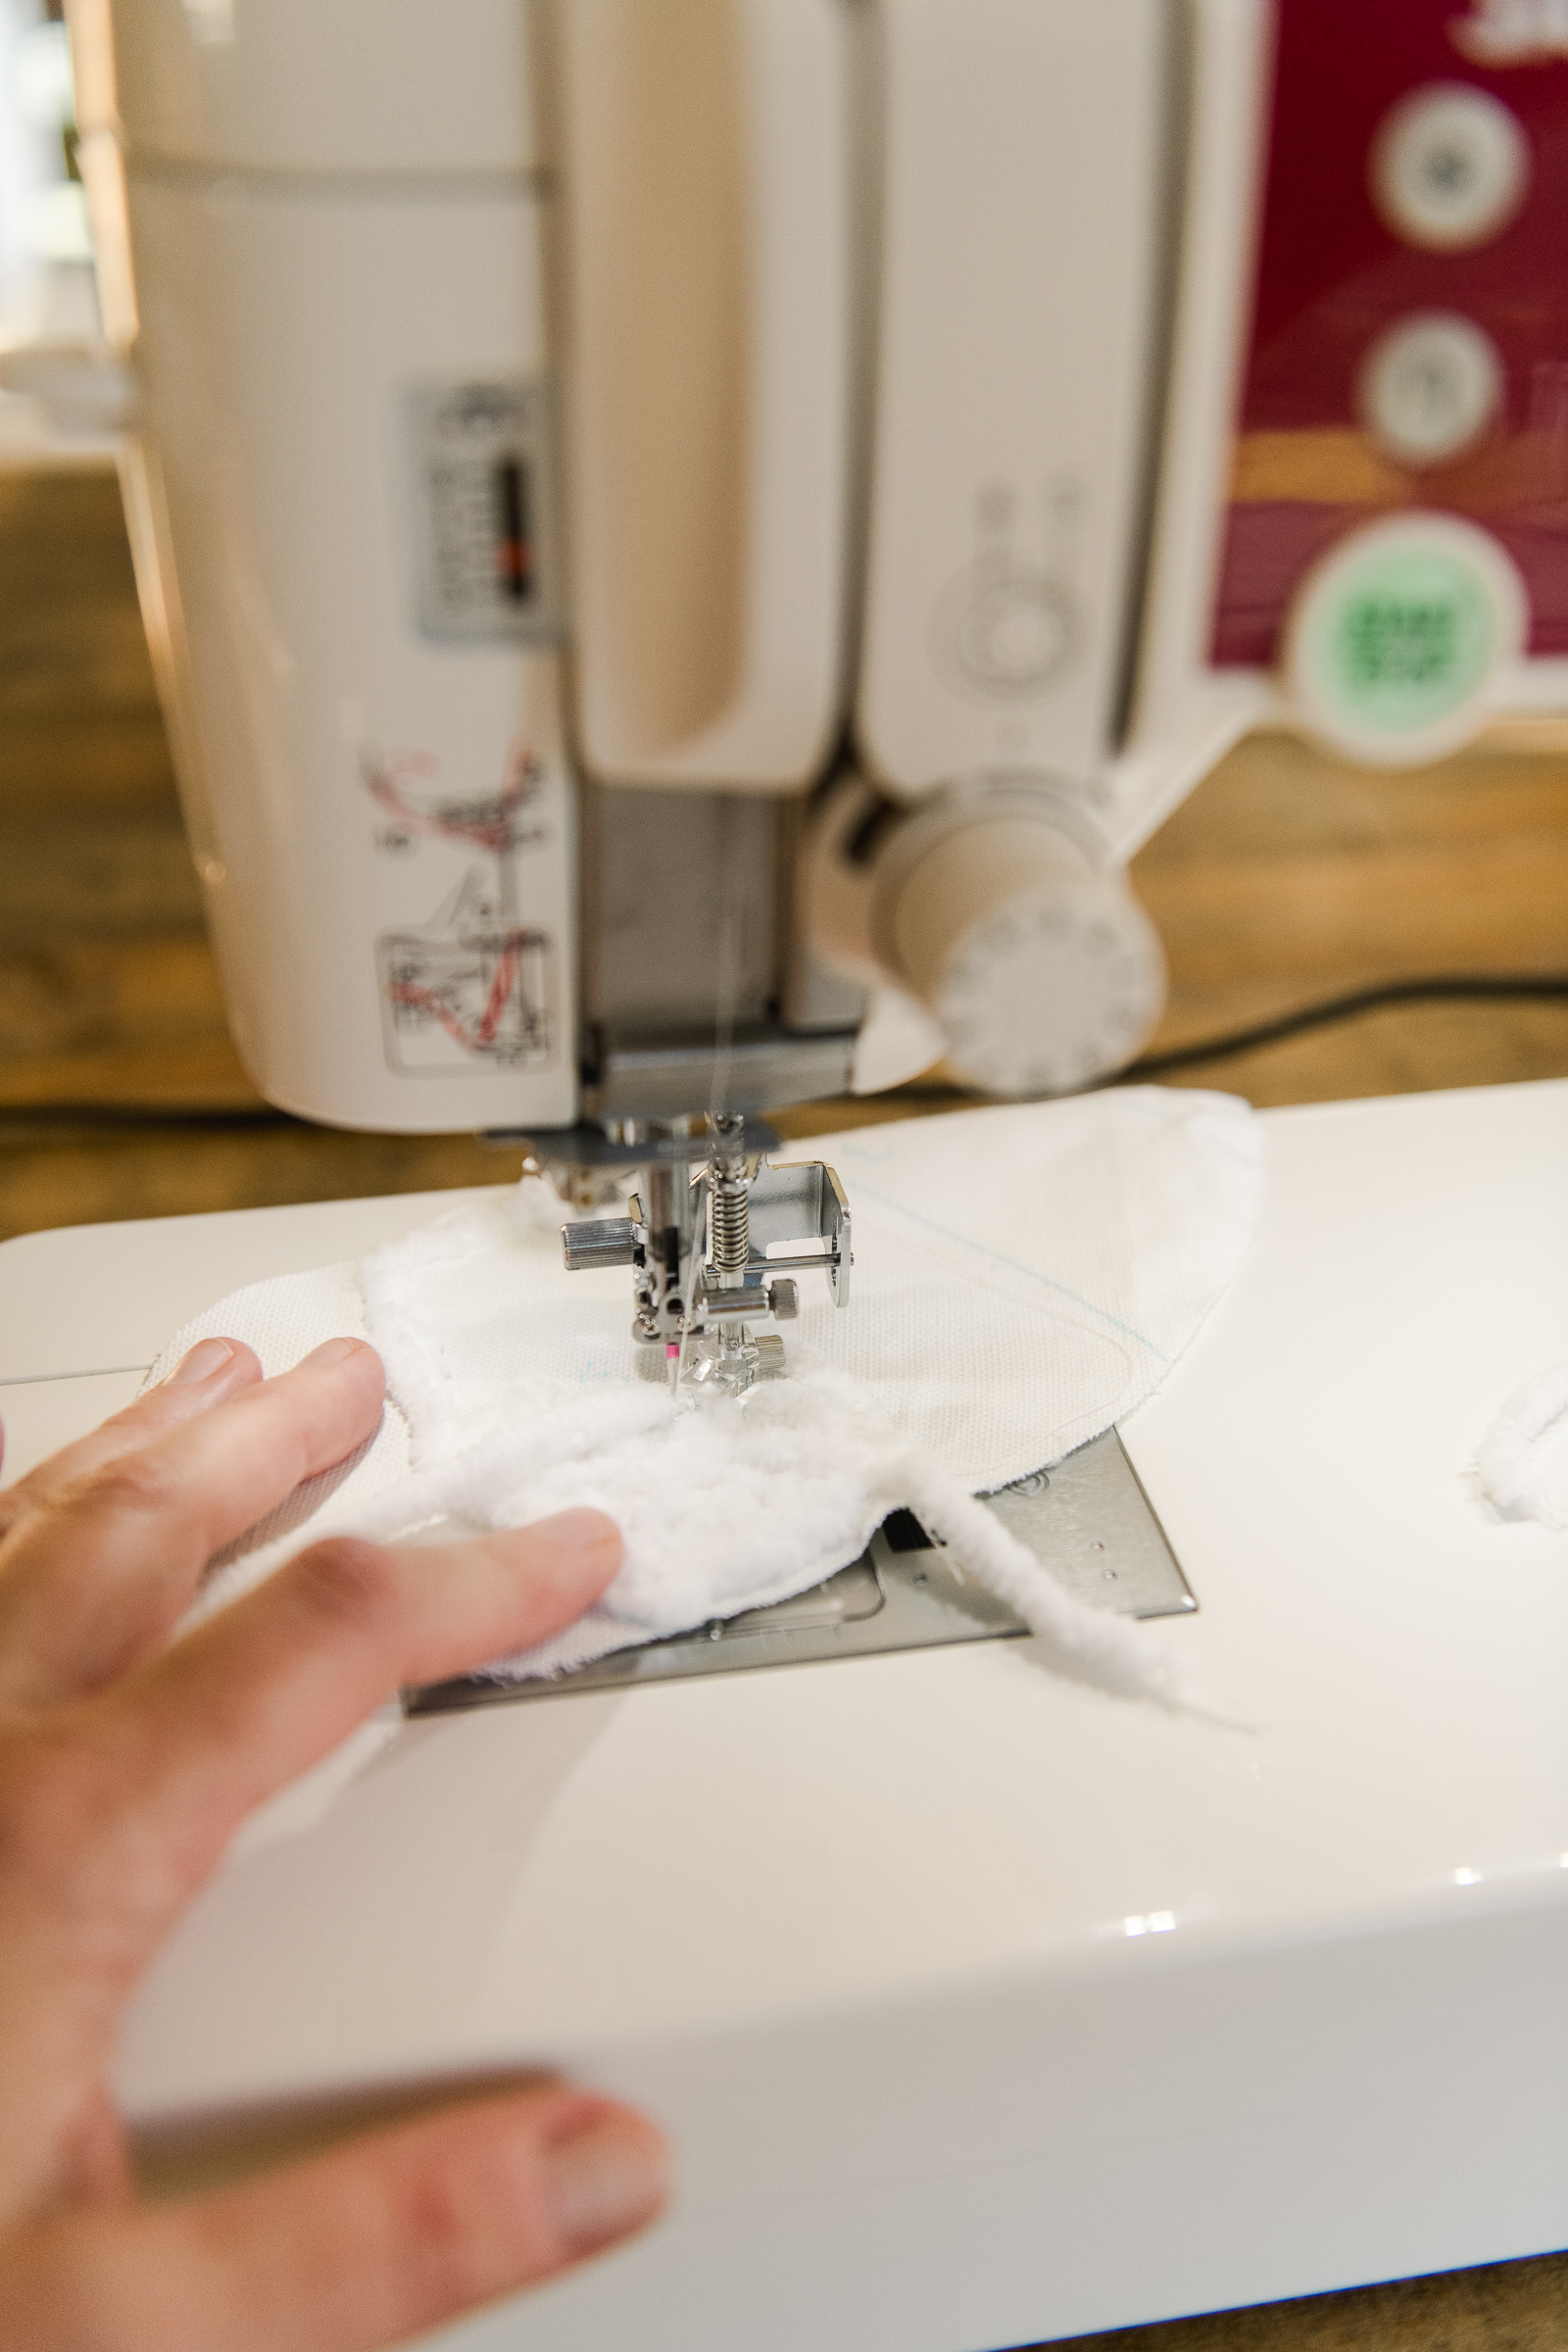
5. Now it’s time to get stitching!!!!! This is the fun part! Just give it a go and pay attention as you go so that you can see your candy cane come to life! :)

Here are some tips that I find helpful when using your couching foot:

• To begin, I just anchored my stitch with an anchor stitch a few times before I got going with the zig-zag (my machine has a button to push for this)!

• The pace of your stitching is KEYYYY! Meaning, how fast or slow do you move your fabric through the machine…..if you go too fast, the zig-zag stitch won’t attach very well to the yarn and seems to pull away more. If you go too slow, the yarn seems to pile up and get jammed in the machine. However, I did find that if I err on the side of slower, that works better. But practice this to get your own rhythm!

• Outline each color section first and then fill in. I found this to be SOOOO helpful so that your lines are crisp and neat….. kind of like painting!

• Be sure your yarn has slack to move – if it gets stuck or snagged, the zig-zag stitch won’t be able to “pick up” the yarn because it will be too taught. I decided to loop my yarn over the back of my machine (or tucked “behind” the little bobbins holder for winding bobbins on top of the machine). Just be sure it can easily be pulled from the skein when stitching.

• Be sure to leave about 1/4” around the very outside edge clear (the “J” shape) of the candy cane to leave for stitching the pillow closed (if you accidentally add some yarn is too close to the edges, no big deal; it may just be a bit trickier to stitch all together) :)

• To stop sewing, lift your presser foot, cut your thread, and cut your yarn as needed.

• Each time I had to refill my bobbin, I would cut the thread but NOT the yarn……I could easily pull out the bobbin and rethread it, then rethread the machine and pick up where I left off with the yarn by sticking the yarn back into the couching foot hole. It's not necessary, but just cuts down on all the little strings!

• Go slow and HAVE FUN! This is so much like painting because you are in FULL control of where the yarn/thread goes, and you can fill in and draw anything and everything you want as it comes to life right in front of your eyes!

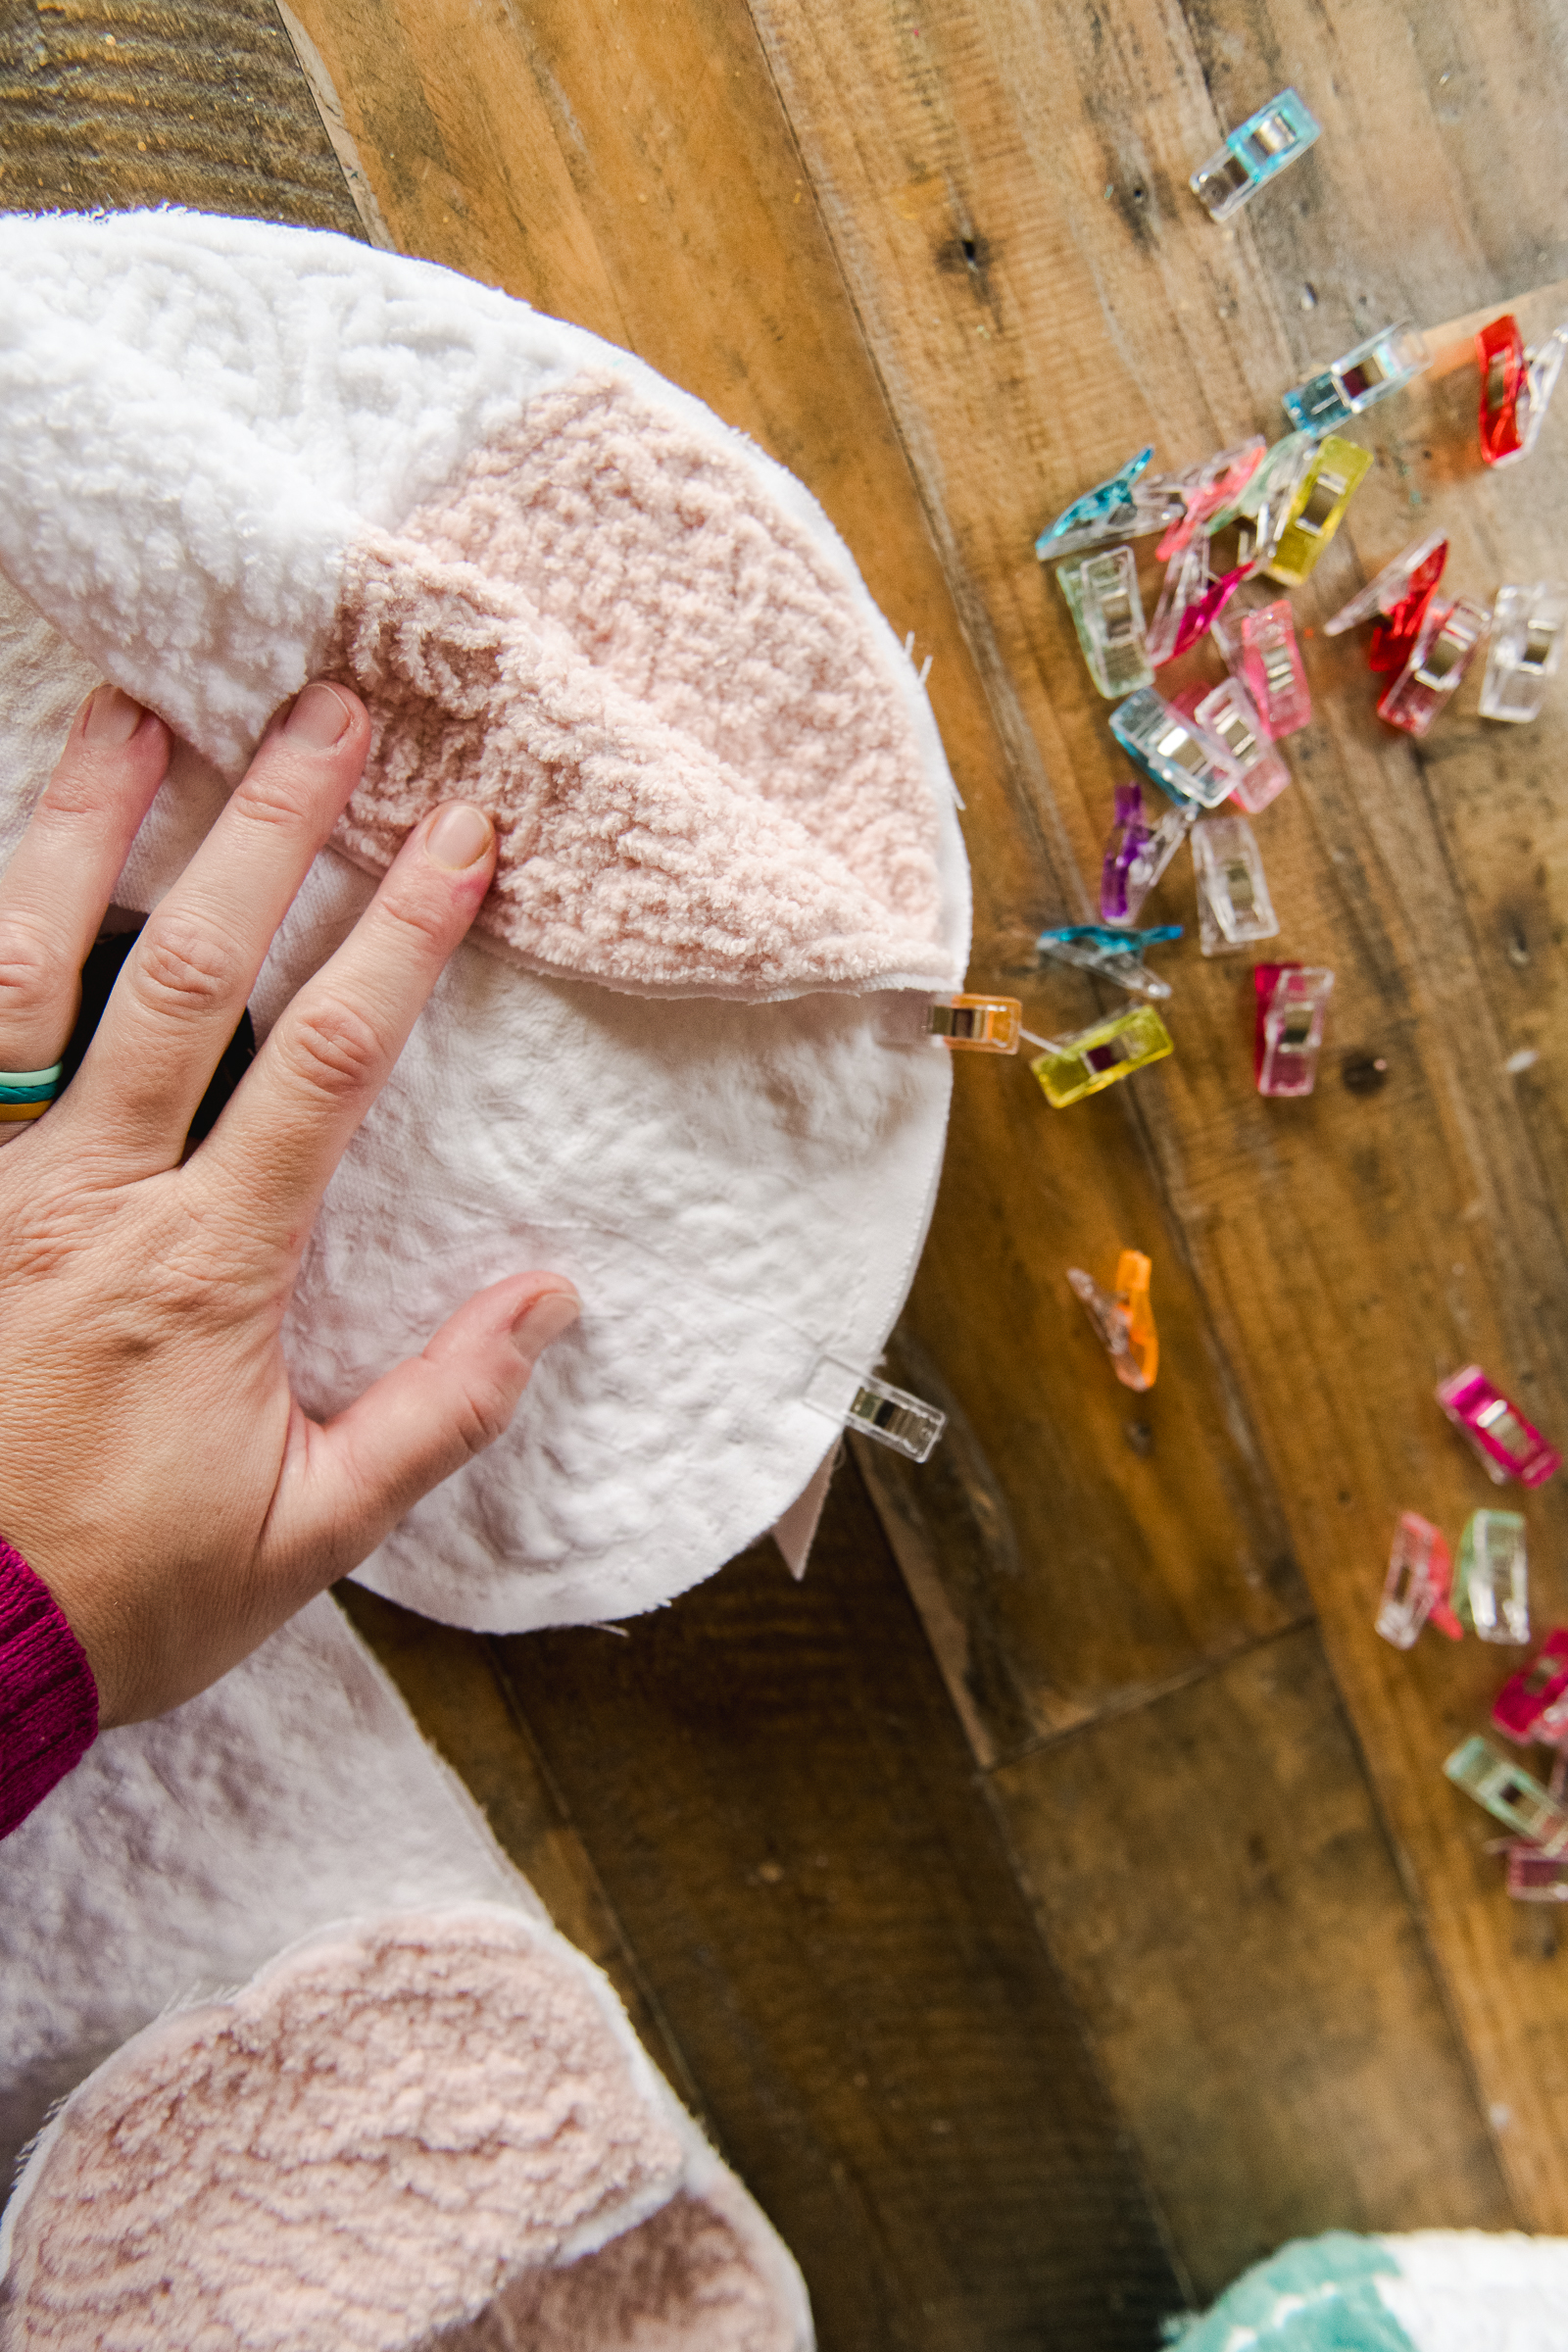
6. When your candy cane front and back are fully “couched” with yarn, it’s time to stitch them together. Simply put both sides of the candy cane together and pin it in place. You will stitch a 1/4” seam allowance all the way around the outer edge, leaving a gap large enough to stick your hand into stuff! :) Make sure to clip your edges up to the seam (without clipping the seam itself) so that when you turn your candy cane right side out, all the curves are nice and curvy without being bunchy!

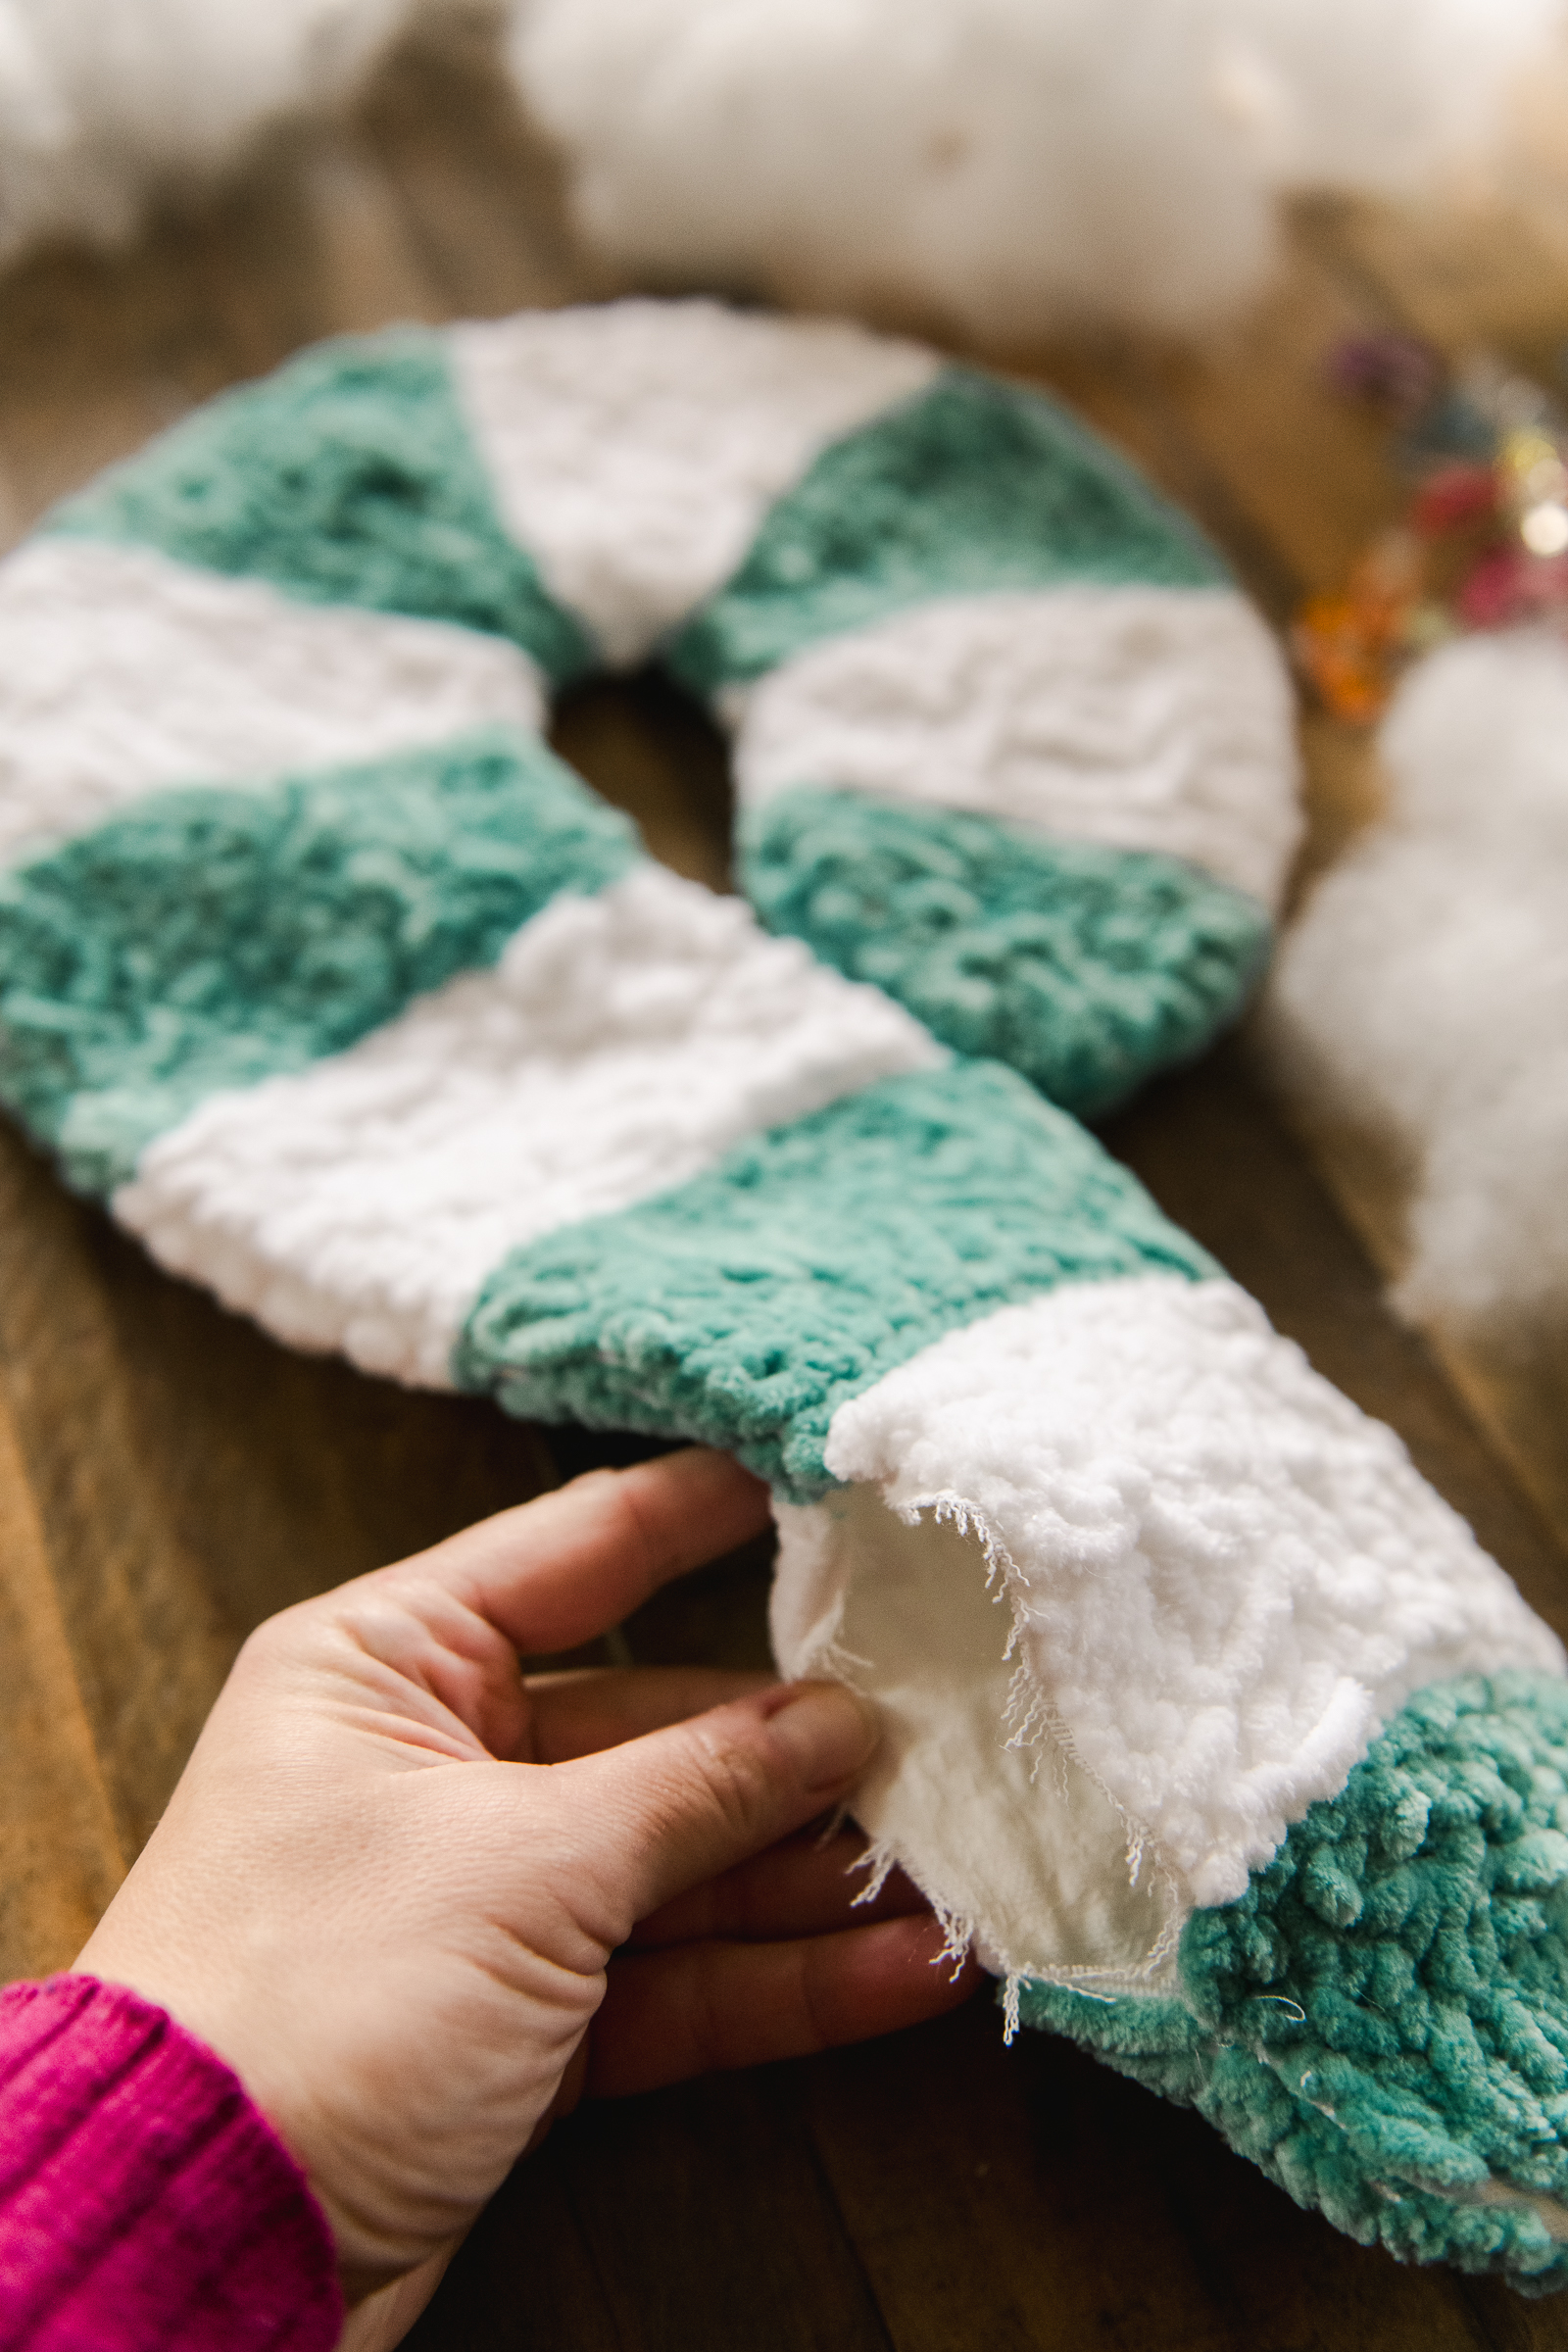
7. Turn your candy cane pillow right side out and stuff it with your poly-fil! Be sure to stuff it firmly (not sooooo plump), but fill it well so that you don’t lose the “J” shape of the candy canes! Then, use your needle and thread to stitch your opening closed - I do this using a ladder stitch so that it’s invisible and hides right into the original seam allowance! :)

Everyone is Talking about Candy Cane Pillow Using the Couching Foot
Reviews


Tako
Beautiful
Wednesday, November 23, 2016

cpindzola
Around the Table Dresden Placemats
Saturday, December 17, 2016

I like the concept, but the directions are "sloppy." Nowhere in the supply list does it mention the felt or the batting (how much?). Also, I would never use a high loft batting in a placemat, or a table runner, as I think that it would be too unstable for a glass. The next time I make these, I will cut out the batting (I use flannel) and spray baste it to the wrong side of the Dresden plate before I put the Dresden plate on the felt to cut out. I have not yet washed the finished placemat, and am hoping that the single layer of felt does not curl up, or become distorted after washing/drying.
Txmaid
Fun Great Gift!
Tuesday, February 21, 2017

MargieARK
Teatime Quilted Tablecloth
Friday, February 24, 2017

I made this today but your cutting directions need to be changed. You only need 4 of color 1 and color 3 4.5 squares for the triangles. Also the inner border, you only need 2 cuts as WOF is long enough to cut each in half to fit the sides.
MickelSews
Great Machine
Wednesday, August 30, 2017

I've had this machine for only a week now. I bought it used from a lady who makes her own clothes, but she no longer needed the machine. During the purchase, she noted that she is almost sad that it's better to give it away because of how well the machine performed. (I also bought it along side a computerized machine of another brand.} She demoed the machine for us, showing it worked and gave us everything (including the box it came in!) She took amazing care of this machine. I have used it a few times now, and the directions for threading were easy to follow (albeit my hands are quite large so the lower looper was a pain, but that is no fault to the machine or brand.) And I recommend this machine to anyone who wants to learn to serge and wants a machine that can grow with them. I will happily use this machine time and time again.
rvstan
S9 Review
Sunday, February 25, 2018

I love, love, love my S9! It's sews and embroiders beautifully and it's simplicity of use amazes me. I would recommend this machine for both a beginner and an experienced seamstress. If I would ask anything of Janome it would be to upgrade the programming to run a larger hoop size. I understand that it can't get much wider but there is most definitely room for it to go longer. That is the only limitation of this machine.
pjmnana
PJMNana
Monday, February 26, 2018

I purchased a Memorycraft 15000 a few years ago and it was the best purchase I ever made! This machine can do just about anything you would would ever want! I love the capability of using the Acuedit app to set up my embroidery pattern on my Ipad and then download it to the machine! I love how my embroidery looks upon completion and I love all the good lighting it has to light up your workspace. That way you don’t need to worry about where to set up your machine. It also has plenty of room to do machine embroidery on any size quilts! There are many decorative stitches from which to choose that are outstanding! It’s hard to choose which one to use! There are so many great features it is hard to decide what I love the most. If you want to buy only one machine to last a lifetime, I would recommend this one!
KLWash
S9 Review
Sunday, February 24, 2019

The S9 is amazing. I learned to sew by hand when I was just 5 and in my grandmothers way as she was quilting. I took seeing classes in high school until they would no longer let me sign up. The S9 makes me appreciate my current skills as well as motivate me to want to learn more. This machine is awesome.
SewSueMe2002
Horizon Memory Craft 15000
Thursday, November 19, 2020

My Janome Horizon Memory Craft 15000 is fantastic! I love, love, love this machine! When I came across the Eye for and Eye embroidery design today, I wanted to make it. However, the embroidery file is missing. Nothing downloads when I select the download button. Please help!
Jillfmischo
Treat Bag fun!
Monday, August 16, 2021

I made the Halloween treat bag for my new granddaughter and I’m sure it will last for years. No embroidery machine so I appliquéd the lettering. Need a little more skirt fabric for a better gathered look, and I used thin double-bias tape for the skirt hem, over edge stitch on skirt sides. I’m pleased with my results!
elenaz
Very helpful tutorial
Wednesday, October 25, 2023

I want to say thank you for teaching me this method of applique. I was able to do it with a small letters. This method is the best so far from all of those I've seen and tried.
plonkar
So useful
Thursday, November 30, 2023

I'd like to express my gratitude for teaching me this appliqué method. I successfully applied it with small letters, and, so far, it's the most effective among all the methods I've seen and tried.

DEALERS
The TWO Closest Dealers to you are:
196 Boston Post Road , Orange CT, 06477
203-878-1654
19 PUTNAM AVENUE , PORT CHESTER NY, 10573
914-934-2934
Find Additional Dealers