Projects

Quilted Sawtooth Flower Pillows

Created By:

Maureen Cracknell 

Skill Level: Advanced

Inspired by my new floral fabric collection The Flower Fields, made using Janome's amazing Continental M17, today's tutorial is for these beautiful and fun Quilted Sawtooth Flower Pillows! The center of this pillow design is a standard 12.5 (unfinished) flower quilt block pattern that can be made over and over to make a quilt, that I finished into a 16" cozy cushion made easy using the CM17's large sewing area, built-in stitches, and incredible speed! Let's get started!

Janome Supplies Required

Janome Sewing Machine (Continental M17 Sewing and Embroidery Machine)

Fabric and Notions Required
  • Four Fat Quarters for pillow front (prints from The Flower Fields by Maureen Cracknell for AGF)
  • One Half Yard for pillow back (a print from The Flower Fields by Maureen Cracknell for AGF)
  • batting (Hobbs Tuscany Supreme 100% Unbleached Cotton) 
  • 16" pillow insert or pillow you'd like to cover (Hobbs Pillow Pals)
  • neutral thread (Aurifil 50wt 2021)
  • basting spray or basting pins
  • scissors or rotary cutter/mat
  • iron
Instructions

Pillow Fabrics


Cutting and Piecing the Pillow Front:

For the pillow front I cut from four fat quarters of quilting cottons.  
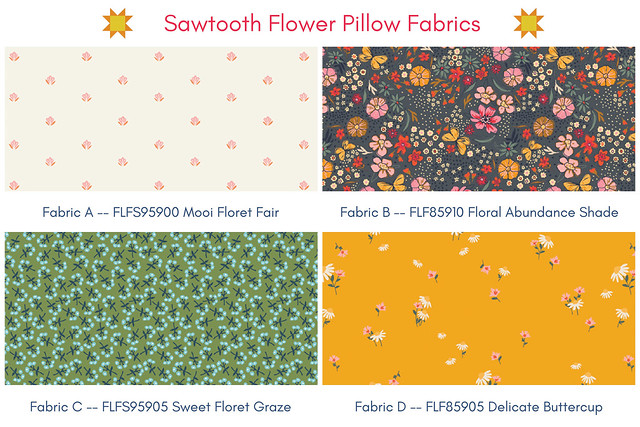
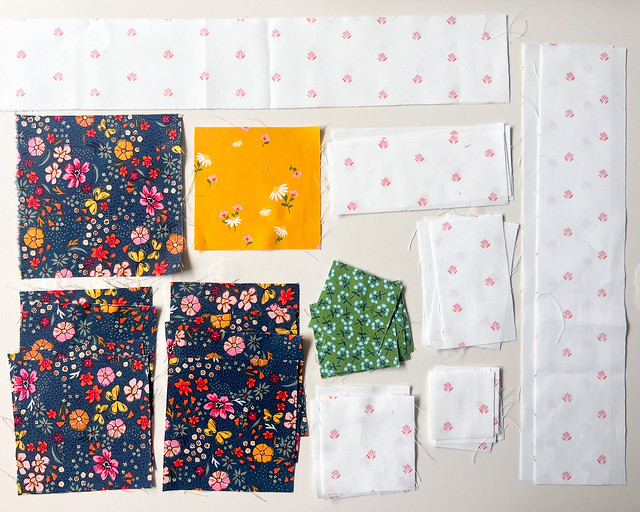
  • From Fabric A cut 8 - 1 3/4" square, 4 - 2.5" squares, 4 - 2" x 3.5" pieces, 4 - 2" x 5" pieces, 2 - 2.5" x 12.5" and 2 - 2.5" x 16.5" 
  • From Fabric B cut 1 - 4.5" square and 8 - 3.5" squares 
  • From Fabric C cut 8 - 2" squares 
  • From Fabric D cut 1 - 3.5" square

Sawtooth Flower Pillow Fabrics

Fabric Cuts

First you'll piece together the four quick corner units. Mark or fold to create a diagonal line on the wrong side of the eight Fabric C 2" squares.

Mark Fabric Squares

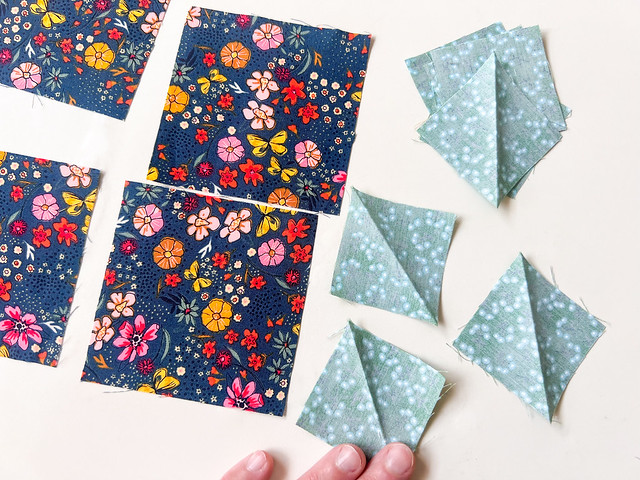
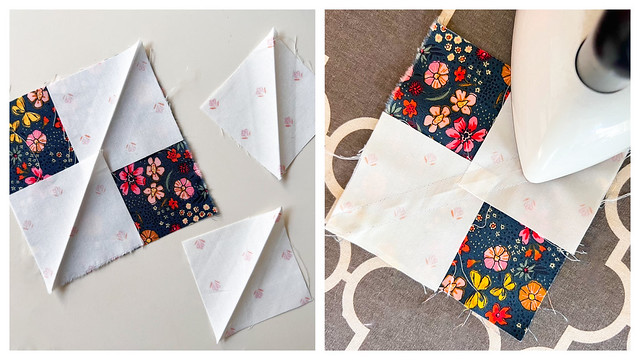
Noting the orientation of that marked line, place one of the marked 2" squares right sides together on a corner of one of the Fabric B 3.5" squares. Sew on the line and then press.

Quick Corner Units 1

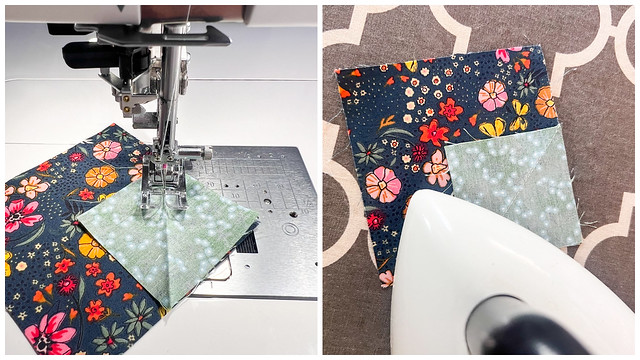
Trim away the corner 1/4" past the stitch line. Press the corner open. Again note the orientation of the marked line and repeat these steps on the other corner. Place another Fabric C 2" marked square right sides together on the corner, stitch on the marked line, and then press to flatten.

Quick Corner Units 2

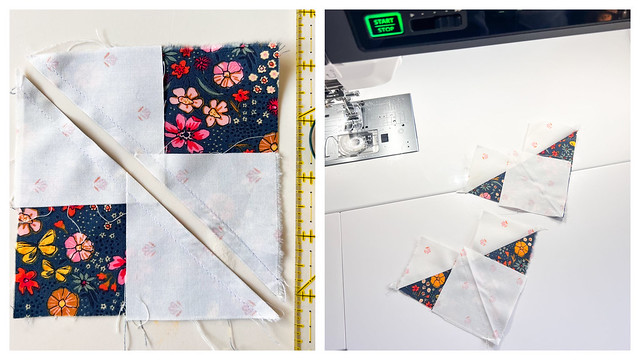
Trim 1/4" past the stitch line and press the corner open to complete the quick corner unit. If necessary trim to square up the quick corner unit to measure a 3.5" square. Repeat these steps to create all four quick corner units.

Quick Corner Units 3

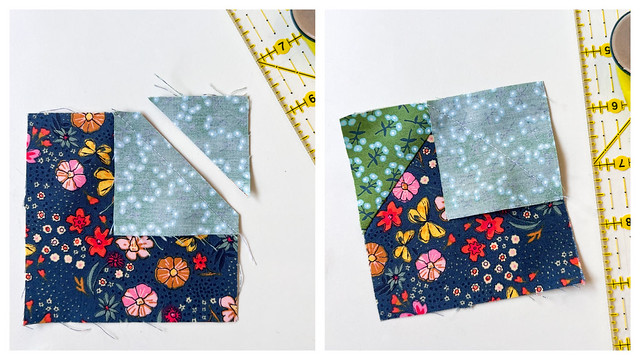
Next you'll make the four flying geese units using the no-waste make four at a time method. Mark or fold to create a diagonal line on the wrong side of the four Fabric A 2.5" squares that will be the geese backgrounds. Place a marked square right sides together on the corner of the Fabric B 4.5" square. Place a second marked 2.5" square right side down on the opposite corner, overlapping the squares in the center. Sew a 1/4" seam on each side of the marked line. Press to flatten.

Flying Geese Units 1

Cut on the marked line to seperate into two, open and press to make two flying geese units. Again note the orientation of the marked line and place a marked 2.5" square right sides together on the unit as shown.

Flying Geese Units 2

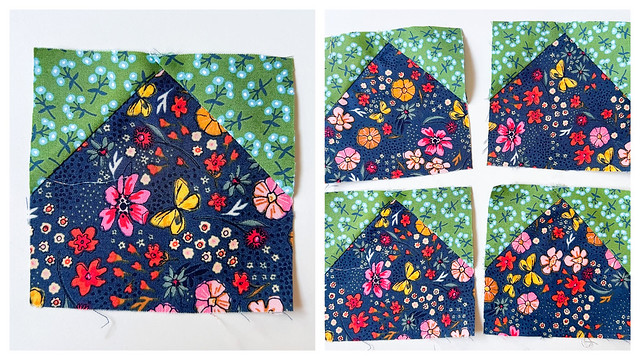
Sew a 1/4" seam allowance on each side of the marked line again. Press to flatten and then cut apart on the line to make two complete flying geese units, open and press.

Flying Geese Units 3

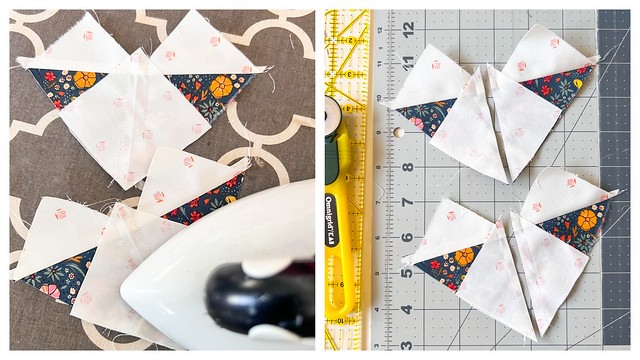
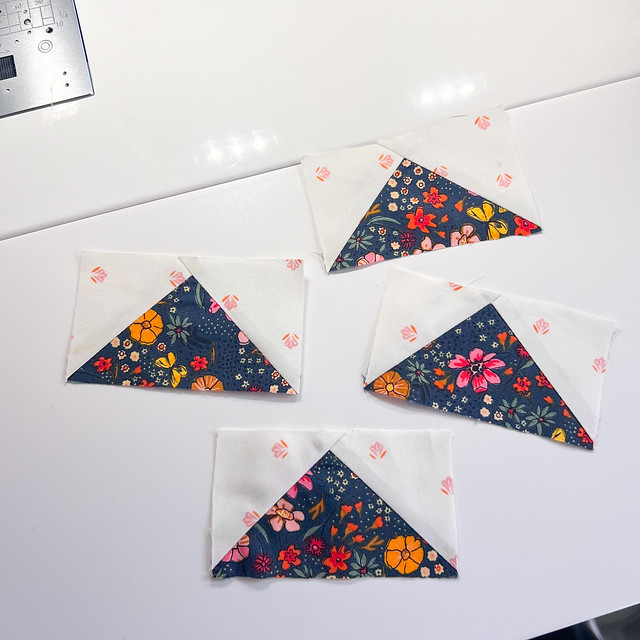
Repeat these steps with the remaining unit to create a total of four complete flying geese units. Trim units to measure 2" x 3.5" rectangles.

Flying Geese

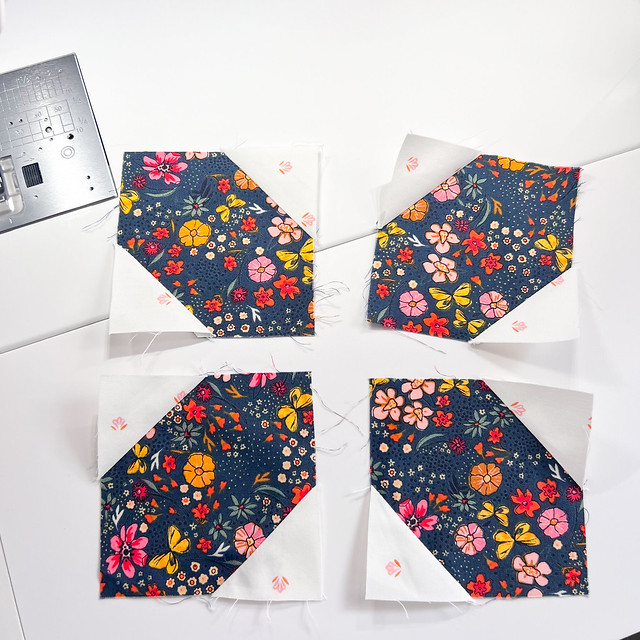
Next you'll make the four corner units. Mark a diagonal line on the wrong side of the eight Fabric A 1-3/4" small squares. Noting the orientation of the marked line place one of the marked 1-3/4" squares right sides together on a corner of one of the remaining Fabric B 3.5" squares. Sew on the line. Place a second marked 1-3/4" square right side down on the opposite corner sew a 1/4" seam the marked line.

Corner Units 1

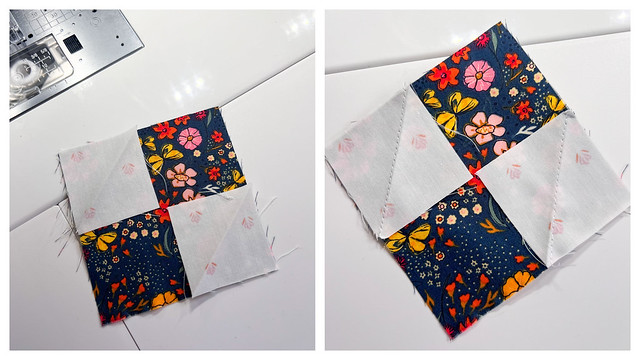
Press to flatten, then trim the corners leaving 1/4, and press the seams open.

Corner Units 2

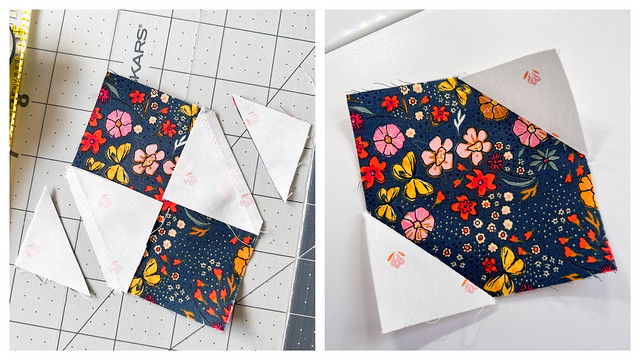
If necessary trim to square up the corner unit to measure a 3.5" square. Repeat these steps to create all four corner units.

Four Corner Units

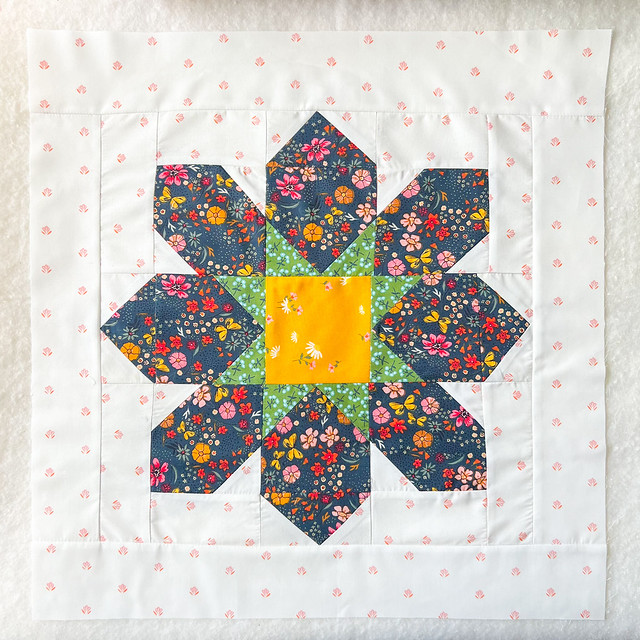
Now that all the pieced units are made it's time to assemble the Sawtooth Flower Block.

Sawtooth Flower Ready to Assemble

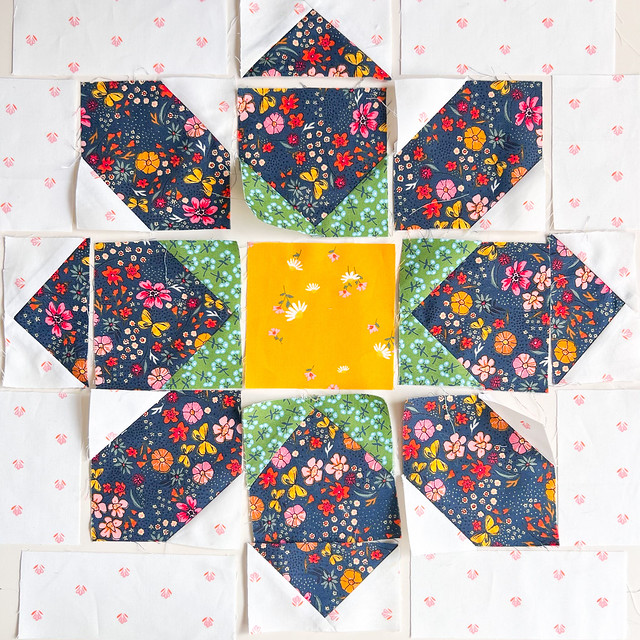
Assembling the Pillow Front:

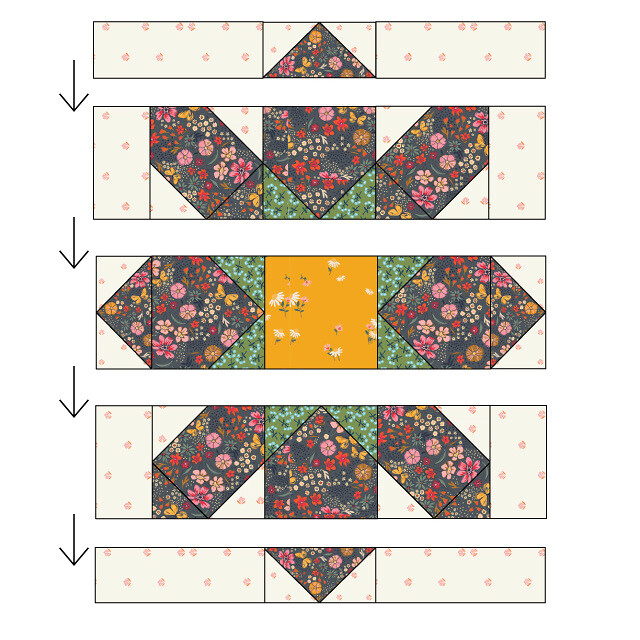
Begin by sewing together the units to create rows reffering to the Block Assembly Diagram below, noting the placement and orientation of each unit.

Sawtooth-Flower-Block (1)

Next join the rows to make a block.

Sawtooth-Flower-Block (2)

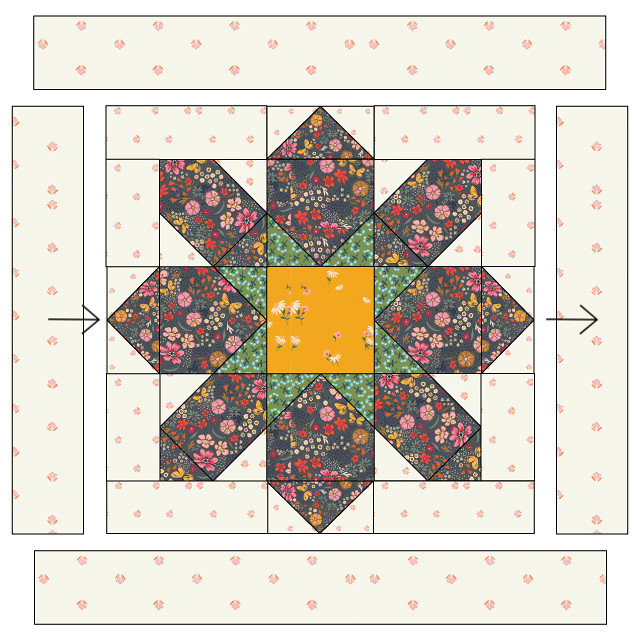
Use the cutting mat, ruler, and rotary cutter to trim block to a 12.5" square.

Finished Sawtooth Flower Block 1

Add 2.5" borders of Fabric A beginning with the side pieces measuring 2.5" x 12.5" and then add the top and bottom borders of Fabric A measuring 2.5" x 16.5" to complete the pillow top.

Sawtooth-Flower-Block (3)

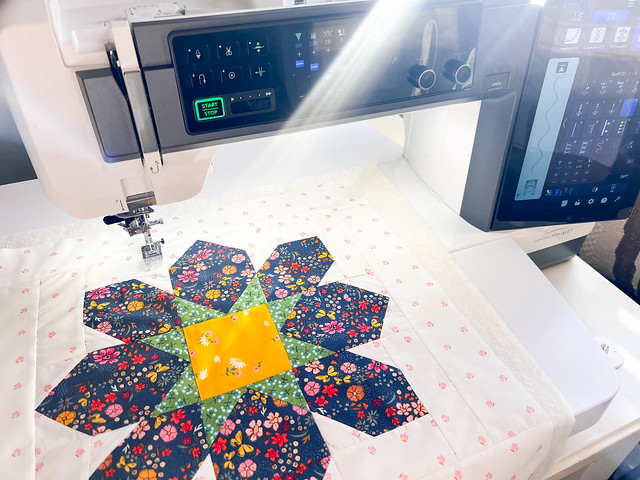
Use pins or spray to baste the pillow top to a piece of batting measuring at least an 18" square.

Baste to Batting

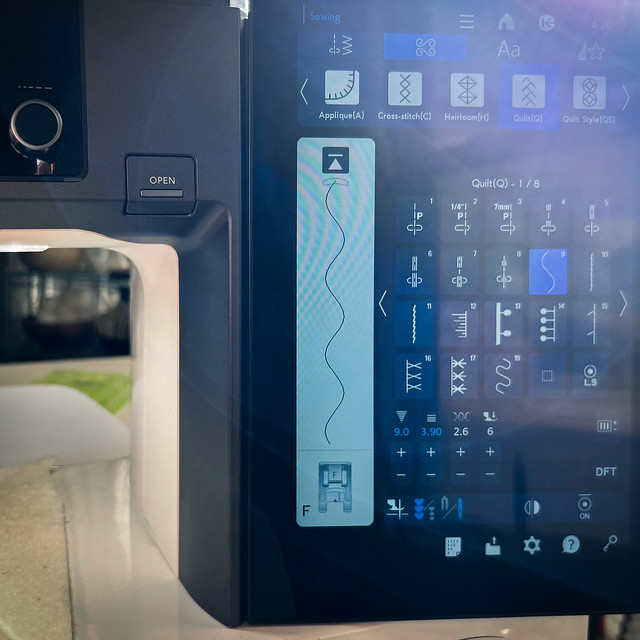
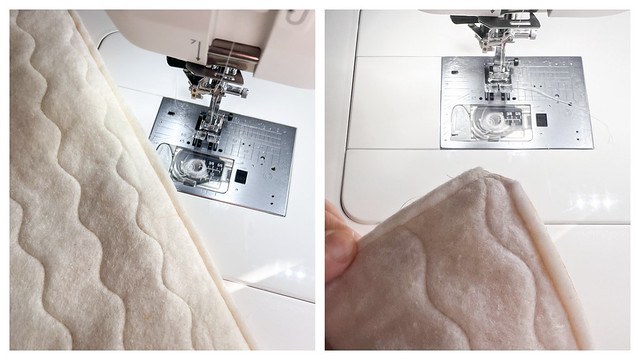
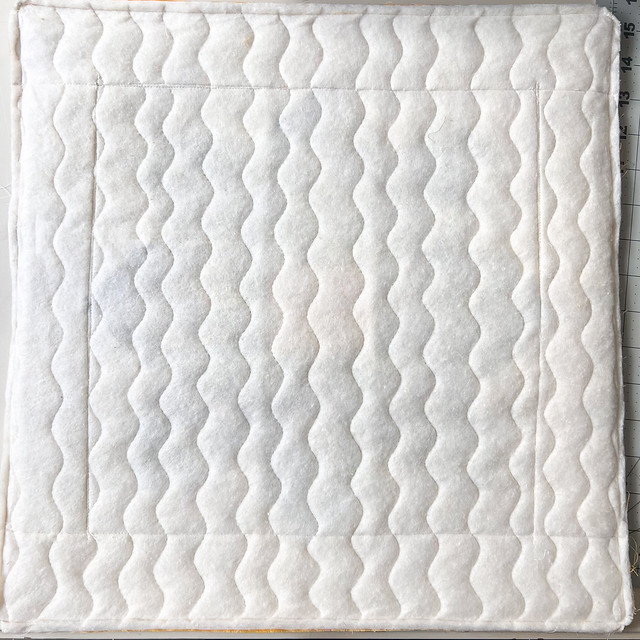
Quilt using the built-in serpentine (wavy) quilting stitch on your Janome set at a stitch width of 9.0 and stitch length of 4.0. Adding the wavy quilting vertically every inch to completely quilt the pillow top.

Quilting

Serpentine Stitch

Once quilting is complete trim away access fabric and batting to a 16" square for a 16" pillow insert.

Quilted Pillow Top with Wavy Quilt Stitch

Quilting Pillow Back Pieces:

Cut from the half yard of fabric for the pillow back one piece measuring 16.5" x 22" and two pieces 2.5" x 16" to bind the backing pieces inner edges. Just as you did for the pillow front, baste the backing piece of fabric onto a piece of batting measuring at least 18" x 24" batting and quilt the same as you did for the pillow front.Trim to two pieces measuring 11" x 16" and binding one edge of each of those pieces.

Quilted Backing Pieces

Sew Together Pillow Pieces:

Lay the quilted pillow front right side up on a flat surface, then layer the top quilted pillow backing piece with the right side facing the pillow front onto the pillow front, then the bottom backing piece. Pin or clip all three layers together. Sew using a 1/4 inch seam all the way around the pillow attaching all three layers to create the pillow cover, removing pins or clips as you go.For nice pointed pillow corners I then sew a small diagonal stitch on the outside of each corner and clip away each of the four corners as shown below.

Finishing

Finished

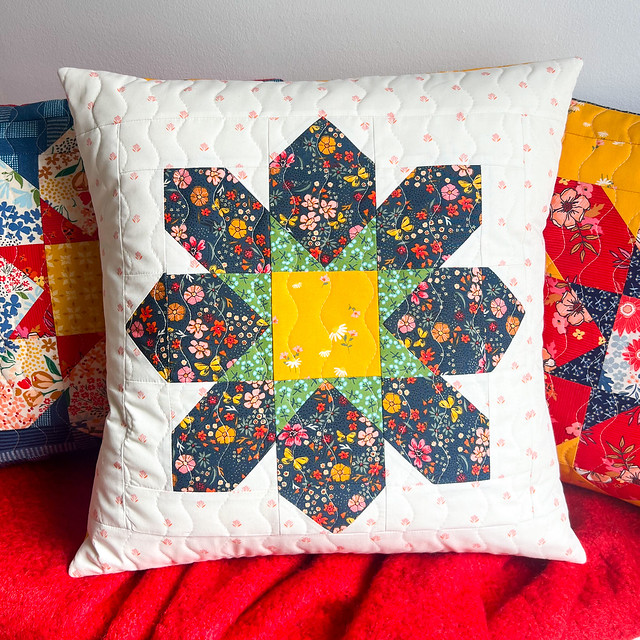
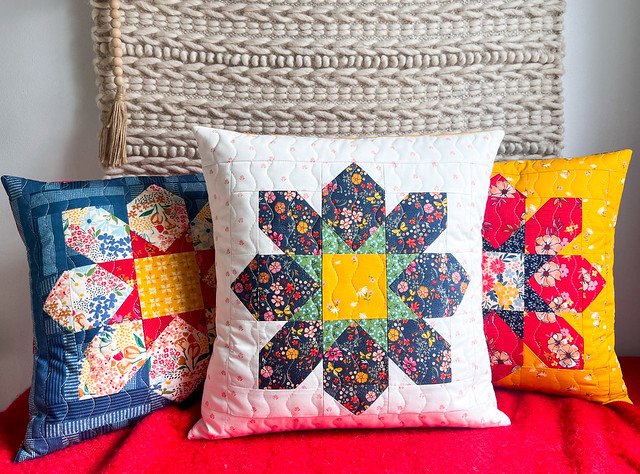
Turn the pillow cover right side out and press to make it nice and smooth before adding the pillow insert.Carefully stuff the pillow insert inside the pillow cover making sure to work the corners of the insert into the corners of the pillow cover. Now you're ready to admire and enjoy your Quilted Sawtooth Flower Pillow!

Quilted Sawtooth Flower Pillows-5

Quilted Sawtooth Flower Pillows-1

Care and Maintenance:

Remove insert and machine wash cover in cold water; gentle cycle. Lay flat to airdry or tumble dry on the lowest heat setting; remove promptly. Use a warm iron as needed to smooth out any wrinkles before reinserted the pillow insert.

I hope you enjoyed this tutorial!
Everyone is Talking about Quilted Sawtooth Flower Pillows
Reviews


Tako
Beautiful
Wednesday, November 23, 2016

cpindzola
Around the Table Dresden Placemats
Saturday, December 17, 2016

I like the concept, but the directions are "sloppy." Nowhere in the supply list does it mention the felt or the batting (how much?). Also, I would never use a high loft batting in a placemat, or a table runner, as I think that it would be too unstable for a glass. The next time I make these, I will cut out the batting (I use flannel) and spray baste it to the wrong side of the Dresden plate before I put the Dresden plate on the felt to cut out. I have not yet washed the finished placemat, and am hoping that the single layer of felt does not curl up, or become distorted after washing/drying.
Txmaid
Fun Great Gift!
Tuesday, February 21, 2017

MargieARK
Teatime Quilted Tablecloth
Friday, February 24, 2017

I made this today but your cutting directions need to be changed. You only need 4 of color 1 and color 3 4.5 squares for the triangles. Also the inner border, you only need 2 cuts as WOF is long enough to cut each in half to fit the sides.
MickelSews
Great Machine
Wednesday, August 30, 2017

I've had this machine for only a week now. I bought it used from a lady who makes her own clothes, but she no longer needed the machine. During the purchase, she noted that she is almost sad that it's better to give it away because of how well the machine performed. (I also bought it along side a computerized machine of another brand.} She demoed the machine for us, showing it worked and gave us everything (including the box it came in!) She took amazing care of this machine. I have used it a few times now, and the directions for threading were easy to follow (albeit my hands are quite large so the lower looper was a pain, but that is no fault to the machine or brand.) And I recommend this machine to anyone who wants to learn to serge and wants a machine that can grow with them. I will happily use this machine time and time again.
rvstan
S9 Review
Sunday, February 25, 2018

I love, love, love my S9! It's sews and embroiders beautifully and it's simplicity of use amazes me. I would recommend this machine for both a beginner and an experienced seamstress. If I would ask anything of Janome it would be to upgrade the programming to run a larger hoop size. I understand that it can't get much wider but there is most definitely room for it to go longer. That is the only limitation of this machine.
pjmnana
PJMNana
Monday, February 26, 2018

I purchased a Memorycraft 15000 a few years ago and it was the best purchase I ever made! This machine can do just about anything you would would ever want! I love the capability of using the Acuedit app to set up my embroidery pattern on my Ipad and then download it to the machine! I love how my embroidery looks upon completion and I love all the good lighting it has to light up your workspace. That way you don’t need to worry about where to set up your machine. It also has plenty of room to do machine embroidery on any size quilts! There are many decorative stitches from which to choose that are outstanding! It’s hard to choose which one to use! There are so many great features it is hard to decide what I love the most. If you want to buy only one machine to last a lifetime, I would recommend this one!
KLWash
S9 Review
Sunday, February 24, 2019

The S9 is amazing. I learned to sew by hand when I was just 5 and in my grandmothers way as she was quilting. I took seeing classes in high school until they would no longer let me sign up. The S9 makes me appreciate my current skills as well as motivate me to want to learn more. This machine is awesome.
SewSueMe2002
Horizon Memory Craft 15000
Thursday, November 19, 2020

My Janome Horizon Memory Craft 15000 is fantastic! I love, love, love this machine! When I came across the Eye for and Eye embroidery design today, I wanted to make it. However, the embroidery file is missing. Nothing downloads when I select the download button. Please help!
Jillfmischo
Treat Bag fun!
Monday, August 16, 2021

I made the Halloween treat bag for my new granddaughter and I’m sure it will last for years. No embroidery machine so I appliquéd the lettering. Need a little more skirt fabric for a better gathered look, and I used thin double-bias tape for the skirt hem, over edge stitch on skirt sides. I’m pleased with my results!
elenaz
Very helpful tutorial
Wednesday, October 25, 2023

I want to say thank you for teaching me this method of applique. I was able to do it with a small letters. This method is the best so far from all of those I've seen and tried.
plonkar
So useful
Thursday, November 30, 2023

I'd like to express my gratitude for teaching me this appliqué method. I successfully applied it with small letters, and, so far, it's the most effective among all the methods I've seen and tried.

DEALERS
The TWO Closest Dealers to you are:
1900 CENTRE ST , WEST ROXBURY MA, 02132
(617)323-6200
443 MOODY STREET , WALTHAM MA, 02453
781-893-3331
Find Additional Dealers