Projects

The Flower Fields Quilt

Created By:

Maureen Cracknell

Skill Level: Advanced

Quilt Tutorial Fabrics

Today I'm excited to share my first tutorial made using Janome's amazing Continental M17 Sewing and Embroidery machine for The Flower Fields Quilt made using prints from my new collection for Art Gallery Fabrics, The Flower Fields! The CM17 offers many top features and for this simple quilt project the incredibly generous workspace, perfect stitches, and fast sewing speed made creating this beautiful quilt so much fun!

Fabric and Notions Required

To create The Flower Fields Quilt, in addition to the Opulent Swell panel print, you will need sixteen prints, eight coordinating solid colors, a sashing fabric, backing fabric, and binding fabric of your choice. Use the fabric requirement and Quilt Mockup image below to help source, plan, and layout The Flower Fields Quilt!

Quilt Fabric Requirements

Backing and Binding

Instructions


Janome CM17

The Flower Fields by Maureen Cracknell for AGF

The star of this quilt pattern design is the panel print from The Flower Fields collection, Opulent Swell, that features 6" floral cluster squares that take the work out of fussy cutting!

Panel Print - Opulent Swell

To create The Flower Fields Quilt, in addition to the Opulent Swell panel print, you will need sixteen prints, eight coordinating solid colors, a sashing fabric, backing fabric, and binding fabric of your choice. Use the fabric requirement and Quilt Mockup image below to help source, plan, and layout The Flower Fields Quilt!

Quilt Fabric Requirements
Backing and Binding

Winters-Garden-Quilt-MockUp

The Flower Fields block pattern begins with a large center square, perfect for showcasing those favorite floral prints. They're fun to make, sew up quick and I hope you'll join me in making them! If you do, feel free to tag me @MaureenCracknell & @JanomeAmerica and to add #TheFlowerFieldsQuilt when you share!

Quilt Blocks made with my Janome M17

*NOTE* Each quilt block measures a 12.5" square (unfinished) and sixteen blocks with the sashing will make a throw size quilt measuring approximately a 60.5" square.

Block Cutting Instructions

For each block you'll need:

  • one 6" square for the center of each block -- from the panel you'll cut eight flower squares with a creamy white background and eight flower squares with a yellow background
  • four pieces measuring 3" x 6" for the top, bottom, and sides of the center fabric. *NOTE* some of these prints are directional so take careful notice to cut them so the design is properly oriented
  • four pieces measuring 3" squares for the four corners
  • two pieces measuring 1.25" x 11" for the outer sides
  • two pieces measuring 1.25" x 12.5" for the outer top and bottom


Fabrics Cuts

Block Layout

Block Construction

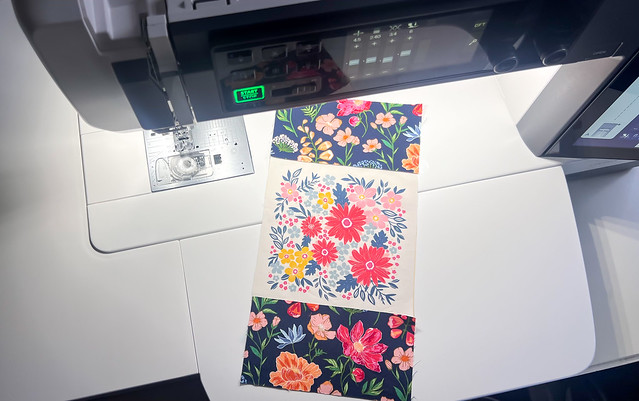
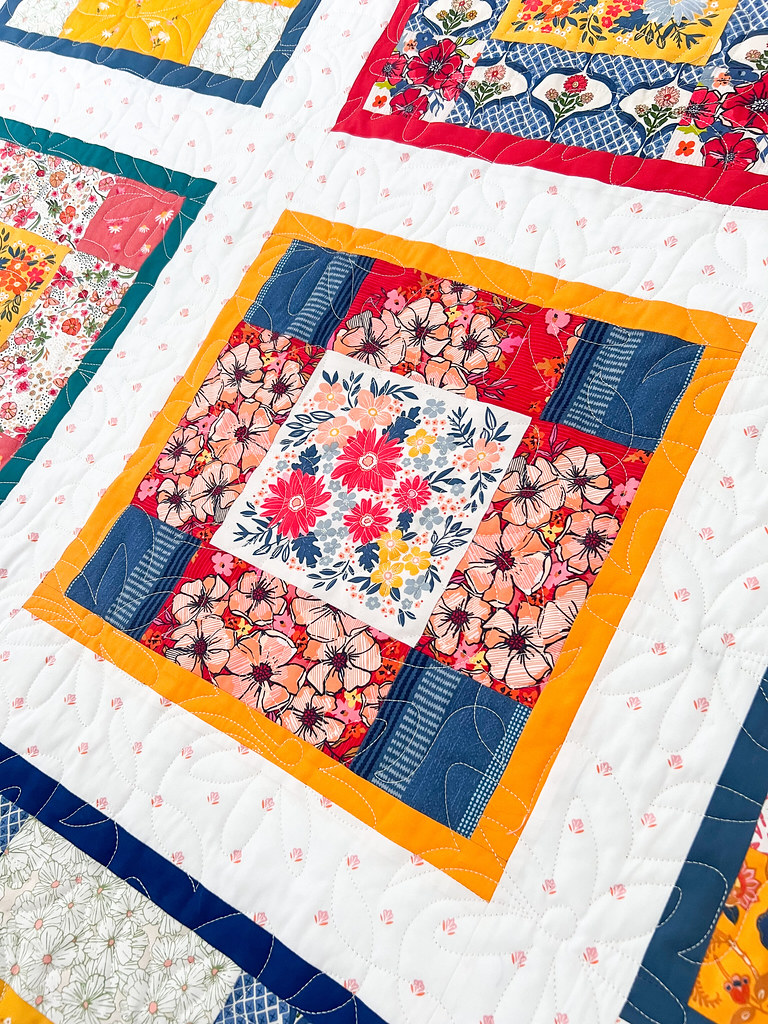
First sew the three center fabrics together. Place the top and then the bottom 3" x 6" fabric cuts one at a time onto the center square with right sides facing and sew along the edge using a 1/4" seam allowance. Repeat to add both the top and bottom fabrics to the center square. Use an iron to press the seams to one direction.

Step 1

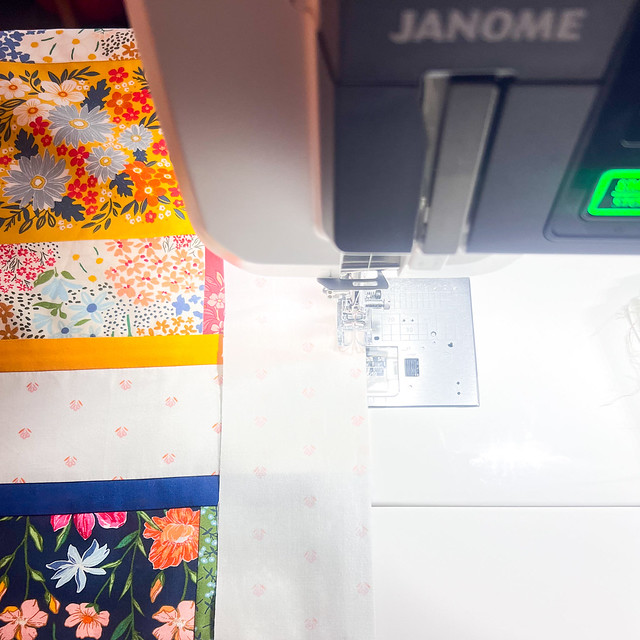
Sew two of the 3" corner squares to the top and bottom of the side 3" x 6" fabric cuts using a 1/4" seam allowance. Chain piecing with the Janome Continental is made easy with the large work space.

Step 2

Step 3

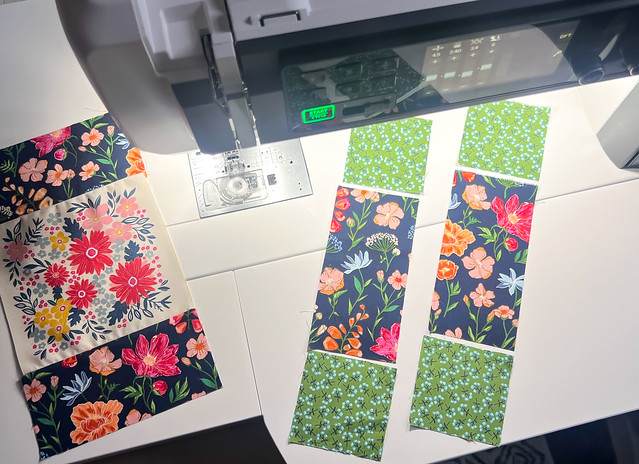
Press the seams of these side pieces in the opposite direction of the direction you pressed the center fabric seams. Pressing in opposite directions is ideal to create perfectly matched seam intersections.

Step 4

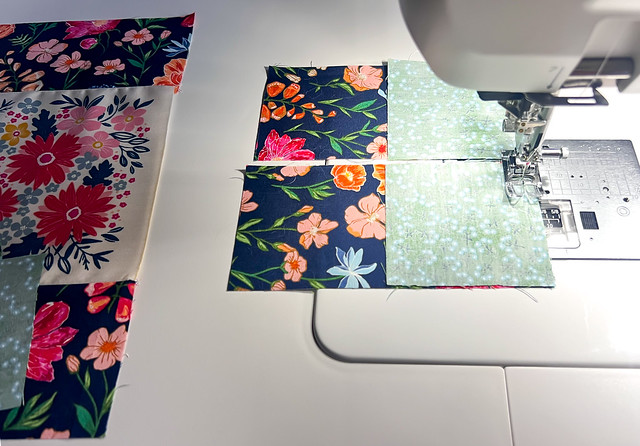
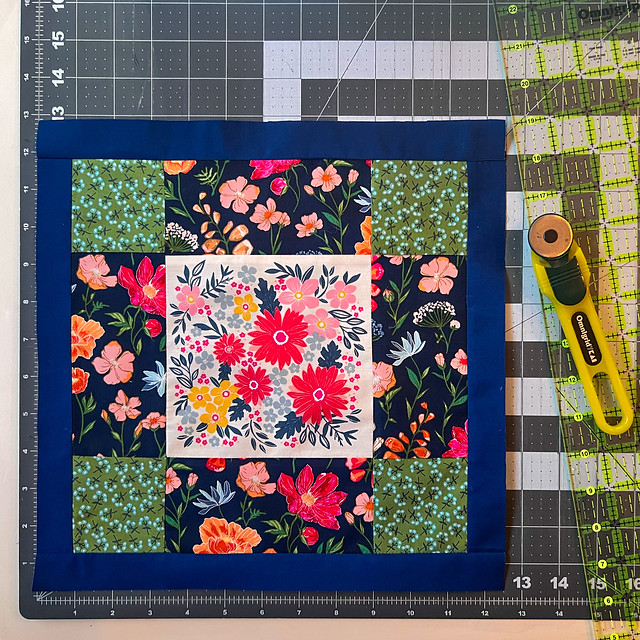
Complete the patchwork by sewing the two side pieces to the center using a 1/4" seam throughout. If necessary, square up the center patchwork to measure an 11" square before adding the solid border fabrics.

Step 5

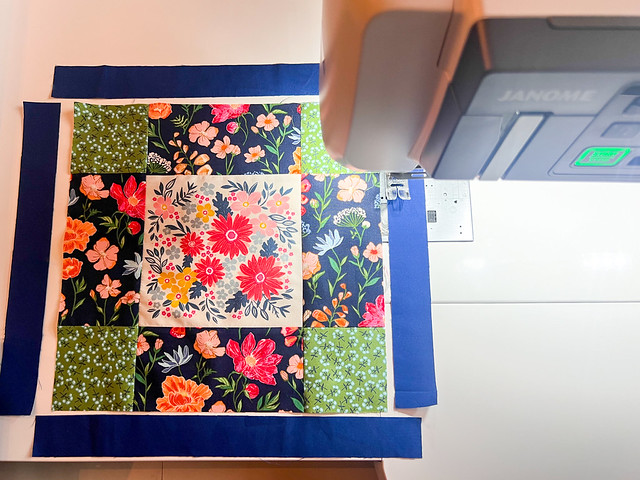
Add the border solid fabrics one at a time beginning with the side pieces. Sew along the 11" side using a 1/4" seam allowance.

Step 6

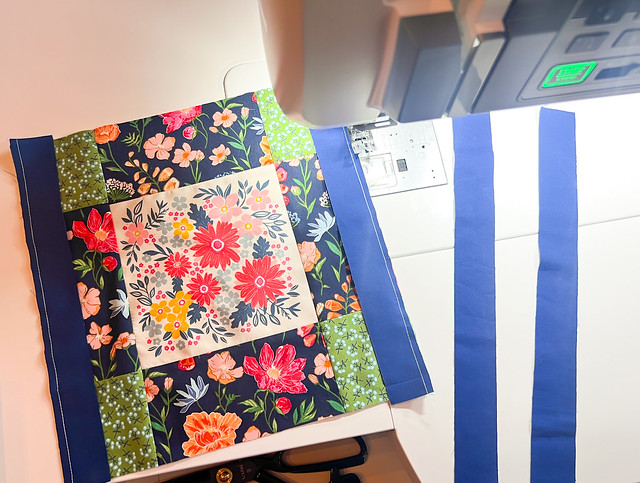
Repeat to add the top and bottom solid border fabrics.

Step 7

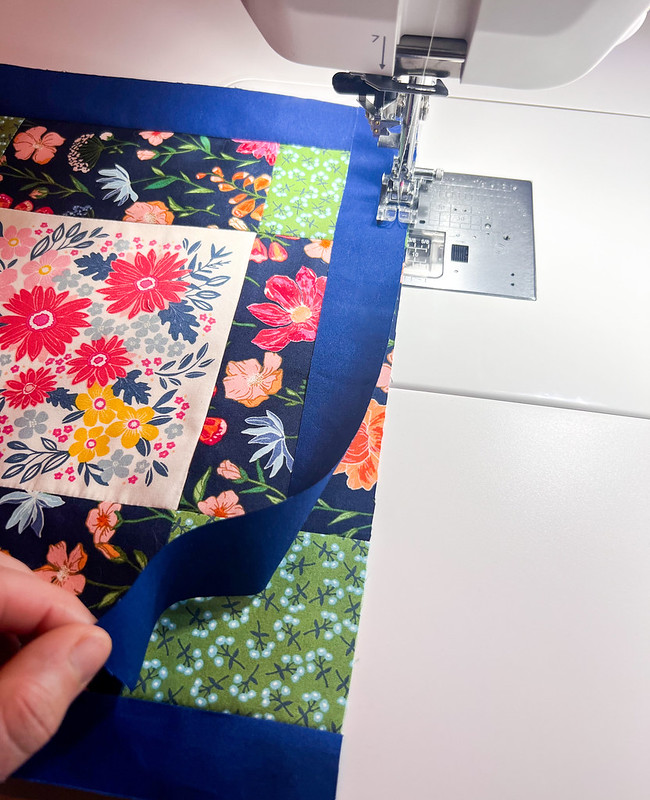
If necessary, again square up the block this time to measure a 12.5"

Step 8

It's as simple as that!

The Flower Fields Blocks

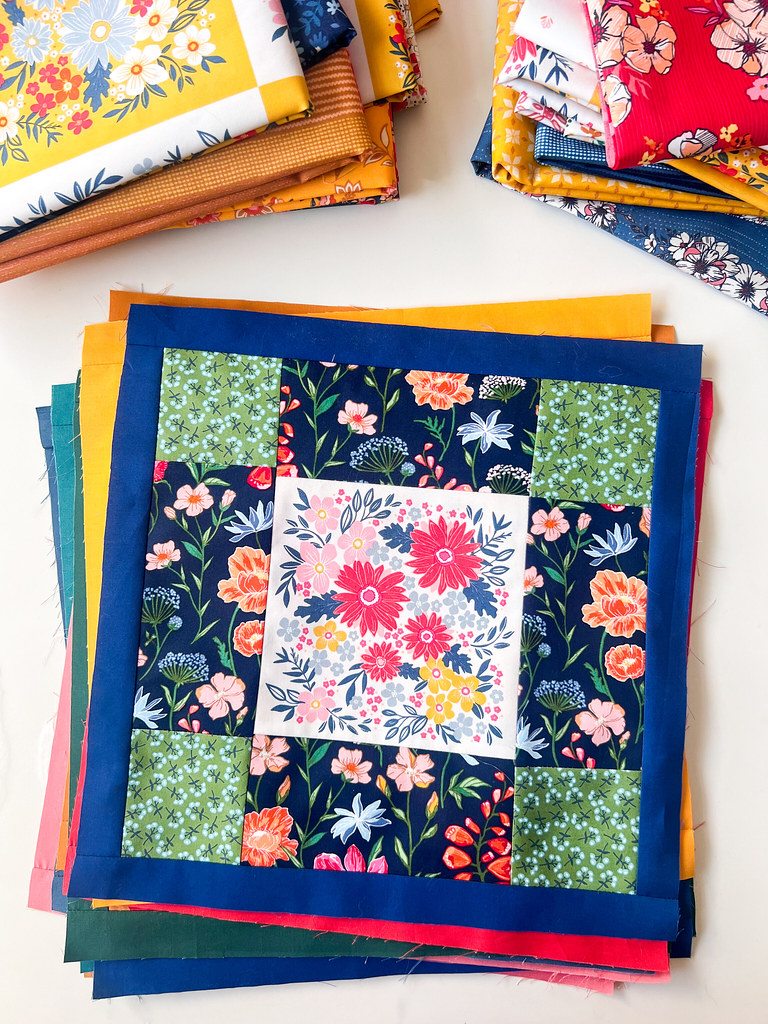
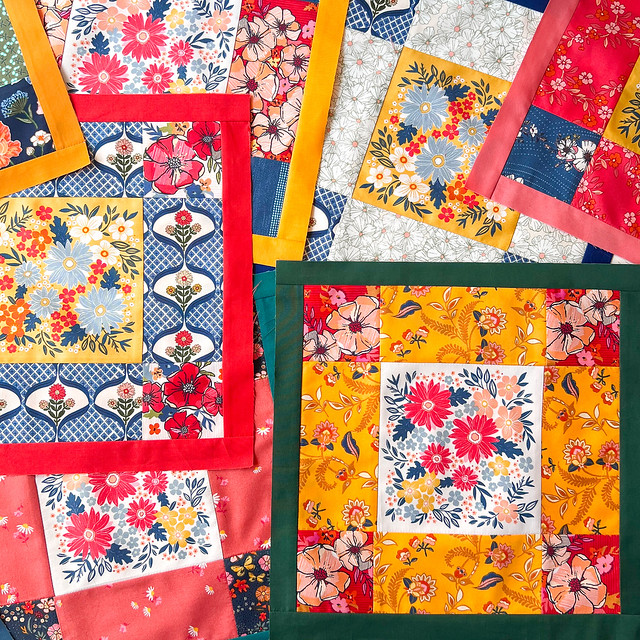
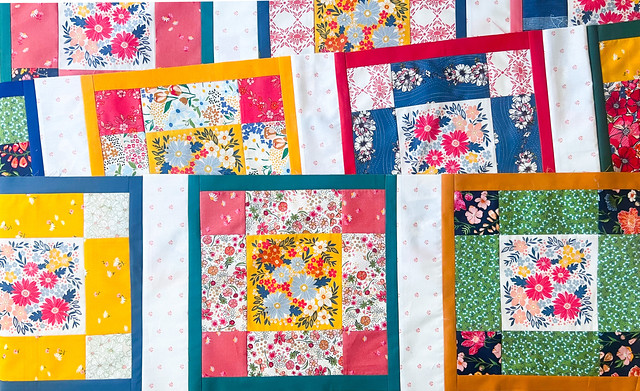
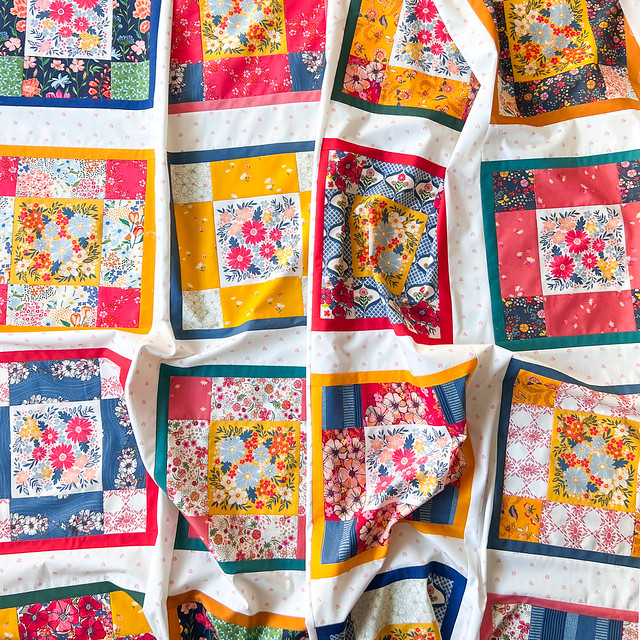
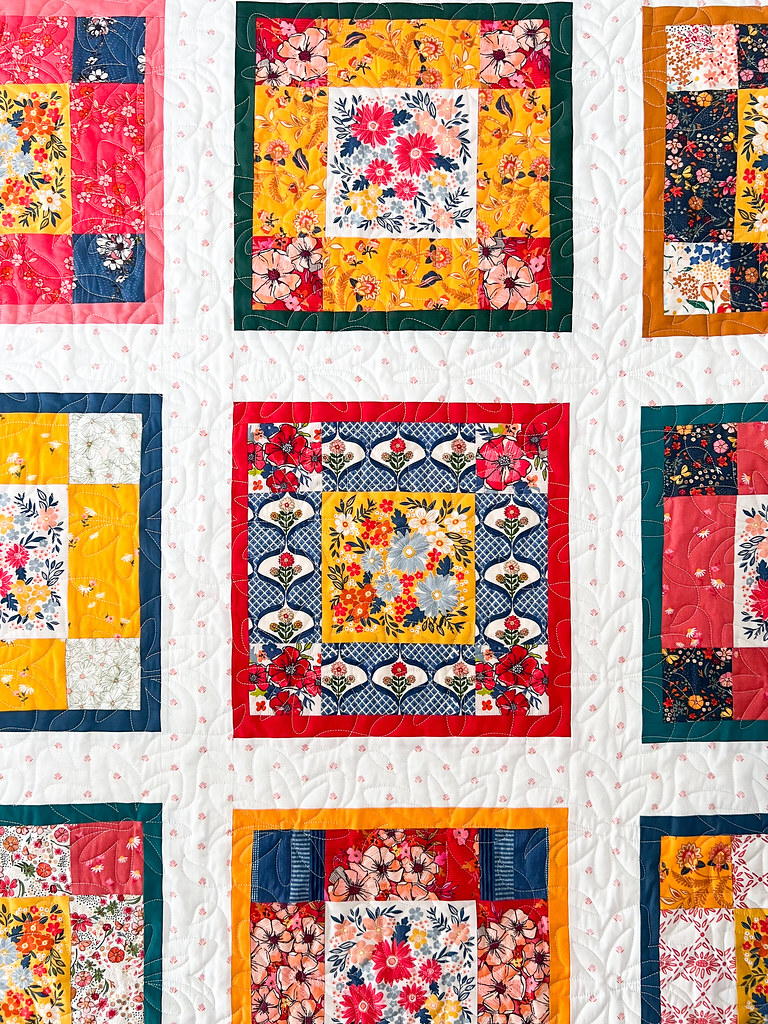
Now use the Quilt Mockup image above to continue to make all sixteen quilt blocks.

Finished Blocks

Cutting and Adding the Quilt Sashing

From the sashing fabric you'll need twenty pieces measuring 3" x 12.5" to sash the quilt blocks together into row and five pieces measuring 3" x 61" to sash the four rows together.

Cutting Sashing

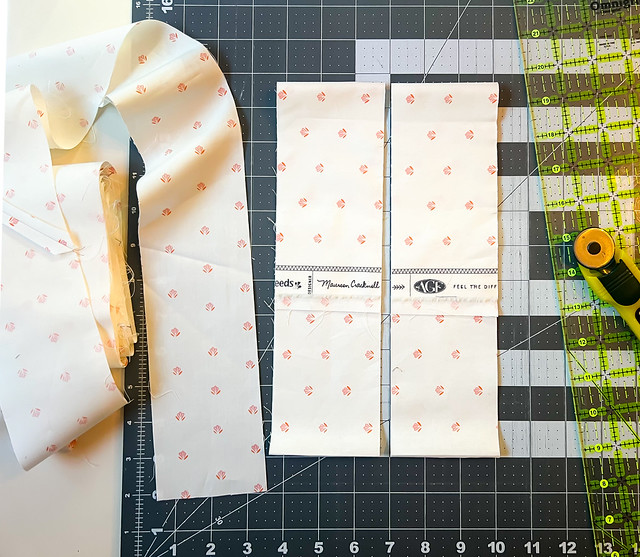
*NOTE* the sashing print used in this tutorial is directional so take careful notice to cut the pieces so the design is properly oriented. To make the lengths of sashing sew together as you would to make quilt binding.

Quilt Sashing

Chain piece using a 1/4" seam to add a sashing piece measuring 3" x 12.5" to connect the quilt blocks into four rows. Use the Quilt Mockup image again to reference the order quilt block should be sewn together.

Chain Piece the Block Sashing

Blocks with Sashing

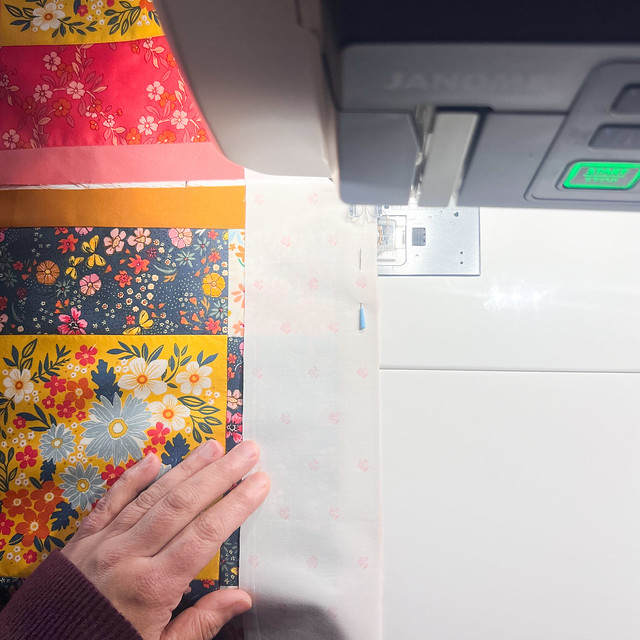
To finish the quilt top use the sashing length to connect the quilt block rows.

Add the Long Sashing

Quilt Top

Quilt Top with Cleo

Layer, baste, and quilt as desired.

Edge to Edge Flowers

Quilted

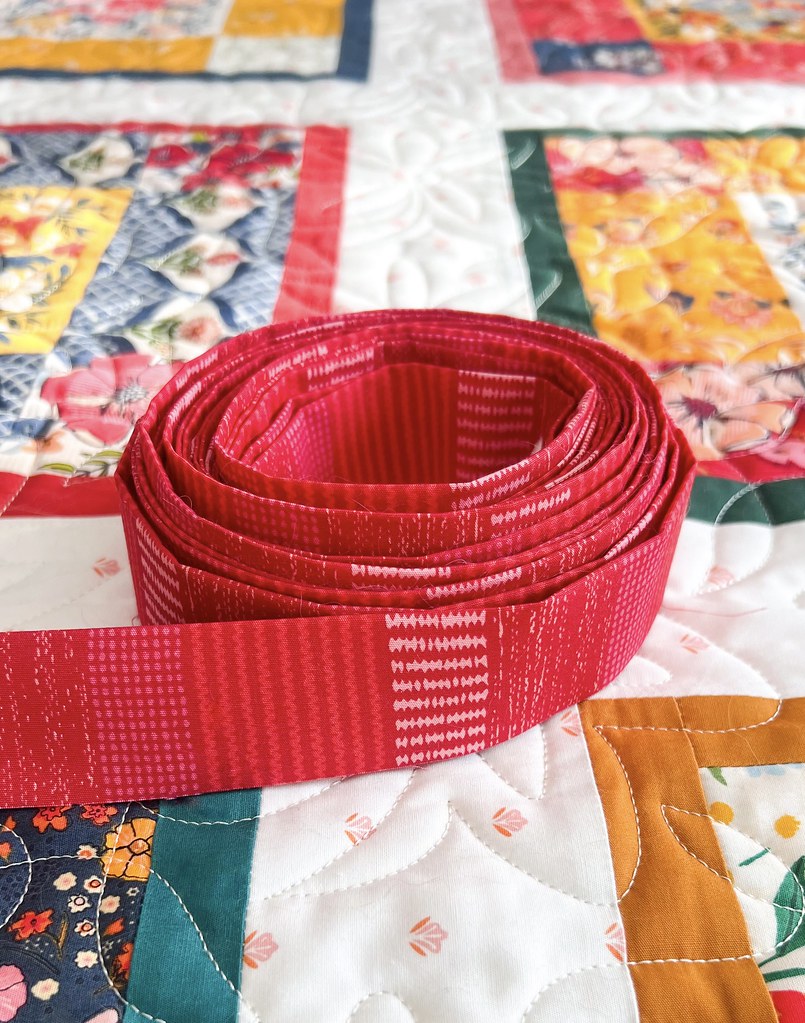
Lastly, from the binding fabric cut seven 2.5" strips, piece together, and bind to finish.

Eclectic Streaks Ablaze Binding-1

Now it's time to hug your Janome & enjoy your beautiful The Flower Fields Quilt!

The Flower Fields Quilt

♡ Maureen
Everyone is Talking about The Flower Fields Quilt
Reviews


Tako
Beautiful
Wednesday, November 23, 2016

cpindzola
Around the Table Dresden Placemats
Saturday, December 17, 2016

I like the concept, but the directions are "sloppy." Nowhere in the supply list does it mention the felt or the batting (how much?). Also, I would never use a high loft batting in a placemat, or a table runner, as I think that it would be too unstable for a glass. The next time I make these, I will cut out the batting (I use flannel) and spray baste it to the wrong side of the Dresden plate before I put the Dresden plate on the felt to cut out. I have not yet washed the finished placemat, and am hoping that the single layer of felt does not curl up, or become distorted after washing/drying.
Txmaid
Fun Great Gift!
Tuesday, February 21, 2017

MargieARK
Teatime Quilted Tablecloth
Friday, February 24, 2017

I made this today but your cutting directions need to be changed. You only need 4 of color 1 and color 3 4.5 squares for the triangles. Also the inner border, you only need 2 cuts as WOF is long enough to cut each in half to fit the sides.
MickelSews
Great Machine
Wednesday, August 30, 2017

I've had this machine for only a week now. I bought it used from a lady who makes her own clothes, but she no longer needed the machine. During the purchase, she noted that she is almost sad that it's better to give it away because of how well the machine performed. (I also bought it along side a computerized machine of another brand.} She demoed the machine for us, showing it worked and gave us everything (including the box it came in!) She took amazing care of this machine. I have used it a few times now, and the directions for threading were easy to follow (albeit my hands are quite large so the lower looper was a pain, but that is no fault to the machine or brand.) And I recommend this machine to anyone who wants to learn to serge and wants a machine that can grow with them. I will happily use this machine time and time again.
rvstan
S9 Review
Sunday, February 25, 2018

I love, love, love my S9! It's sews and embroiders beautifully and it's simplicity of use amazes me. I would recommend this machine for both a beginner and an experienced seamstress. If I would ask anything of Janome it would be to upgrade the programming to run a larger hoop size. I understand that it can't get much wider but there is most definitely room for it to go longer. That is the only limitation of this machine.
pjmnana
PJMNana
Monday, February 26, 2018

I purchased a Memorycraft 15000 a few years ago and it was the best purchase I ever made! This machine can do just about anything you would would ever want! I love the capability of using the Acuedit app to set up my embroidery pattern on my Ipad and then download it to the machine! I love how my embroidery looks upon completion and I love all the good lighting it has to light up your workspace. That way you don’t need to worry about where to set up your machine. It also has plenty of room to do machine embroidery on any size quilts! There are many decorative stitches from which to choose that are outstanding! It’s hard to choose which one to use! There are so many great features it is hard to decide what I love the most. If you want to buy only one machine to last a lifetime, I would recommend this one!
KLWash
S9 Review
Sunday, February 24, 2019

The S9 is amazing. I learned to sew by hand when I was just 5 and in my grandmothers way as she was quilting. I took seeing classes in high school until they would no longer let me sign up. The S9 makes me appreciate my current skills as well as motivate me to want to learn more. This machine is awesome.
SewSueMe2002
Horizon Memory Craft 15000
Thursday, November 19, 2020

My Janome Horizon Memory Craft 15000 is fantastic! I love, love, love this machine! When I came across the Eye for and Eye embroidery design today, I wanted to make it. However, the embroidery file is missing. Nothing downloads when I select the download button. Please help!
Jillfmischo
Treat Bag fun!
Monday, August 16, 2021

I made the Halloween treat bag for my new granddaughter and I’m sure it will last for years. No embroidery machine so I appliquéd the lettering. Need a little more skirt fabric for a better gathered look, and I used thin double-bias tape for the skirt hem, over edge stitch on skirt sides. I’m pleased with my results!
elenaz
Very helpful tutorial
Wednesday, October 25, 2023

I want to say thank you for teaching me this method of applique. I was able to do it with a small letters. This method is the best so far from all of those I've seen and tried.
plonkar
So useful
Thursday, November 30, 2023

I'd like to express my gratitude for teaching me this appliqué method. I successfully applied it with small letters, and, so far, it's the most effective among all the methods I've seen and tried.

DEALERS
The TWO Closest Dealers to you are:
196 Boston Post Road , Orange CT, 06477
203-878-1654
19 PUTNAM AVENUE , PORT CHESTER NY, 10573
914-934-2934
Find Additional Dealers