Hello! My name is Jessee, and this is my first post here on the Janome Blog. I'm super excited!
To give a little bit of background...
I have been sewing since I was 5 years old and I come from a family of makers. My mom is a seamstress and my sisters all make their own clothes. I myself have had a maker business for the past 18 years under the name Art School Dropout. I make everything from 3D printed pieces, laser cut jewelry, cast plastic accessories, quilt patterns & quilts, wood pieces, embroidered pieces and more. I also teach these things at a local makerspace and I'm a girl scout leader! Basically my whole life revolves around being a maker.
Lately my maker habits have pushed me towards Conventions and Cosplay. My family and I go to all of the local conventions around the Washington DC area and I even sell at a few. So when I was thinking about what my first project would be, I thought of the trends I'd see at these events. I noticed a bunch of Kawaii (cute) embroirdered wool berets at different booths last year. They'd have cut animals, fruit or something else anime themed dancing around them. A few even had ribbon borders and cute bows. My 10 year old daughter loved them anbd kept asking for one.
Which brings me to today's tutorial...
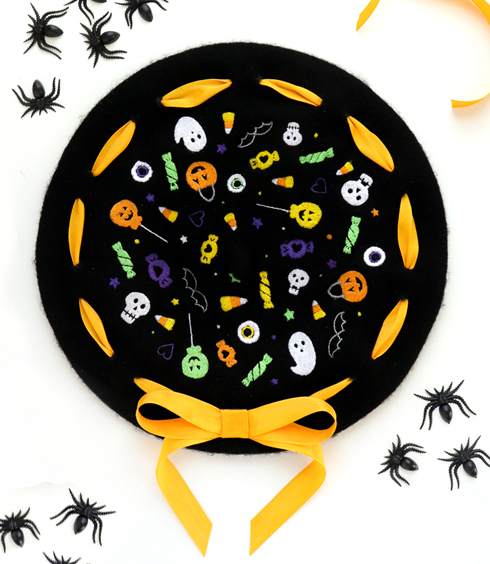
How to Machine Embroider a Kawaii Halloween Beret!
You'd think the process was a no brainer, but these wool berets can get tricky to machine embroider. It took some trial and error with both the file and the technique to get it just right. I also went through a handful of berets! oops.
Now lets get started with a supply list...
You will need:
- A Janome Embroidery Machine that can use the SQ23 230x230 Hoop (I am using the MC15000)
- An 11" wool beret (I bought mine off of Amazon since I'm still staying home 24/7)
- Embroidery thread in Yellow, Orange, Bright Purple, Slime Green, White and Medium Grey
- A stiletto tool or a 'That Purple Thang'
- Peel & Stick stabilizer (I used Pellon)
- Scissors
- 1/4" or 1/2" Ribbon (optional)
- Fabric Fusion Glue or a Glue Gun (optional)
- A white gel pen or silver sharpie marker (optional)
- A large upholstrey or needlework needle (optional)
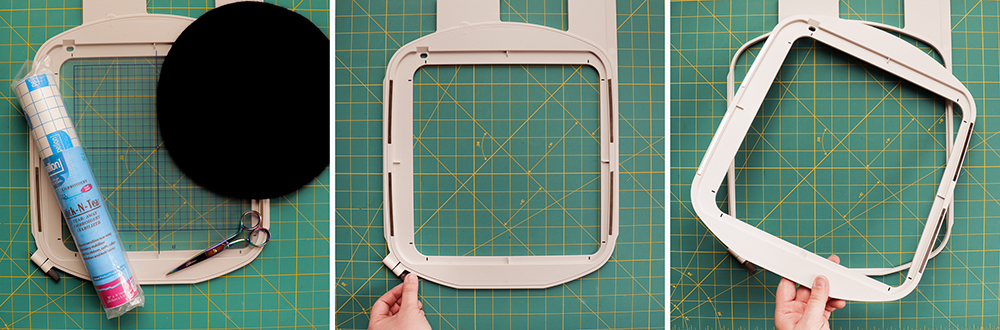
First things first, lets untighten the embroidery hoop and get it ready!
Next you will want to measure how much of the Peel & Stick stabilizer you will need. I always cut a little extra just in case.
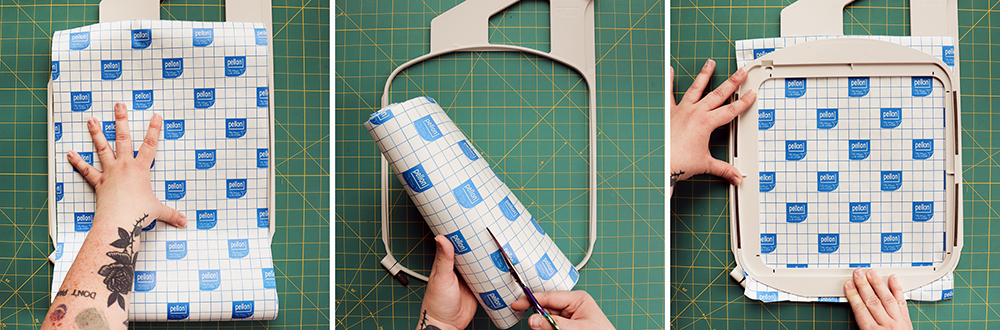
Place it in your hoop with the paper side up! This is very important.
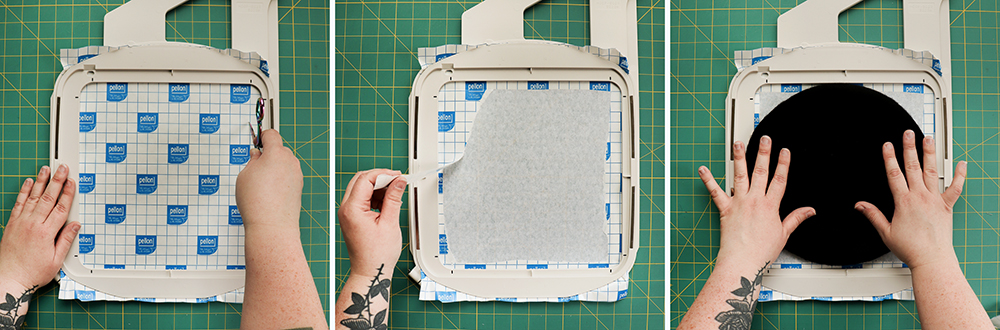
Now using your stiletto or a pair of scissors open, score some lines around the paper. You will want to cut through the paper, but not the stabilizer underneath. I always say it's better to score a few times than to push too hard and cut through on the first time around.
The scoring should have allowed you to start peeling off the paper. Make sure to get as much off as possible.
To make the beret easy to embroider, you will need to turn it inside out. Once you have done so, try and center it on the hopp using the raised lines on each side of the hoop. It's fine if it's not perfect, we'll do some more wiggling around in the next step.
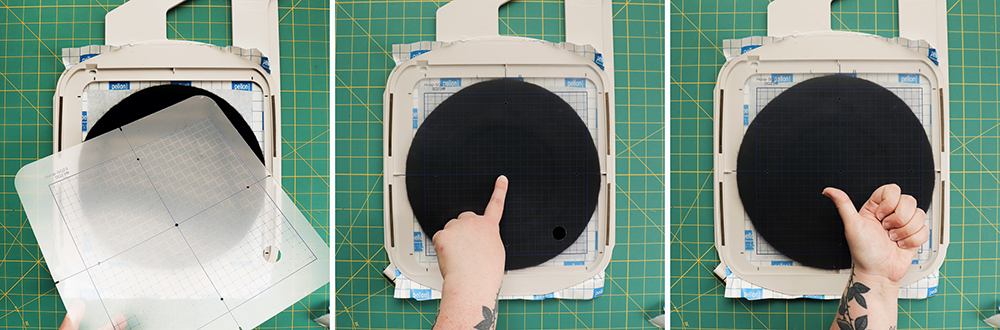
Your hoop should have come with a clear centering template like shown above. This is absolutely perfect for this project, since you will now try and center the little nub on the beret with the hole in the center of the template. Make sure the template mactches up with those notches on the hoop! This will save you heartache later.
Once you are comfortable with the placement of the beret, press down as much as possible to make sure it doesnt shift on the machine.
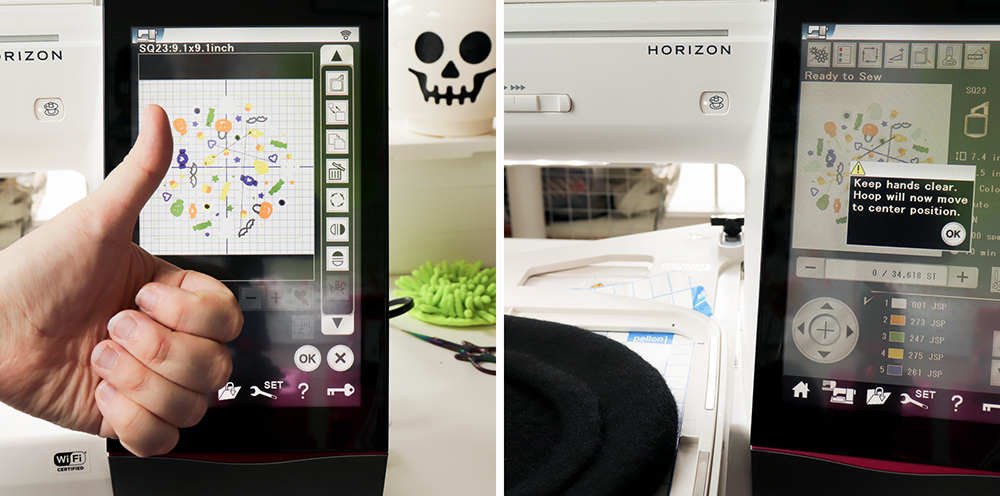
Now load up the Halloween Beret file and get started! It has already been sized perfectly to fit on the beret AND to account for the inside flaps with some assistance.
Please note that this is a 65min embroidery job and it will need constant babysitting due to those flaps, but I promise you it will be worth it in the end.
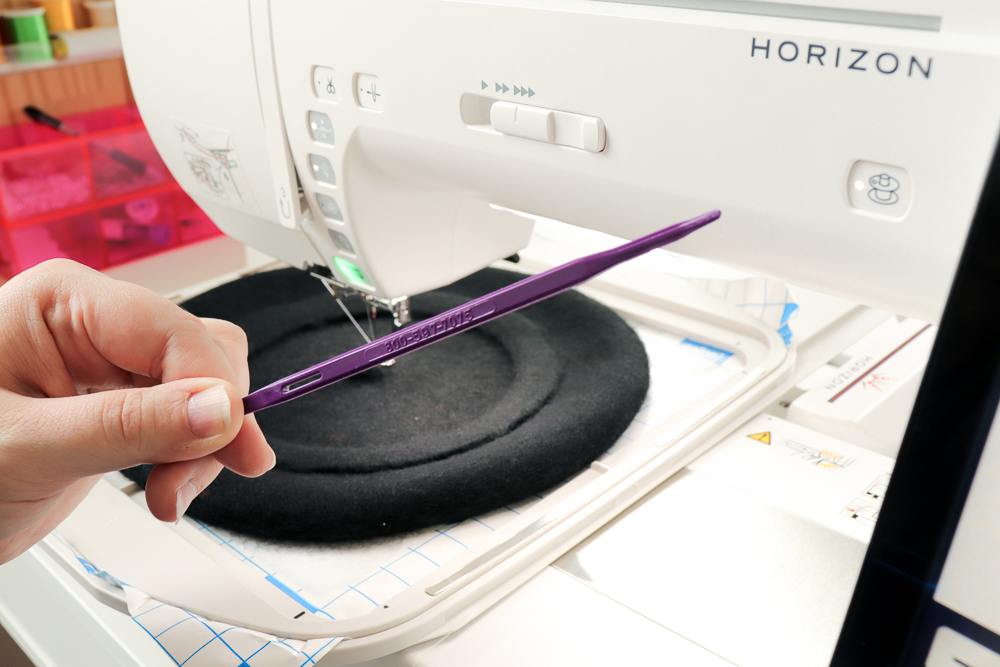
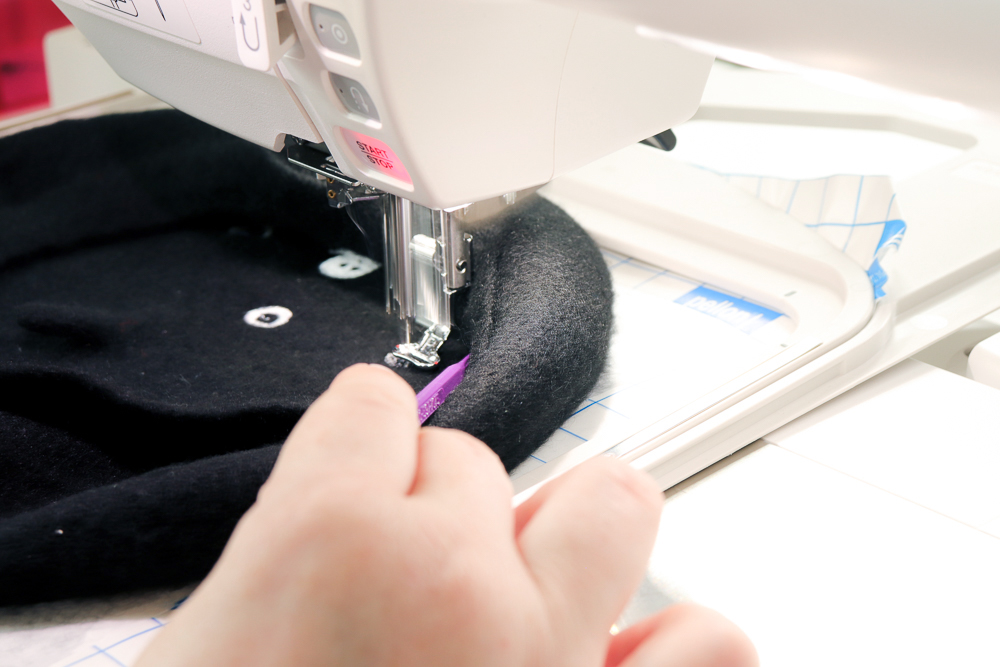
Now I bet you were wondering what I was talking about it the supply list when I wrote "That Purple Thang'. Well, this was it! It's one of my most used tools and is almost crucial for this project. It's a plastic slightly curved stiletto that can also be used to thread ribbon and elastic as well as push out corners in sewn pieces.
For this project we are using it to move the flaps on the beret to the side while the machine is going. This allows for zero interference with the needle and carriage, as well as keeping our hands as far away as possible.
Thats a must! I have def sewn through my finger with both a sewing machine and a longarm machine. I don't wish that grossness on my worst enemy.
A regular sewing stiletto will also work for this btw, I'm just a fan of 'That Purple Thang' (plus I just really like saying "Thang")
Once you have sat and watched the embroidery machine work it's magic, you could be 100% finished and go about your day wearing your new magical halloween beret.
You could also take it one more step, which is what my daughter requested, and add some fun ribbon around the edge!
To make this easier, I have included a printable template for positioning the ribbon. I wanted to help you and take out any guess work. It will print out on two pages, so you will need to cut it out and tape it together. Make sure to match up the shapes with the stars inside. Please note: It is an inch smaller than the actual beret. I did this so there were only two pages to print instead of four.
To accomplish the ribbon look, you can use either 1/4" or 1/2" ribbon. We used 1/2" because thta is what my daughter picked out. I personally wanted to go with gold, but she is the one who will be wearing this.
DOWNLOAD the ribbon template HERE!
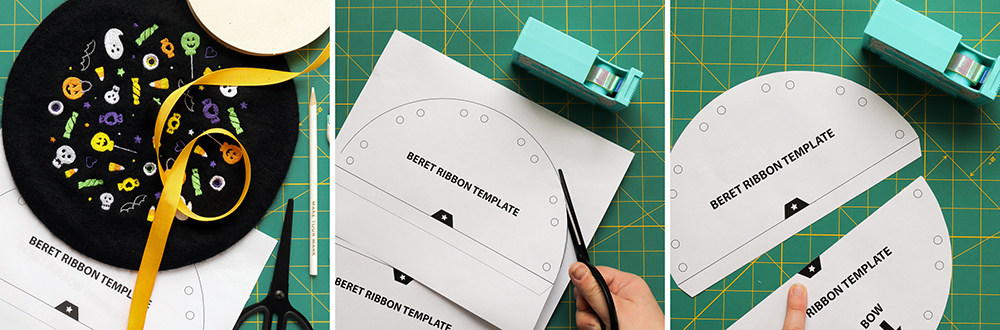
Once your template is taped together, you will need to poke holes in all the circles. My hole punches all mysteriously dissapeared, so I just used the tips of my scissors, but a hole punch would be so much nicer!
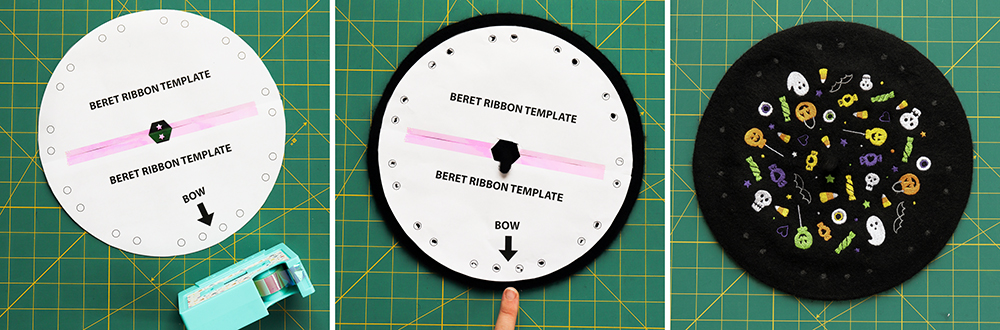
Now center the template and line up where you would like the bow to go. Once you are happy with the placement, use a white gel pen or a silver sharpie to mark where each hole should go.
Side note: I tried to use chalk, a dressmakers pen, and a chalk pencil but none of them would leave nice enough marks.
We're almost done! I promise!
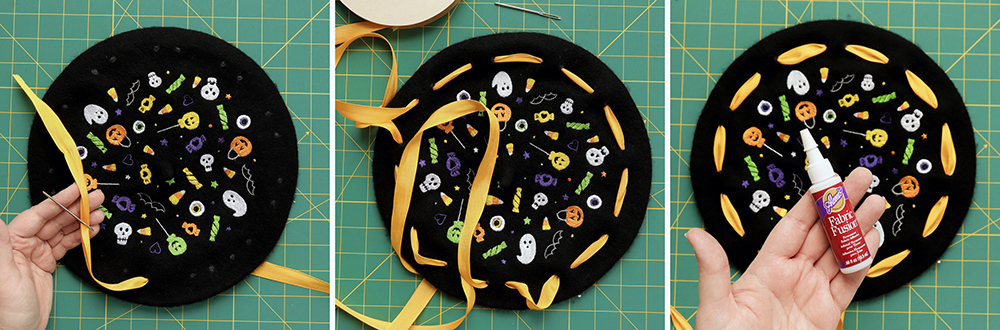
I left the ribbon the spool and threaded it into my large upolstrey needle. I started inside at the part where the bow was going to go and just when in and out all the way around the beret. If the needle isn't big enough to make a hole for the ribbon, you can cut little slits. I personally only had to do that twice.
When you get to the end it make look a little sloppy, mine did. I just went around and straightened it all up and opened the robbon so it was "puffier" looking. To keep this look and to prevent movement later, I dabbed a glob of Fabric Fusion glue under each piece os ribbon.
From here you can tie a pretty bow, glue the and go about your day. You could also struggle with tying a pretty bow and instead tie it off, make a seperate bow and hot glue it on. Your choice!
Ta-Da! You now have a super cute Kawaii Halloween Beret to wear this spooky season OR year 'round. I don't judge.
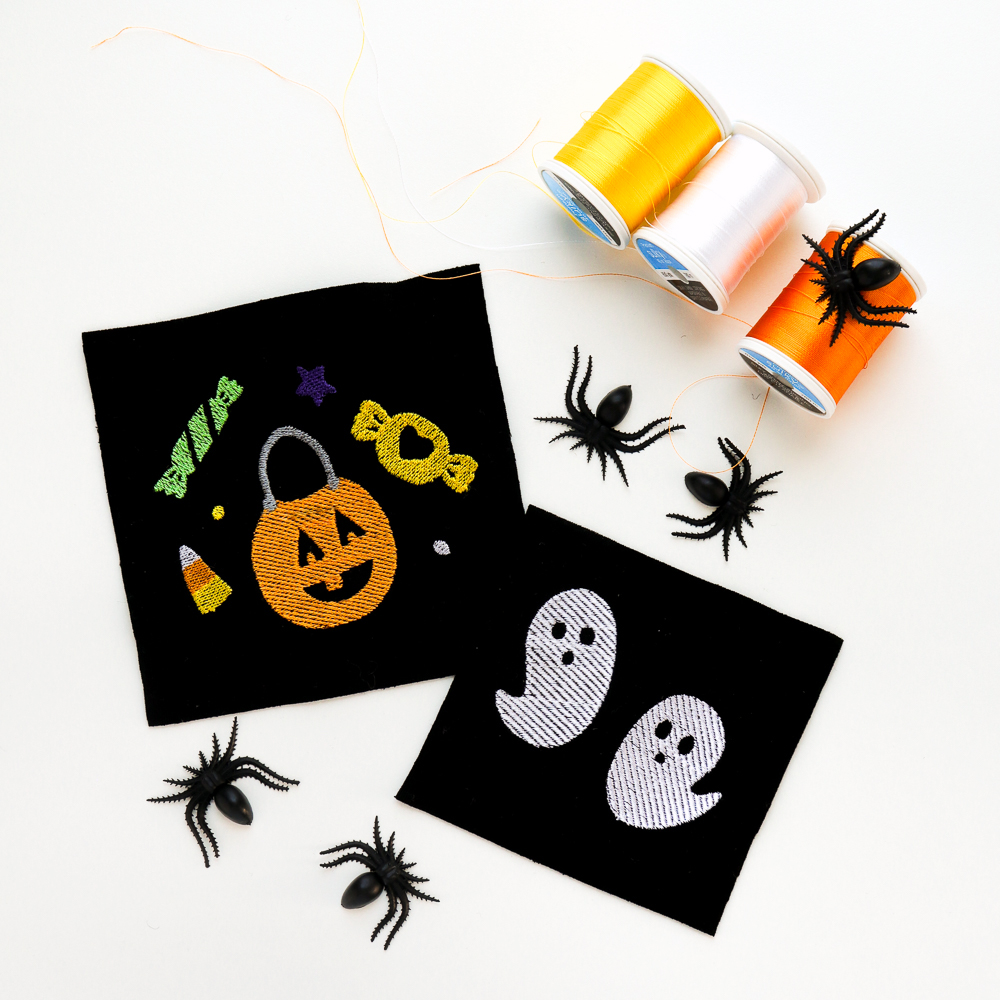
Bonus: I've added two extra files to this project incase you want to add them to some cute accessories or the top left corner of a shirt. Pretty much anywhere a 75mm wide design will fit! I know I'll be adding those ghosts to a simple sweatshirt and wearing it year 'round.
All of the files for this project can be found on our Janome Projects page HERE!