Projects

Pencil Plushie

Created By:

Emily Steffen

Skill Level: Intermediate

If you know anything about our family, you know that our little Esther is
OBSESSEDDDDDDD with plushies and stuffies! Like this is nearly almost exclusively
what she plays with - and I’m not one bit mad because her imagination is in FULL
FORCE as she makes houses and plays pretend with them with birthday parties and
doctor visits and walks around the yard, etc! :) AND AND AND the best part is that
plushies are 100% makable….it isn’t uncommon for her to ask me to make her a shape
or character that she doesn’t have! And she just recently asked me to make her a few
pencils so that she can play school with them (she thinks it’s hilarious that a pencil
would actually GO to school to learn….ahhhh, the imagination of a 6 year old)! :)
SOOOOOO! Today, let’s sew a colorful pencil plushie….the full pattern and instructions
are below! :)

Janome Supplies Required

Your fave sewing machine with coordination thread (HOLLLLLLAAA to my fave sewing
machine brand, Janome! There is none better IMO)! :)
Black, tan, pink, and silver/grey fabric (honestly, you can use whatever you have in your
stash….doesn’t have to be exact and you don’t need much)!
A fat quarter (or less) of fabric in whatever color you want the main pencil body to be!
Some poly-fill or batting or whatever you want to stuff your plushie with
A needle and thread for hand stitching

Instructions

1. Download the pattern HERE and cut out all of your pieces:


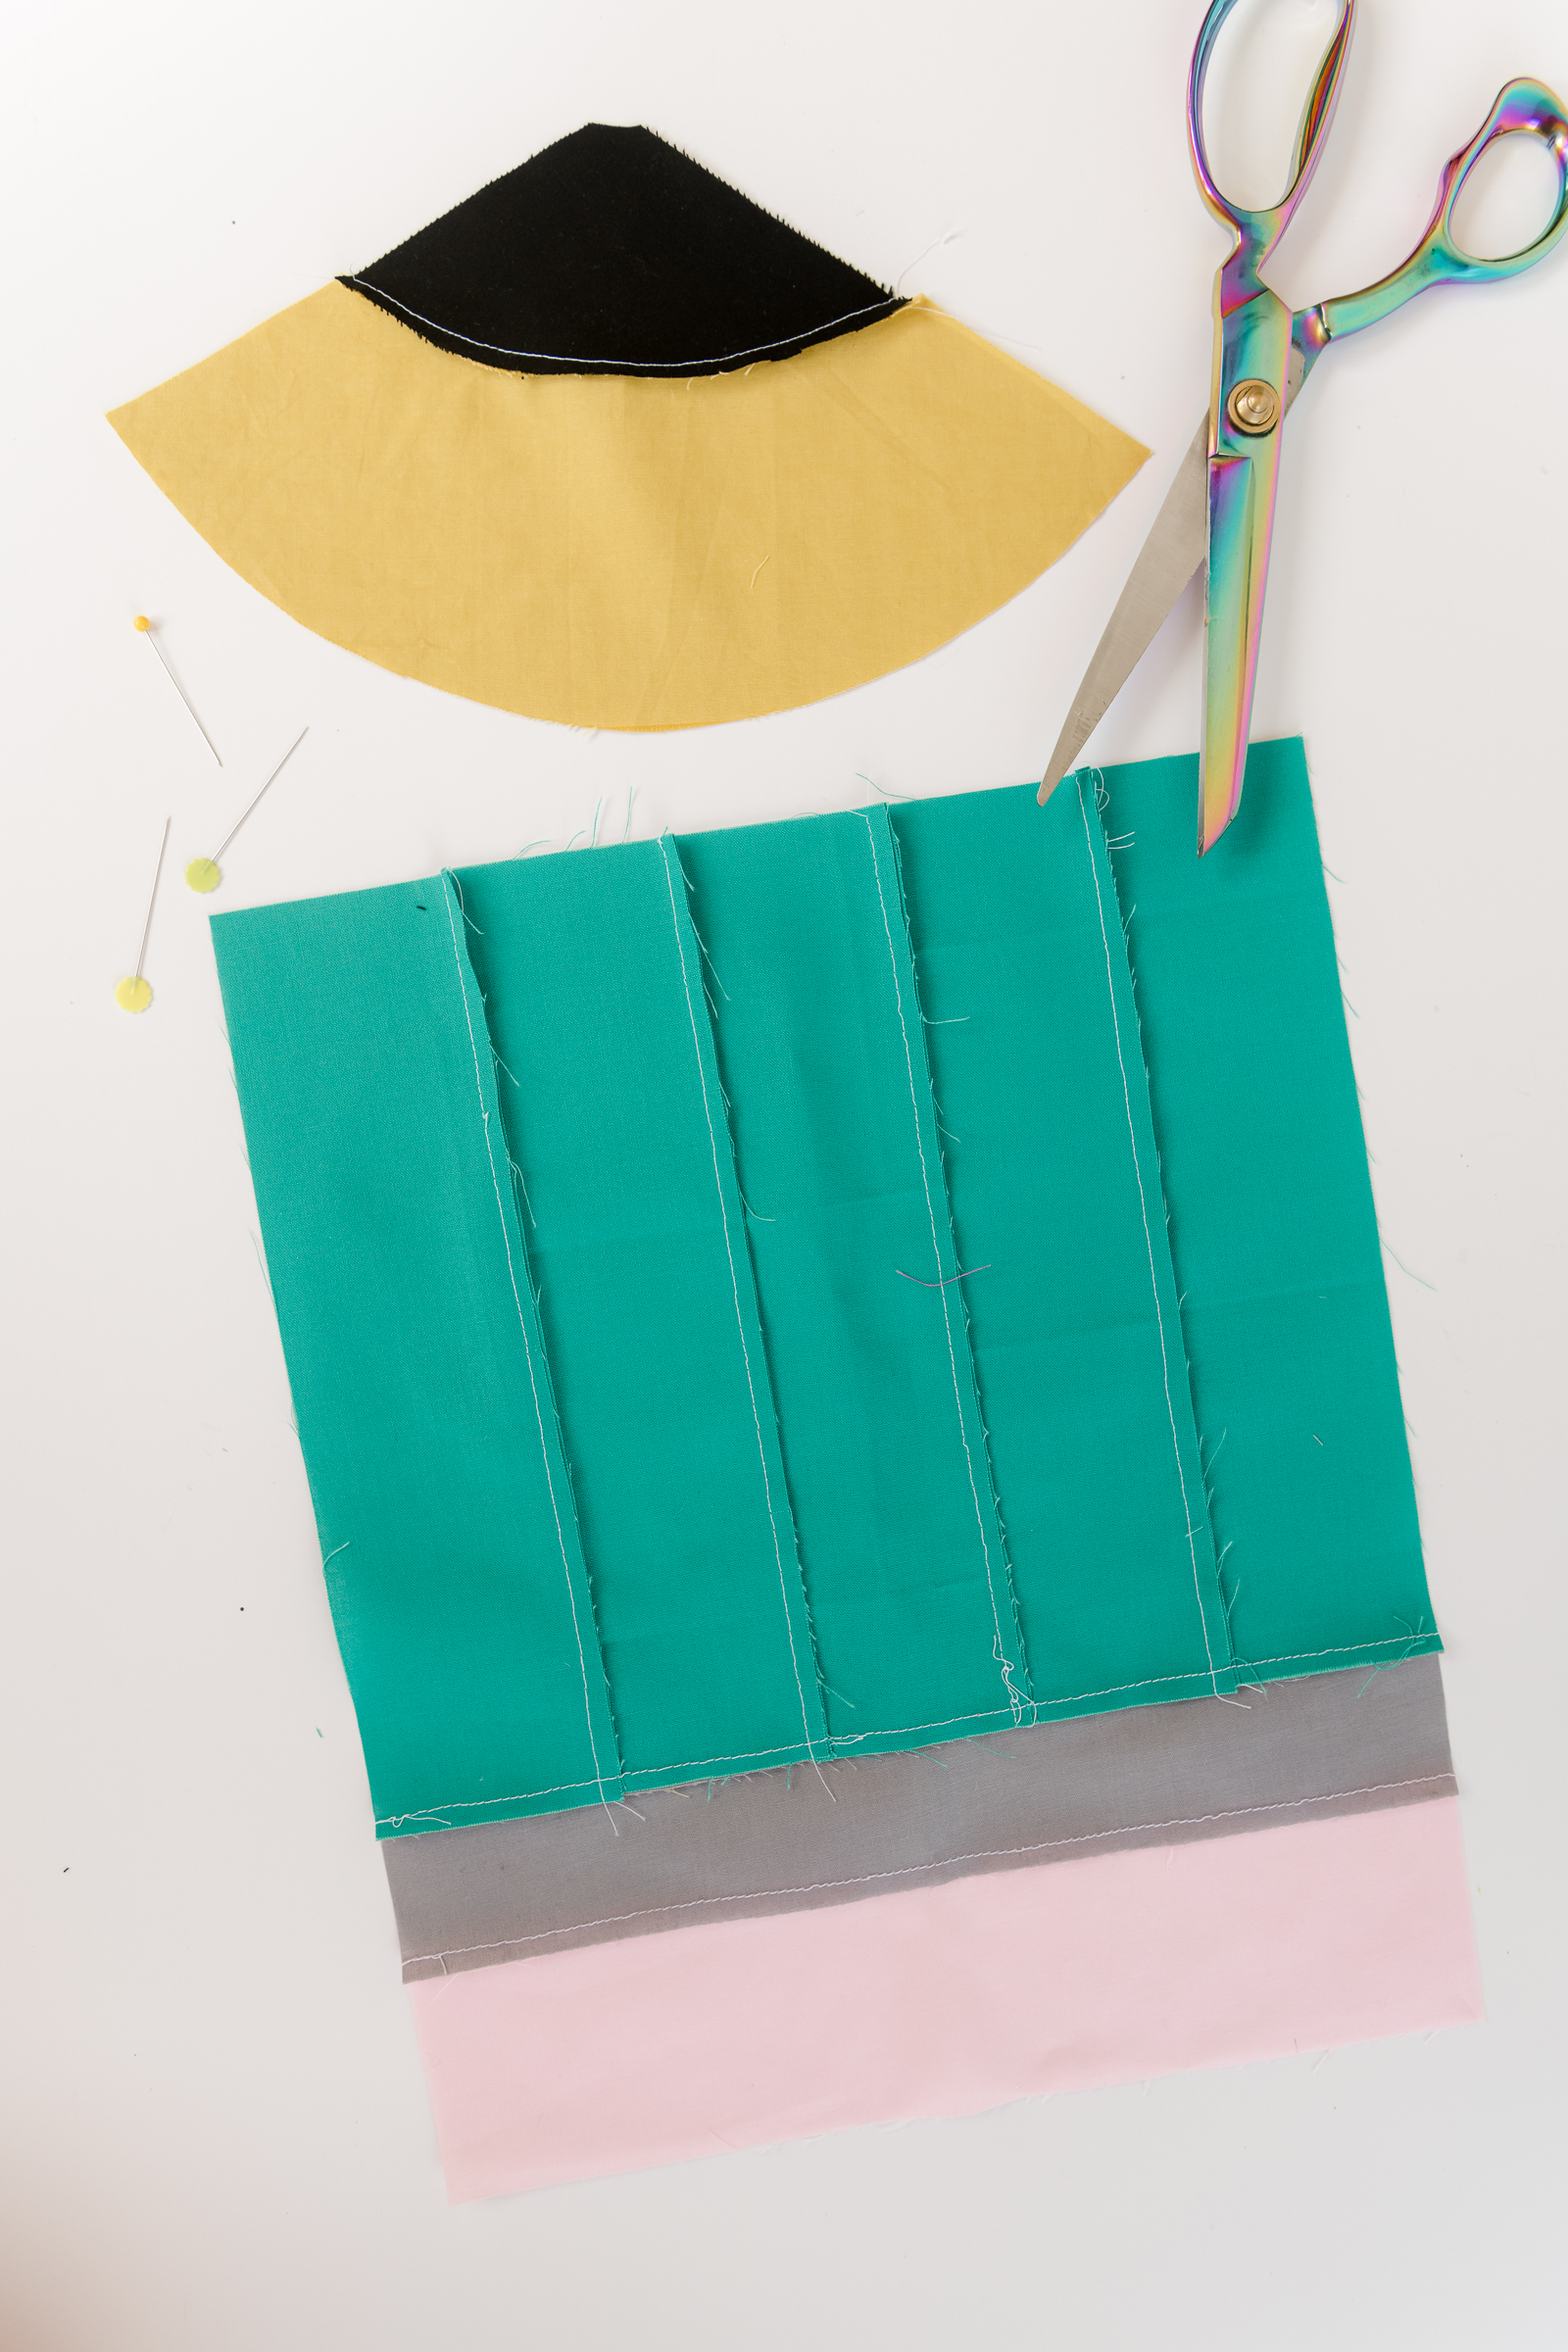
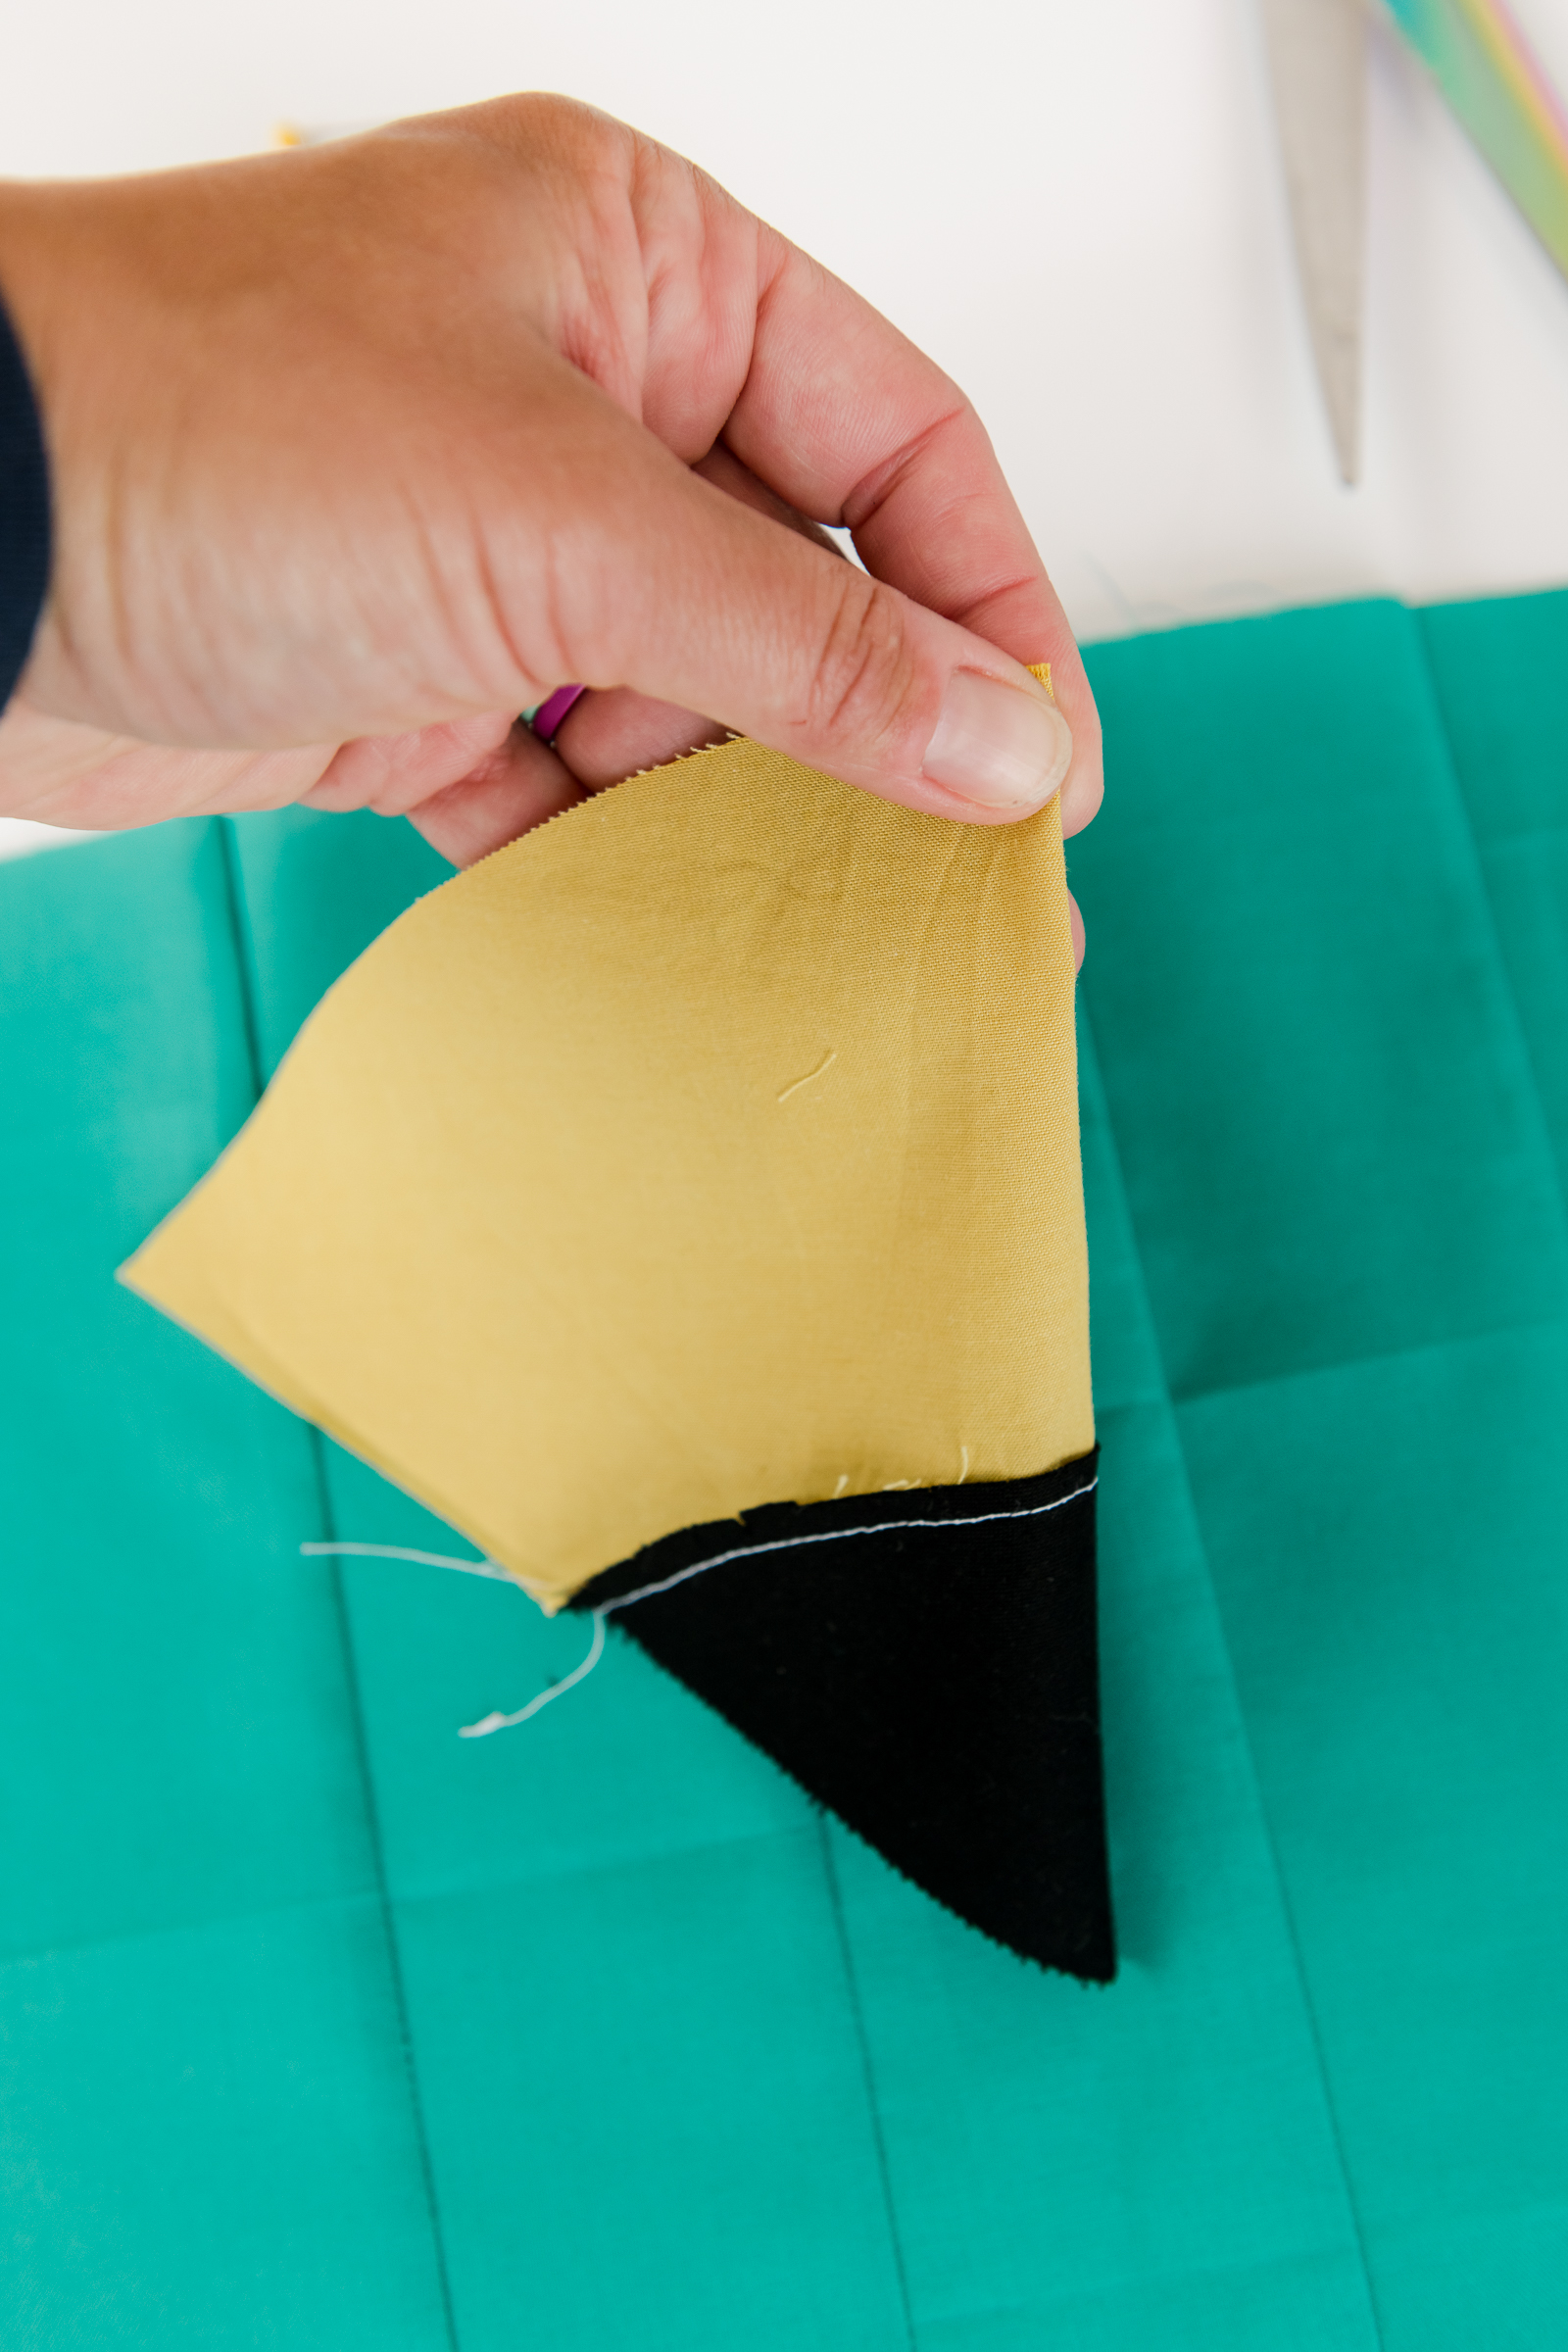
Cut 1 of the pencil graphite tip (A) out of black fabric

Cut 1 of the pencil tip (B) out of tan or yellow fabric

Cut 5 pieces of your main pencil fabric sizes 2 3/4” x 10”

Cut 1 of your metal piece before eraser out of gray or silver fabric sized 2” x 12”

Cut 1 of your eraser out of pink fabric sized 3” x 12”

Cut 1 of your eraser bottom (C) out of pink fabric


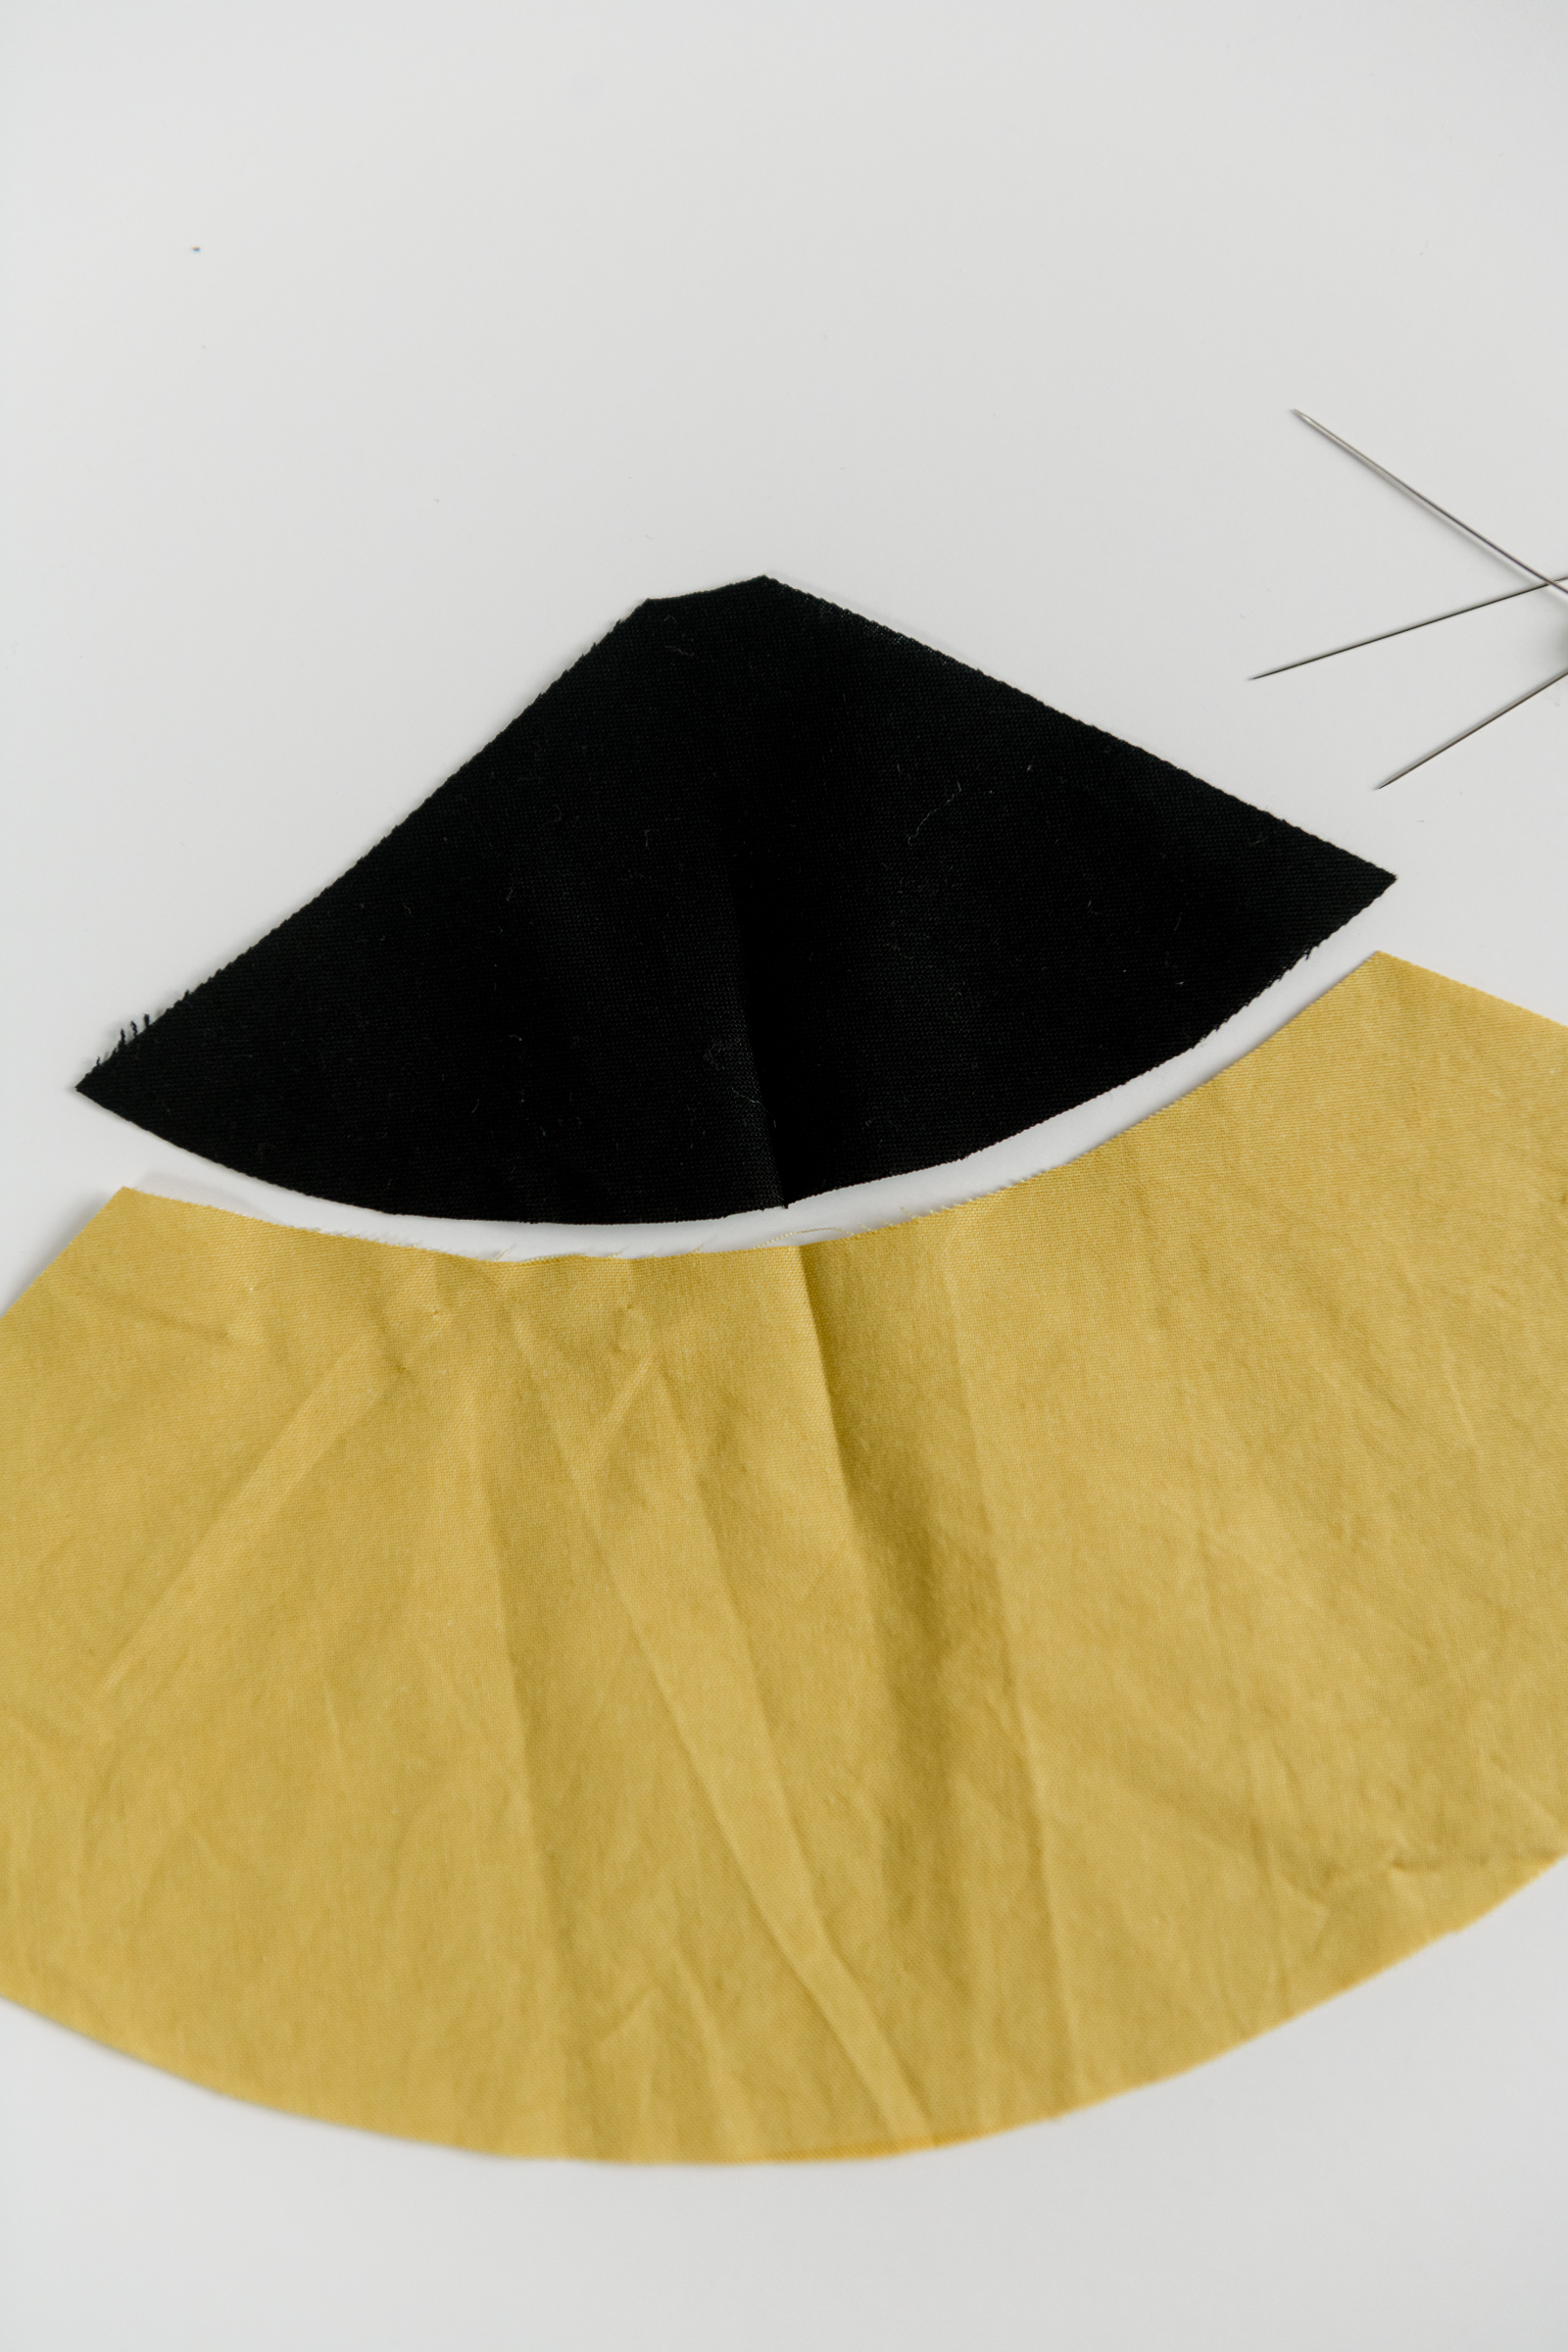
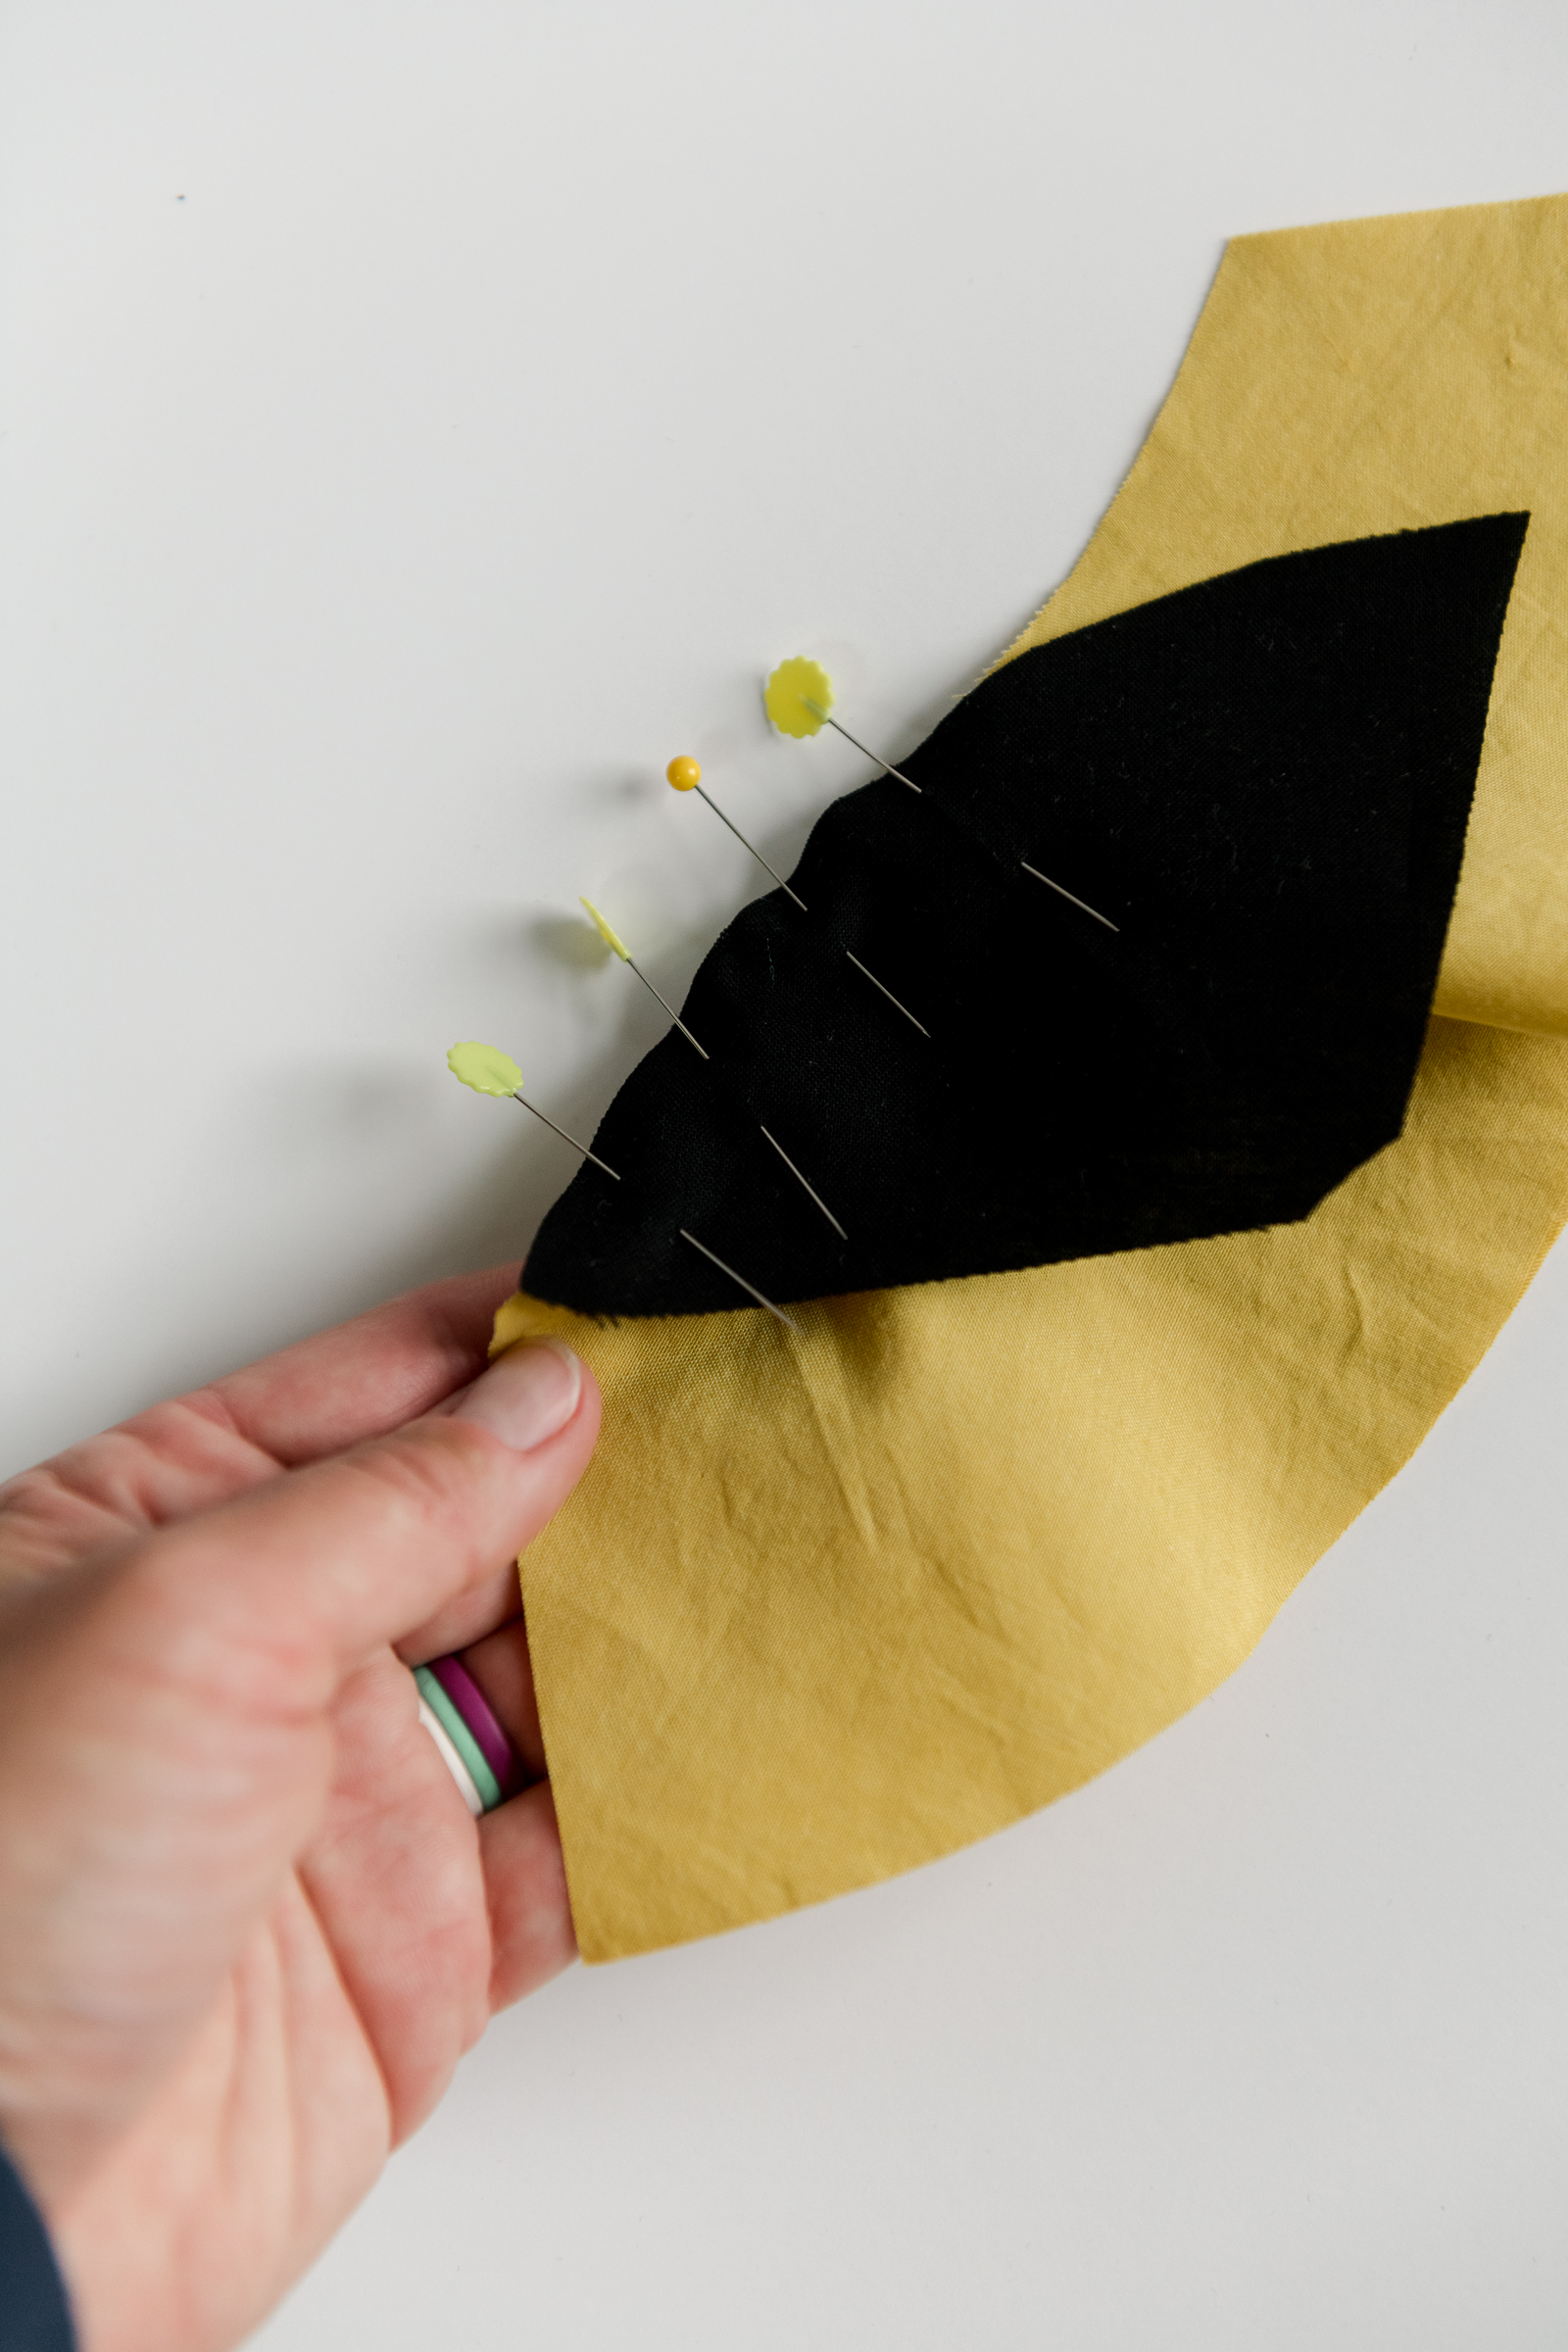
2. Begin construction by sewing your pencil top together. Do this by folding both the
graphite tip and the pencil tip in half widthwise to find the middle. Mark the middle along
the bottom curved side of the pattern of each the pencil tip and the graphite tip with a
pin and then match those pins up, with the fabric wrong sides together. Pin both the
graphite tip and the pencil tip together by slowly working around both arcs matching up
the edges as you go. Once pinned, sew a 1/4” seam allowance along the pinned edge
(being careful to remove the pins as you go so that you don’t sew over them with your
sewing machine)!
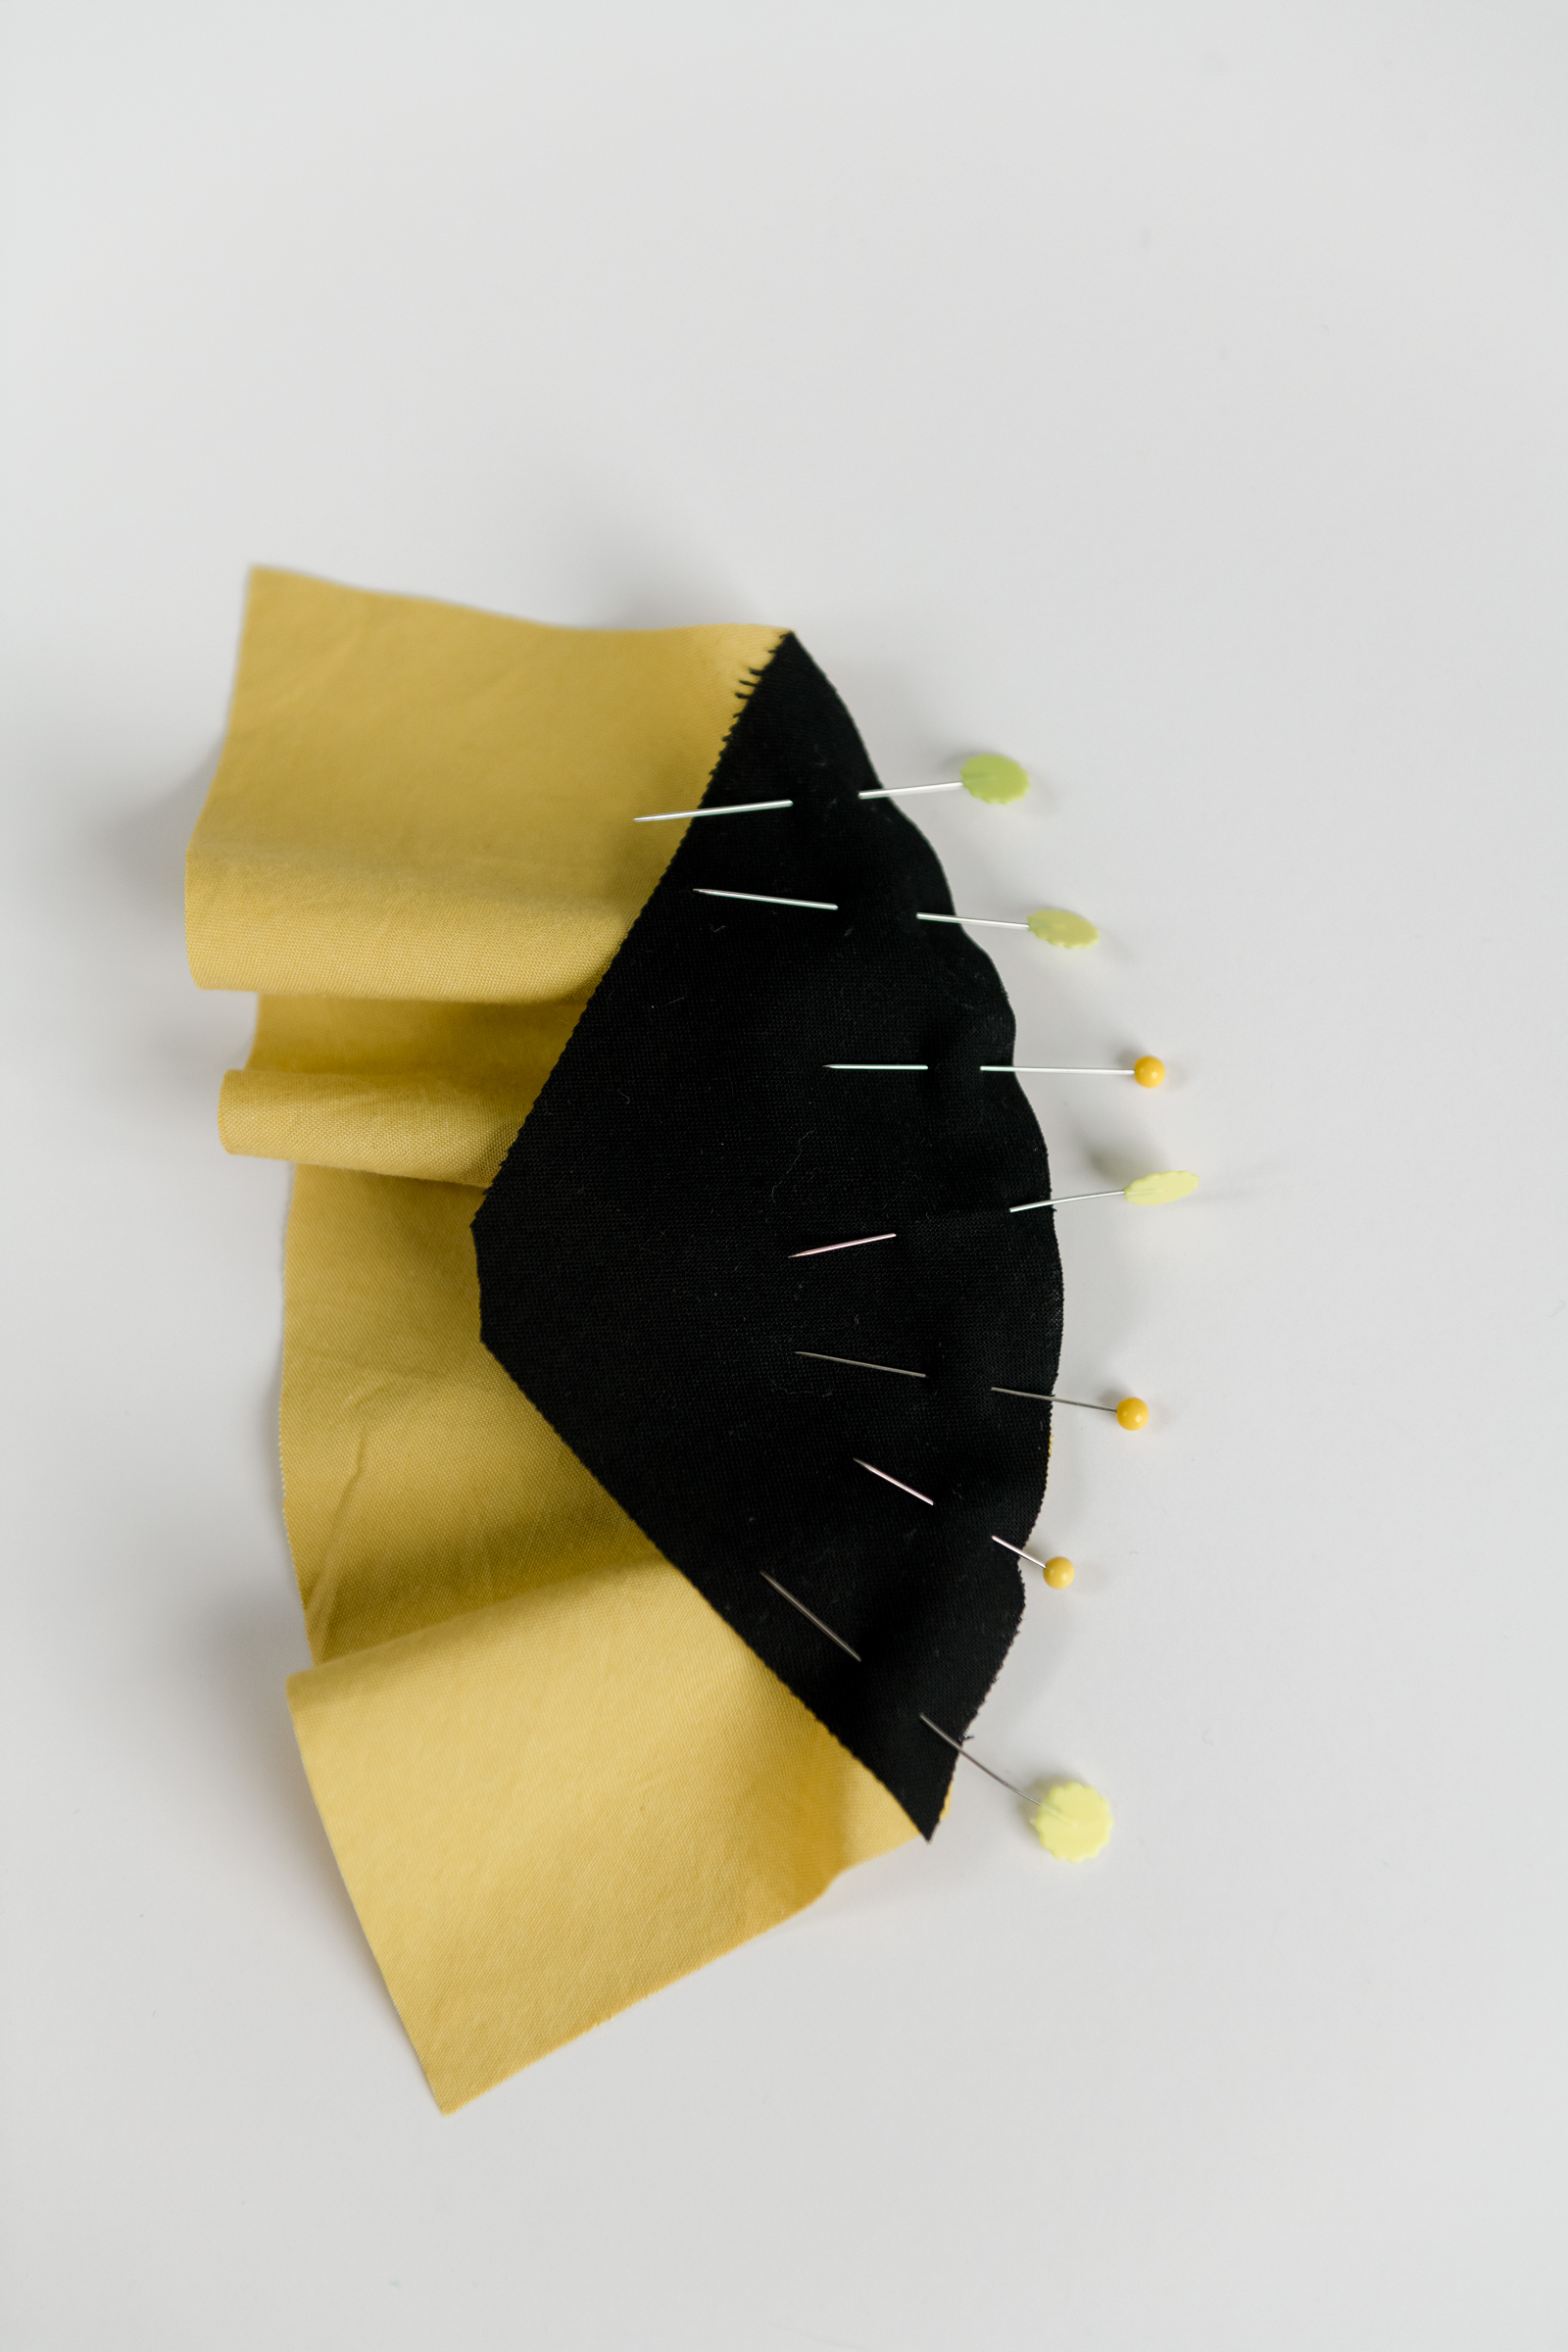
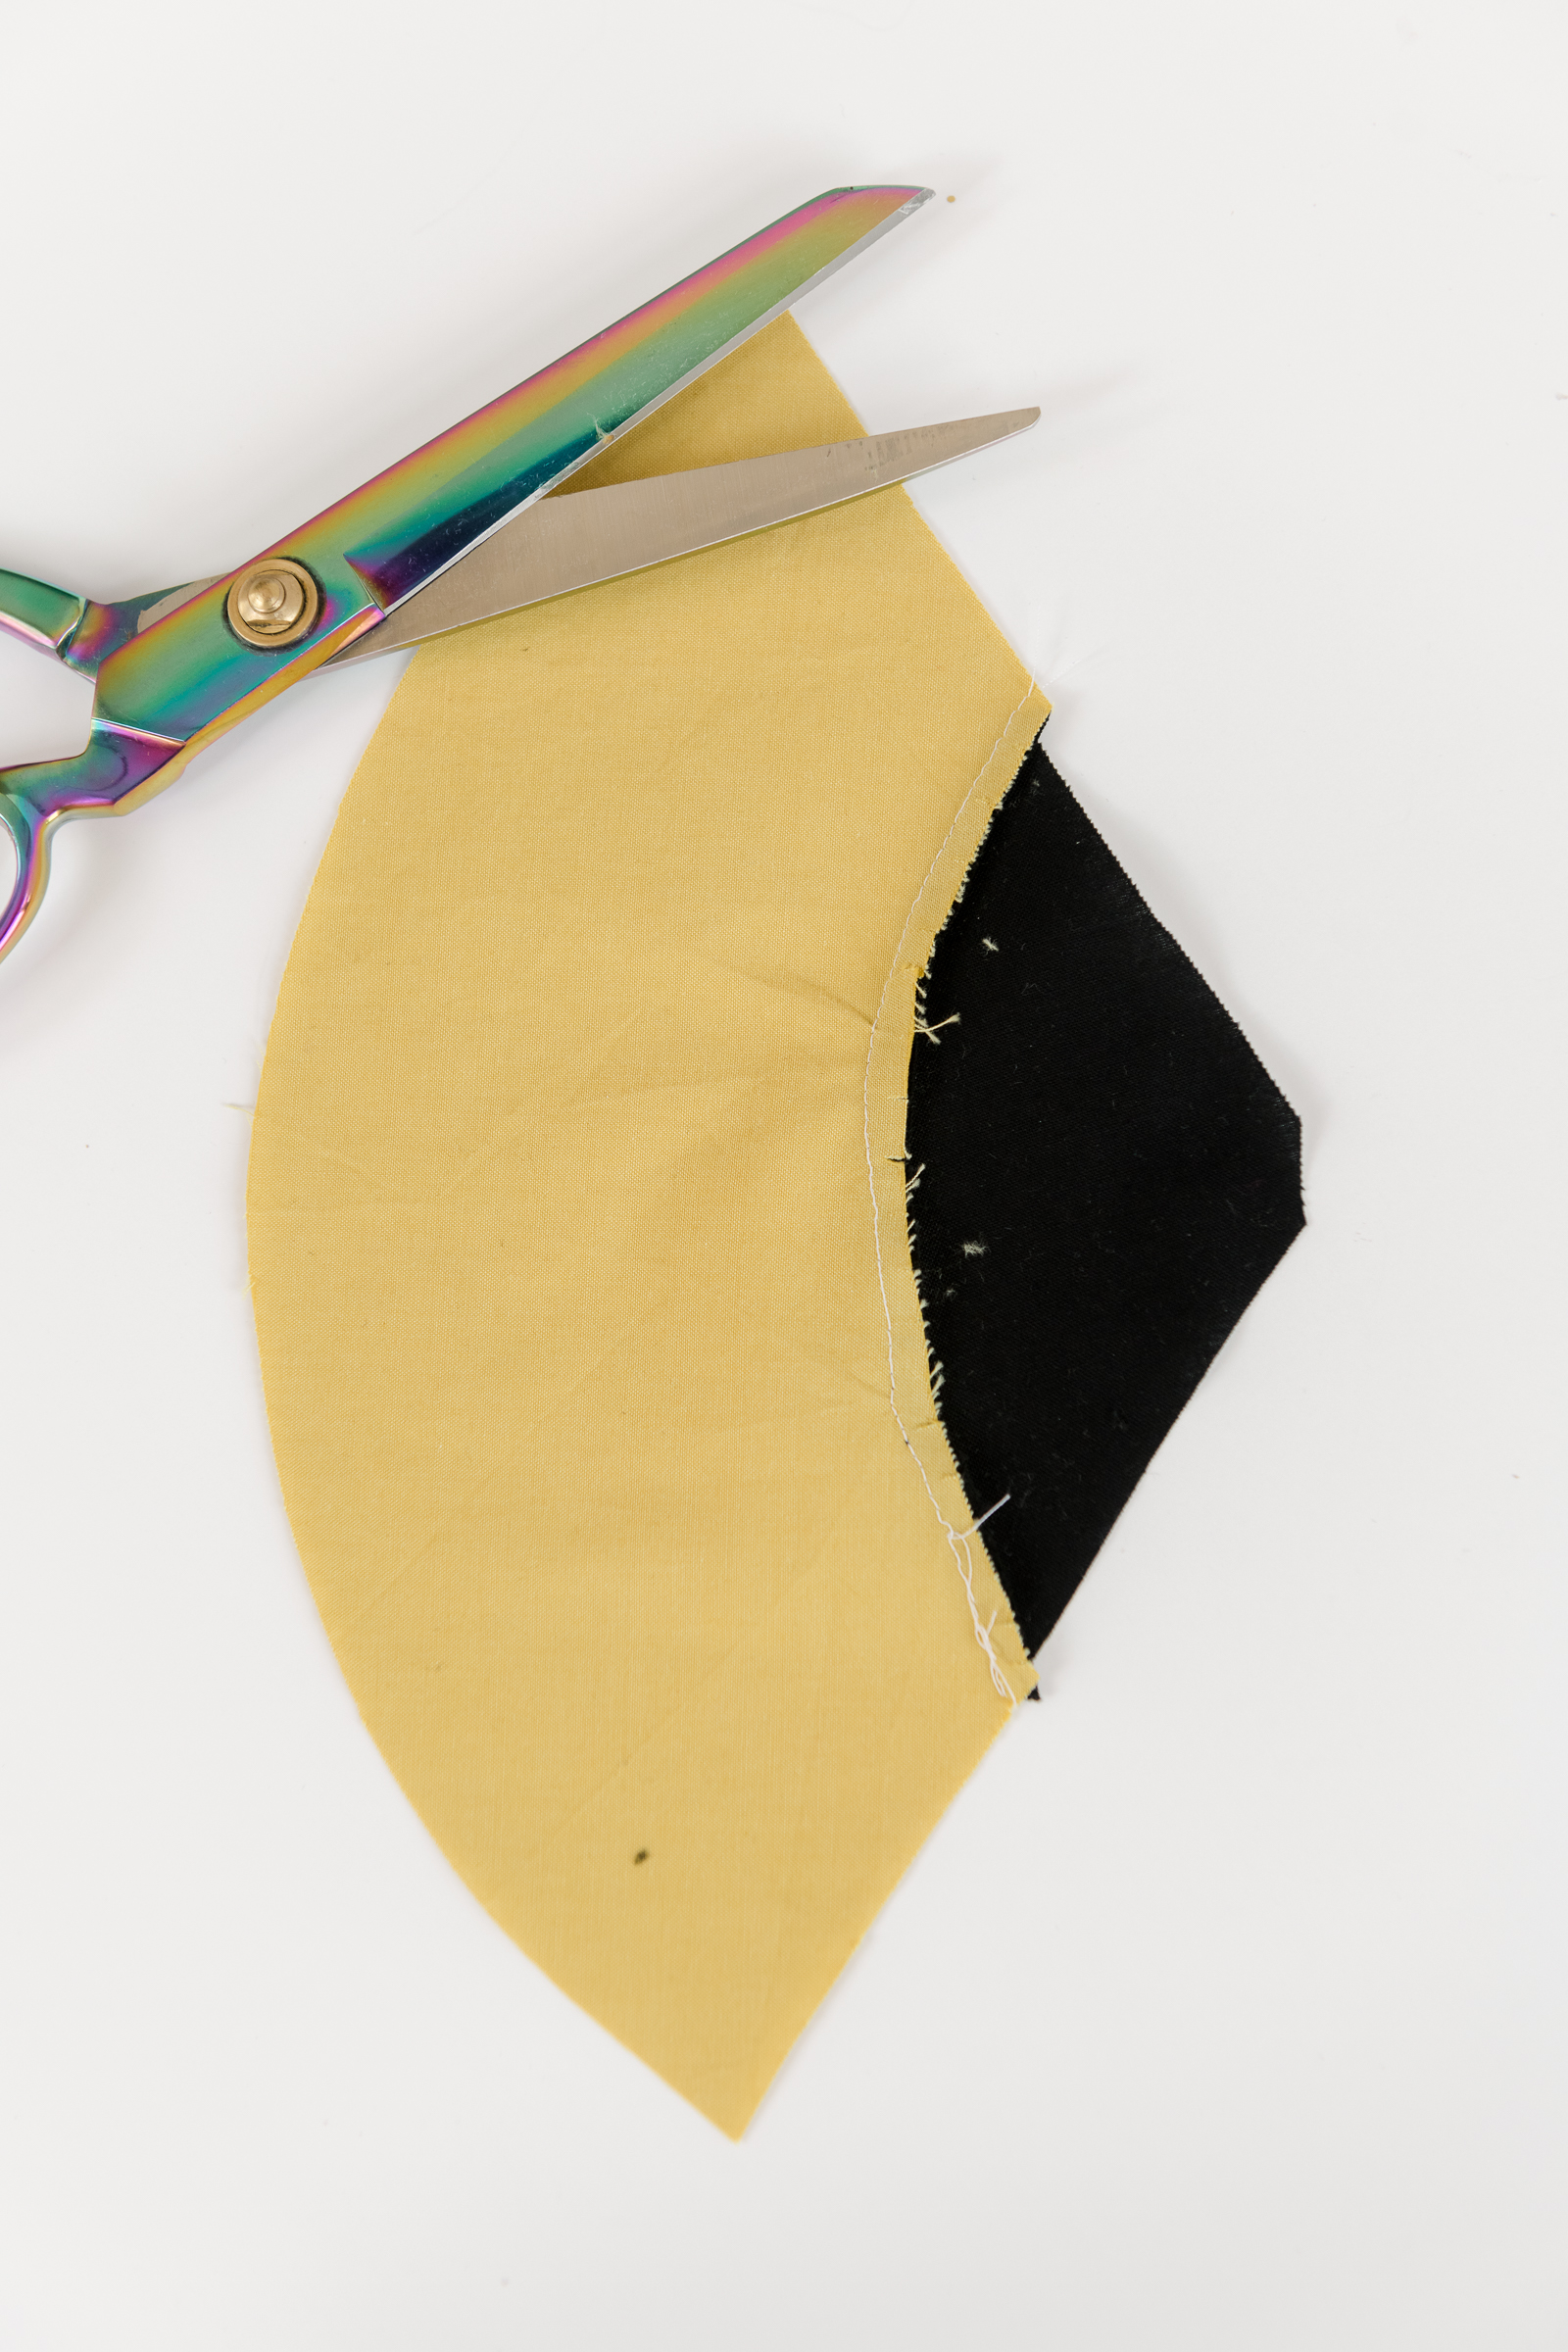
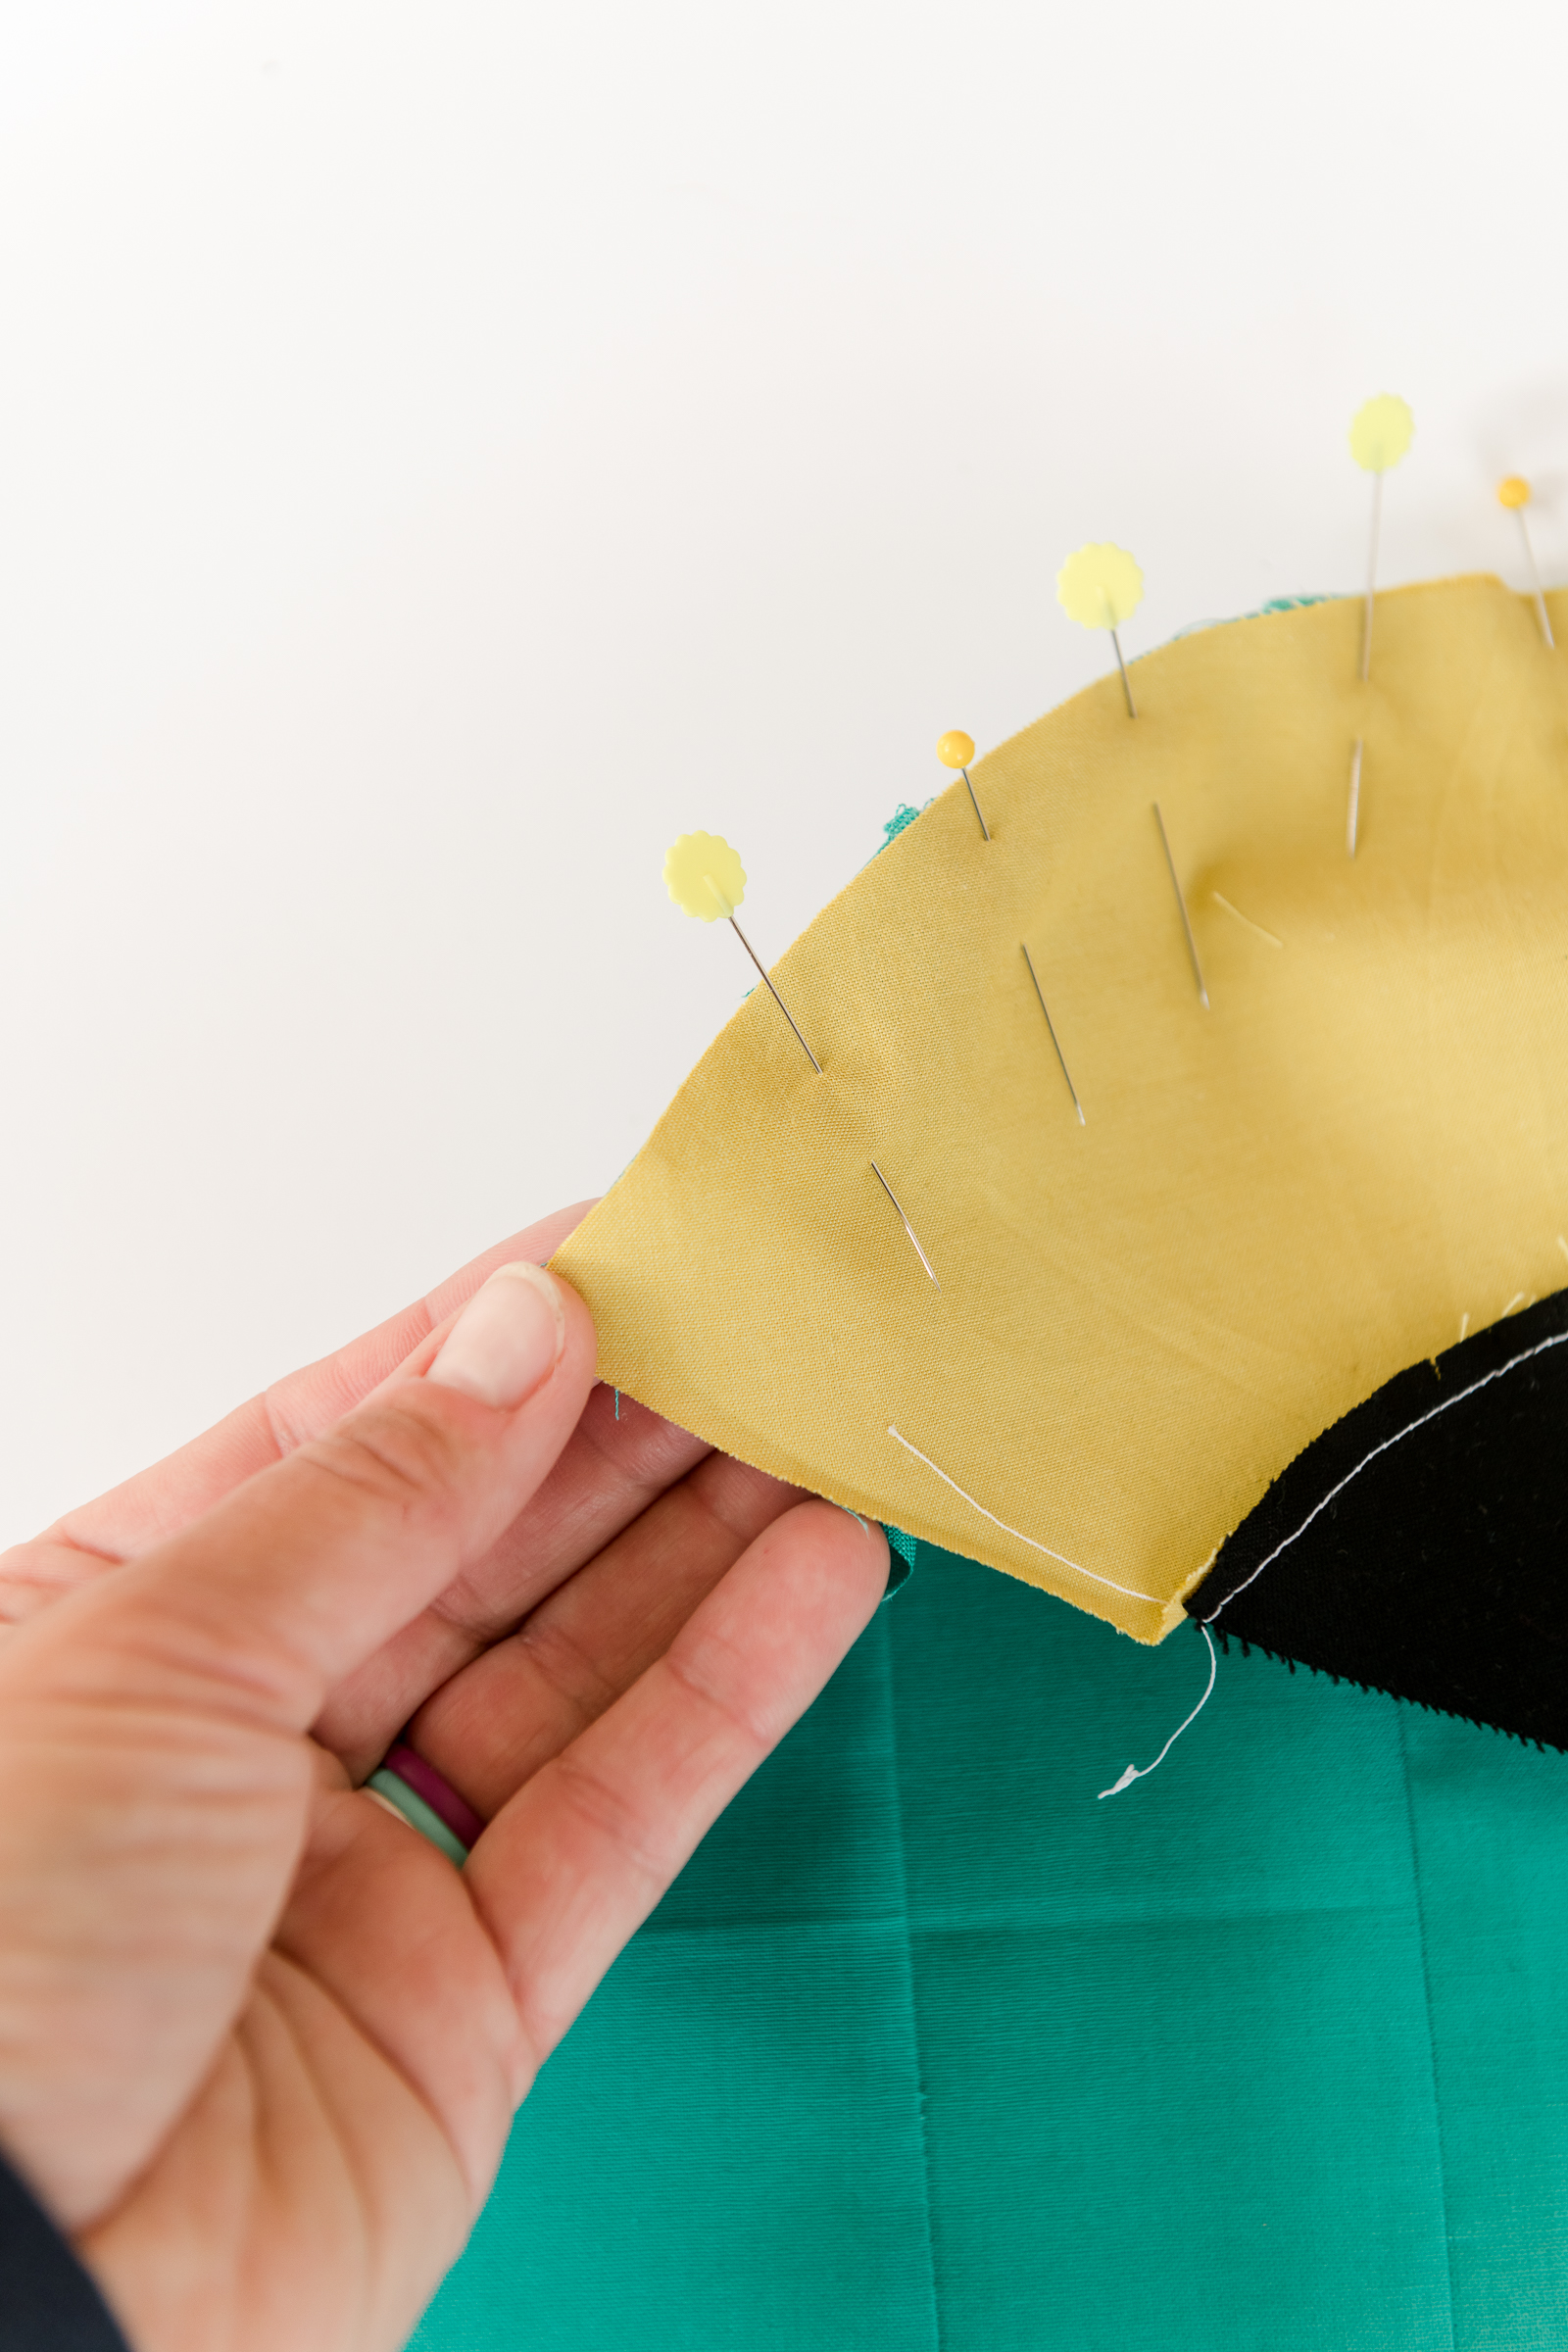
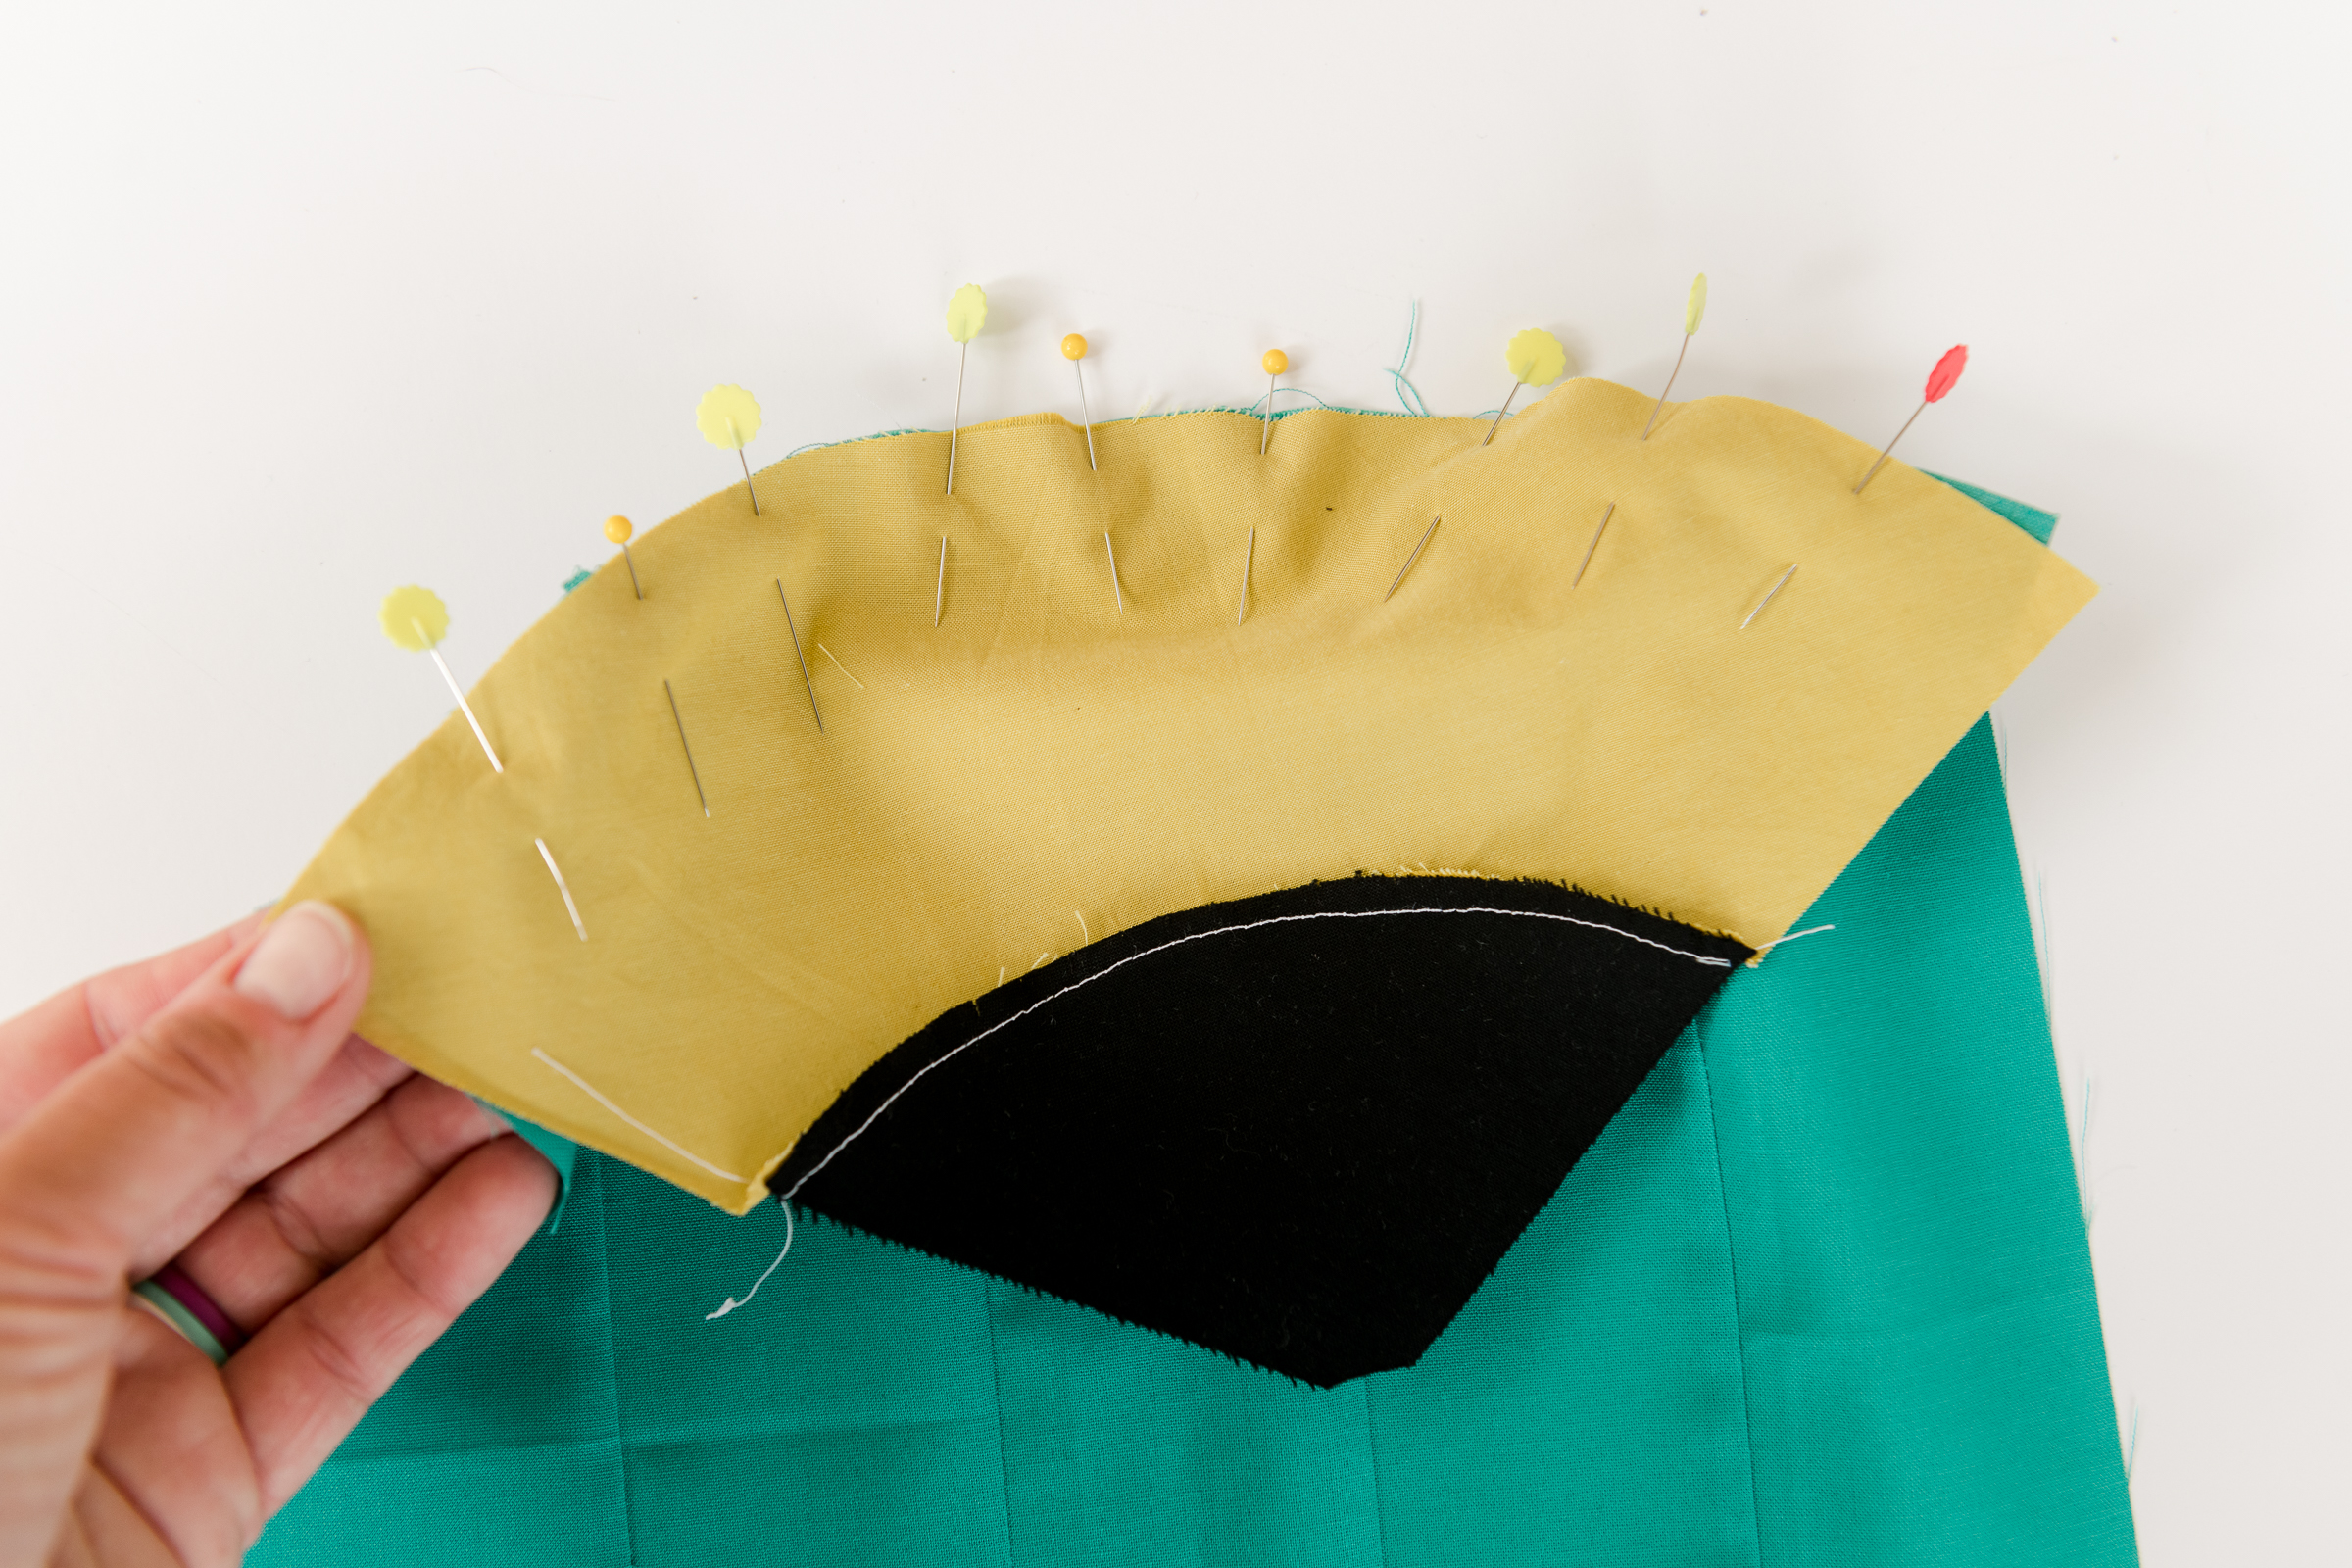
Next, carefully (as not to clip the seam you just stitched) clip little notches or slits along
the seam allowance. This allows the fabric to be lay flatter removing the tension of the
curved piece! Then press the seam with your iron. Set the pencil top aside


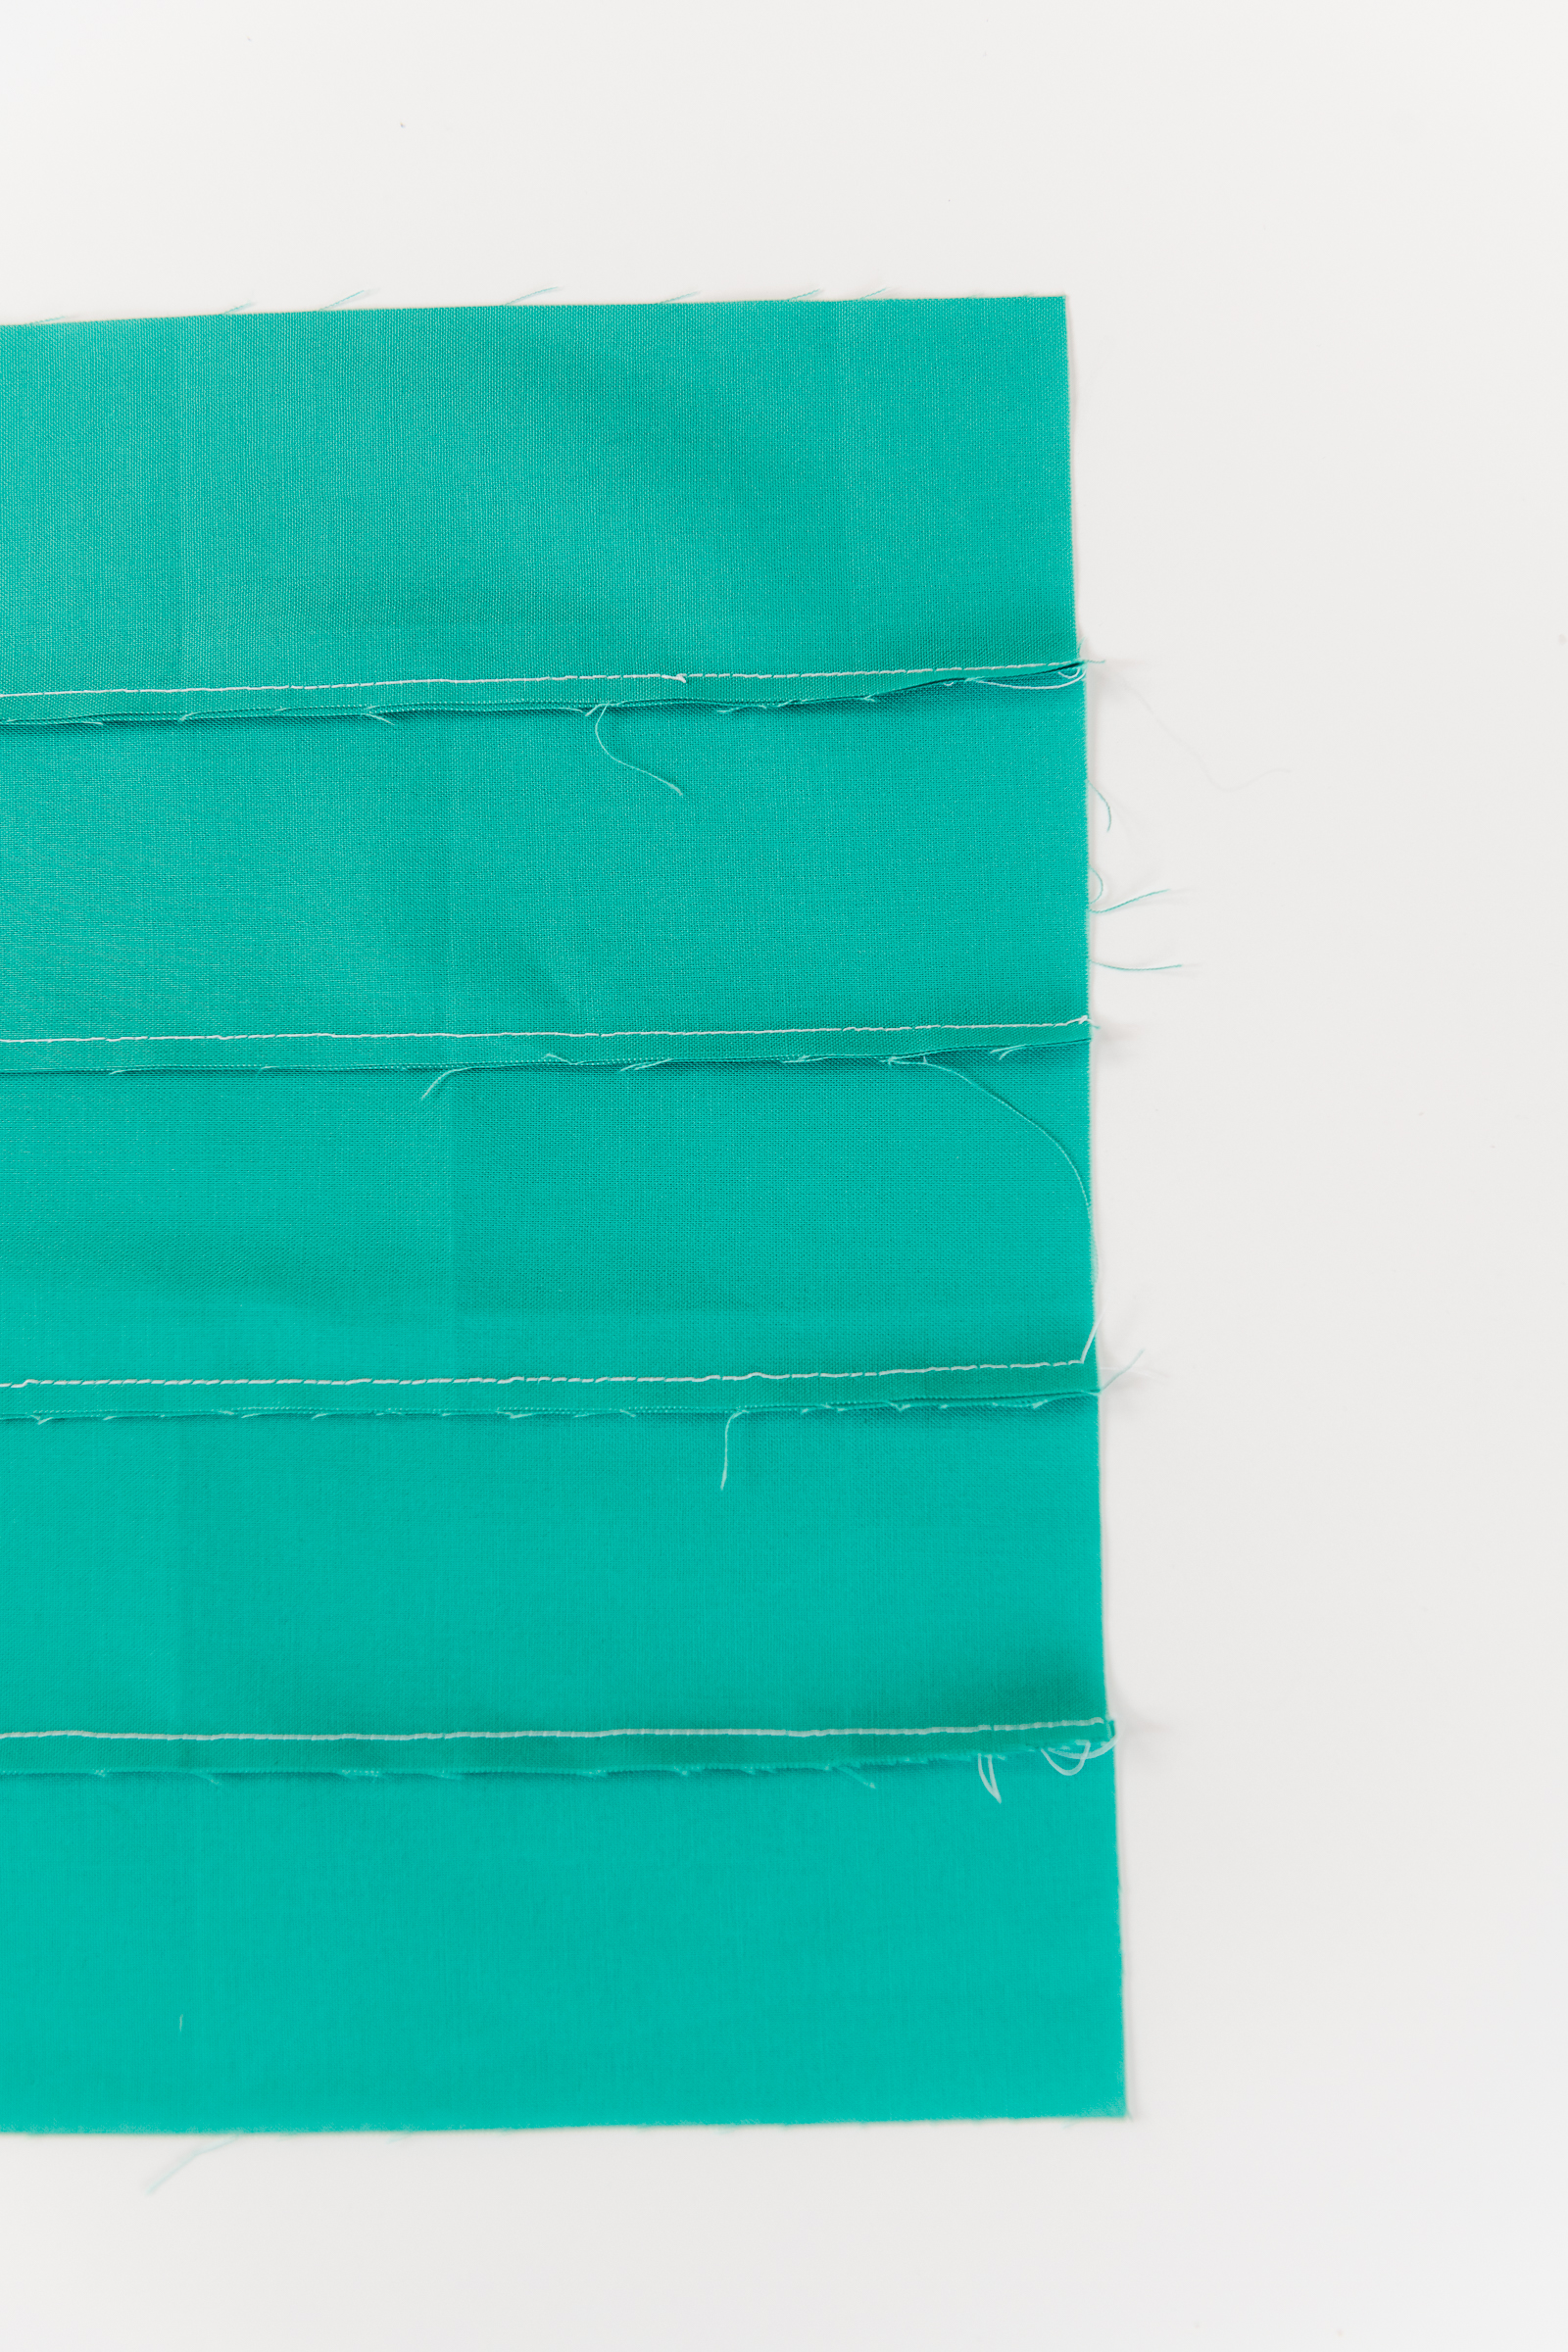
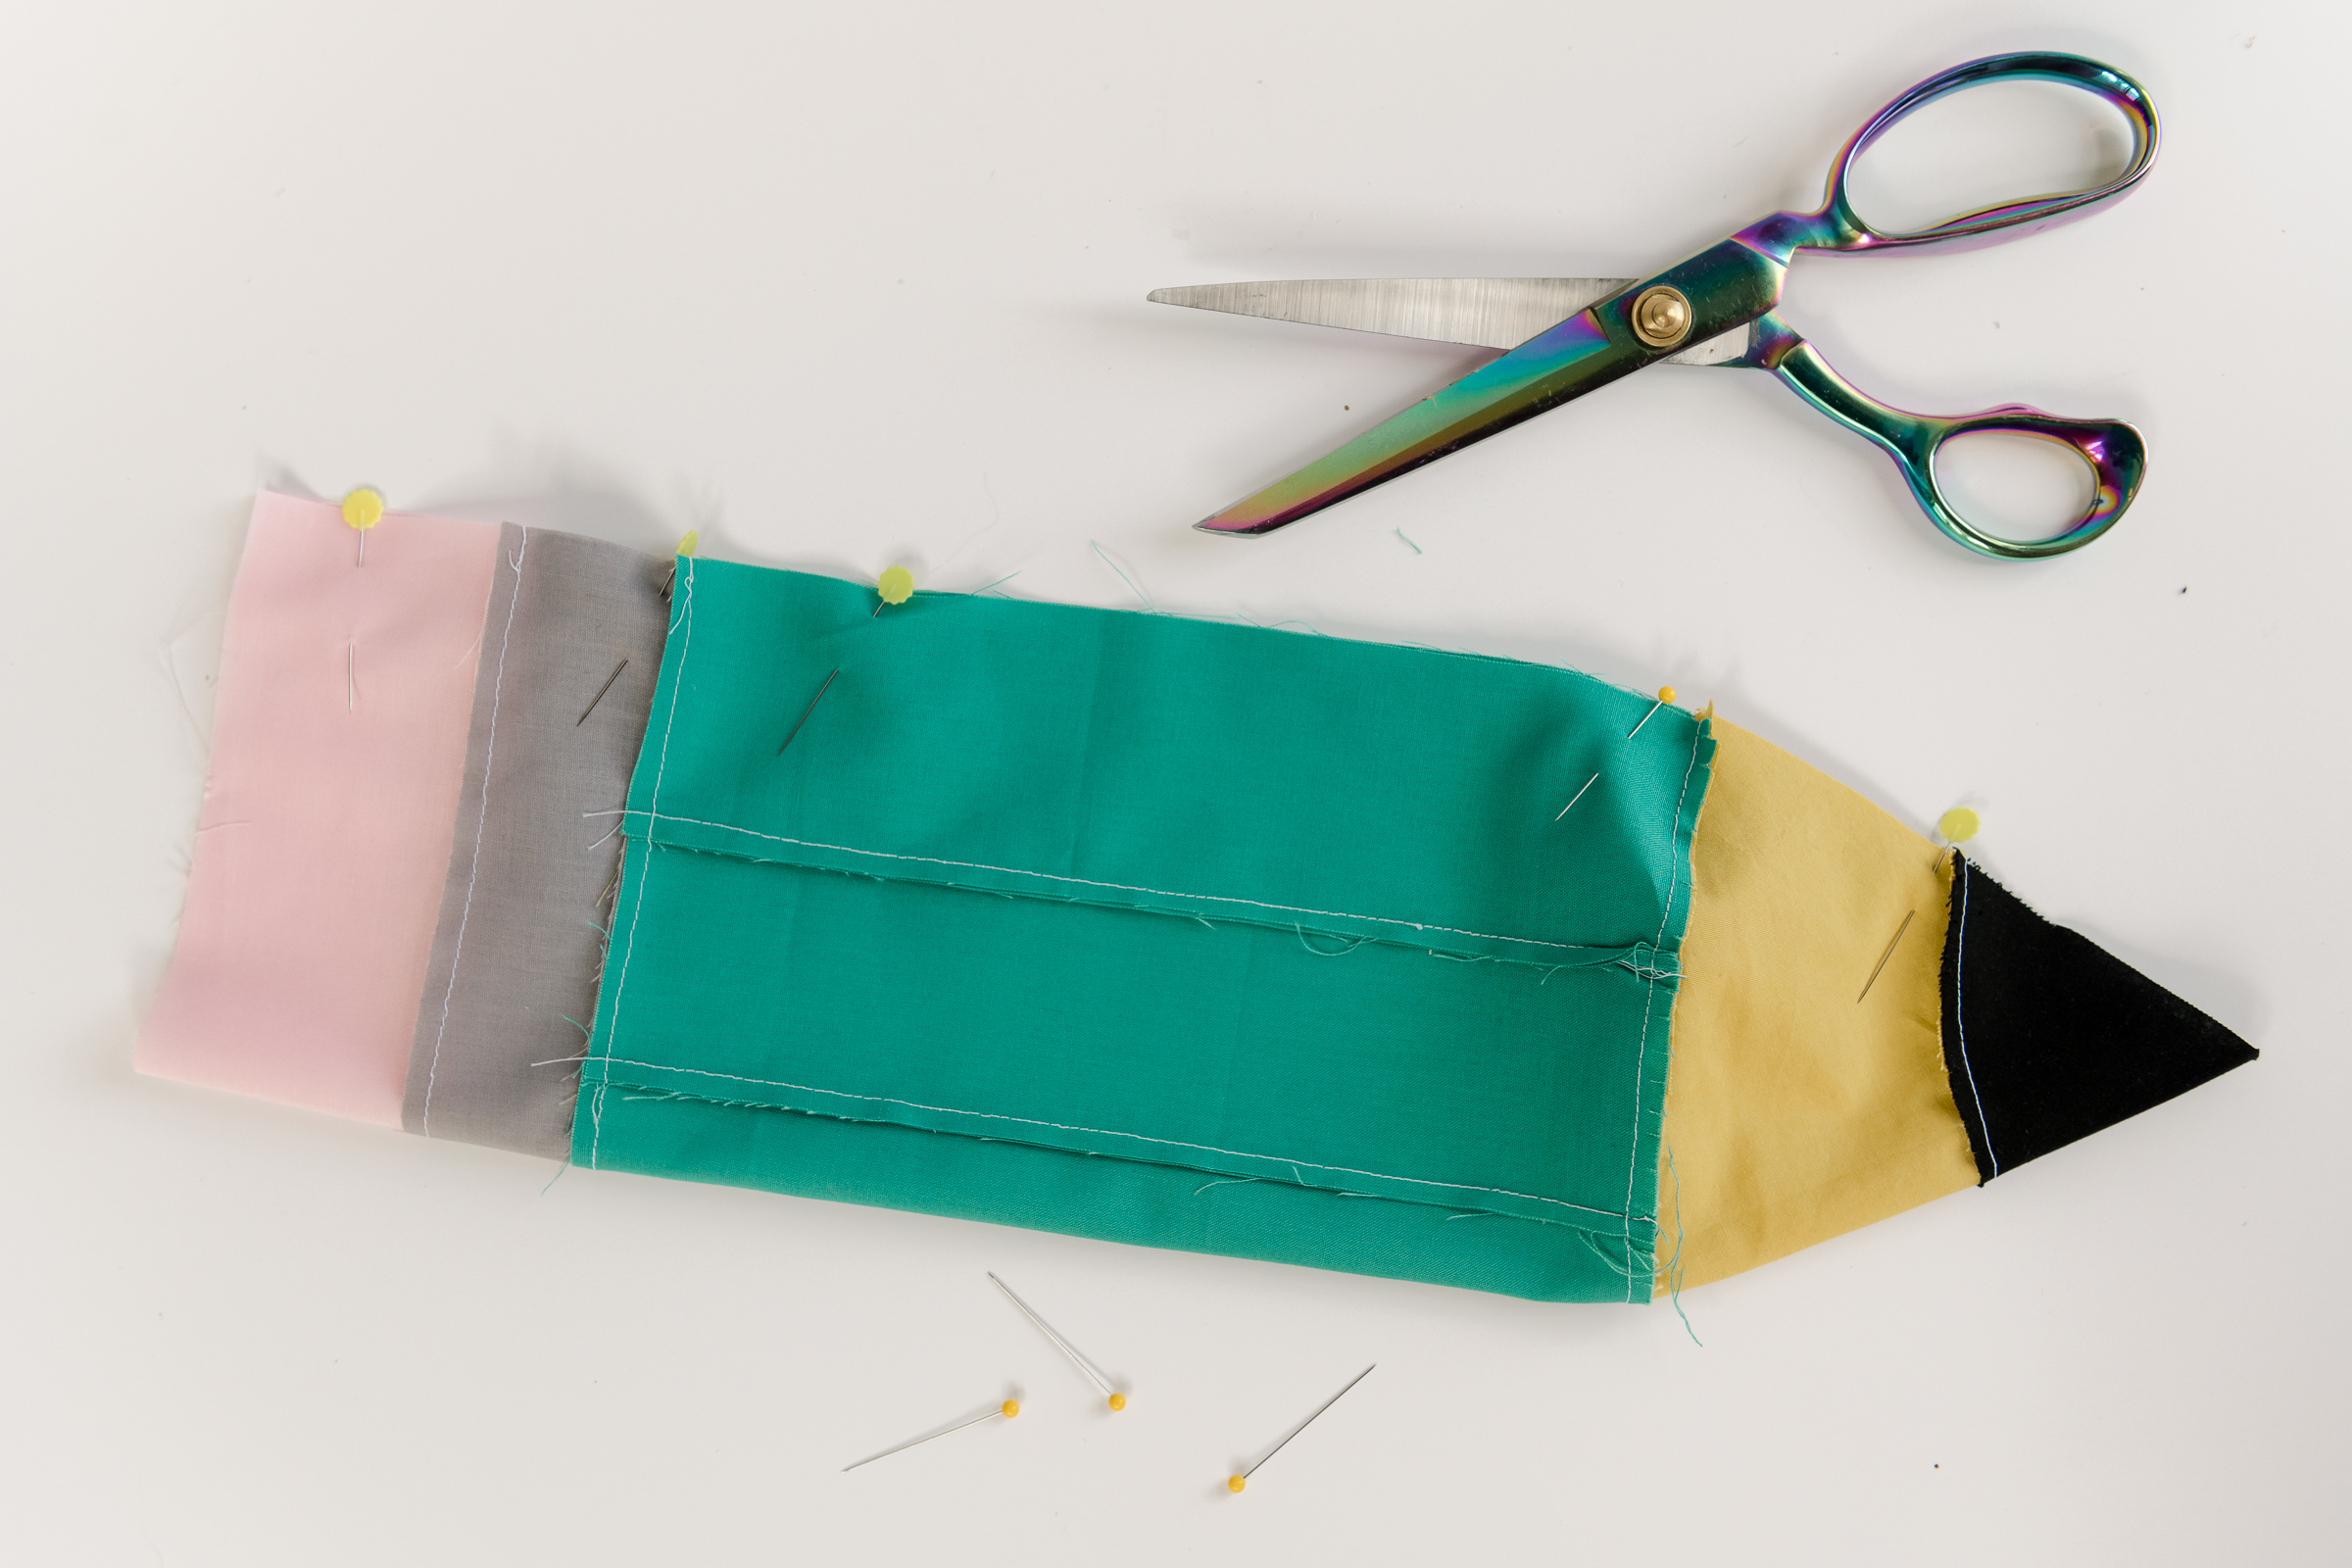
3. Next, construct your pencil shaft. Do this by sewing your main pencil pieces right
sides together along the long edge with a 1/4” seam allowance - do this for all 5 pieces
until you have sewn one “larger” piece of fabric.

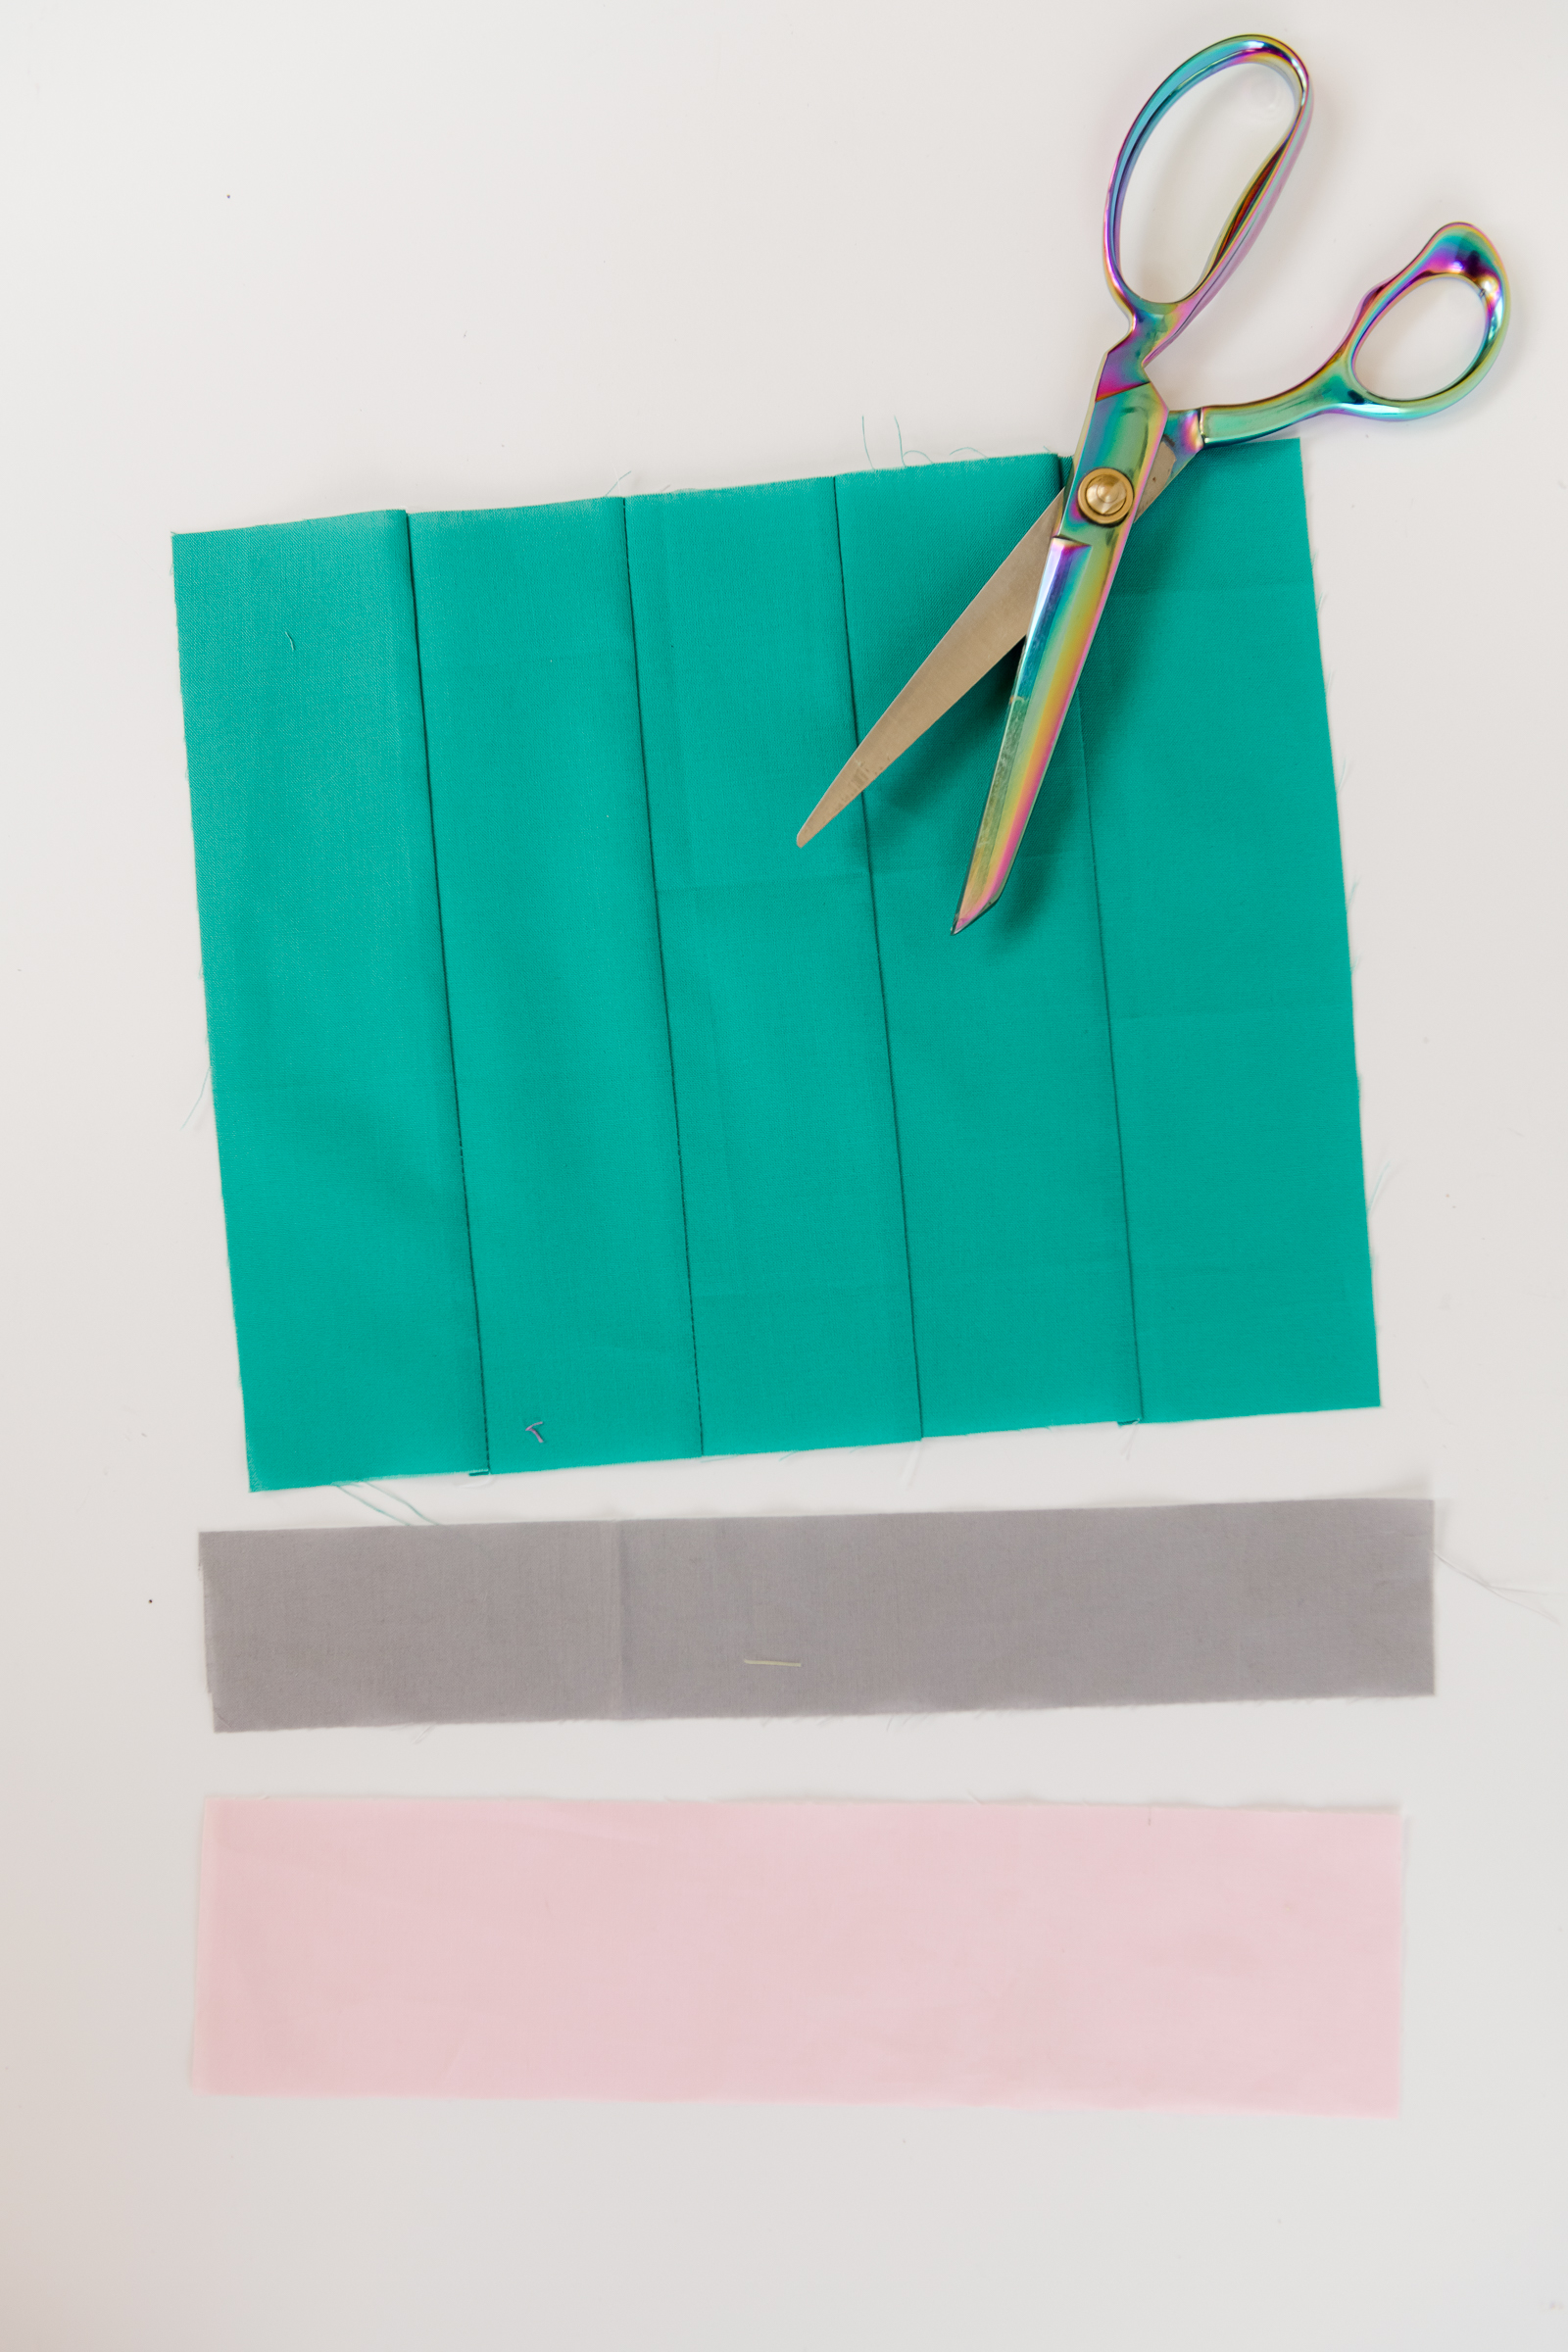
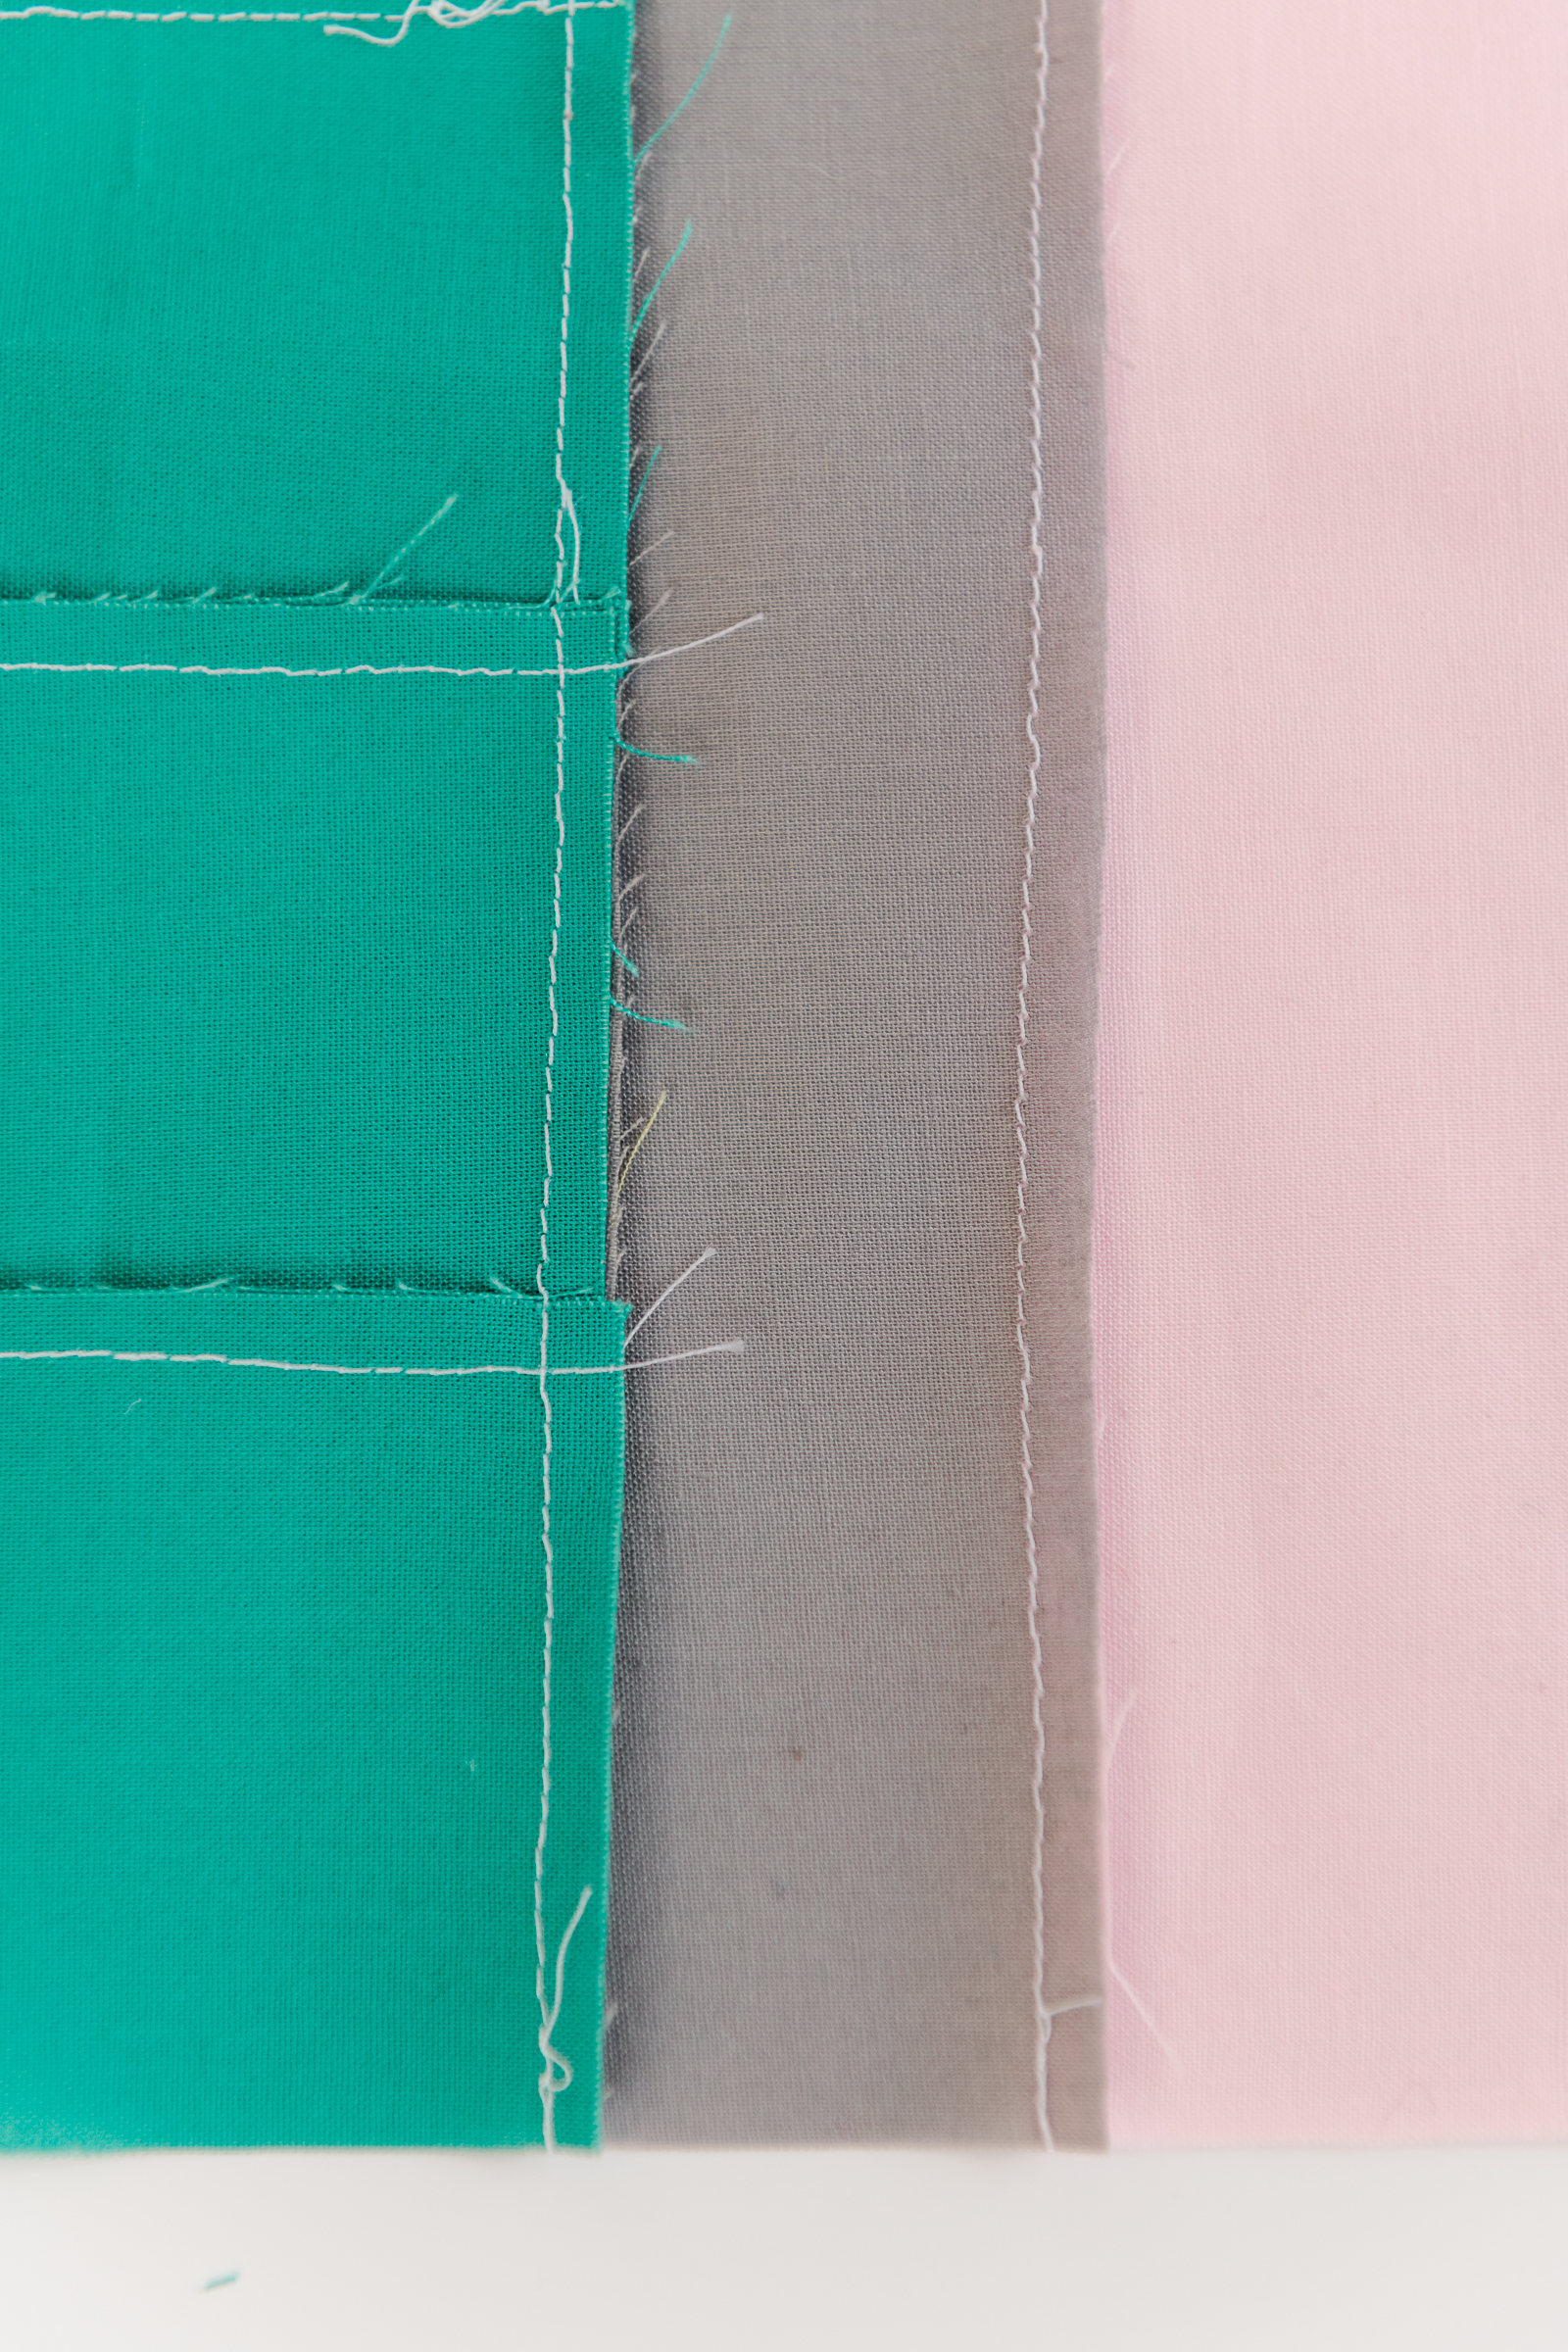
4. With right sides together, add on your silver metal eraser piece (matching up the
edges along the short end of the pencil shaft) and stitch in place with a 1/4” seam
allowance. Then do the same with your pink eraser piece. You will be left with a long
rectangle that has your pencil shaft, then your silver/grey metal eraser piece and then
the pink eraser piece.

5. Add your pencil tip to your pencil shaft. Similar to step 2 above, find the center of your
pencil shaft (along the top short edge….not the eraser edge) and mark with a pin. Fold
your pencil tip (constructed in step 2) in half and mark with a pin along the curved edge.
Then just the same as step 2, match your pined centers up and then begin to pin, right
sides together, the pencil tip to the pencil shaft. Then stitch in place with a 1/4” seam
allowance.
And clip your seam allowance just the same as in step 2 to give the fabric more space
to lay flat and then press with your iron.


6. Right sides together, fold your big pencil in 1/2 to make a “tube”, matching up the long
pencil shaft all the way up to the tip of the graphite! Be sure to match up the areas
where all of the colors meet (pink, grey and the pencil tip) so that when your pencil is
stuffed, there isn’t an obvious seam on the plushie! :)
Stitch up the long side to make a tube, but DO NOT STITCH ALL THE WAY
CLOSED…..stop about 1/2 way up the long shaft and leave a 3-4” opening to stuff and
turn the plushie in step 8!


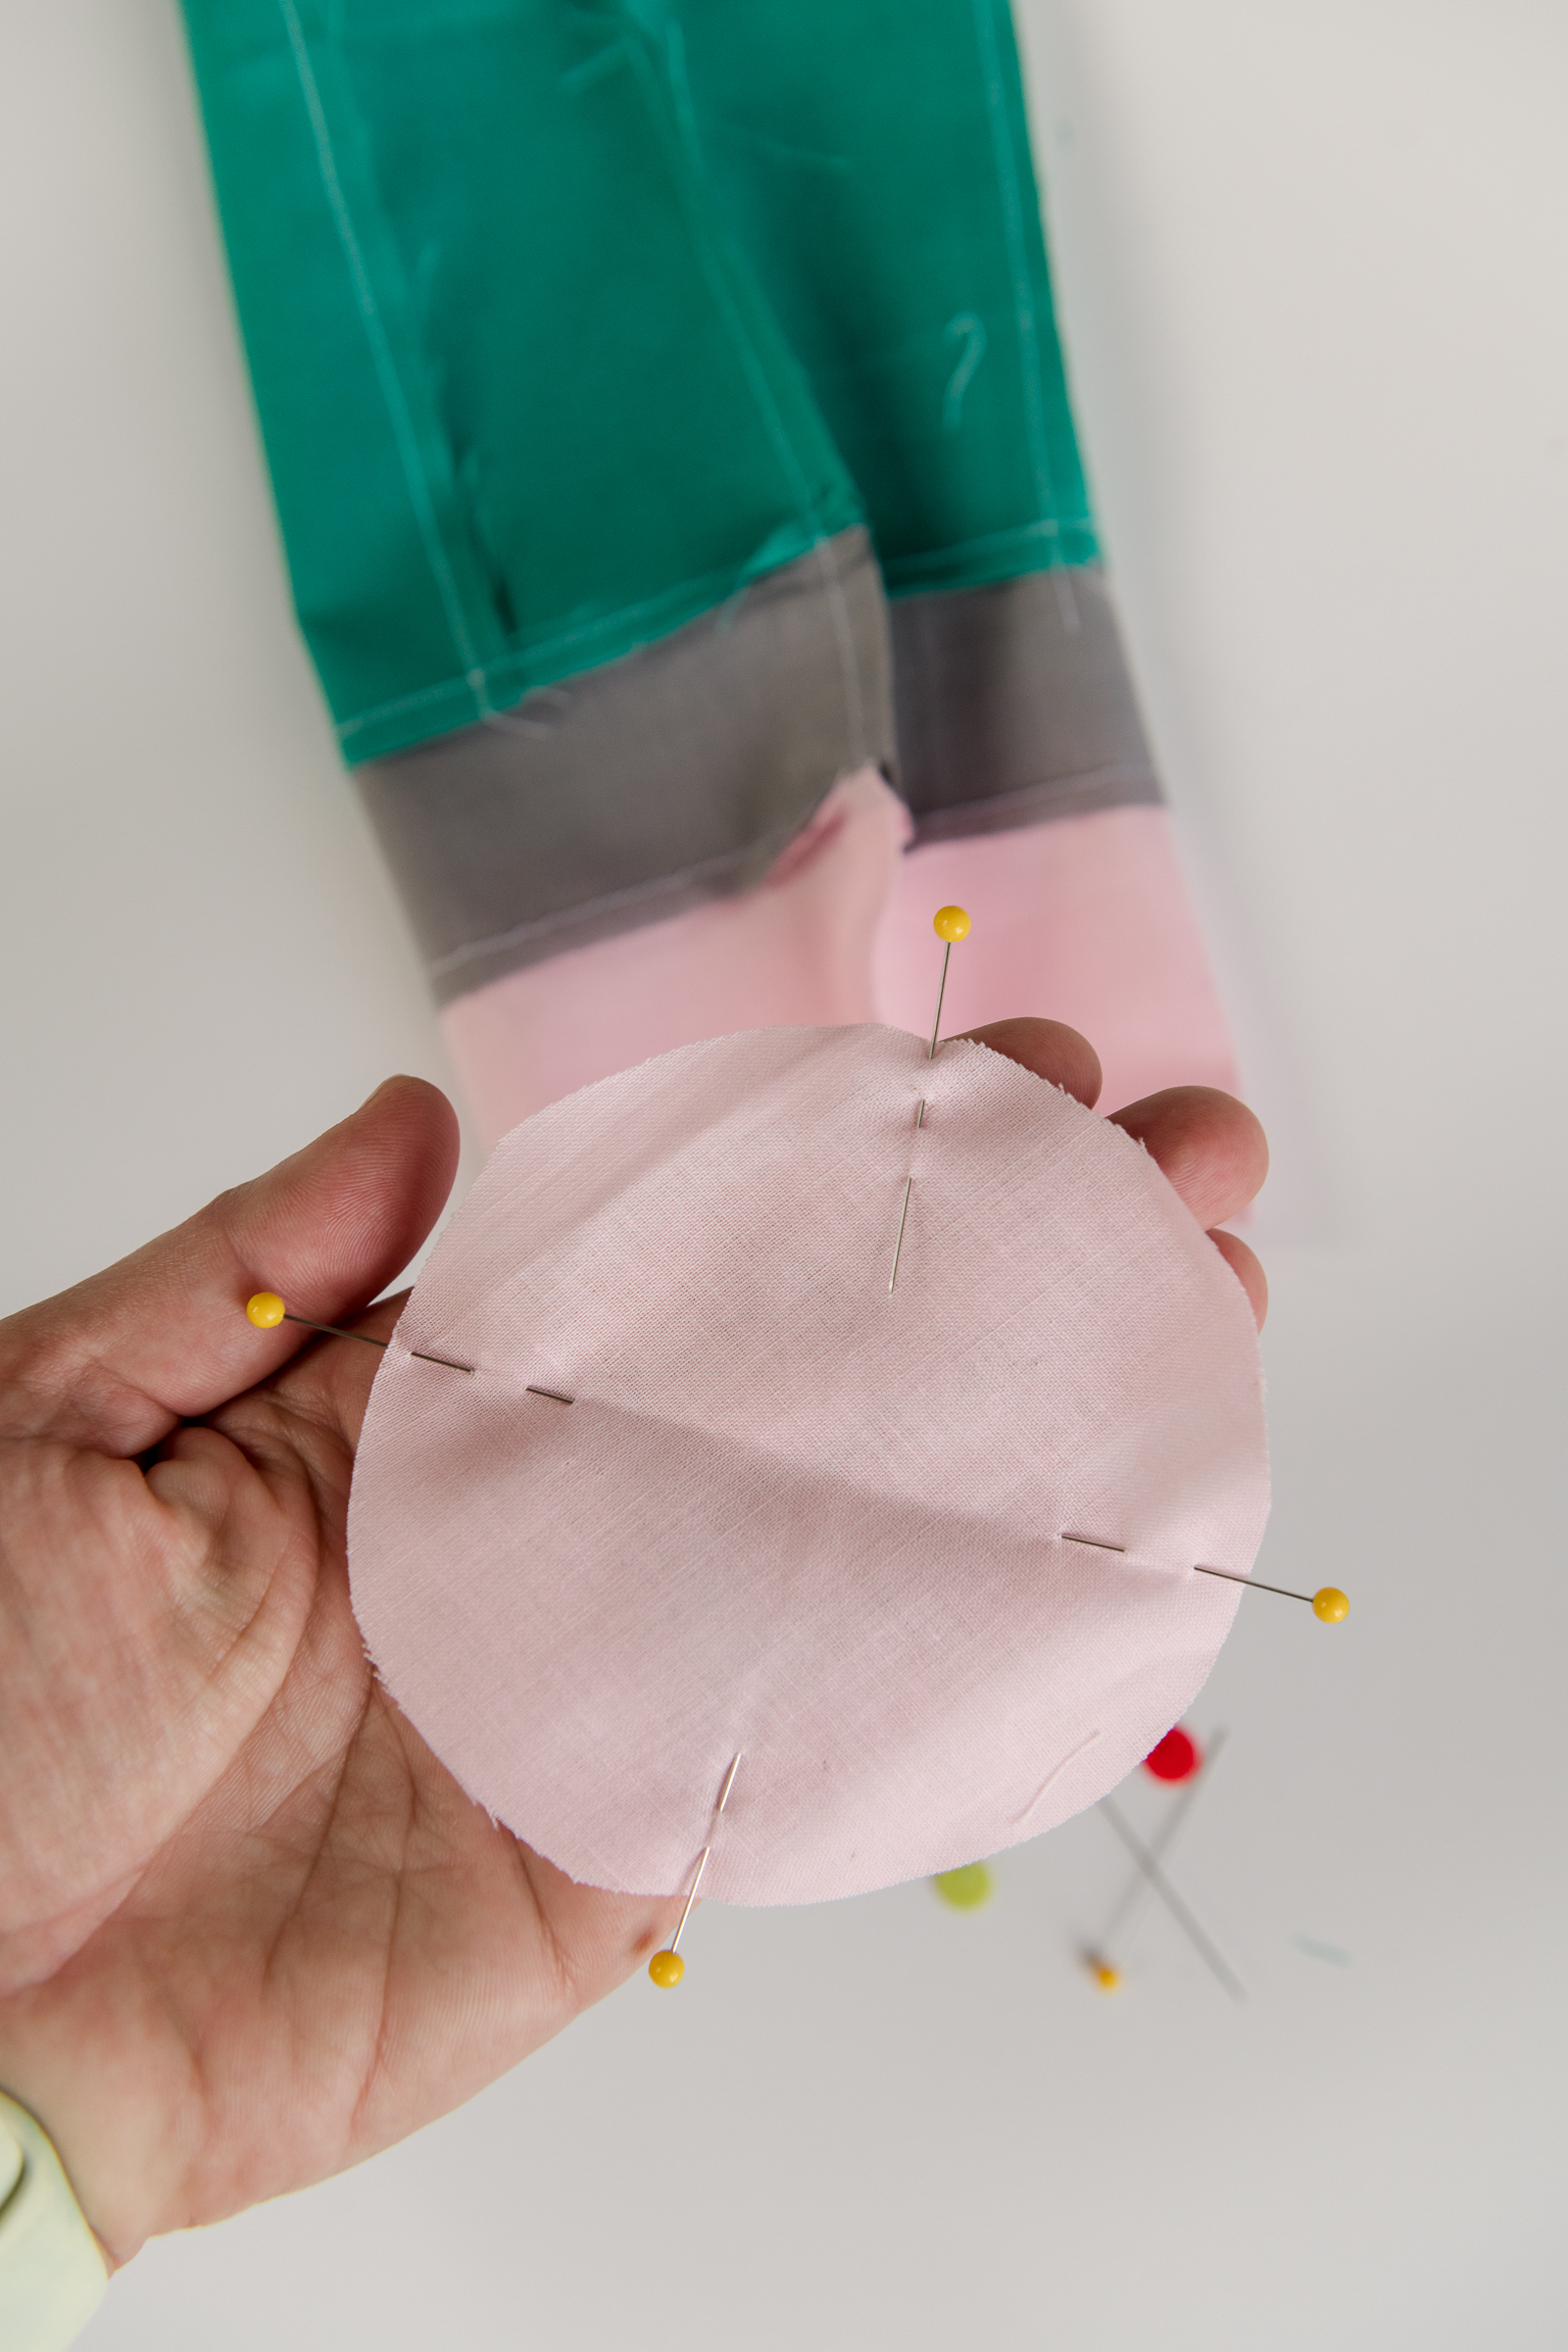
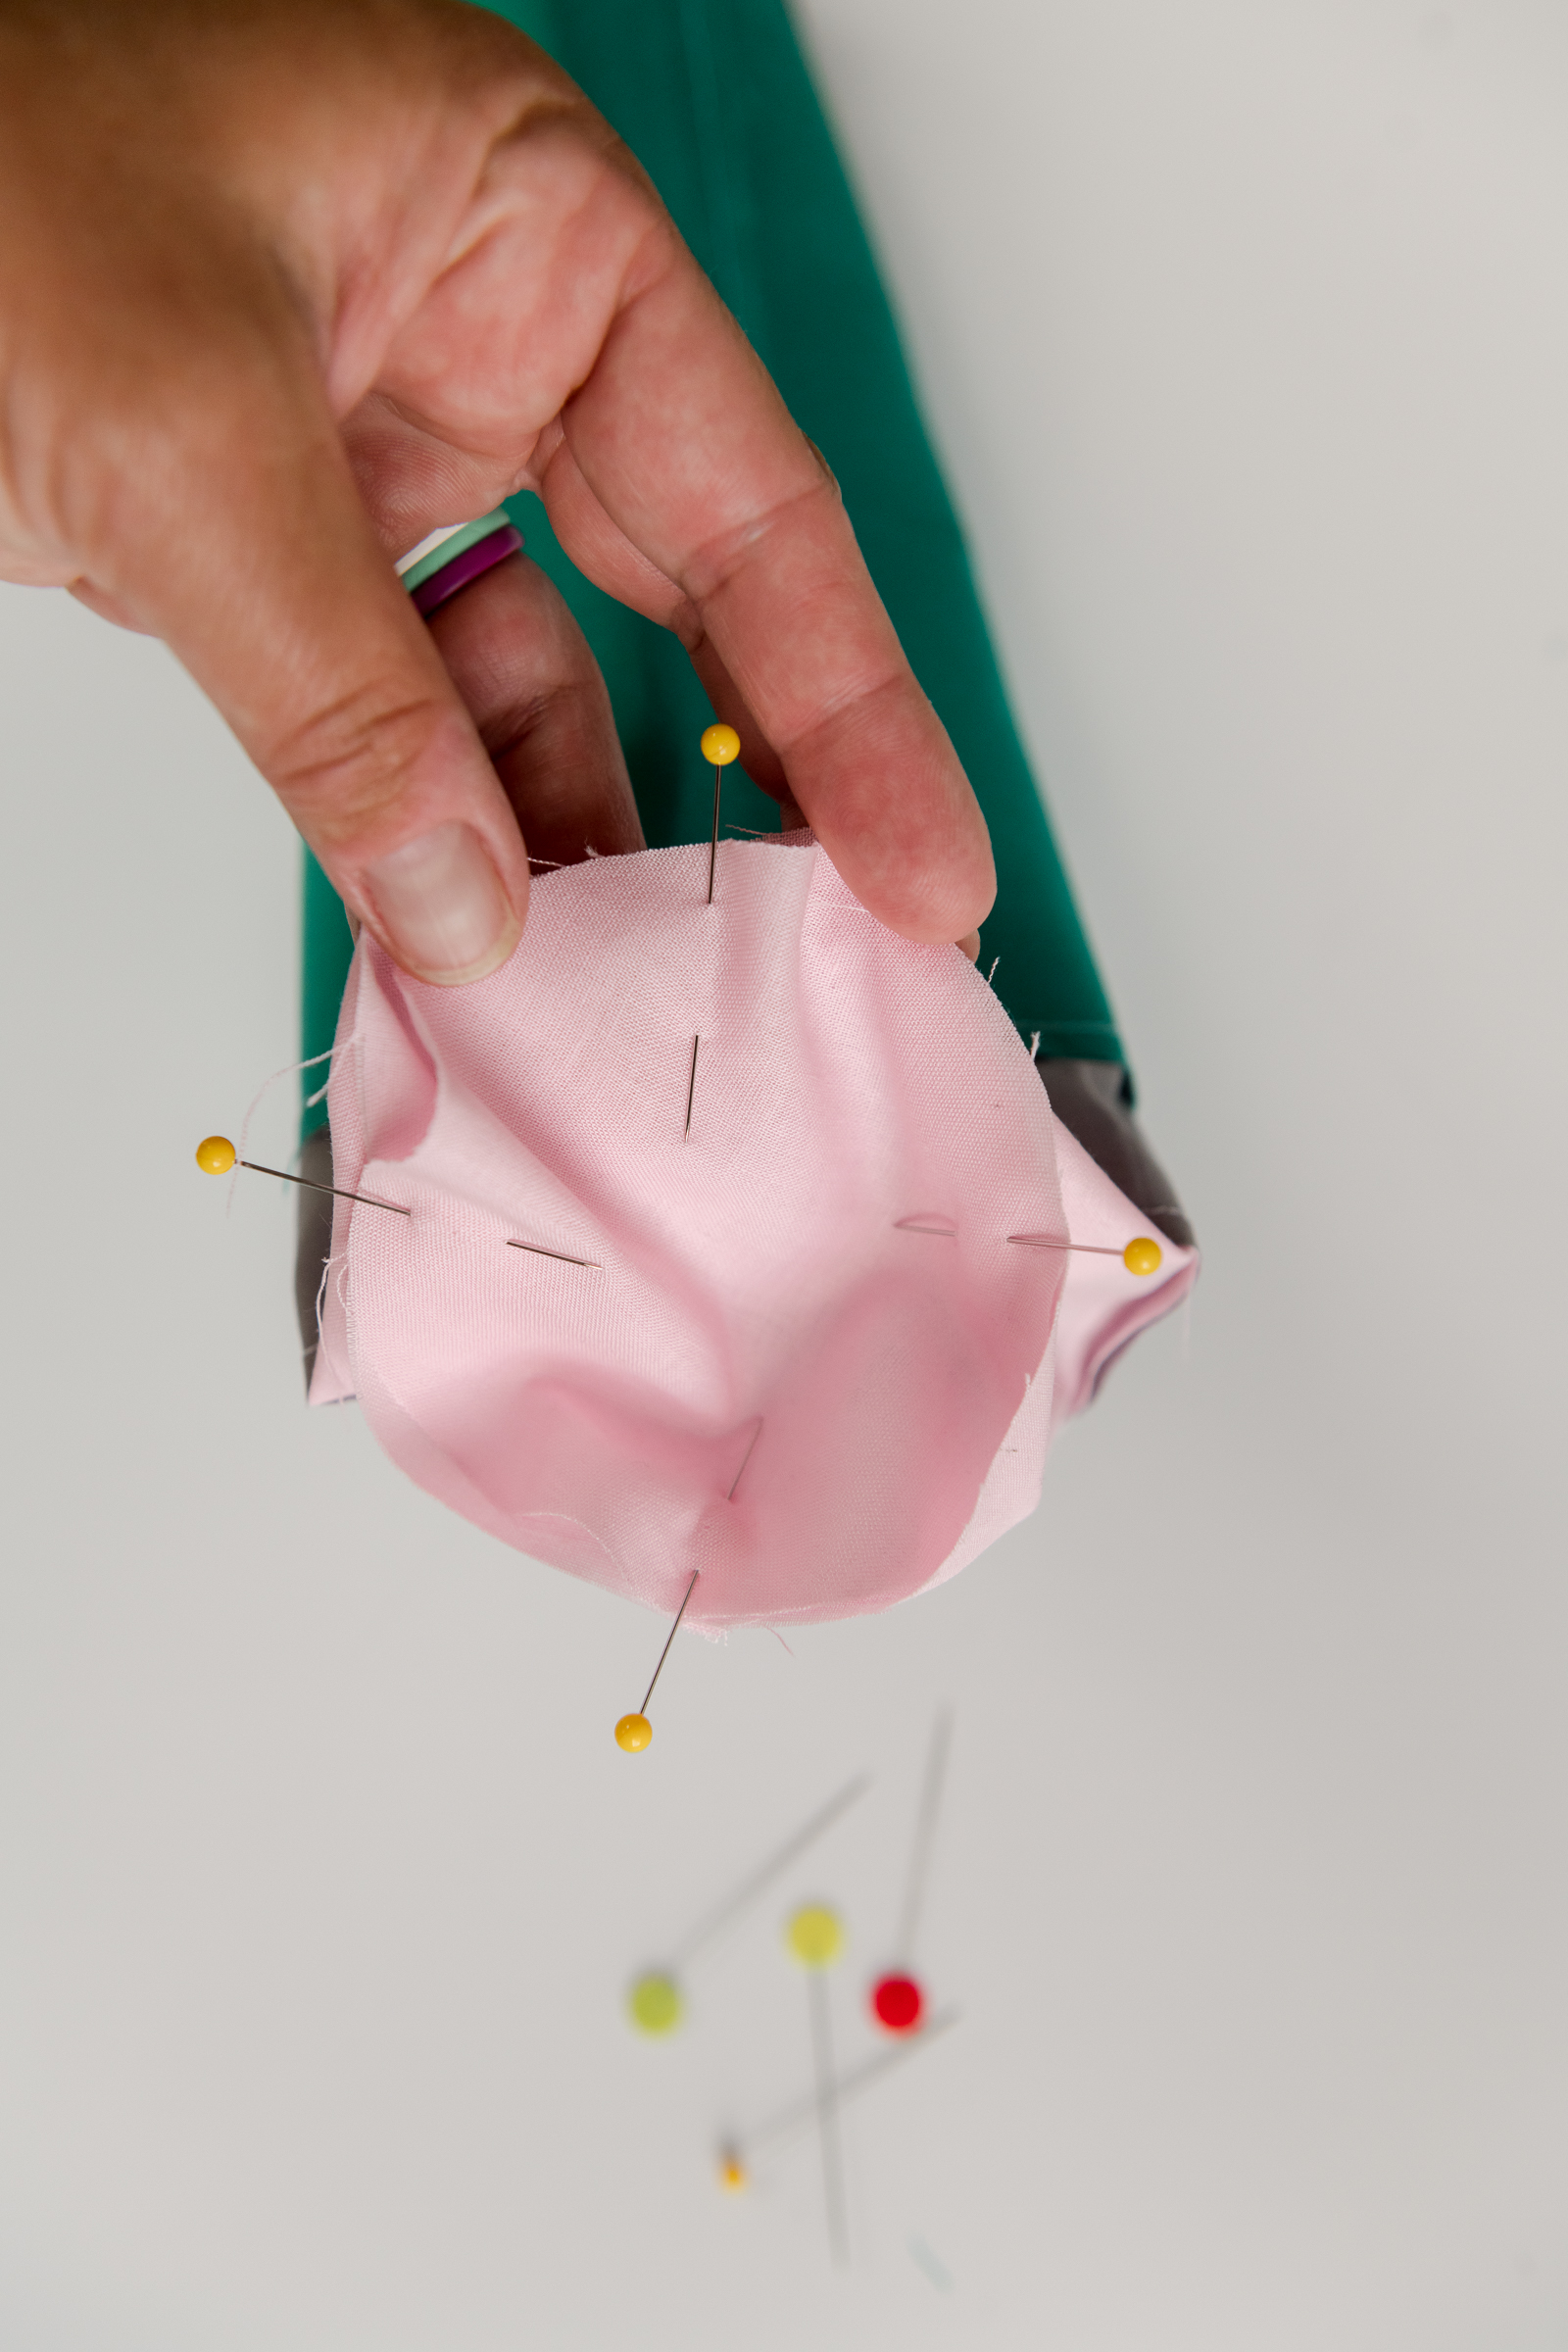
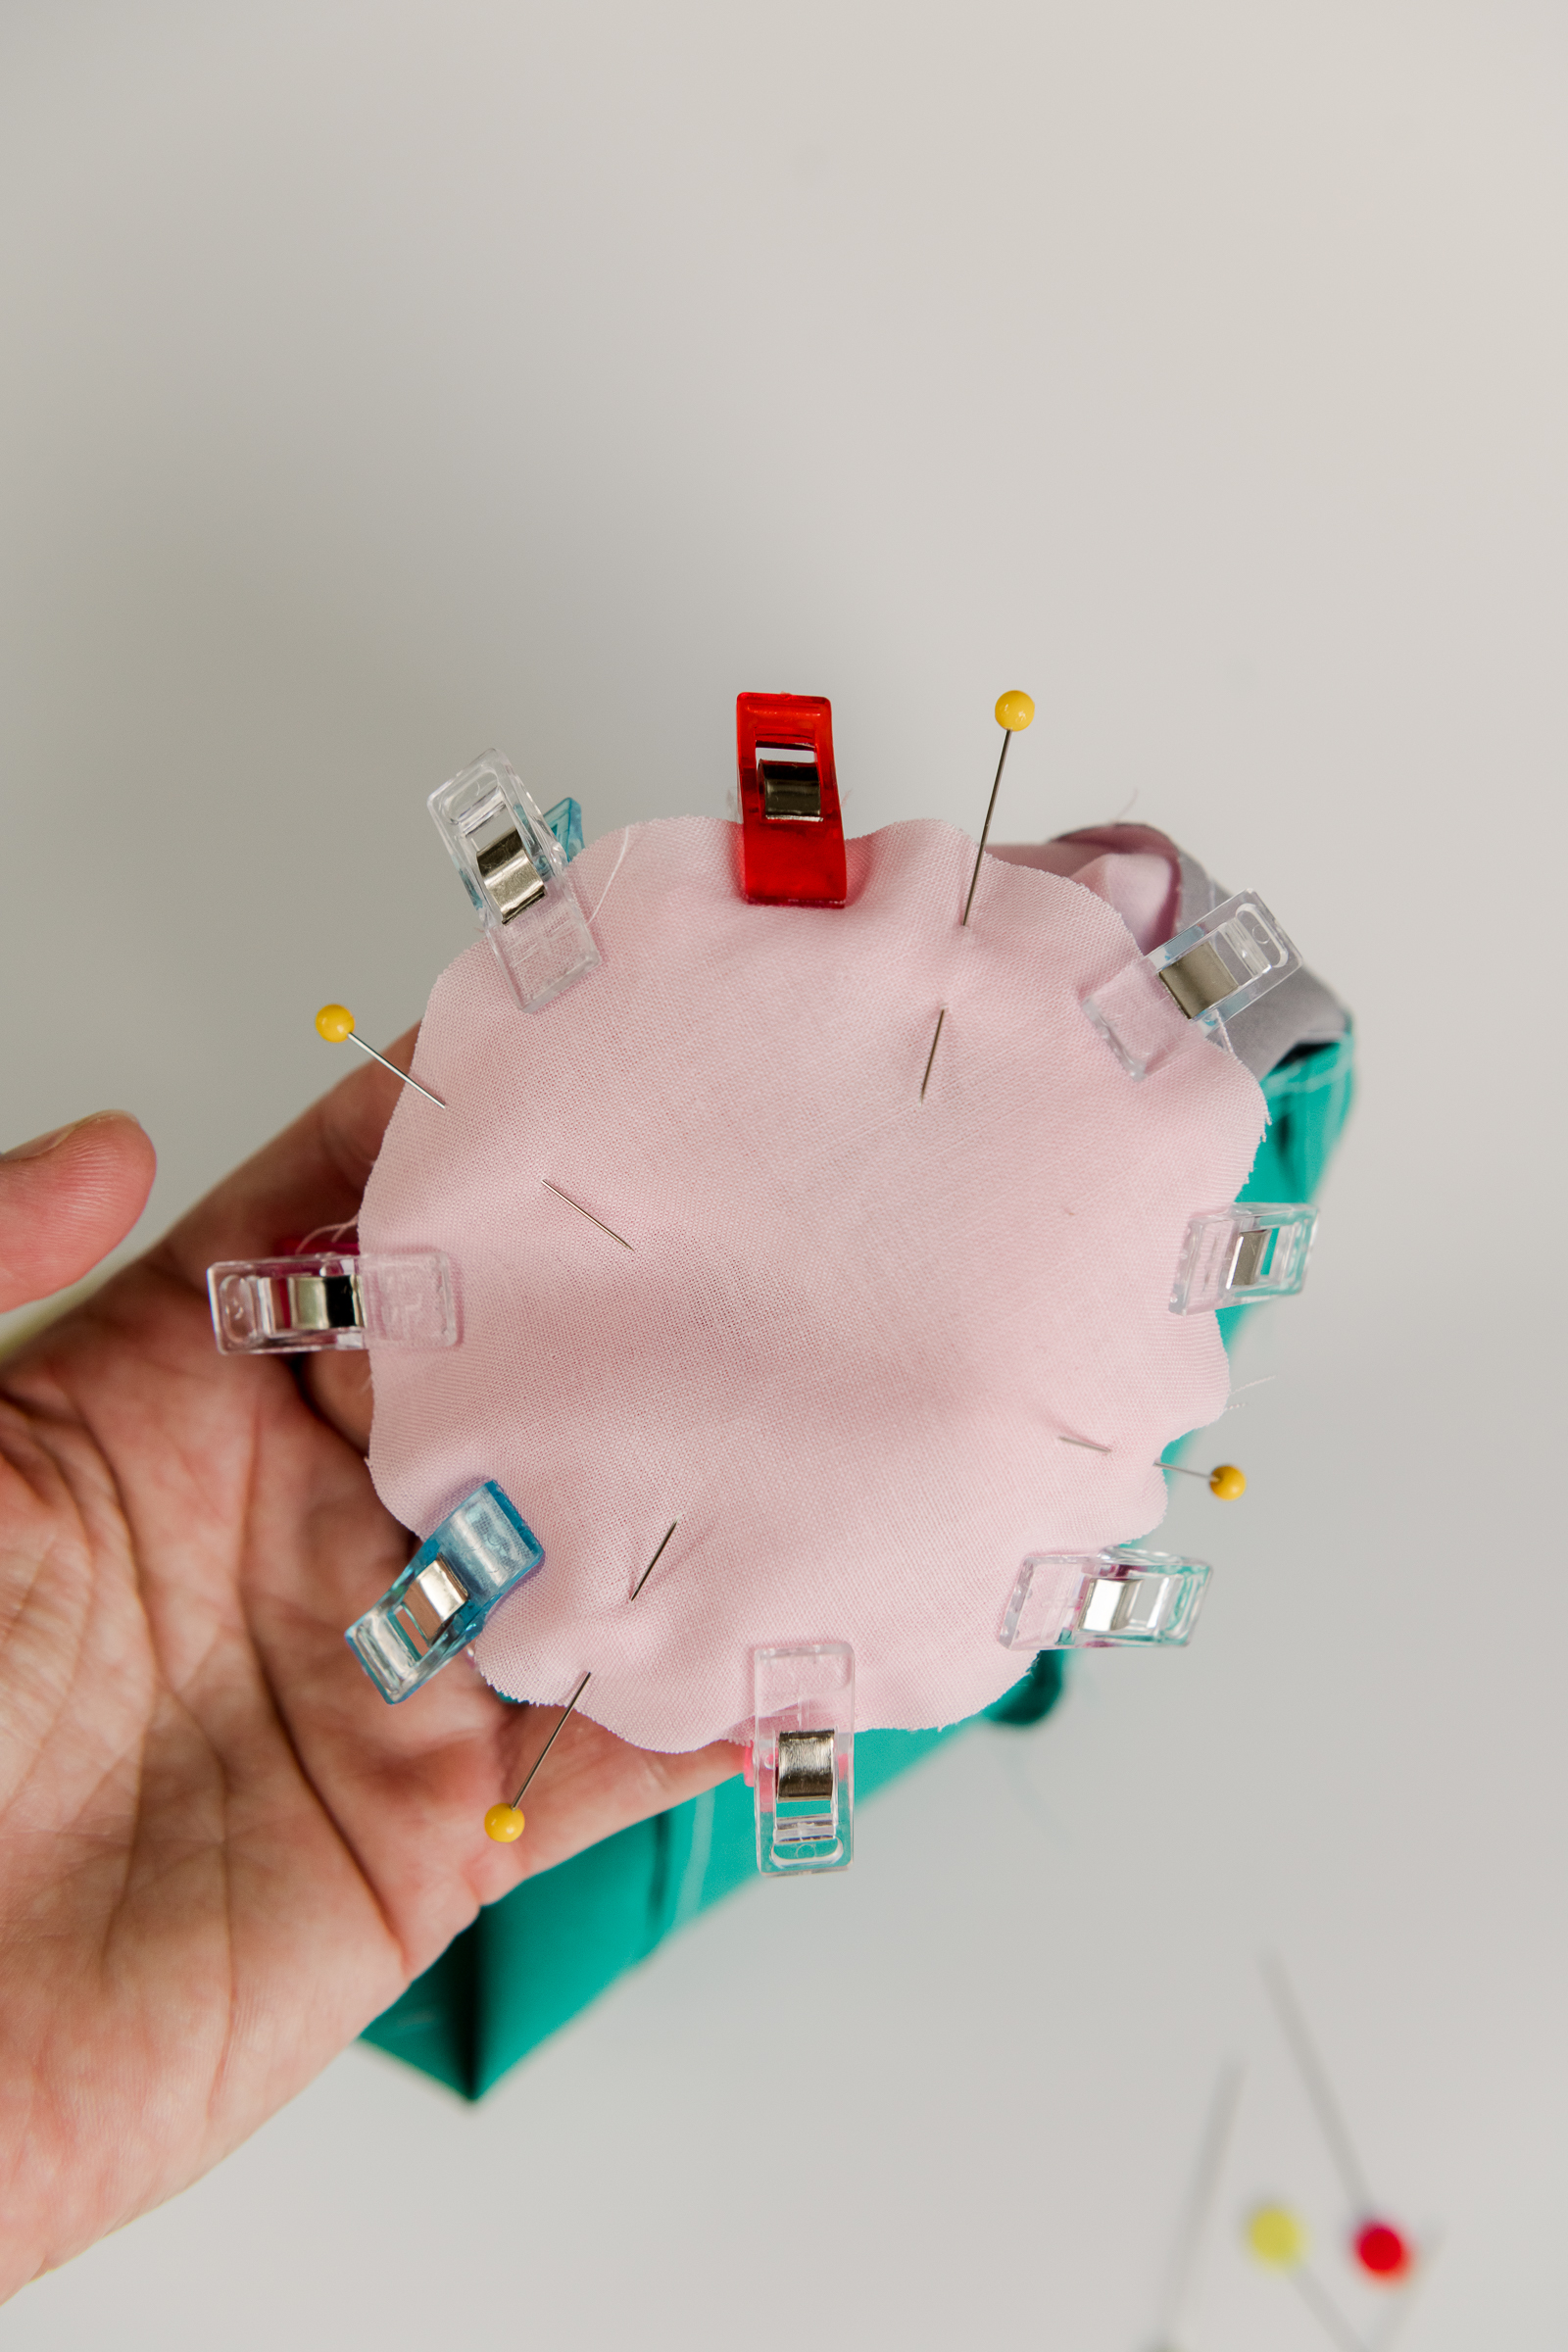
7. Now it’s time to add the bottom eraser! With pattern piece C, fold the circle in 1/2 2
times to mark the 4 “corners” of the circle. You can either finger press or mark them with
pins. Do the same with the bottom opening of the eraser on your big pencil shaft. You
will match up the 4 corners of piece C circle with the 4 “corners” of the bottom of the
pencil. Be sure to pin in place right sides together (the pink circle essentially gets put
“inside” the bottom of the pencil shaft)! Then carefully stitch in place using a 1/4” seam
allowance and being sure not to stitch the shaft of the pencil into the seam allowance
(trust me, that is easy to do if you’re not going slow on this step)! :)

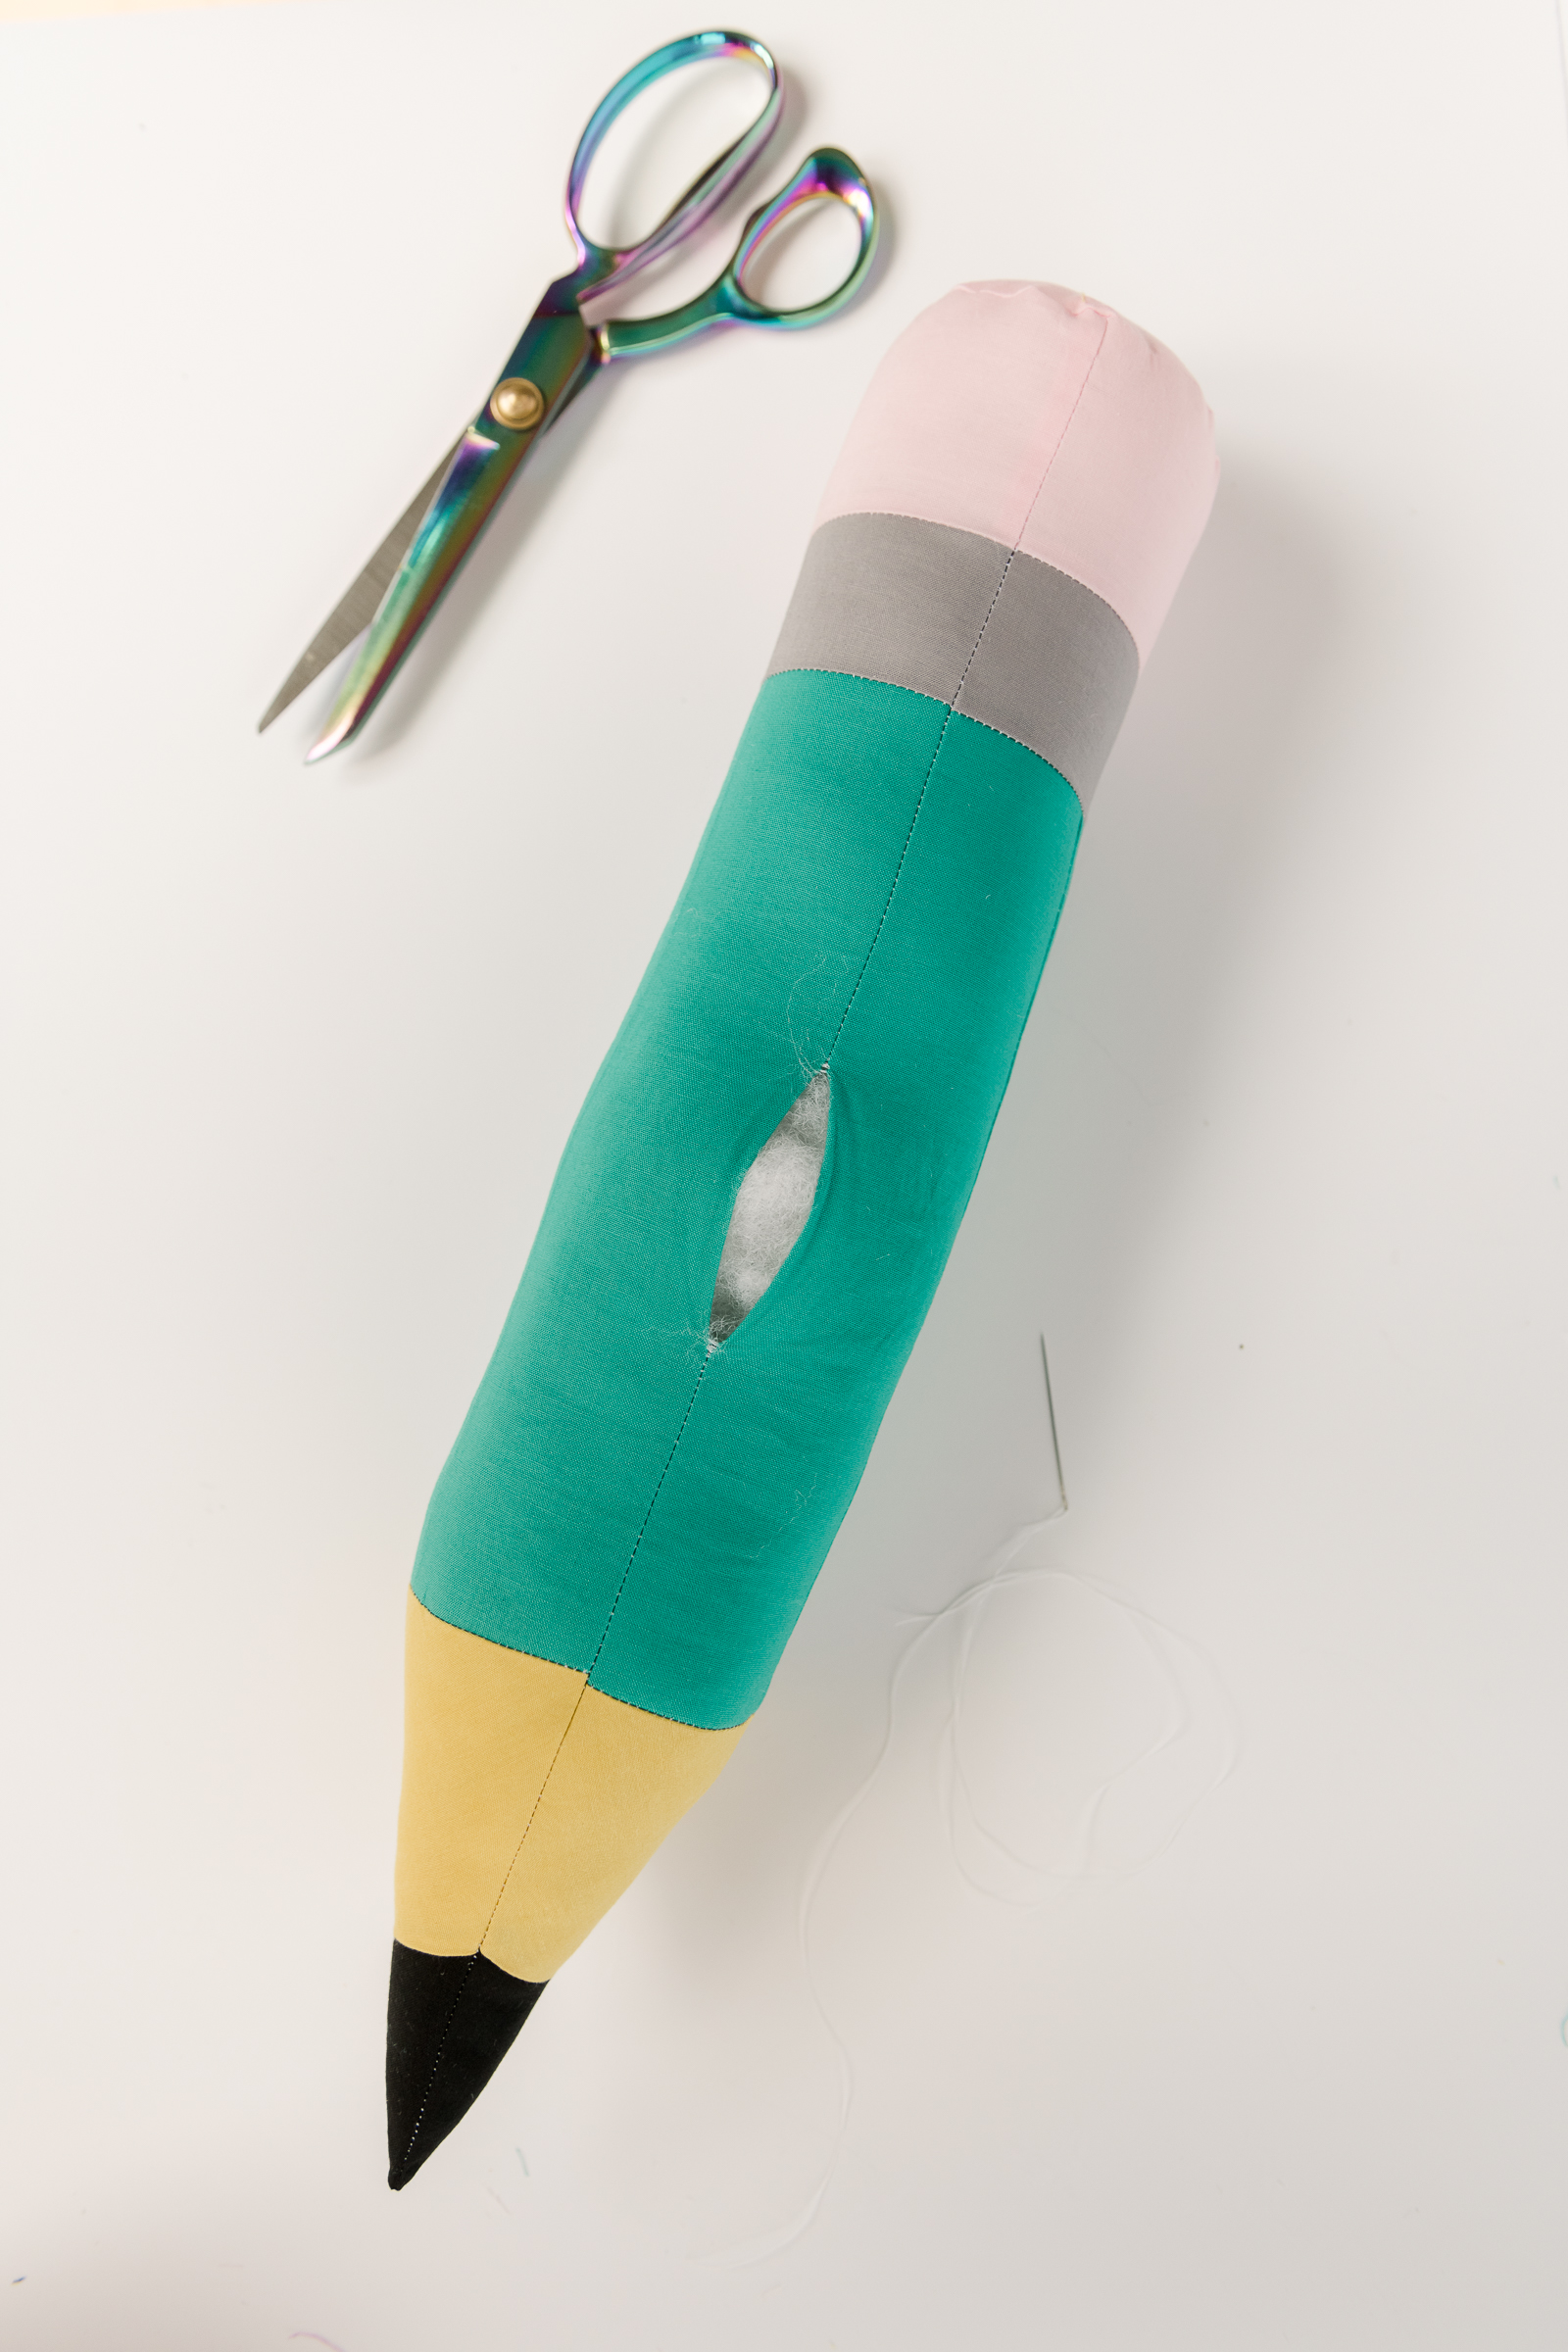
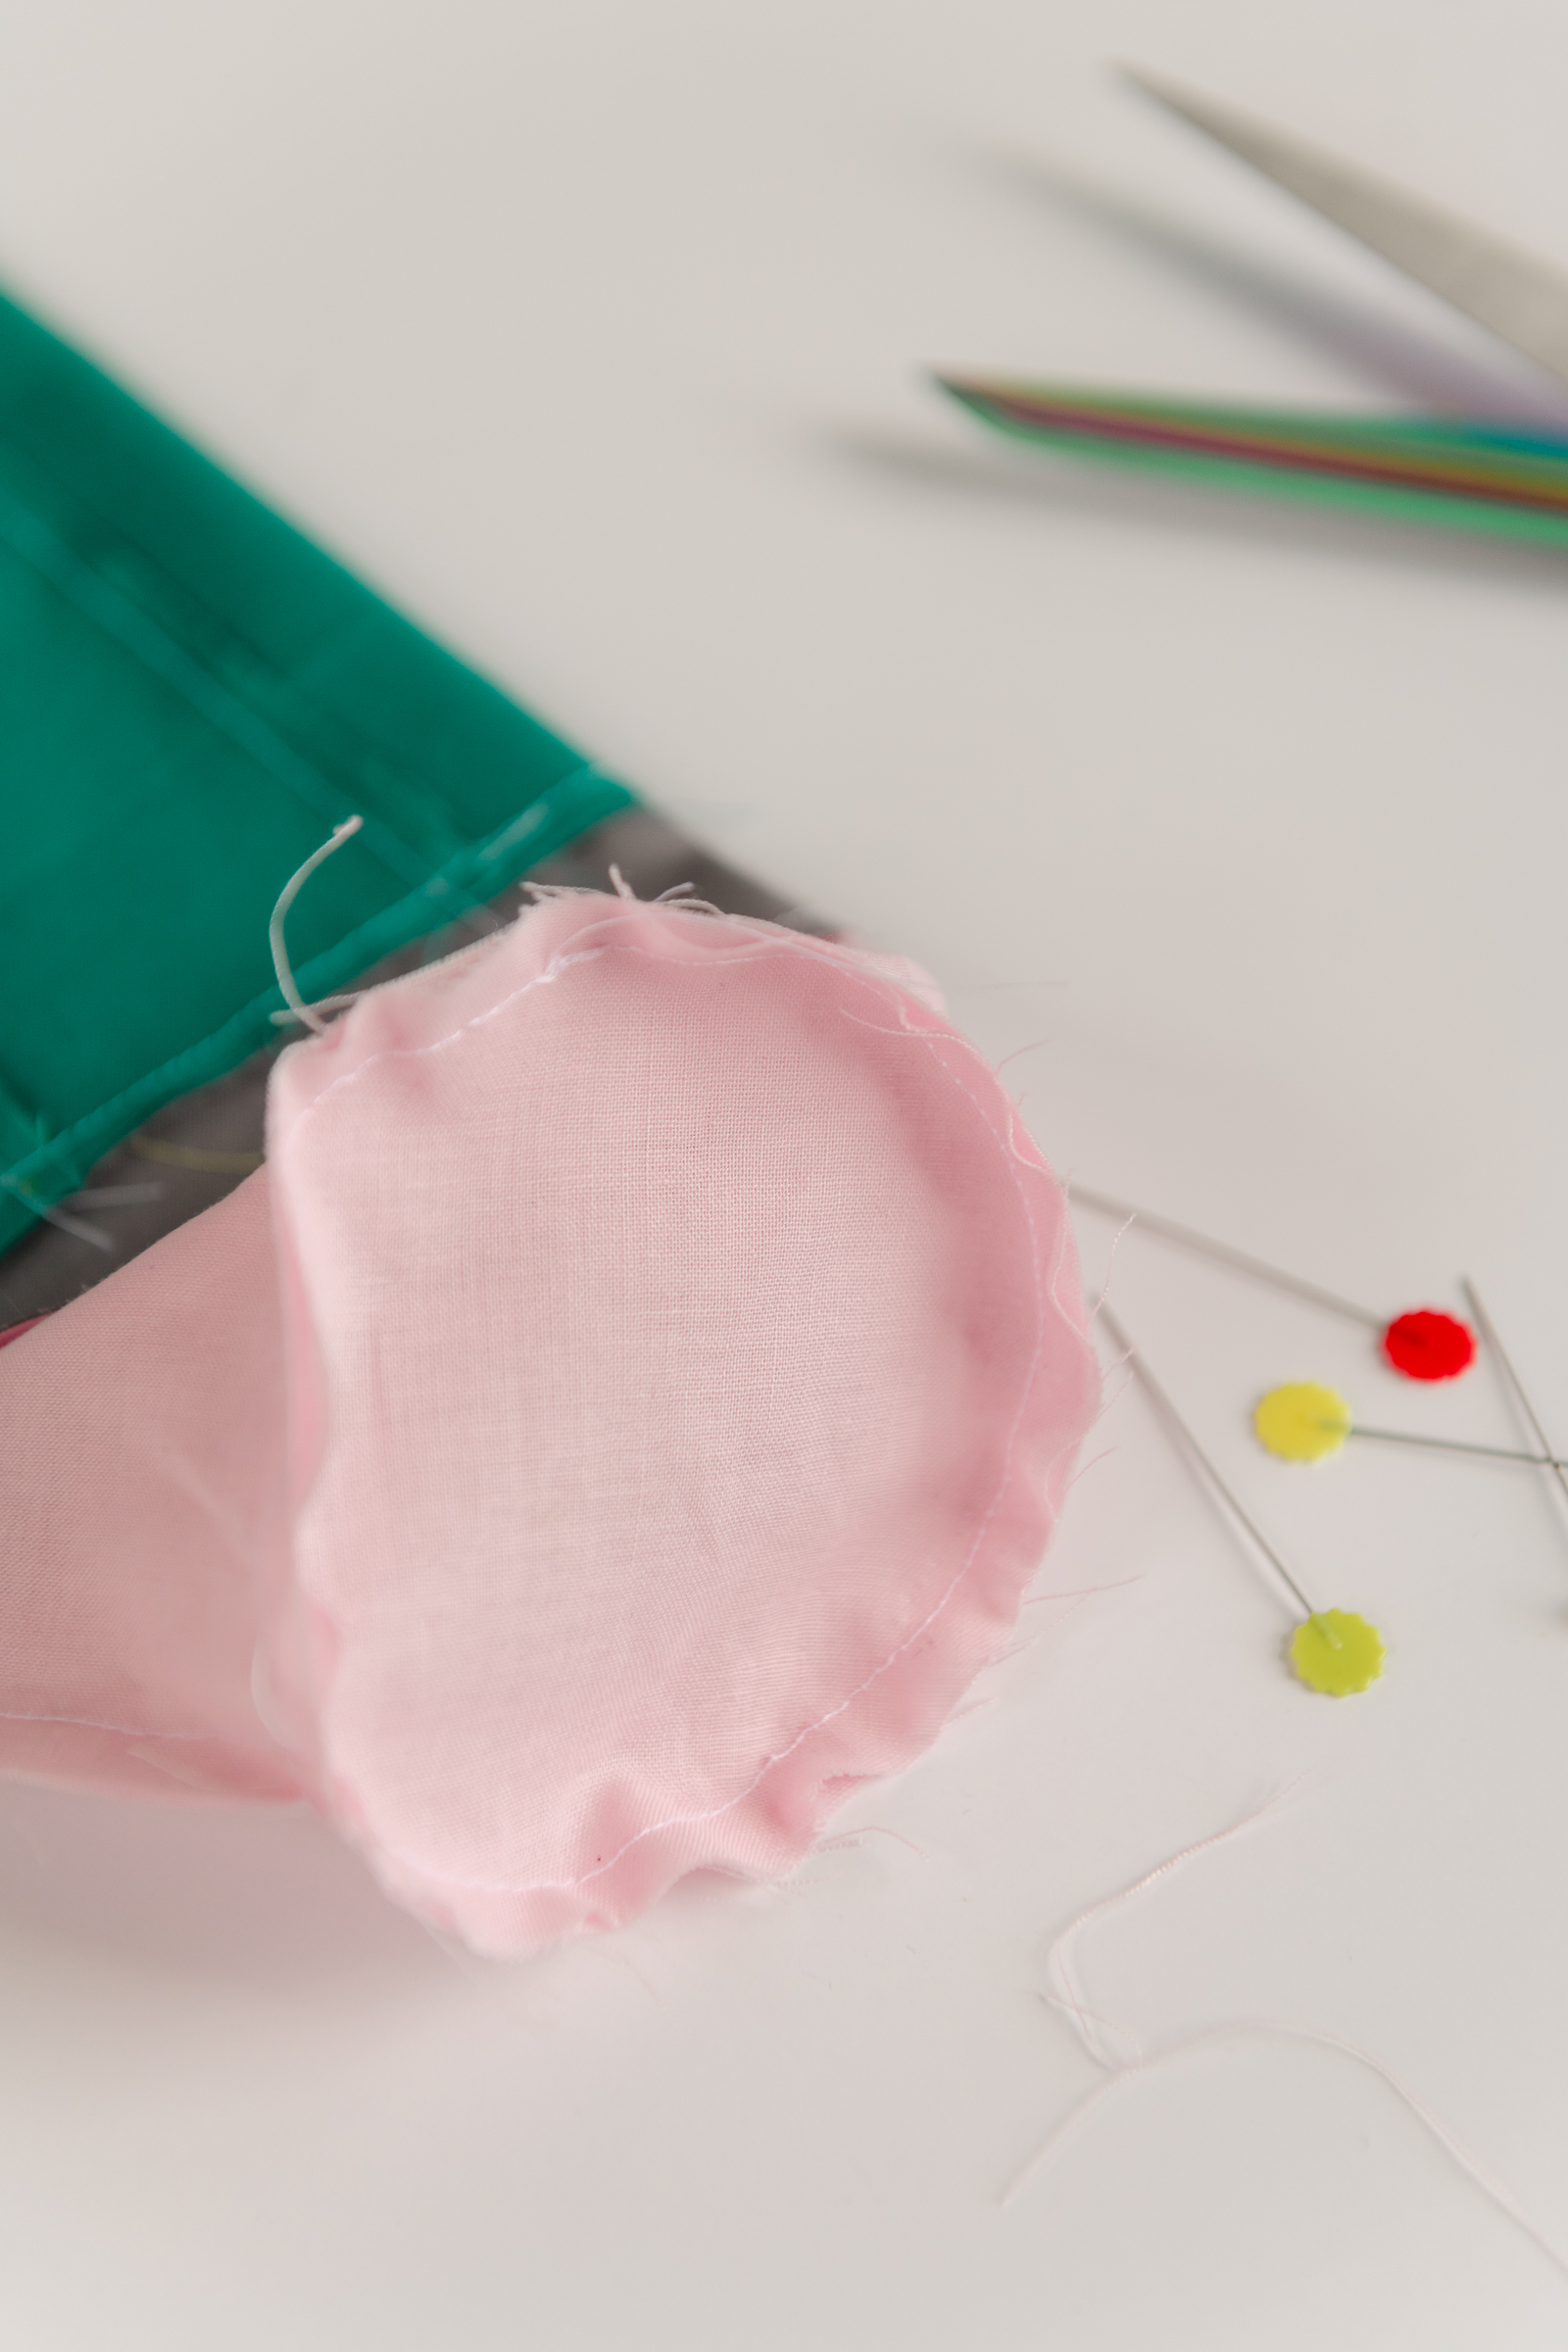
8. Now turn your pencil right sides out (make sure that all seams are stitched and
perfect looking)! And begin to stuff your pencil plushie! YAY! This is the fun part where
you see your plushie come to life and fill out. When it is stuffed to your desire, you can
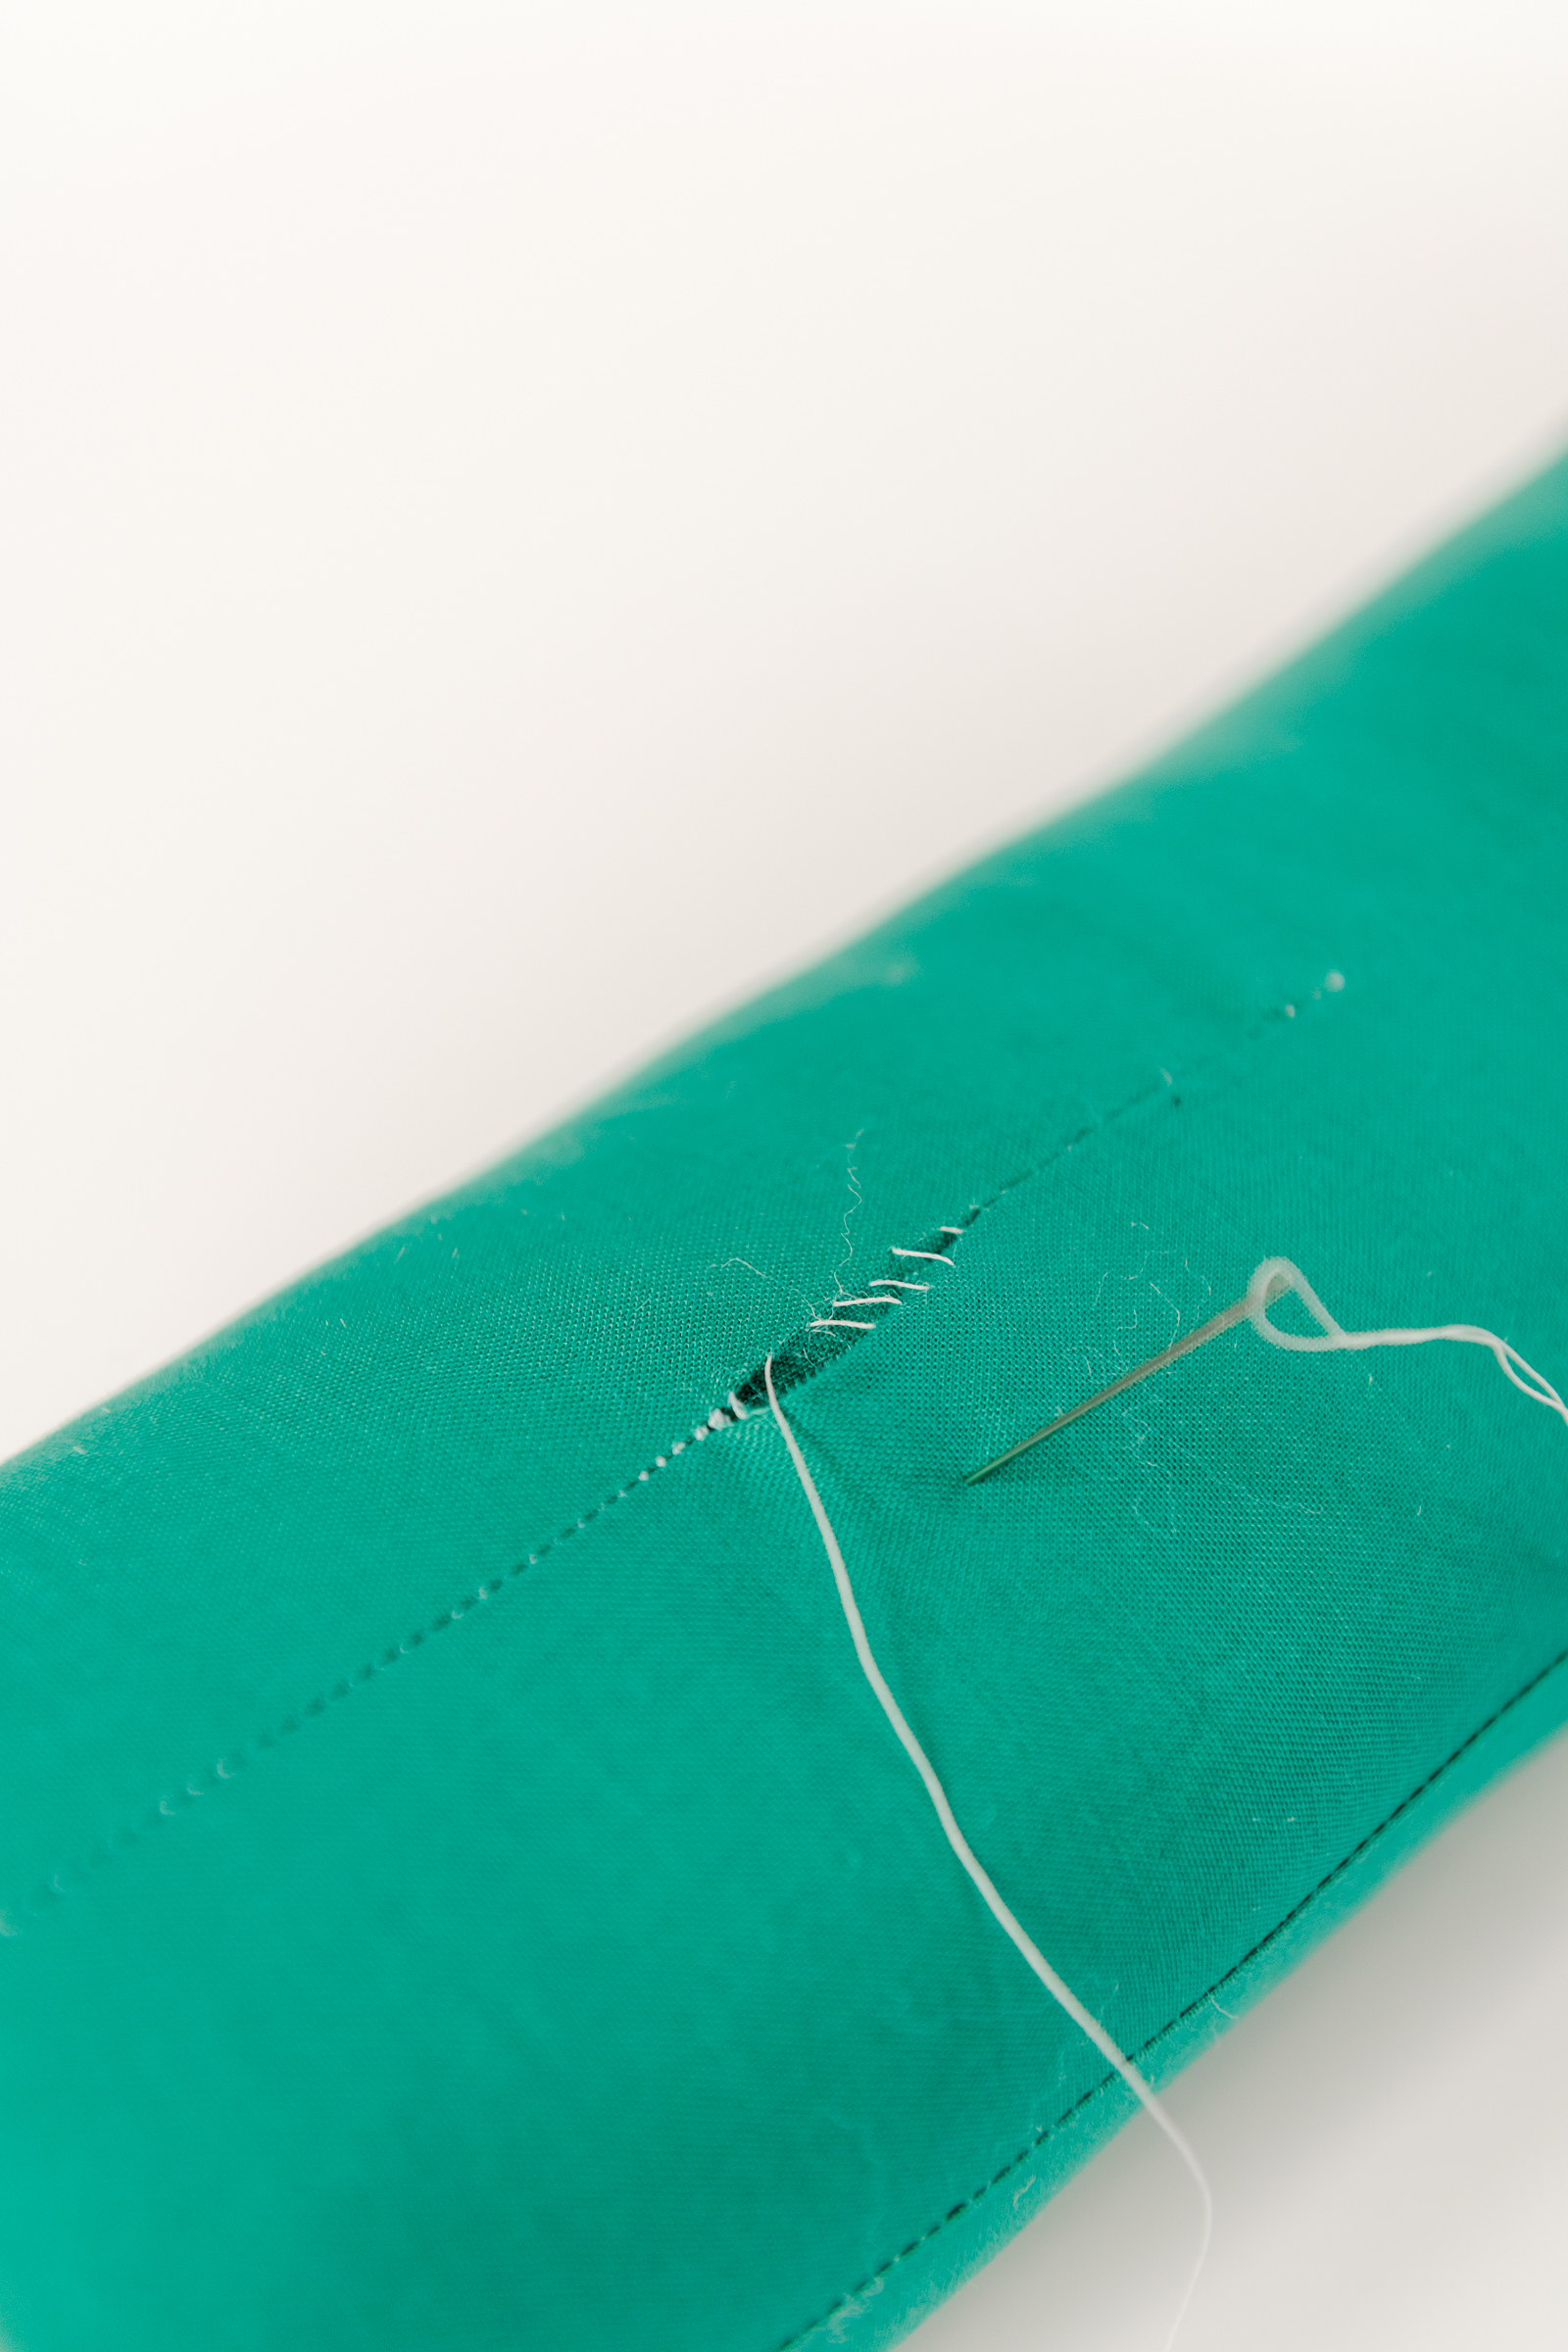
use a needle and thread to ladder stitch the last opening closed from step 6 where we
turned the plushie!

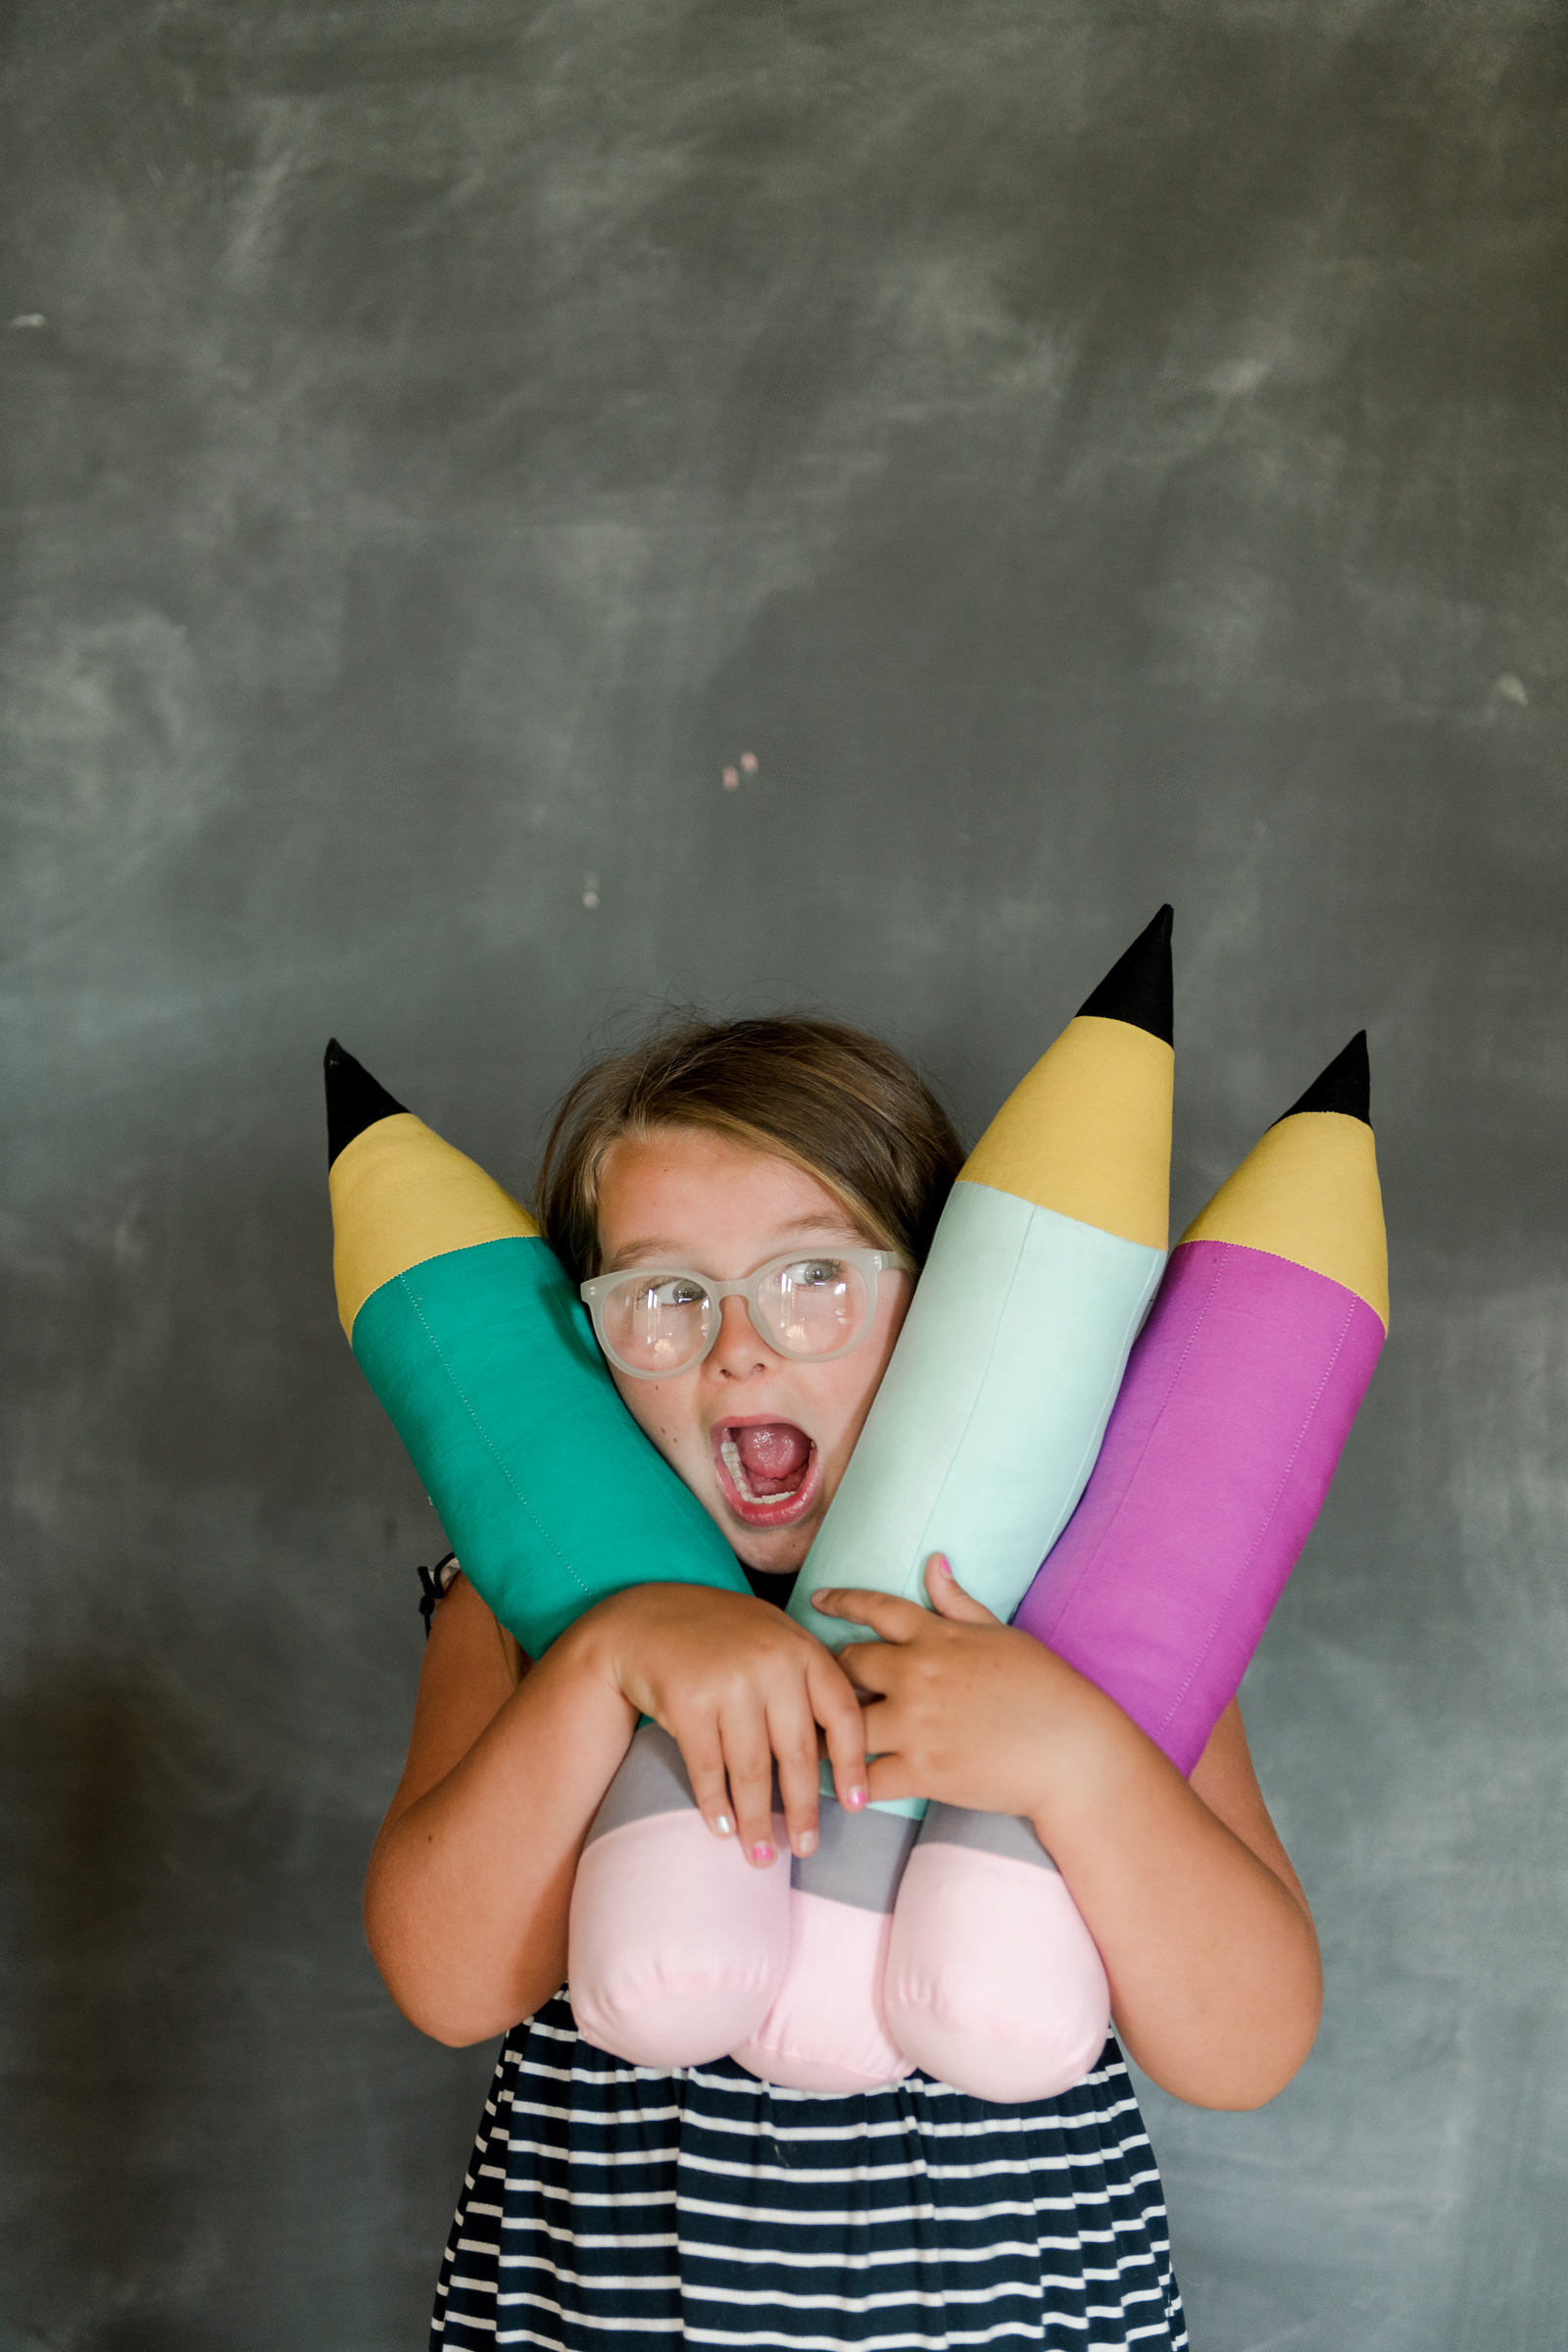
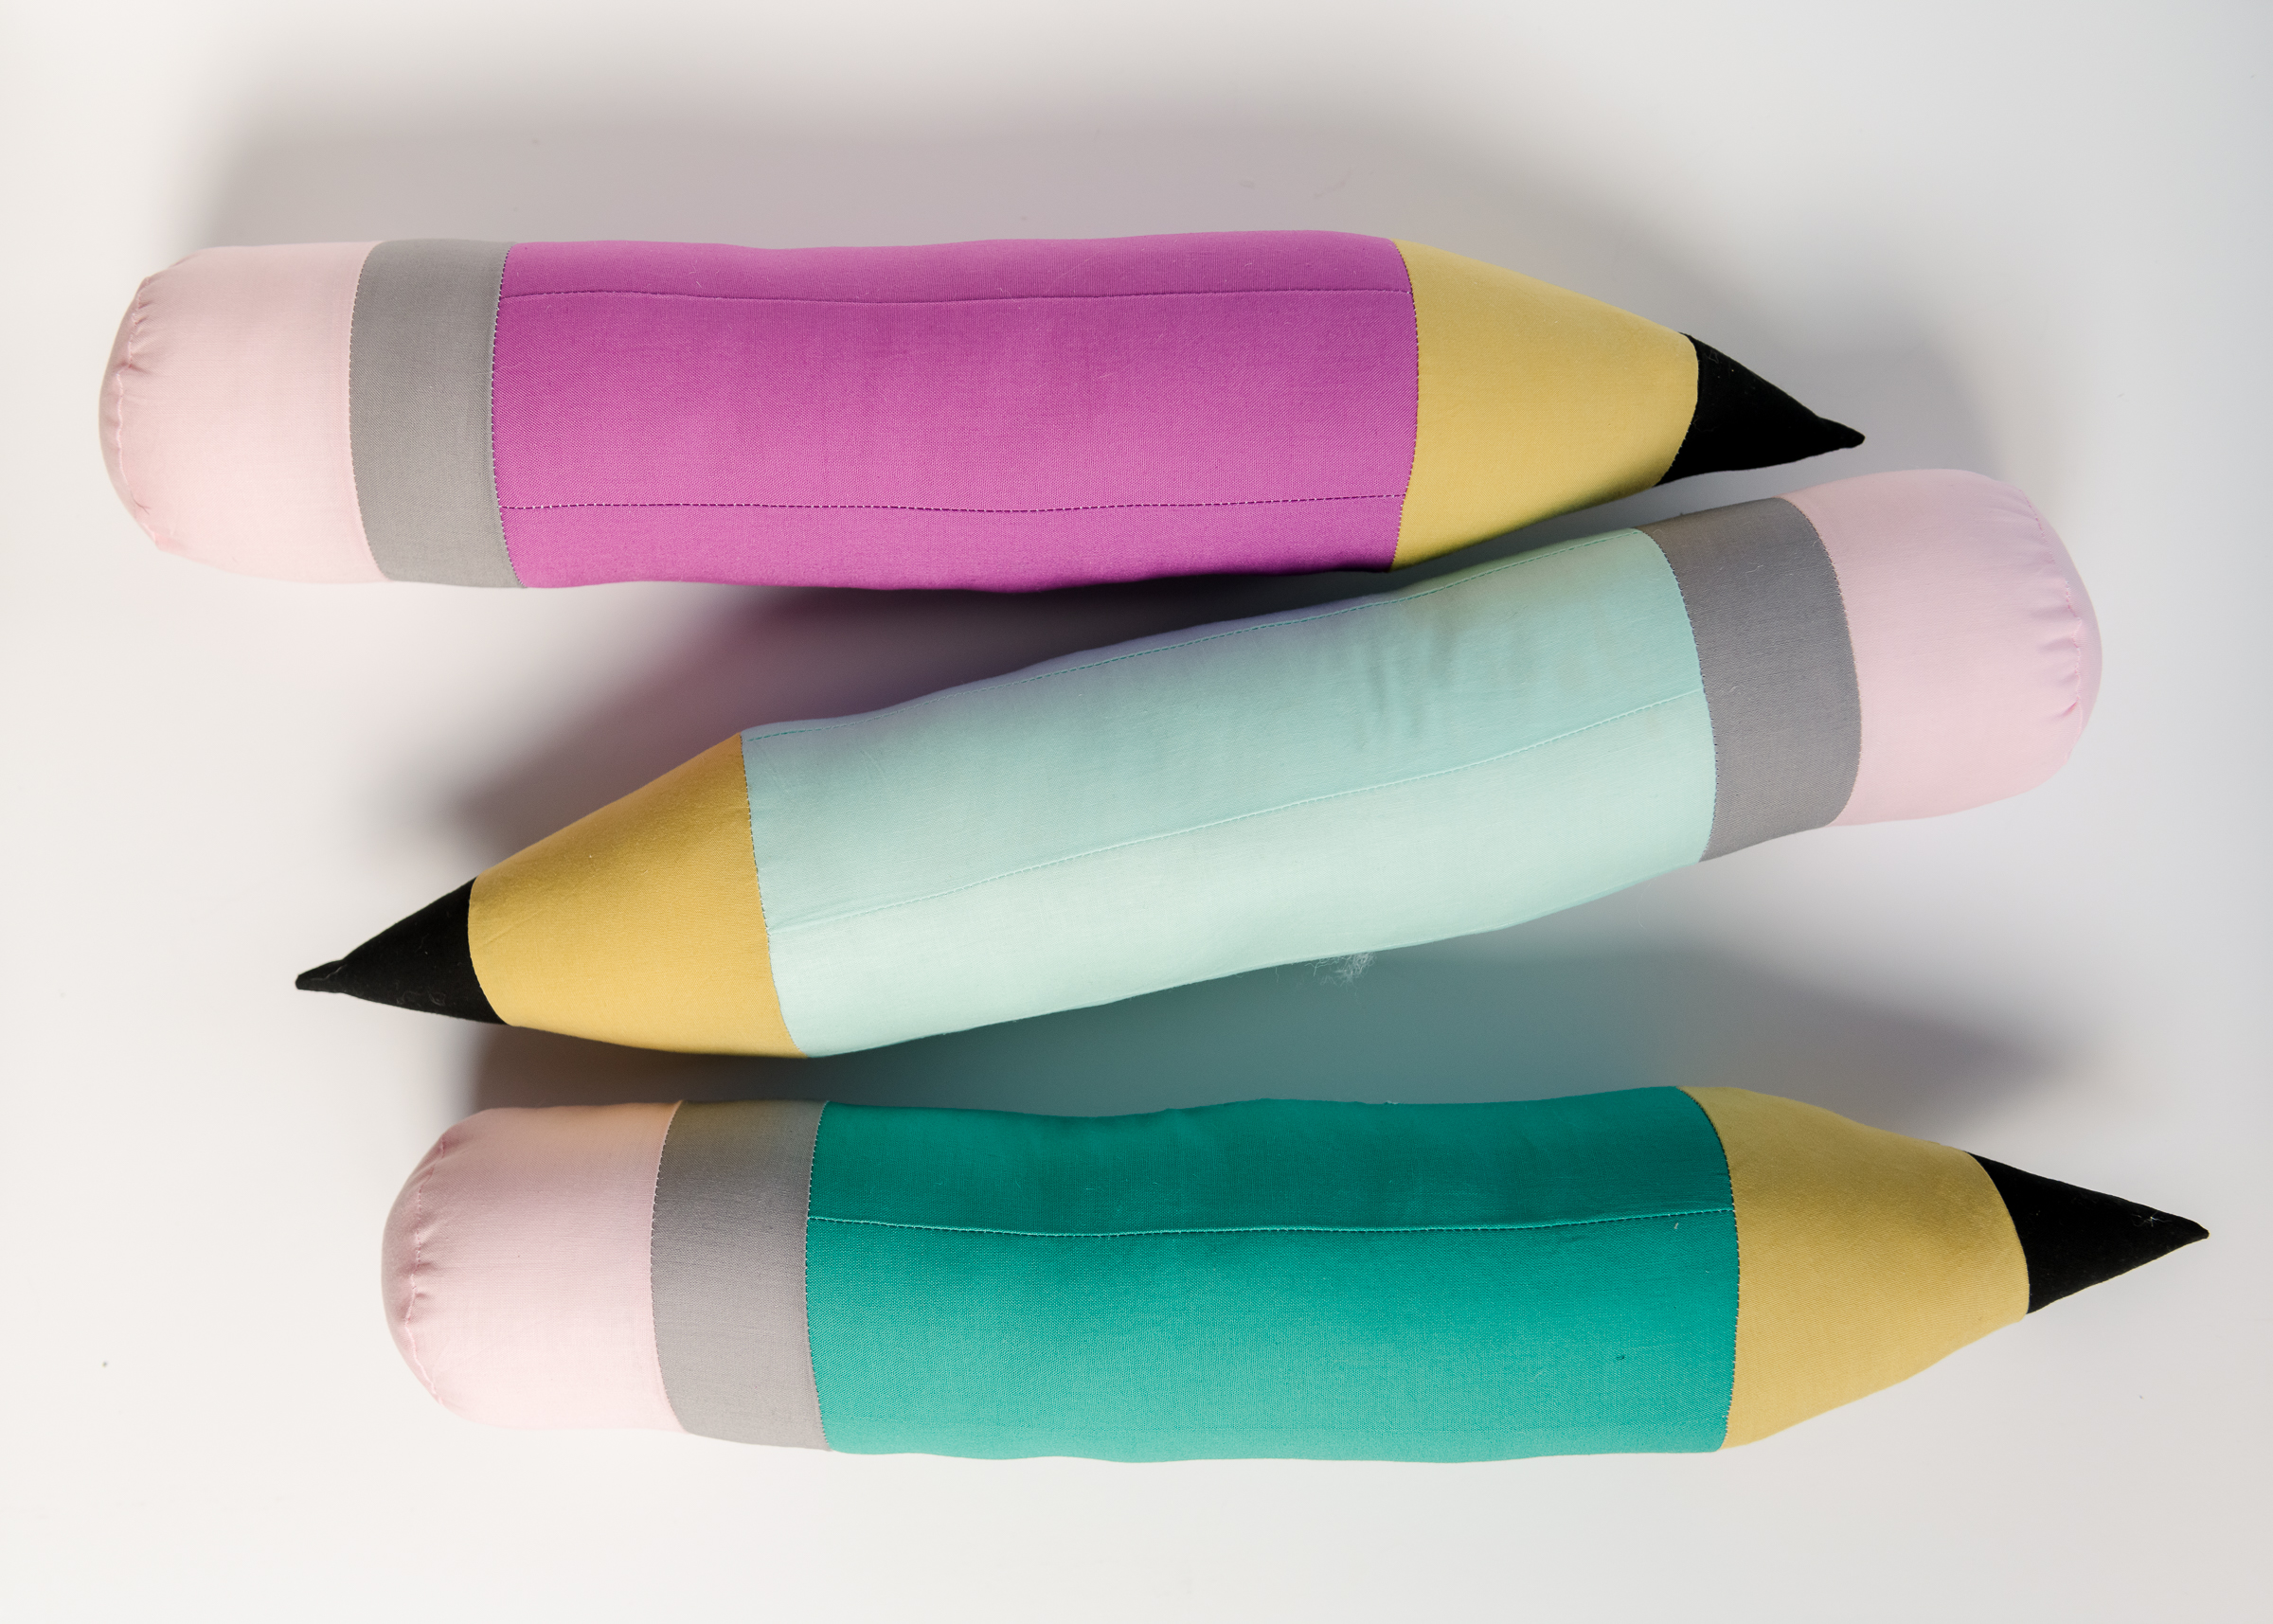
And VOILA! :) a cute, pencil plushie to snuggle with, play with or just have as colorful
classroom decor (if you happen to be a teacher)! :)

Everyone is Talking about Pencil Plushie
Reviews


Tako
Beautiful
Wednesday, November 23, 2016

cpindzola
Around the Table Dresden Placemats
Saturday, December 17, 2016

I like the concept, but the directions are "sloppy." Nowhere in the supply list does it mention the felt or the batting (how much?). Also, I would never use a high loft batting in a placemat, or a table runner, as I think that it would be too unstable for a glass. The next time I make these, I will cut out the batting (I use flannel) and spray baste it to the wrong side of the Dresden plate before I put the Dresden plate on the felt to cut out. I have not yet washed the finished placemat, and am hoping that the single layer of felt does not curl up, or become distorted after washing/drying.
Txmaid
Fun Great Gift!
Tuesday, February 21, 2017

MargieARK
Teatime Quilted Tablecloth
Friday, February 24, 2017

I made this today but your cutting directions need to be changed. You only need 4 of color 1 and color 3 4.5 squares for the triangles. Also the inner border, you only need 2 cuts as WOF is long enough to cut each in half to fit the sides.
MickelSews
Great Machine
Wednesday, August 30, 2017

I've had this machine for only a week now. I bought it used from a lady who makes her own clothes, but she no longer needed the machine. During the purchase, she noted that she is almost sad that it's better to give it away because of how well the machine performed. (I also bought it along side a computerized machine of another brand.} She demoed the machine for us, showing it worked and gave us everything (including the box it came in!) She took amazing care of this machine. I have used it a few times now, and the directions for threading were easy to follow (albeit my hands are quite large so the lower looper was a pain, but that is no fault to the machine or brand.) And I recommend this machine to anyone who wants to learn to serge and wants a machine that can grow with them. I will happily use this machine time and time again.
rvstan
S9 Review
Sunday, February 25, 2018

I love, love, love my S9! It's sews and embroiders beautifully and it's simplicity of use amazes me. I would recommend this machine for both a beginner and an experienced seamstress. If I would ask anything of Janome it would be to upgrade the programming to run a larger hoop size. I understand that it can't get much wider but there is most definitely room for it to go longer. That is the only limitation of this machine.
pjmnana
PJMNana
Monday, February 26, 2018

I purchased a Memorycraft 15000 a few years ago and it was the best purchase I ever made! This machine can do just about anything you would would ever want! I love the capability of using the Acuedit app to set up my embroidery pattern on my Ipad and then download it to the machine! I love how my embroidery looks upon completion and I love all the good lighting it has to light up your workspace. That way you don’t need to worry about where to set up your machine. It also has plenty of room to do machine embroidery on any size quilts! There are many decorative stitches from which to choose that are outstanding! It’s hard to choose which one to use! There are so many great features it is hard to decide what I love the most. If you want to buy only one machine to last a lifetime, I would recommend this one!
KLWash
S9 Review
Sunday, February 24, 2019

The S9 is amazing. I learned to sew by hand when I was just 5 and in my grandmothers way as she was quilting. I took seeing classes in high school until they would no longer let me sign up. The S9 makes me appreciate my current skills as well as motivate me to want to learn more. This machine is awesome.
SewSueMe2002
Horizon Memory Craft 15000
Thursday, November 19, 2020

My Janome Horizon Memory Craft 15000 is fantastic! I love, love, love this machine! When I came across the Eye for and Eye embroidery design today, I wanted to make it. However, the embroidery file is missing. Nothing downloads when I select the download button. Please help!
Jillfmischo
Treat Bag fun!
Monday, August 16, 2021

I made the Halloween treat bag for my new granddaughter and I’m sure it will last for years. No embroidery machine so I appliquéd the lettering. Need a little more skirt fabric for a better gathered look, and I used thin double-bias tape for the skirt hem, over edge stitch on skirt sides. I’m pleased with my results!
elenaz
Very helpful tutorial
Wednesday, October 25, 2023

I want to say thank you for teaching me this method of applique. I was able to do it with a small letters. This method is the best so far from all of those I've seen and tried.
plonkar
So useful
Thursday, November 30, 2023

I'd like to express my gratitude for teaching me this appliqué method. I successfully applied it with small letters, and, so far, it's the most effective among all the methods I've seen and tried.

DEALERS
The TWO Closest Dealers to you are:
196 Boston Post Road , Orange CT, 06477
203-878-1654
19 PUTNAM AVENUE , PORT CHESTER NY, 10573
914-934-2934
Find Additional Dealers