Projects

10 Tips & Time-Saving Tricks for Making Costumes

Created By:

Vivien Lee

Skill Level:

Hello! Vivien here from freshfrippery.com and @freshfrippery on Instagram. I love making historical costumes, but I don’t always have time to use historical methods. This is why I’m glad I can speed things up with modern techniques and tools like my Janome Skyline S9 and FA4 serger! This post will show you 10 different tips and tricks to make your costume look polished or save you time, so you can get more look in less time!

Instructions


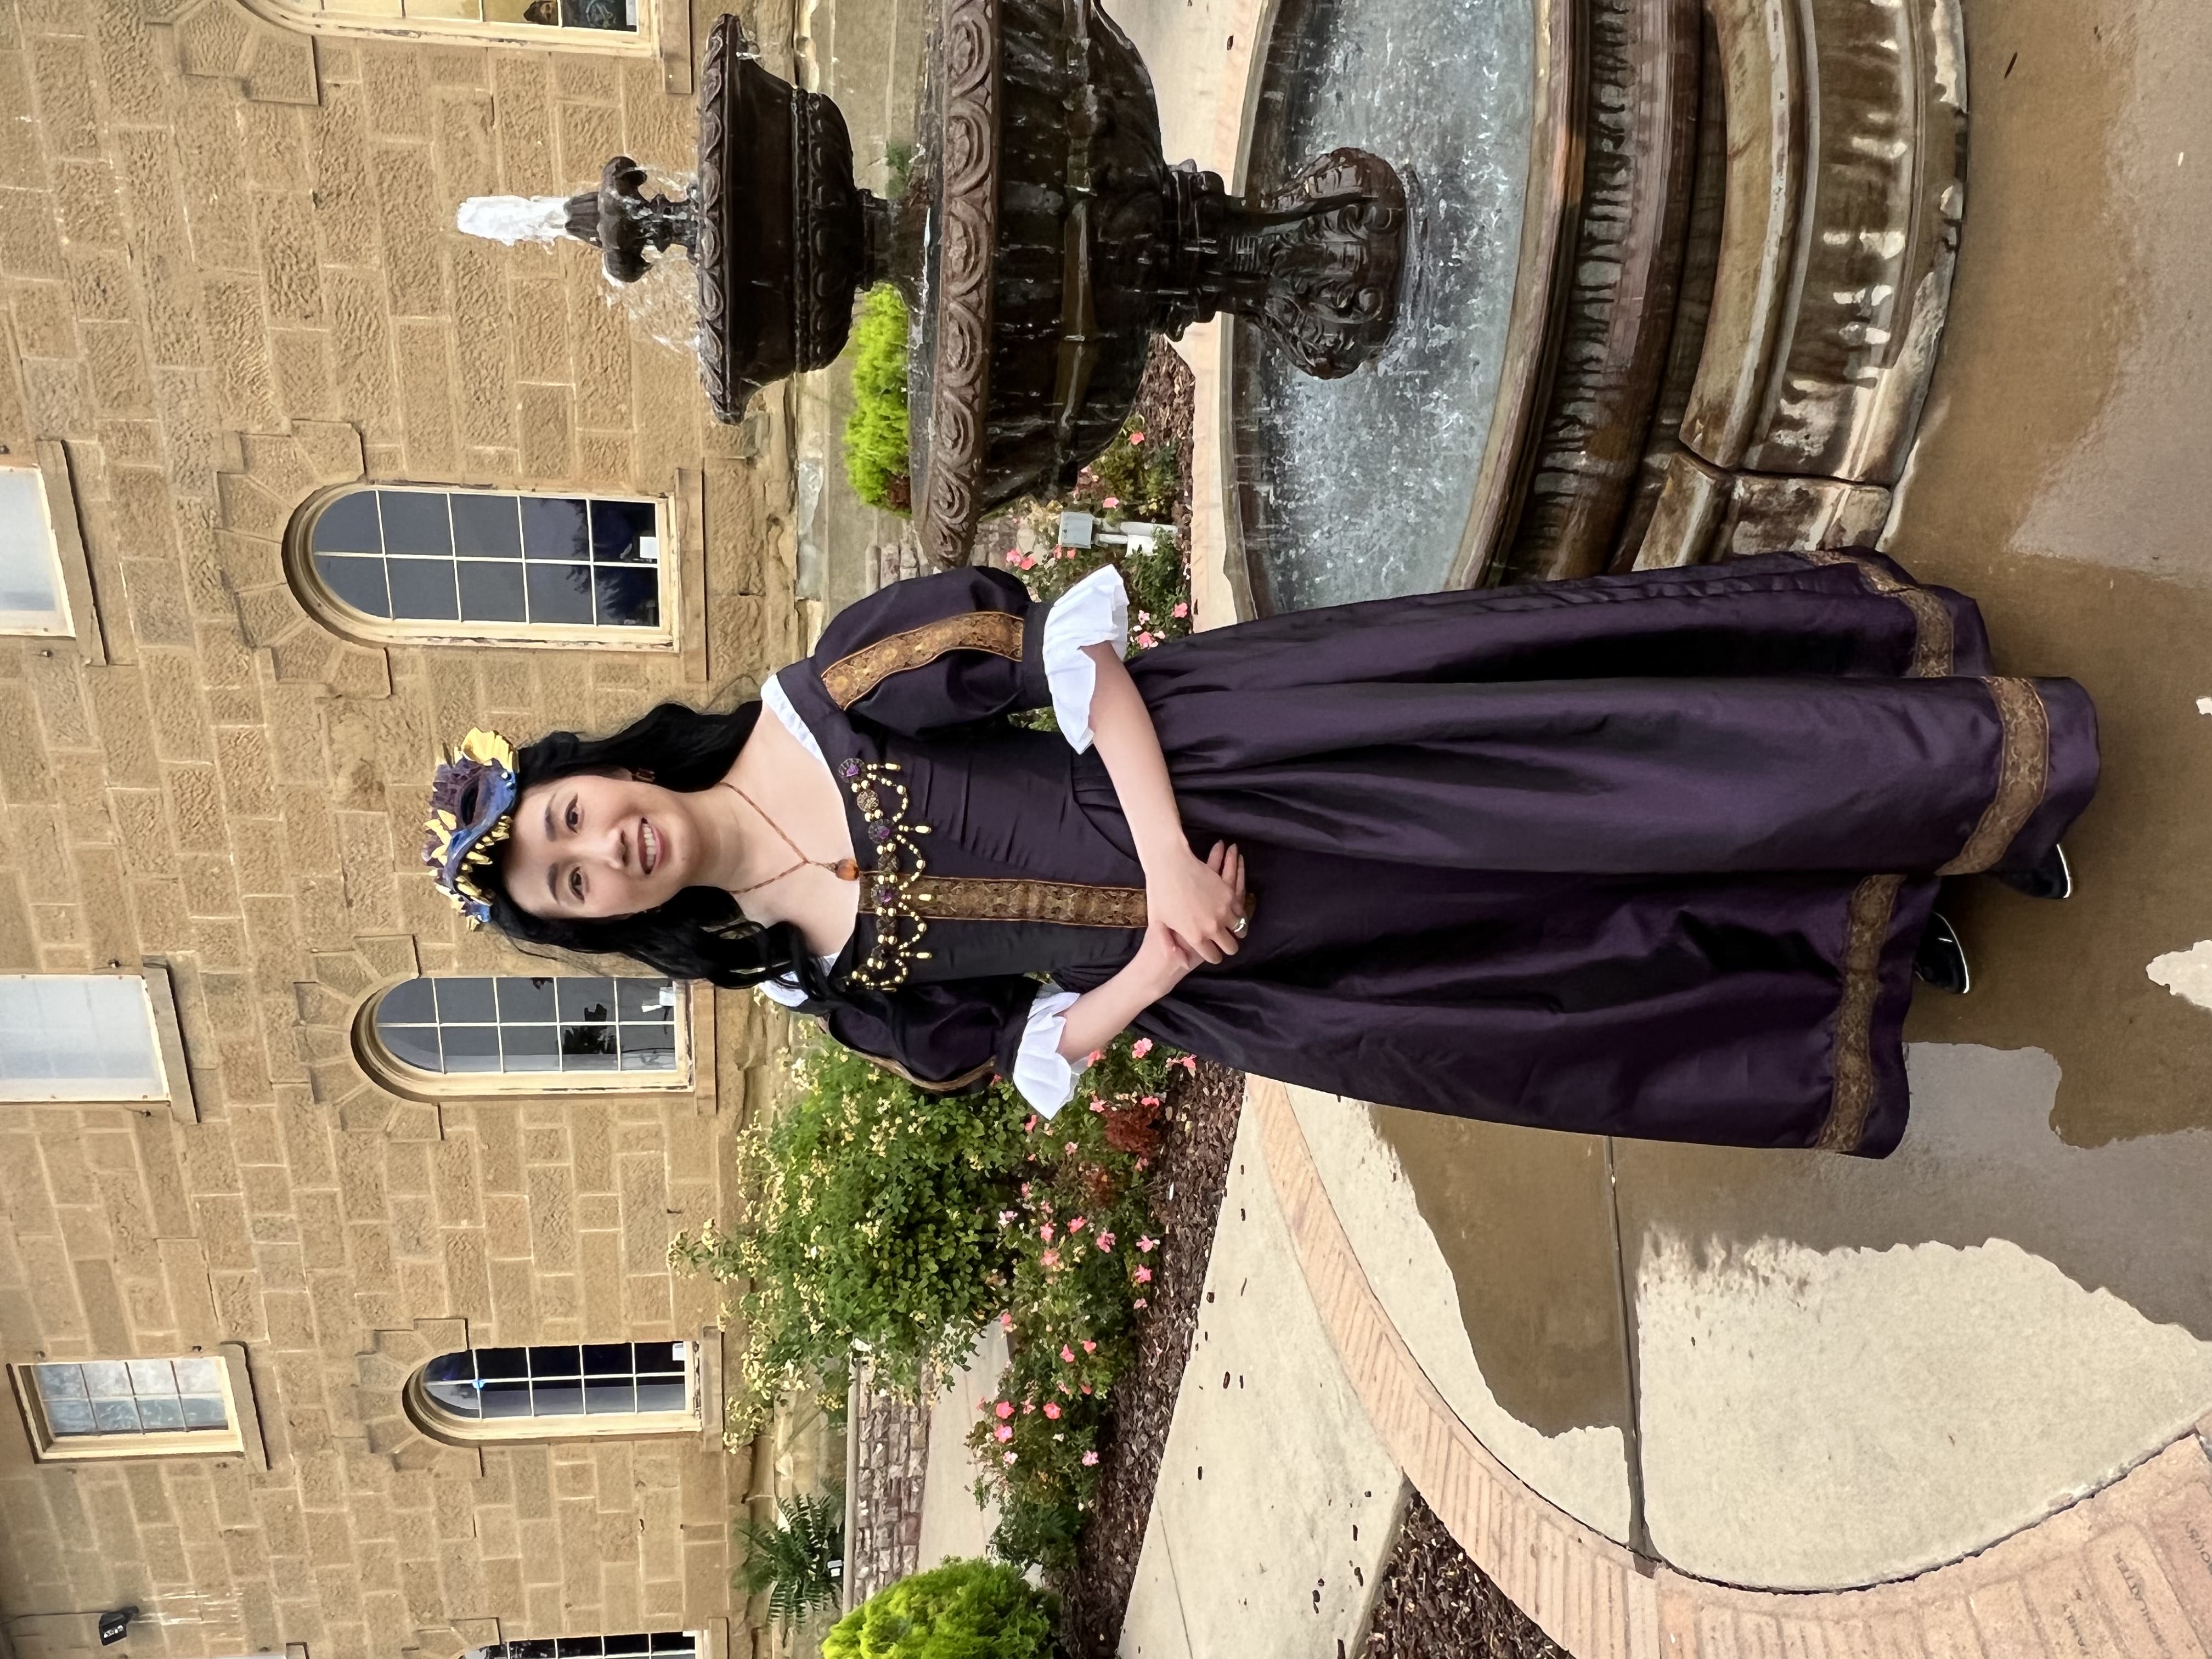
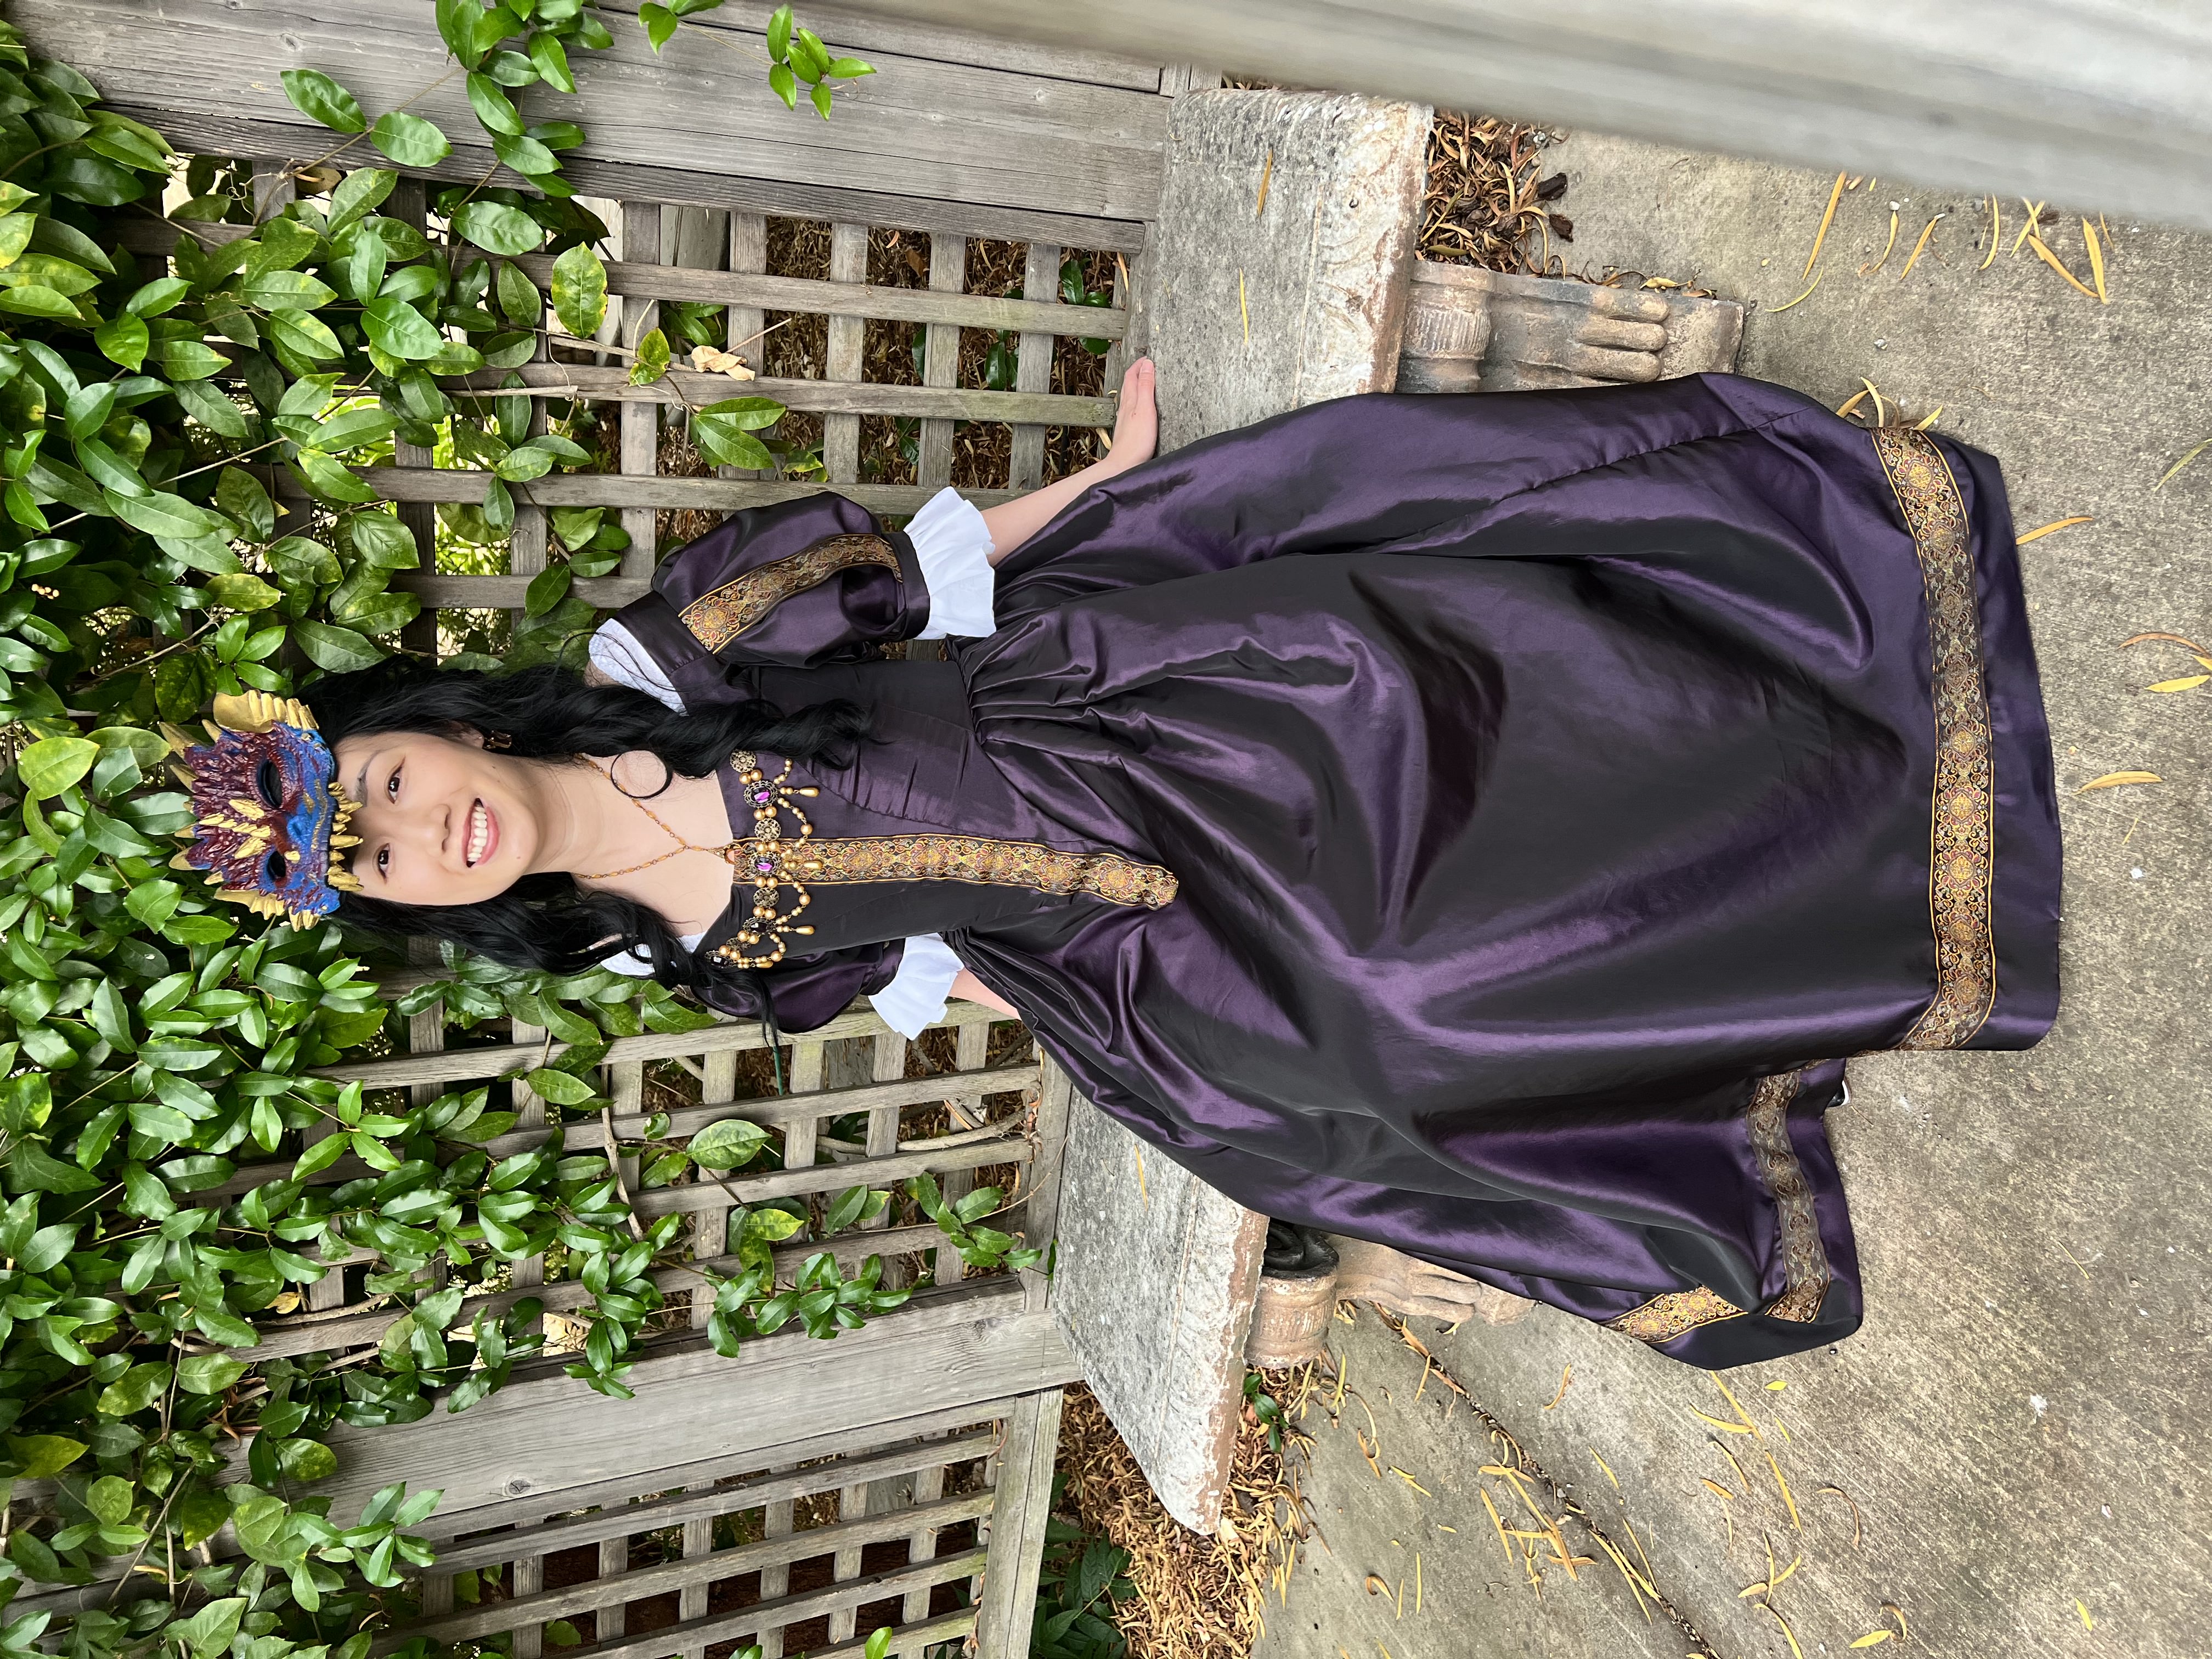
I will be using a 17th century noblewoman’s costume I wore to a masquerade ball as an example. This style of dress features a long skirt, a fully boned bodice with a pointed center front, and puffy sleeves, made of a purple taffeta fabric.


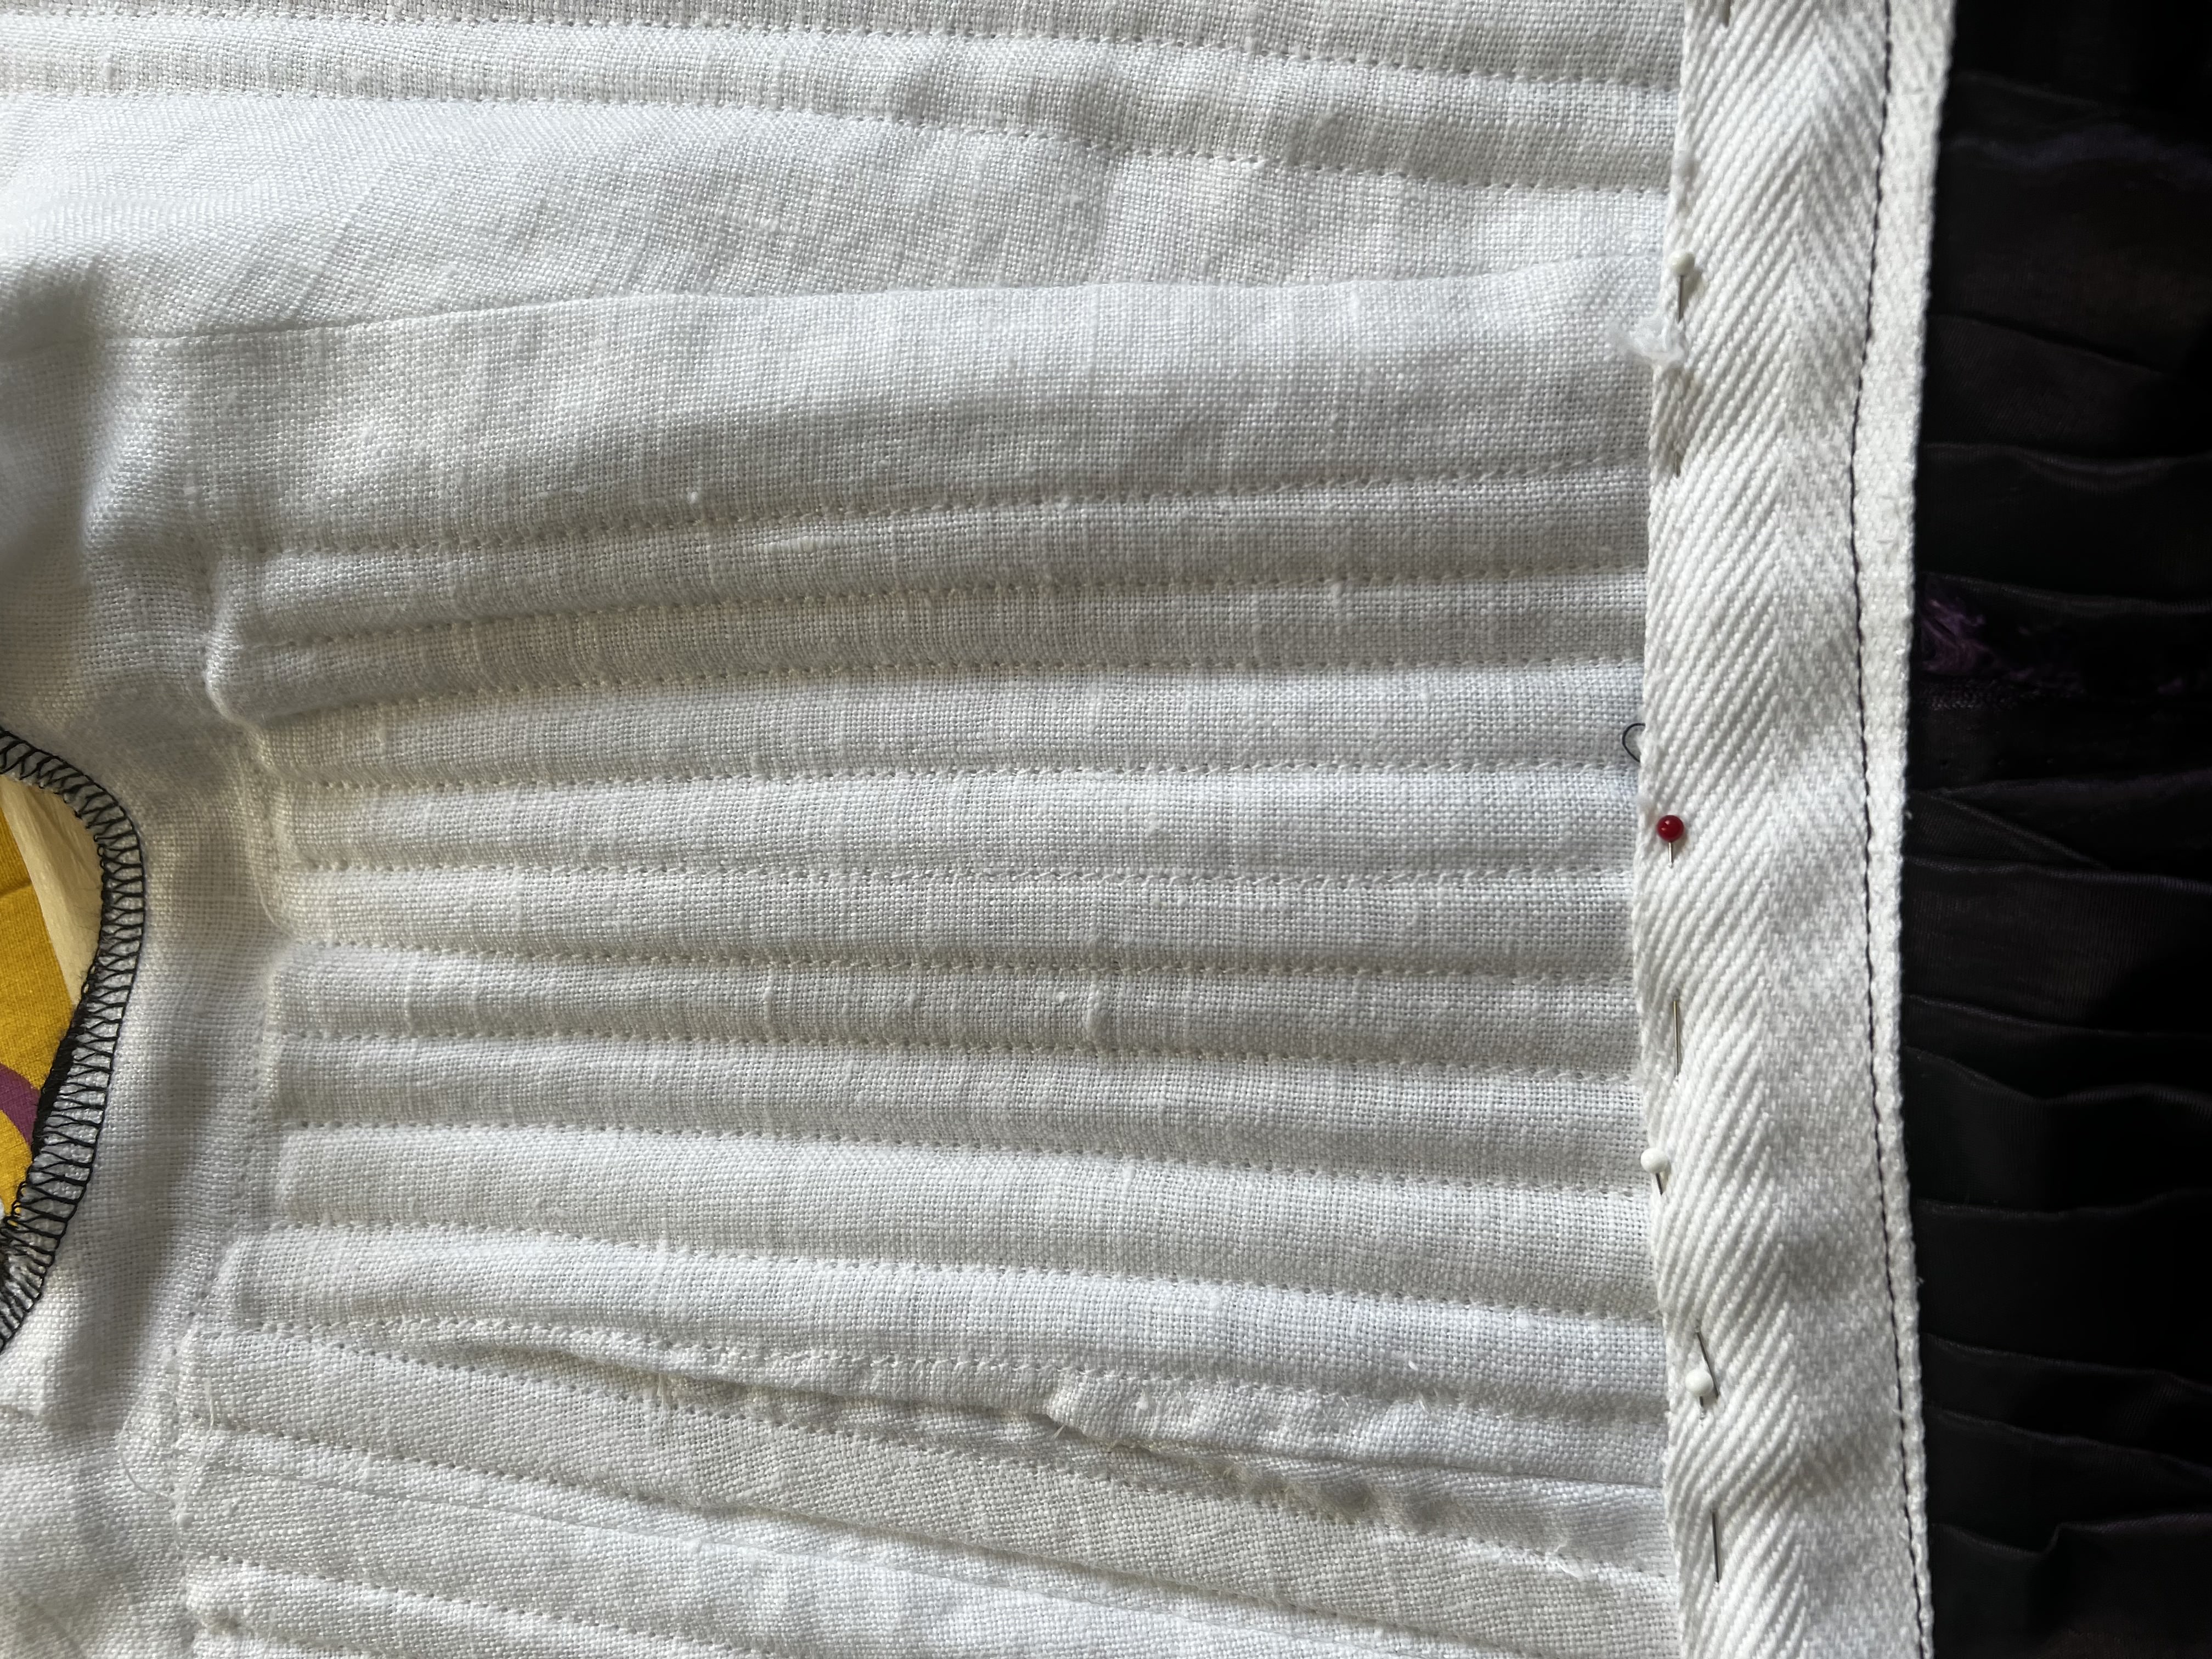
Tip/trick #1: Instead of making a corset as a separate garment, make your bodice fully boned. To do this you will cut out two linings and stitch them together with a series of parallel lines to make channels for your boning! Then you will cover this boned lining layer with your fashion fabric layer.


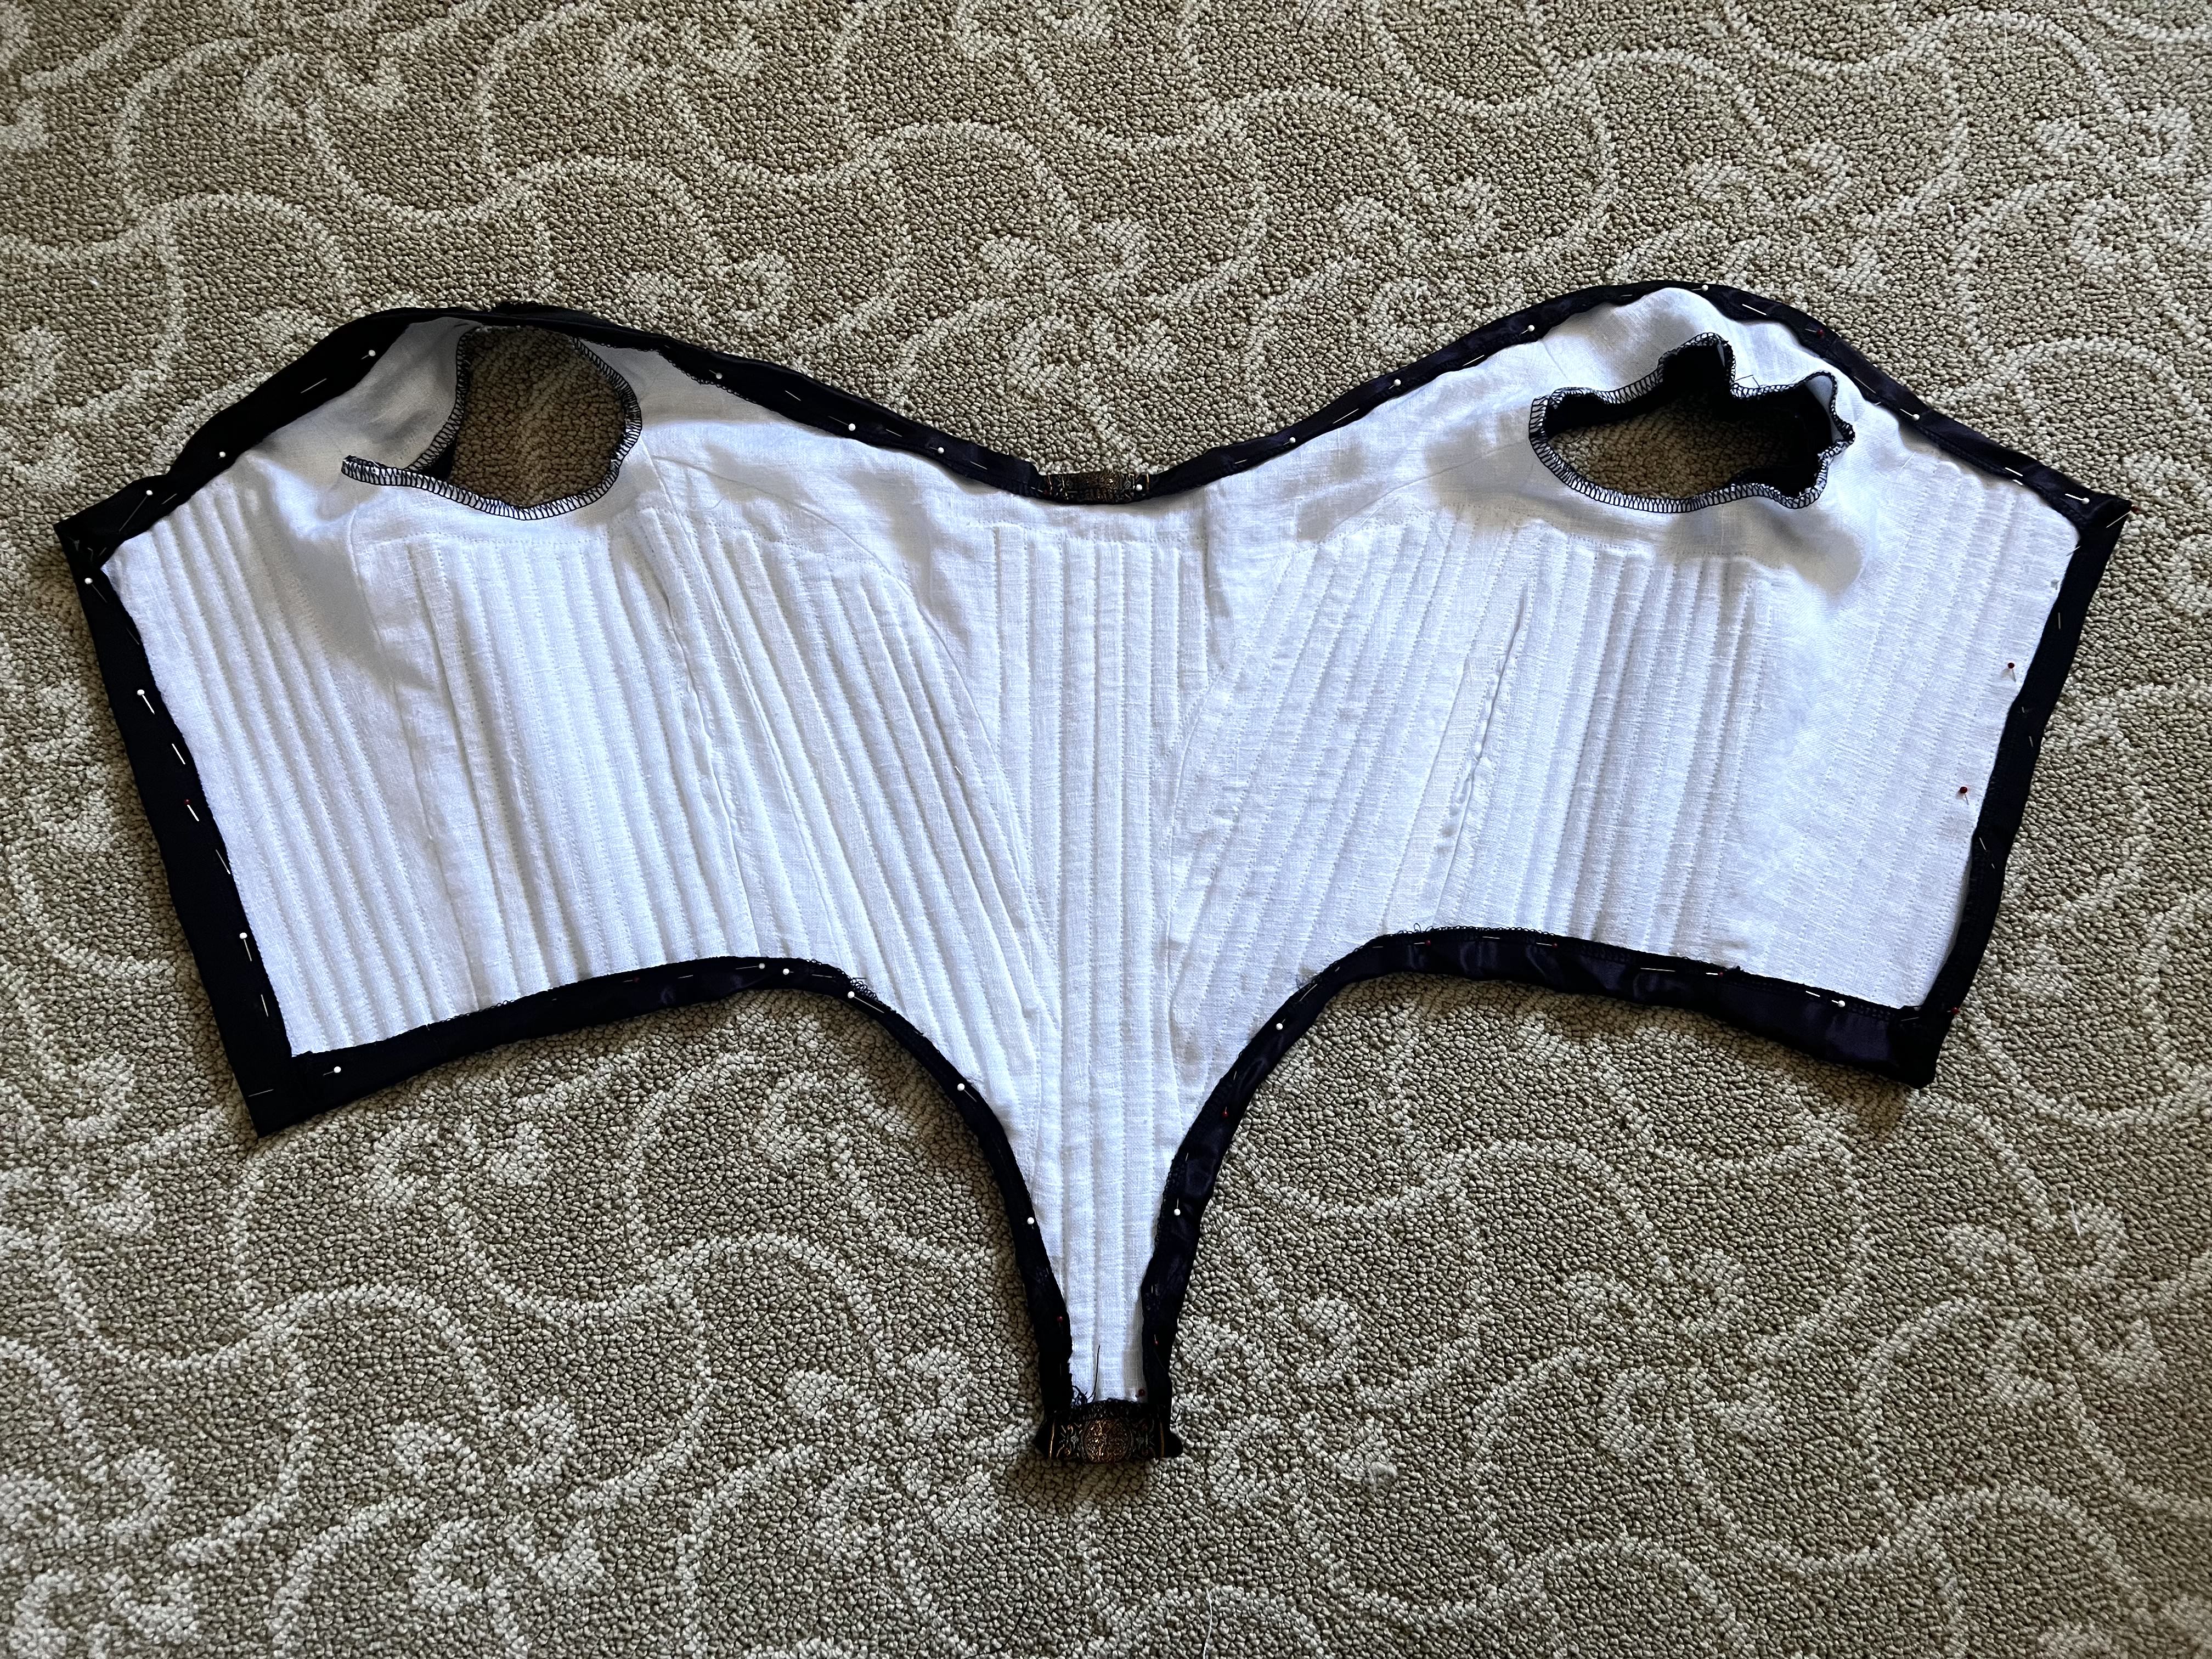
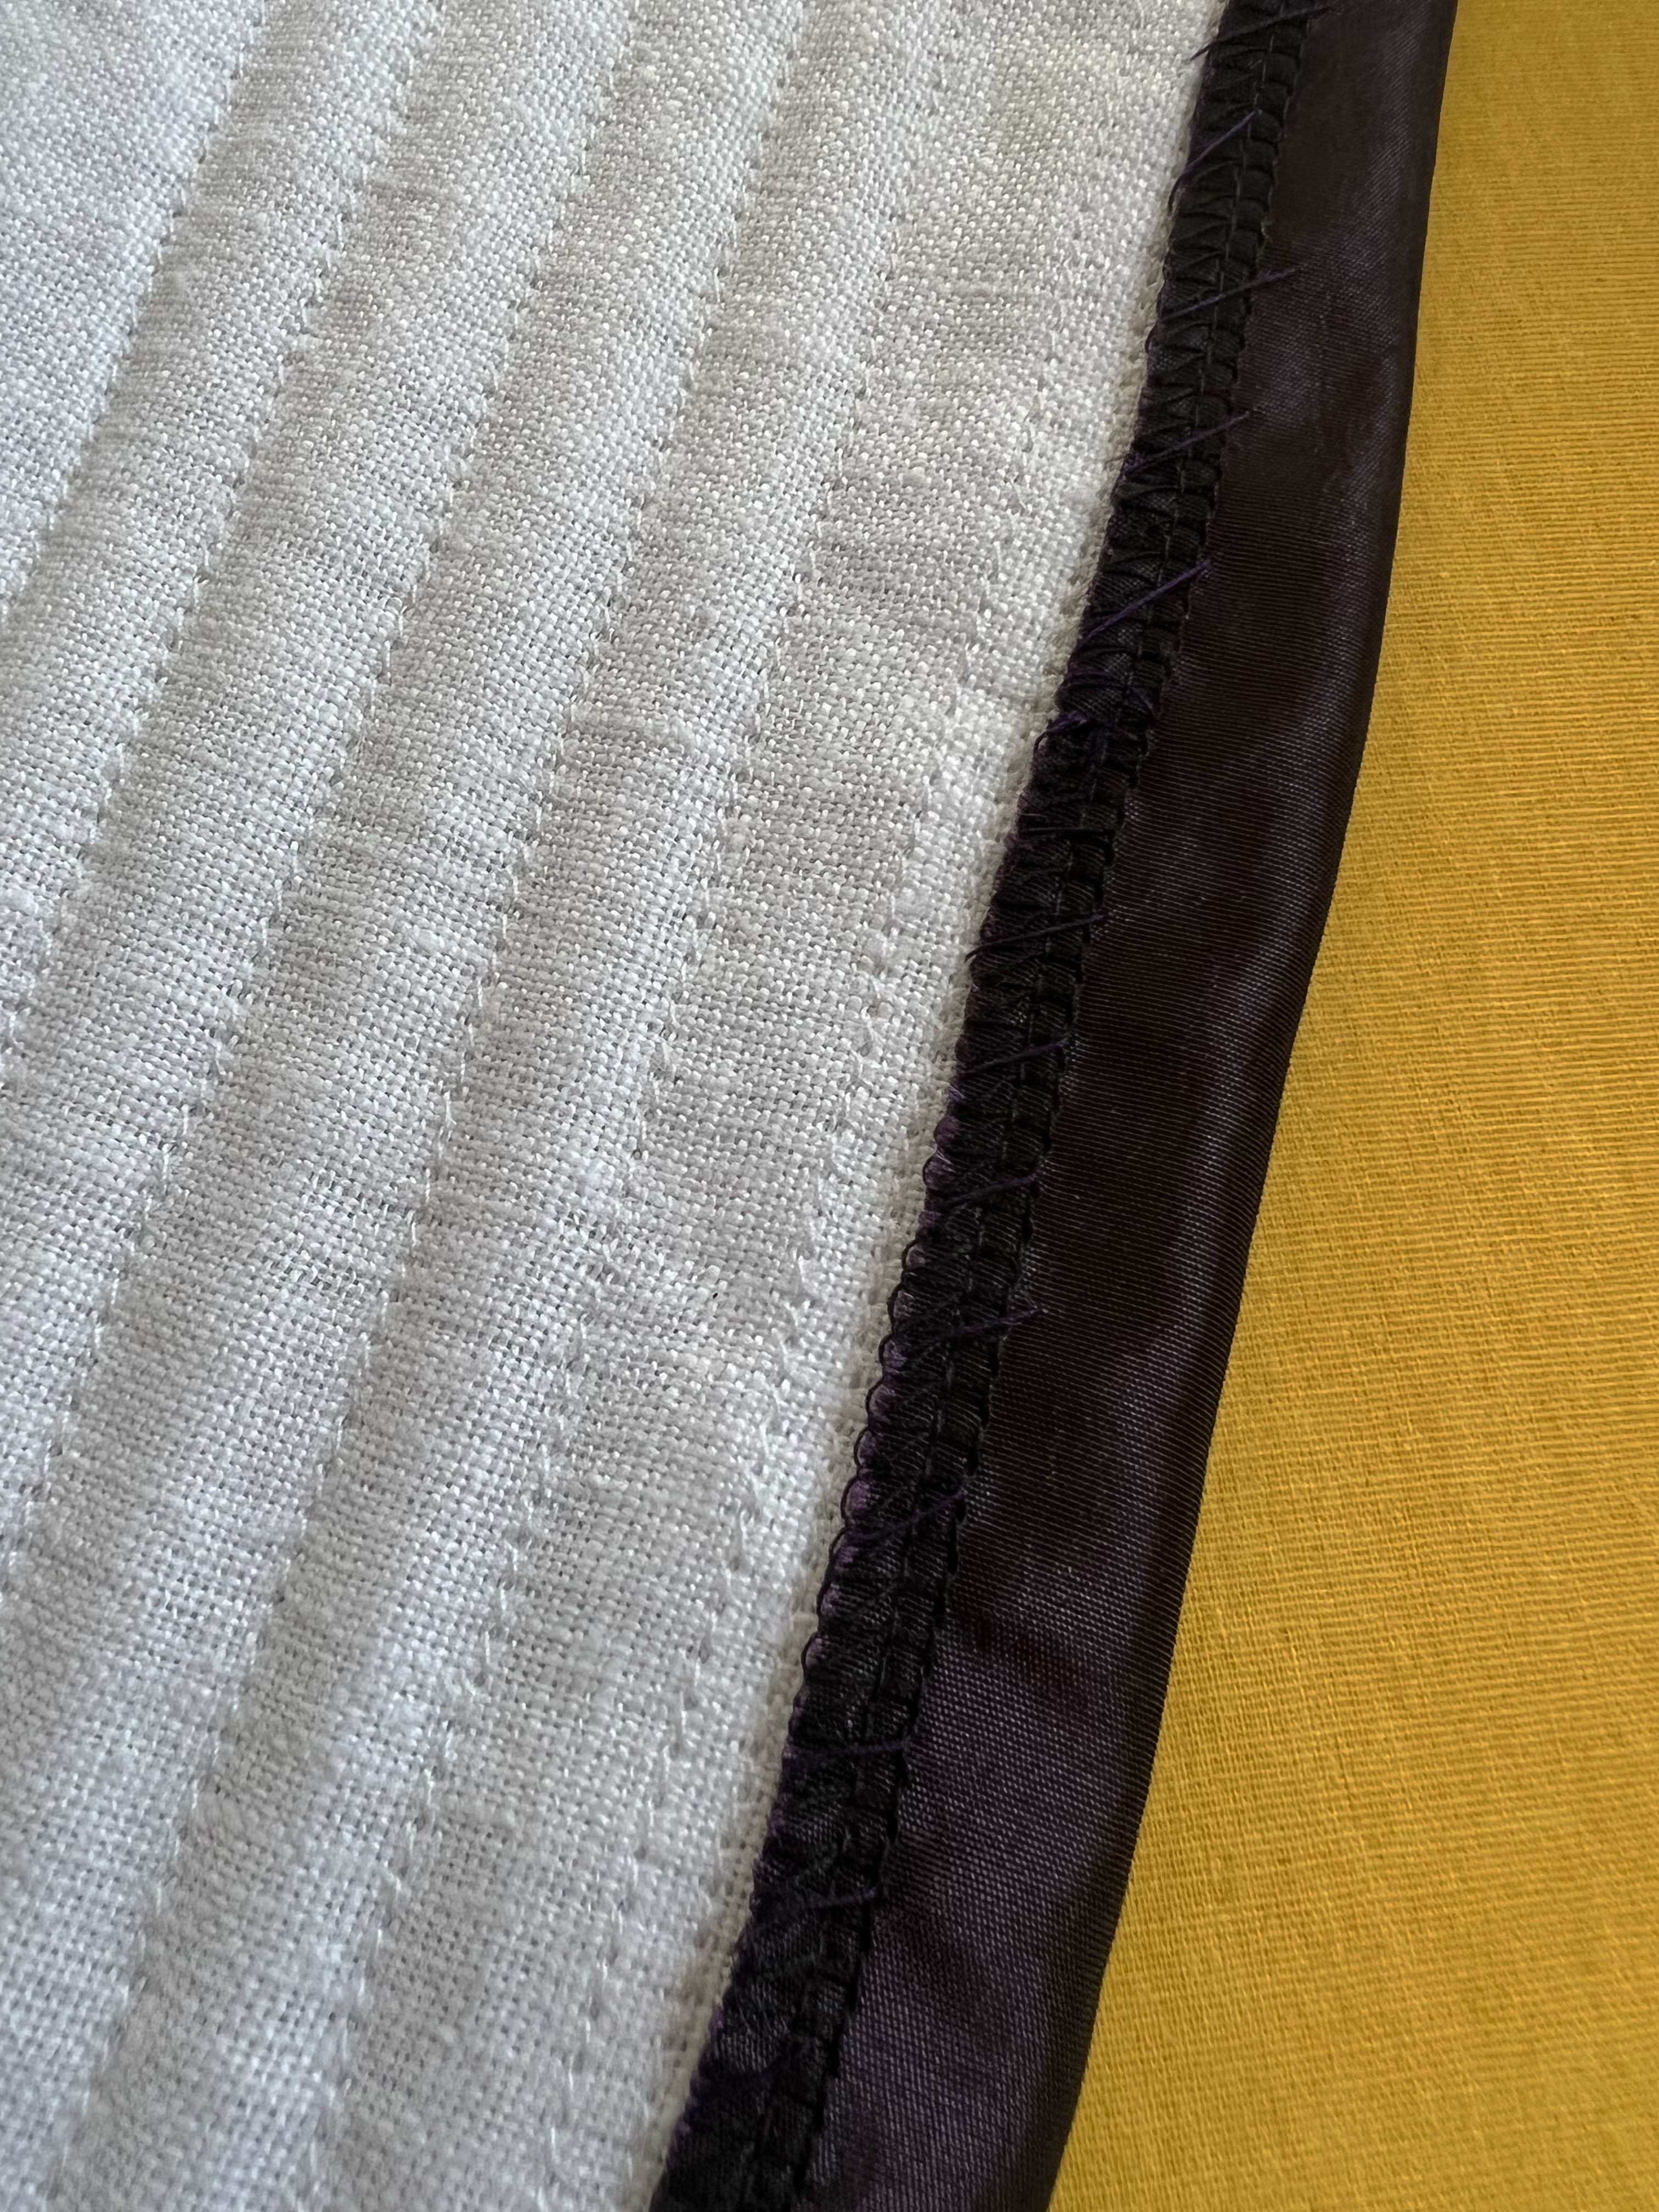
Tip/trick #2: When you cut out your bodice fashion fabric pattern pieces, extend the sides of the pieces that will make up the neckline, back closure, and bottom edge by about an inch. After you assemble the bodice fashion layer can serge the raw edges, fold them over, and then whipstitch them to the lining. This way your linings won’t show when worn and you can skip making facings.


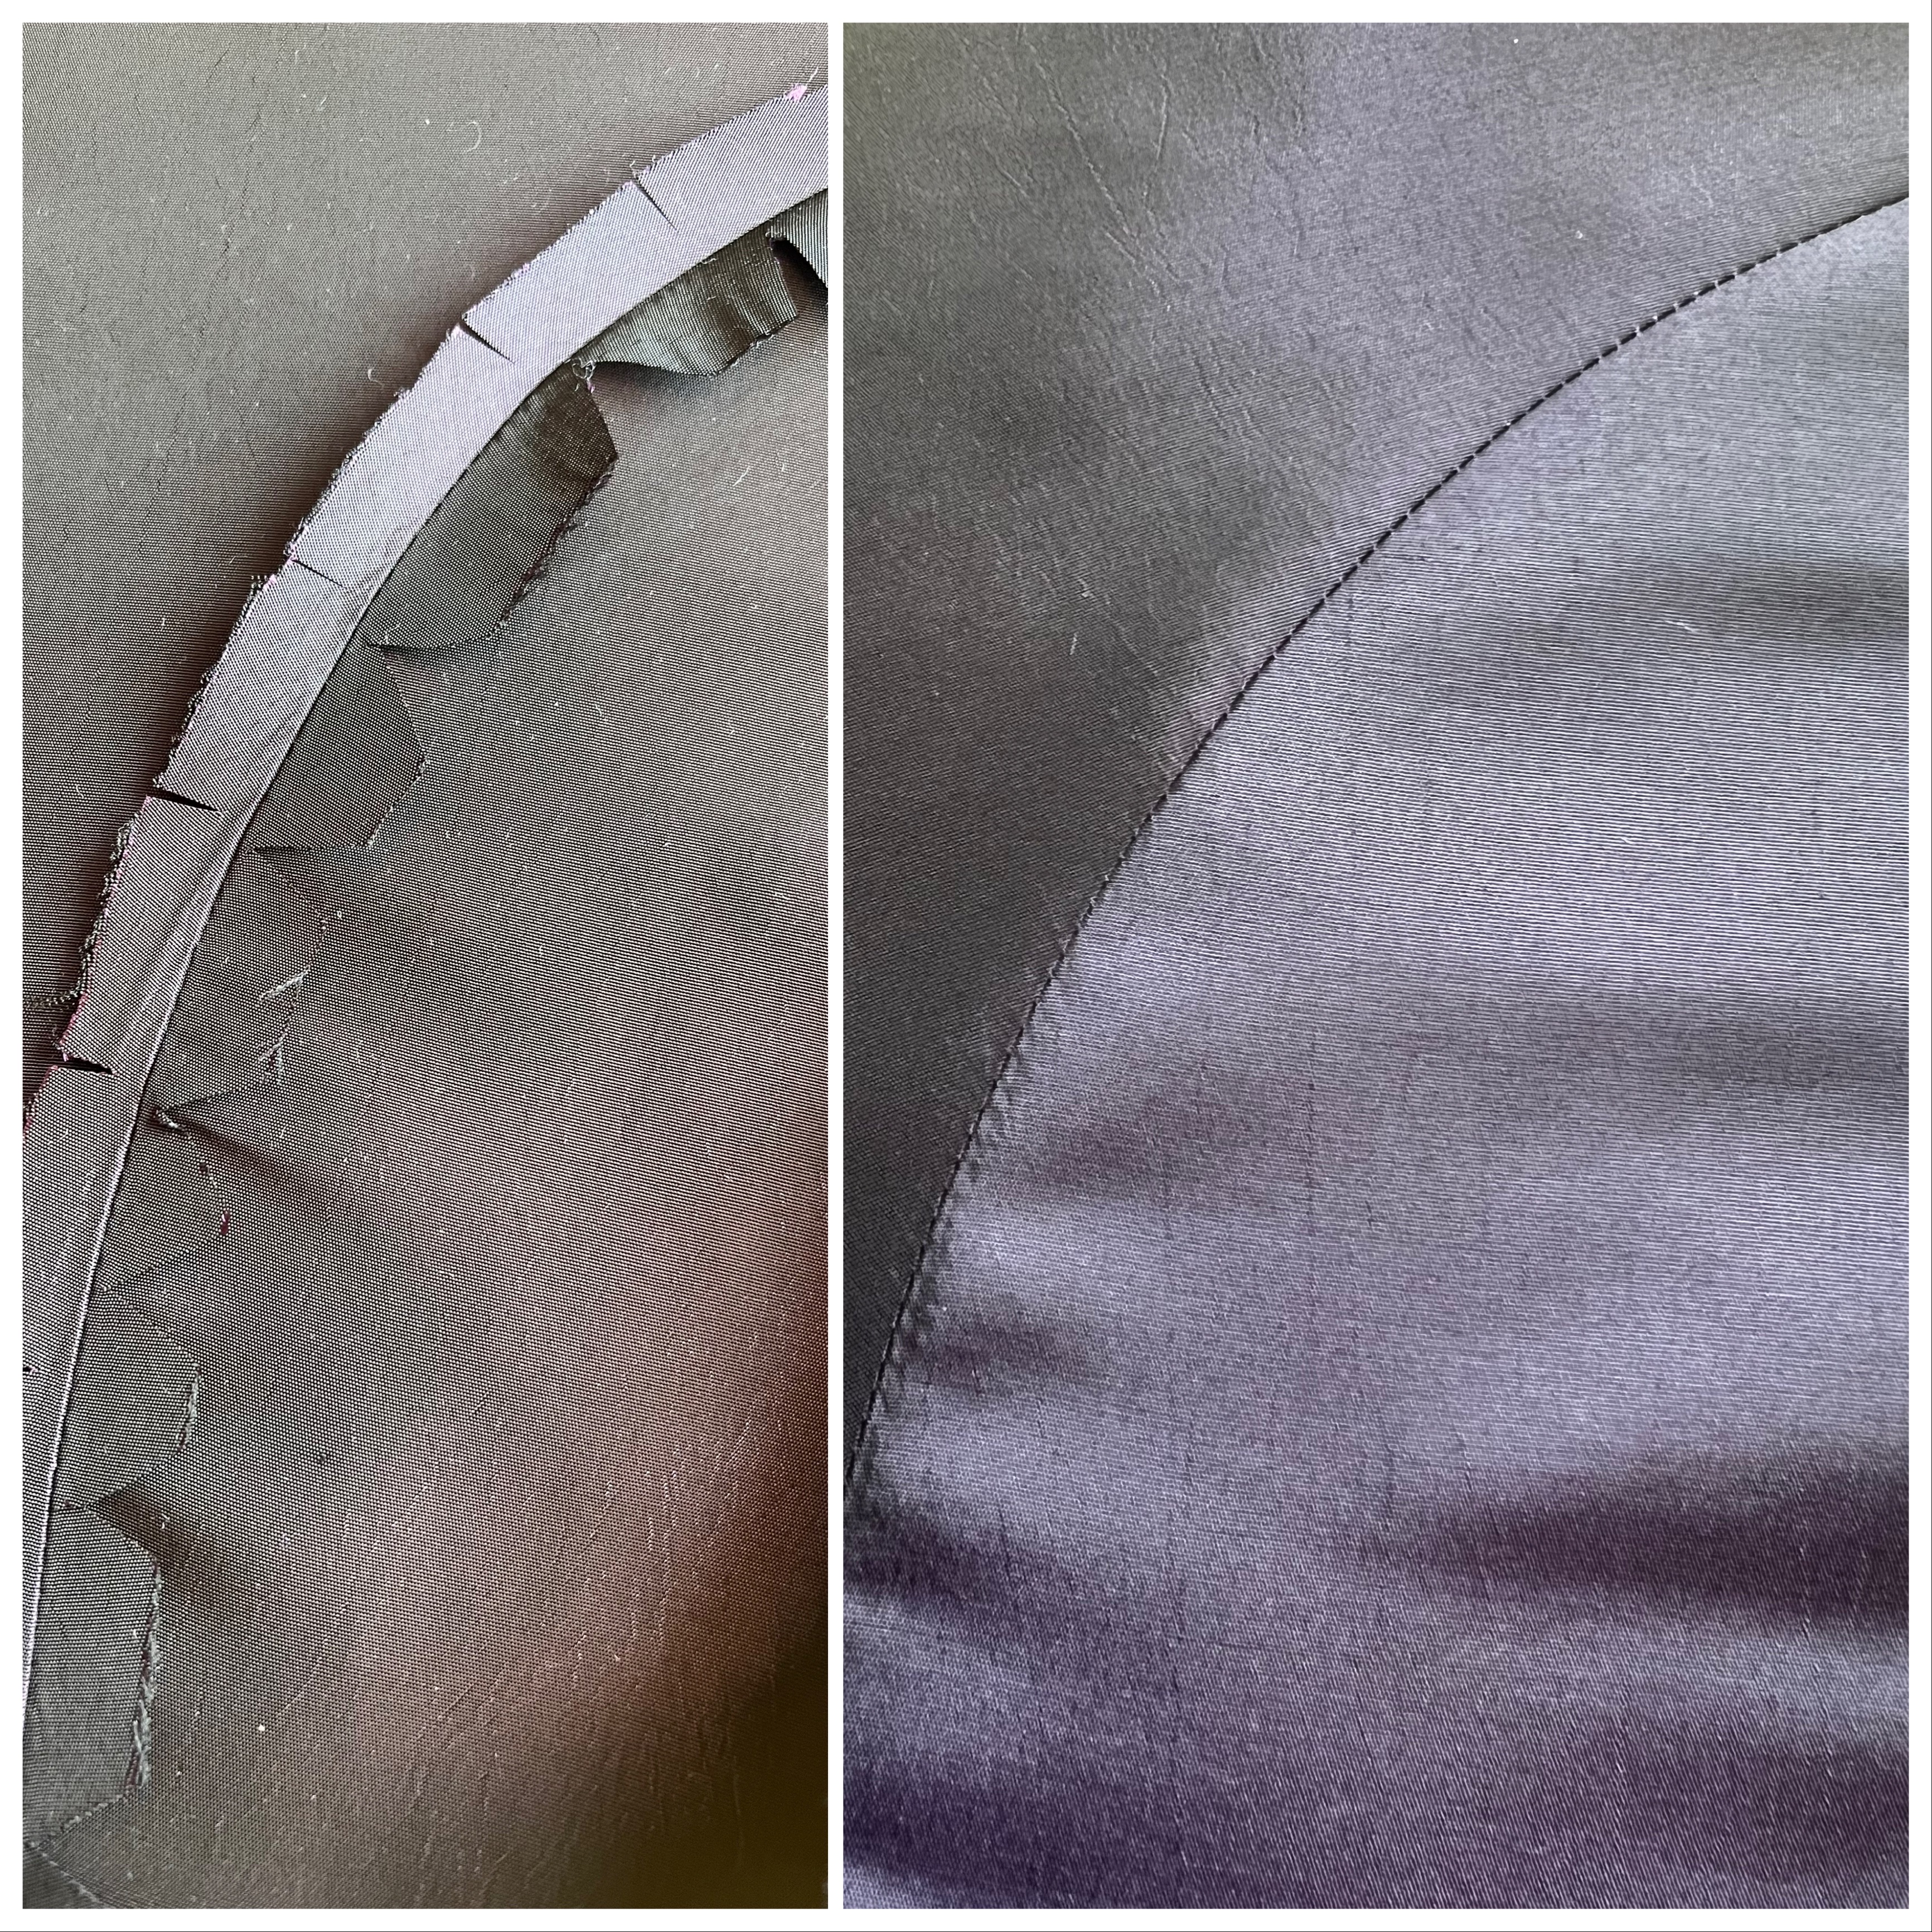
Tip/trick #3: To make your curved seams nice and smooth, you will want to clip after sewing. Iron your seam allowances open. Cut notches in the inner curve of the seam allowance and snip or cut notches in the outer curve of the seam allowance. Iron again on the right side of the fabric to make a very neat seam.


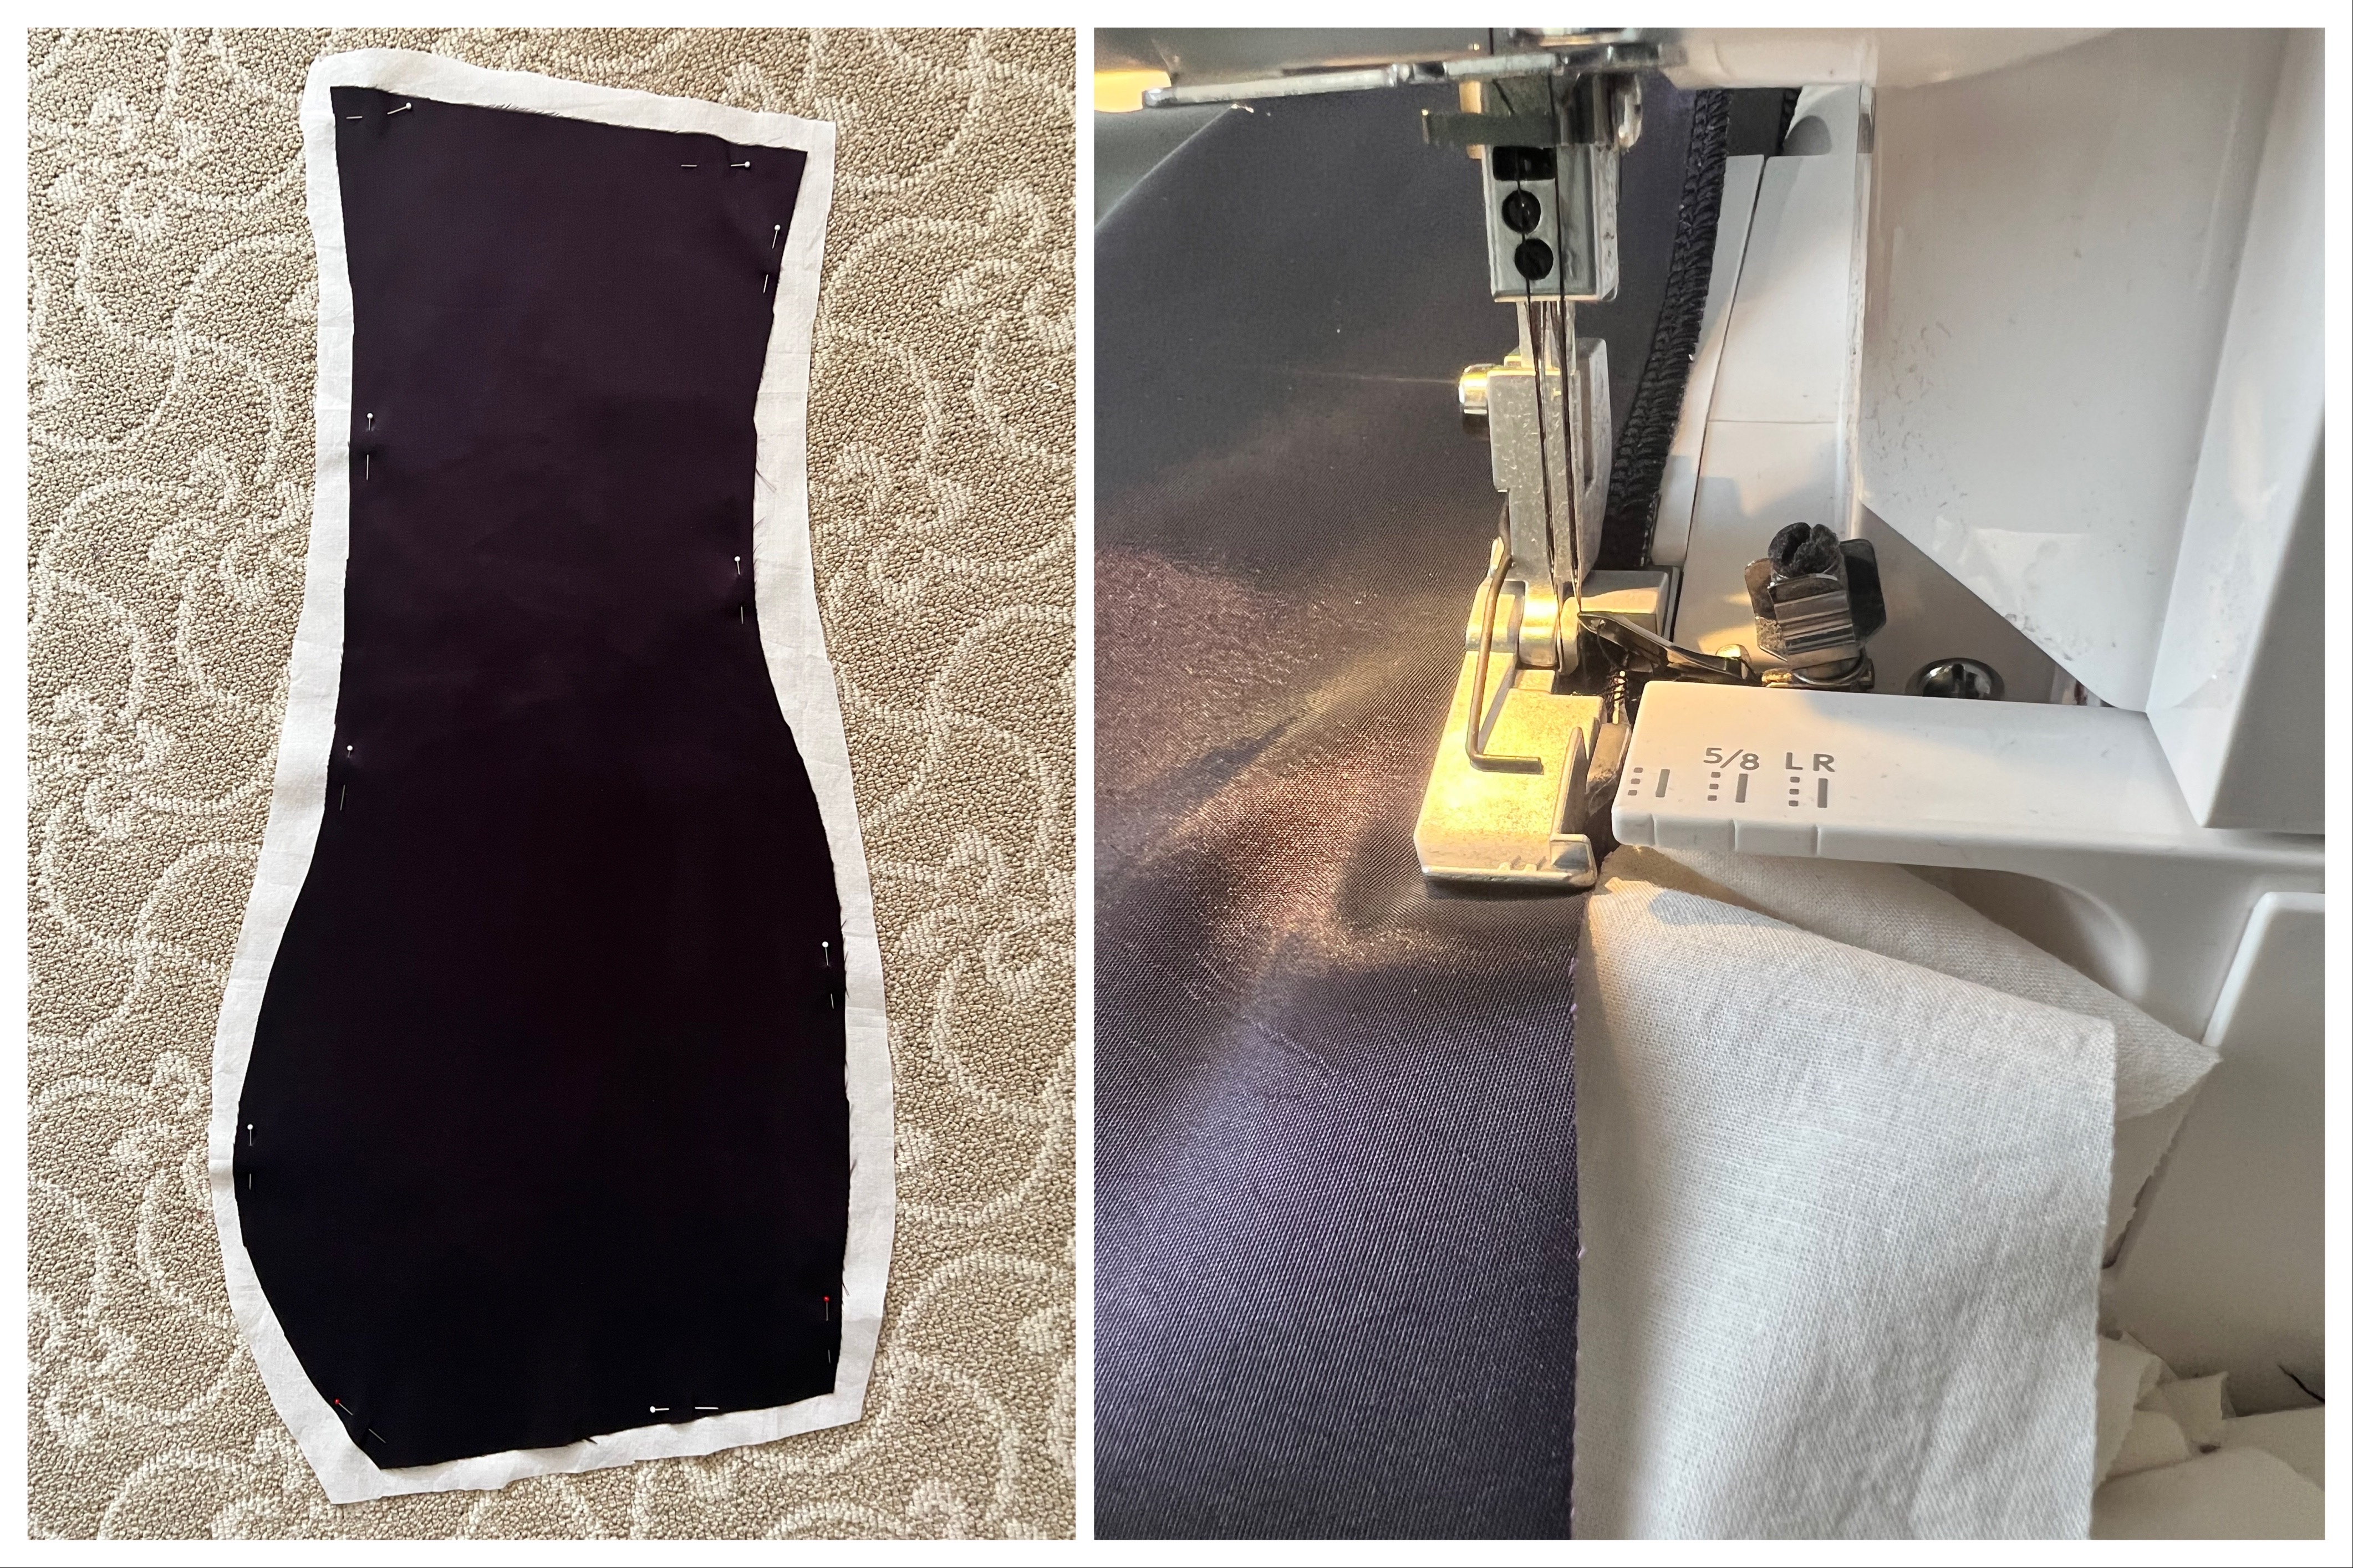
Tip/trick #4: To add extra body to thin fabric, flat-line it by adding an extra layer of fabric. However, to save time on cutting your pattern piece out twice, only cut out one layer and put it on the second. Use your serger to sew the pieces together and trim the excess at the same time!


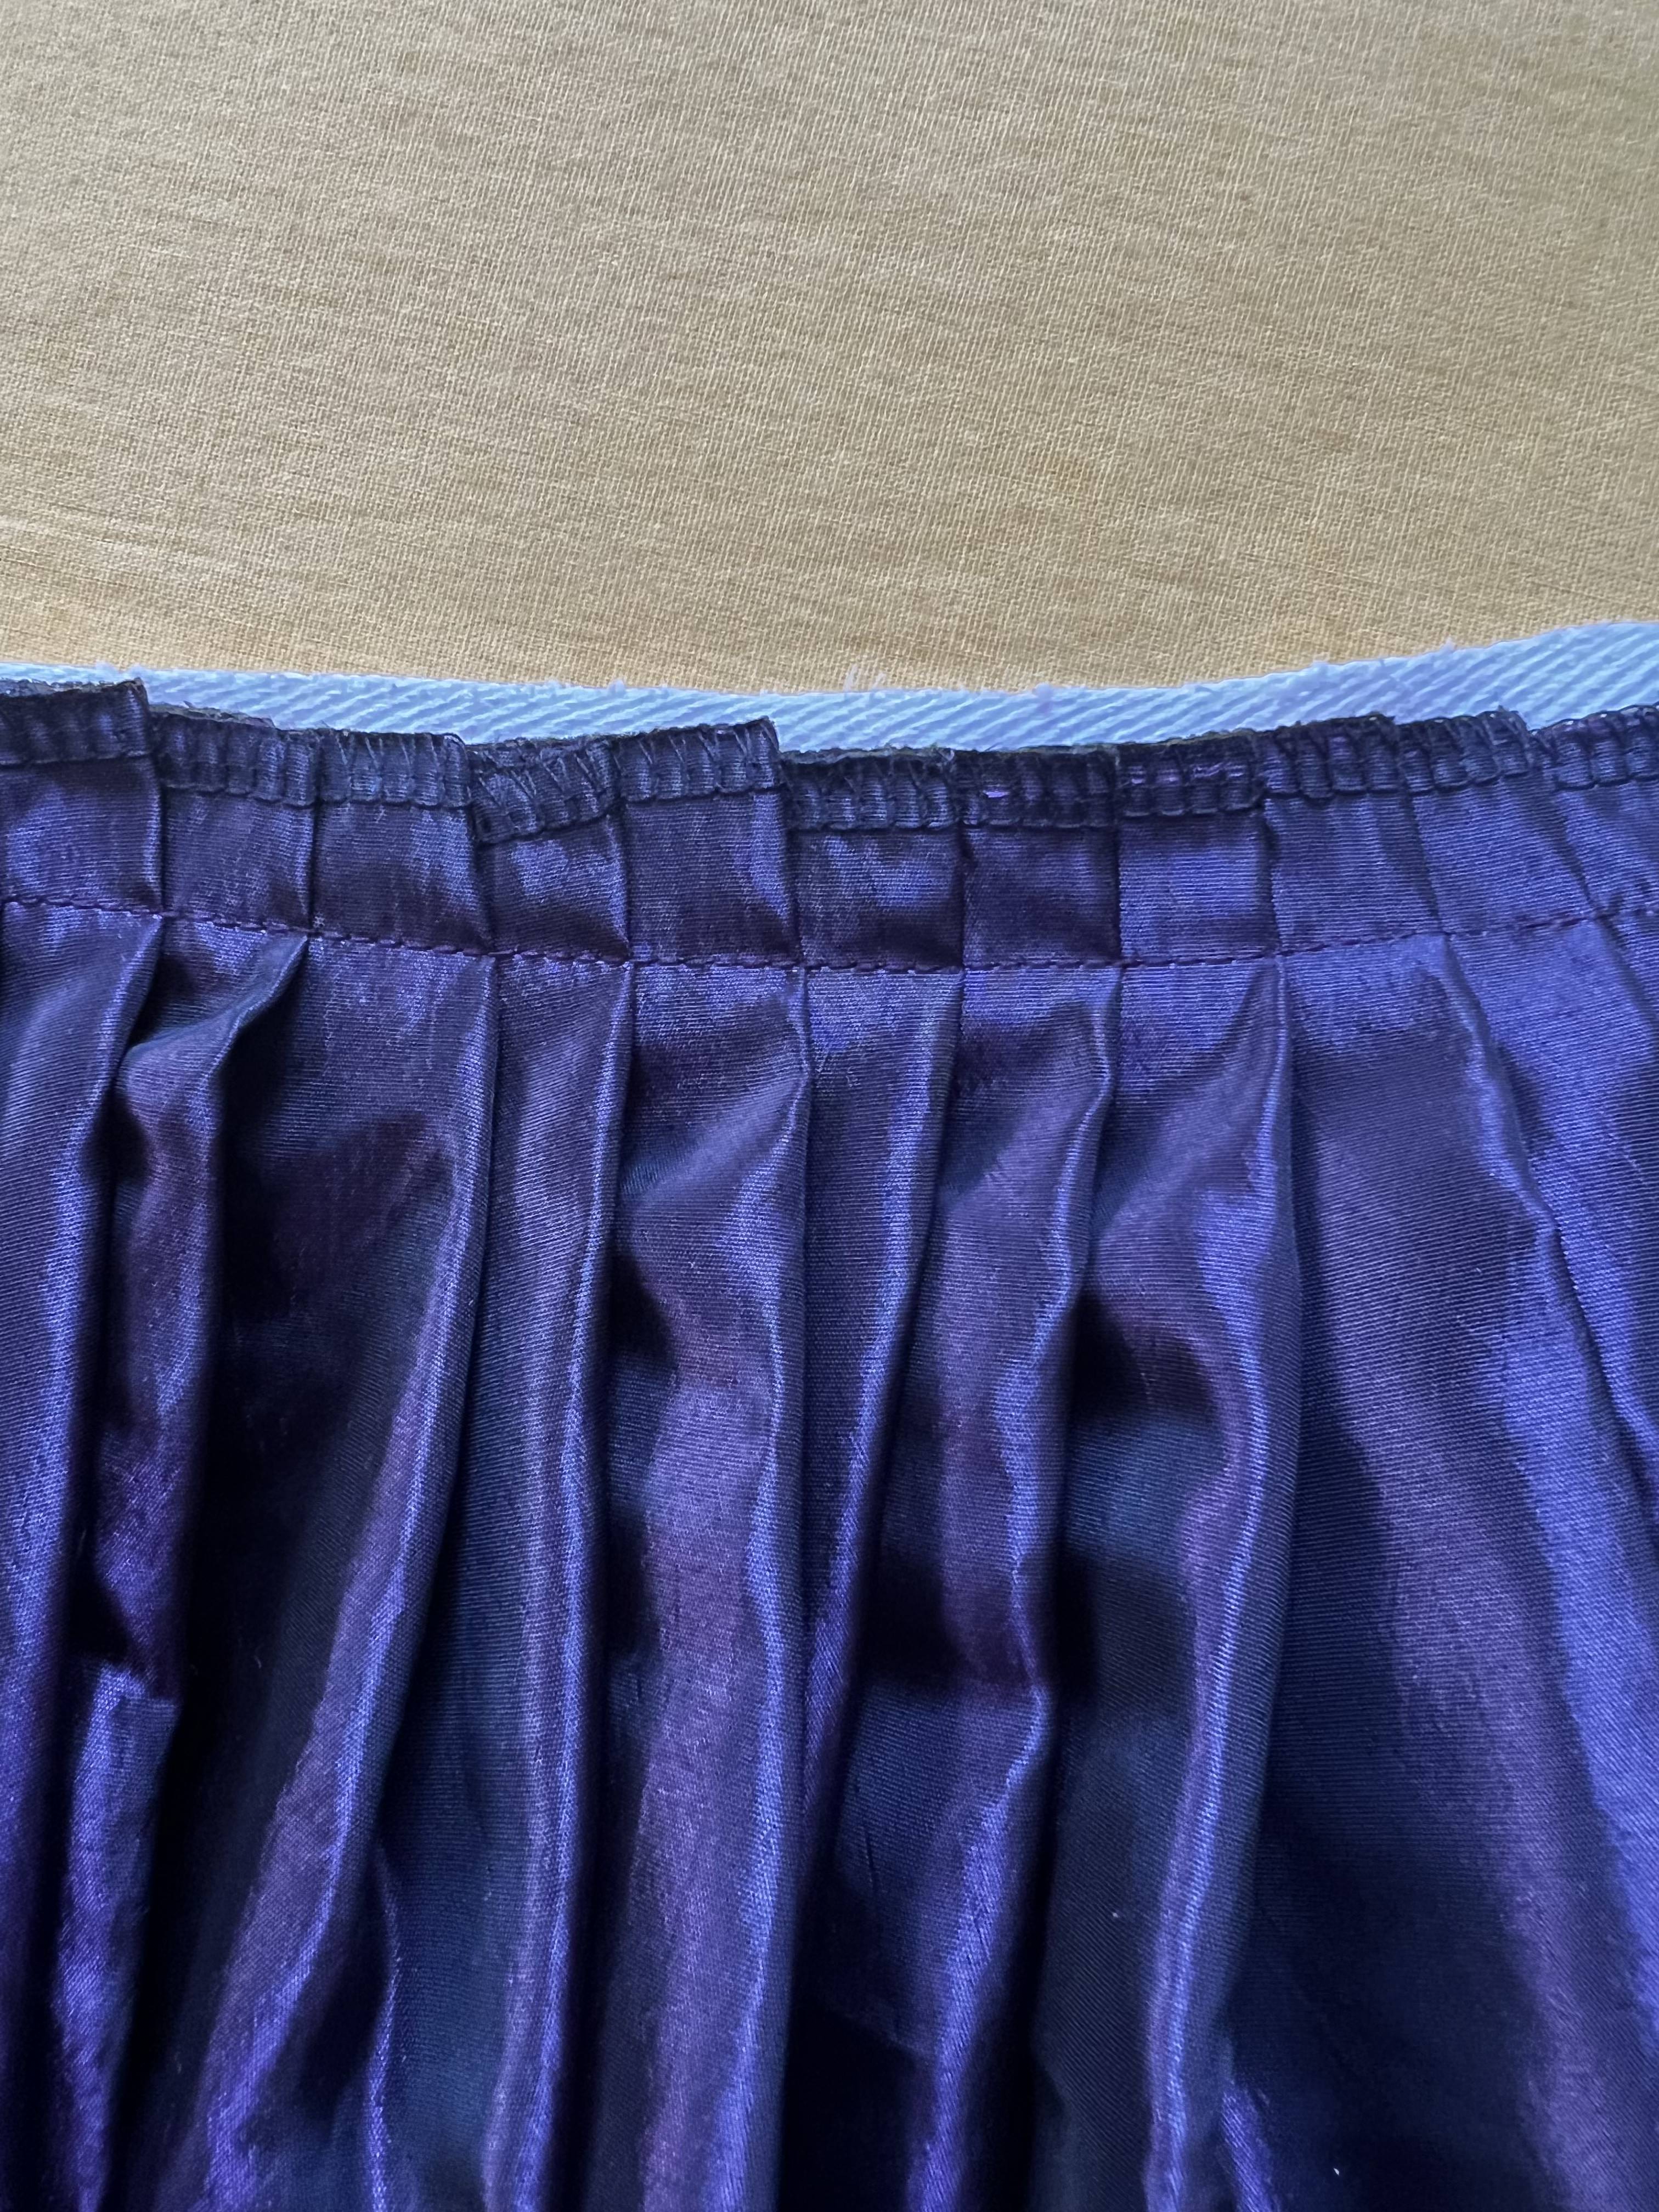
Tip/trick #5: Use knife pleats instead of cartridge pleats. Historically many gowns of this type used cartridge pleating to gather up the skirt. However, this is time-consuming and uses hand-sewing so I prefer knife pleats when I want to make the costume quickly. First serge the raw edges of the top edge of your skirt, then pleat, then stitch down the pleats. 


Tip/trick #6: If you want to skip making a waistband for the skirt, and have the convenience of a one-piece dress instead of a separate bodice and skirt, when you stitch down your skirt pleats sew them to a piece of twill tape. Then you will whip-stitch your twill tape to the bodice. 


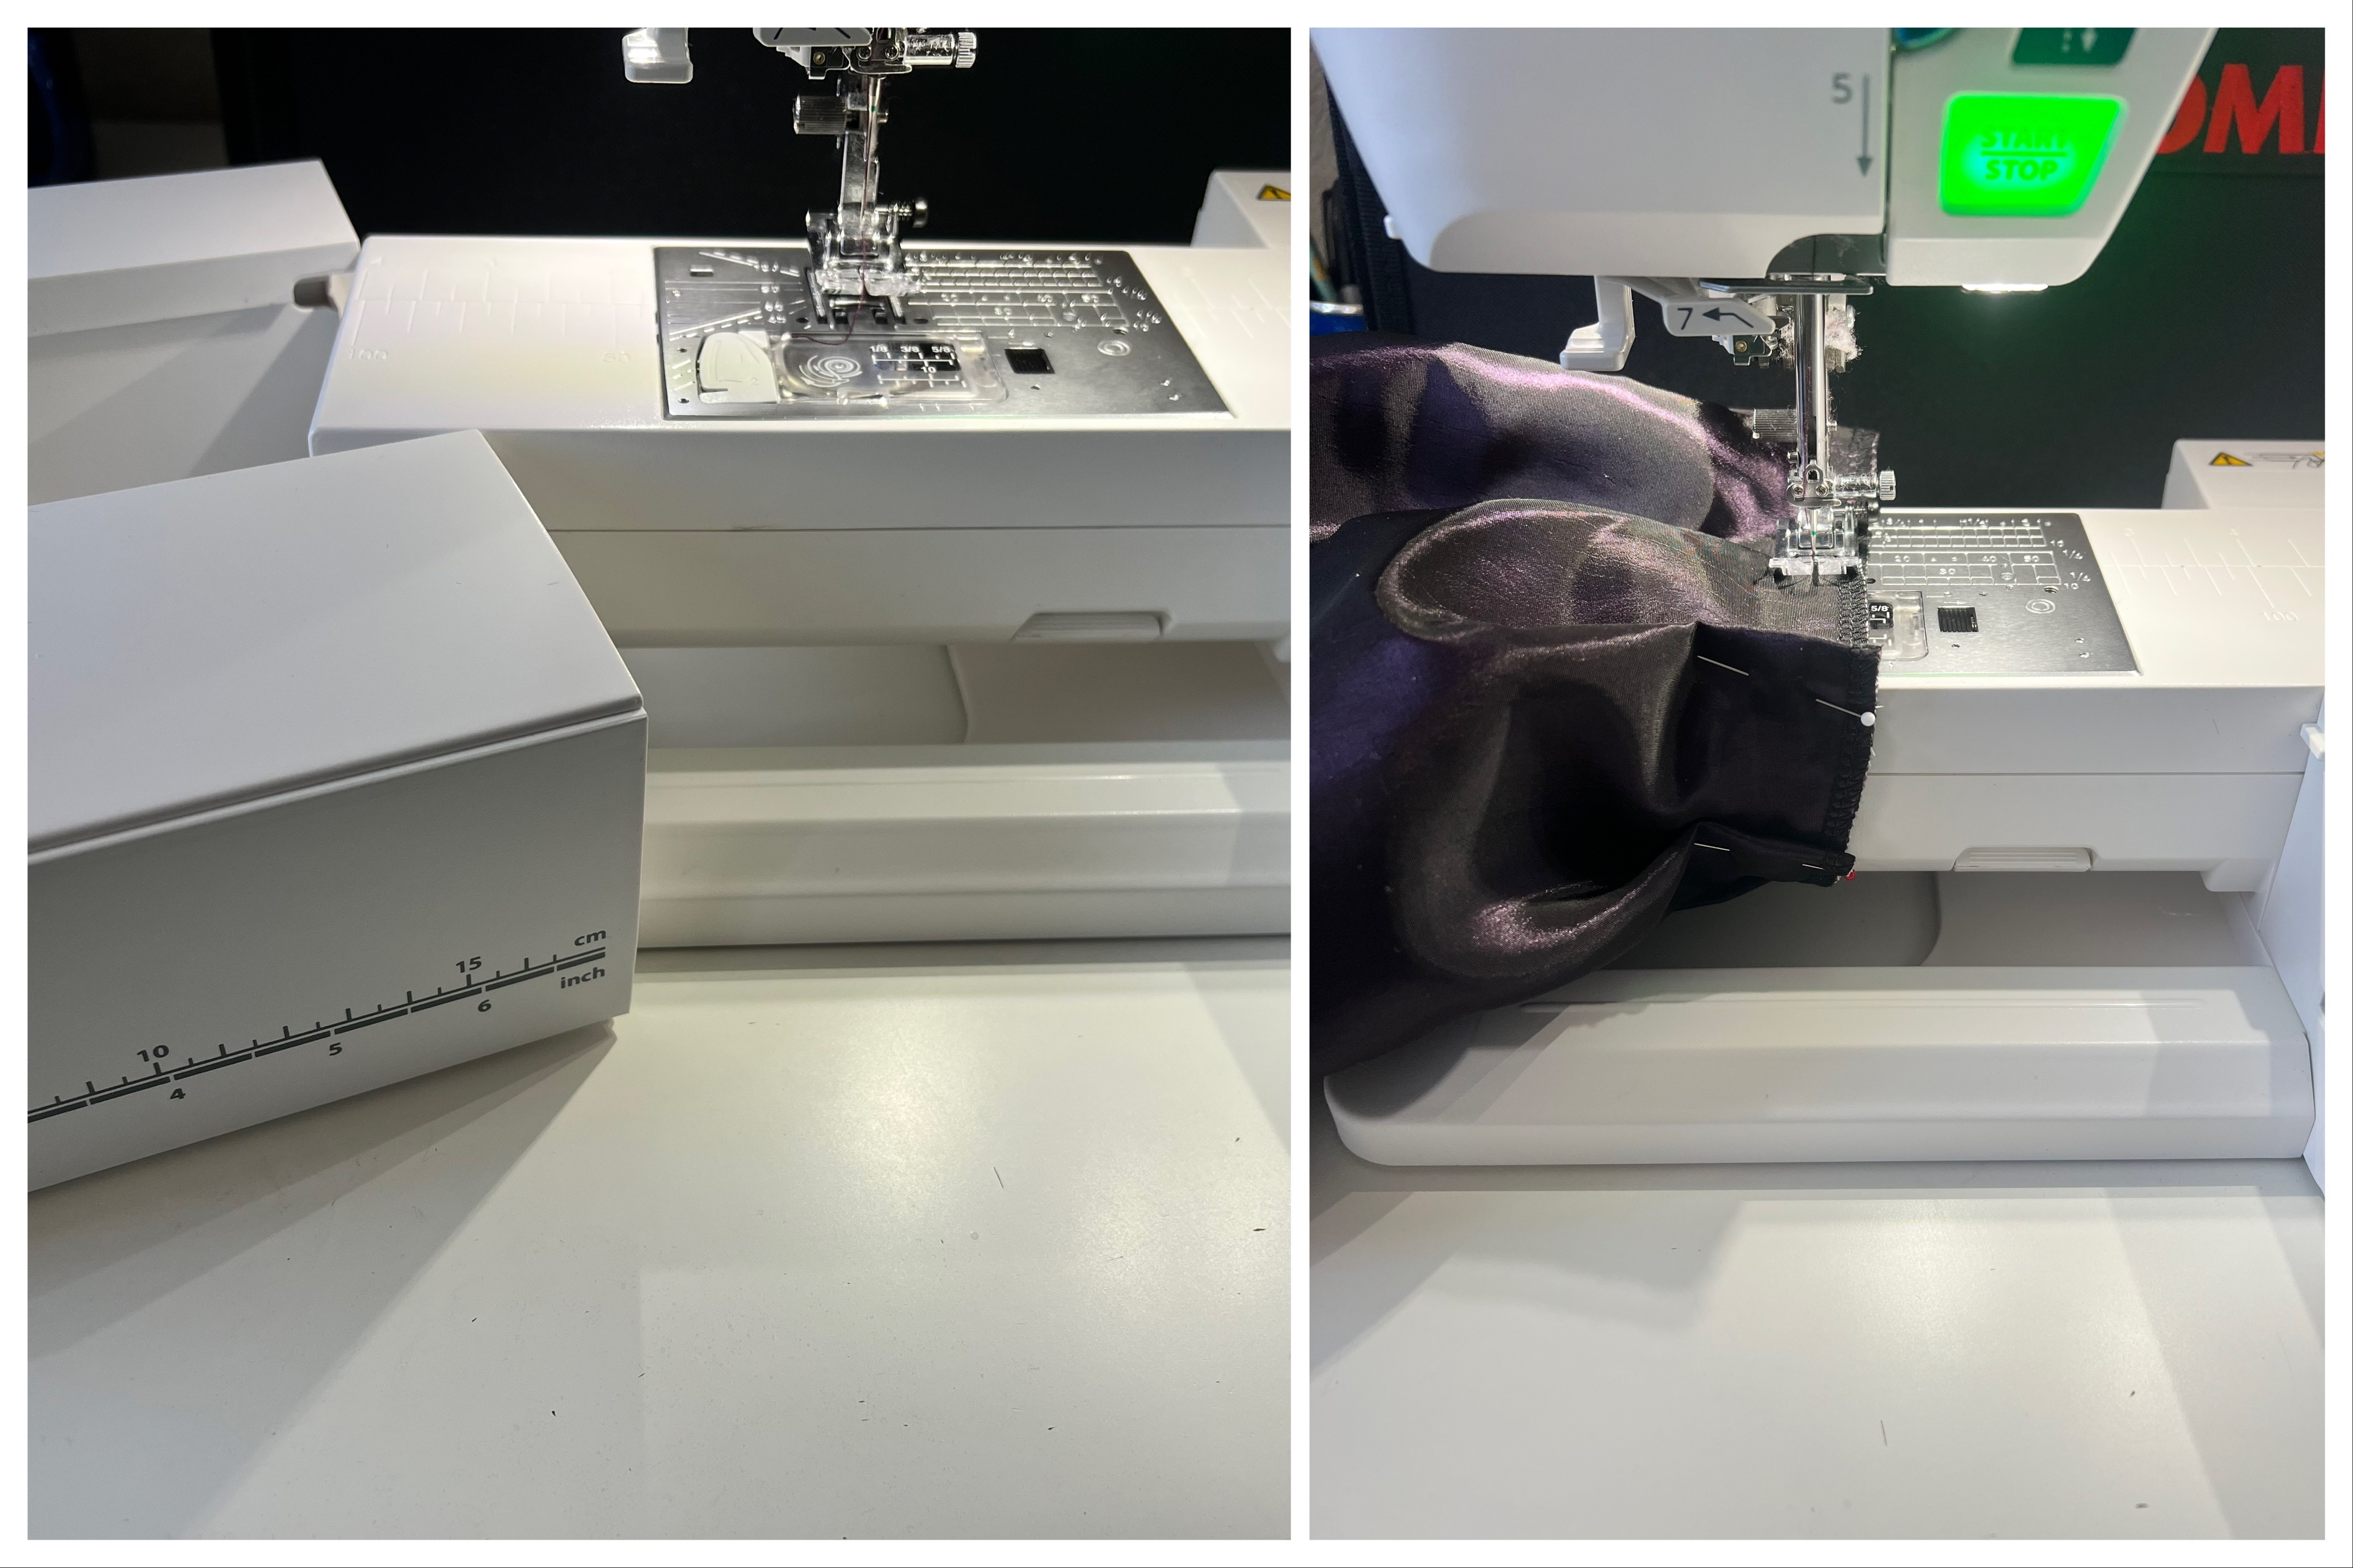
Tip/trick #7: If you are trying to sew thing tubular like a sleeve or cuff, remember you can remove the flatbed/storage tray of your Janome to turn it into a free arm machine, making it easier to maneuver your sewing project. 


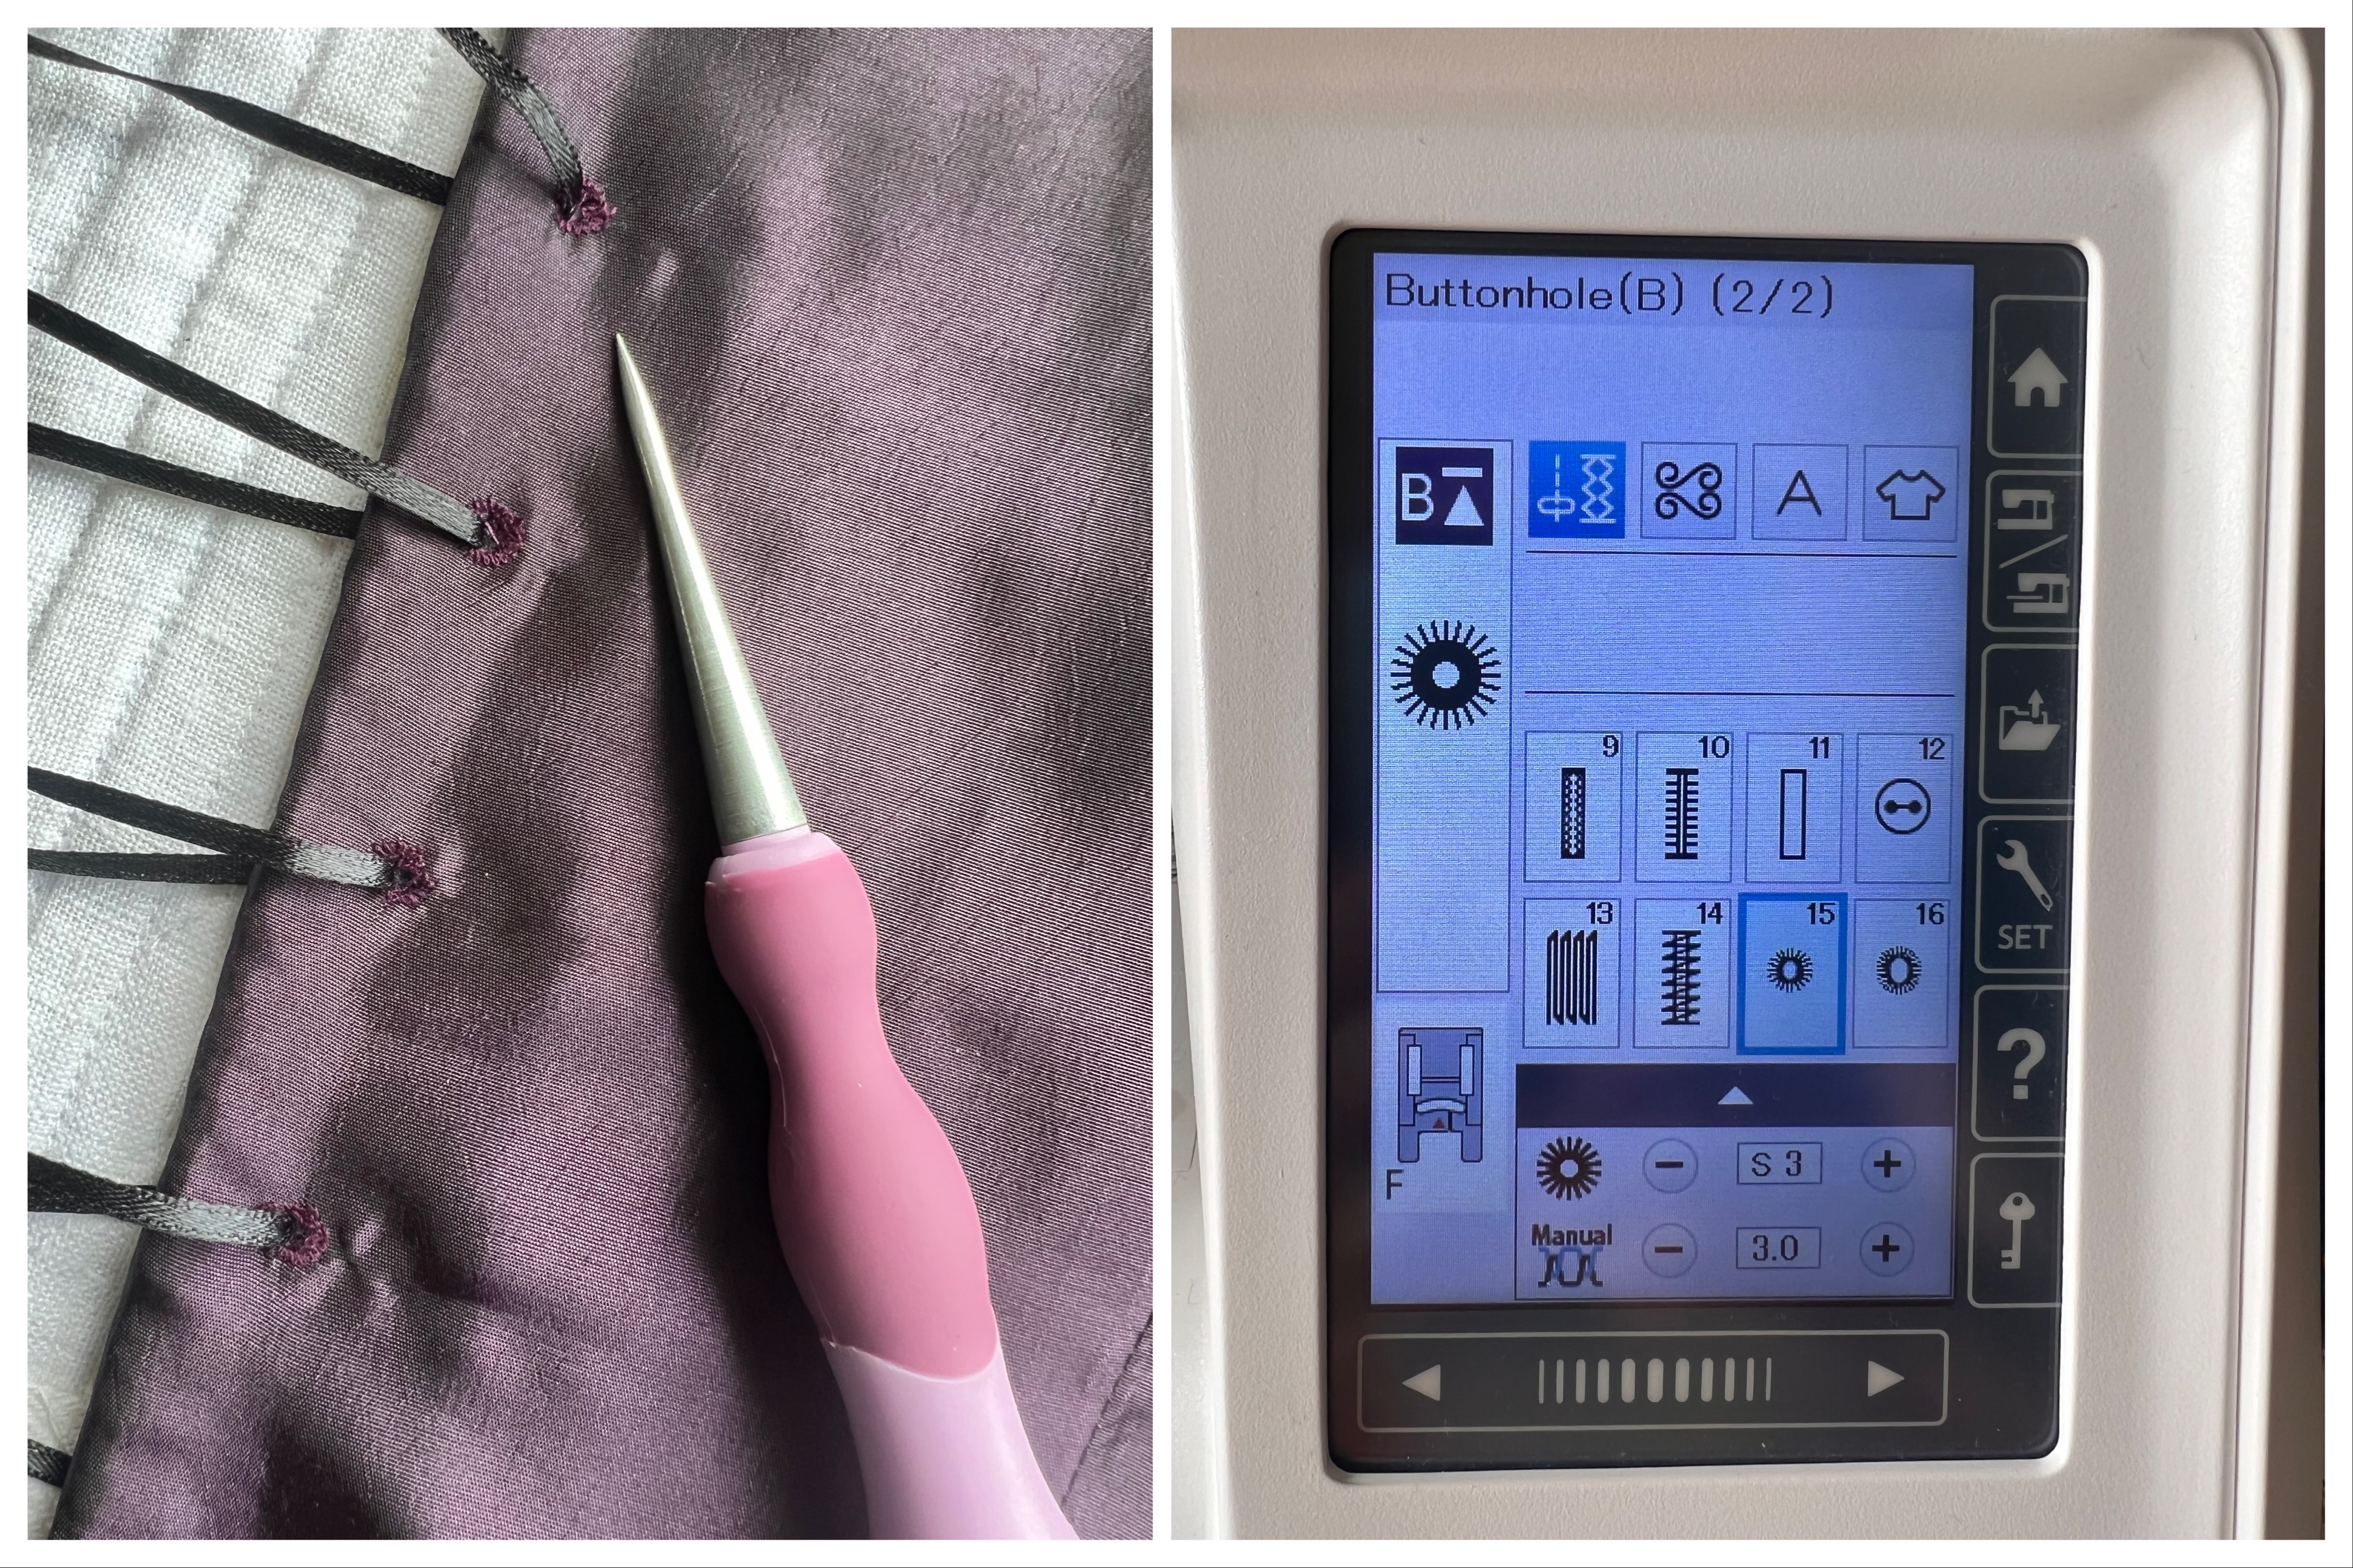
Tip/trick #8: To save time installing metal eyelets or sewing thread eyelets by hand, use the automatic eyelet stitch under your buttonhole menu. After sewing, use an awl to open the holes and put your lacing through. (My dress closes in the back with adjustable lacing).


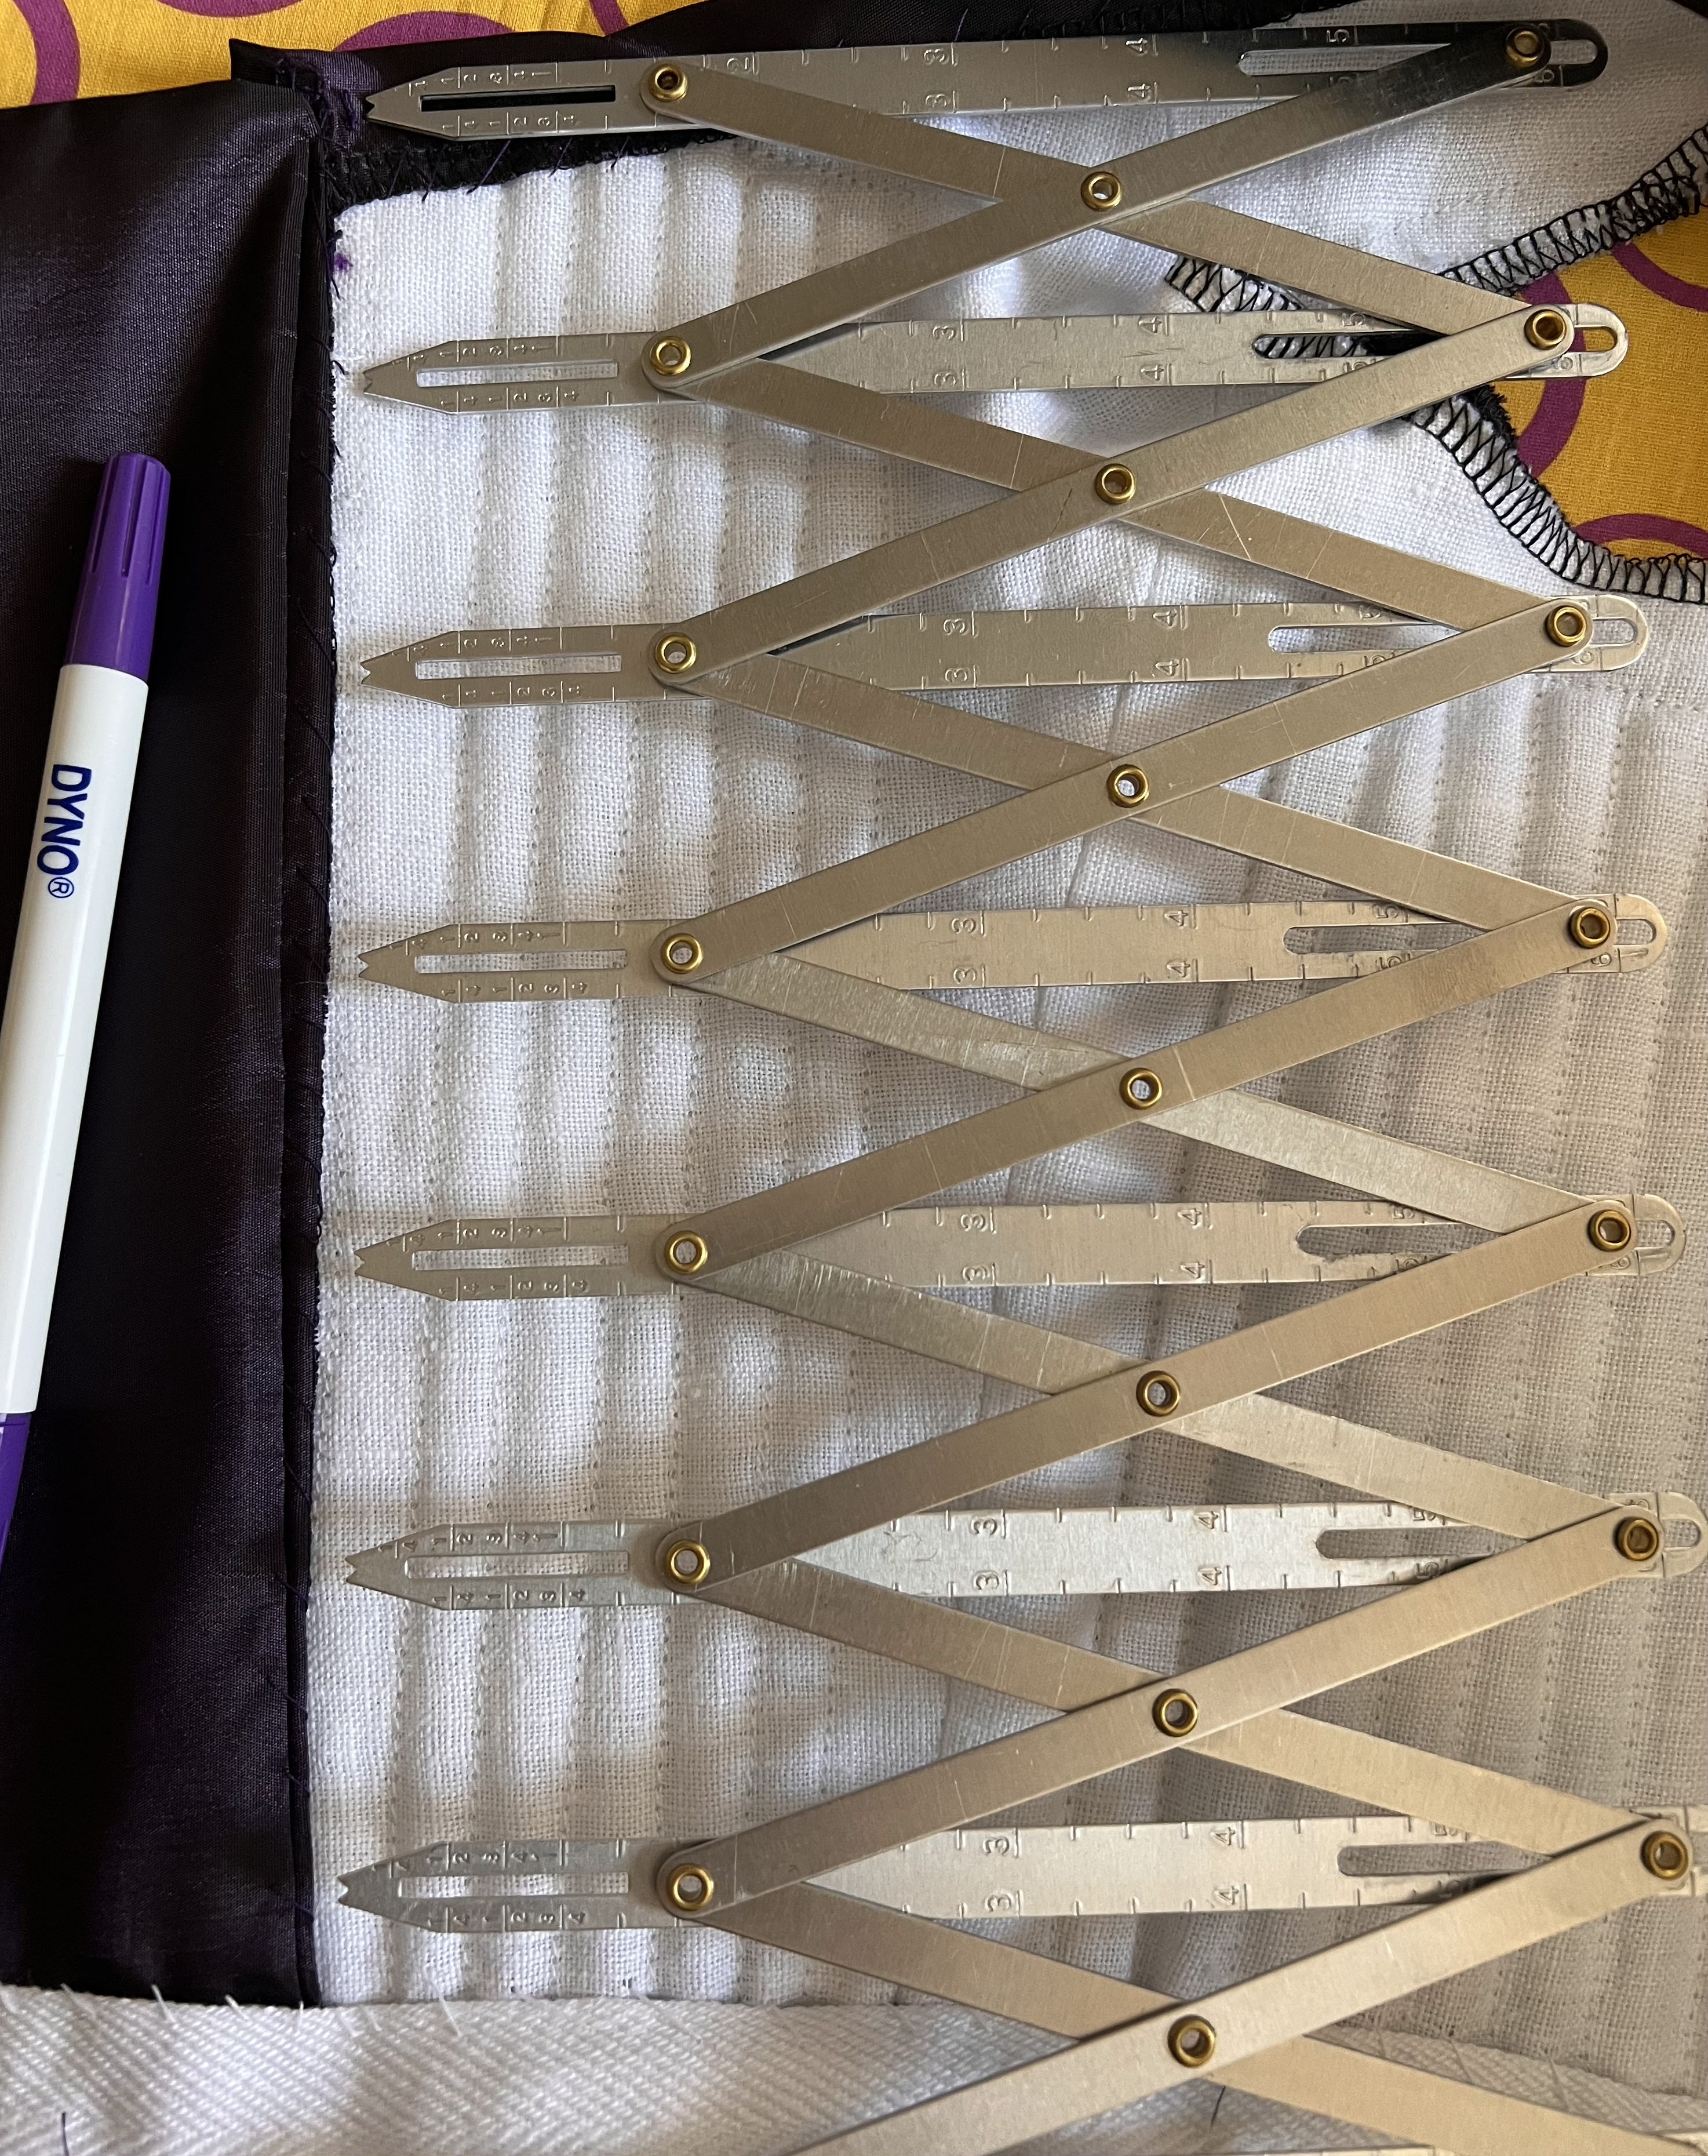
Tip/trick #9: To save time doing math, use an expandable sewing gauge to mark out where your evenly spaced eyelets should be. This also works for measuring out buttonholes and pleats.


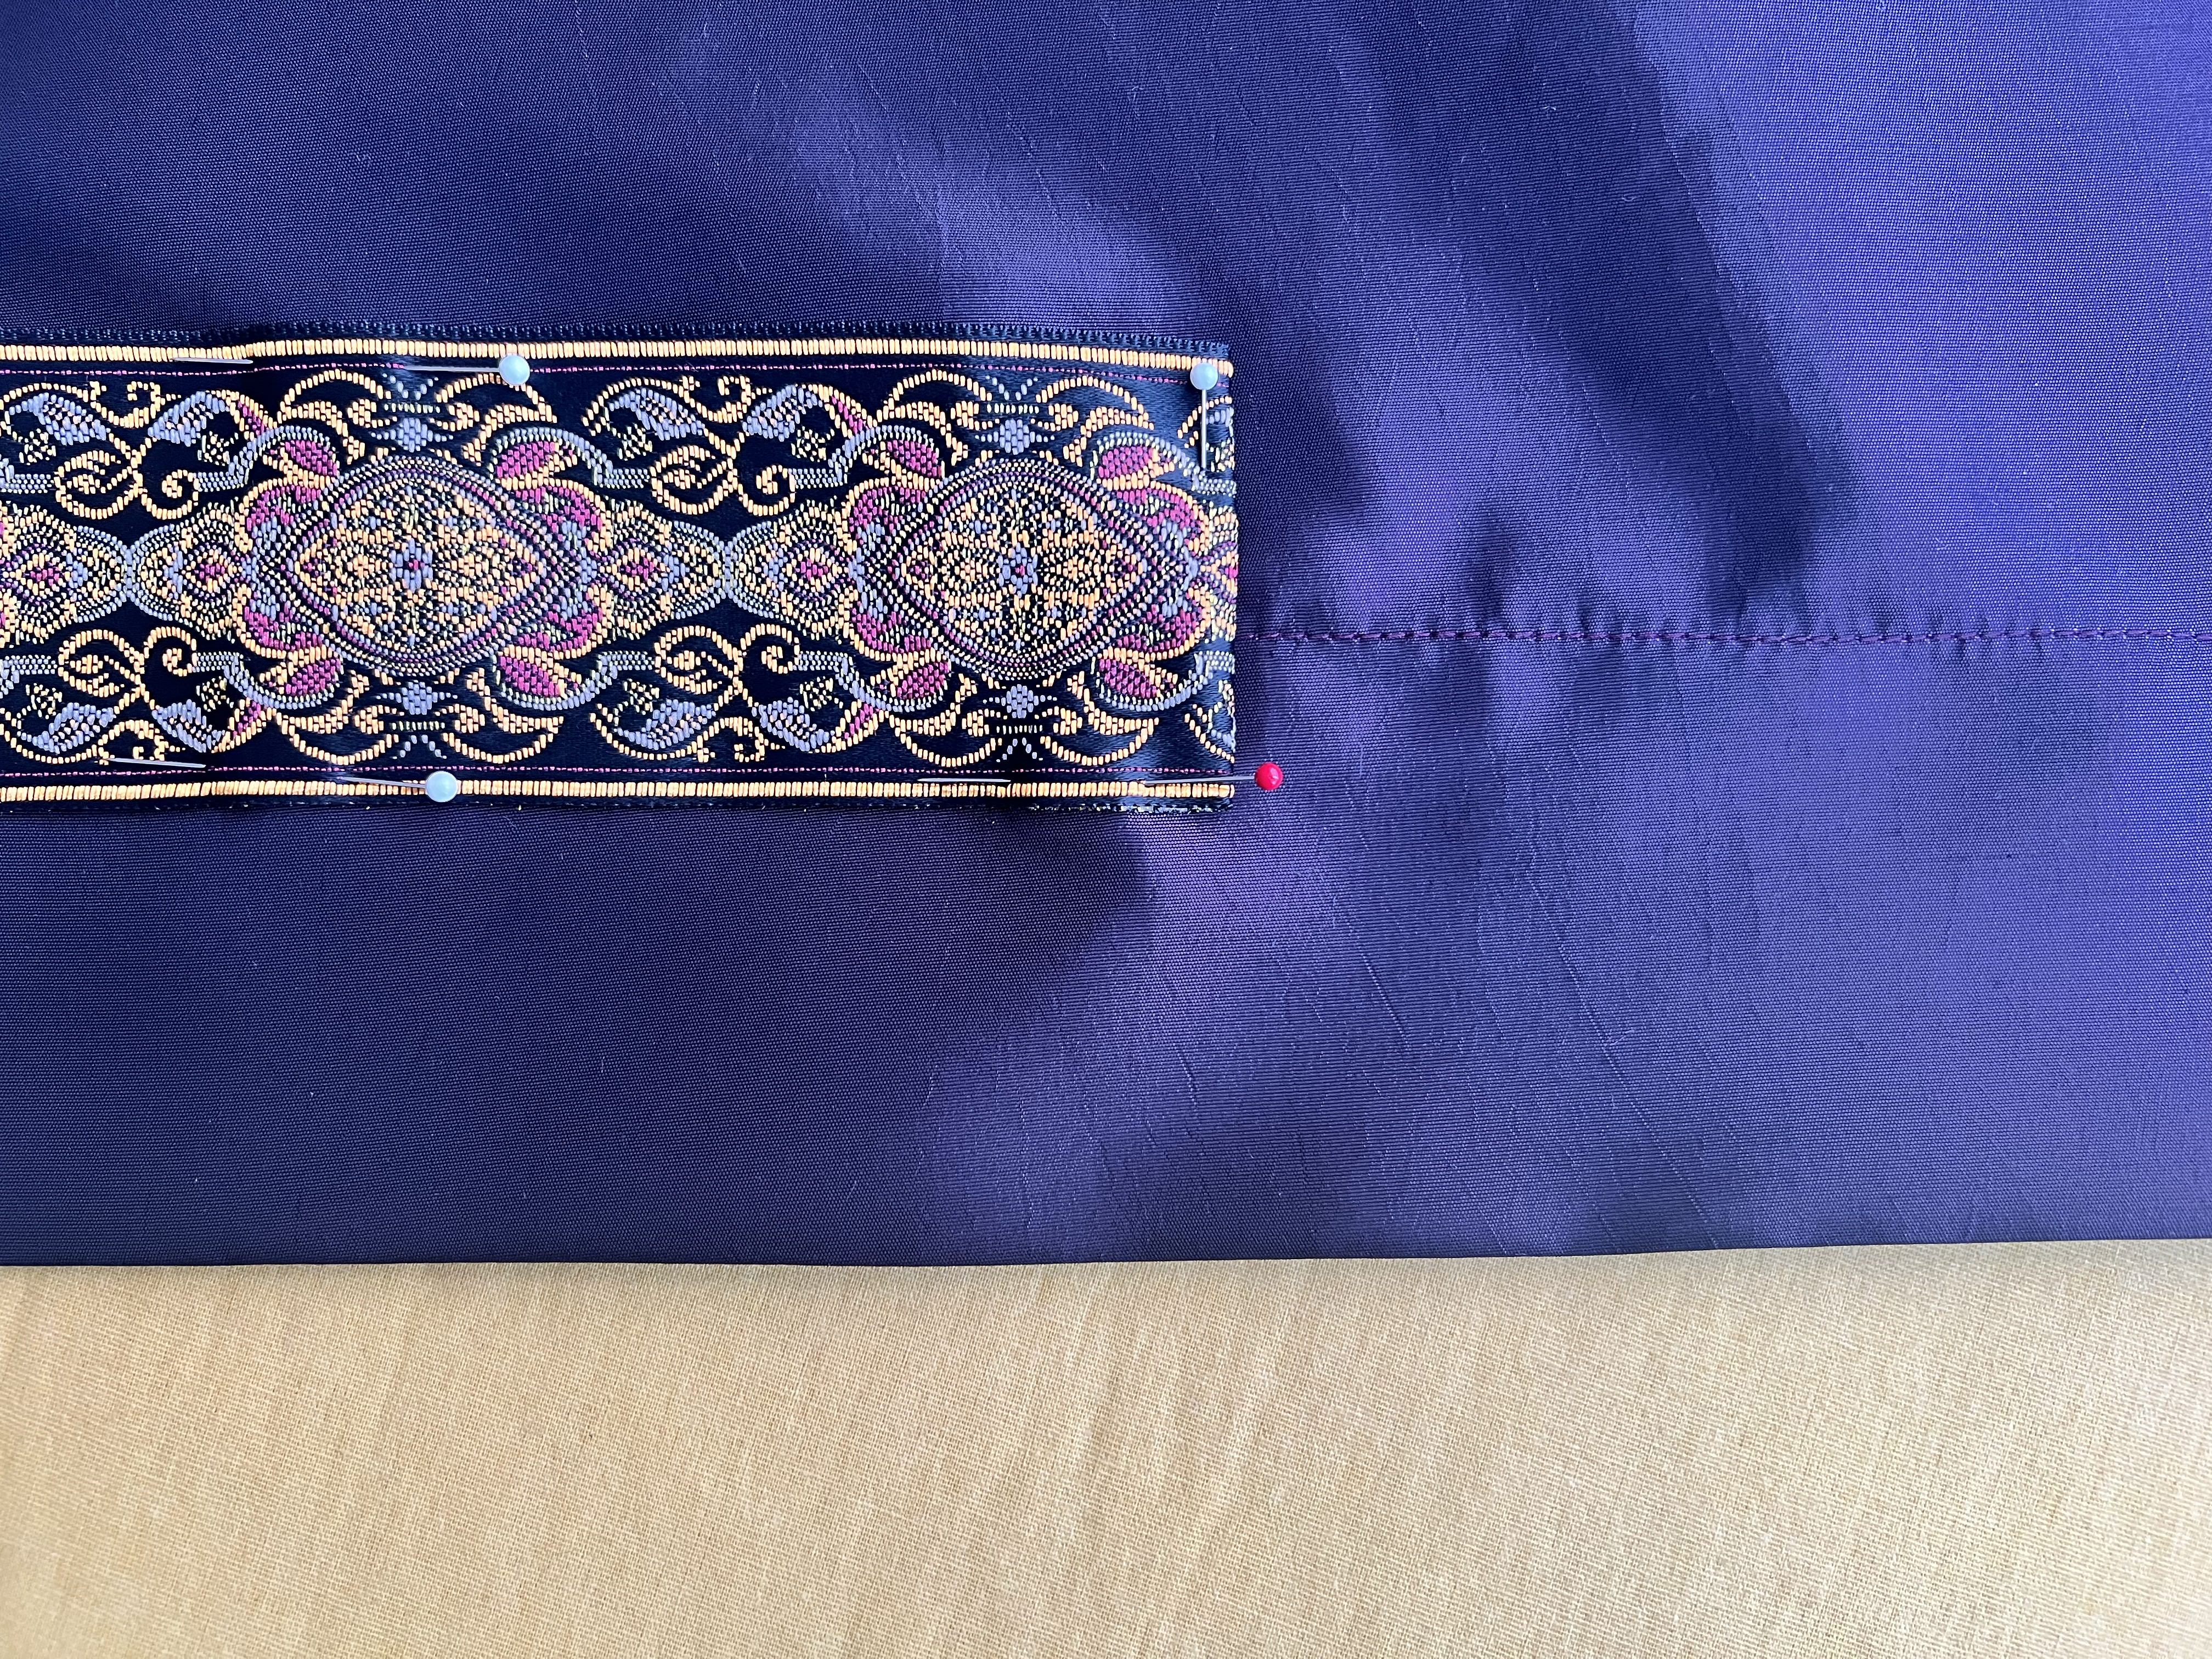
Tip/trick #10: To avoid having an obvious machine-sewn hem, but not have to go through the effort of hemming your skirt by hand, you can cover your machine-sewn hem with a pretty trim. For this hem I serged the raw edge, folded it up inside the skirt, stitched it down, pinned on trim, and then sewed down both edges of the trim using a matching thread.


Thank you for reading and I hope this helps you with your costumes!


Everyone is Talking about 10 Tips & Time-Saving Tricks for Making Costumes
Reviews


Tako
Beautiful
Wednesday, November 23, 2016

cpindzola
Around the Table Dresden Placemats
Saturday, December 17, 2016

I like the concept, but the directions are "sloppy." Nowhere in the supply list does it mention the felt or the batting (how much?). Also, I would never use a high loft batting in a placemat, or a table runner, as I think that it would be too unstable for a glass. The next time I make these, I will cut out the batting (I use flannel) and spray baste it to the wrong side of the Dresden plate before I put the Dresden plate on the felt to cut out. I have not yet washed the finished placemat, and am hoping that the single layer of felt does not curl up, or become distorted after washing/drying.
Txmaid
Fun Great Gift!
Tuesday, February 21, 2017

MargieARK
Teatime Quilted Tablecloth
Friday, February 24, 2017

I made this today but your cutting directions need to be changed. You only need 4 of color 1 and color 3 4.5 squares for the triangles. Also the inner border, you only need 2 cuts as WOF is long enough to cut each in half to fit the sides.
MickelSews
Great Machine
Wednesday, August 30, 2017

I've had this machine for only a week now. I bought it used from a lady who makes her own clothes, but she no longer needed the machine. During the purchase, she noted that she is almost sad that it's better to give it away because of how well the machine performed. (I also bought it along side a computerized machine of another brand.} She demoed the machine for us, showing it worked and gave us everything (including the box it came in!) She took amazing care of this machine. I have used it a few times now, and the directions for threading were easy to follow (albeit my hands are quite large so the lower looper was a pain, but that is no fault to the machine or brand.) And I recommend this machine to anyone who wants to learn to serge and wants a machine that can grow with them. I will happily use this machine time and time again.
rvstan
S9 Review
Sunday, February 25, 2018

I love, love, love my S9! It's sews and embroiders beautifully and it's simplicity of use amazes me. I would recommend this machine for both a beginner and an experienced seamstress. If I would ask anything of Janome it would be to upgrade the programming to run a larger hoop size. I understand that it can't get much wider but there is most definitely room for it to go longer. That is the only limitation of this machine.
pjmnana
PJMNana
Monday, February 26, 2018

I purchased a Memorycraft 15000 a few years ago and it was the best purchase I ever made! This machine can do just about anything you would would ever want! I love the capability of using the Acuedit app to set up my embroidery pattern on my Ipad and then download it to the machine! I love how my embroidery looks upon completion and I love all the good lighting it has to light up your workspace. That way you don’t need to worry about where to set up your machine. It also has plenty of room to do machine embroidery on any size quilts! There are many decorative stitches from which to choose that are outstanding! It’s hard to choose which one to use! There are so many great features it is hard to decide what I love the most. If you want to buy only one machine to last a lifetime, I would recommend this one!
KLWash
S9 Review
Sunday, February 24, 2019

The S9 is amazing. I learned to sew by hand when I was just 5 and in my grandmothers way as she was quilting. I took seeing classes in high school until they would no longer let me sign up. The S9 makes me appreciate my current skills as well as motivate me to want to learn more. This machine is awesome.
SewSueMe2002
Horizon Memory Craft 15000
Thursday, November 19, 2020

My Janome Horizon Memory Craft 15000 is fantastic! I love, love, love this machine! When I came across the Eye for and Eye embroidery design today, I wanted to make it. However, the embroidery file is missing. Nothing downloads when I select the download button. Please help!
Jillfmischo
Treat Bag fun!
Monday, August 16, 2021

I made the Halloween treat bag for my new granddaughter and I’m sure it will last for years. No embroidery machine so I appliquéd the lettering. Need a little more skirt fabric for a better gathered look, and I used thin double-bias tape for the skirt hem, over edge stitch on skirt sides. I’m pleased with my results!
elenaz
Very helpful tutorial
Wednesday, October 25, 2023

I want to say thank you for teaching me this method of applique. I was able to do it with a small letters. This method is the best so far from all of those I've seen and tried.
plonkar
So useful
Thursday, November 30, 2023

I'd like to express my gratitude for teaching me this appliqué method. I successfully applied it with small letters, and, so far, it's the most effective among all the methods I've seen and tried.

DEALERS
The TWO Closest Dealers to you are:
1900 CENTRE ST , WEST ROXBURY MA, 02132
(617)323-6200
443 MOODY STREET , WALTHAM MA, 02453
781-893-3331
Find Additional Dealers