
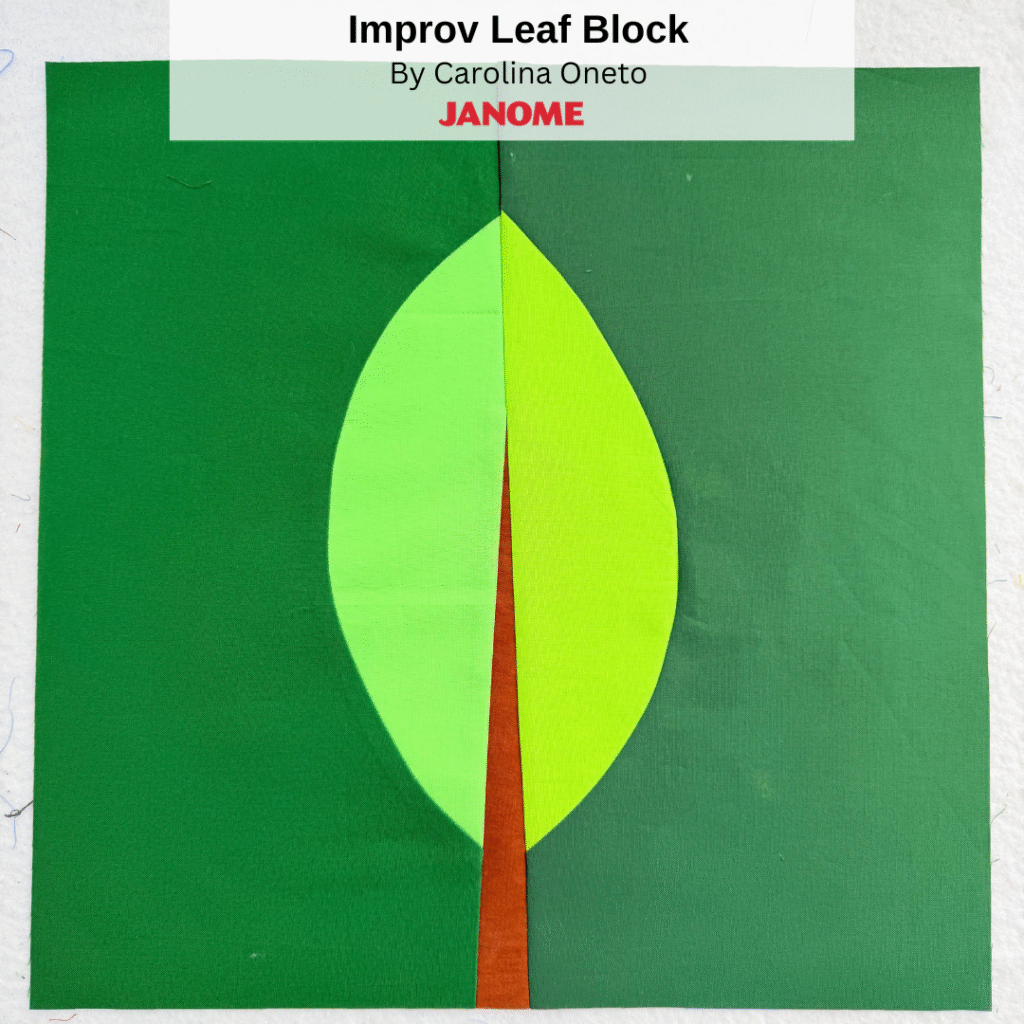
Created by: Carolina Oneto
Welcome to my first Janome tutorial of 2026!
In this tutorial, we’ll create a playful improv leaf block using organic curves and intuitive piecing. You can explore different sizes, experiment with color and contrast, and see how small changes can completely transform the design.
This block works beautifully on its own or repeated to build a larger quilt full of movement and energy. It’s a fun, flexible project that invites you to relax, play, and enjoy the creative process. Let’s get started!
Supply List
- Sewing machine, I’m using my JANOME Continental M7
- 1/4” inch foot for sewing
- Quilting ruler
- Rotary cutter
- Cutting mat
- Iron & ironing board
- Fabrics to make one block that will measure aproximatly 15” x 15”
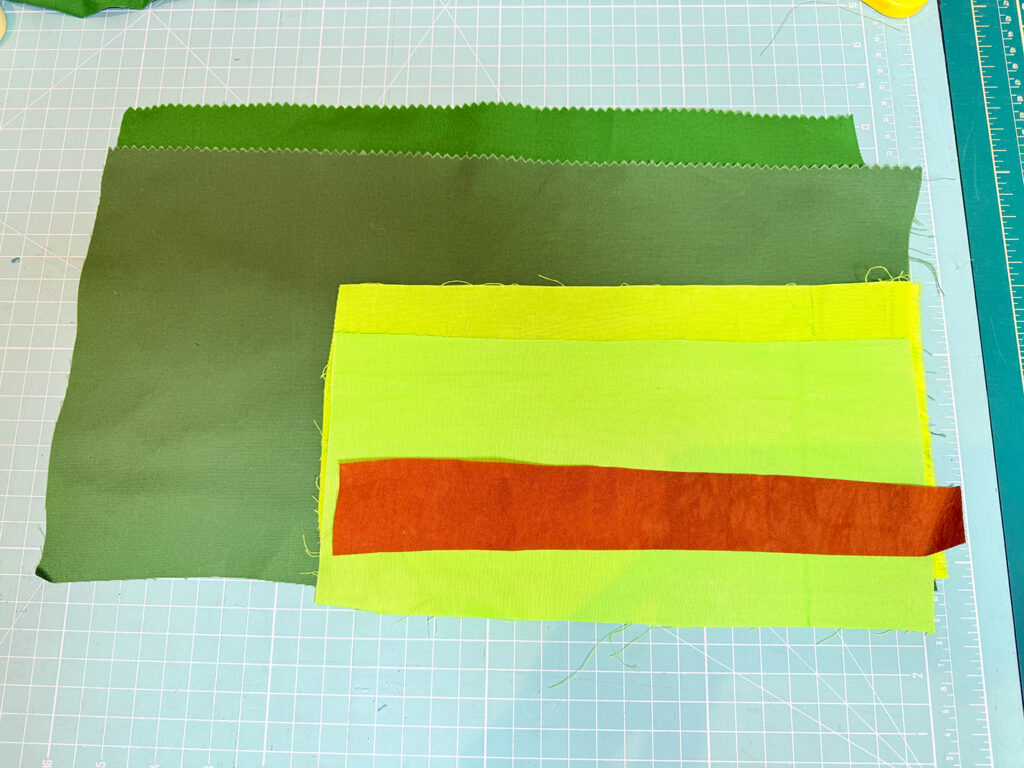
- 2 rectangles of fabric (block background) 17” x 9”
- 2 rectangles of fabric (for the leaf) 12” x 5”
- 1 strip for the stem 12” x 1 1/2”
- Fabric for backing and binding, batting
- Threads for piecing and quilting
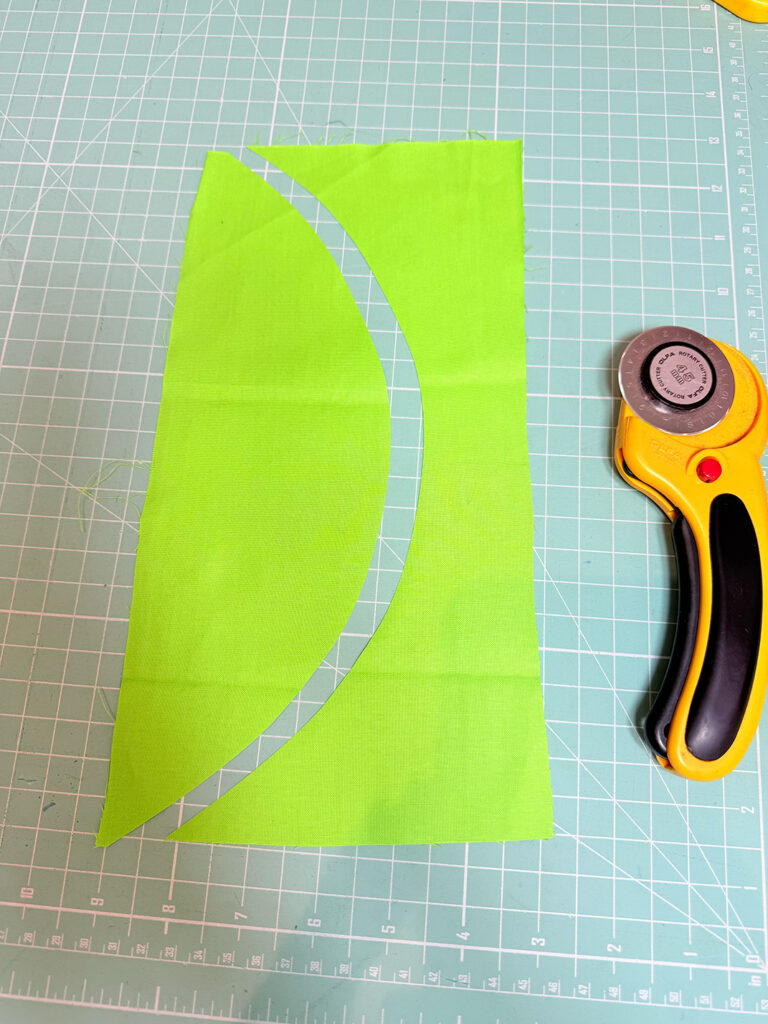
1. Cut the Leaf Curve
With a rotary cutter, cut a gentle, organic curve along one side of the leaf fabric. This curve does not need to be perfect—embrace the improvisational nature of the design. Always cut a gentle curve.
2. Position the Leaf on the Background
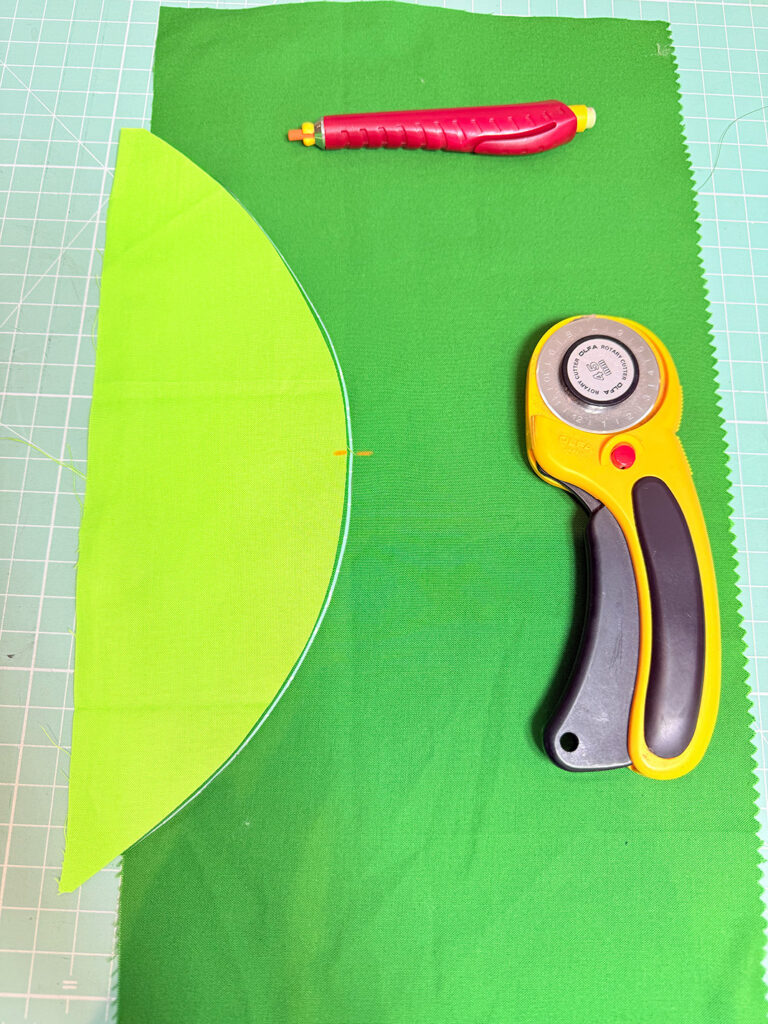
- Place the leaf fabric right side up on top of the background rectangle. Allow the leaf to extend about ½ inch beyond the background fabric along the curved edge.
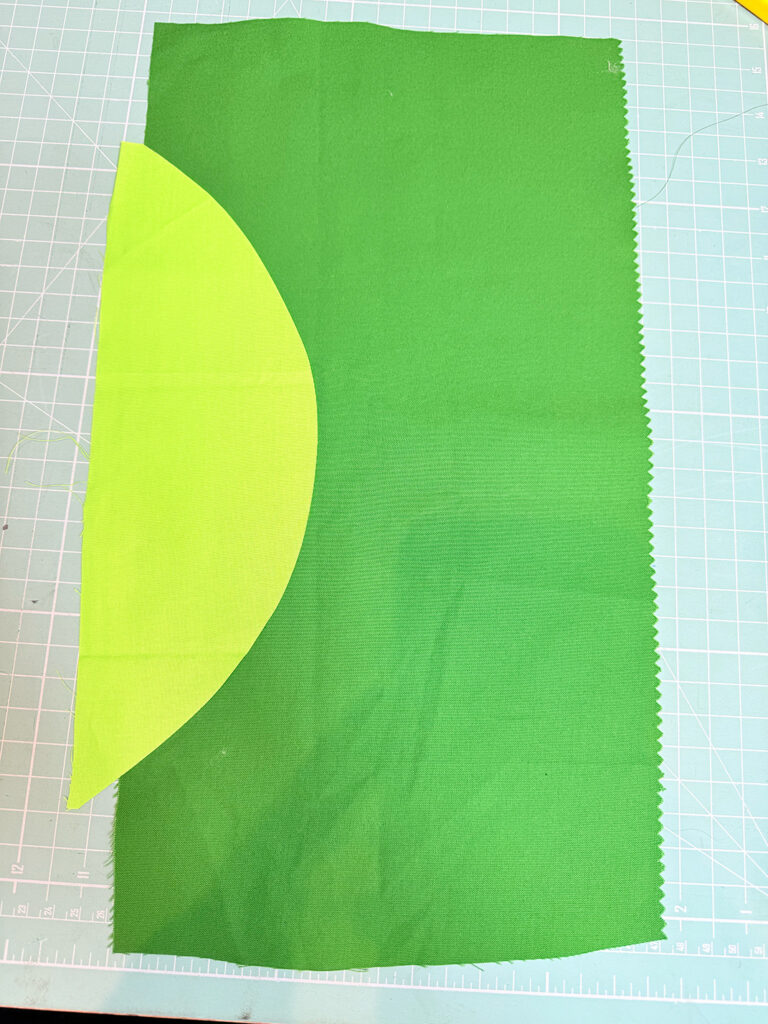
3. Mark the Registration Point
Make a small mark at the center of the curve, marking both the leaf and the background fabric. This registration mark will help you align the pieces accurately when sewing. Cut the Background Fabric: Keeping the leaf fabric in place, cut the background fabric along the curved edge, carefully following the shape of the leaf.
4. Remove Excess Fabric
Remove and discard the background fabric that sits underneath the leaf, leaving you with one curved leaf edge and a matching curved background edge.

5. Align and Pin
Place the background fabric on top of the leaf fabric, right sides together. Match the registration marks first. Begin pinning at the center, then pin toward one end of the curve, and finally toward the other end, gently easing the fabric as needed.

6. Sew the Curve
Sew the curved seam from one end to the other using a ¼ inch seam allowance. Set your sewing machine to a short stitch length (2.0) for better control on curves.

7. Press the Seam
Press the seam toward the background fabric, allowing the leaf shape to emerge clearly.


8. Repeat for the Other Half
Repeat the same process to attach the second half of the leaf, you will have 2 half leaf. Trim the edge.


Now it’s time to sew the stem to both halves of the leaf.
1. Prepare the Stem Strip
- Take the strip of fabric you’ll use for the stem and trim it slightly into a wedge shape.
- The top of the stem should measure about ½ inch wide
- The bottom should measure about 1½ inches wide
This gentle taper gives the stem a more natural, organic look.

2. Sew the First Leaf Half
Align the bottom edge of the stem with one half of the leaf. Using your ¼ inch foot, sew the stem to the leaf with a ¼ inch seam allowance.

3. Press the Seam
Press the seam toward the leaf.


4. Trim for Alignment
Trim the stem edge at a slight angle so you create a straight edge. This will allow the second half of the leaf to align cleanly when sewn.

5. Sew the Second Leaf Half
Align the second half of the leaf to the trimmed stem edge and sew using the same ¼ inch seam allowance. Press toward the leaf.


6. Final Trim
Square up your block. In this example, after trimming, the finished block measures 15 inches square.

Play and Explore
Now the real fun begins. I encourage you to:
- Change the scale of the block
- Make multiple units
- Play with different colors, values, and contrast
- Experiment with sharper or gentler curves, noticing how they dramatically change the character of the leaf
By moving these variables around, you can create endless variations and build beautiful, dynamic compositions using this improv leaf block.
Use these prompts to push the improv leaf block beyond a single unit and into rich, expressive compositions:
- Scale Shift
Make the same leaf block in three different sizes. Combine them in one composition and notice how scale creates movement and depth. - Curve Language
Cut one leaf with a very gentle curve and another with a sharp, dramatic curve. How does the personality of the leaf change? - Value First
Work with a limited color palette but exaggerate value contrast between leaf, stem, and background. Try light leaves on dark backgrounds—and reverse it. - Monochrome Leaf
Choose one color family and explore it fully: light, medium, and dark values. Let value—not color—define the leaf. - Stem as a Design Element
Make the stem unusually bold, very narrow, or highly contrasting. Let the stem become an active line in your composition. - Repetition with Variation
Create several leaf blocks using the same colors, but change the curve, scale, or stem angle in each one. - Negative Space Focus
Increase the background area and let the leaf float. Observe how space changes the visual weight of the block.
Reflection Question:
Which single decision—curve, value, scale, or color—had the biggest impact on your composition?
These prompts are meant to be playful and exploratory. There’s no wrong answer—just information you can use in your next design.