Cooler nights and diminishing sunlight are gentle reminders that we are transitioning into sweet Autumn. A season of change is also a great time to slow down and learn a new surface design technique, aimed at invigorating your current sewing practice.
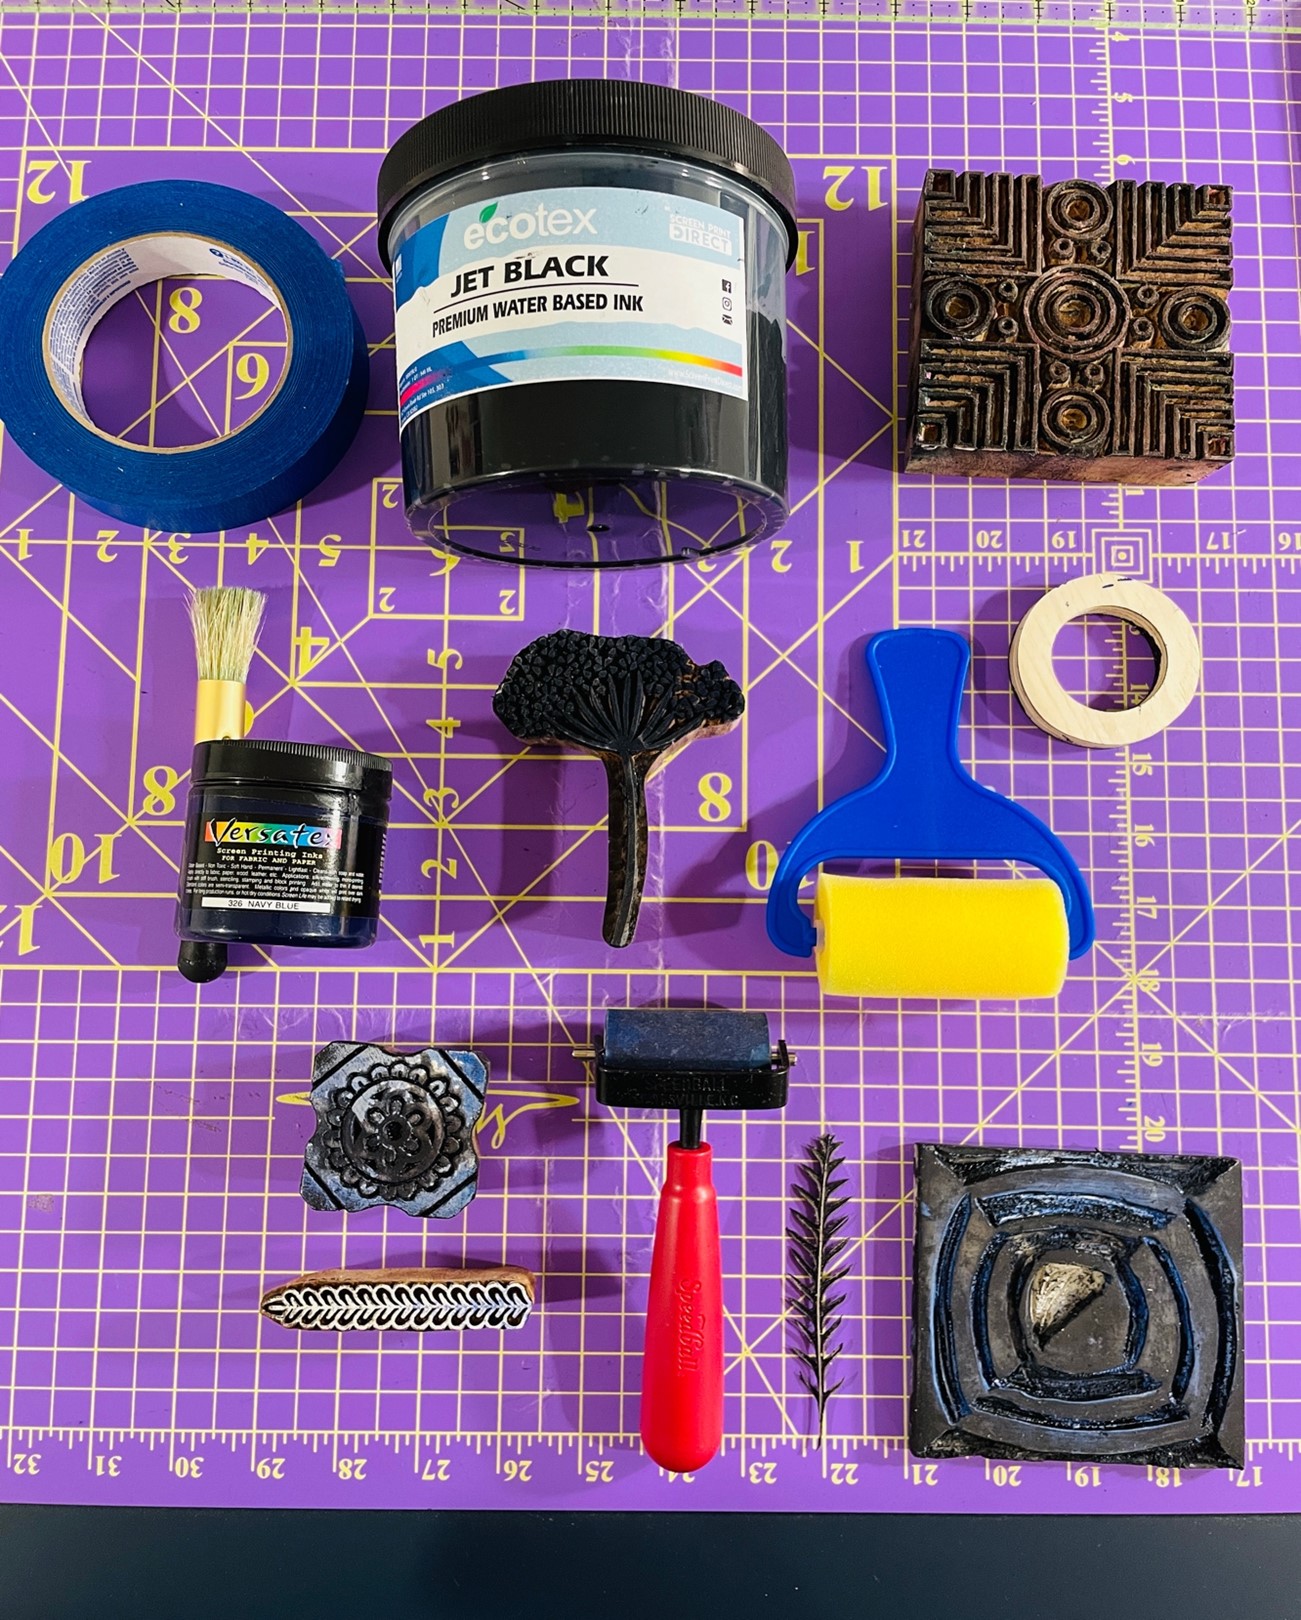
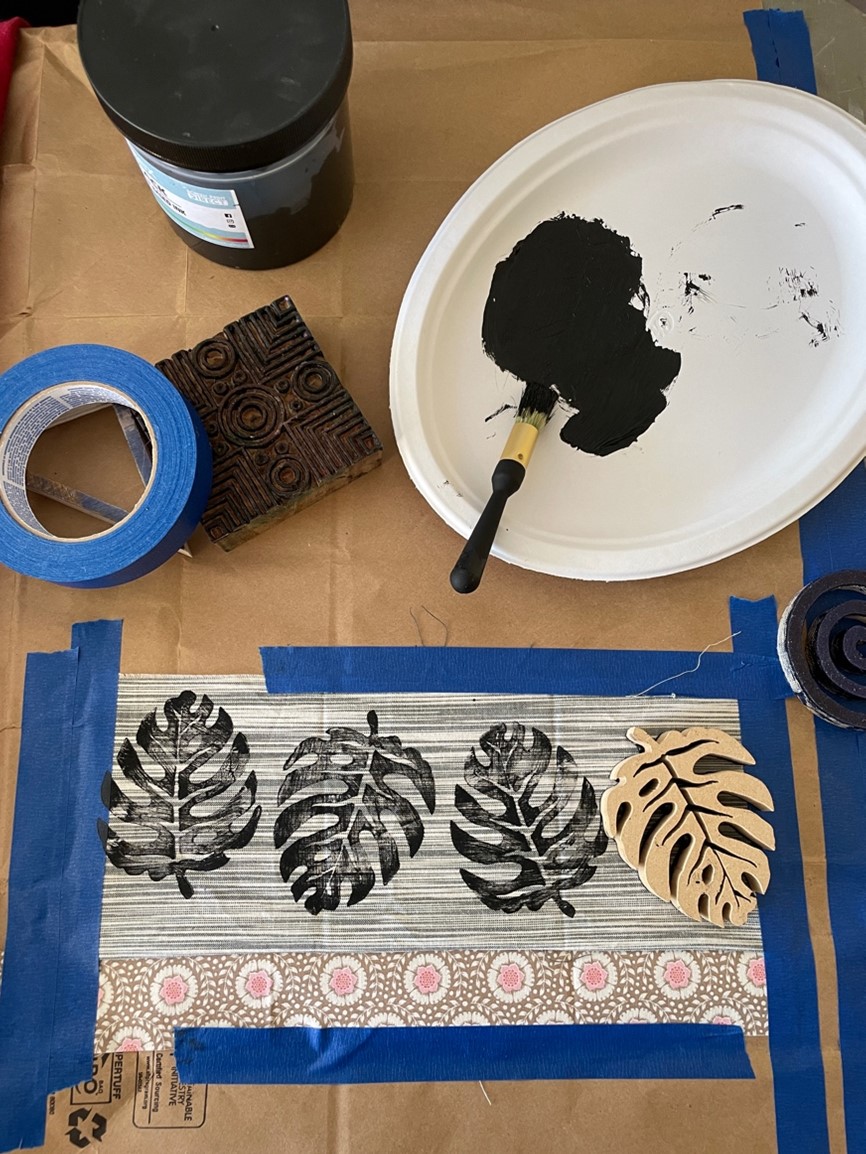
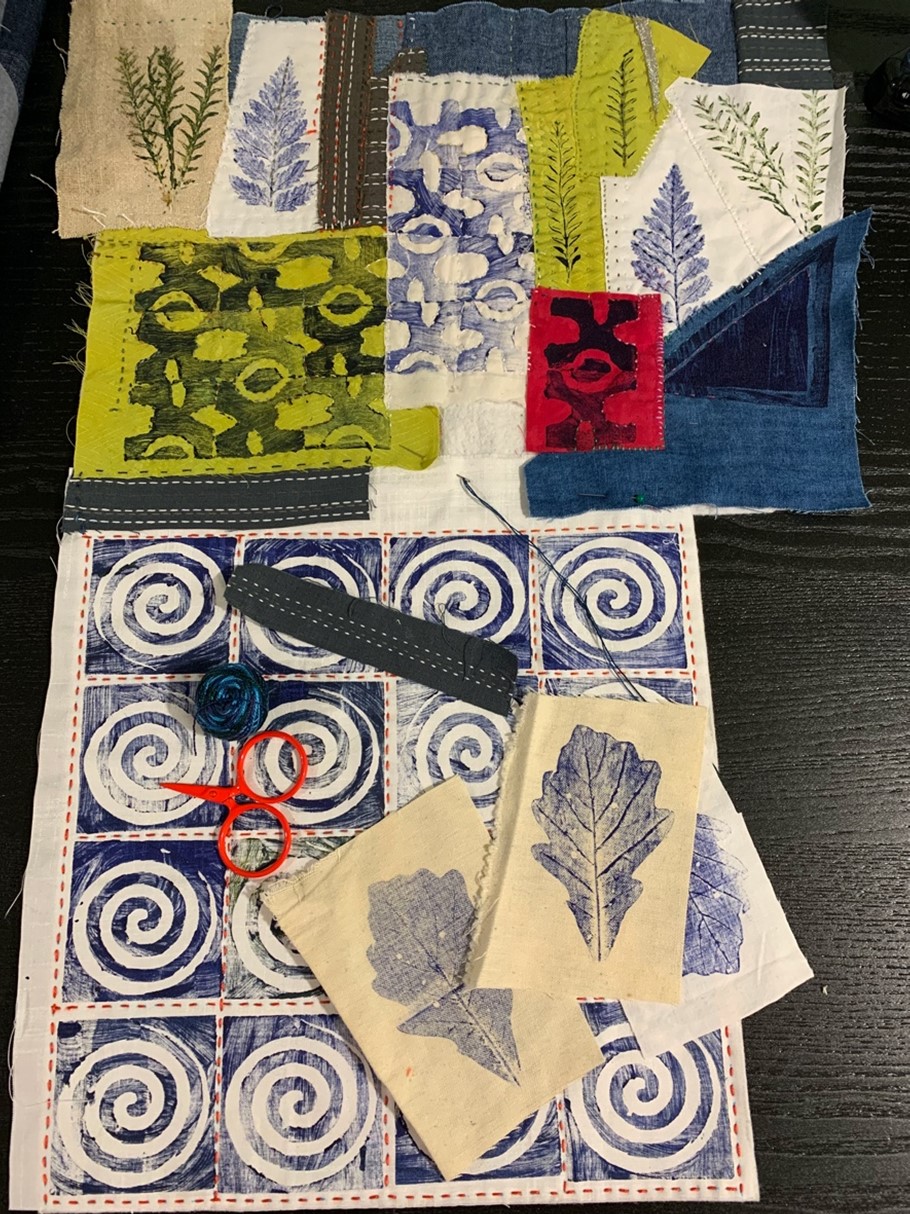
Welcome to hand block-printing on textiles! The blocks that I like to use are wooden blocks created by Indian Artisans. You can also create Lino blocks like the one pictured above, but you would have to carve them. Sometimes we have the most interesting printing objects around our house; look for objects that have interesting bases, random shapes that bring you joy, and are suited to hold on to ink without damaging the piece. The textile ink that I use is permanent once dried, but always water-based, never oil. Experiment with creating shapes on potatoes (cut in half), printing with broccoli or dry leaves found during walks or in your yard.
By Janome Artisan Maday from Sustainable Textile Design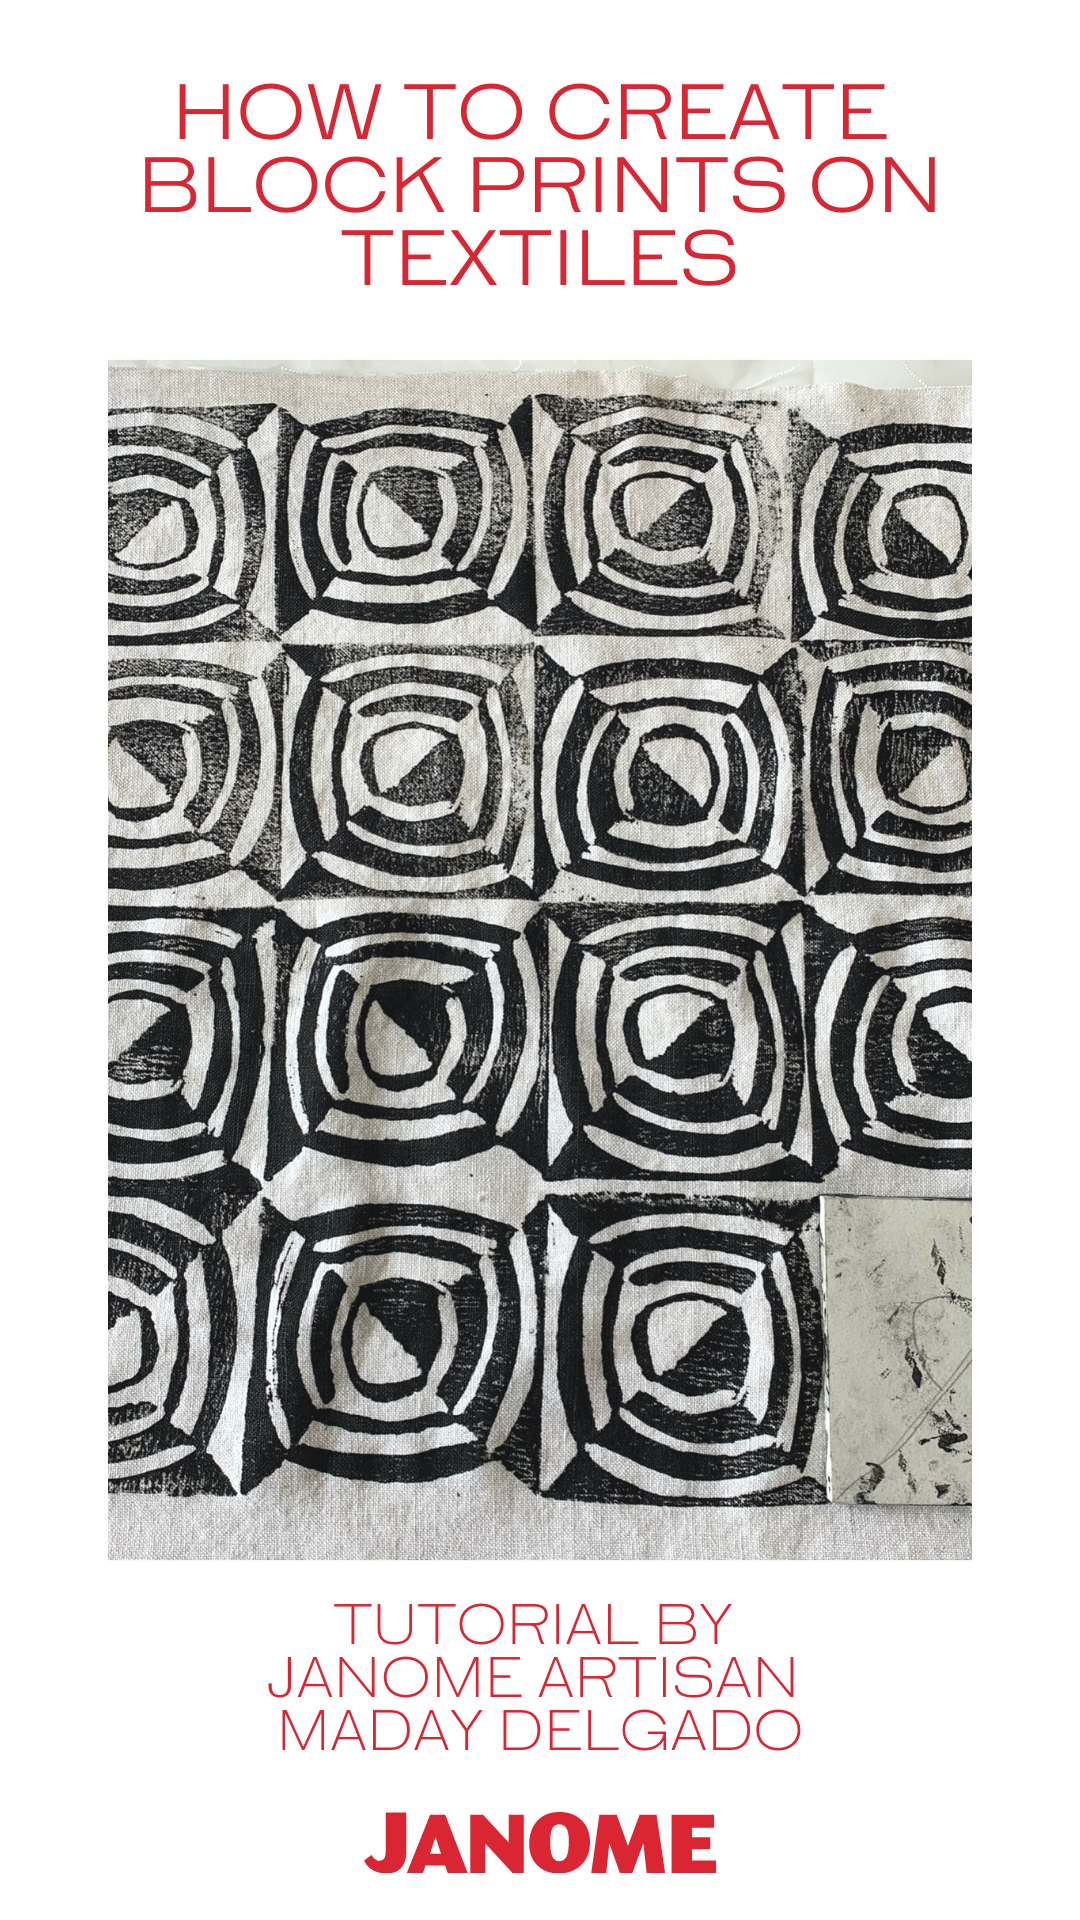
The possibilities to create marks on textiles are infinite and the whole family can get involved. Print on fabric; sew your printed textiles into every day, machine sewn projects later. Use block-printing as the starting point for applique-ing with your Janome, monogramming, creating geometric shapes or simply, printing on garments to give them a new life.
Helpful Hints:
Practice printing on paper first; it will inform how much ink to use before printing on beautiful fabrics. You must apply more ink to blocks when printing on textiles.
Cover tables to avoid damage and secure textiles using painter’s tape to create smooth printing surfaces. Allow fabrics to fully dry before ironing or sewing.
I have included two brands of textile ink that I use; purchasing versatex which comes in smaller containers is more economical and allows you to explore without breaking the bank!
Supplies:
2 Solid cotton or linen fat quarters
(yellow and light grey) - optional
Contrasting Cotton thread
Organ needle size 14
Wooden blocks for printing
Strong, dried leaves from garden or flower arrangements (optional)
3” foam brayer with plastic handle
Speedball hard brayer (optional)
Versatex screen printing ink – 326 navy blue (small container)
Ecotex Jet Black Water-based ink (giant container, optional)
Painter’s tape
Paper or plastic to cover printing surfaces
Small brush (helps displace ink throughout block)
Cardstock paper
Paper plate to keep ink during the printing
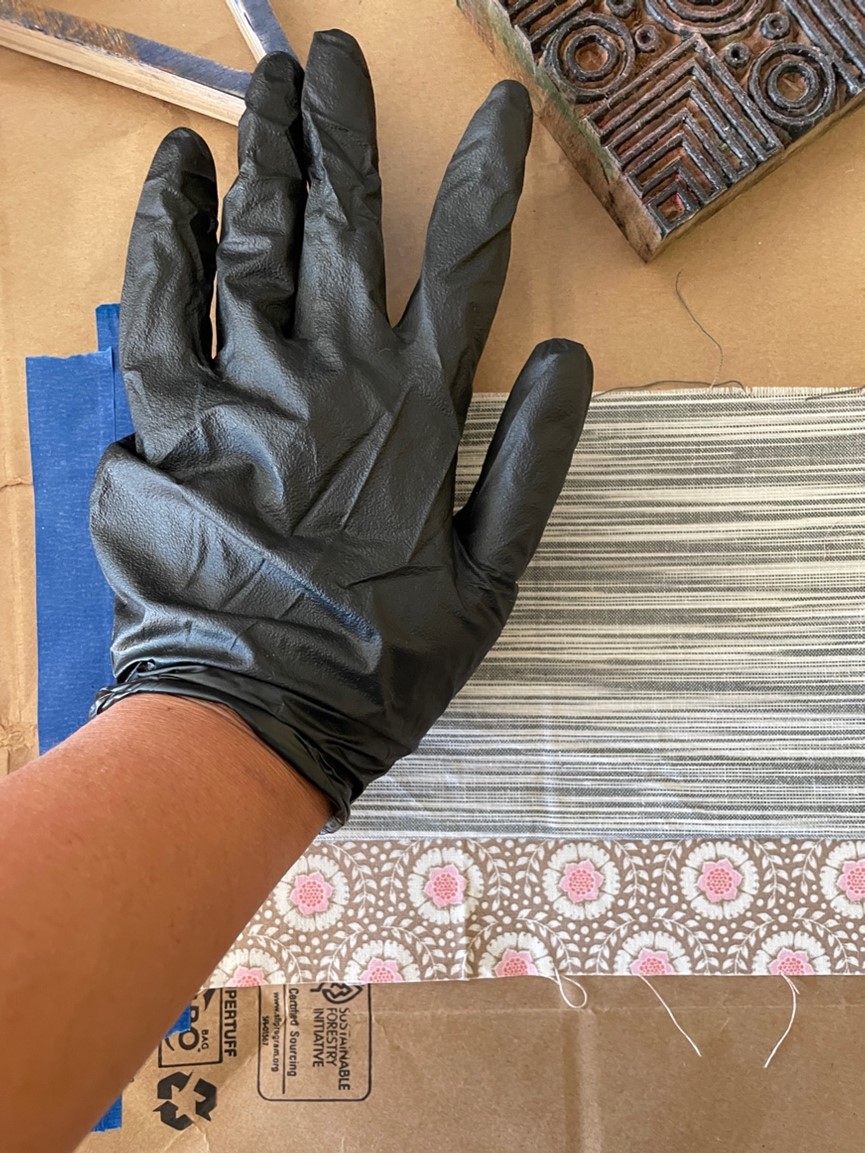
Gloves
Apron
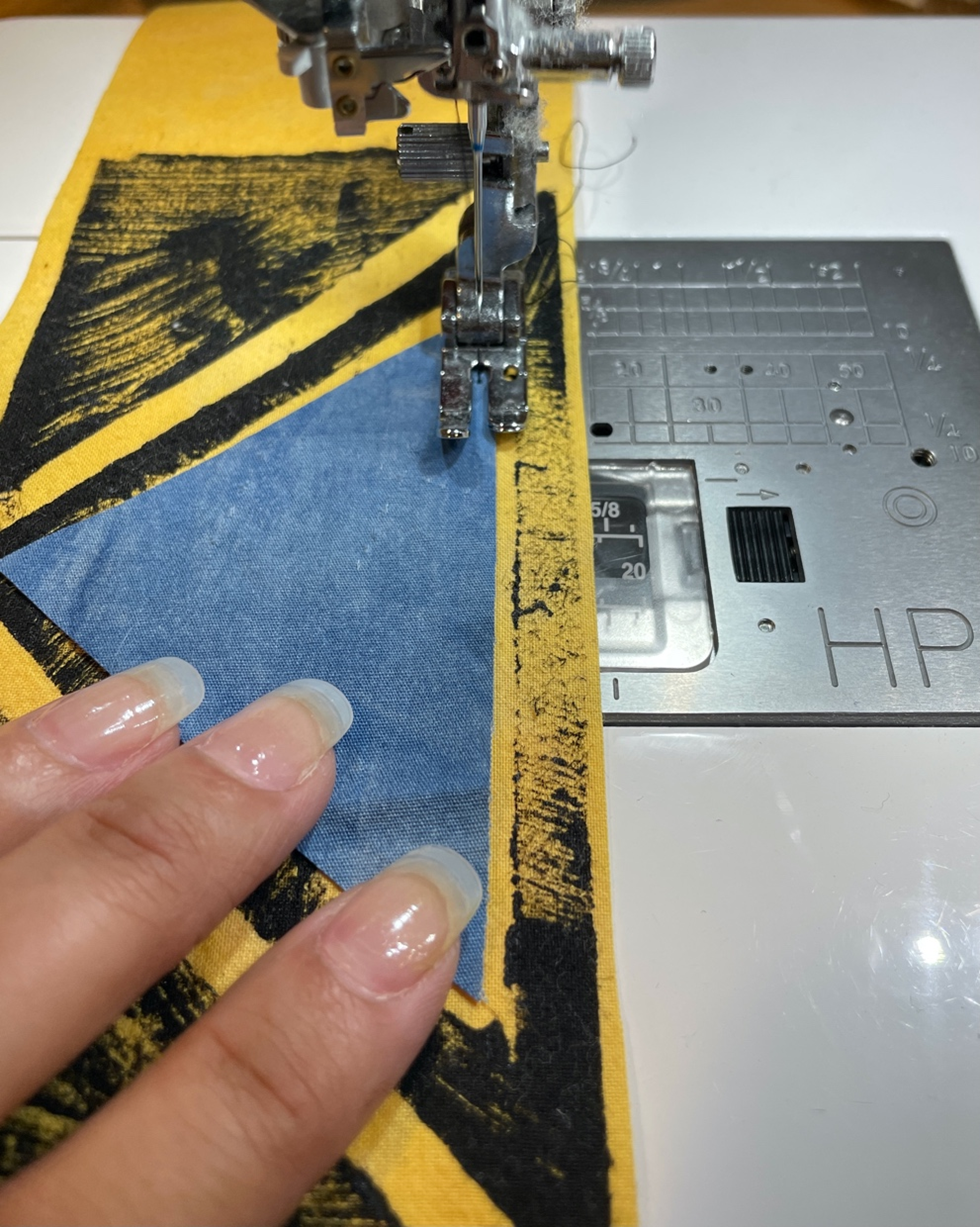
Machine
Janome M7 Continental HP foot and plate
Foot F open toe and zig zag plate
Prepare surfaces by covering the table with paper or plastic.
Use painter’s tape to attach textiles to the table for a smooth printing surface; this makes it easier to lift blocks once the ink has been transferred to the cloth.
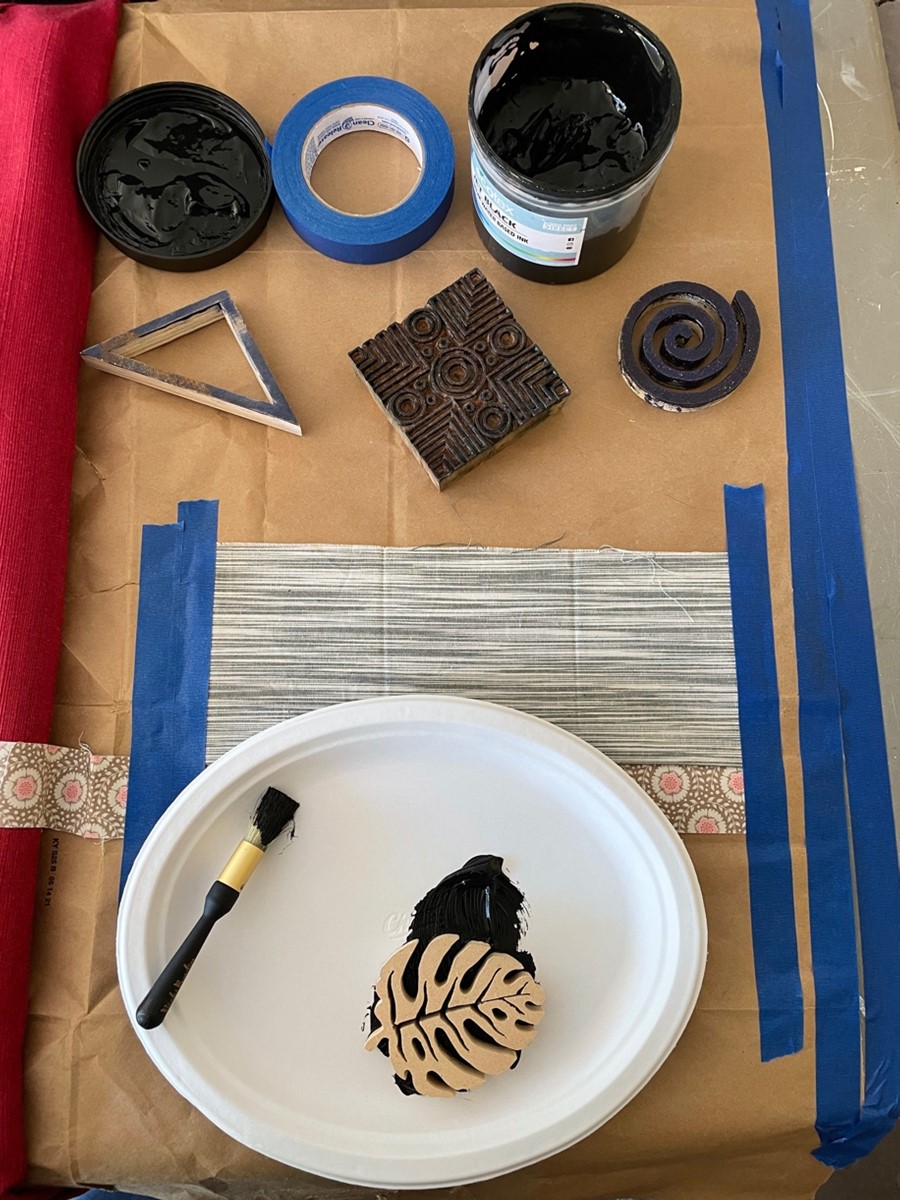
- Load a small amount of Ink into a disposable dish or dish used solely for ink. Use a variety of leaves to print if blocks are not readily available.
- TIP: Practice printing on cardstock to learn about ink and pressure, for a smooth design print. Once you are satisfied, you are ready to practice on your fat quarters.
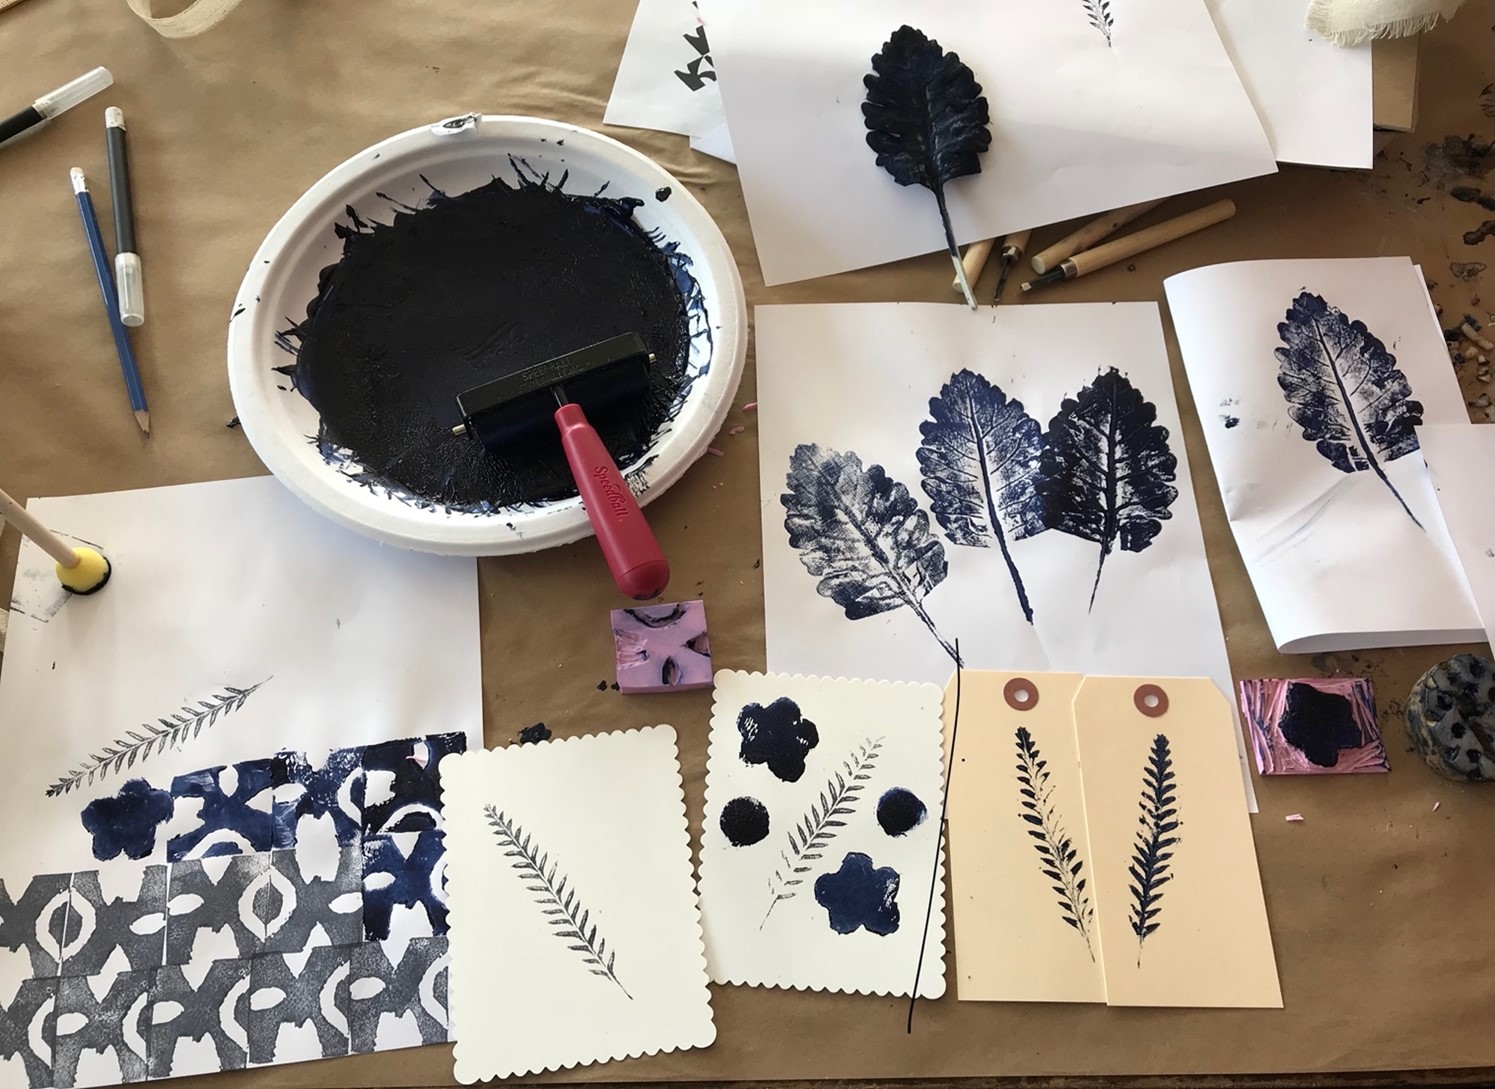
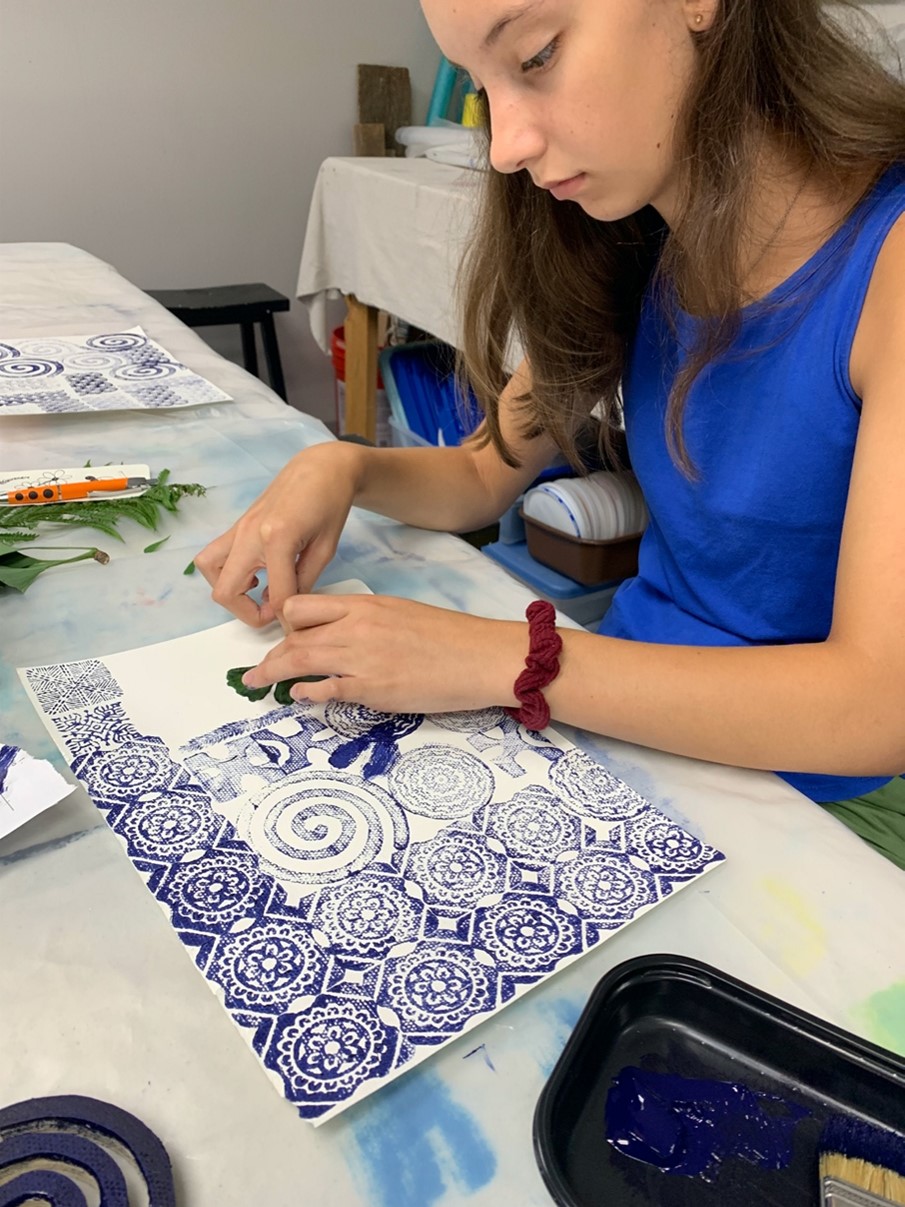
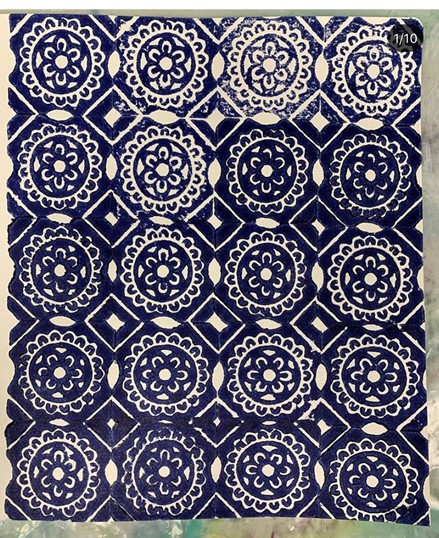
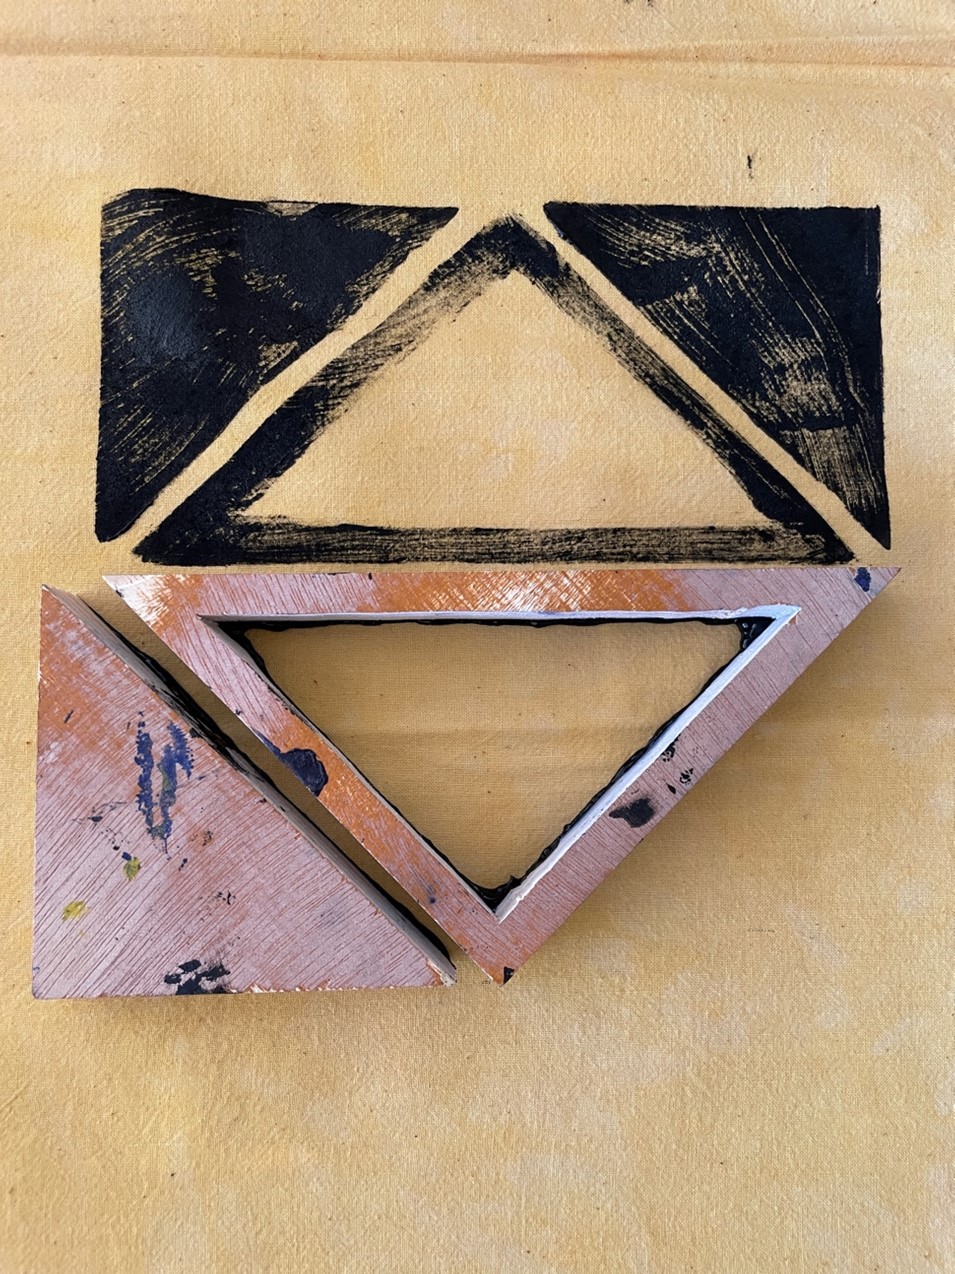
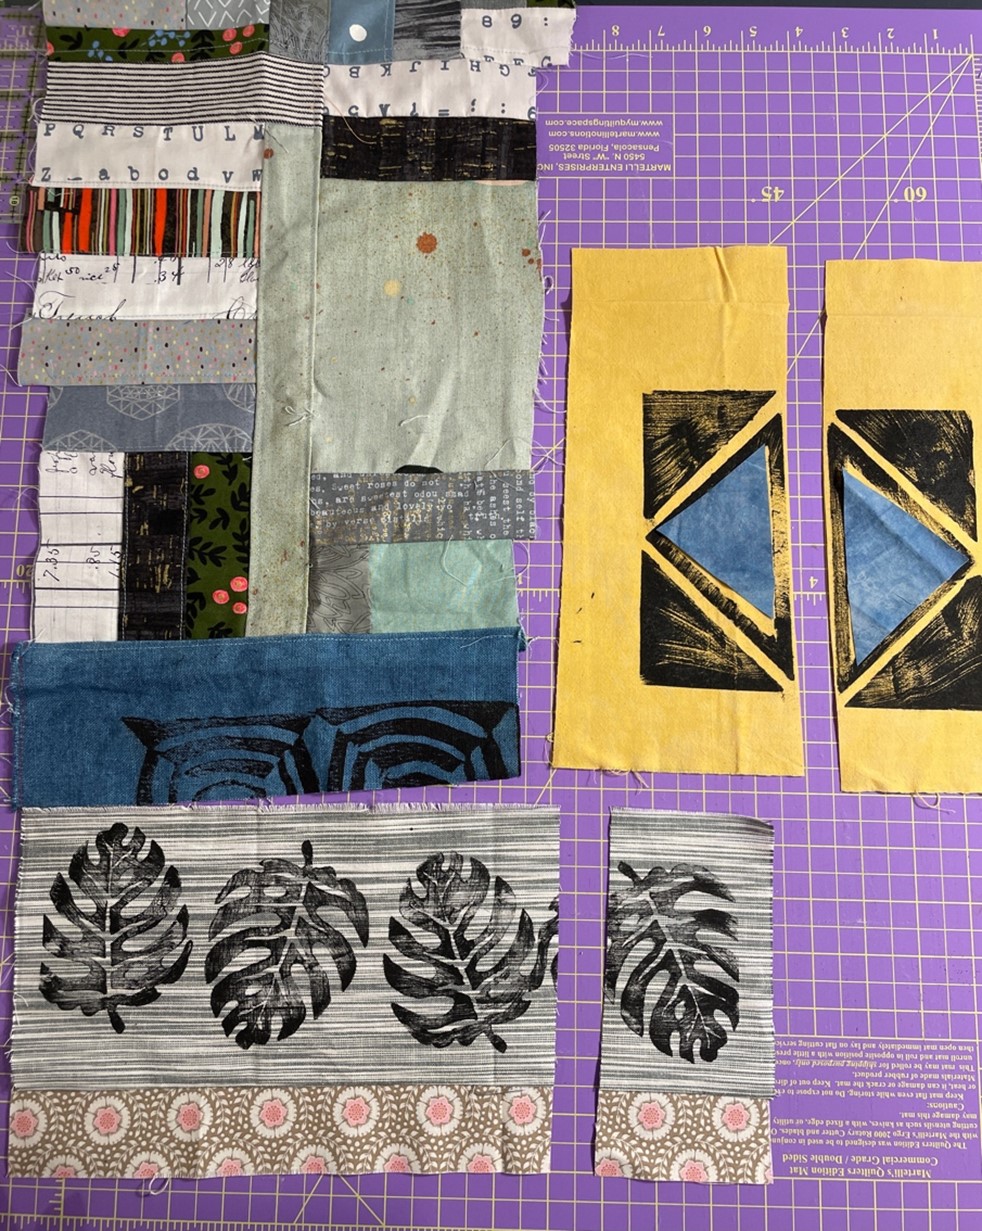
Using the foam brayer or brush, apply textile ink evenly on a wooden block.

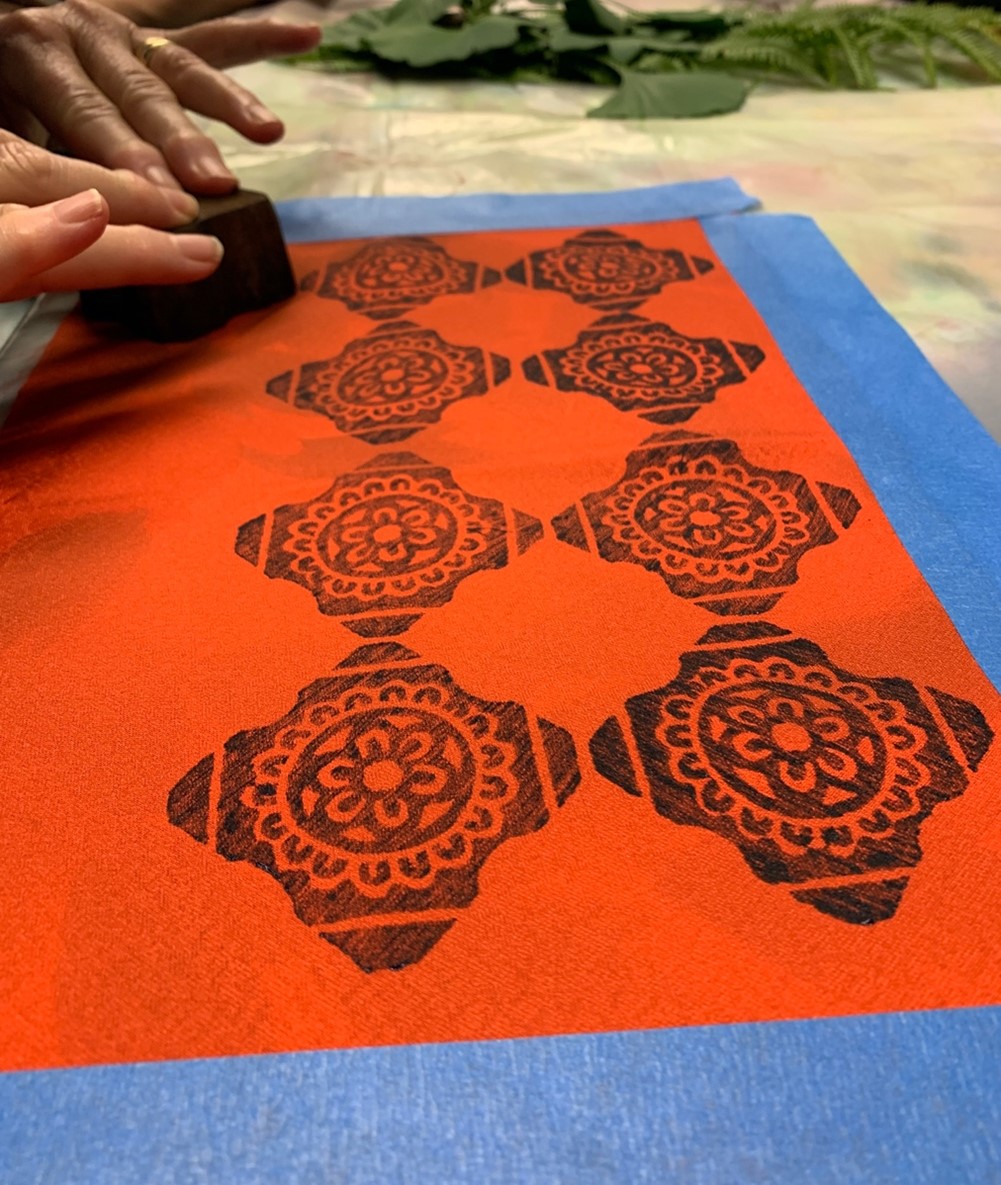
Press block firmly onto cloth to make the imprint. Twenty seconds is a good estimate. Lift straight up to minimize ink spread. Tip: Cut fat quarters into smaller sections to make it easier to print.
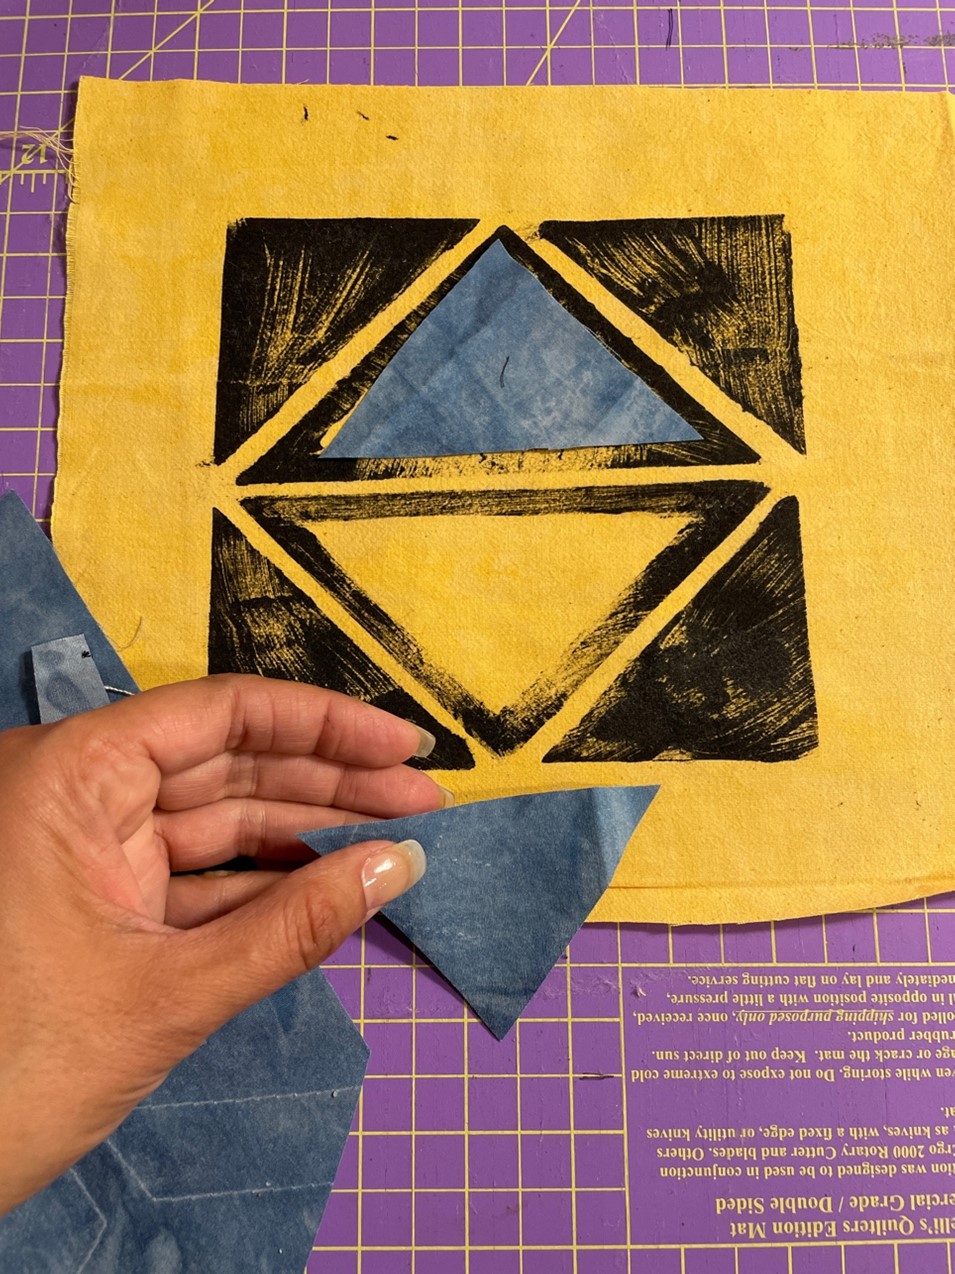
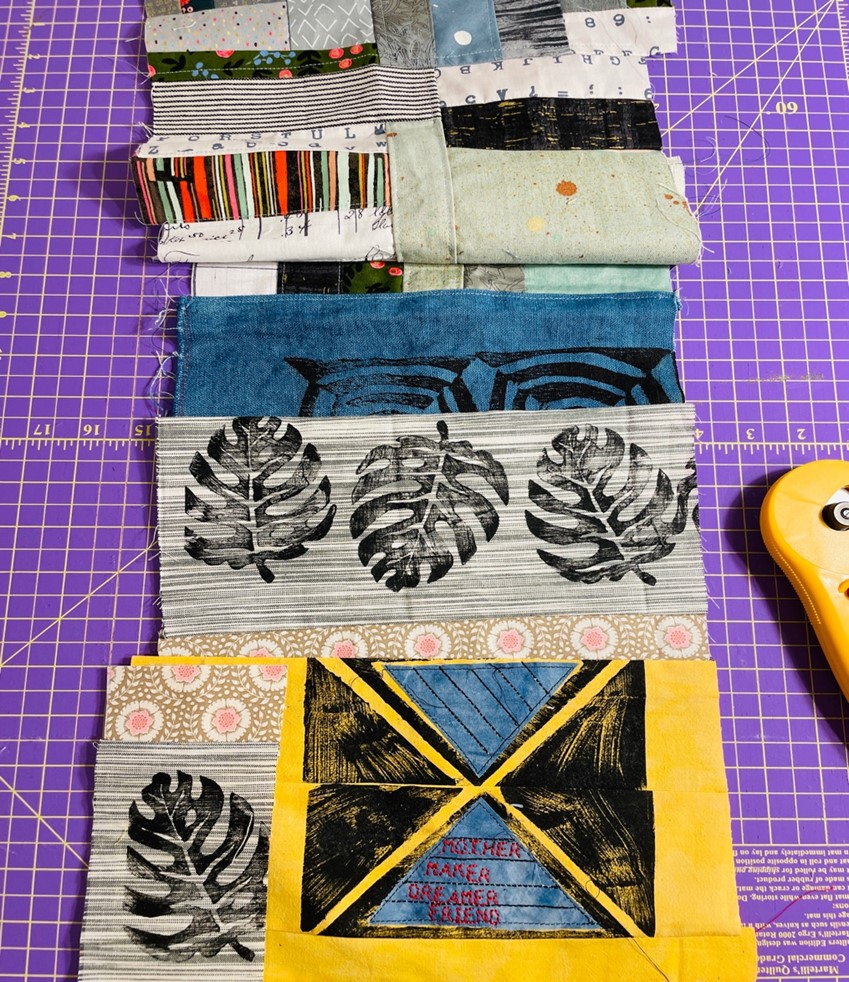
Tip: Add fabric cutouts and raw edge applique using the hp foot, to the center of the shapes (see step 7 photos below). Apply more ink to blocks for greater design depth and less transparency. You will have to reapply ink every time you wish to print.
Mix it up by using different block combinations, fabric prints, and/or textile ink colors.
Use the reinforcement stitch under Utility, to create more texture while stitching rows or adding raw edge applique.
I cut the printed, yellow block in ½, flipped and sewed it back together for a different look.
You can follow the same format to create whole quilts or panels for garment making. For my complete scarf tutorial please visit Janome at https://www.janome.com/siteassets/inspire/projects/garment/boro-inspired-scarf/boro-insired-scarf-from-maday-delgato.pdf
I love the look of upcycled materials or patchwork, that offer surprising combinations and liven up Midwestern winters. Adding block printing to projects, using the ink color you most like, gives you the flexibility to customize everything in our homes and even what we wear. It can also help us create a bridge where younger generations embrace machine sewing that includes playful techniques while honoring traditions.
Below I share a few projects that include block-printed segments.
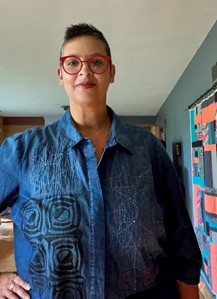
I block printed on this store-purchased shirt with Ecotex Jet Black Water-based ink.
The tote below was machine pieced using my Janome M7 Continental. The pattern is the Fika Tote by Noodlehead. I loved including the block printed panel (below), as part of the tote’s exterior pockets.

I hope you make this technique your own and always have fun sewing.
Happy Autumn!
Maday
www.sustainabletextiledesign.com