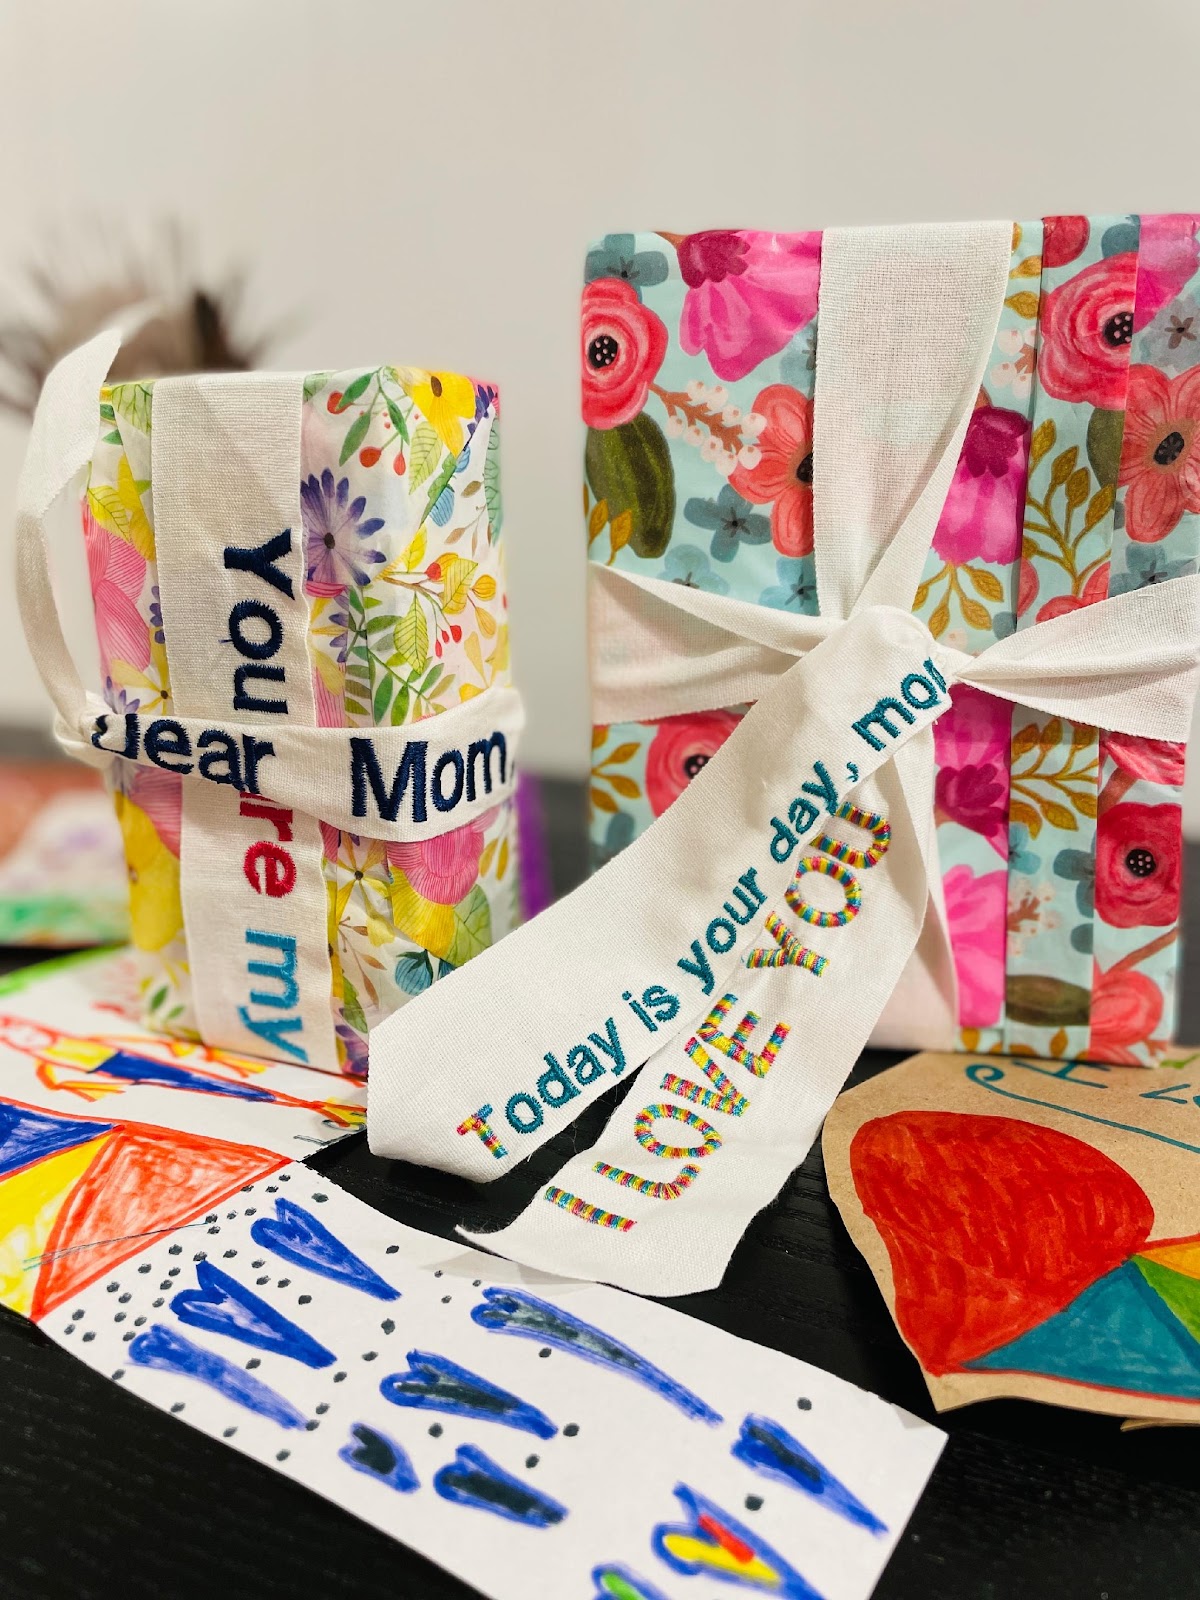
Celebrate Mom by designing and embroidering customized ribbons with your Janome embroidery machine, to compliment your gift wrapping. Let her know just how much she means to you by including a special message of your choice.
Janome Artisan Maday from Sustainable Textile Design has the perfect solution to add that special touch to all of your gifts for Mother’s Day and throughout the year!
Supplies:
Iris Polyester ultra brite embroidery thread – assorted colors
Bobbin thread – white
RE20 embroidery hoop
Sulky Sticky Fabri-Solvy stabilizer (water-soluble)
Tear-away stabilizer (to float under the length of the hoop)
Cotton ribbon 1.5” wide (your choice of color and desired length)
Organ needle size 12 or 14
Water-soluble marking pen (optional)
Janome curved embroidery scissors
Machine Used
Janome Skyline 9
Wrapping Paper
Assorted Florals
Don’t forget mom’s presents!
Celebrating moms and all mother figures around the world this month is always inspiring to me.
I look forward to the love and unique experiences this holiday brings to my family. There are always opportunities to spoil the mother figures in our lives and we never take for granted the chance to show them just how much we care about them.
While I pondered what project to create for this submission, I knew that I wanted it to be customizable for any occasion, quick, and most importantly, meaningful!
The ribbon that I used for this project was repurposed from another package I received in the mail. It was too good not to reuse it.
Let’s get started!
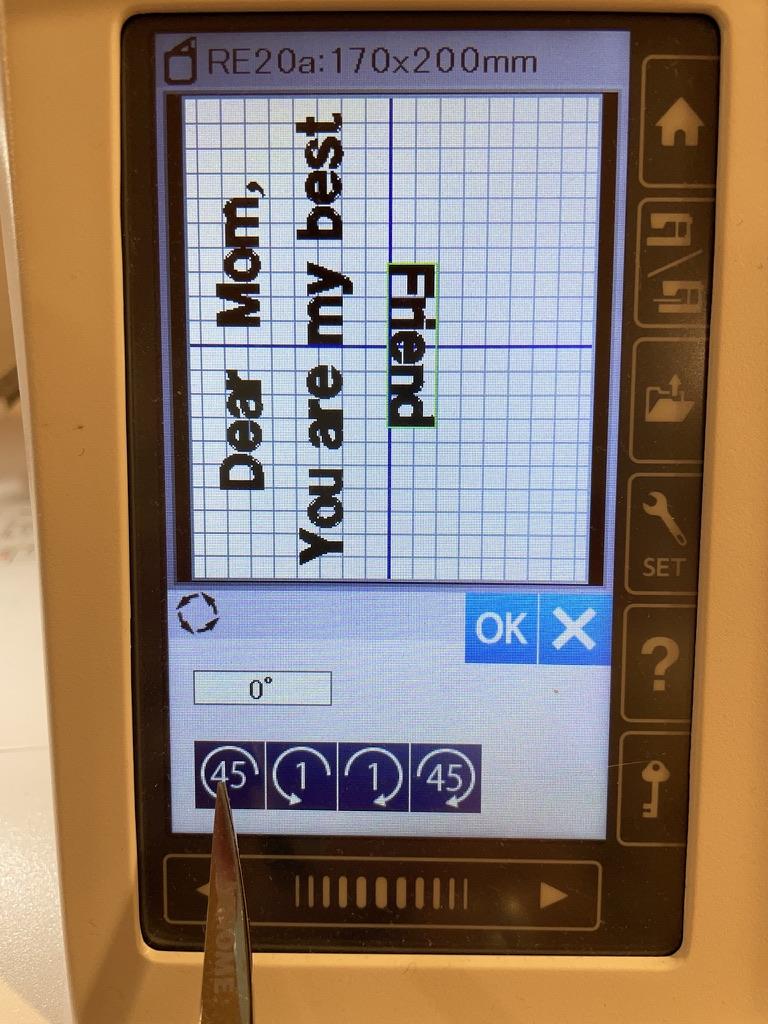
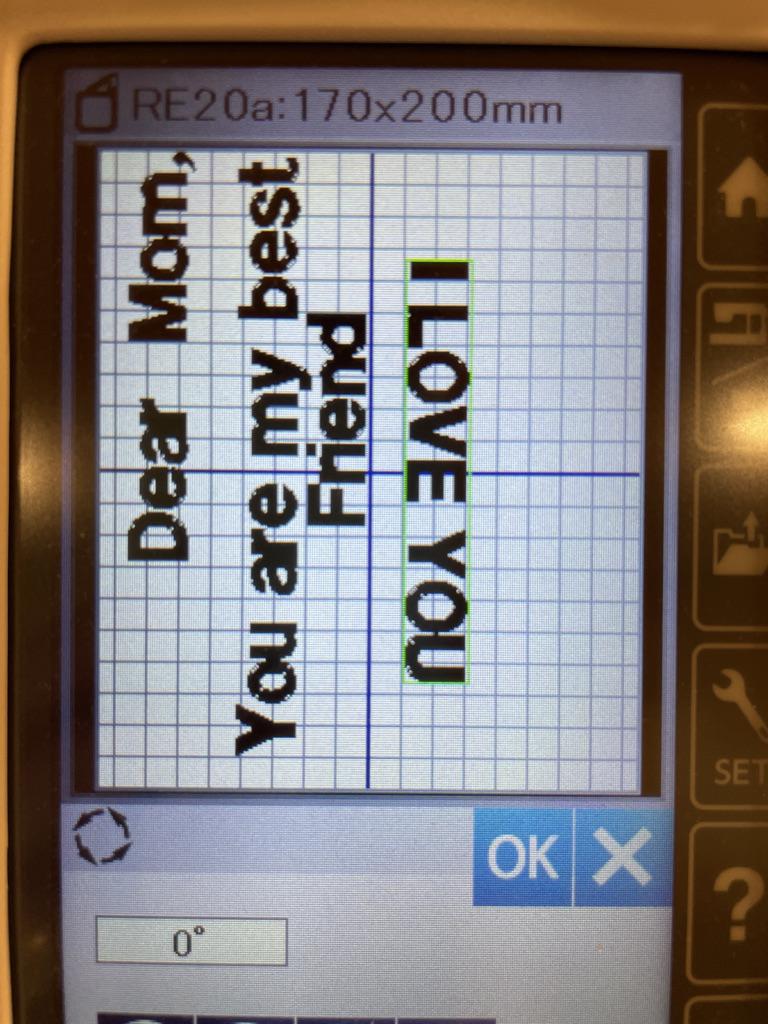
HINT: Practice wrapping the gift so that you have an idea of how the text will lay once embroidered. You can use water-soluble pens to mark where you want the monogramming to appear exactly when you hoop it.

-
Choose the text box that appears vertically (AB highlighted below) so that it runs the length of the ribbon. For letter-size, I chose Small and Medium and most of the time, lower case letters. If something does not look correct, you can use the “trash can” icon under “OK” to delete and start over.


Once you are satisfied with the placement, you are ready to embroider!
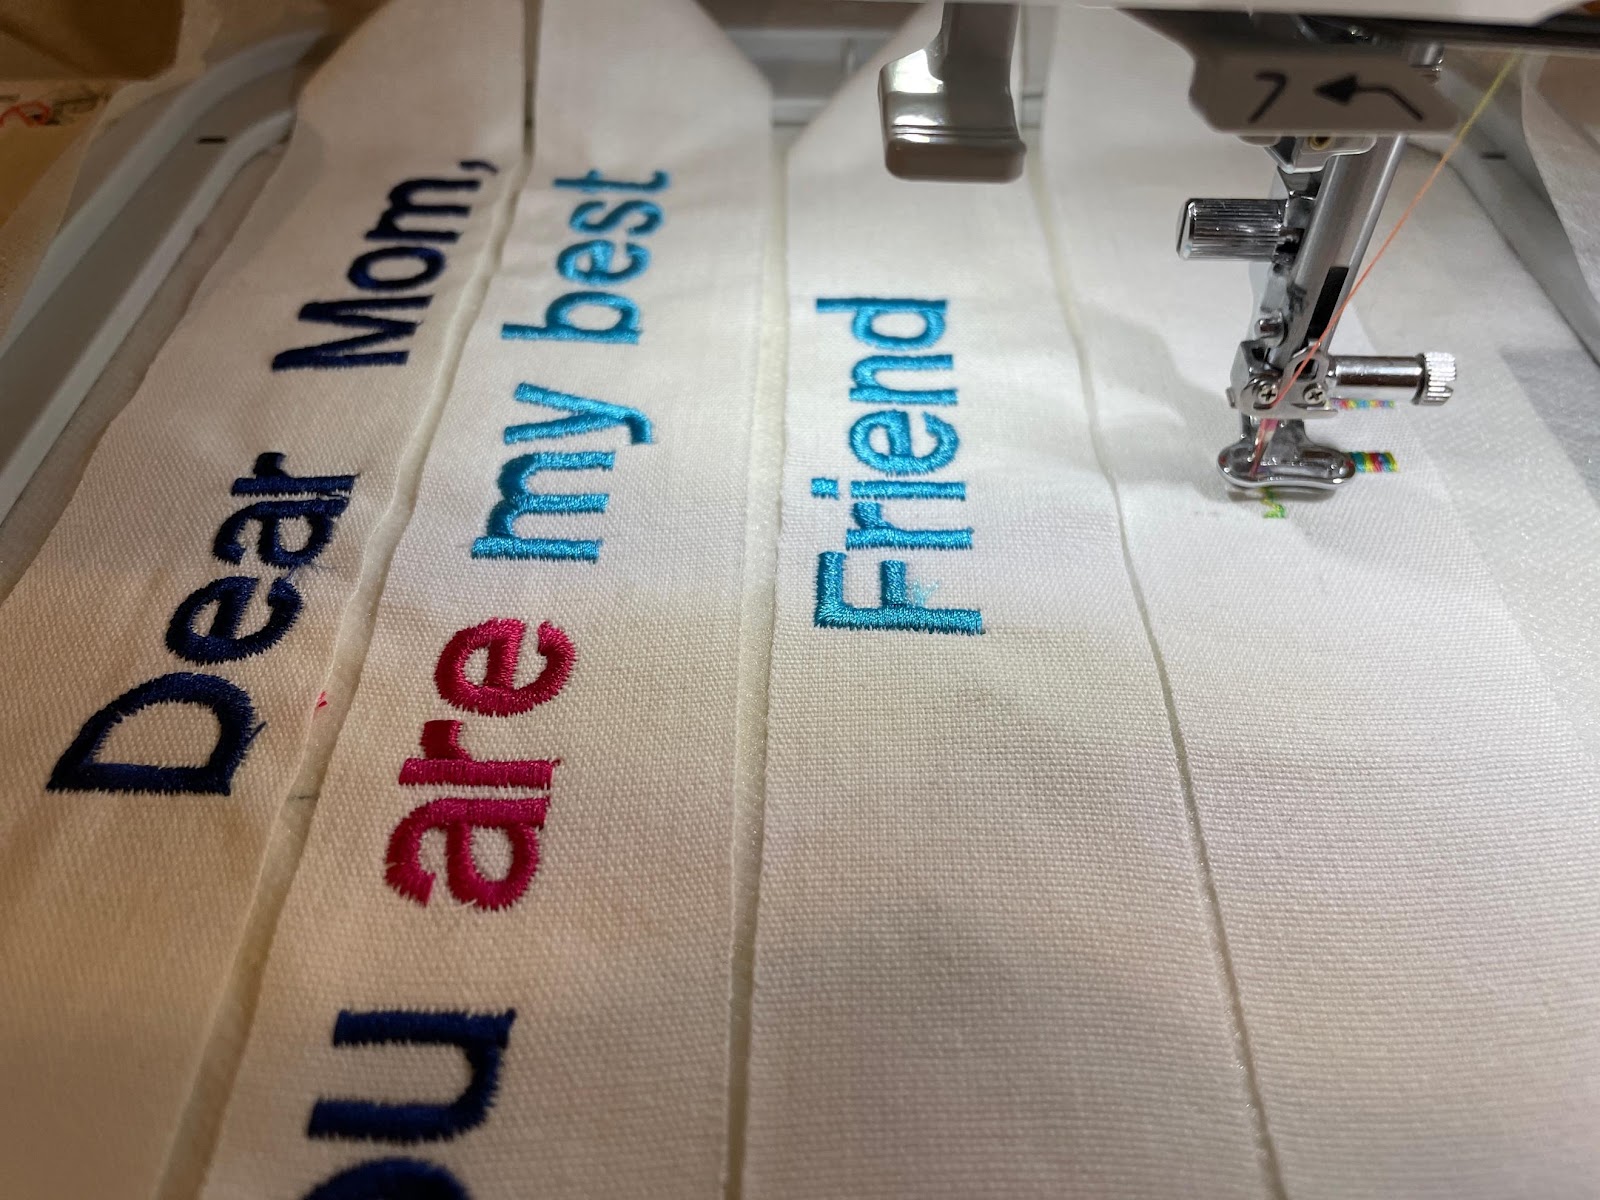
HINT: Keep in mind that the ribbon will wrap around the objects, so moving the text to appear differently on the ribbon (i.e-top, middle, lower part), helps to see it more clearly. The same applies to the size of the font and thread color used (please see photo below).


Helpful Hints:
Use your hoop grid template to assist you in aligning the text of your choice within the width of the ribbon.
Untread your machine needle and hit the “start” button (when you are ready to start) to ensure that the text will appear in the desired spot before you start embroidering, that way you don’t have to remove stitches if it does not align correctly and ribbon or thread won’t be wasted.
Always “float” a piece of tear-away under the fabri-solvy stabilizer when embroidering on ribbon or delicate fabrics to prevent puckering. Start with a new needle.
Measure the boxes you will use to ensure that you have enough ribbon and that your text will appear where it will be readable.
Now comes the fun part! Gift wrapping Mom’s gifts!

I hope this quick project inspires you to use and experiment with embroidering on ribbons to create customizable gift-wrapping accessories that are sure to delight makers and recipients alike. Testing on a small piece of ribbon will inform how best to stabilize the ribbon before making yards of it. Have fun and happy gift-giving for all occasions!
Maday.
www.sustainabletextiledesign.com