Projects

Grab & Go Chic Wristlet with Cork Fabric

Created By:

Maday

Skill Level: Intermediate

The perfect size wristlet with an angled zipper will make the statement of the year! Keep your essentials nearby as you run errands, go for a walk or attend a party! Make one to match a special celebration and coordinate with your favorite outfit. It is fast and fun. Add machine embroidery for an extra spark. Think of it as your new perfect travel companion. Sewing this fun project with the Janome HD9 was a dream come true!

Janome Supplies Required


Polyester thread 50wt

embroidery thread (optional)

organ needle 16 (for cork), 14 (embroidery, optional)

sewing/knitting small gauge

Sewing/Crafting double sided tape ¼” wide

Ruler

Point and press turning tool

Rotary cutter

Cutting mat

7” Brass Metal zipper

Chalk pencil

Cork for sewing (Sally Tomato) 9”x18” rectangle

Machines

Janome HD9 with original foot and Janome 550E with SQ14 hoop (optional)

Instructions
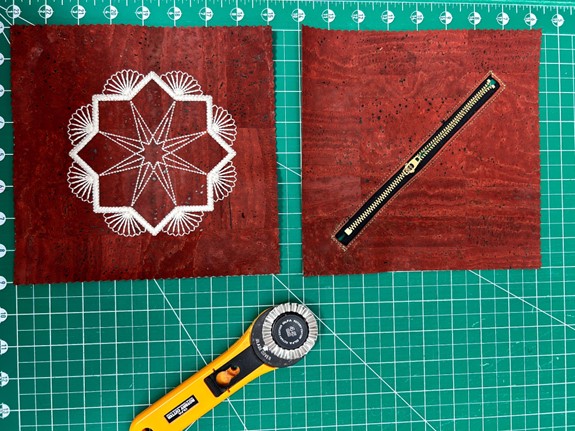
  1. Cut cork into (2) 9”x9” squares
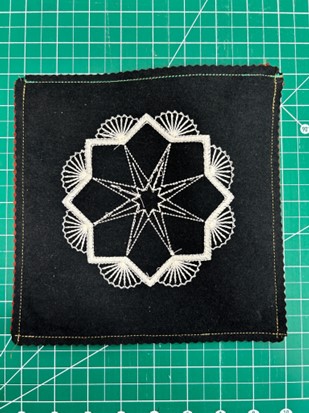
  2. Hoop (1) 9”x9” square using SQ14 hoop for the Janome 550E, The design called for many thread color changes; I opted to embroider using the same color throughout. Hint: hooping cork can be challenging. Loosen the hoop screw to ensure that it doesn't stress the plastic and tighten slowly but firmly.


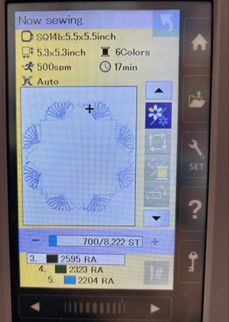
3 Cork is very stable. It doesn’t require additional stabilizer.


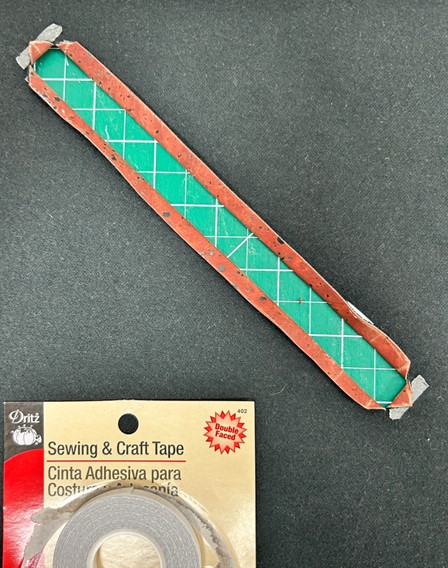
4. Select the remaining cork square and using a chalk pencil, draw a rectangle, diagonally, on the right side of the cork, .5”x7 ¾.” This will be used for placing and sewing the 7” zipper. Draw another line down the center which will be the cutting line later. Chalk is a great marking tool on cork. Please see the photos below.


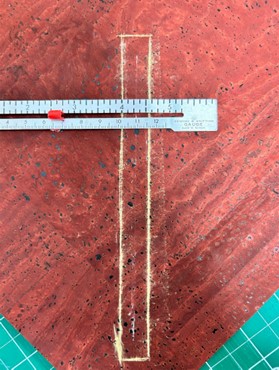
Note: I used the 7” zipper in its entirety and didn’t create a zipper tab.


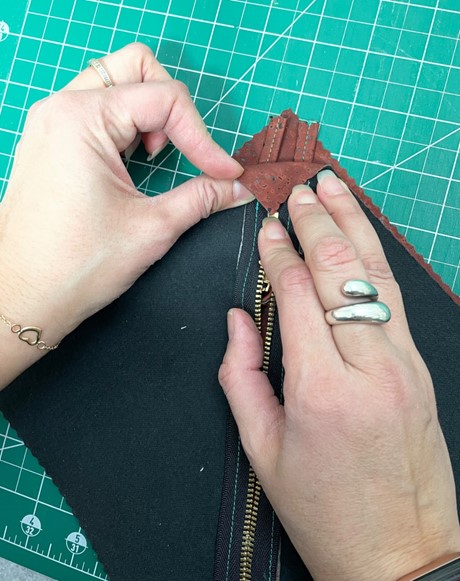
5. Measure ¼” from the short side of the rectangle and mark. Draw lines diagonally as shown below, from the center. The small triangle that it forms, will be folded to the wrong side later.

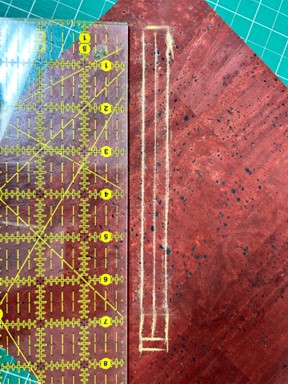
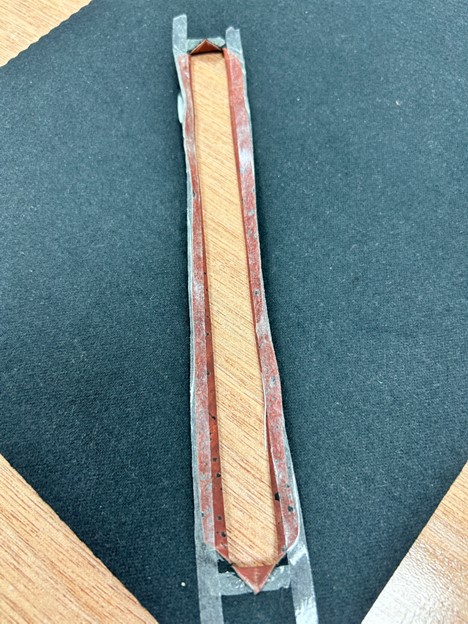
6. Carefully, cut down the center line and the short sides of the small triangle just drawn, only.

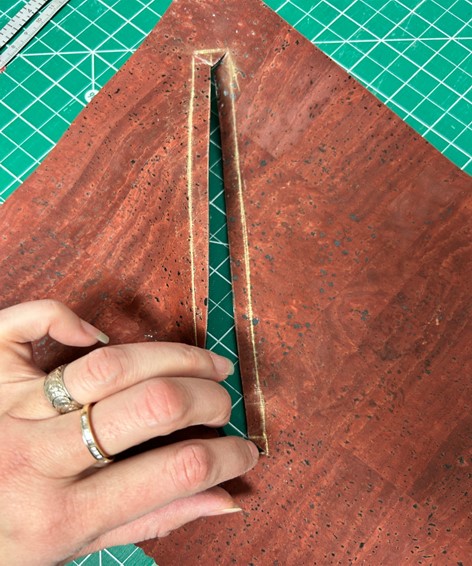
 7. Fold cork to the wrong side following the chalk lines. Apply ¼” double sided tape to hold it in place. Finger press well as this is temporary. 


8. Apply ¼” double sided tape again, to the top of the folded cork (wrong side). Doing this holds the zipper in place before stitching it down. Cork can’t be easily pinned.


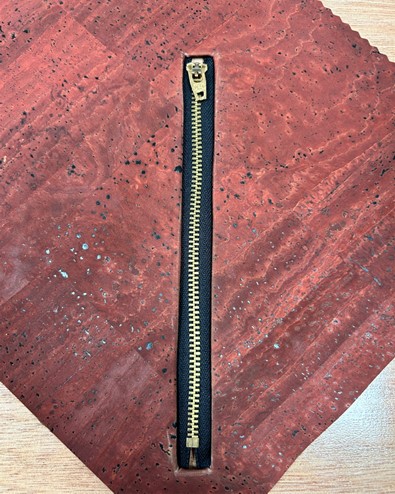
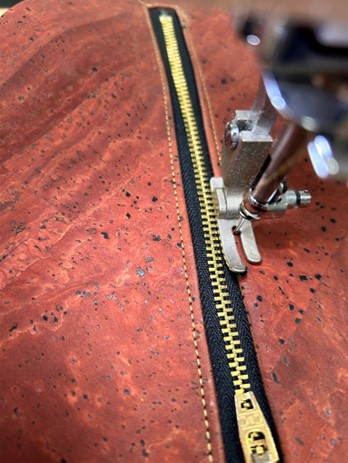
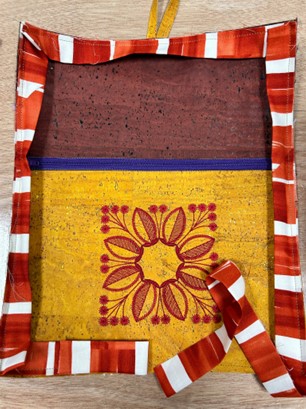
9. Place the zipper right side down on the wrong side of the cork. It should look like this from the right side. Center zipper on the rectangle so that it’s evenly distributed. Once you are satisfied with the placement, stitch all around it.


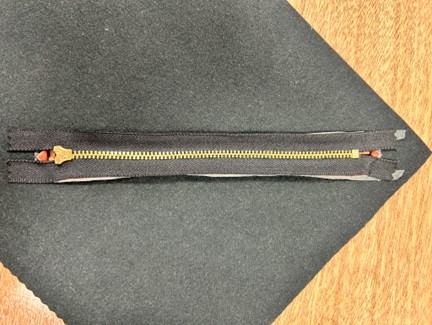
Below you can see the same step from the wrong side of the cork before stitching the zipper. The tape holds it in place long enough to keep it from shifting.

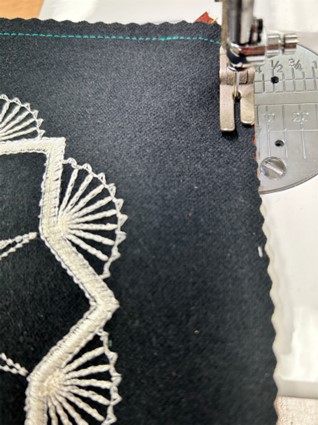
10. Topstitch as close as you can to the edge to secure the zipper to the cork.

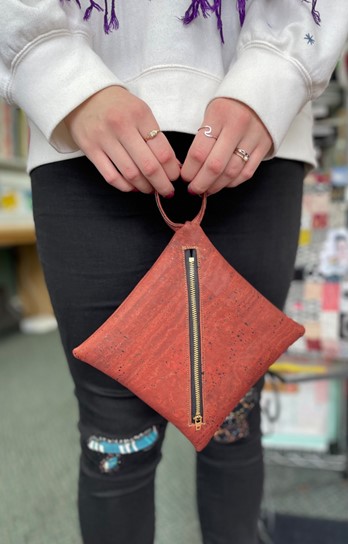
11. Trim both cork pieces to 8”x8” squares. Save cork remnants to create wrist handle and/or zipper pulls.


12.  If you are adding a wrist loop/handle, now is your chance. Fold (1) of the 1”x8” rectangles we trimmed above, in half, wrong sides together and fold again to hide the raw edges. Top stitch to get about ¼” cork strip (handle). Sandwich cork strip to form a loop, between the two squares, right sides together, as shown below.

13. Most of the handle will be inside the square sandwich. Carefully topstitch using the edge of the foot as your guide. I placed the loop on a corner.

Note:  Zipper must be opened to turn the pouch right side out.


14. Turn the pouch right side out, pushing the corners out carefully using a point and press tool with rounded ends.


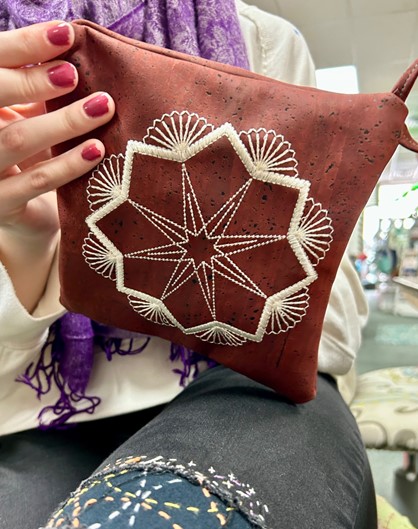
15.  I loved working with cork for this project. It is versatile, doesn’t unravel and the back of the embroidery looks just as beautiful as the front. Another bonus is that there is no stabilizer to tear or peel. Pair it with vinyl to create other types of pouches and even envelopes to store your patterns, quilt blocks and more. My daughter fell in love with this project and let’s just say, I no longer own it!


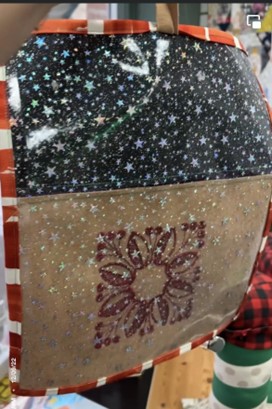
If you are ready to try sewing cork and vinyl together, here is another project idea (see below). Use a decorative vinyl for visibility and wonder clips instead of pins to hold materials together. Be patient and more importantly, have fun and experiment!


     Thank you so much for viewing this tutorial. It is an honor to be part of this Janome 

     family.

     I would like to wish you a Happy and Prosperous New Year!


Maday

www.sustainabletextiledesign.com

IG - sustainabletextiledesign

Everyone is Talking about Grab & Go Chic Wristlet with Cork Fabric
Reviews


Tako
Beautiful
Wednesday, November 23, 2016

cpindzola
Around the Table Dresden Placemats
Saturday, December 17, 2016

I like the concept, but the directions are "sloppy." Nowhere in the supply list does it mention the felt or the batting (how much?). Also, I would never use a high loft batting in a placemat, or a table runner, as I think that it would be too unstable for a glass. The next time I make these, I will cut out the batting (I use flannel) and spray baste it to the wrong side of the Dresden plate before I put the Dresden plate on the felt to cut out. I have not yet washed the finished placemat, and am hoping that the single layer of felt does not curl up, or become distorted after washing/drying.
Txmaid
Fun Great Gift!
Tuesday, February 21, 2017

MargieARK
Teatime Quilted Tablecloth
Friday, February 24, 2017

I made this today but your cutting directions need to be changed. You only need 4 of color 1 and color 3 4.5 squares for the triangles. Also the inner border, you only need 2 cuts as WOF is long enough to cut each in half to fit the sides.
MickelSews
Great Machine
Wednesday, August 30, 2017

I've had this machine for only a week now. I bought it used from a lady who makes her own clothes, but she no longer needed the machine. During the purchase, she noted that she is almost sad that it's better to give it away because of how well the machine performed. (I also bought it along side a computerized machine of another brand.} She demoed the machine for us, showing it worked and gave us everything (including the box it came in!) She took amazing care of this machine. I have used it a few times now, and the directions for threading were easy to follow (albeit my hands are quite large so the lower looper was a pain, but that is no fault to the machine or brand.) And I recommend this machine to anyone who wants to learn to serge and wants a machine that can grow with them. I will happily use this machine time and time again.
rvstan
S9 Review
Sunday, February 25, 2018

I love, love, love my S9! It's sews and embroiders beautifully and it's simplicity of use amazes me. I would recommend this machine for both a beginner and an experienced seamstress. If I would ask anything of Janome it would be to upgrade the programming to run a larger hoop size. I understand that it can't get much wider but there is most definitely room for it to go longer. That is the only limitation of this machine.
pjmnana
PJMNana
Monday, February 26, 2018

I purchased a Memorycraft 15000 a few years ago and it was the best purchase I ever made! This machine can do just about anything you would would ever want! I love the capability of using the Acuedit app to set up my embroidery pattern on my Ipad and then download it to the machine! I love how my embroidery looks upon completion and I love all the good lighting it has to light up your workspace. That way you don’t need to worry about where to set up your machine. It also has plenty of room to do machine embroidery on any size quilts! There are many decorative stitches from which to choose that are outstanding! It’s hard to choose which one to use! There are so many great features it is hard to decide what I love the most. If you want to buy only one machine to last a lifetime, I would recommend this one!
KLWash
S9 Review
Sunday, February 24, 2019

The S9 is amazing. I learned to sew by hand when I was just 5 and in my grandmothers way as she was quilting. I took seeing classes in high school until they would no longer let me sign up. The S9 makes me appreciate my current skills as well as motivate me to want to learn more. This machine is awesome.
SewSueMe2002
Horizon Memory Craft 15000
Thursday, November 19, 2020

My Janome Horizon Memory Craft 15000 is fantastic! I love, love, love this machine! When I came across the Eye for and Eye embroidery design today, I wanted to make it. However, the embroidery file is missing. Nothing downloads when I select the download button. Please help!
Jillfmischo
Treat Bag fun!
Monday, August 16, 2021

I made the Halloween treat bag for my new granddaughter and I’m sure it will last for years. No embroidery machine so I appliquéd the lettering. Need a little more skirt fabric for a better gathered look, and I used thin double-bias tape for the skirt hem, over edge stitch on skirt sides. I’m pleased with my results!
elenaz
Very helpful tutorial
Wednesday, October 25, 2023

I want to say thank you for teaching me this method of applique. I was able to do it with a small letters. This method is the best so far from all of those I've seen and tried.
plonkar
So useful
Thursday, November 30, 2023

I'd like to express my gratitude for teaching me this appliqué method. I successfully applied it with small letters, and, so far, it's the most effective among all the methods I've seen and tried.

DEALERS
The TWO Closest Dealers to you are:
1900 CENTRE ST , WEST ROXBURY MA, 02132
(617)323-6200
443 MOODY STREET , WALTHAM MA, 02453
781-893-3331
Find Additional Dealers