Projects

Floral and Embroidered Fairytale Cape

Created By:

Duy Truong 

Skill Level: Intermediate

Hello!

This is Duy (@CafeDeDuy) here with anther creation to share.

Recently, I was in the Her Universe Fashion Show at San Diego Comic Con where I presented a design that featured a floral and embroidered cape that everyone loved, Now you can have your own as well! Everyone deserves a beautiful cape, and this is achievable with your Janome machines.

Janome Supplies Required

Machines:

Fabric and Notions Required
  • 6 YARDS OF FABRIC (12 IF YOU LINE IT)
  • Multiple supplies of various organza and chiffon fabrics
  • Candle
  • Hand needle
  • AB Crystals
  • Interface
Instructions


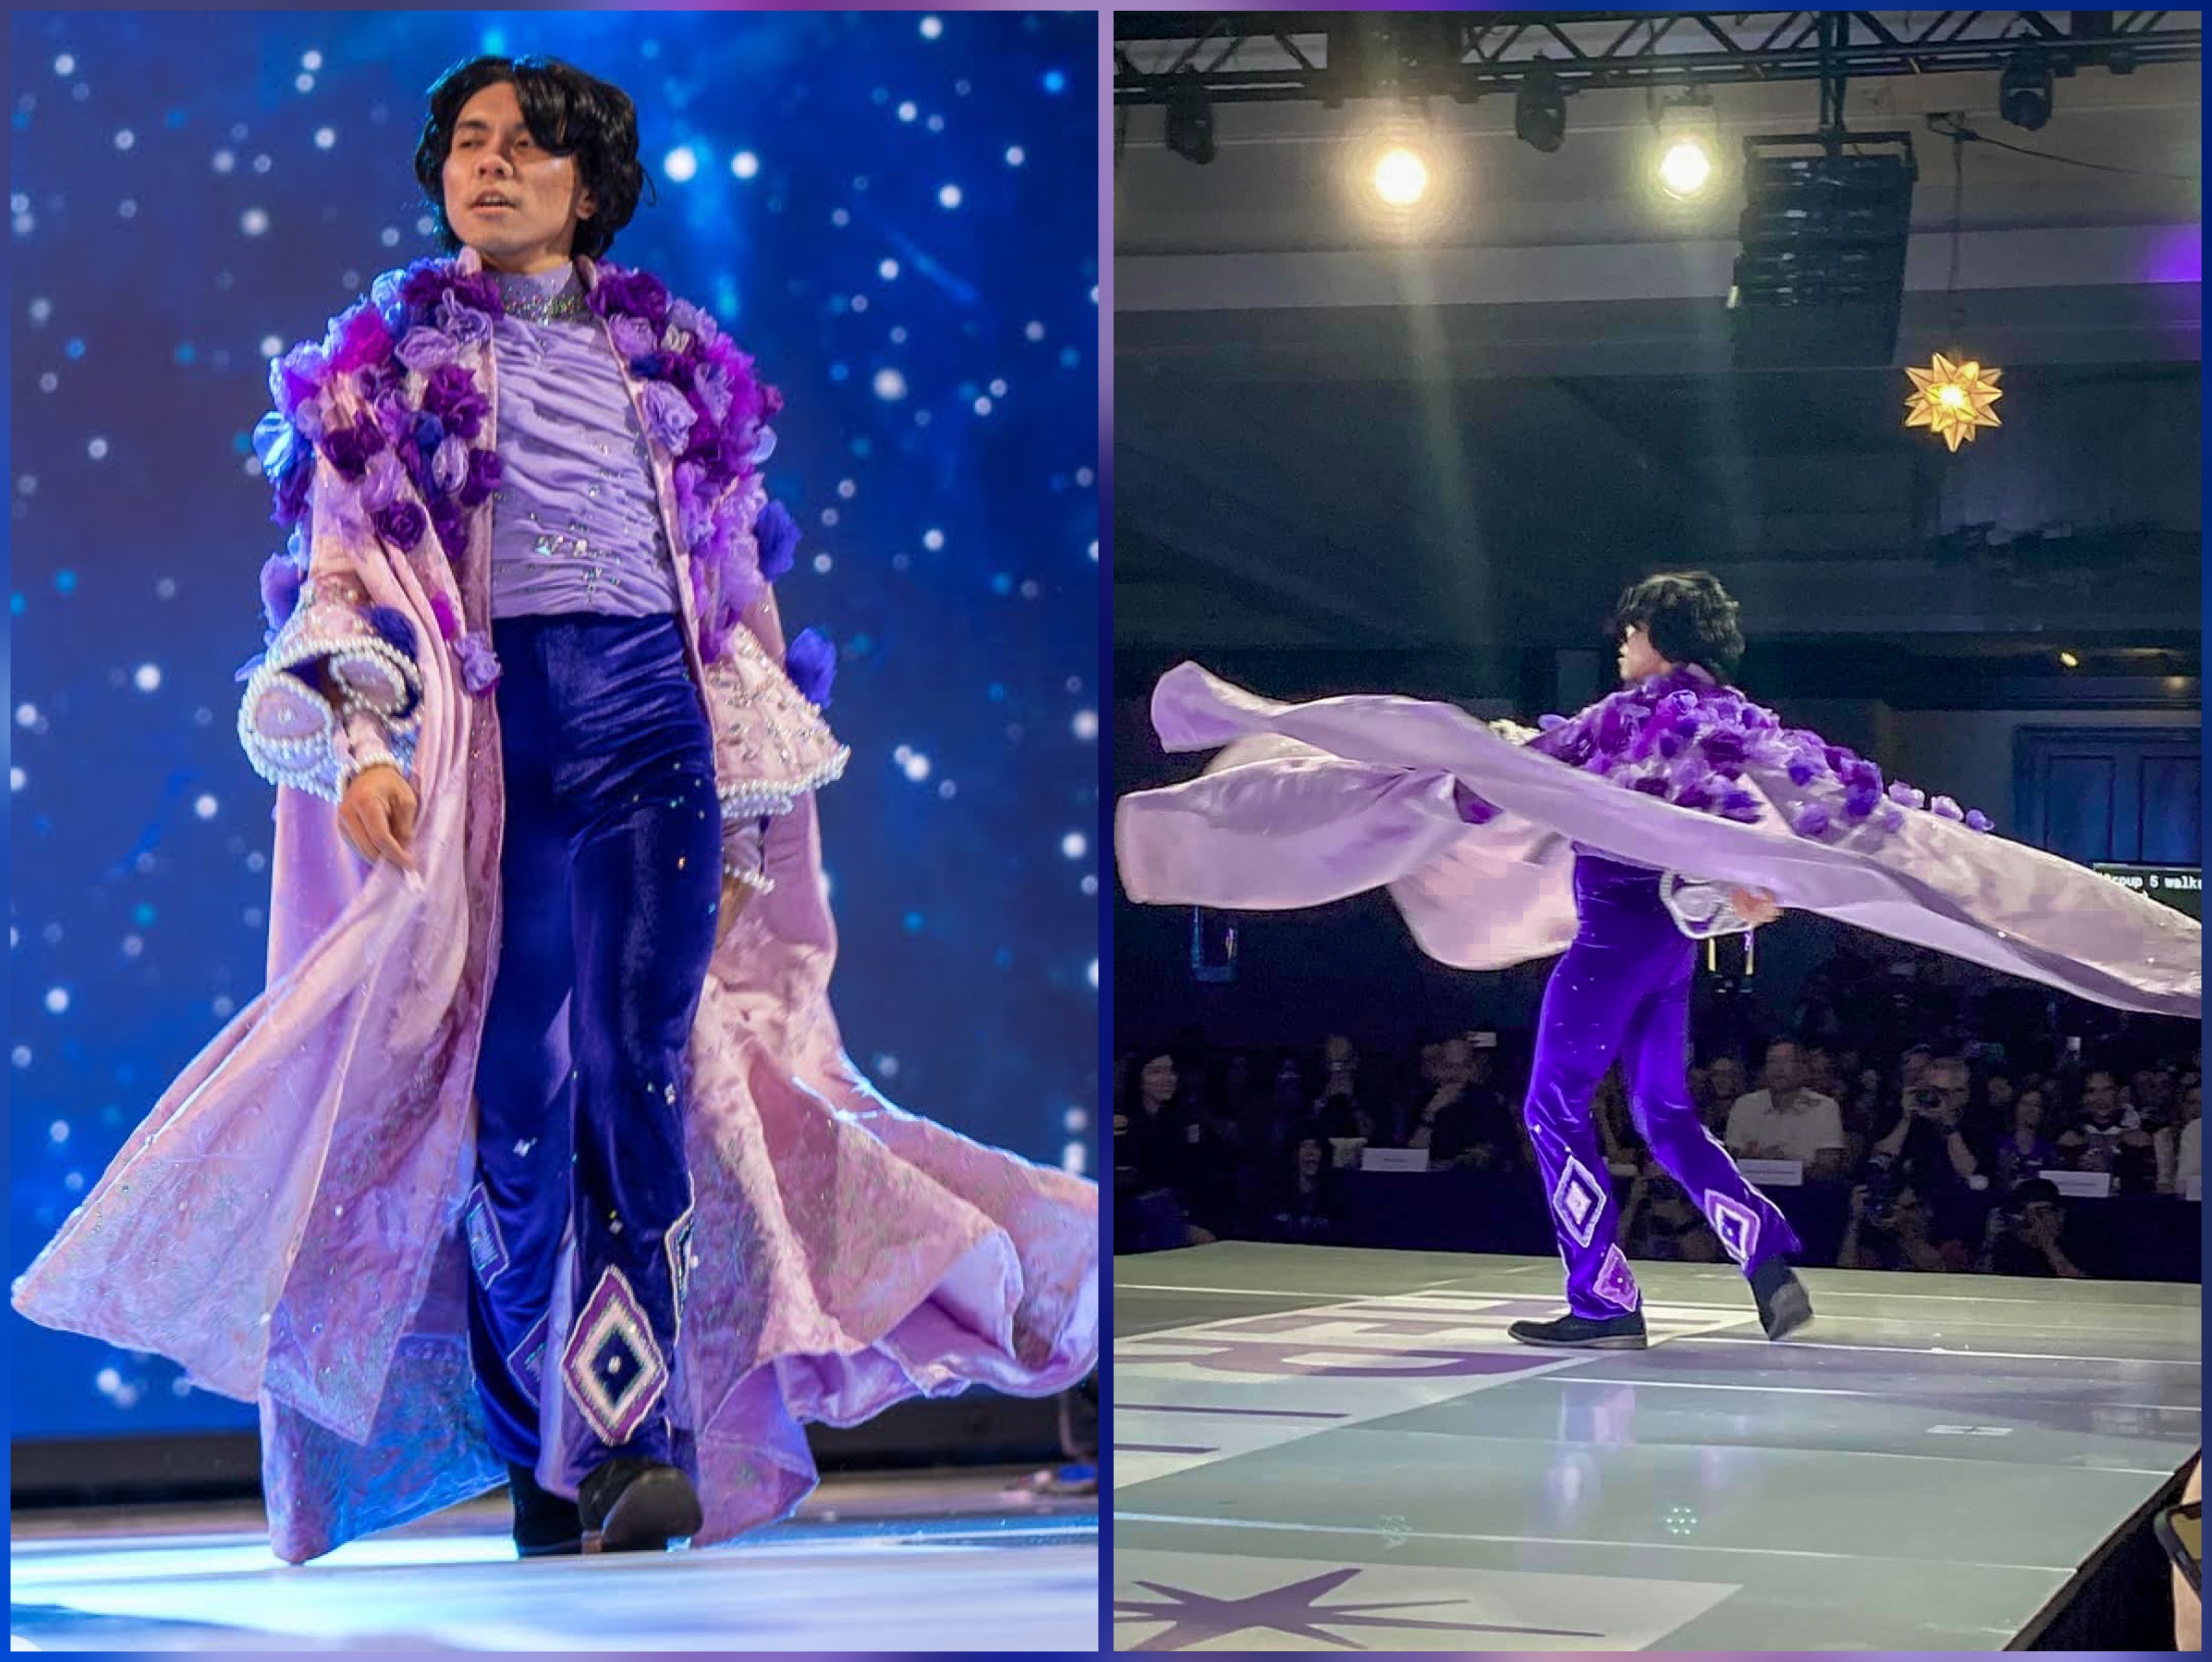
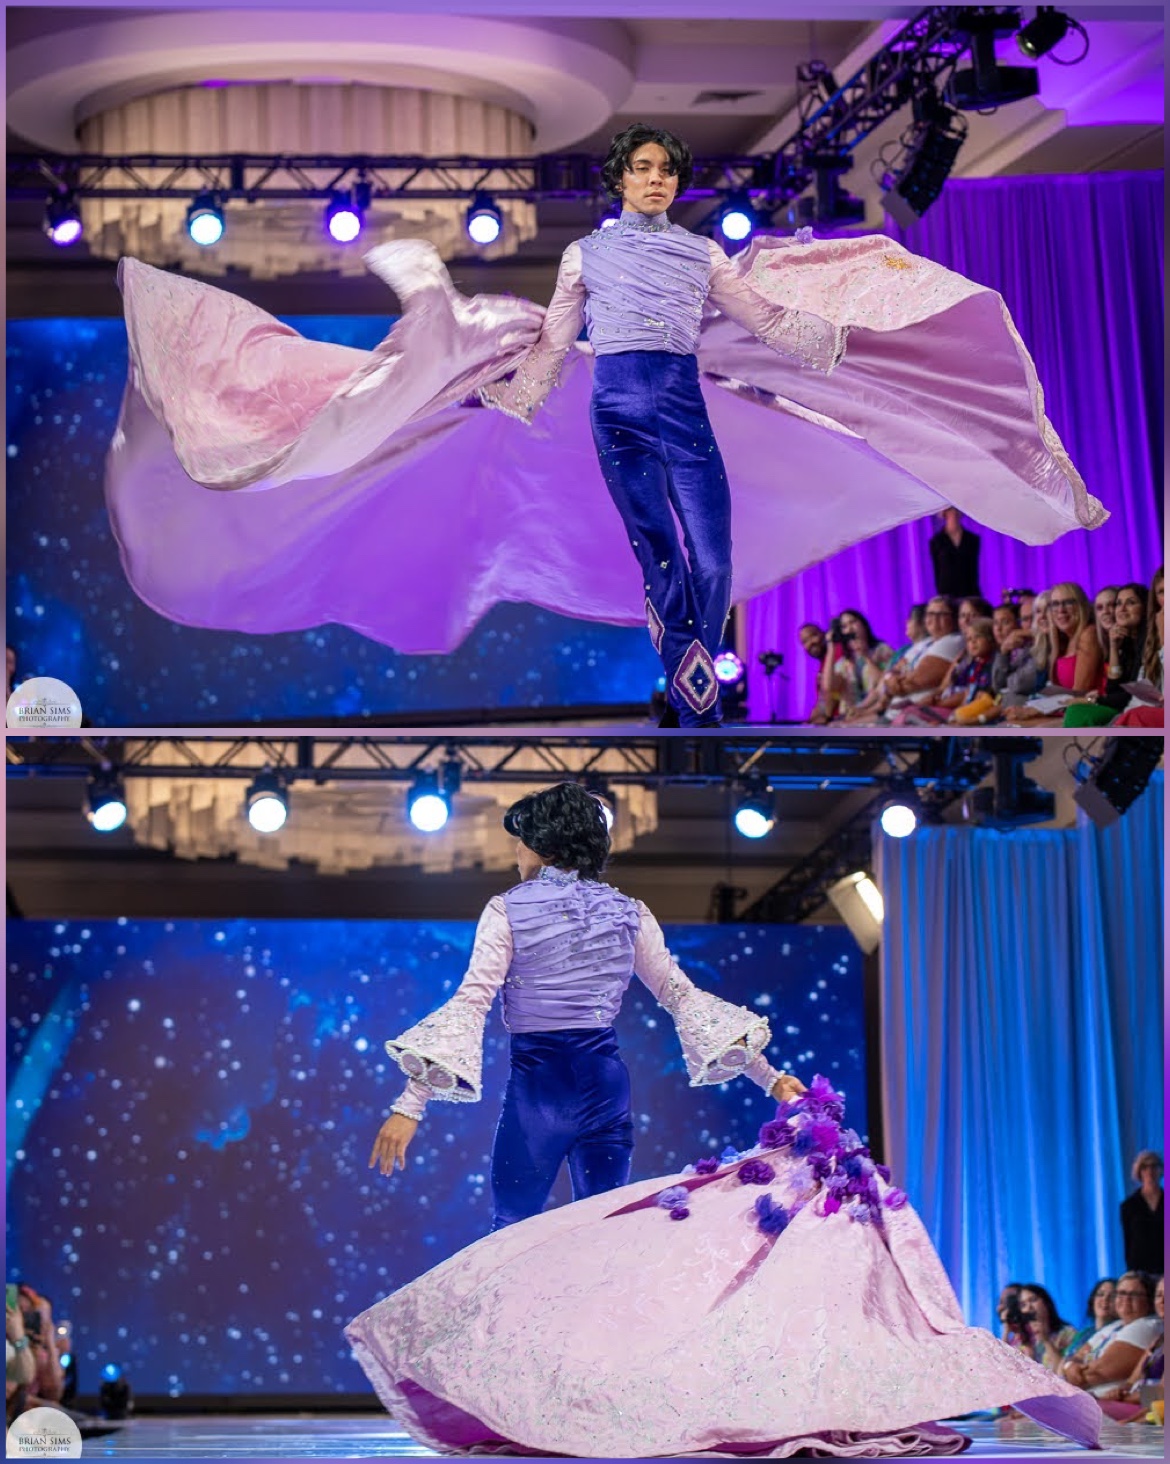
NOTE: My design is a lavender cape with purple tones and silver embroidery, but adjust as you need.


FIRST STEPS - EMBROIDERY


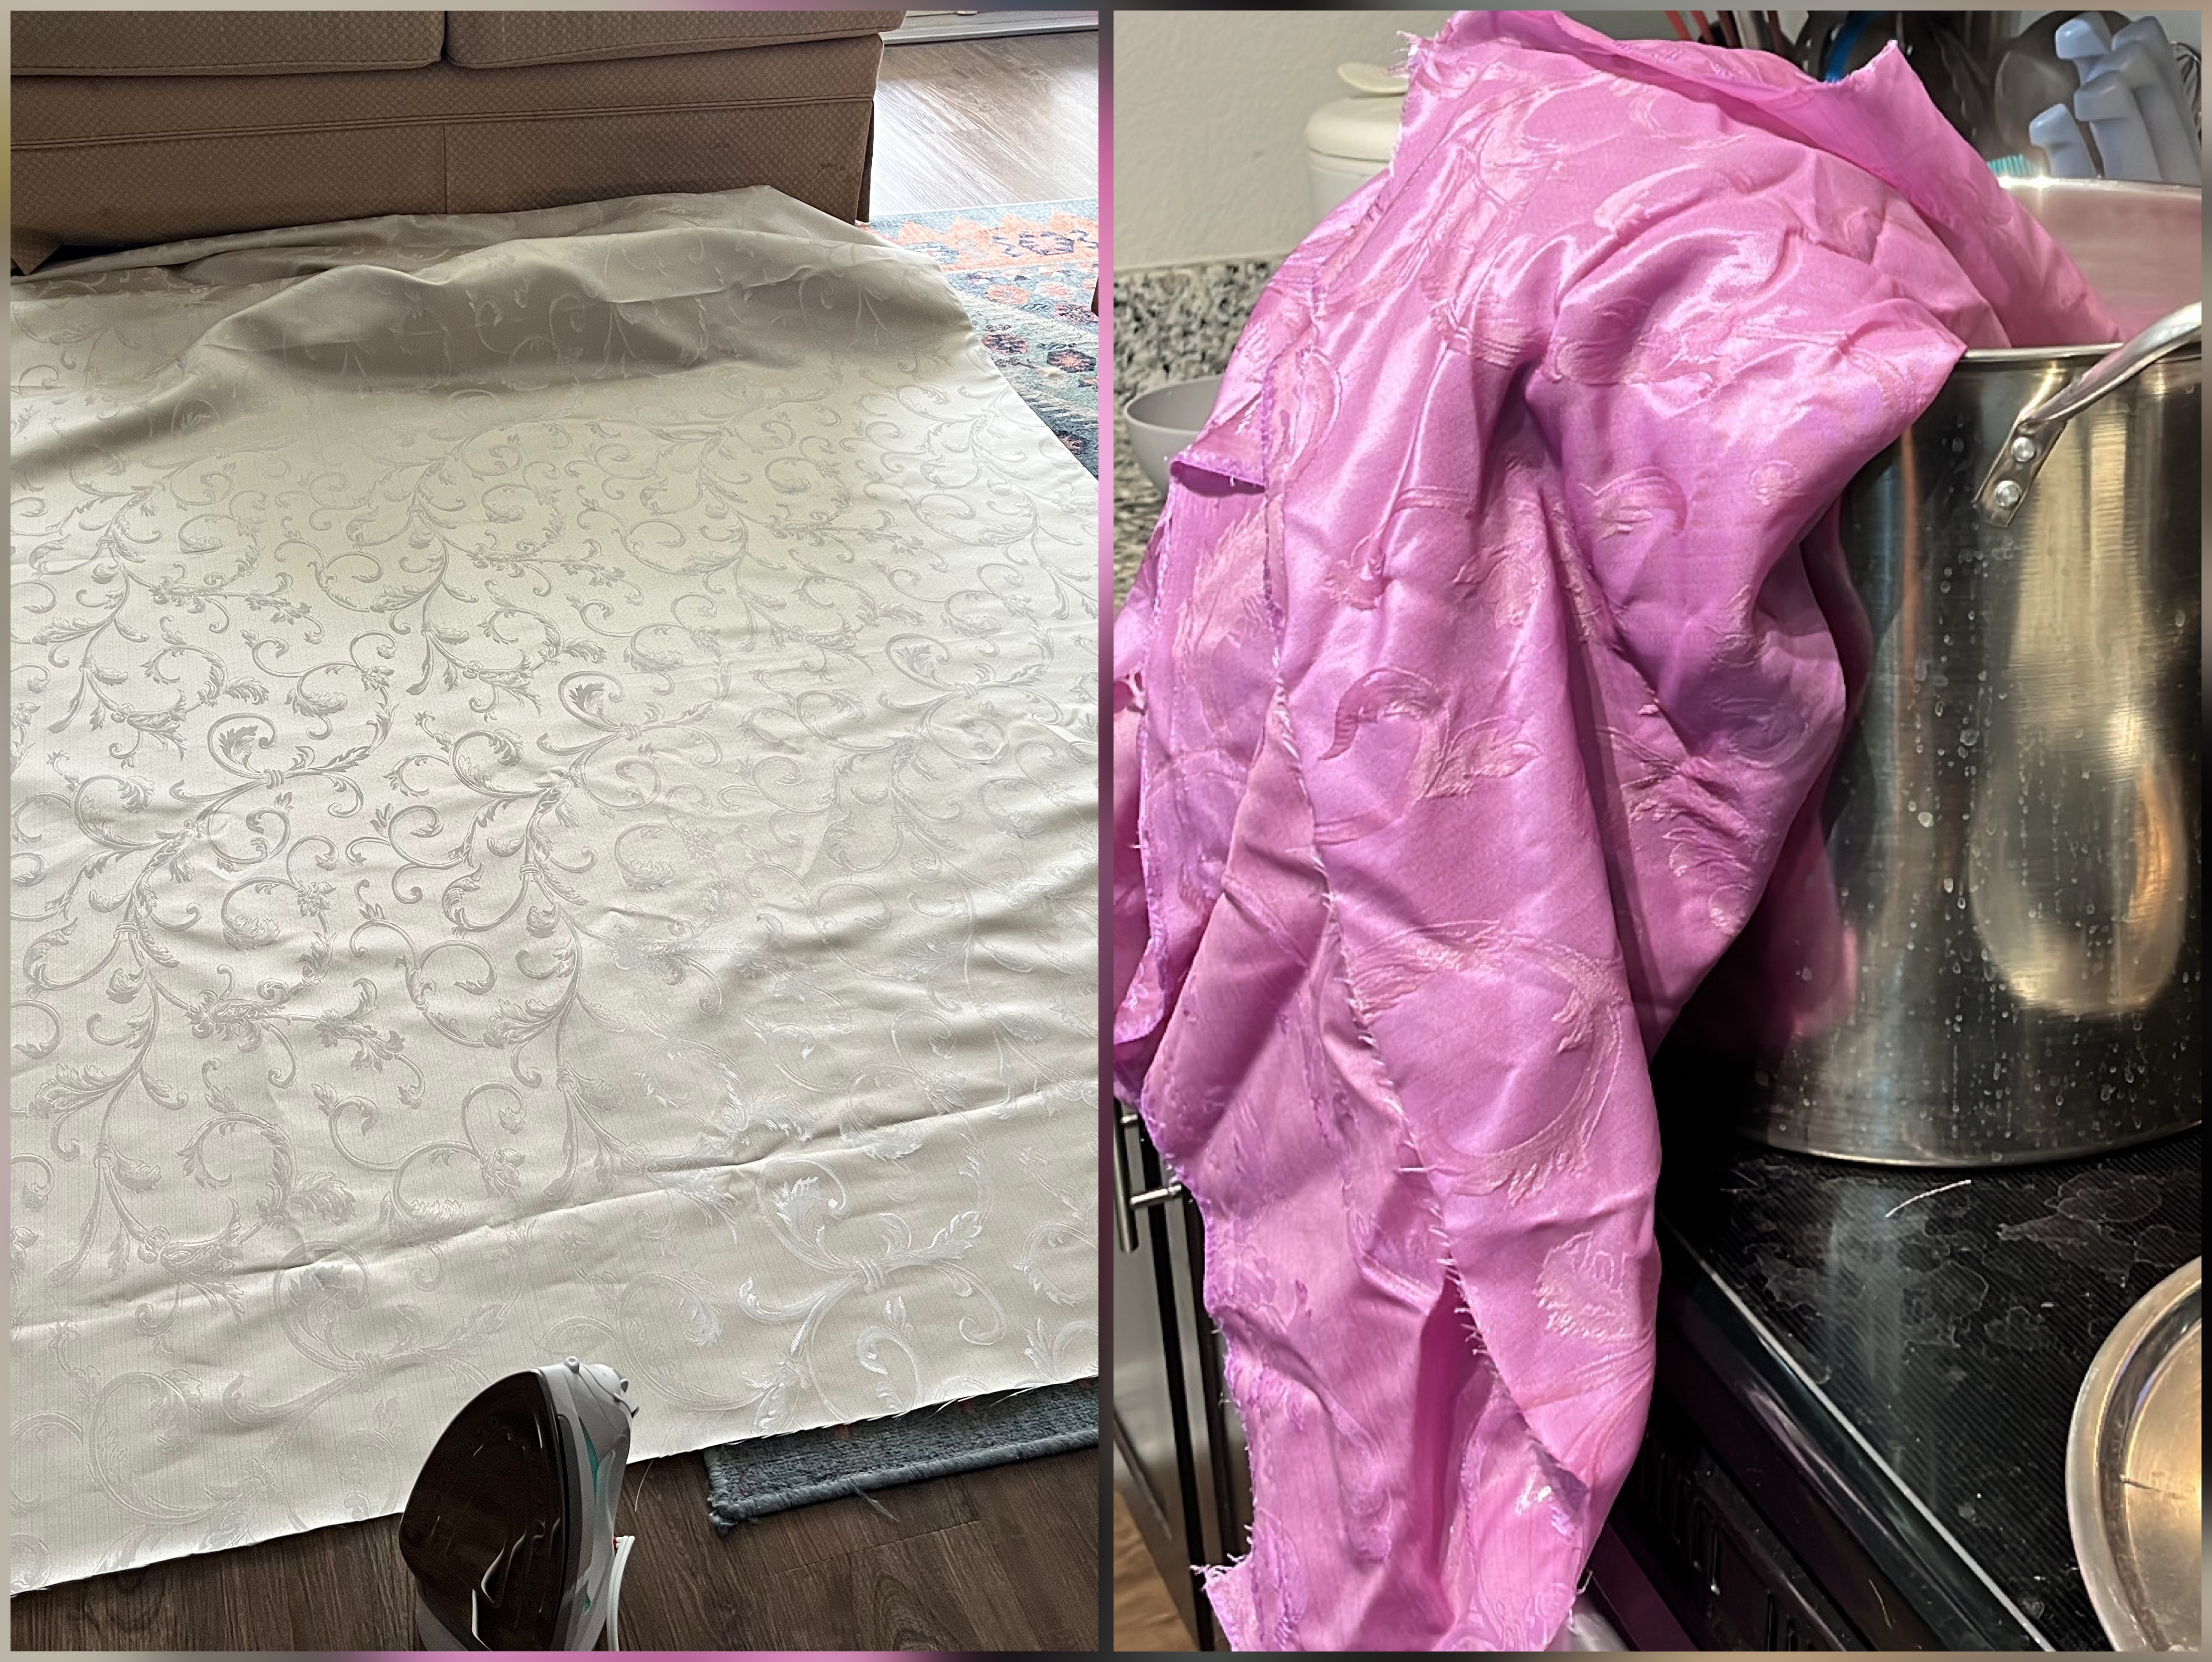
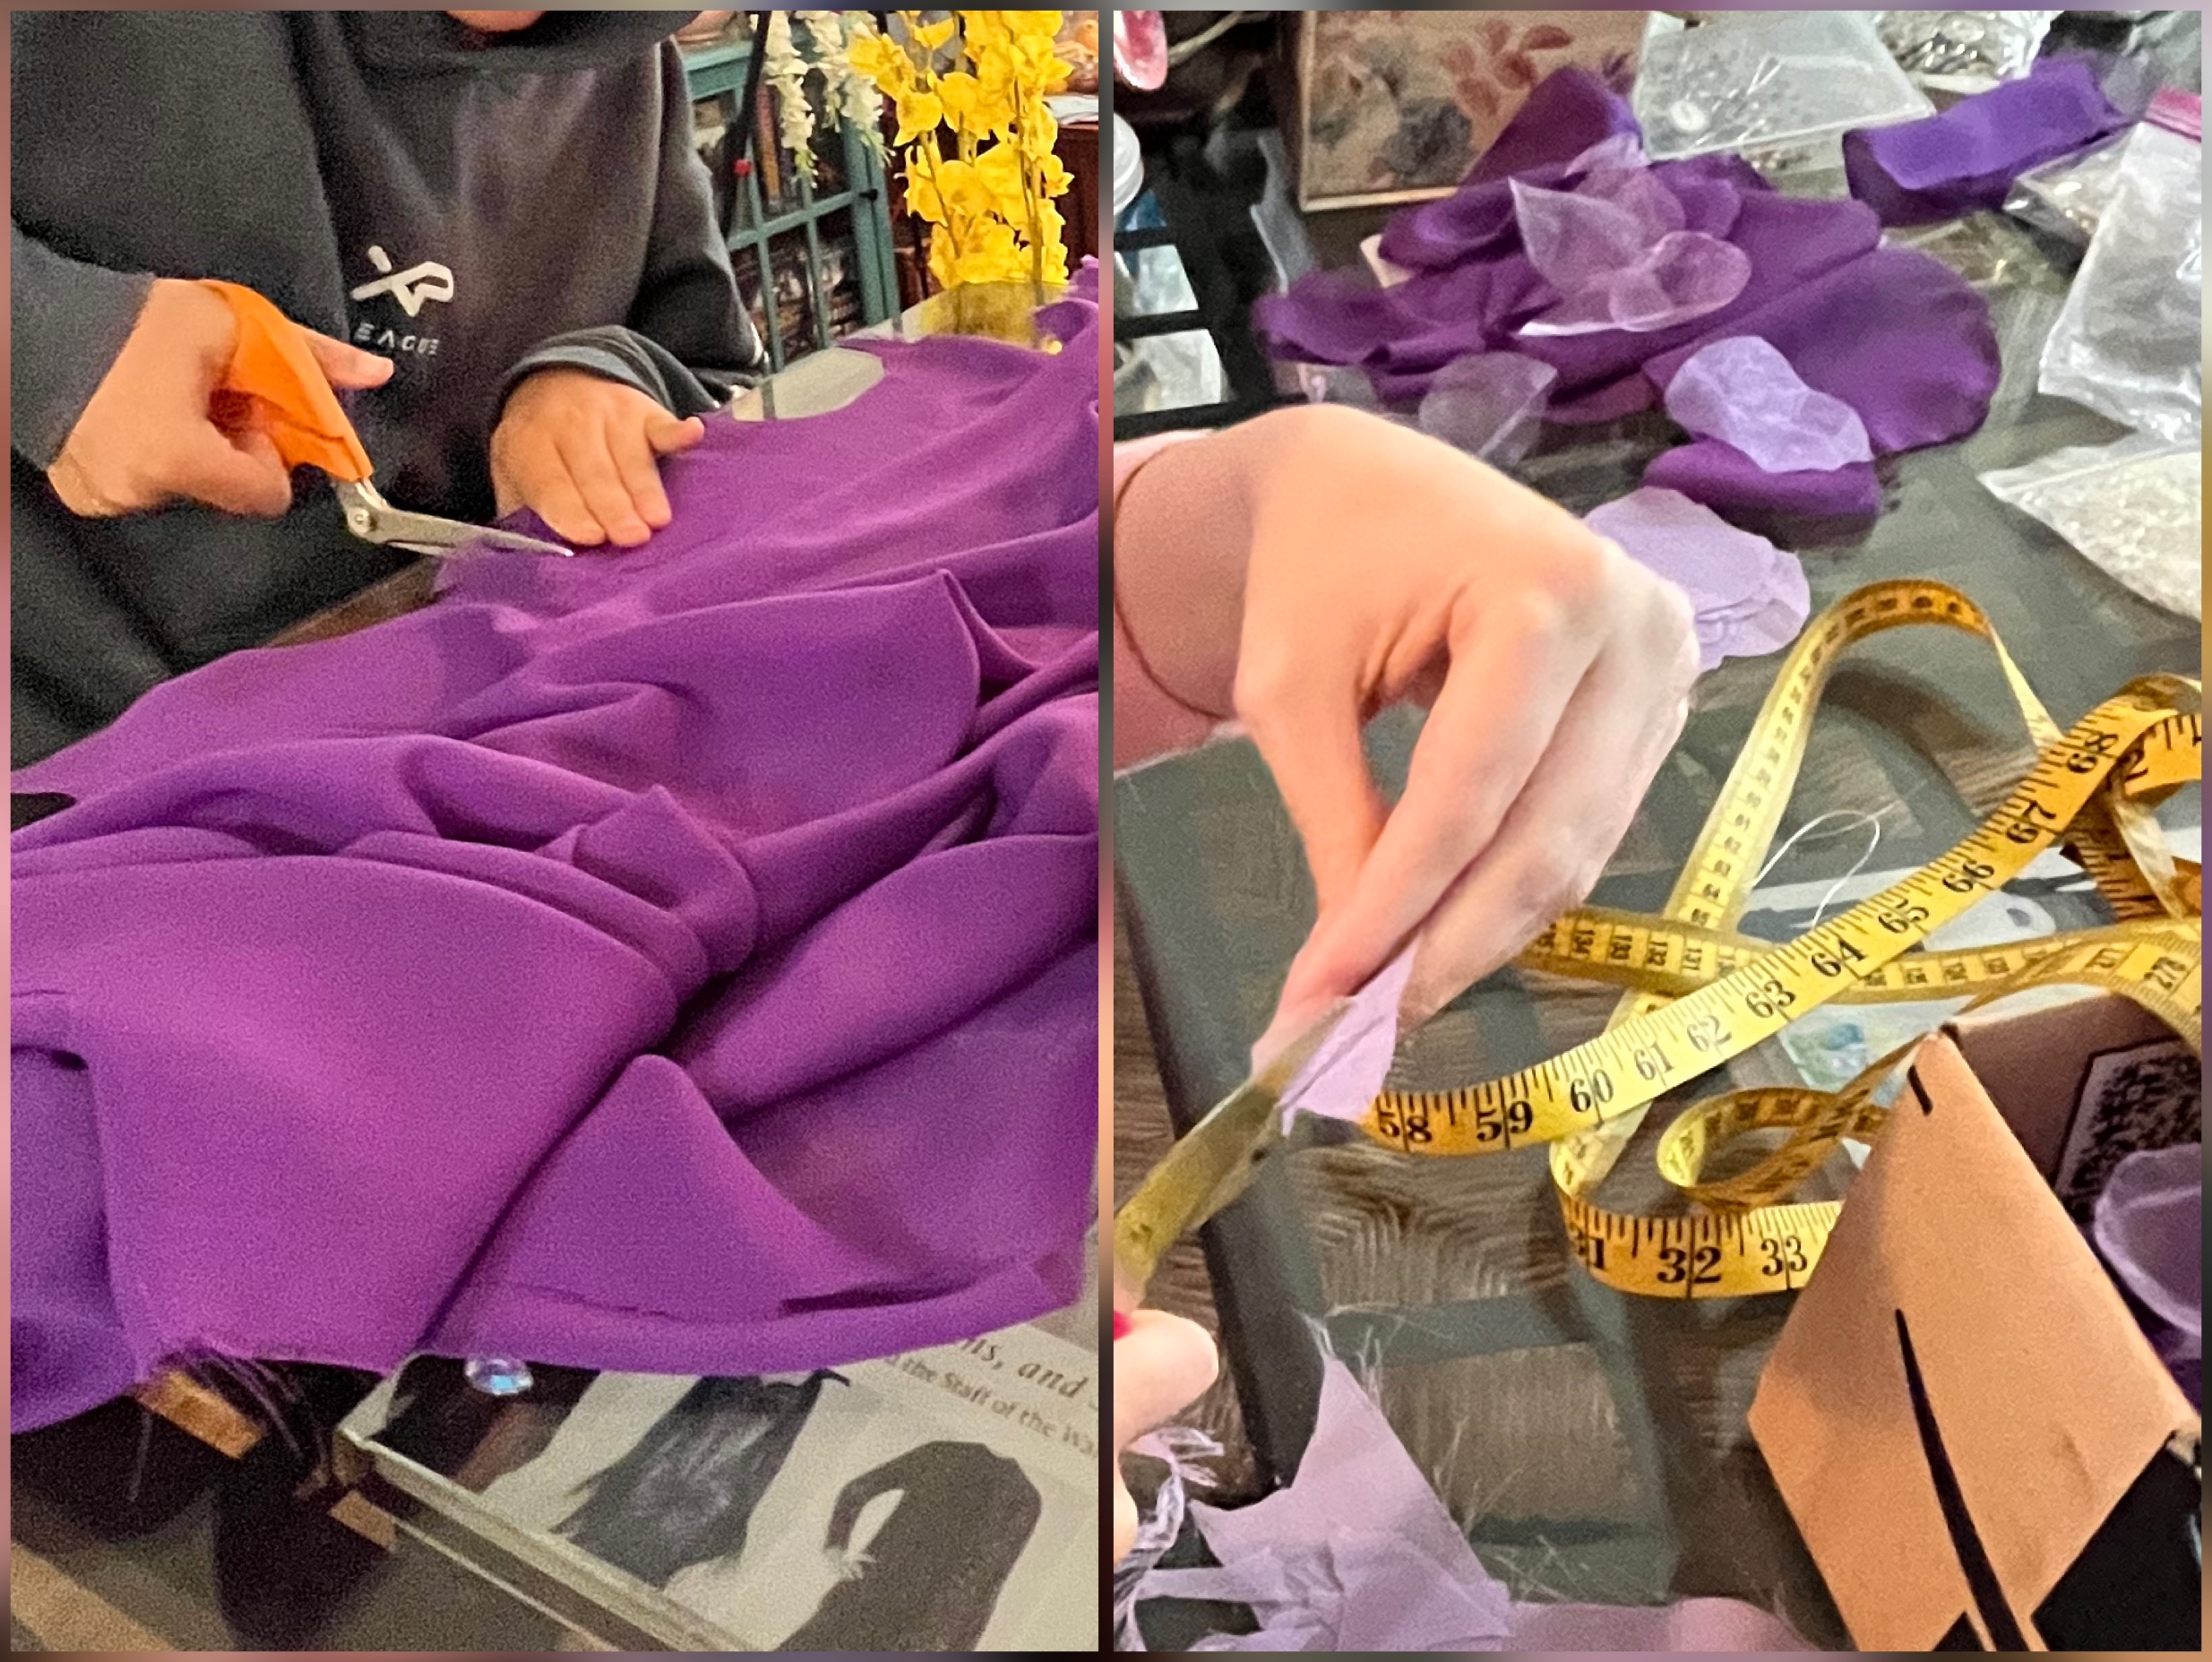
1. Cut out your cape. I always cut out my cape as a full circle, hence the 6 yards. But adjust as you need to. Remember, capes are just neck skirts. If you are going to line your skirt, do not line it yet; we want our craftsmanship to be clean as possible.

2. (Optional) I dyed my cape into a specific shade that I needed, but if you can get your fabric in the color you want, skip this step. But after dying your fabric, make sure you iron it out because it will make the embroidery process so much easier.

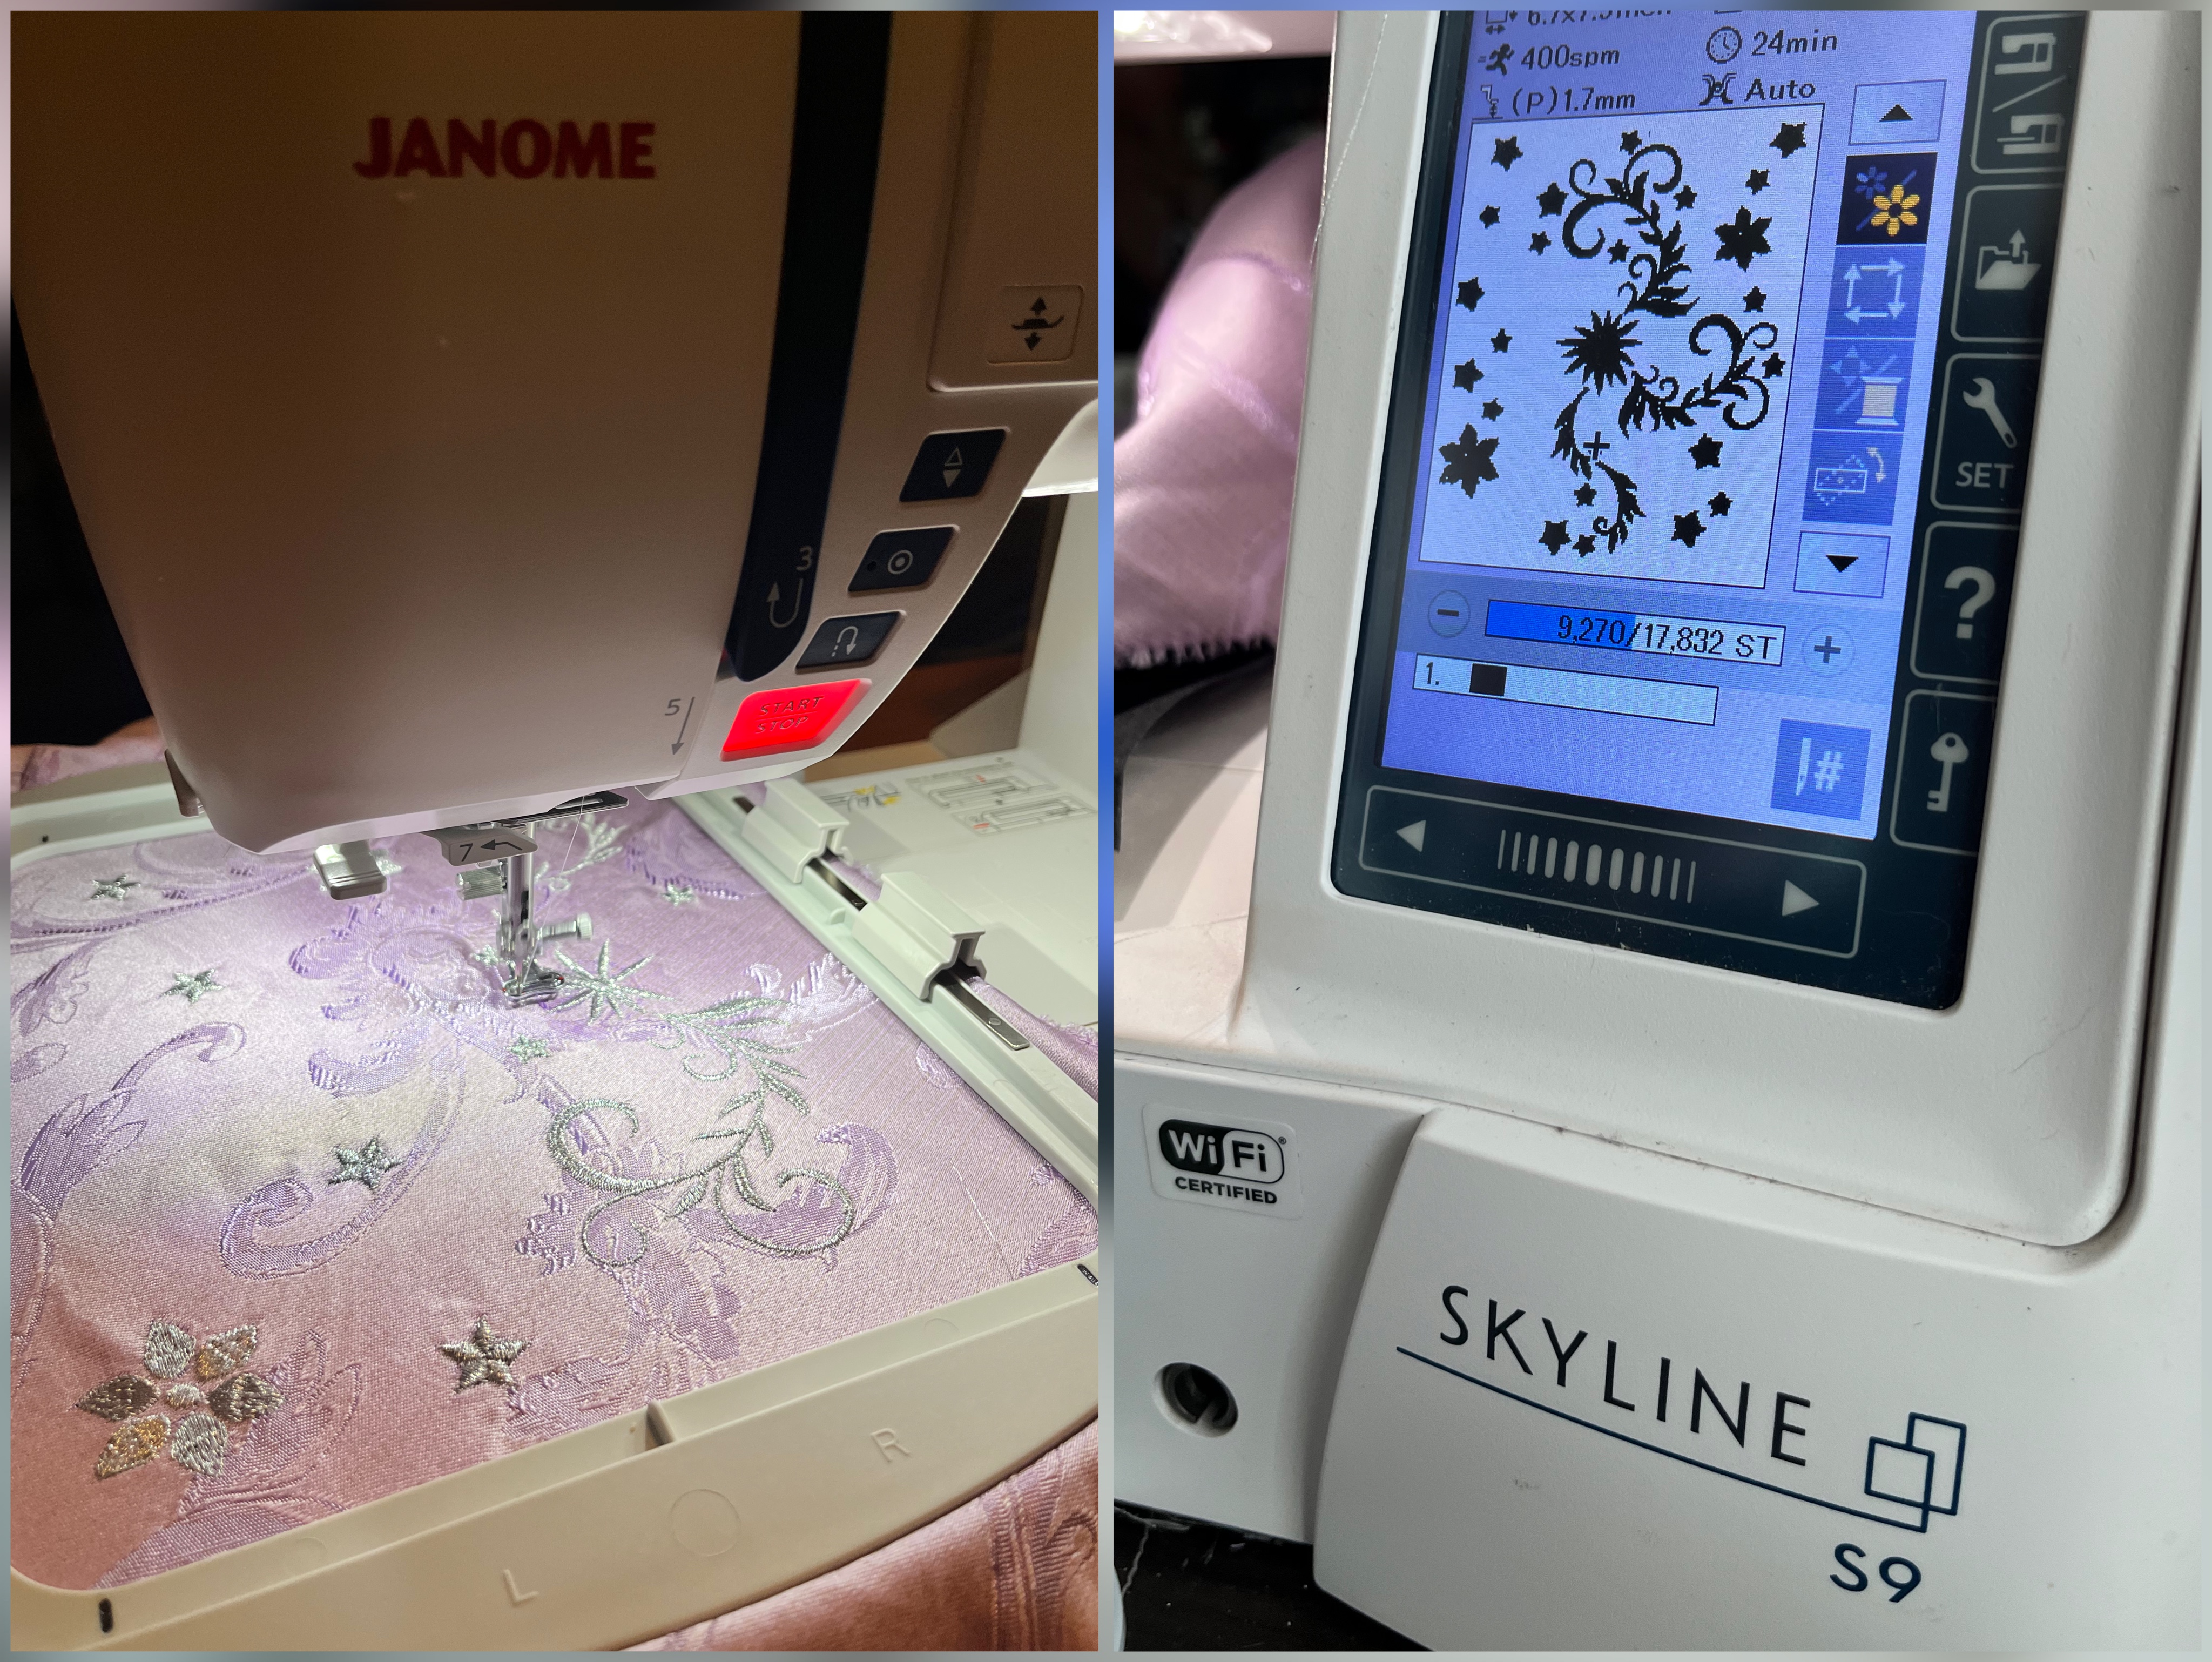
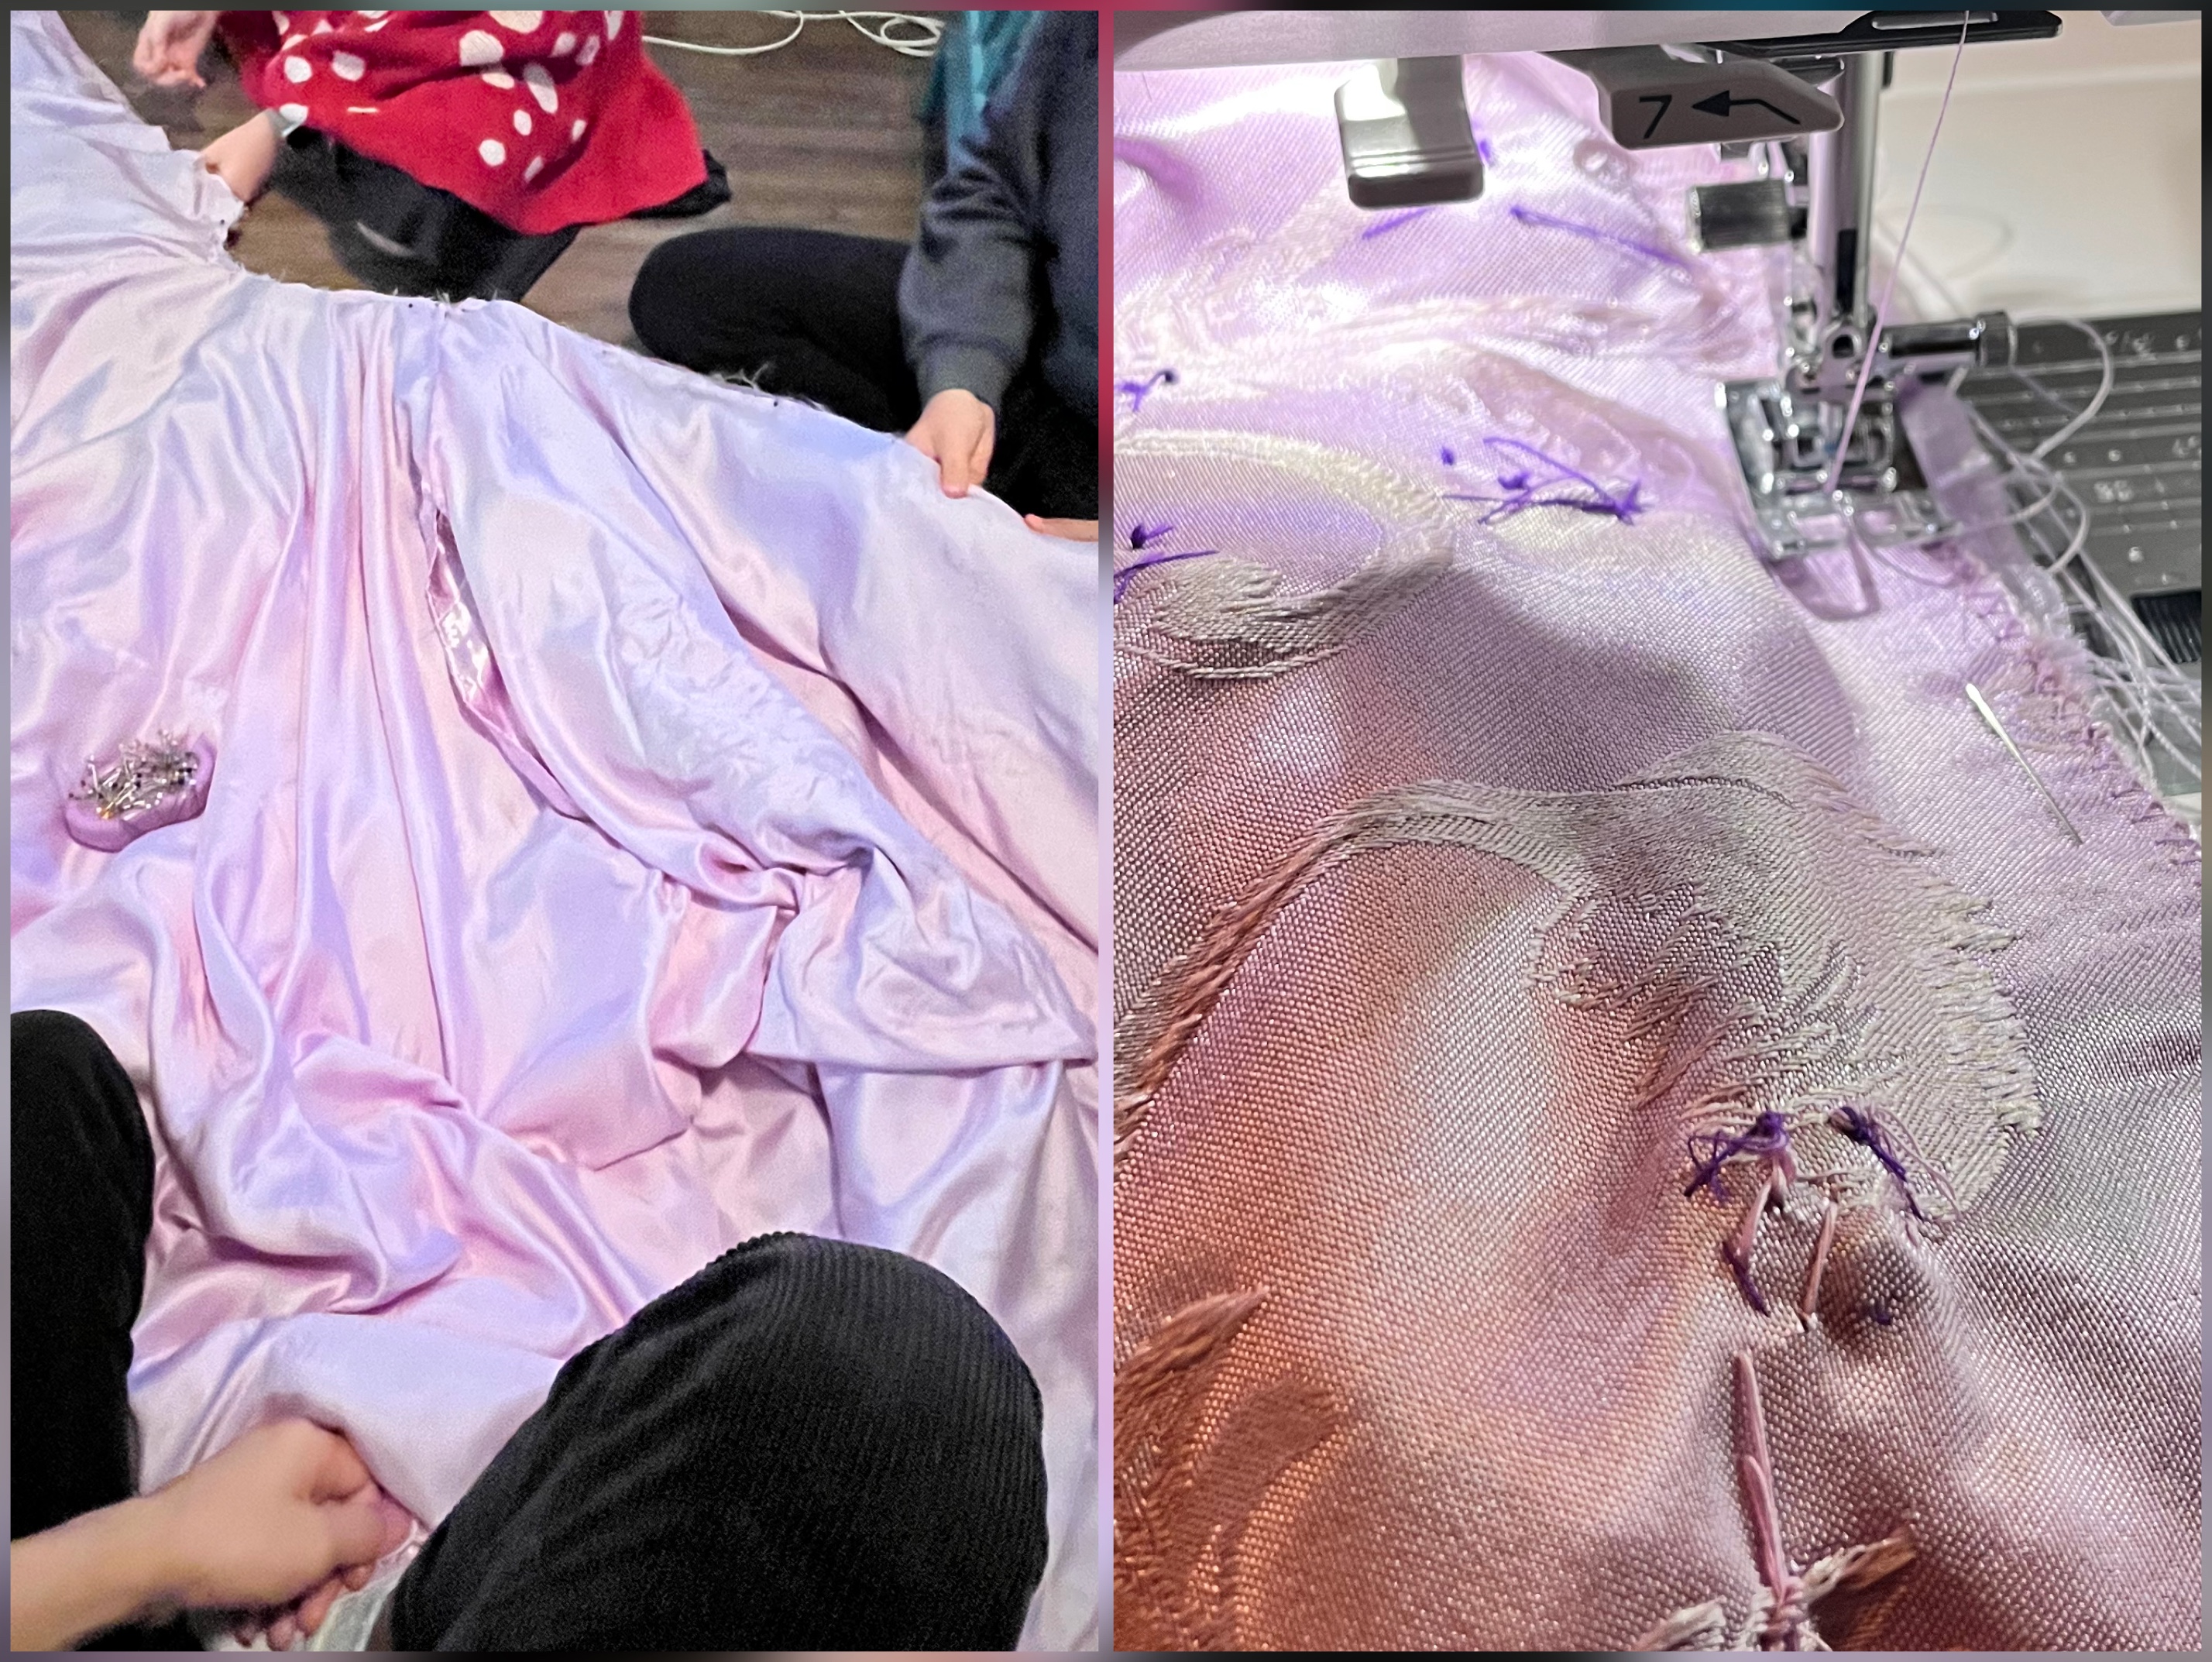
3. With your Janome Skyline S9 on embroidery mode, start decorating the entire perimeter of the cape. I used the preprogrammed designs on the machine and adjusted accordingly. With the embroidery option, you are able to import designs files into your machine via USB as well. This process will take a while if your skirt is floor length like mine.


MOVING ONTO FLOWERS


While your machine embroiders, which could take days, we will start making flowers from scratch. If you choose not to make flowers from scratch, skip this section. Remember, there are no right or wrong ways to do this. We aim for diverse looks and not uniform, as nature itself is diverse.

There are multiple tutorials online on how to make millinery flowers, so always look to those, but here’s the gist.

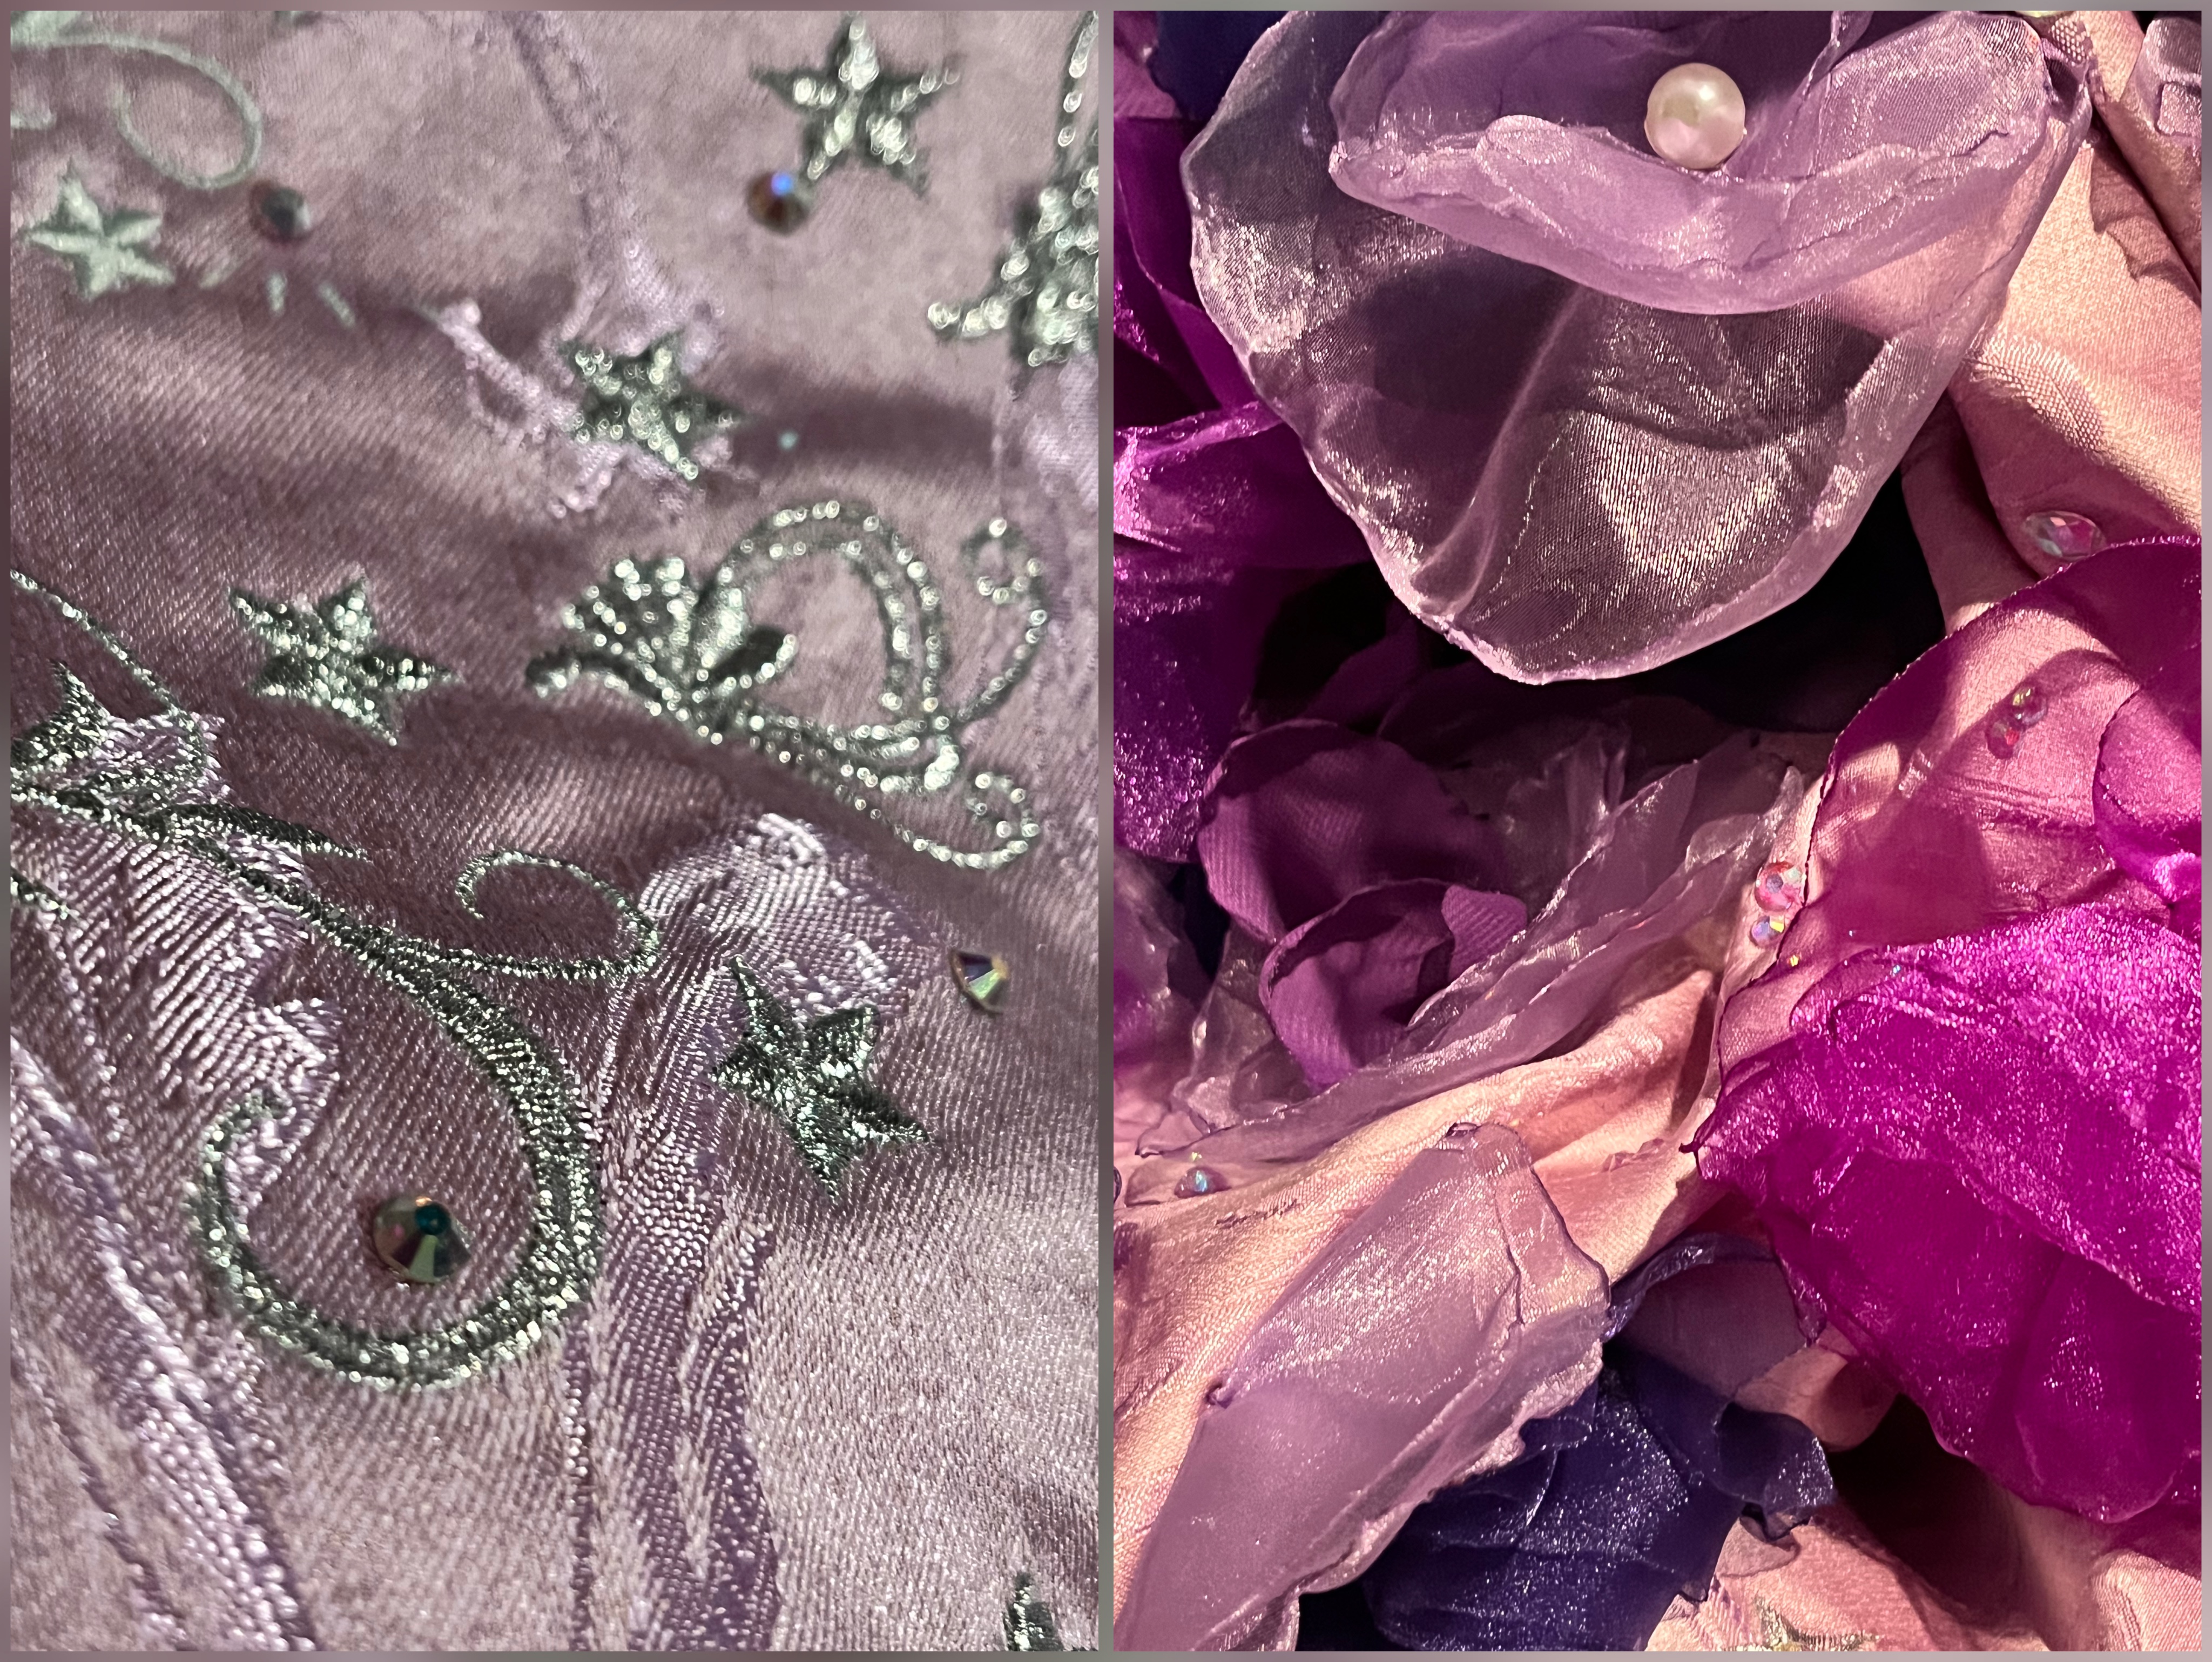
1. Cut your various organza and chiffon pieces into circles (does not have have to be perfect). Aim for various sizes.

2. With your candle flame, melt your circular edges. Most fabrics nowadays are made with polyester threads, so the flame will seal the plastic-based edges.

3. Hand stitch each circle on top of each other in various directions and folds with the base circle being flat.

4. No two flowers will be the same or perfect, and that’s completely okay. Hand stitch your flowers onto your cape. I stitched my flowers with the upper half condensed and scatter as it reaches halfway down at the elbows.


PUTTING IT TOGETHER


1. After the embroidery and the flowers are all on the cape, cut out your lining in the same shape as your cape.

2. Pin your lining to the cape. Pinning is a given, but the flowers will make it difficult, which is why you need the pinning to ensure everything perfectly line up with each other.

3. With your HD9 machine, which can sew through multiple layers, start sewing the lining and the external cape fabric together! Some embroidery might get in the way, which is perfect because the HD9 can withstand the thickness.

4. Cut out your collar and sew (or insert the interface) to your own liking. The collar should be able to fit your neck. Attach it together via the HD9 machine.

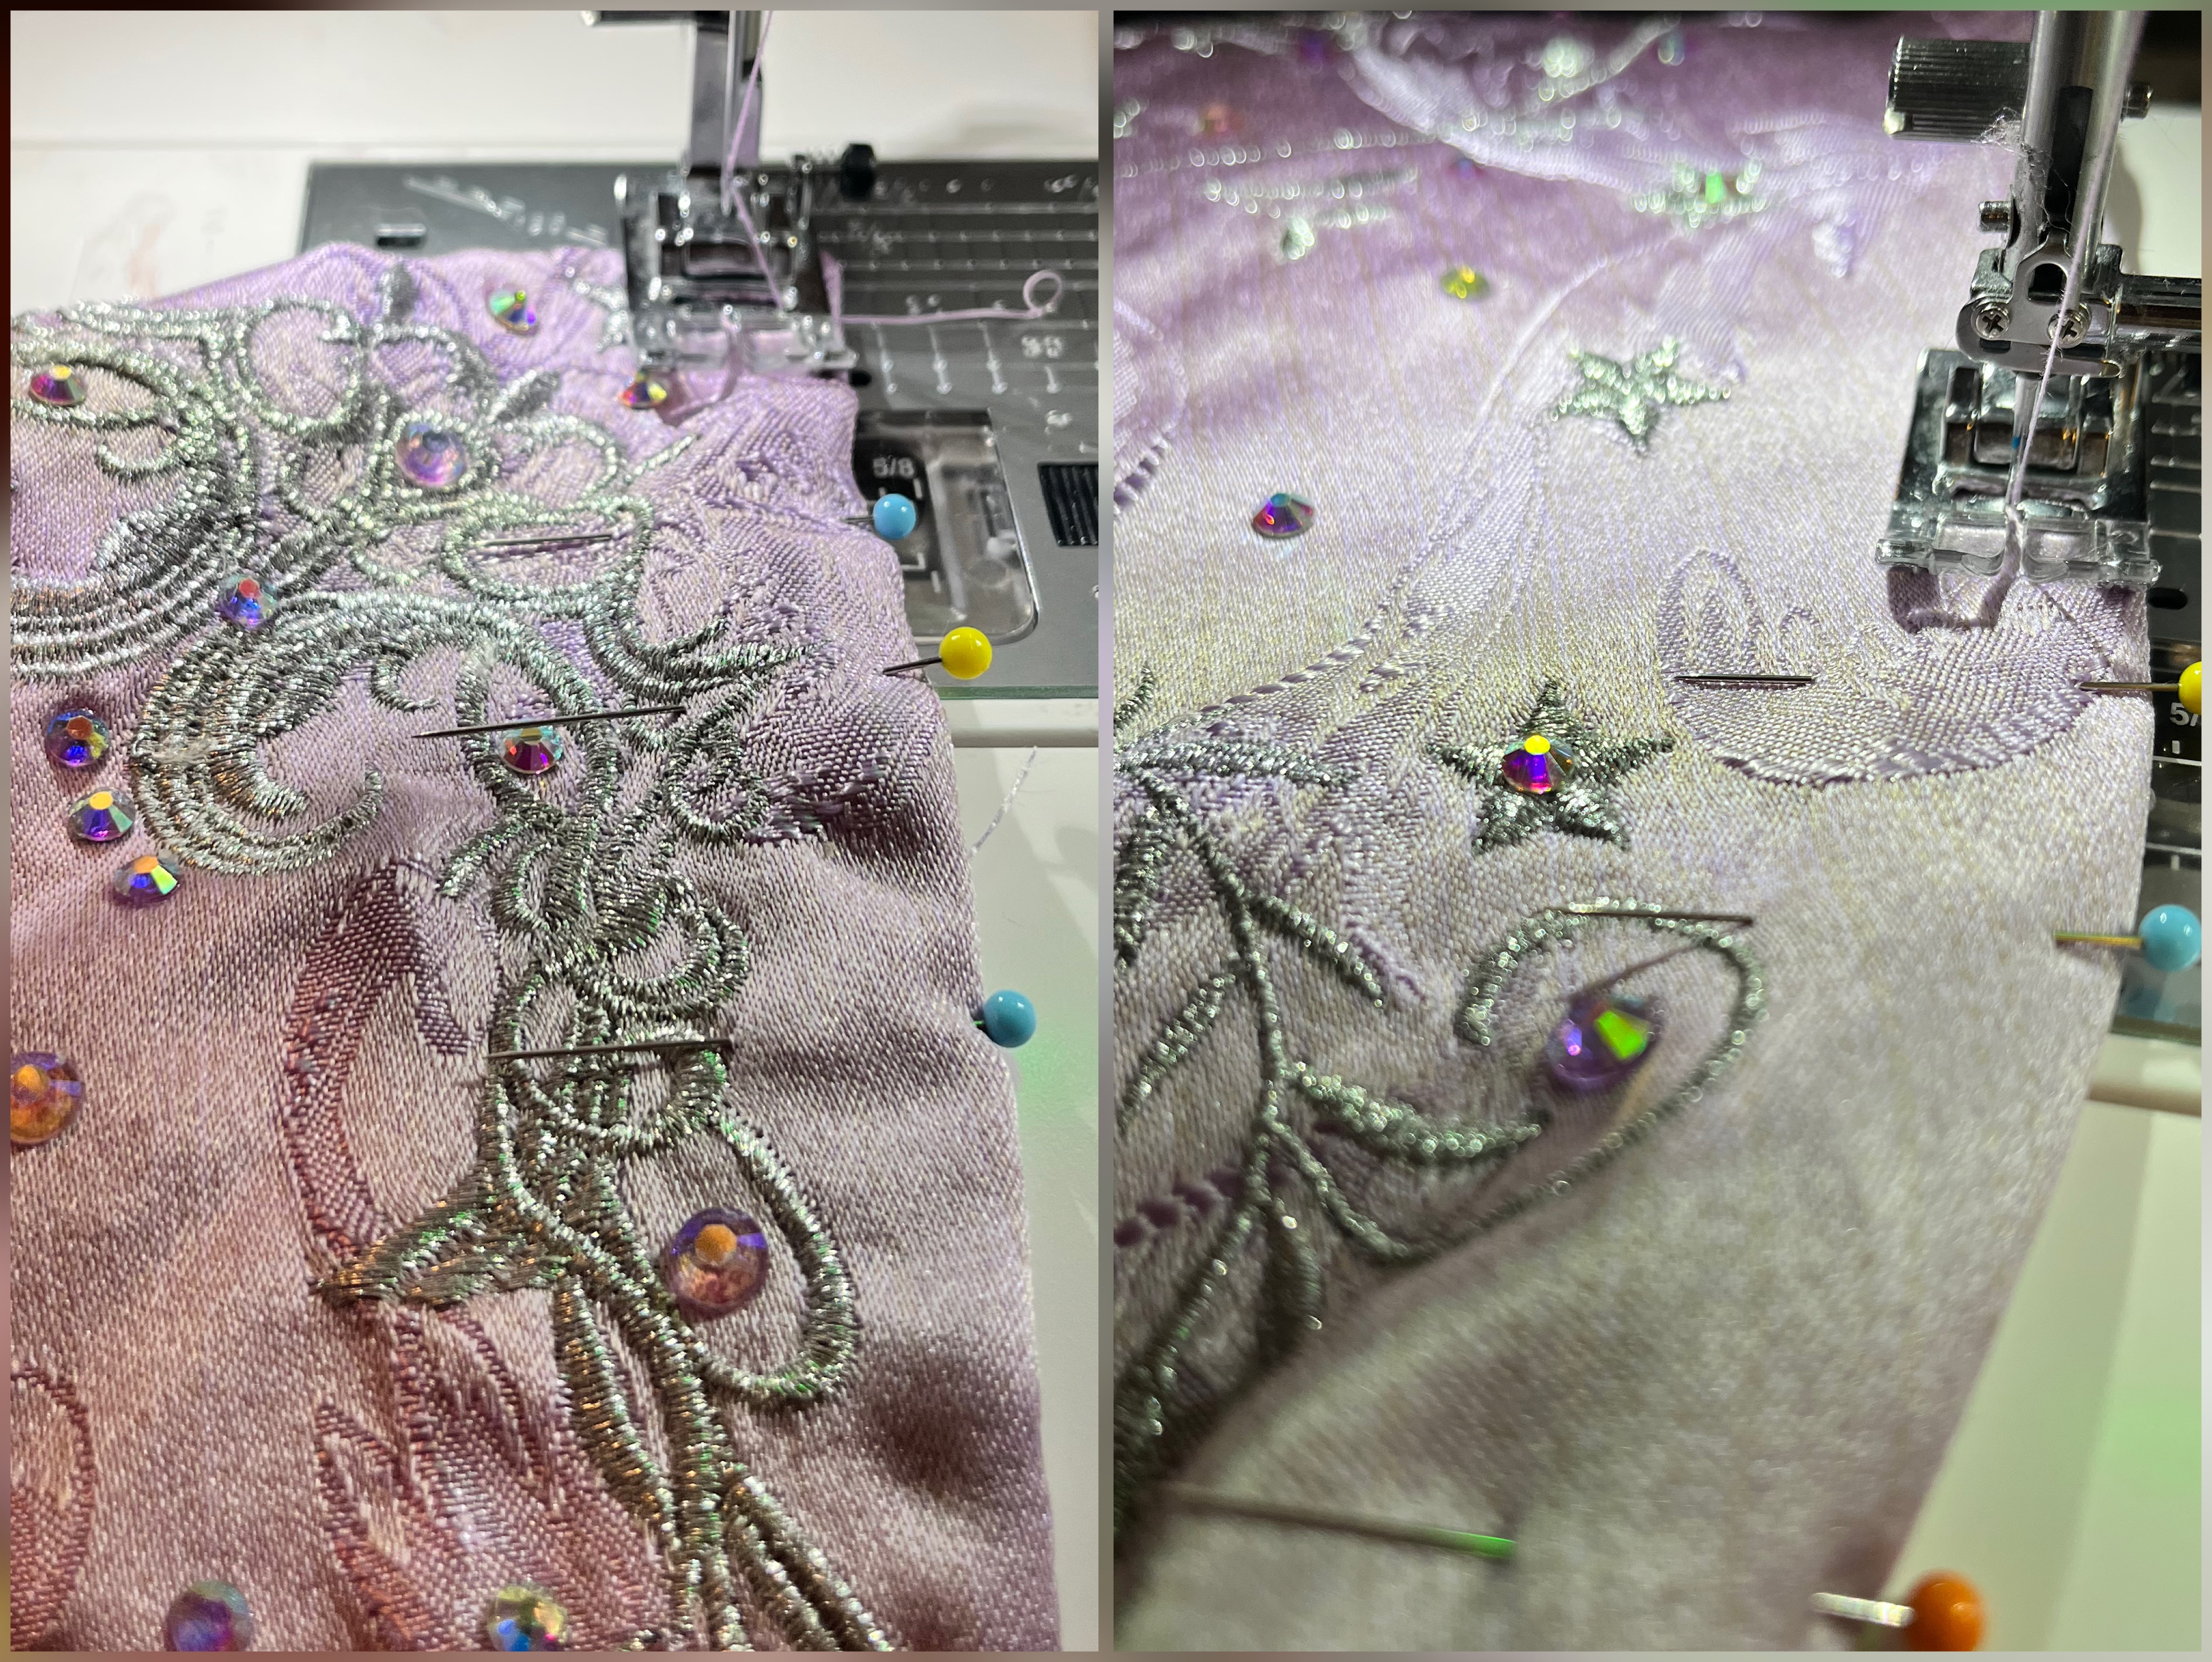
5. After you successfully lined the cape, it’s time to add crystals, Start adding crystals everywhere onto the cape. I aimed to have the top and bottom parts of the cape condensed with crystals and disperse into the middle.


While the steps here seems fairly easy, I should also warn that it is very time consuming and would dare say that this is a master level of sewing because of the amount of patience you will have to undergo to achieve this perfectly.


And there you have it! A floral embroidered cape to match your fairy dreams. Keep on dreaming Janome sewists!


Everyone is Talking about Floral and Embroidered Fairytale Cape
Reviews


Tako
Beautiful
Wednesday, November 23, 2016

cpindzola
Around the Table Dresden Placemats
Saturday, December 17, 2016

I like the concept, but the directions are "sloppy." Nowhere in the supply list does it mention the felt or the batting (how much?). Also, I would never use a high loft batting in a placemat, or a table runner, as I think that it would be too unstable for a glass. The next time I make these, I will cut out the batting (I use flannel) and spray baste it to the wrong side of the Dresden plate before I put the Dresden plate on the felt to cut out. I have not yet washed the finished placemat, and am hoping that the single layer of felt does not curl up, or become distorted after washing/drying.
Txmaid
Fun Great Gift!
Tuesday, February 21, 2017

MargieARK
Teatime Quilted Tablecloth
Friday, February 24, 2017

I made this today but your cutting directions need to be changed. You only need 4 of color 1 and color 3 4.5 squares for the triangles. Also the inner border, you only need 2 cuts as WOF is long enough to cut each in half to fit the sides.
MickelSews
Great Machine
Wednesday, August 30, 2017

I've had this machine for only a week now. I bought it used from a lady who makes her own clothes, but she no longer needed the machine. During the purchase, she noted that she is almost sad that it's better to give it away because of how well the machine performed. (I also bought it along side a computerized machine of another brand.} She demoed the machine for us, showing it worked and gave us everything (including the box it came in!) She took amazing care of this machine. I have used it a few times now, and the directions for threading were easy to follow (albeit my hands are quite large so the lower looper was a pain, but that is no fault to the machine or brand.) And I recommend this machine to anyone who wants to learn to serge and wants a machine that can grow with them. I will happily use this machine time and time again.
rvstan
S9 Review
Sunday, February 25, 2018

I love, love, love my S9! It's sews and embroiders beautifully and it's simplicity of use amazes me. I would recommend this machine for both a beginner and an experienced seamstress. If I would ask anything of Janome it would be to upgrade the programming to run a larger hoop size. I understand that it can't get much wider but there is most definitely room for it to go longer. That is the only limitation of this machine.
pjmnana
PJMNana
Monday, February 26, 2018

I purchased a Memorycraft 15000 a few years ago and it was the best purchase I ever made! This machine can do just about anything you would would ever want! I love the capability of using the Acuedit app to set up my embroidery pattern on my Ipad and then download it to the machine! I love how my embroidery looks upon completion and I love all the good lighting it has to light up your workspace. That way you don’t need to worry about where to set up your machine. It also has plenty of room to do machine embroidery on any size quilts! There are many decorative stitches from which to choose that are outstanding! It’s hard to choose which one to use! There are so many great features it is hard to decide what I love the most. If you want to buy only one machine to last a lifetime, I would recommend this one!
KLWash
S9 Review
Sunday, February 24, 2019

The S9 is amazing. I learned to sew by hand when I was just 5 and in my grandmothers way as she was quilting. I took seeing classes in high school until they would no longer let me sign up. The S9 makes me appreciate my current skills as well as motivate me to want to learn more. This machine is awesome.
SewSueMe2002
Horizon Memory Craft 15000
Thursday, November 19, 2020

My Janome Horizon Memory Craft 15000 is fantastic! I love, love, love this machine! When I came across the Eye for and Eye embroidery design today, I wanted to make it. However, the embroidery file is missing. Nothing downloads when I select the download button. Please help!
Jillfmischo
Treat Bag fun!
Monday, August 16, 2021

I made the Halloween treat bag for my new granddaughter and I’m sure it will last for years. No embroidery machine so I appliquéd the lettering. Need a little more skirt fabric for a better gathered look, and I used thin double-bias tape for the skirt hem, over edge stitch on skirt sides. I’m pleased with my results!
elenaz
Very helpful tutorial
Wednesday, October 25, 2023

I want to say thank you for teaching me this method of applique. I was able to do it with a small letters. This method is the best so far from all of those I've seen and tried.
plonkar
So useful
Thursday, November 30, 2023

I'd like to express my gratitude for teaching me this appliqué method. I successfully applied it with small letters, and, so far, it's the most effective among all the methods I've seen and tried.

DEALERS
The TWO Closest Dealers to you are:
196 Boston Post Road , Orange CT, 06477
203-878-1654
19 PUTNAM AVENUE , PORT CHESTER NY, 10573
914-934-2934
Find Additional Dealers