Projects

The Bookish Pouch

Created By:

Emily Herbster

Skill Level: Advanced
Janome Supplies Required
Fabric and Notions Required
  • 9” Zipper
  • 2 ¼” x8” Strip of Fabric for Binding
  • 1 Fat Quarter of Outer Fabric
  • 1 Fat Quarter of Inner Fabric
  • 1 Fat Quarter of the Batting of your choice. (You can choose between using fusible fleece like Pellon 987F or opting for Soft & Stable by Annie’s to achieve a puffer look instead of traditional batting. For this project, I decided to use regular batting to achieve a softer and squishier feel.)
  • Pins or Basting Spray
  • Acrylic Ruler
  • Rotary Cutter
  • Erasable Marker
  • Point Turner
Instructions

Binding for front Pocket:
2 ¼” x 8” Strip of Fabric
Pocket Panel:

6.5” X 7” Quilted Panel
Body Panel:
17”x 7” Quilted Panel

Finished Size: 8”x6” Pouch
Specifically made for Kindle Paperwhite
With accommodations to fit a Kindle with a case.

1. Baste your two layers of fabric + batting together and quilt as desired to create one large quilted panel. 

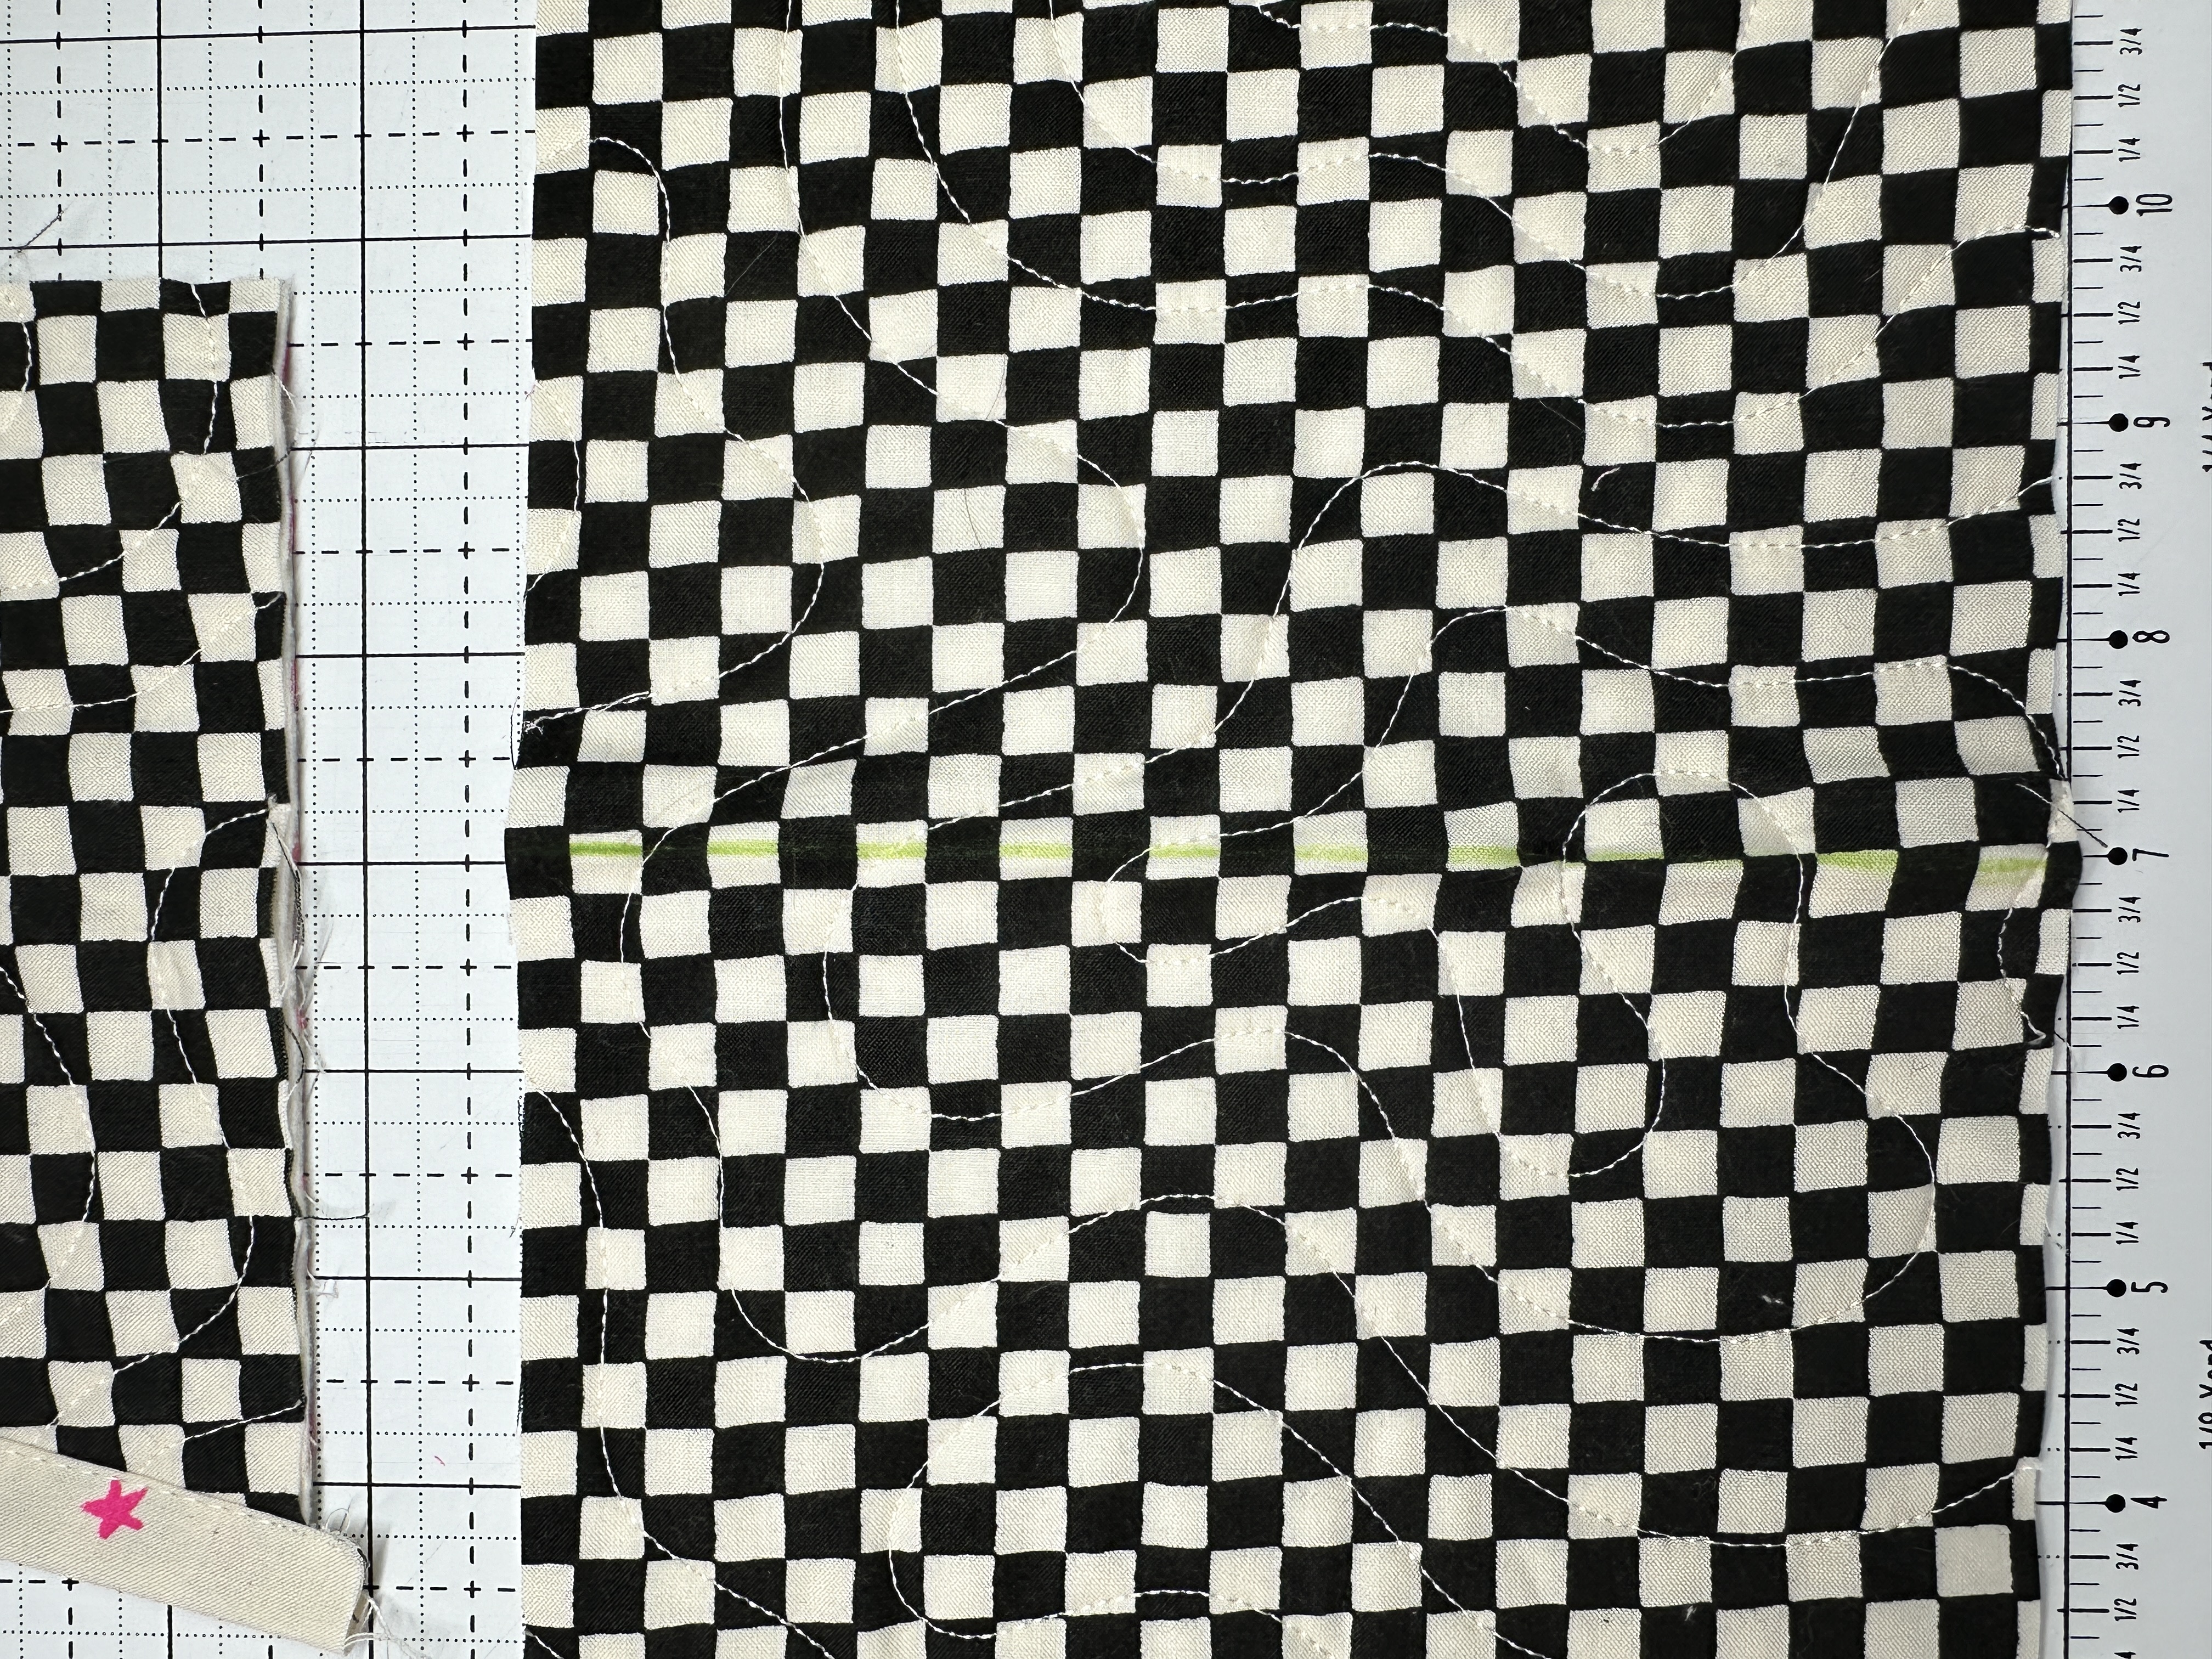
2. Cut from your large panel of quilted fabric created in step one to one 17”x7” for the Body Panel and one 6.5”x7” for the Pocket panel. Set aside.  
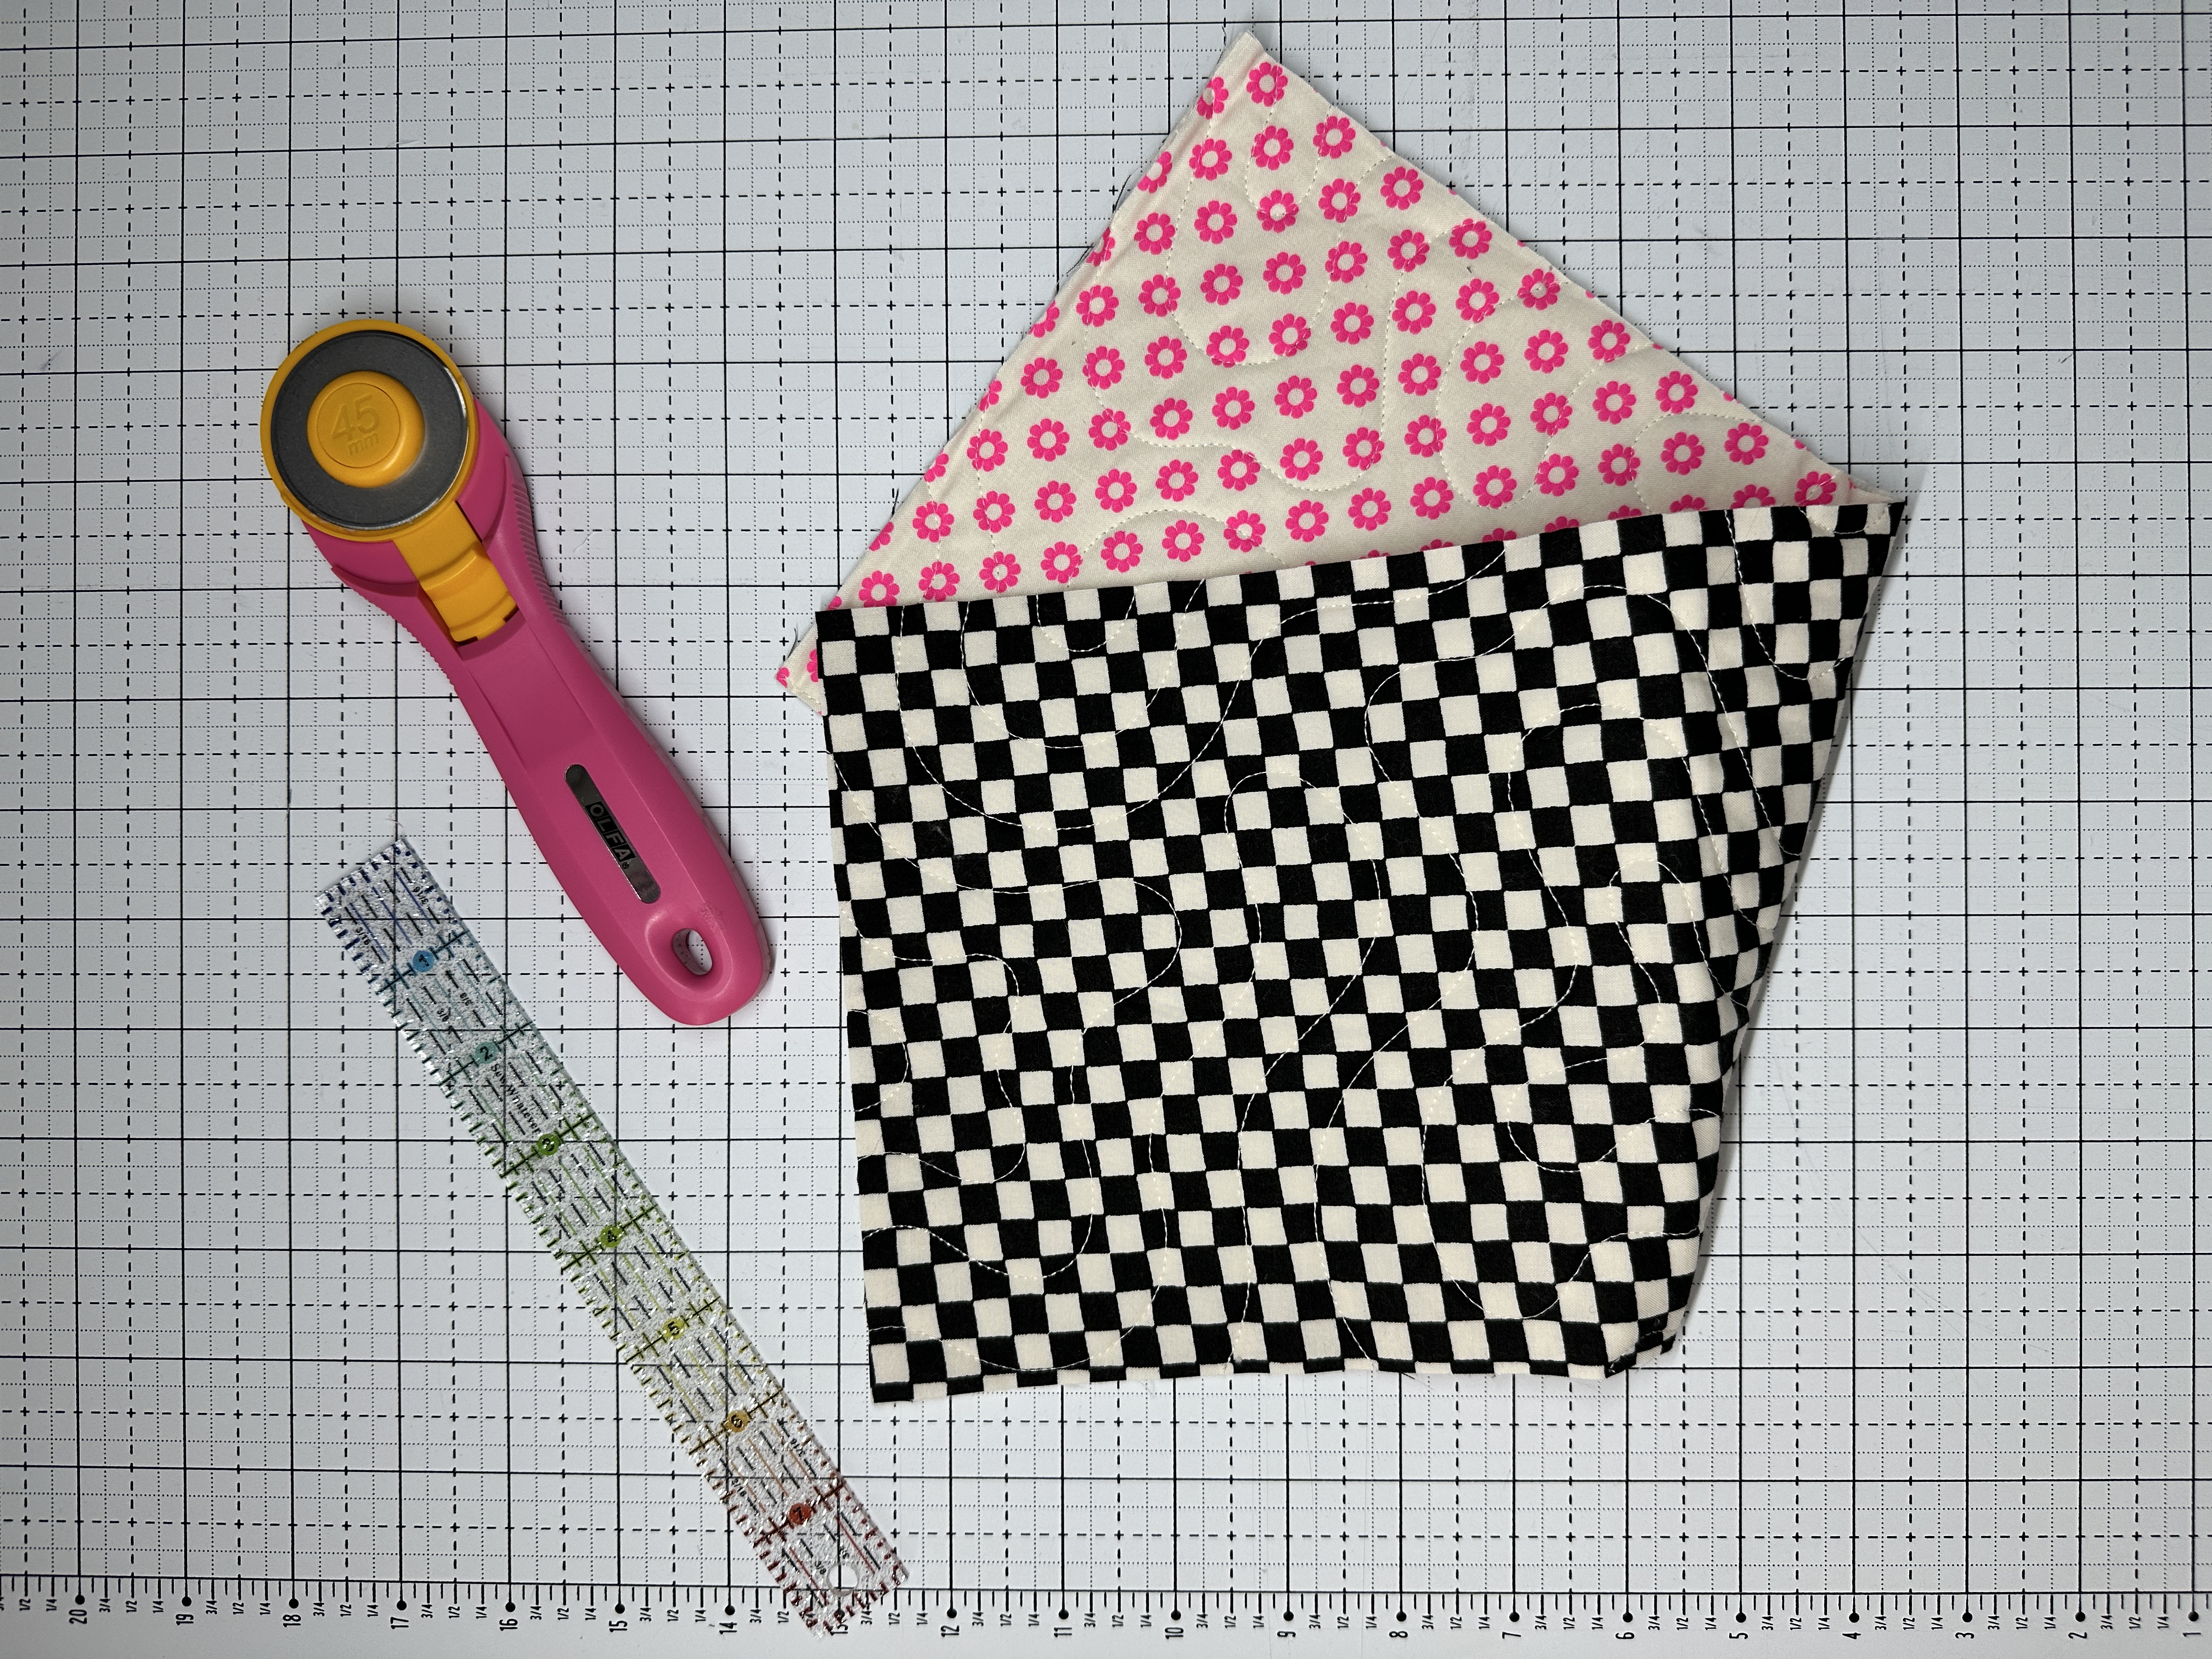
please note only body Panel is shown.

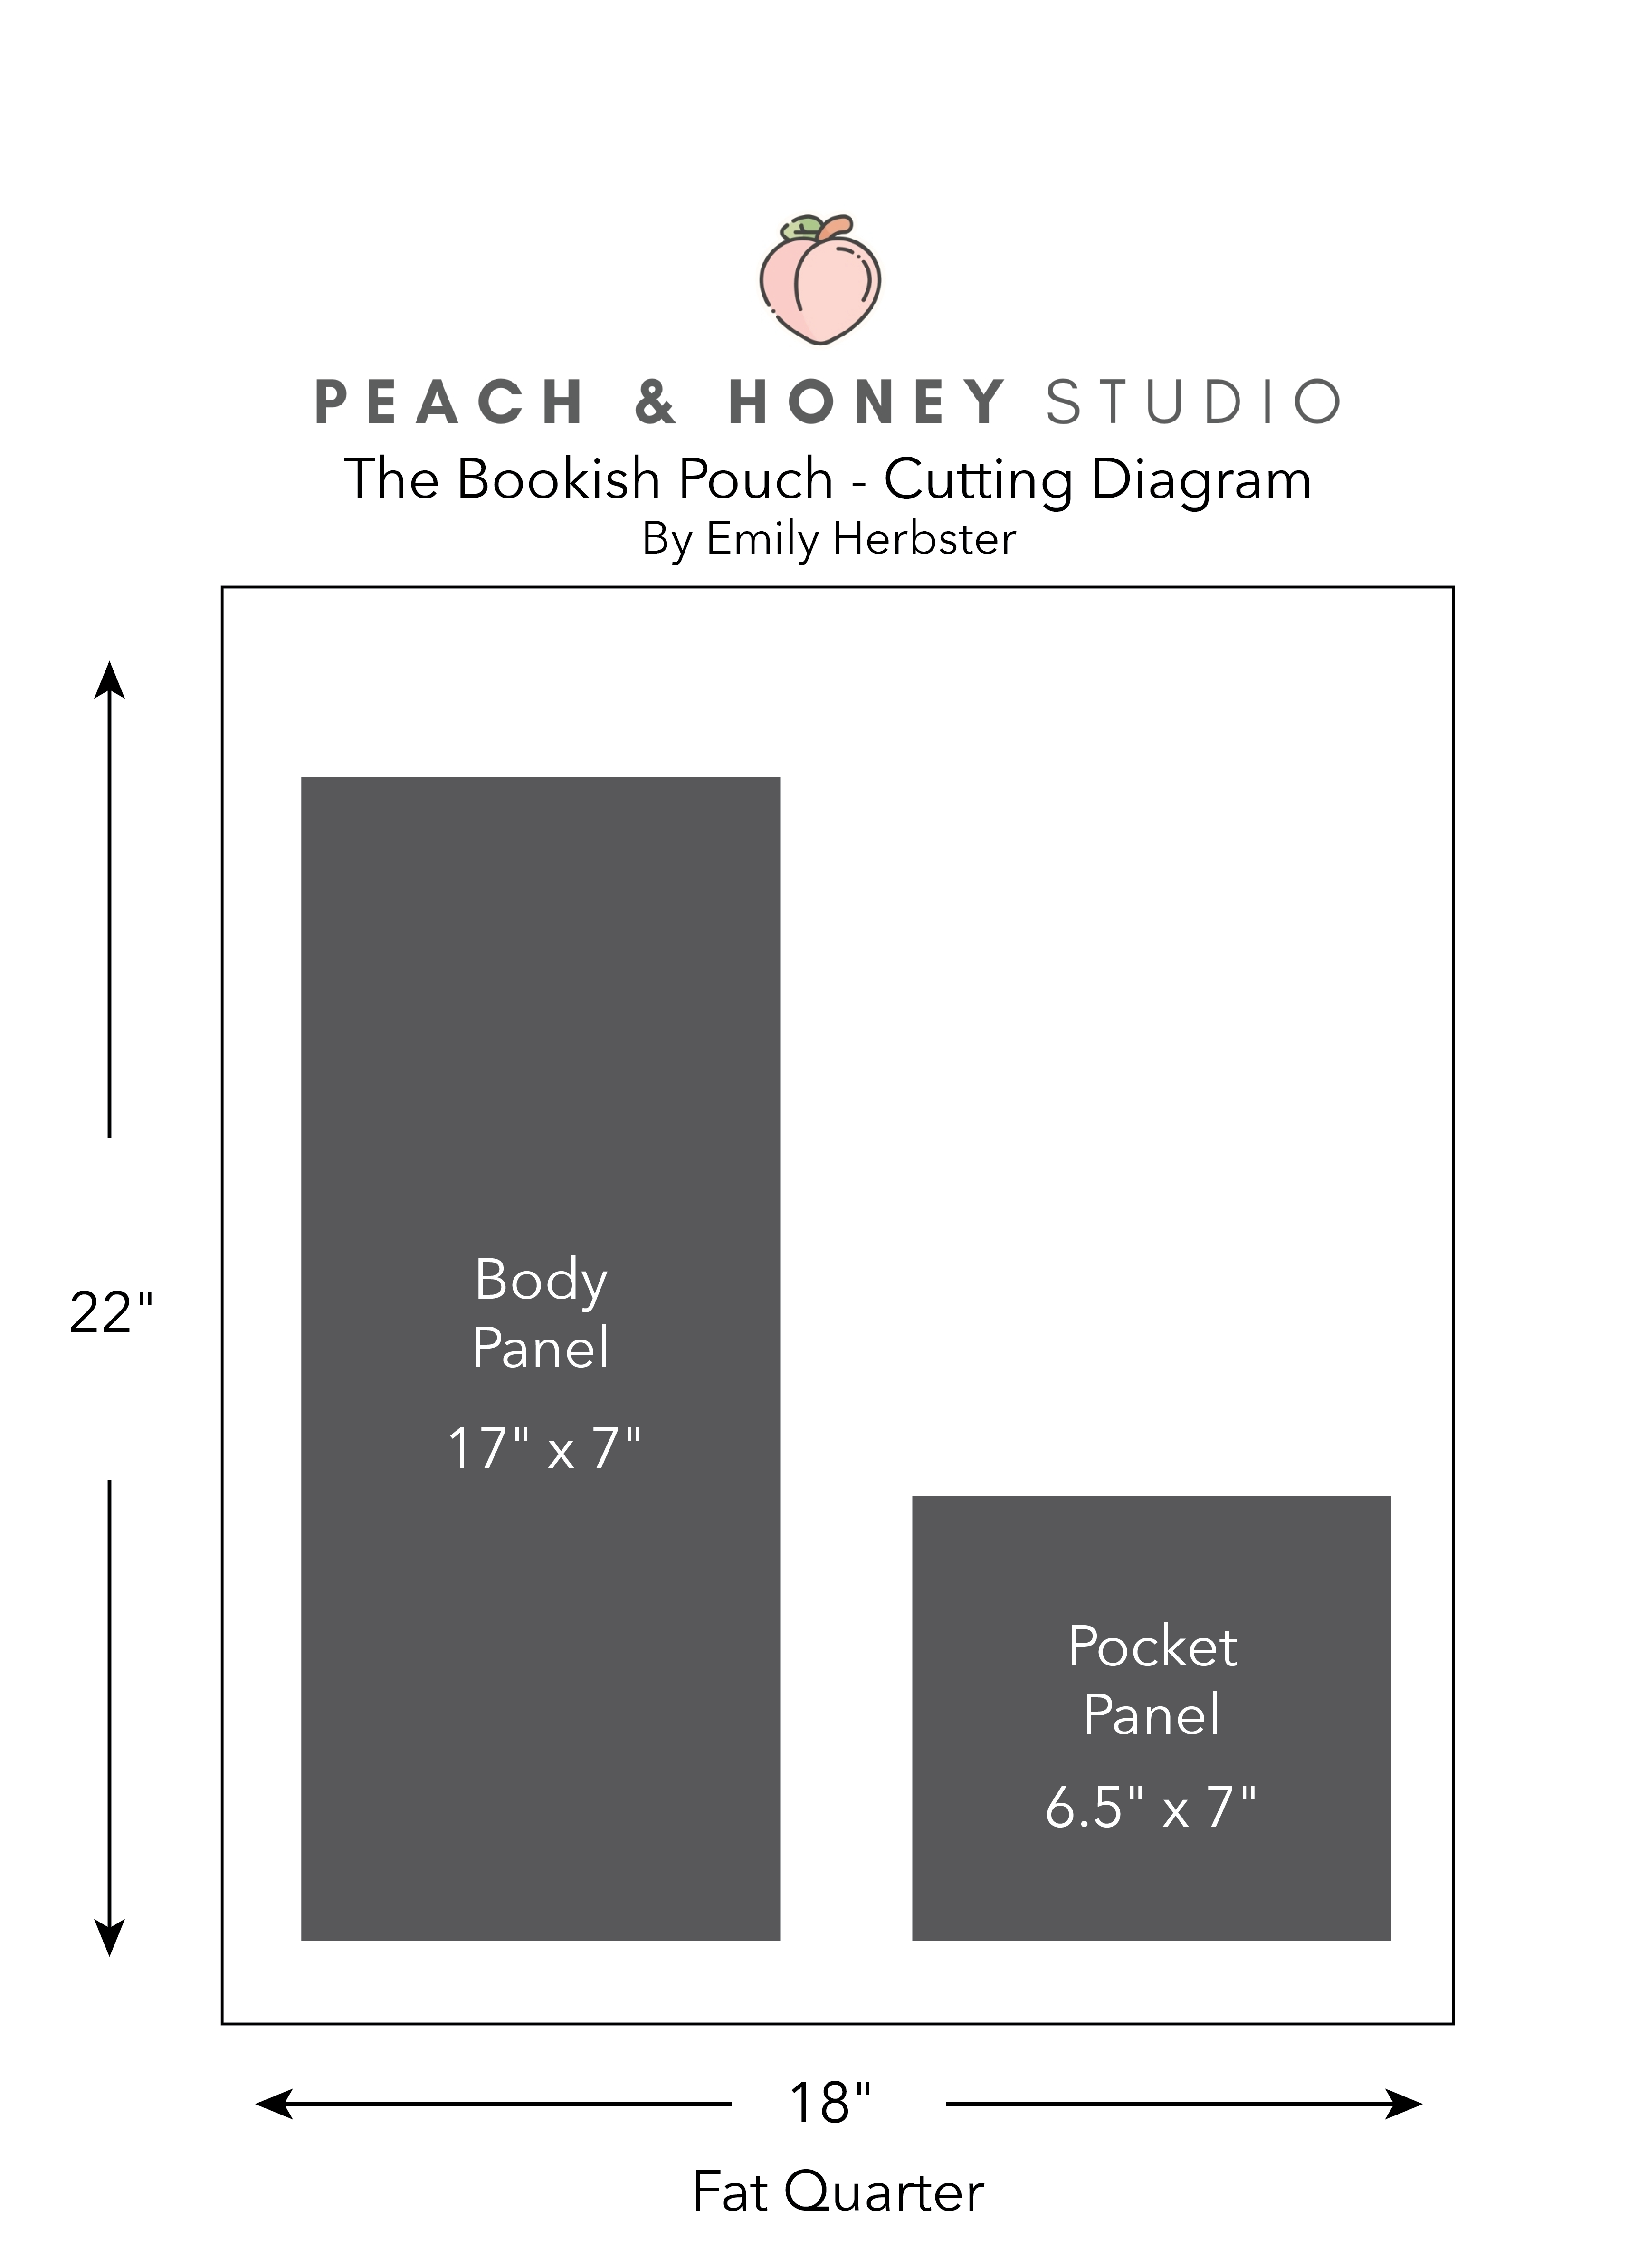
3. Taking your Body Panel, mark the top edge by dotting the left and right edge 1 ½” from the top as shown. This marking will help you fold over the top edge ensuring it’s as even as possible. 

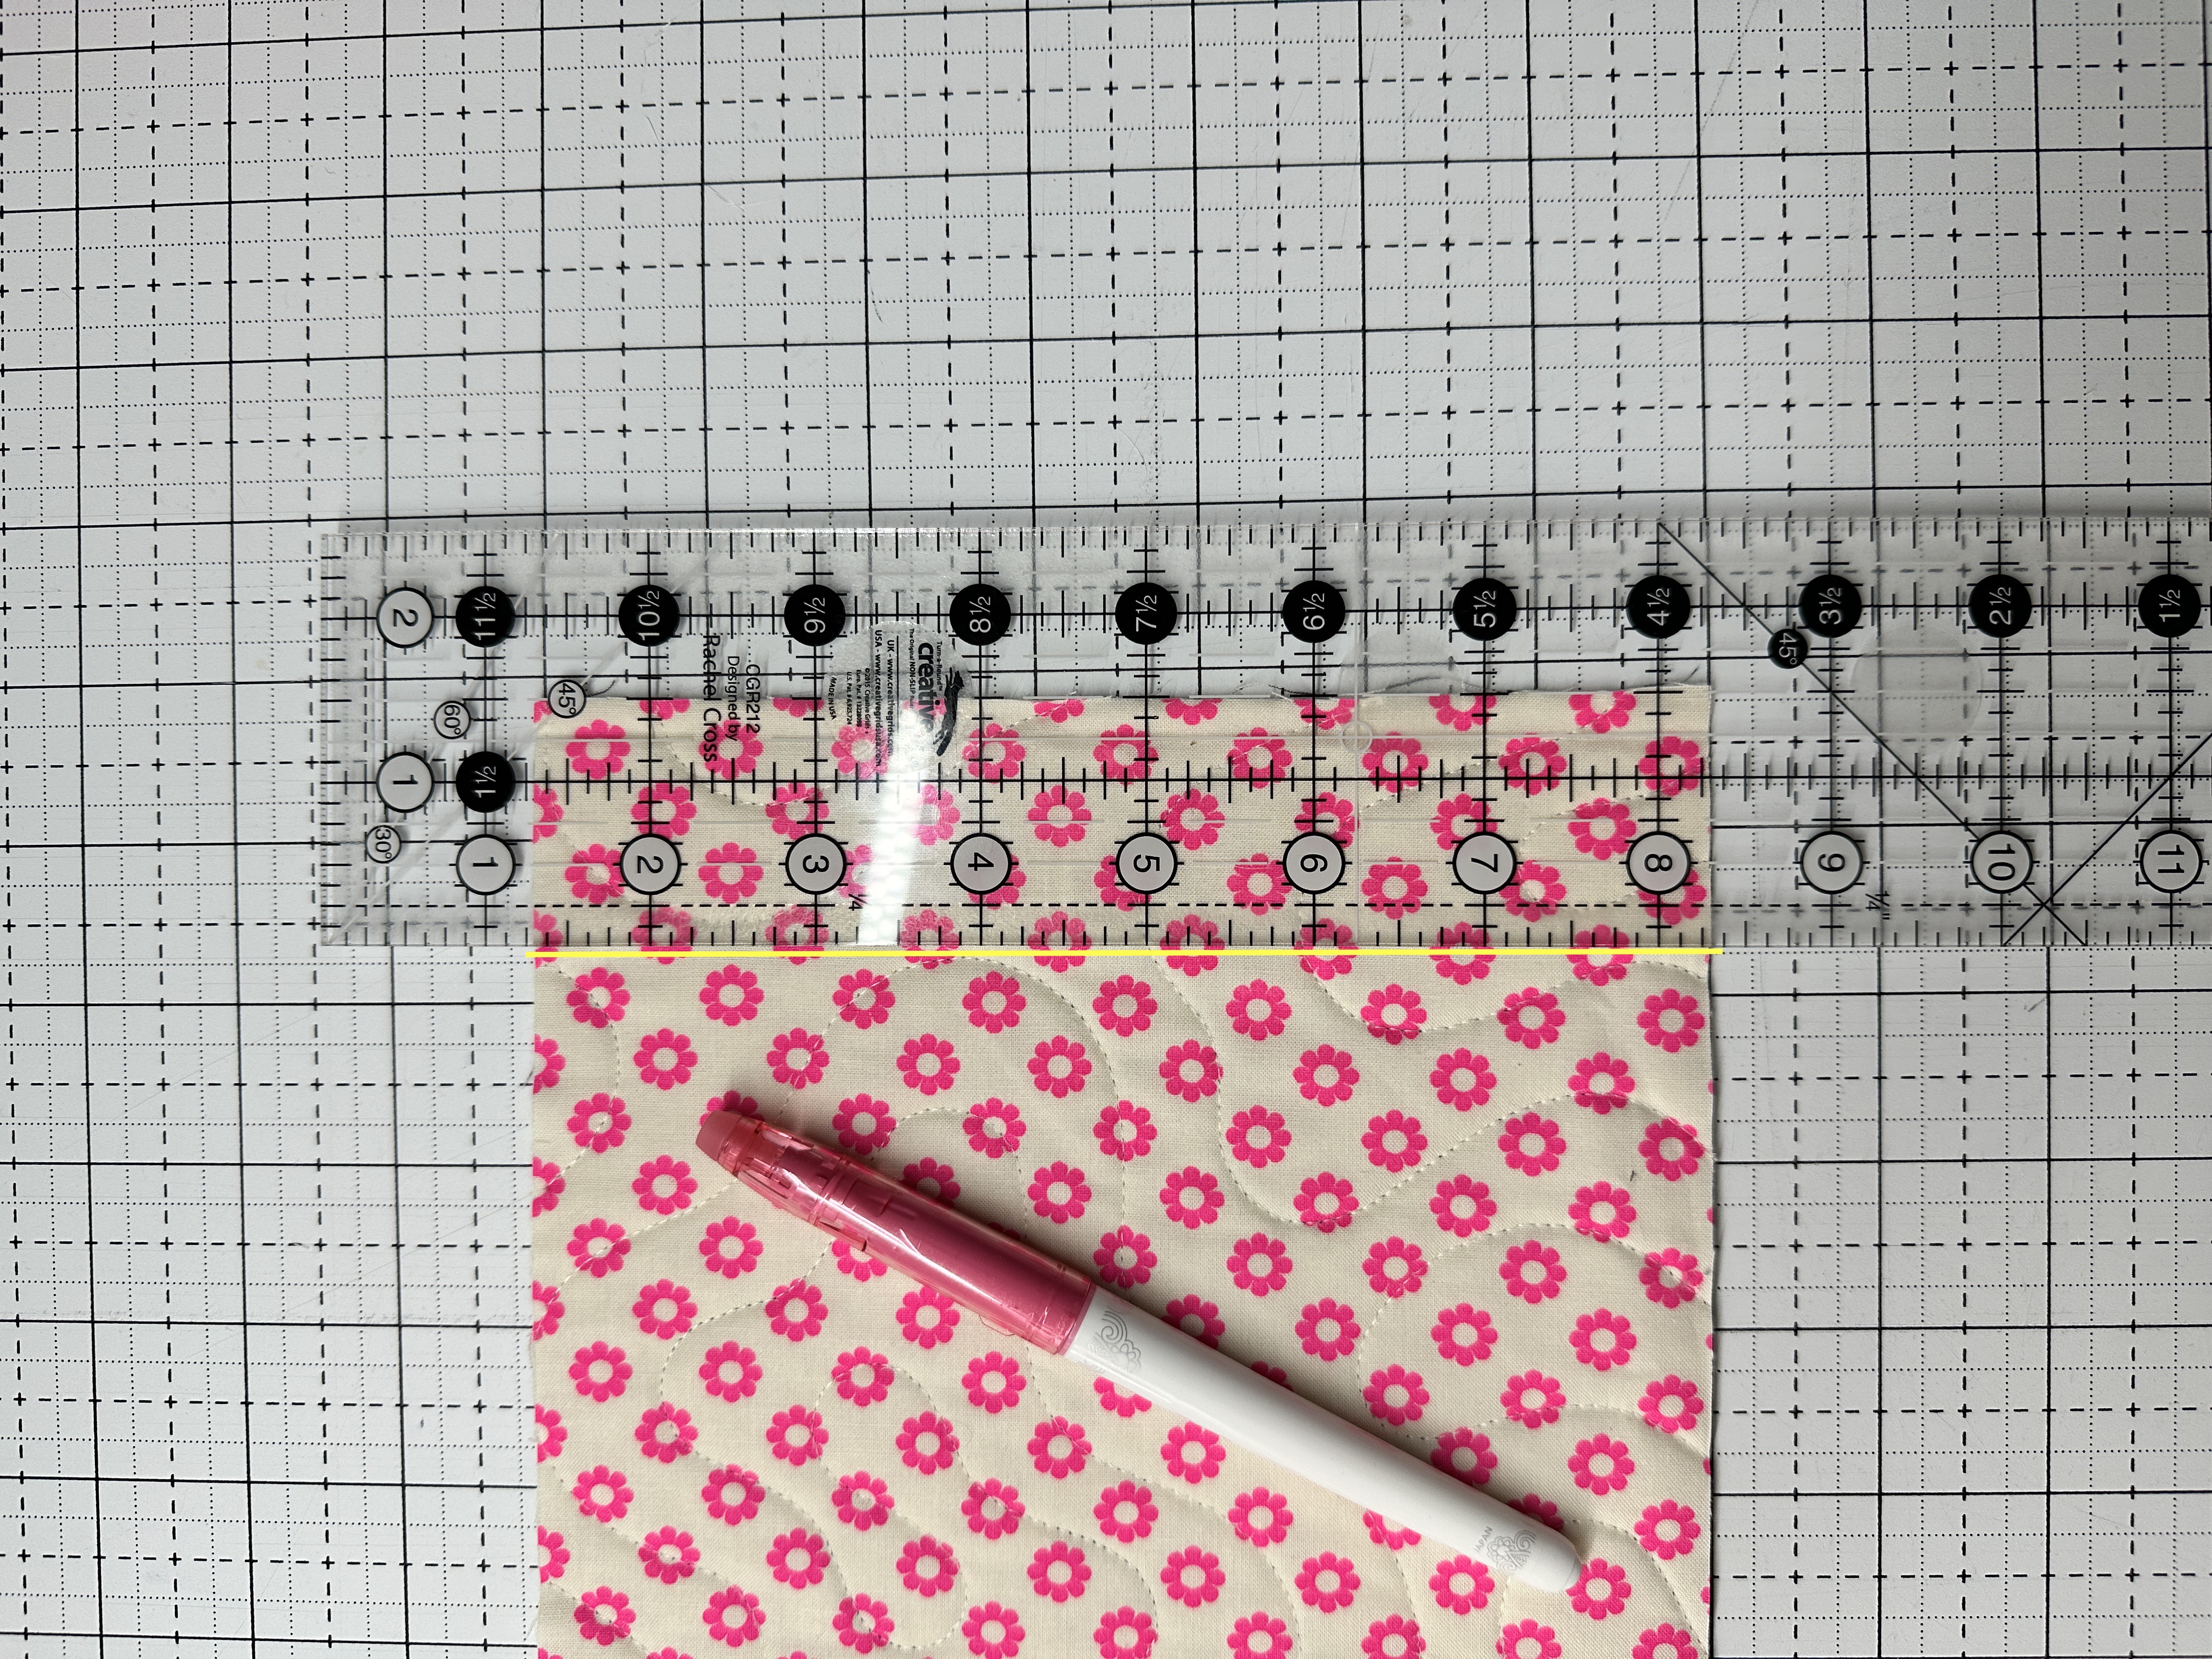
4. Folder over the top edge you just marked pressing and clipping into place. Fold and press the closed bottom half as well. Your raw seams should be close to touching. 


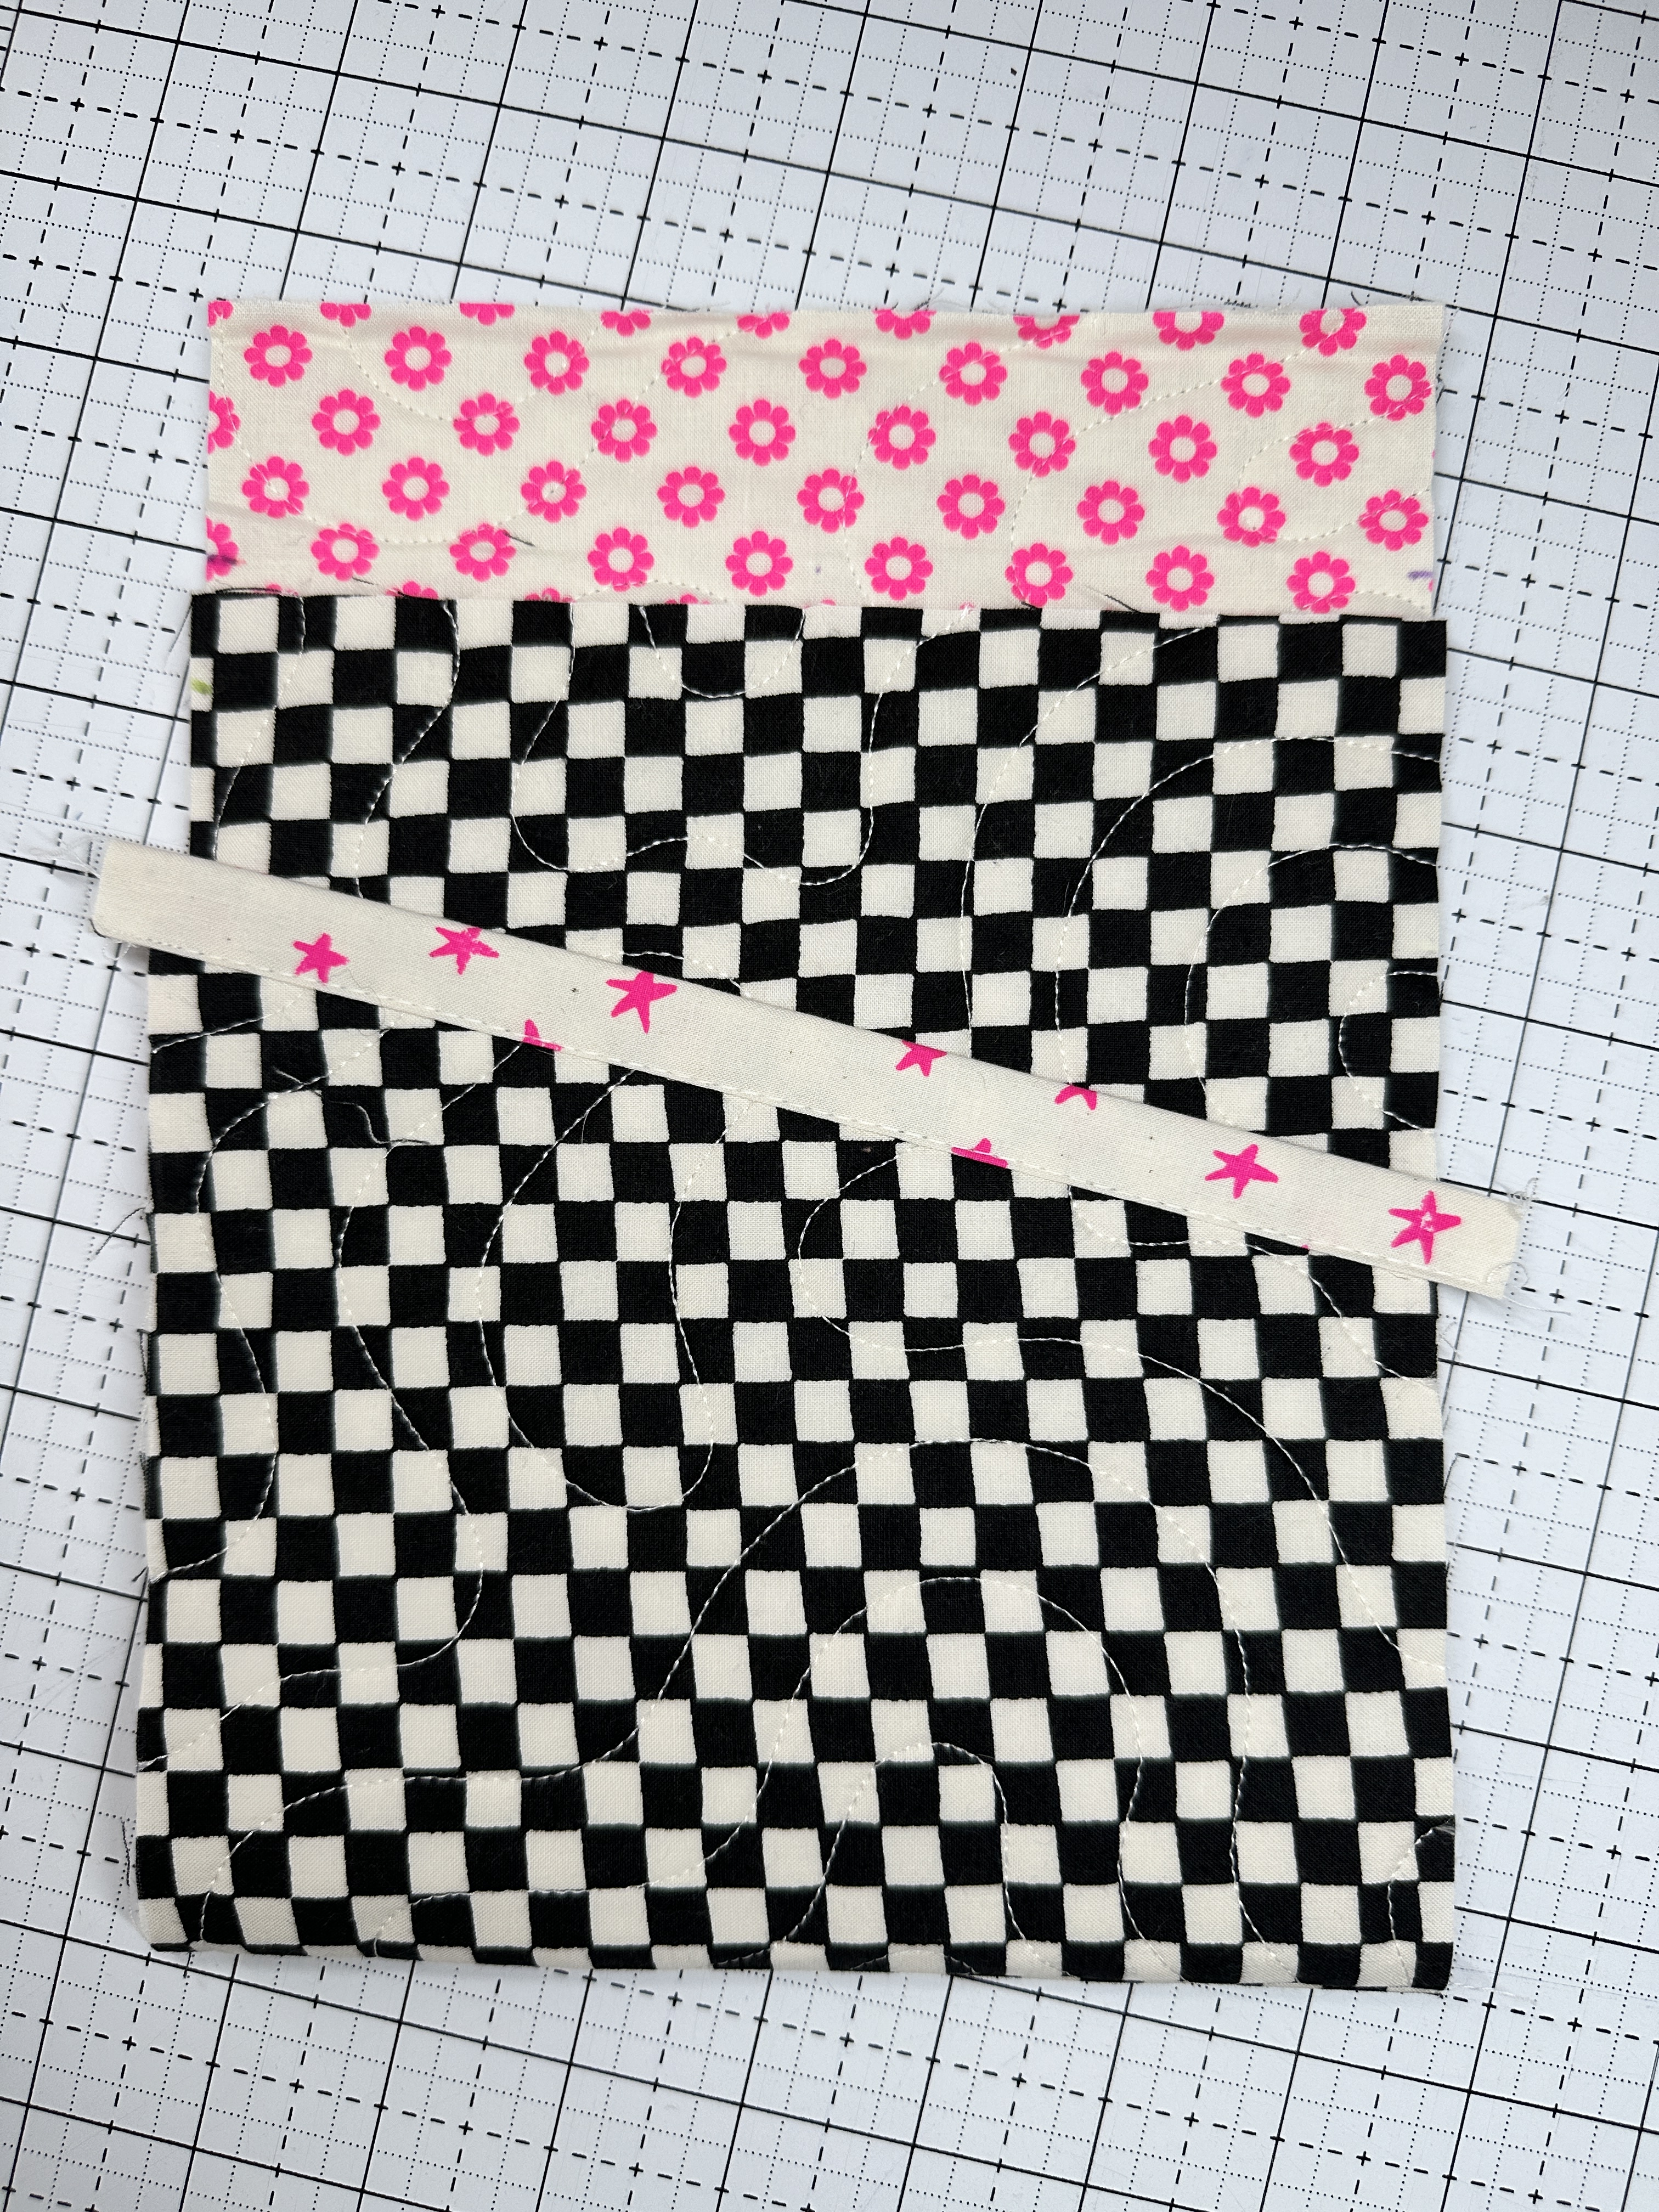
5. Taking your Pocket panel, trim to create the slanted edge. Lay your Pocket panel out on your cutting mat lining it up with the 7 ½” mark on your mat lining up with the top of your panel. Set your ruler on top of your Pocket panel in preparation to trim. 


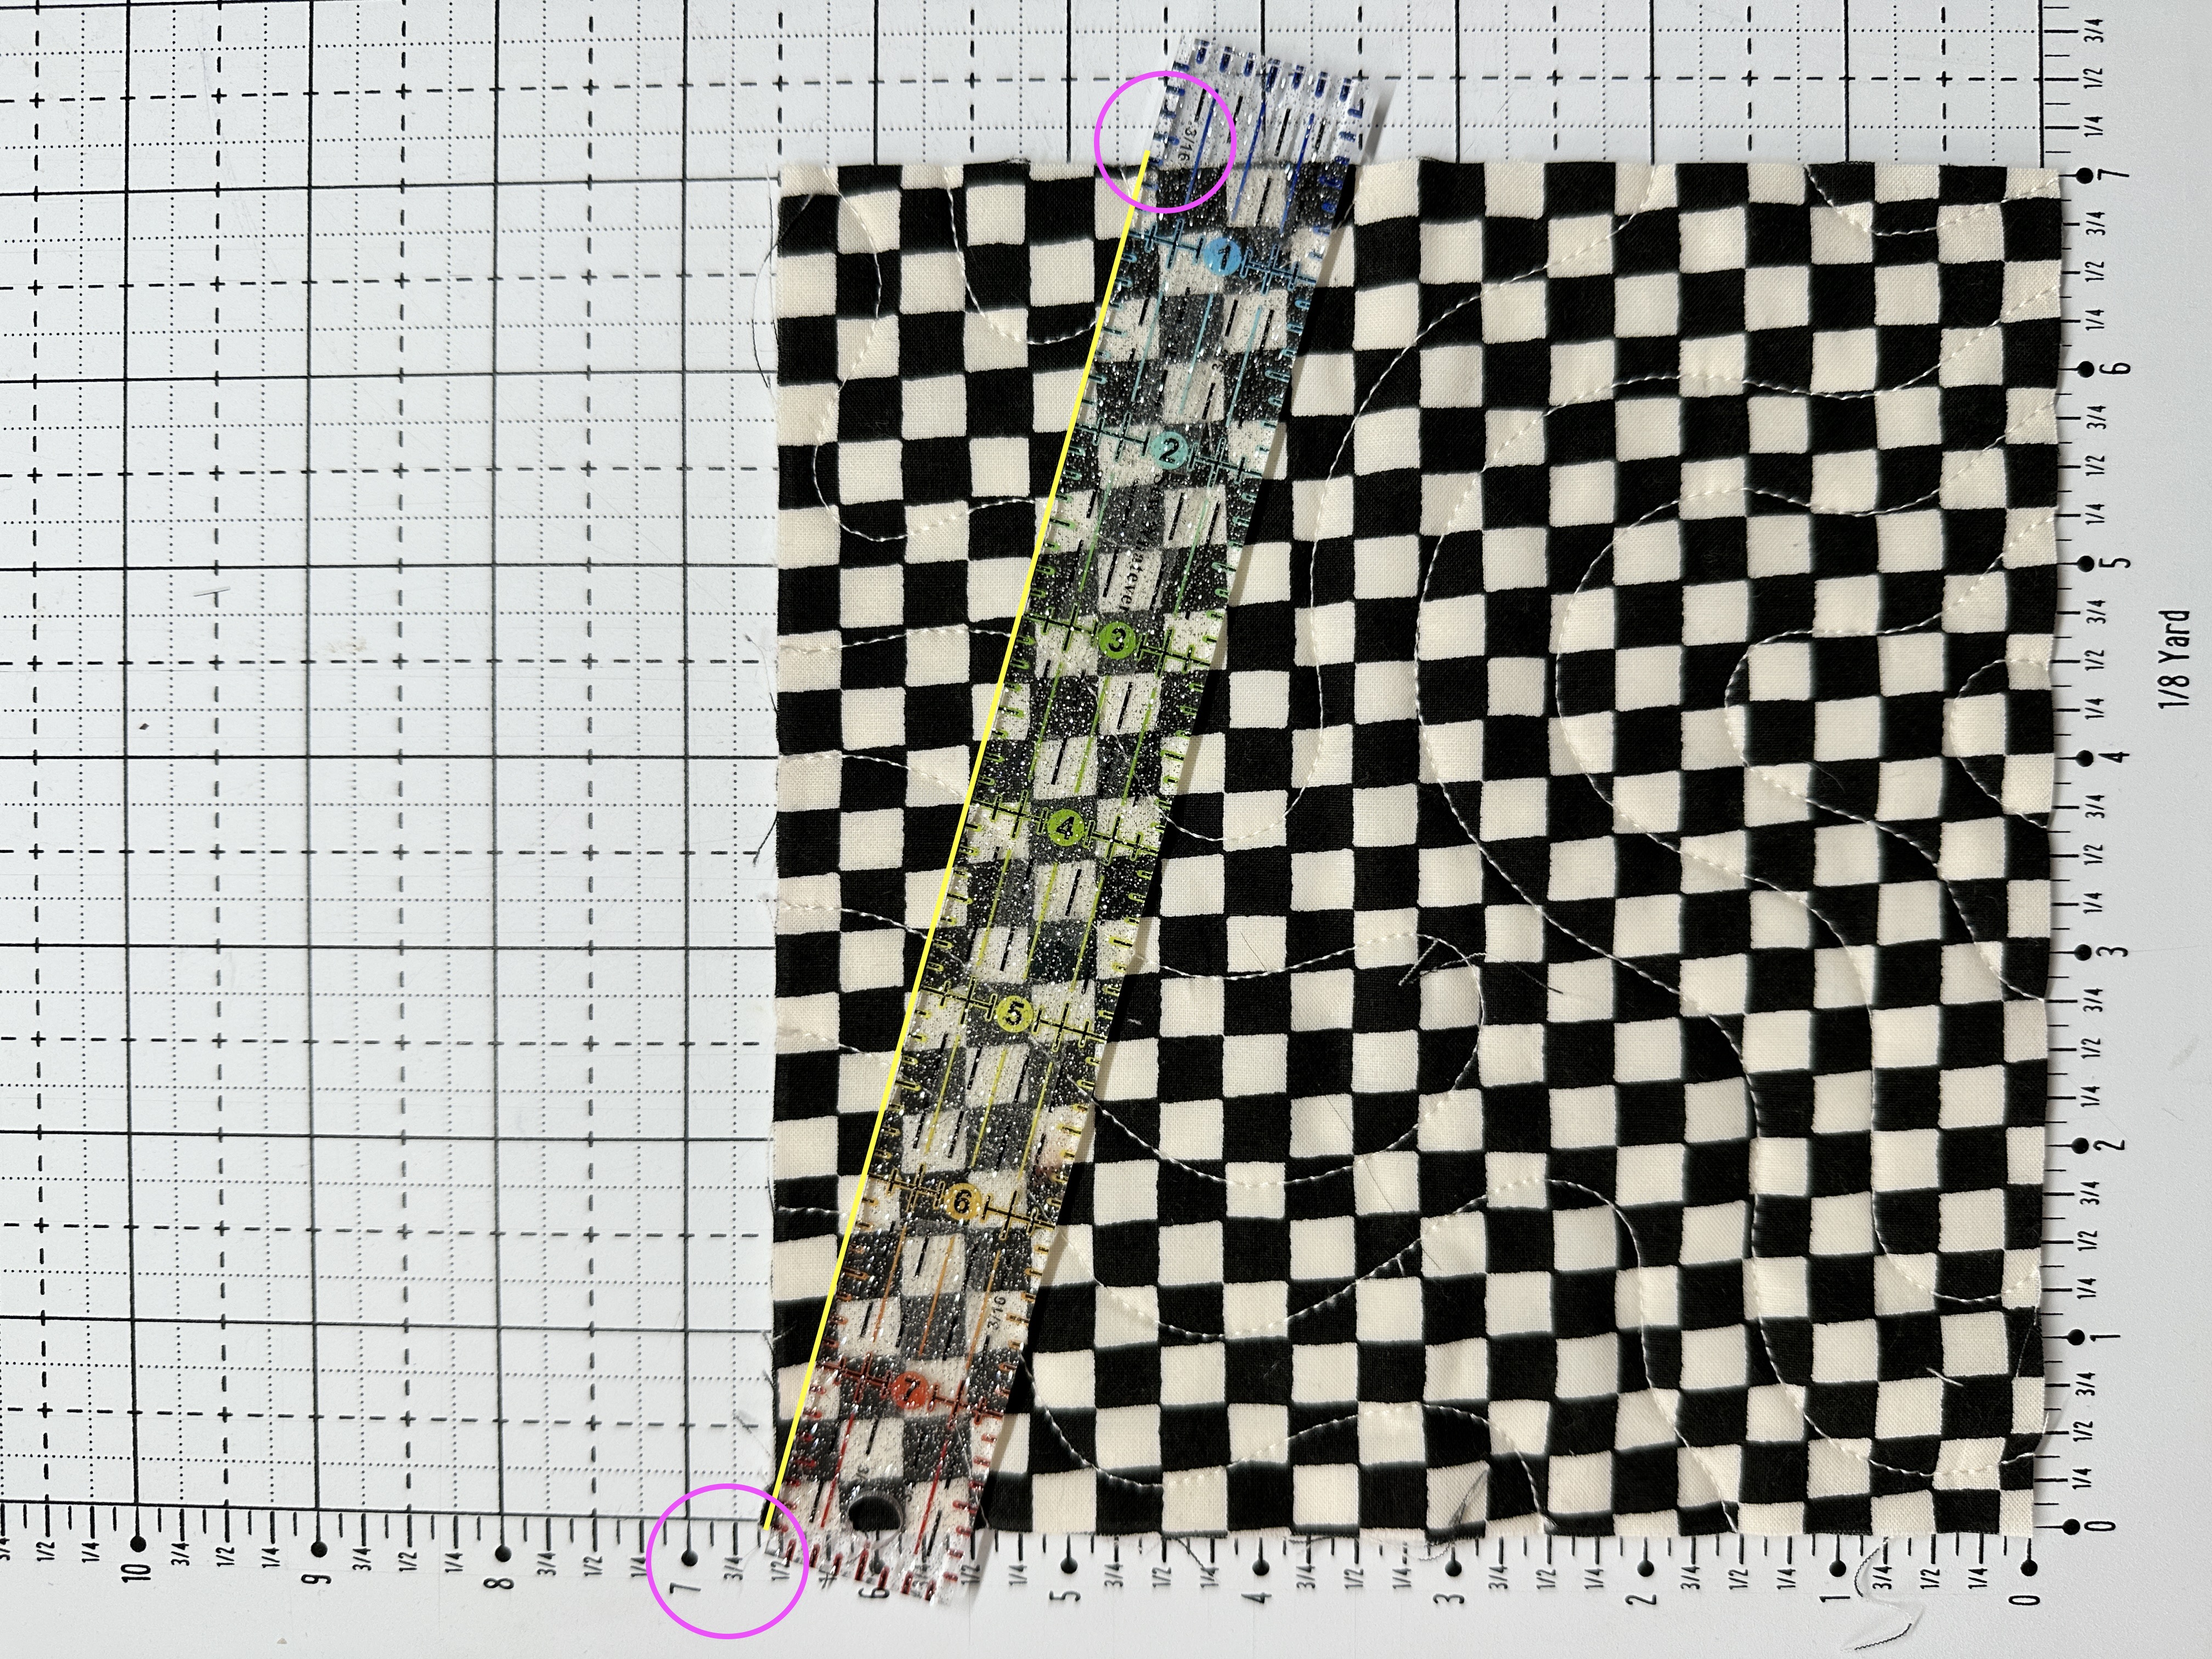
6. Your ruler should line up on your panel from your 7 ½” mark to 4 ½” mark as shown in the photo. Cut this line to create your slanted pocket panel edge with your rotary cutter. 


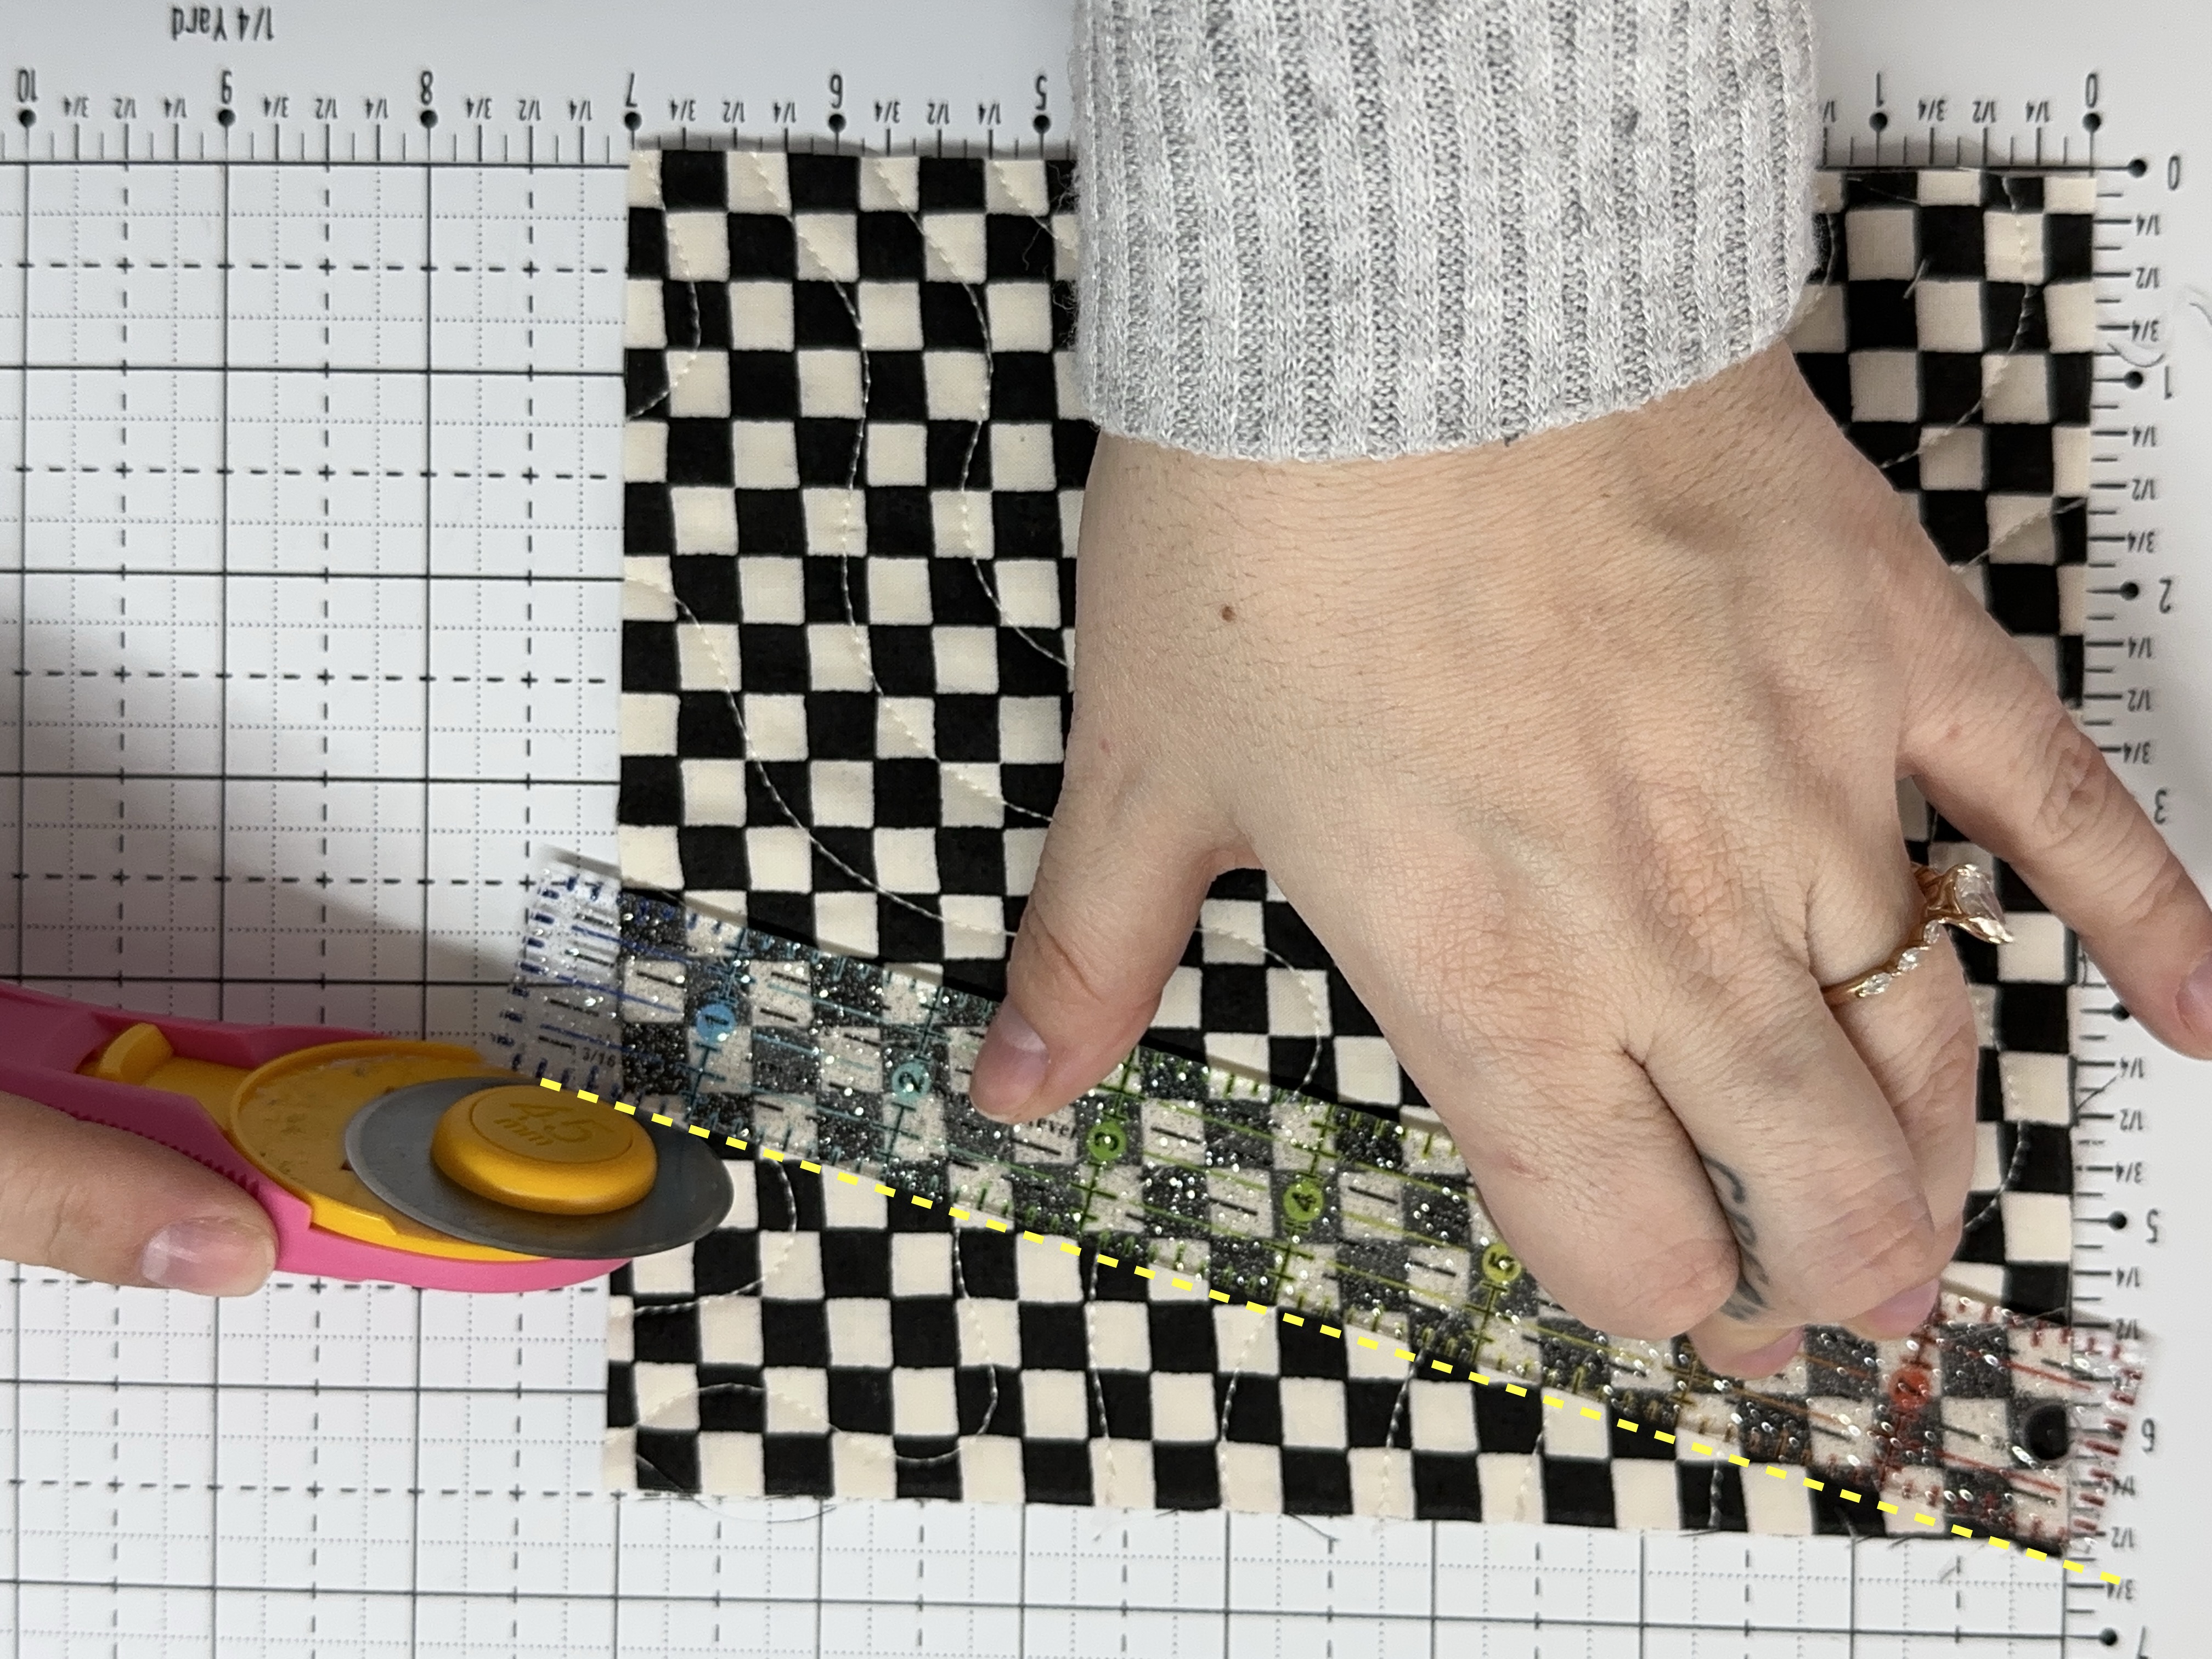
7. Take your binding and press it in half, wrong sides facing each other. Center your binding along the top raw edge and pin your binding to the inside of your Pocket Panel and head over to your sewing machine. You will have binding overage on each side. Attach your binding sewing with a ¼” seam allowance. 

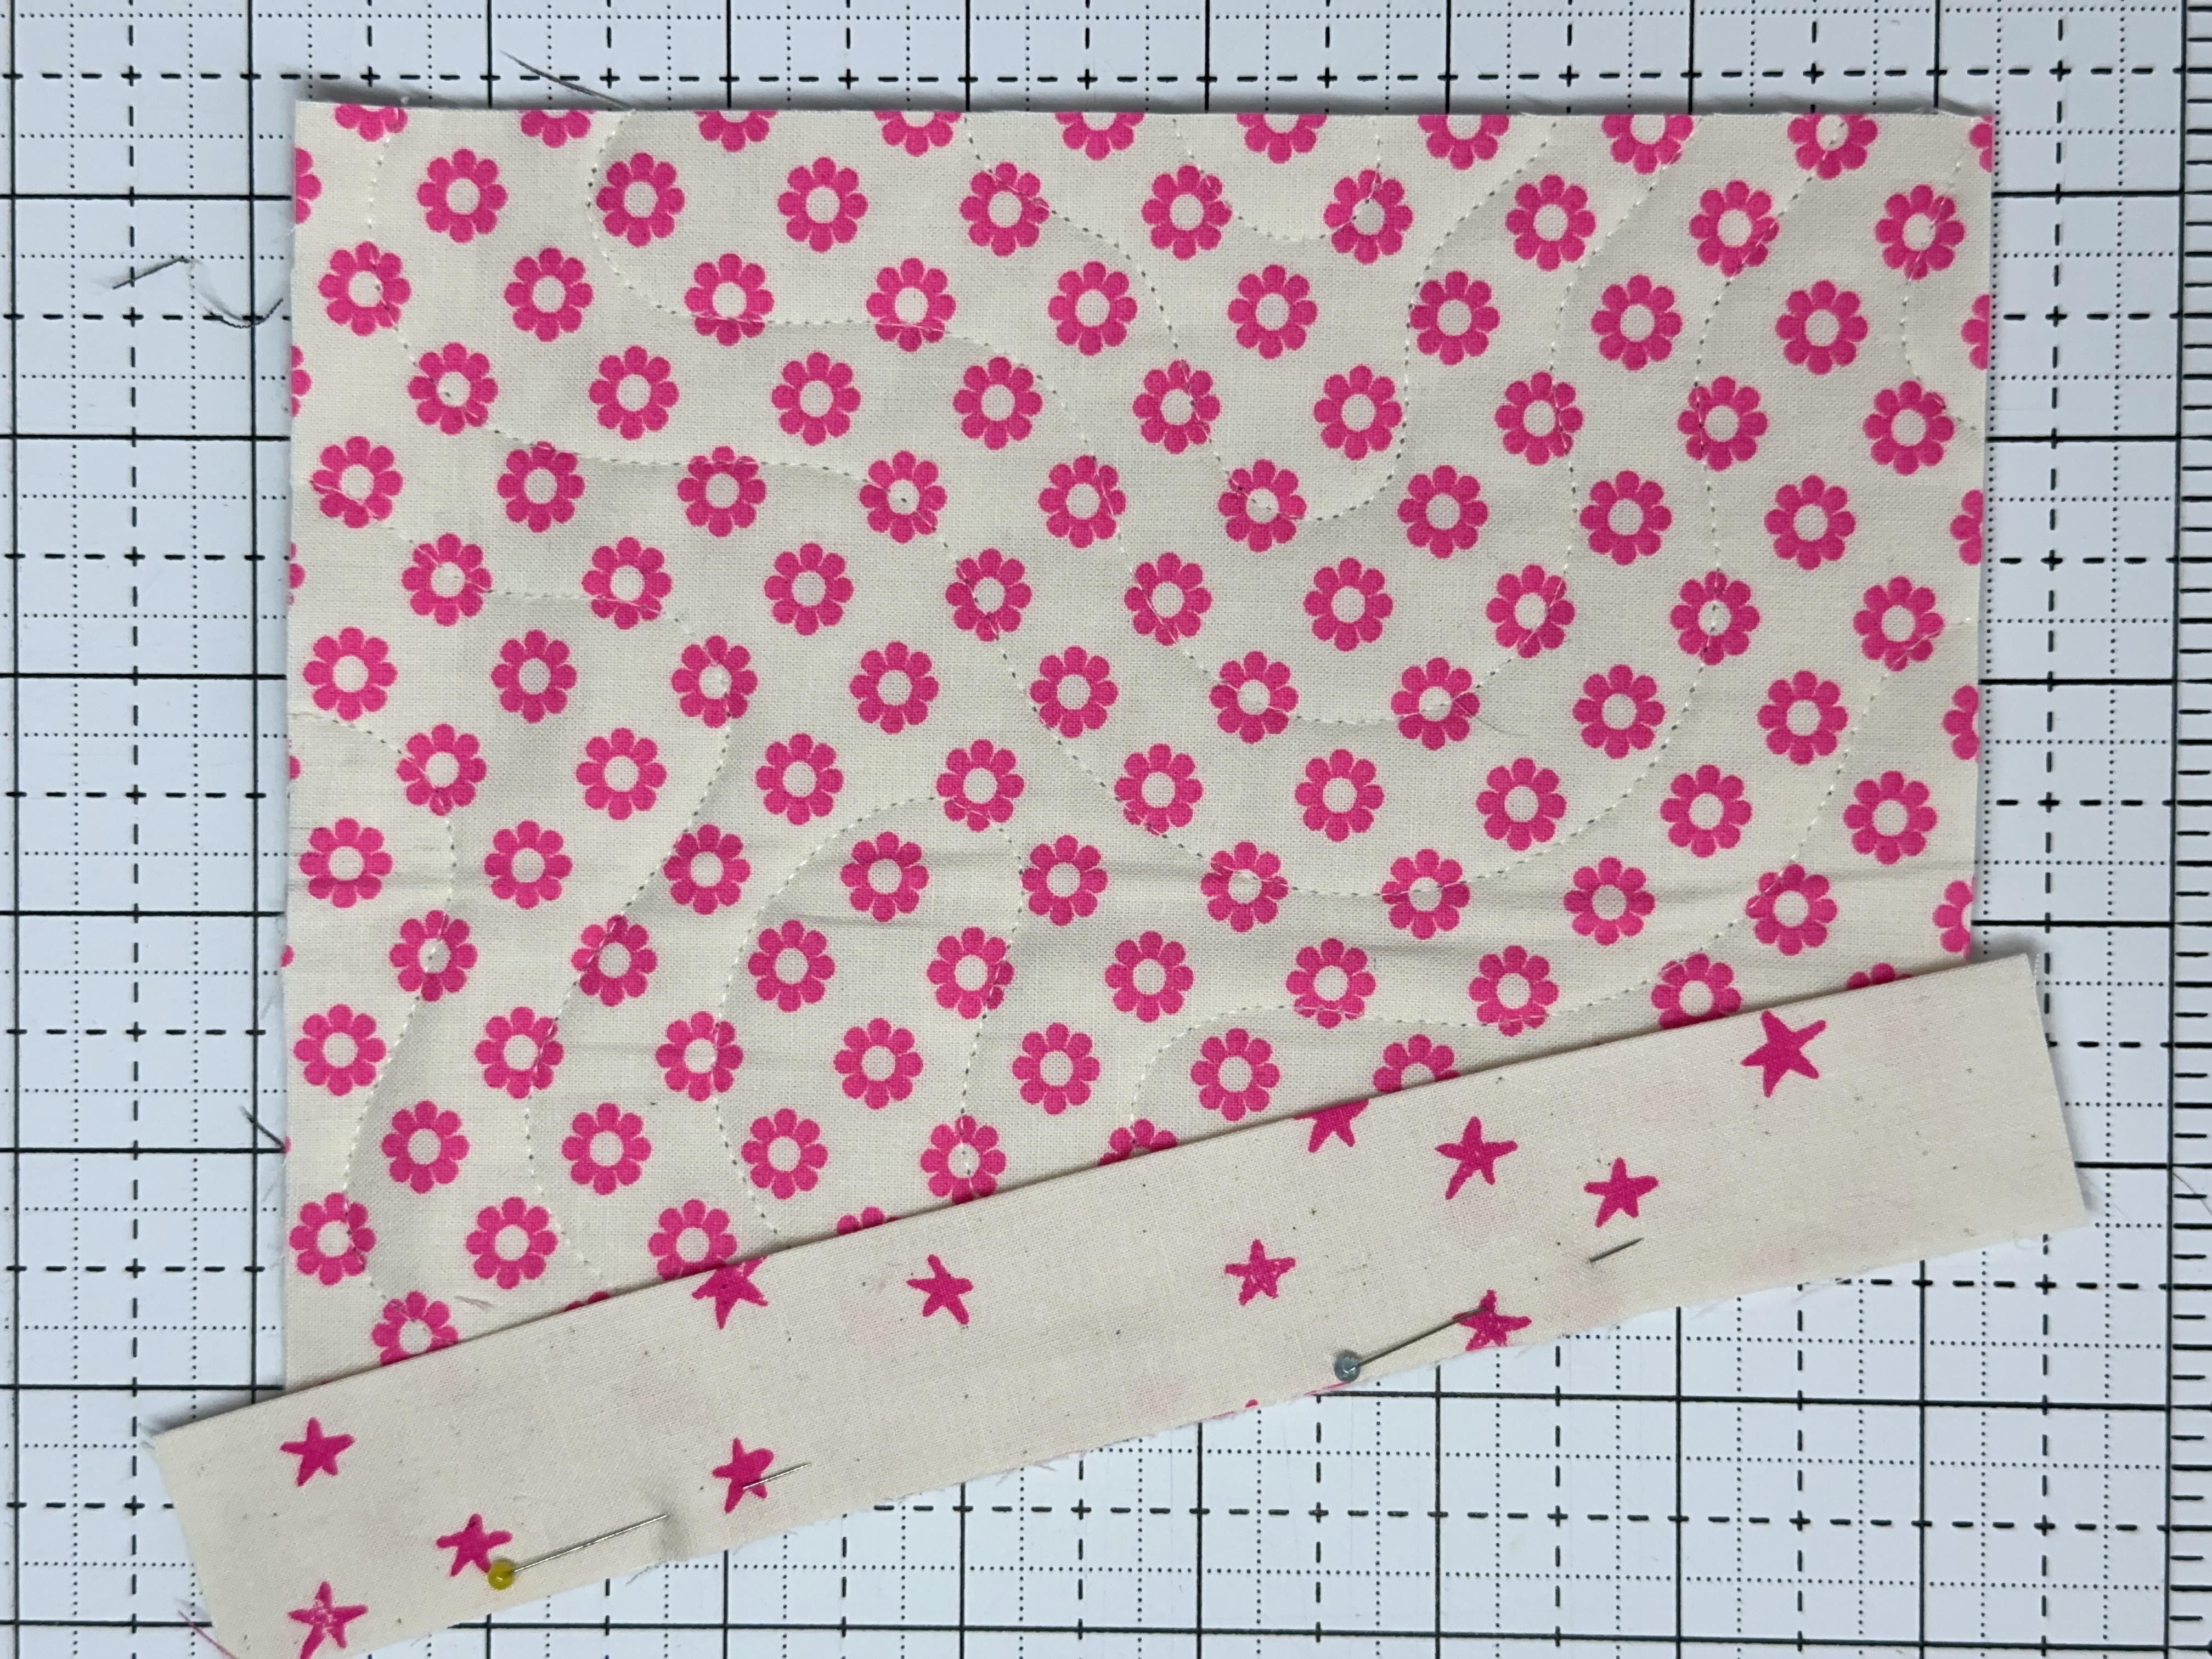
8. Head over to your pressing area and flip up your binding and press. 


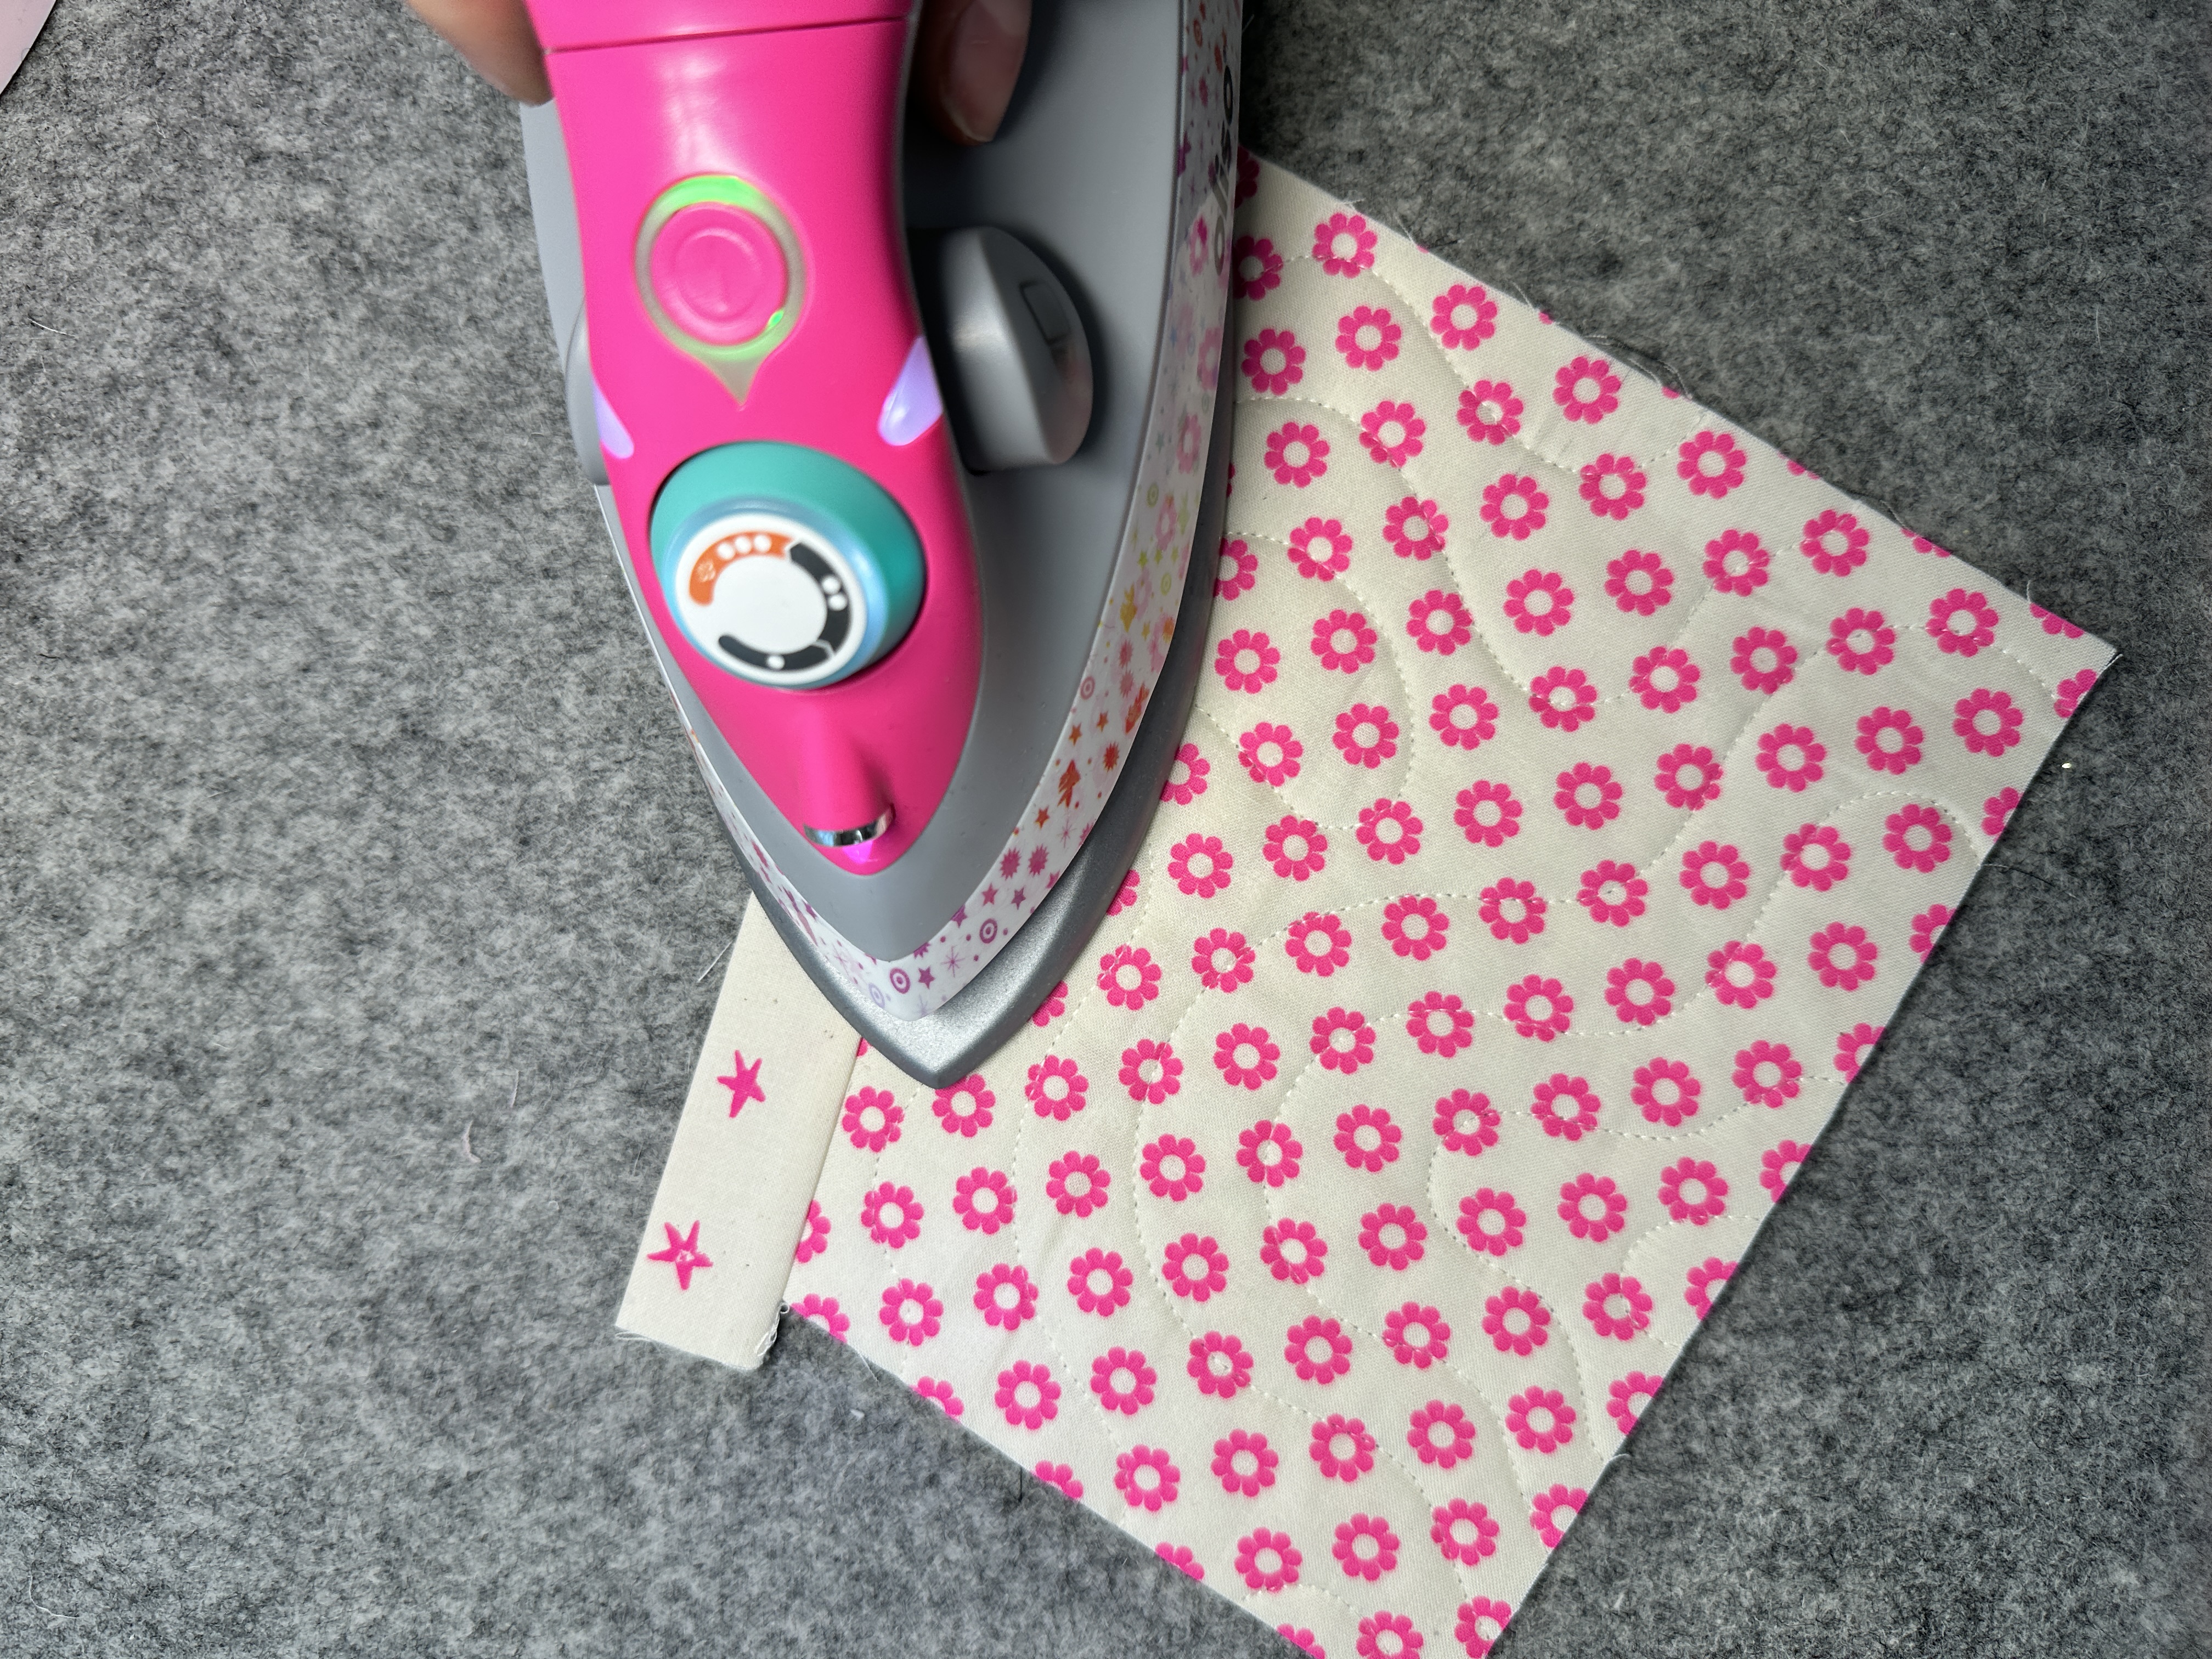
9. Fold binding over the raw edge to the front of your Pocket panel and press. Pin in place. 


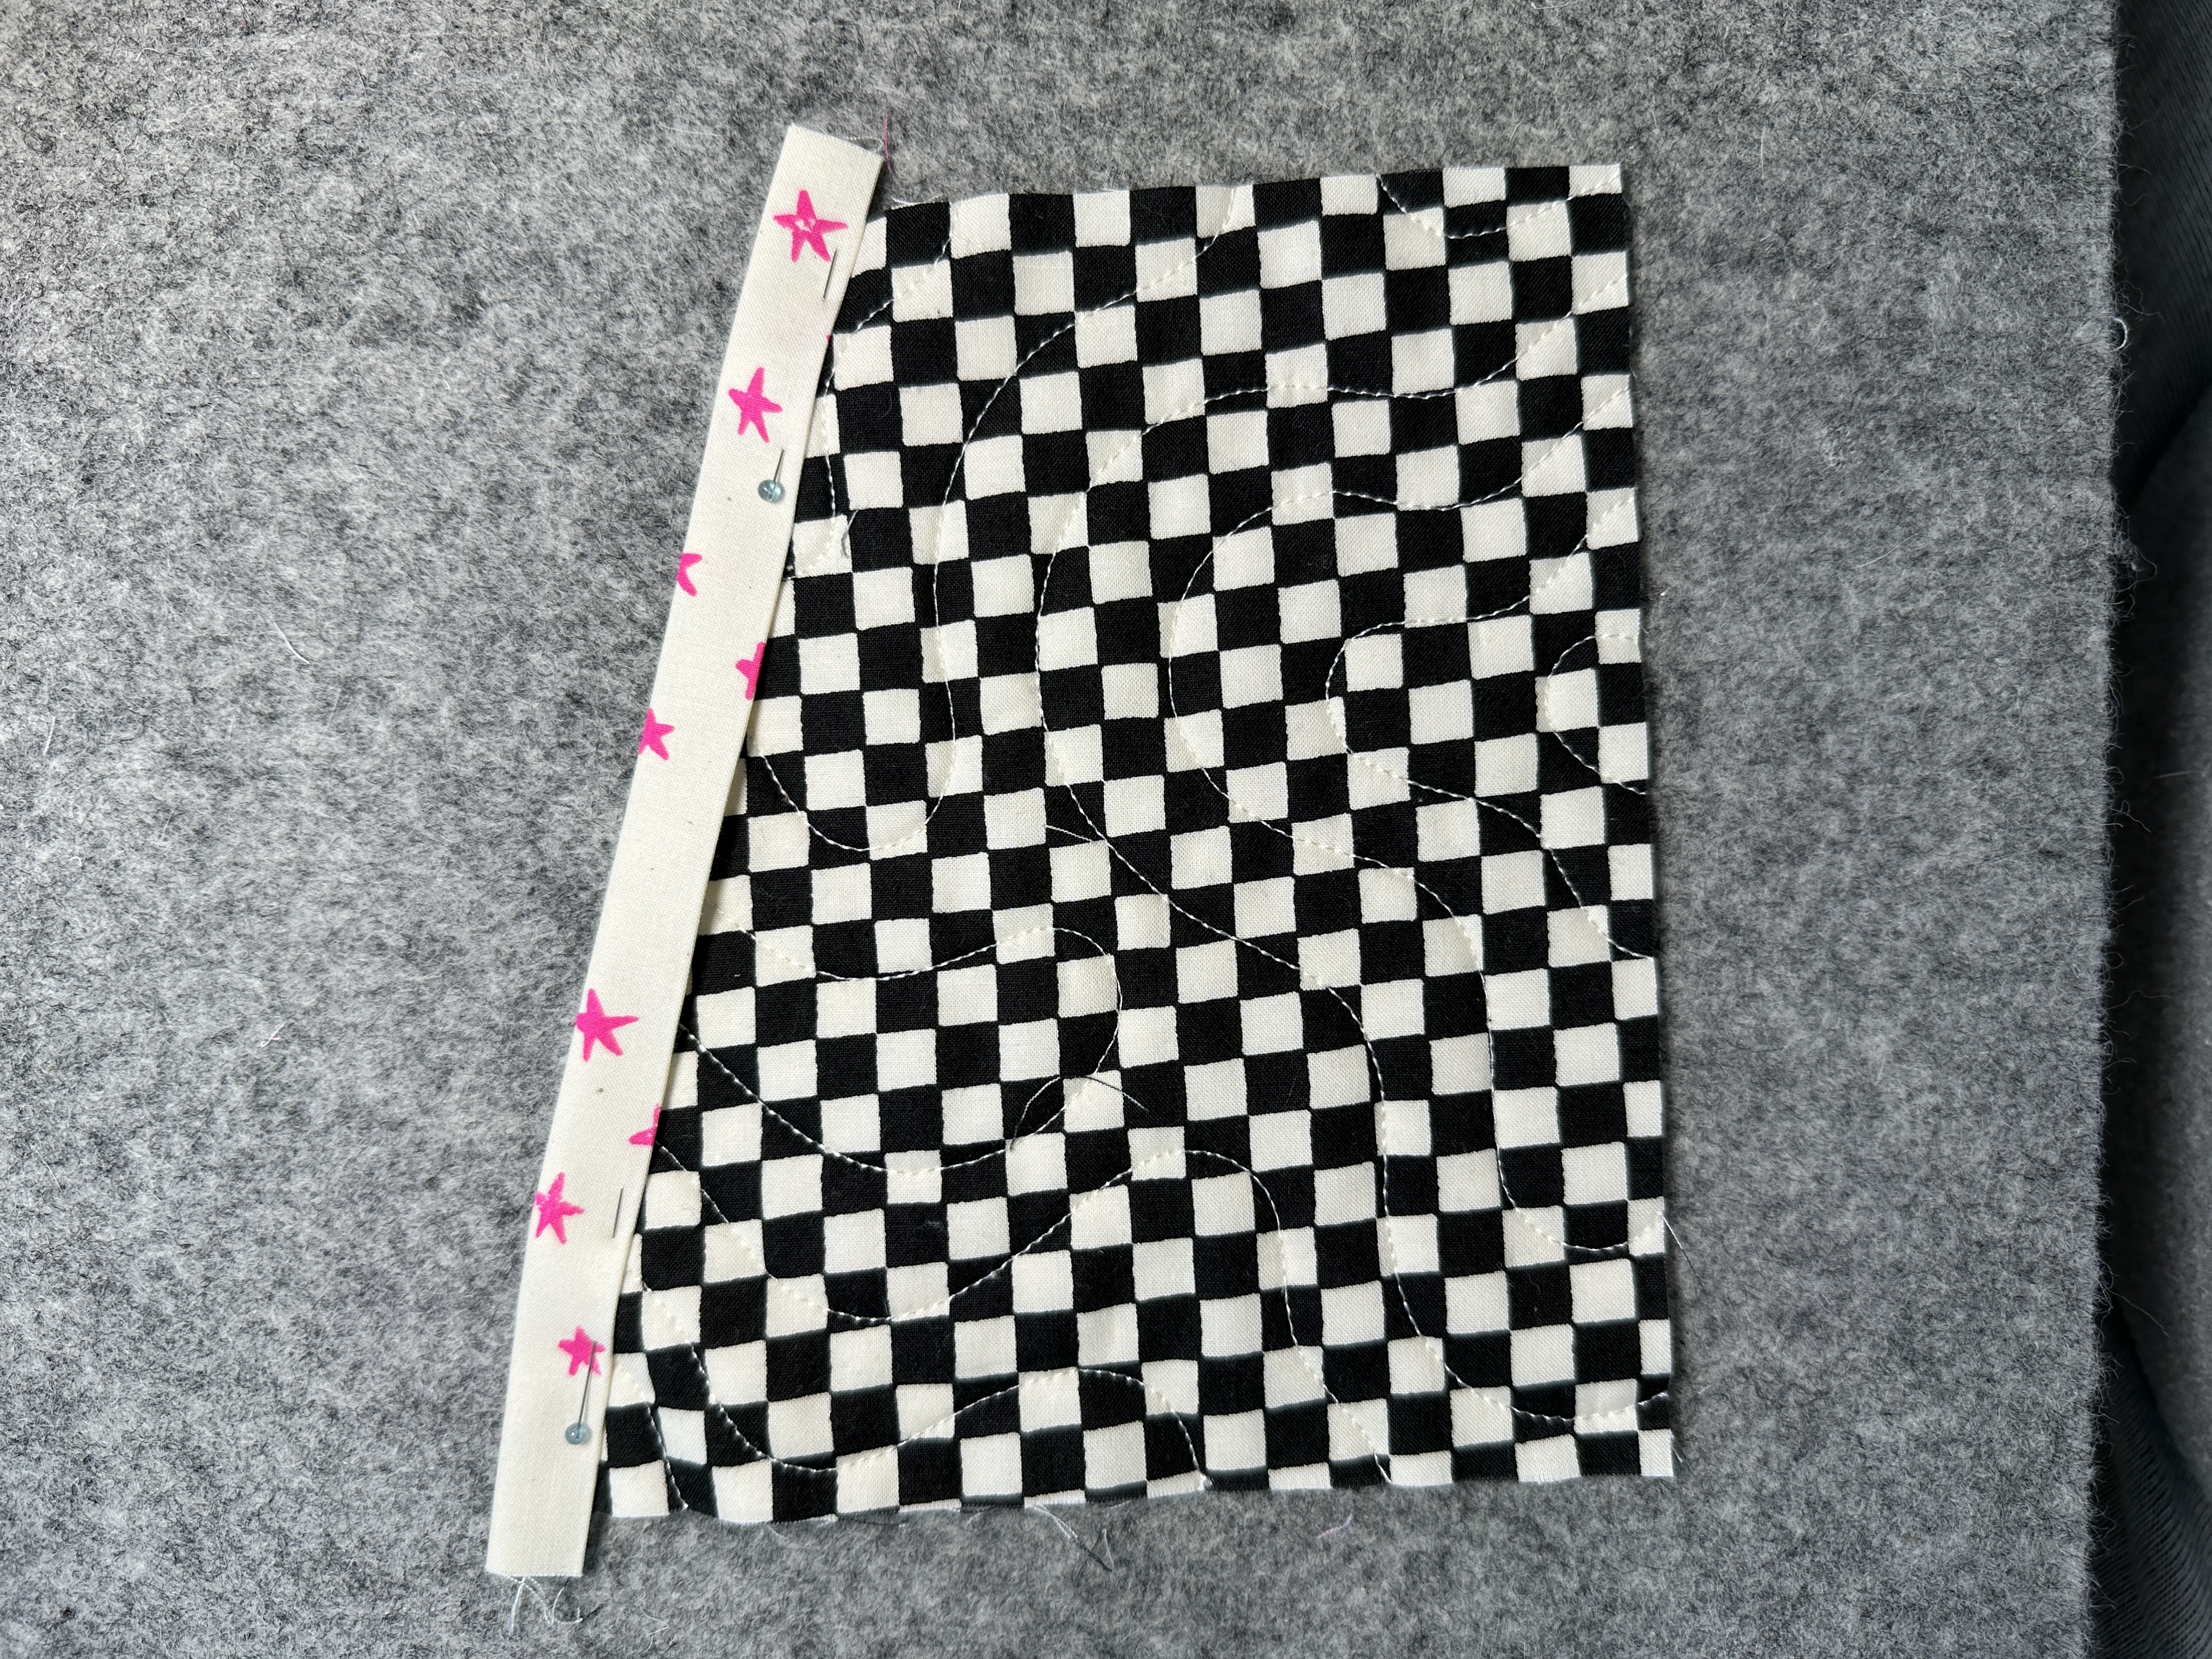
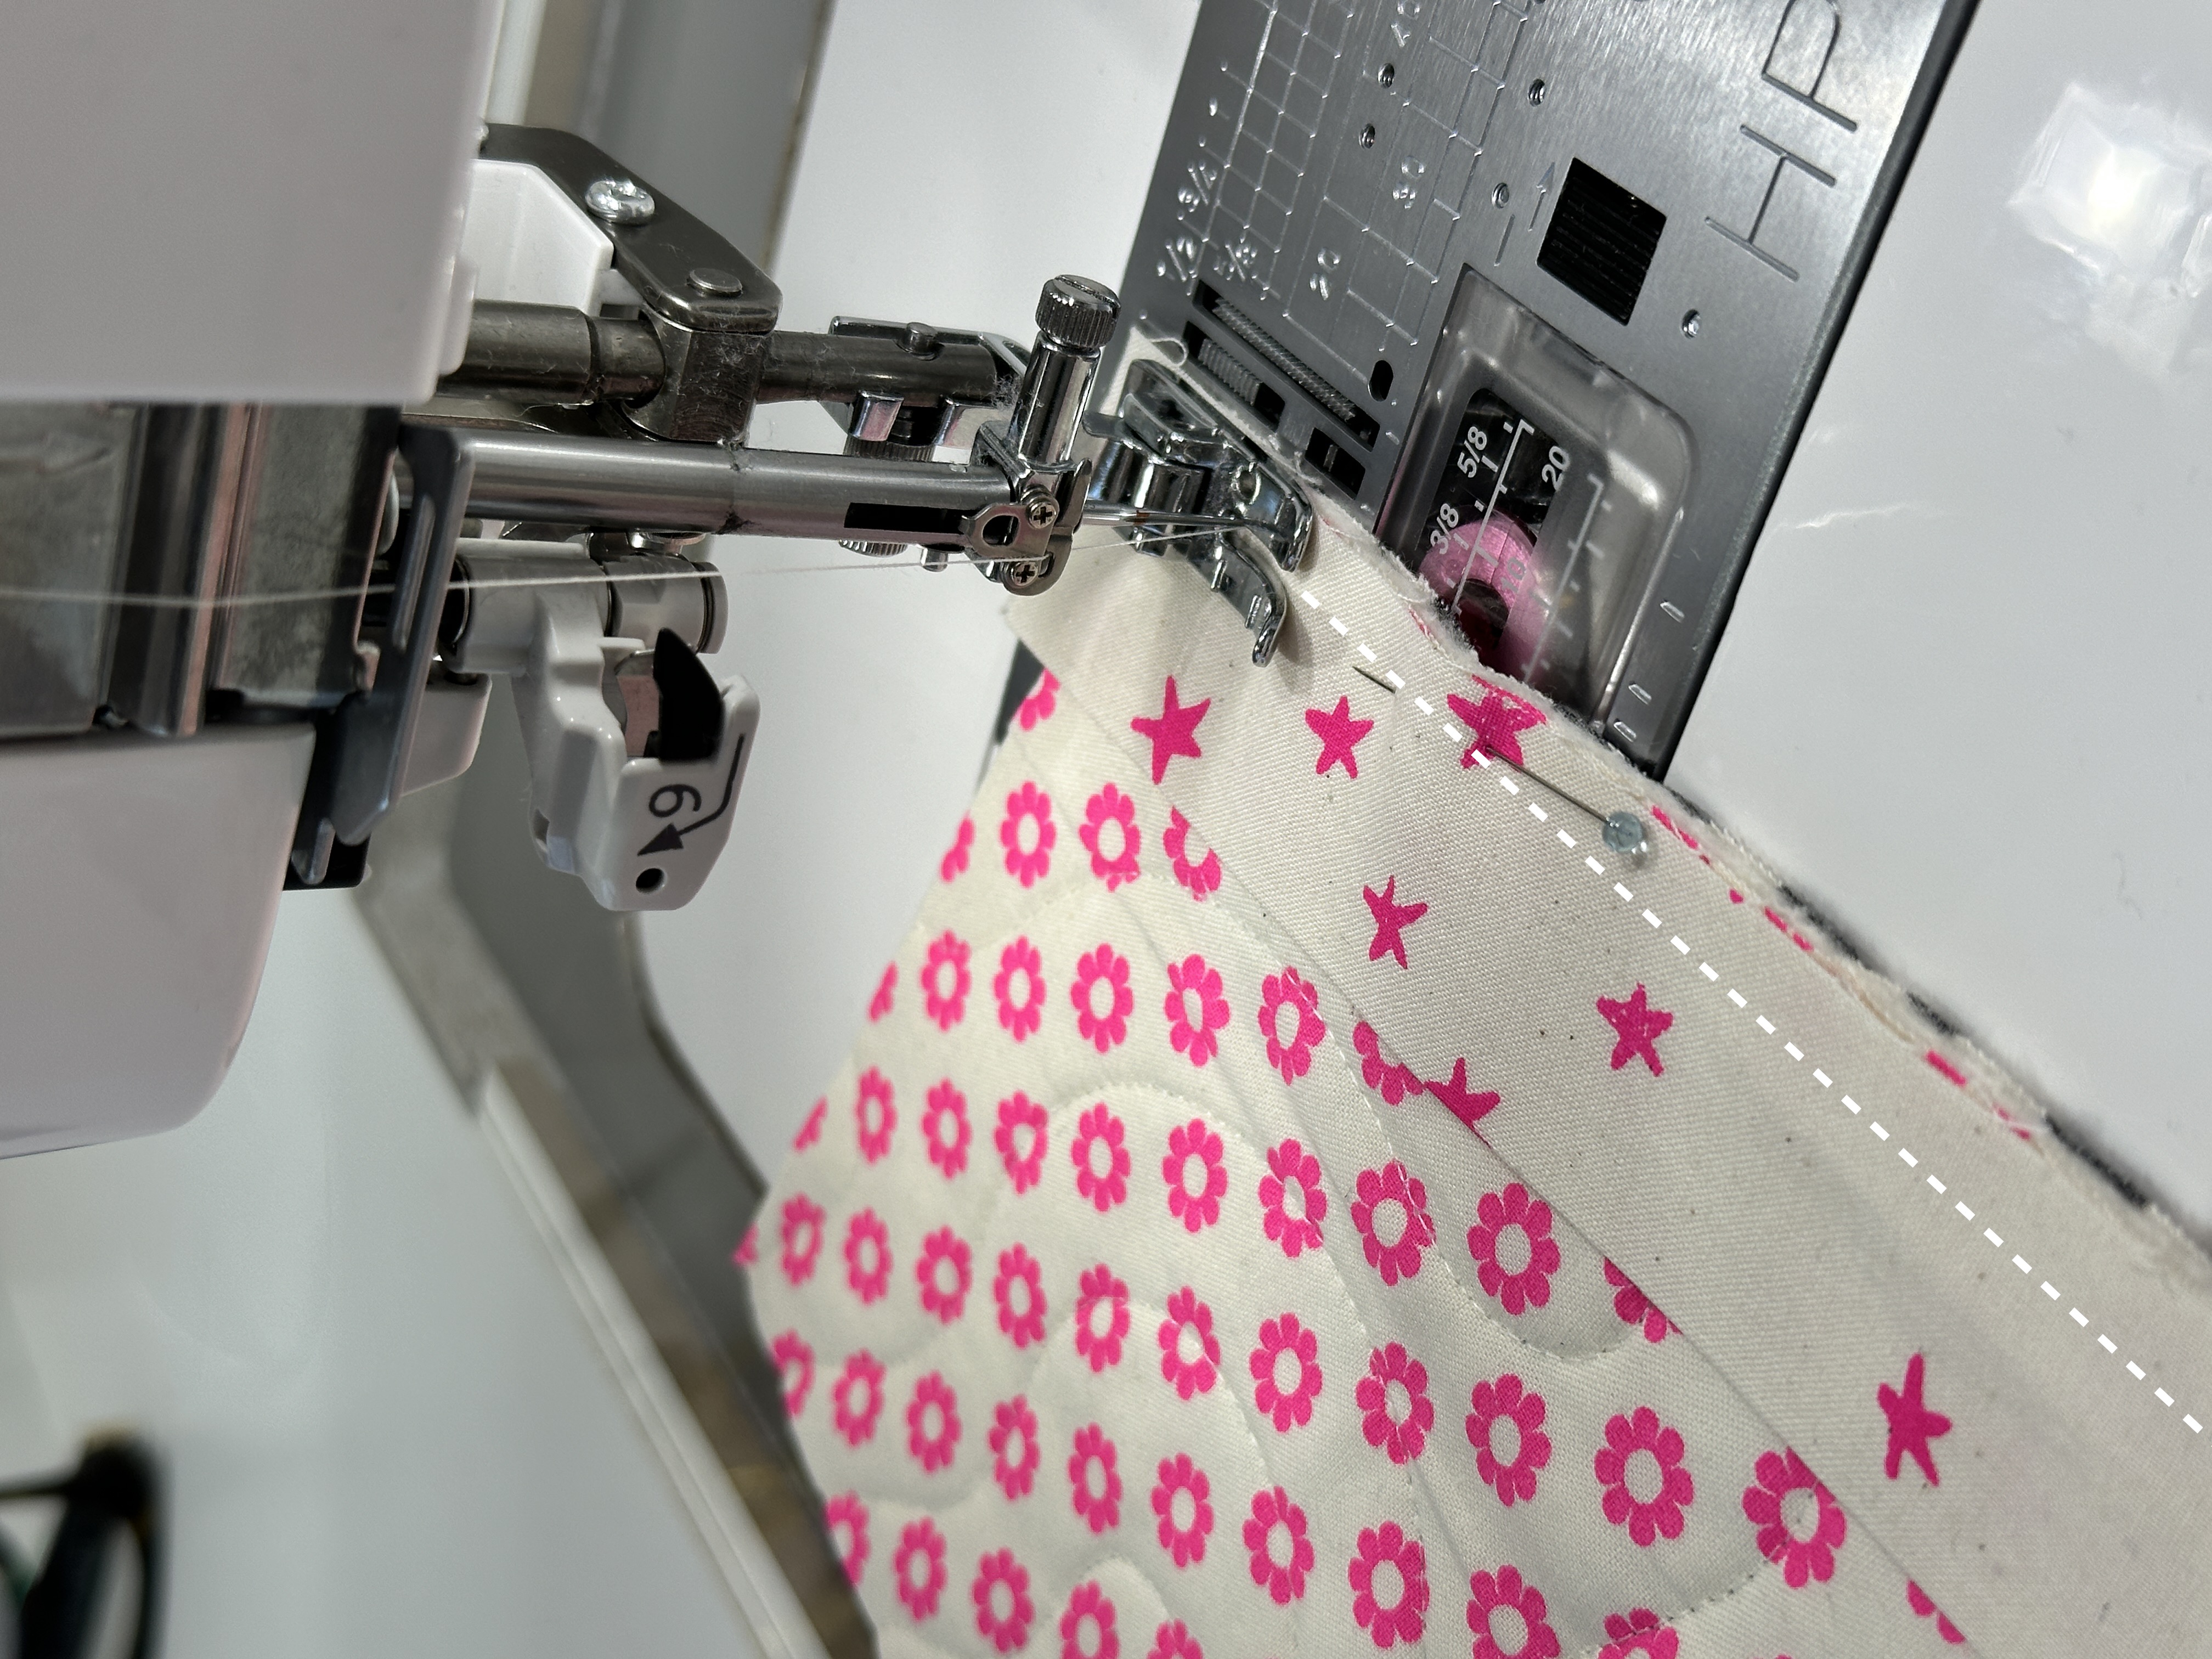
10. Take your pocket panel over to your sewing machine and sew your binding neatly to the front. I prefer to do my binding method this way so I can control how the stitching looks. I increase my stitch length to 3.50 and sew close to the edge of the binding.  


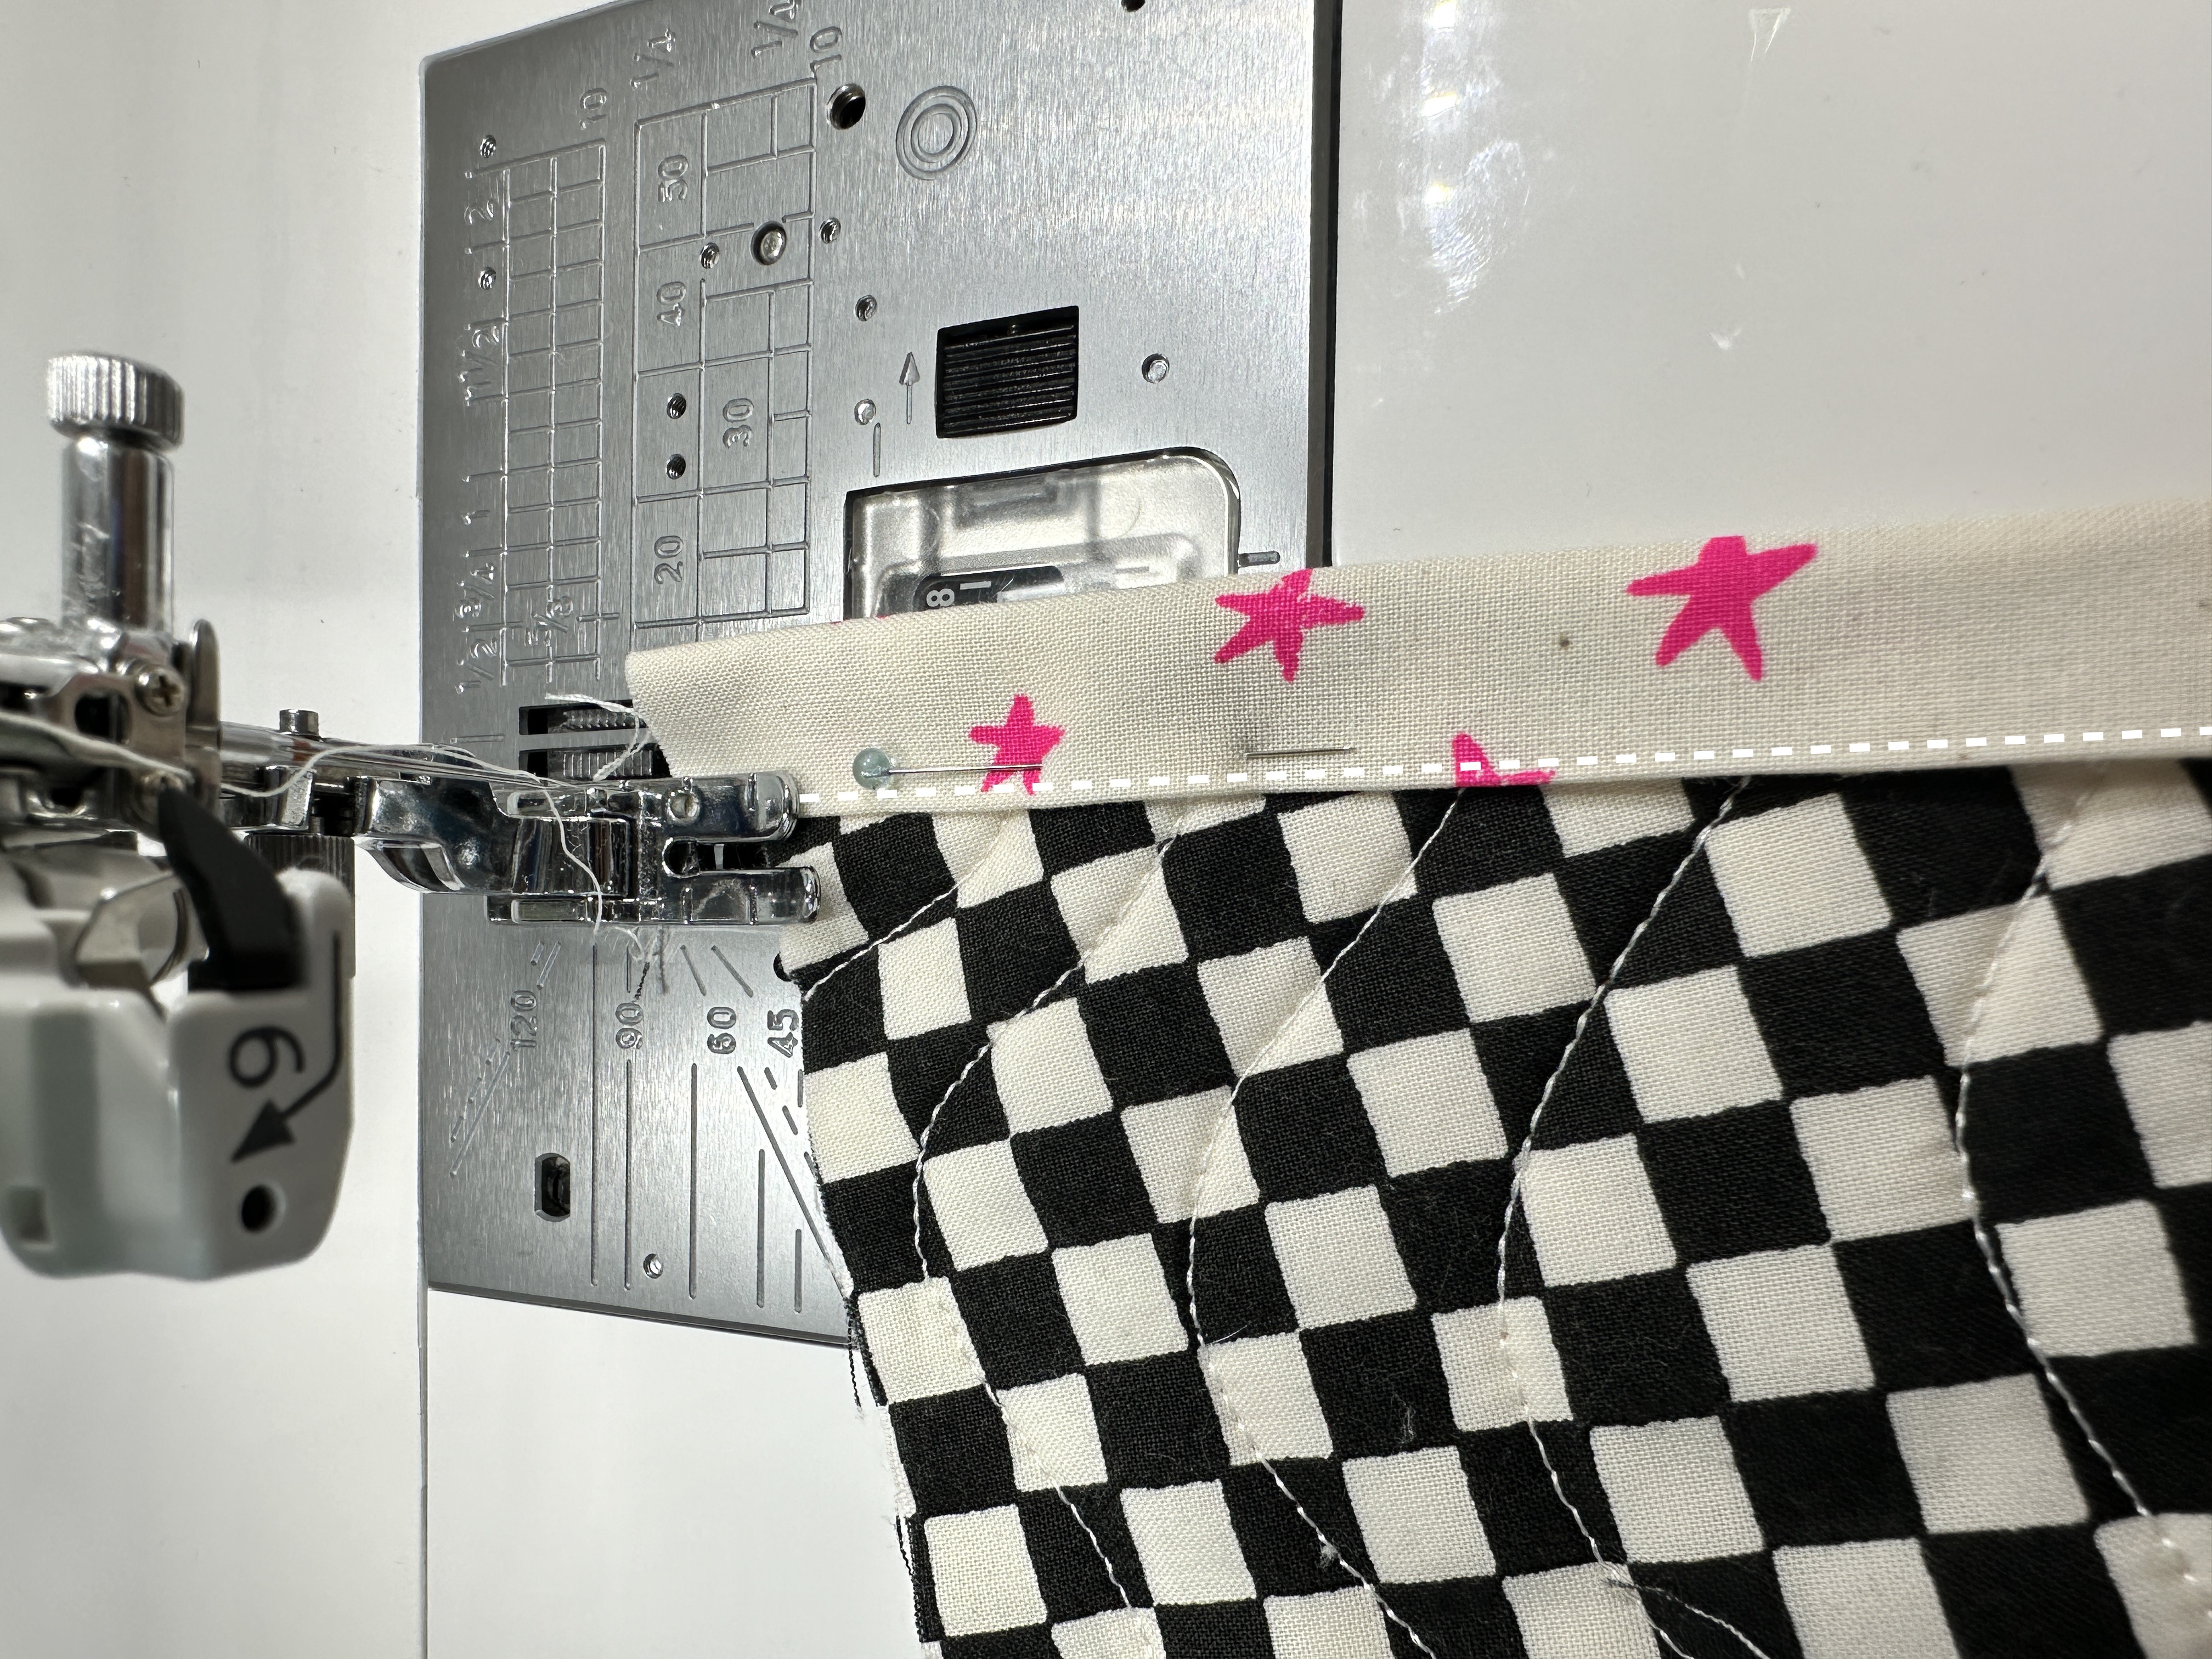
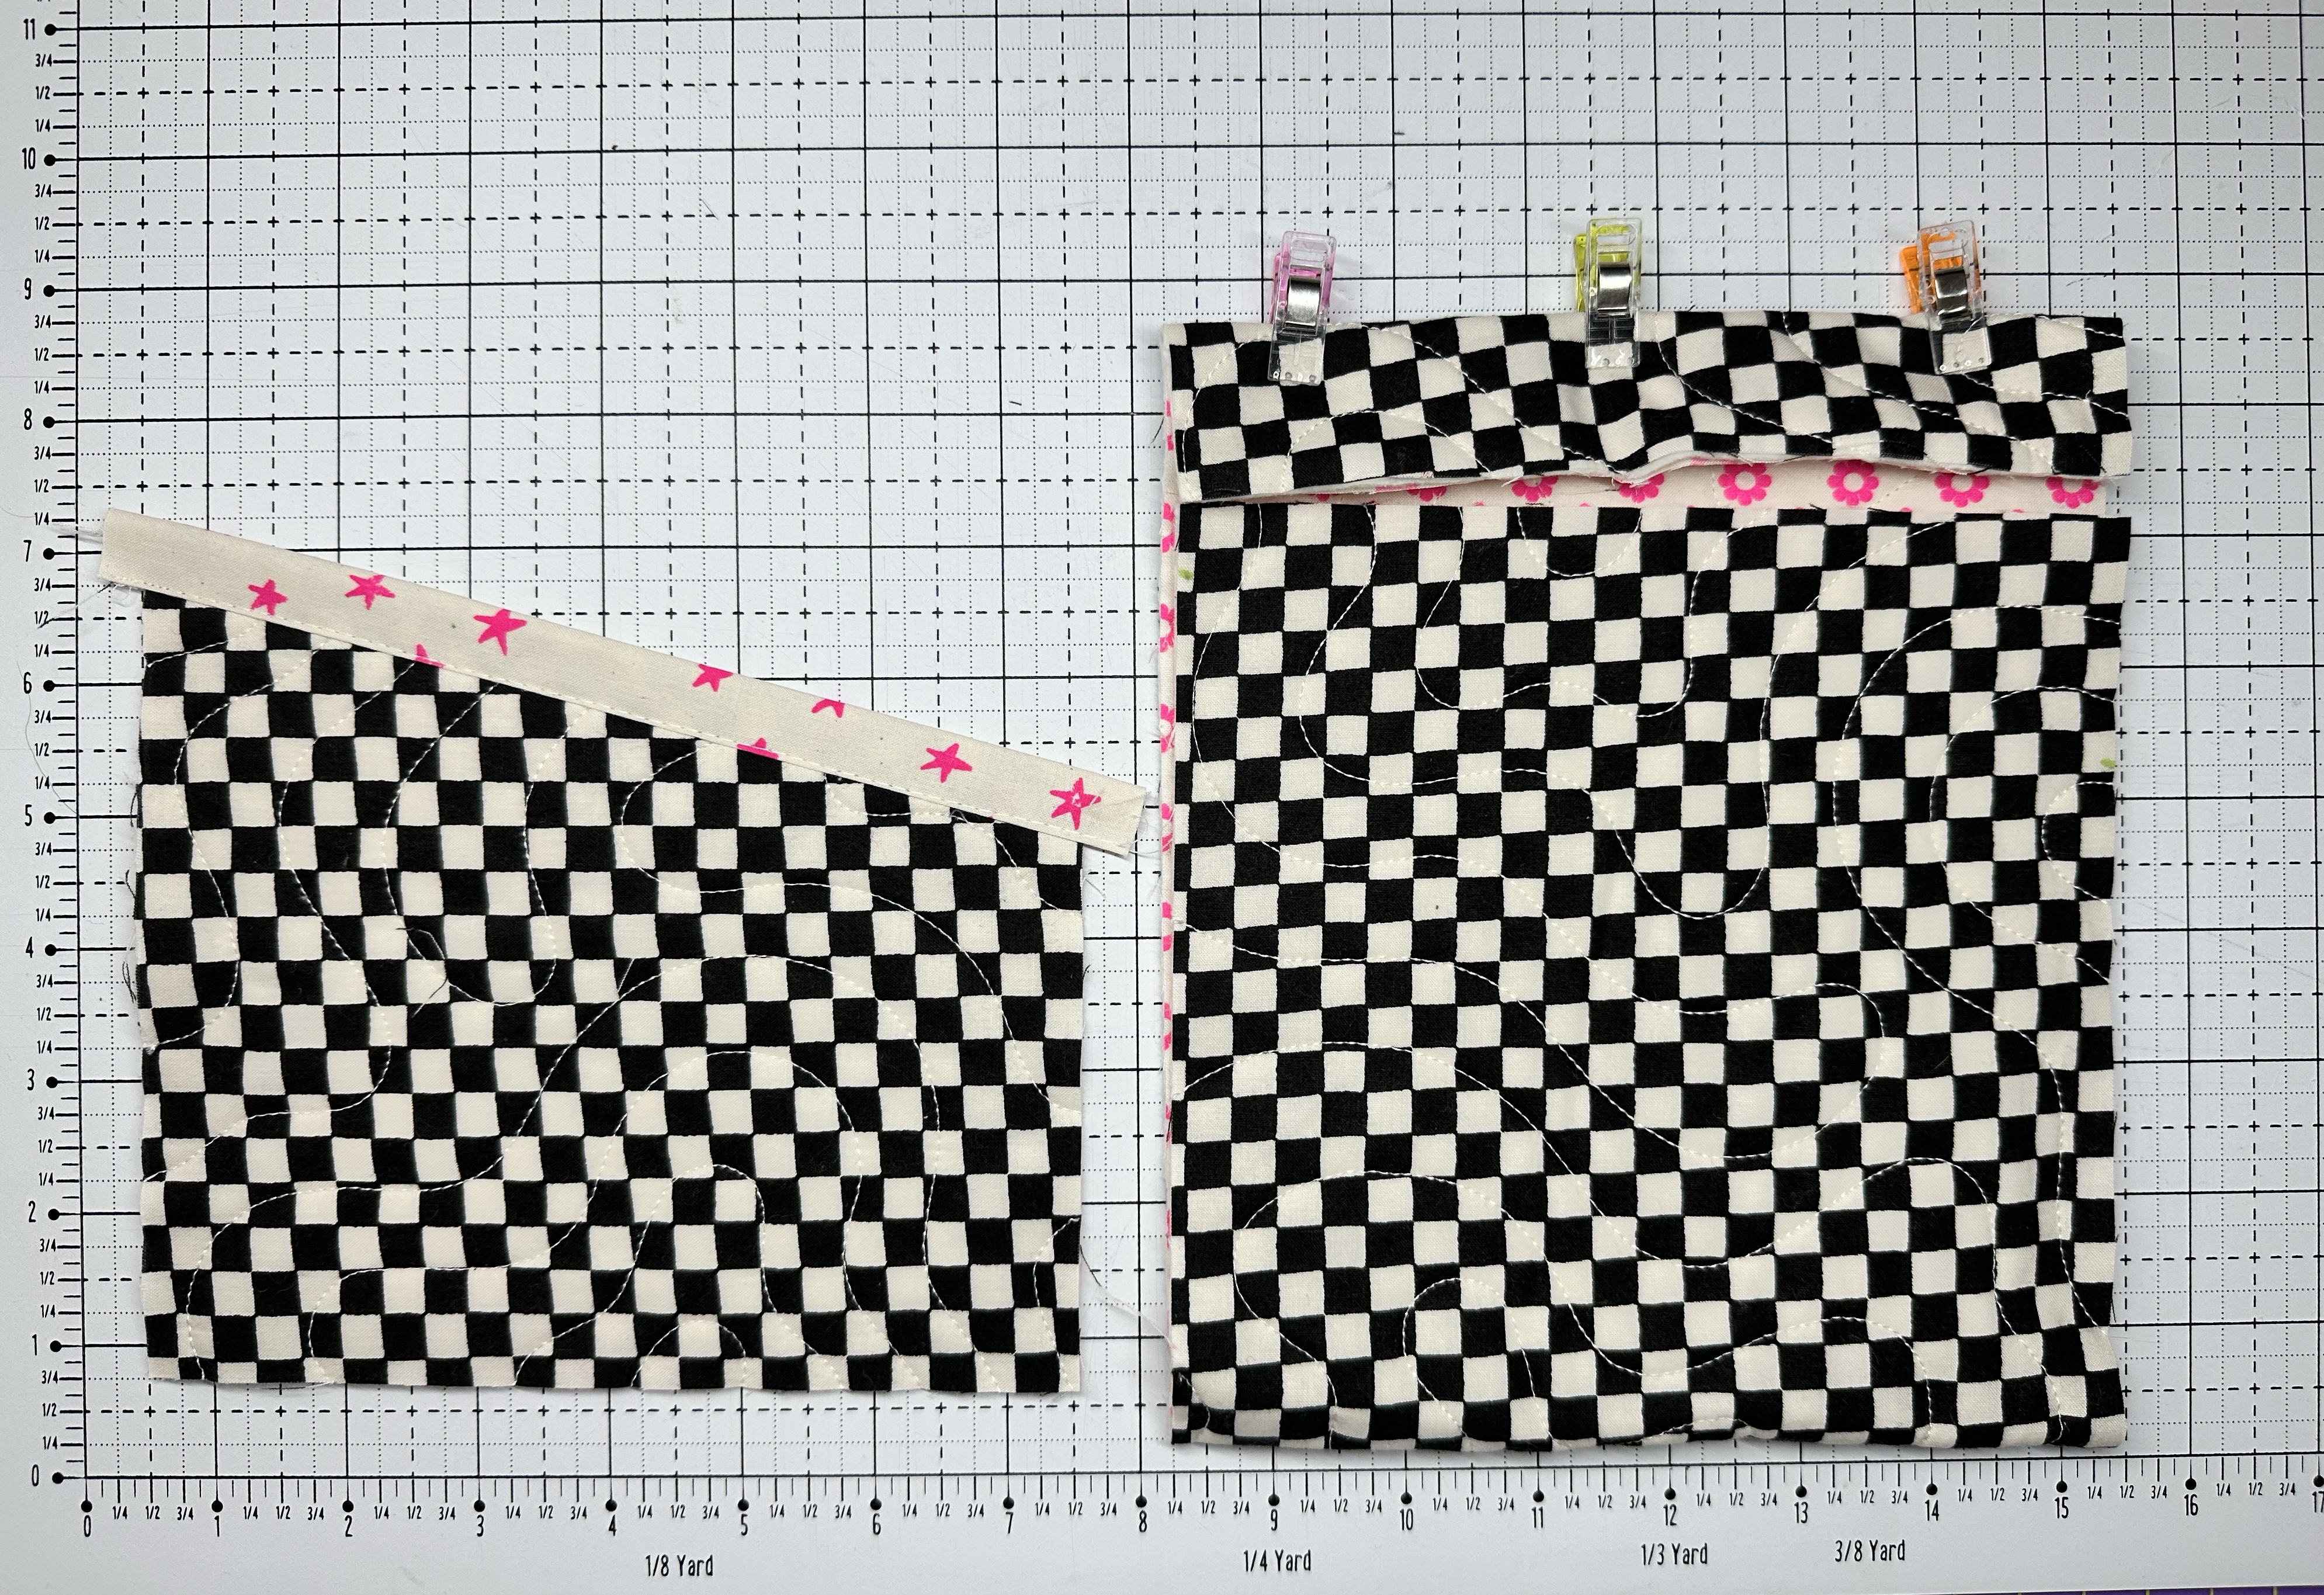
11. Now that the Pocket panel is complete, we will move onto attaching the Pocket panel to the body panel. With your body panel folded, your bottom fold should be as even as possible after pressing in step 4. Press down with your ruler along the closed bottom edge marking a solid line. 


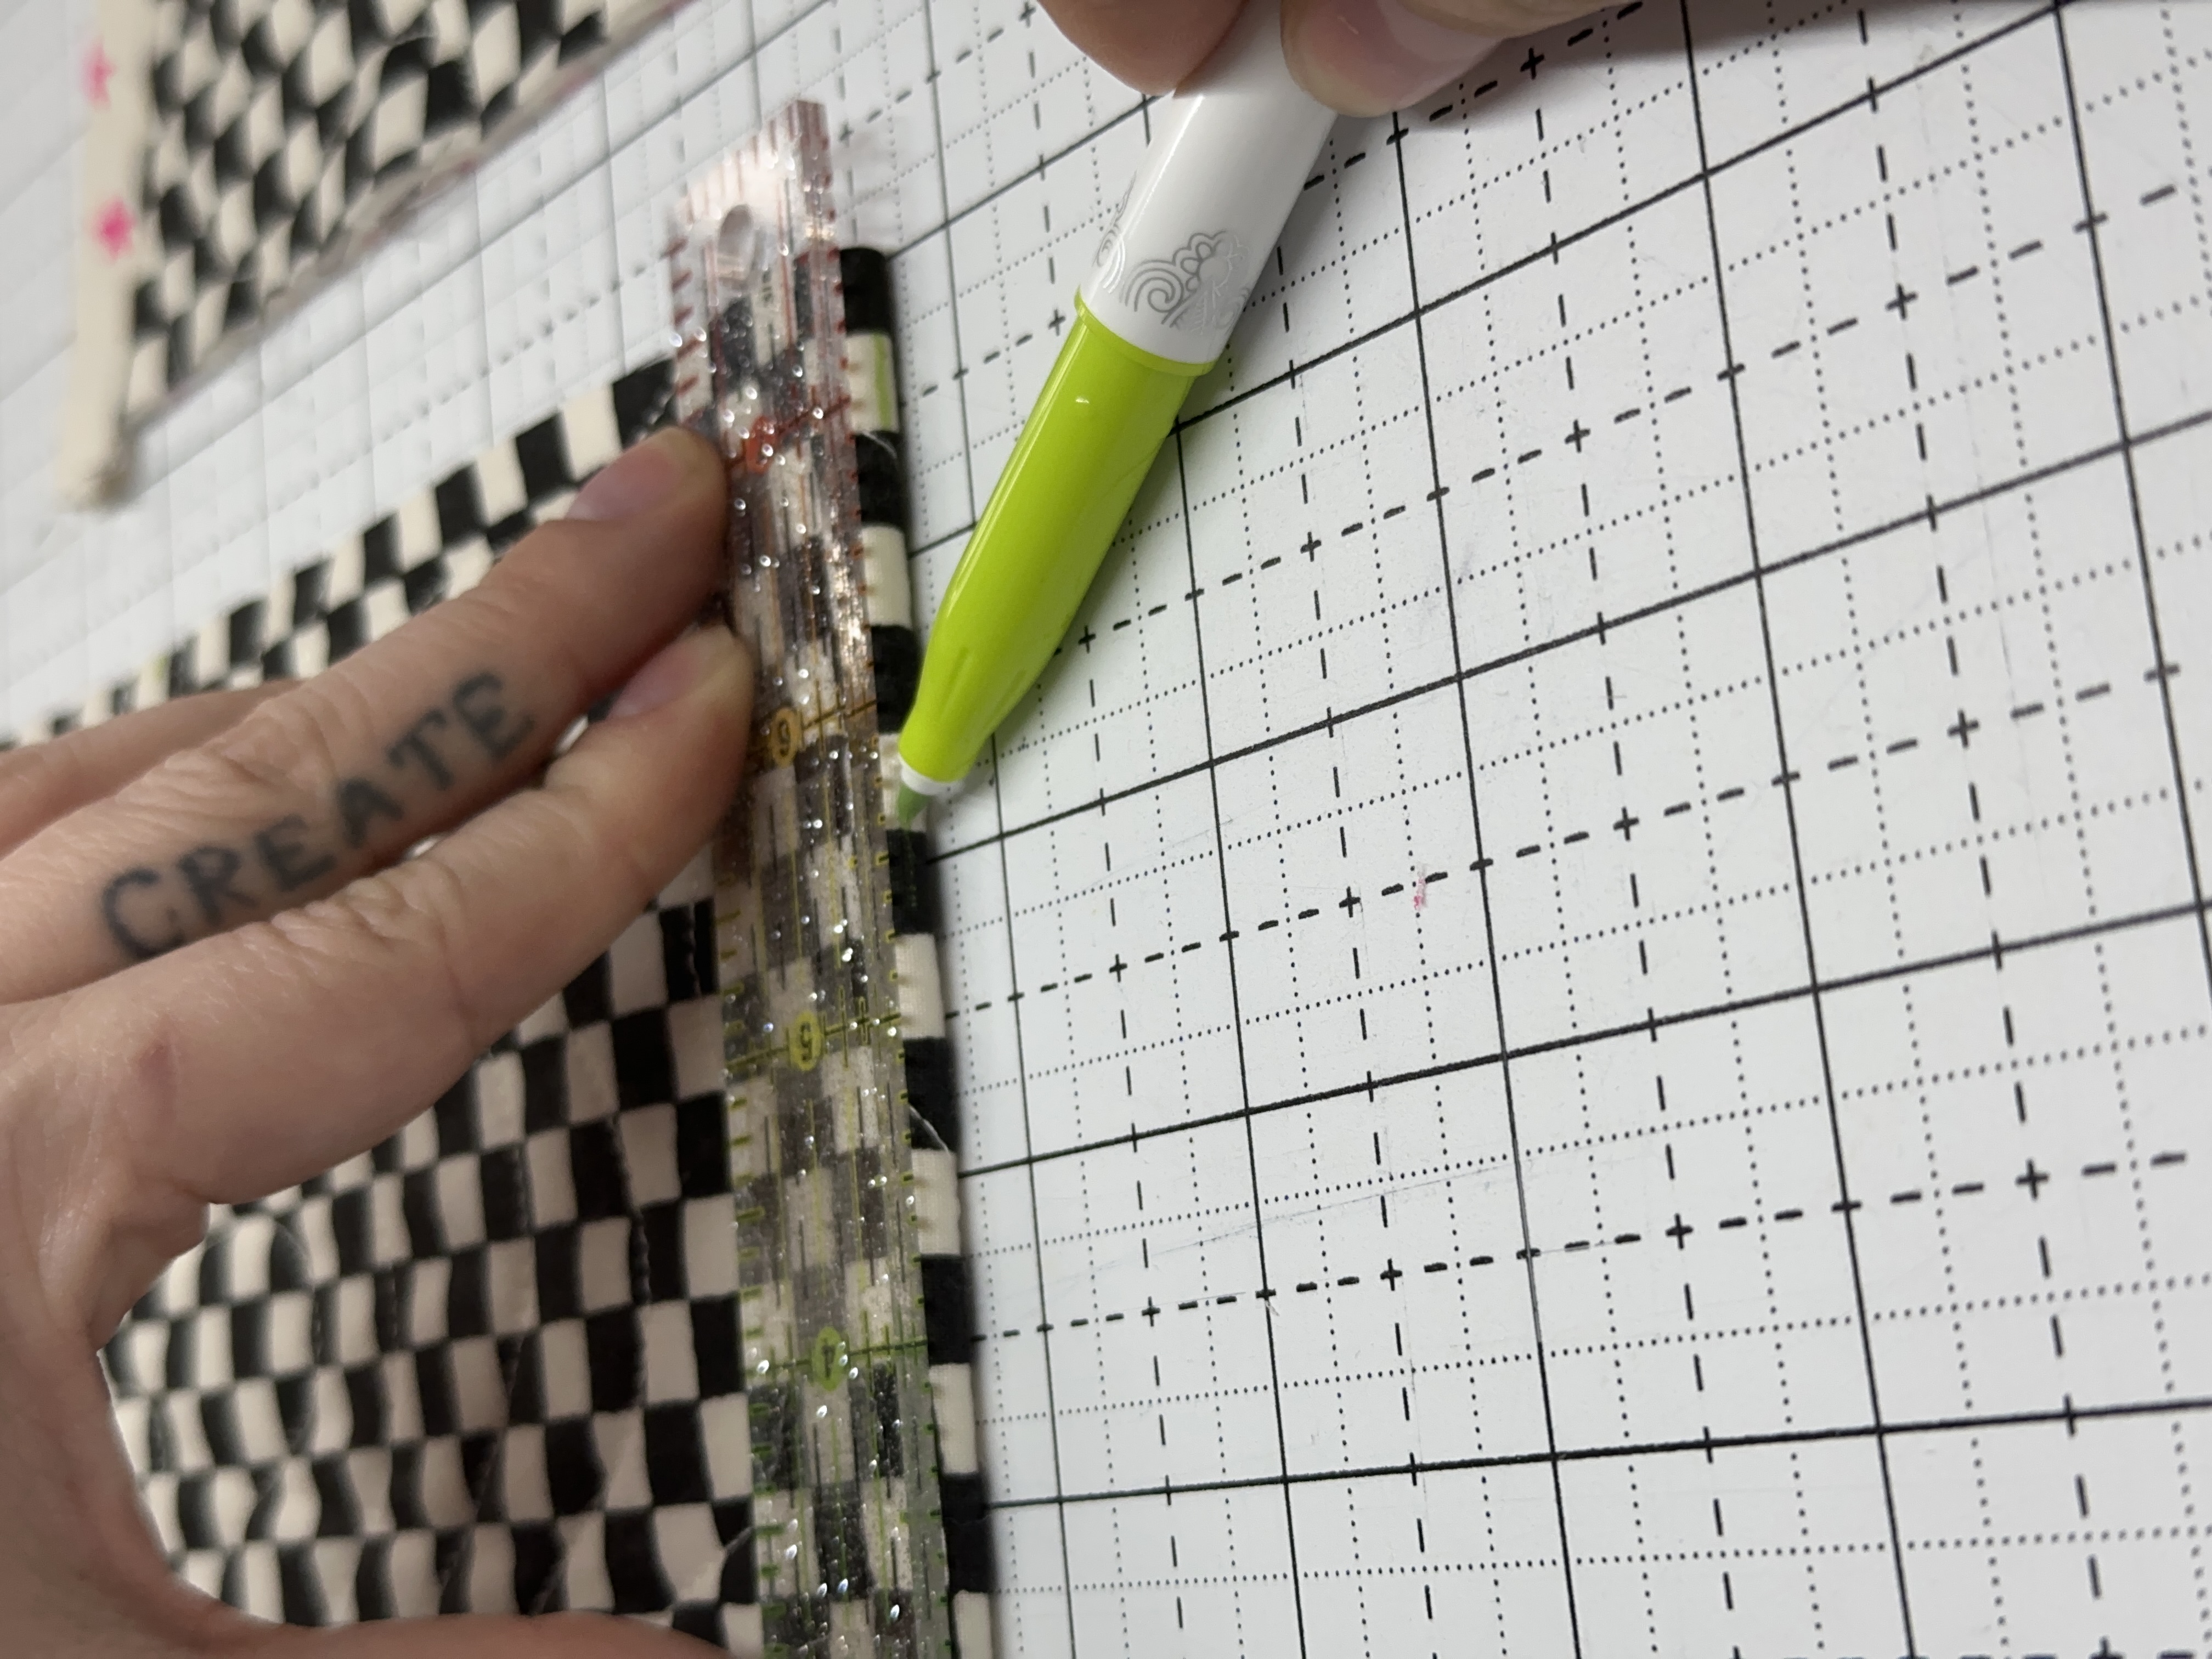
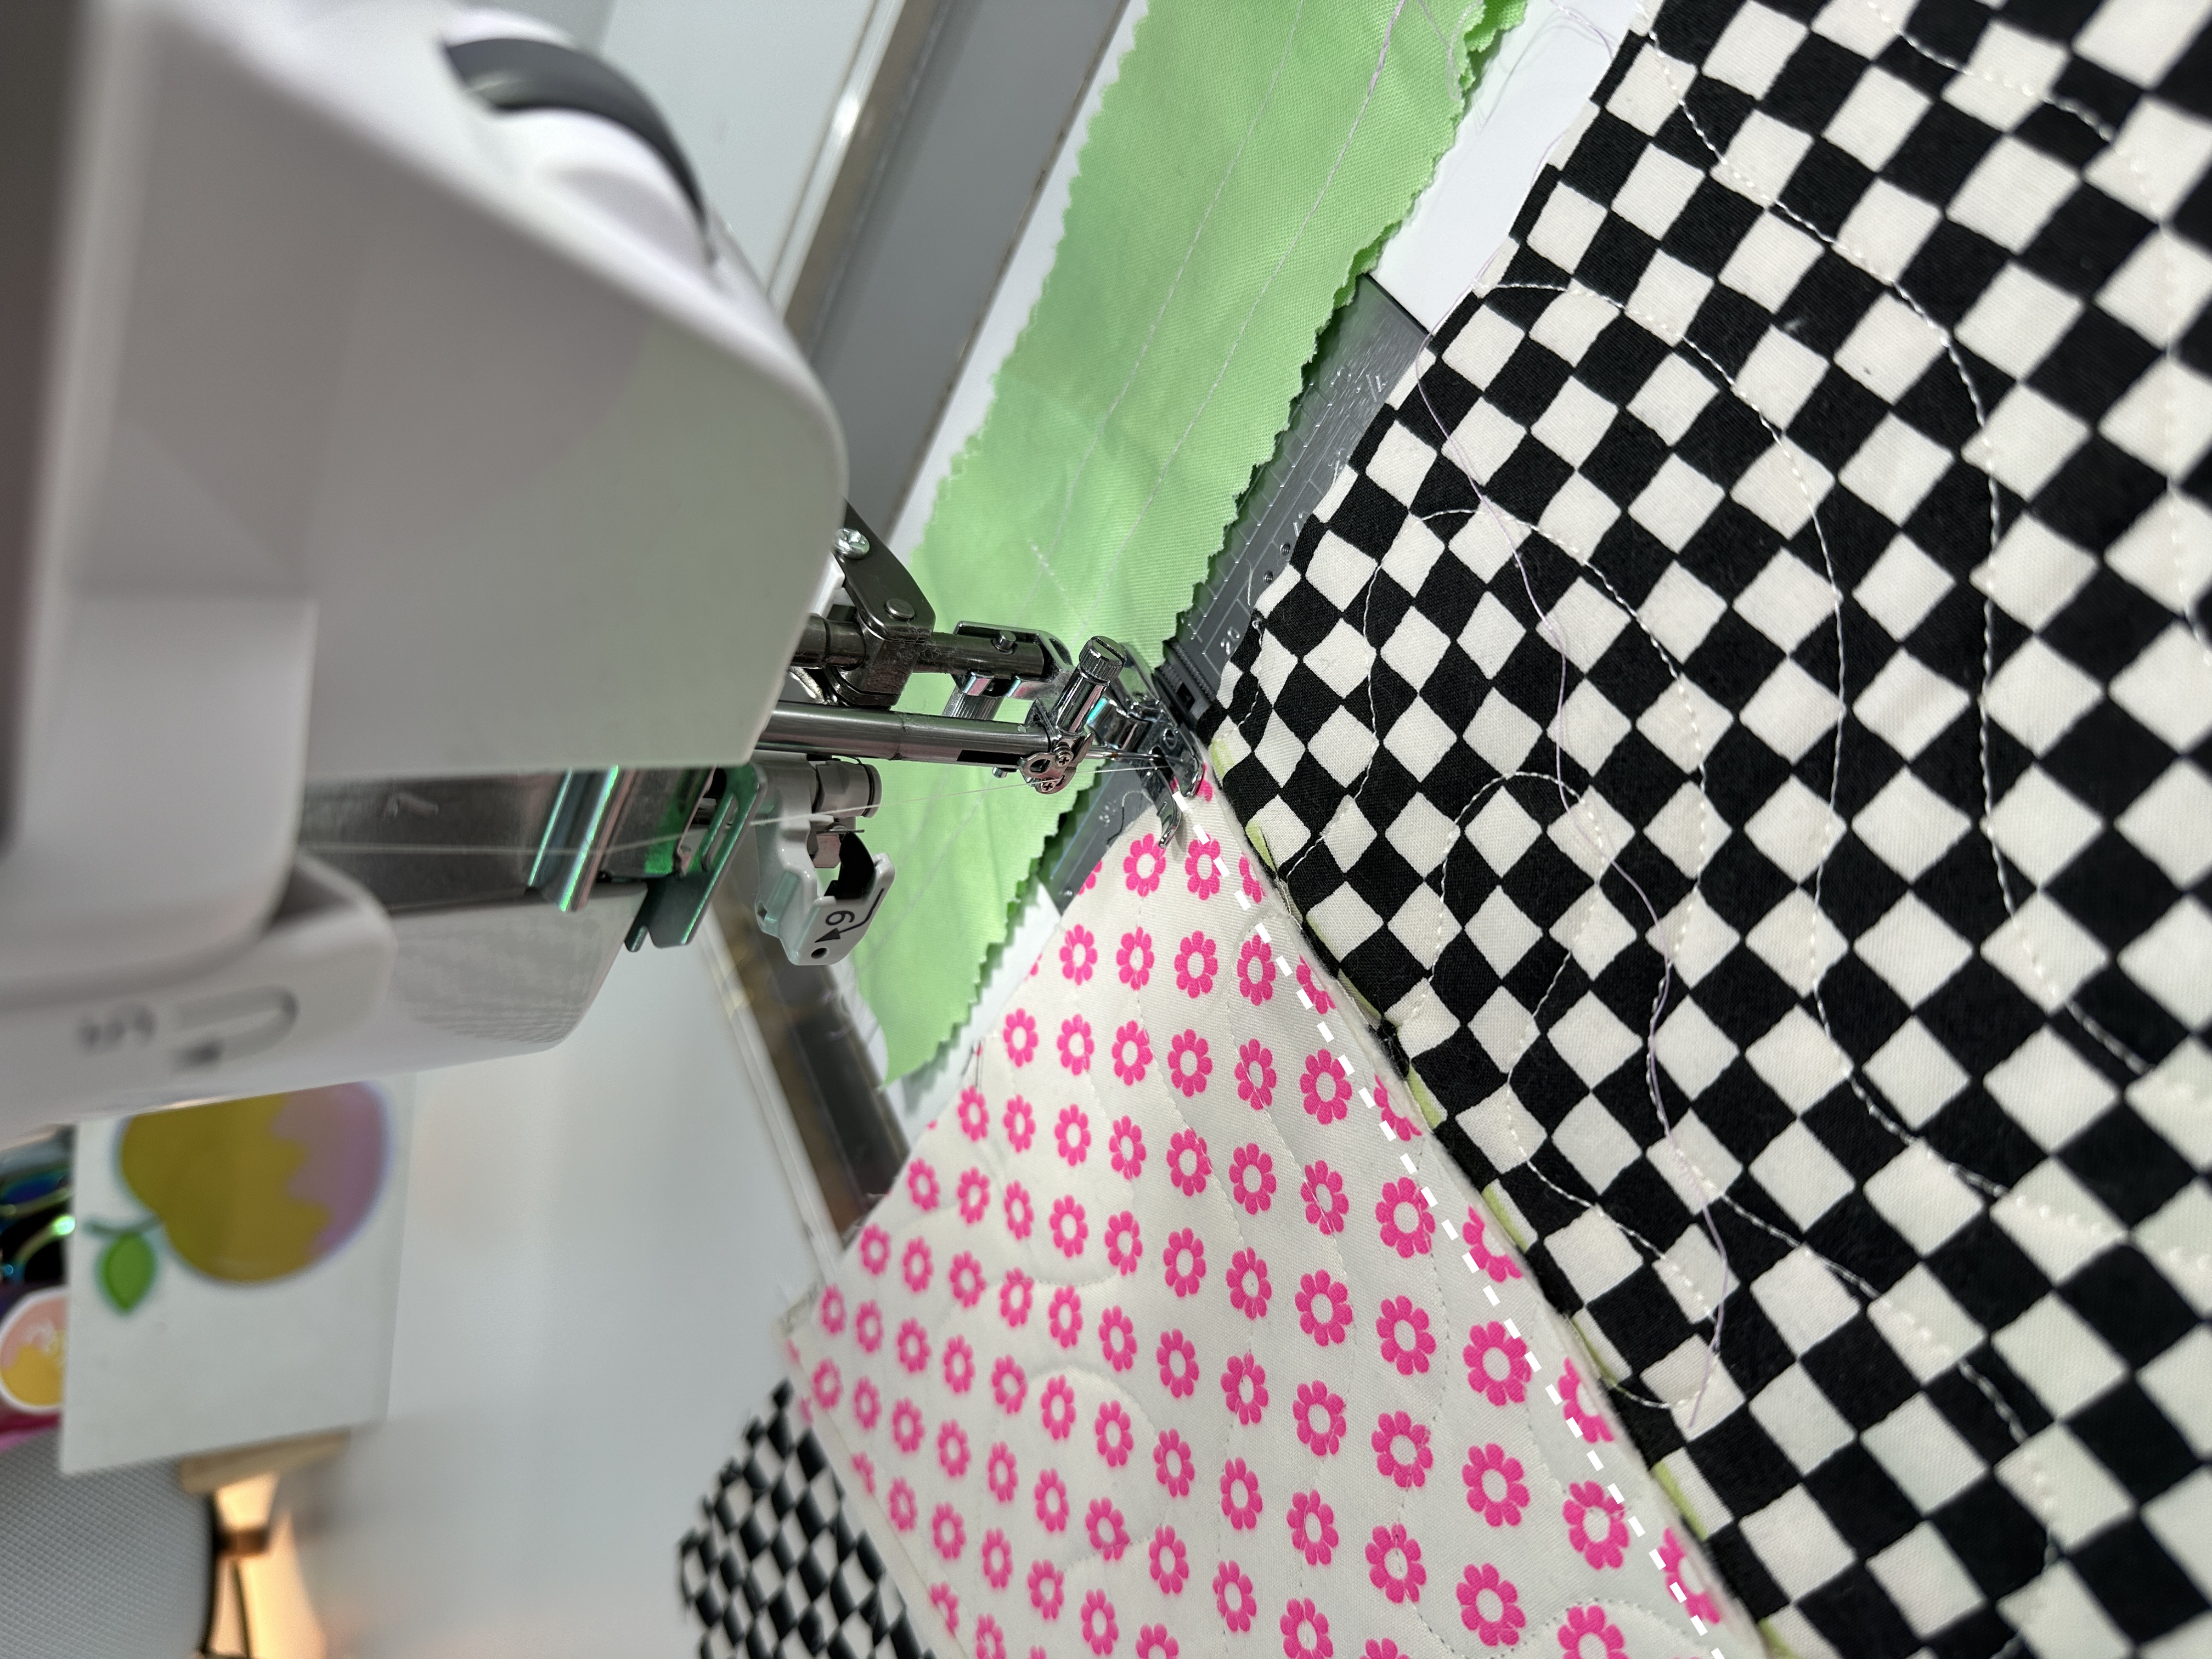
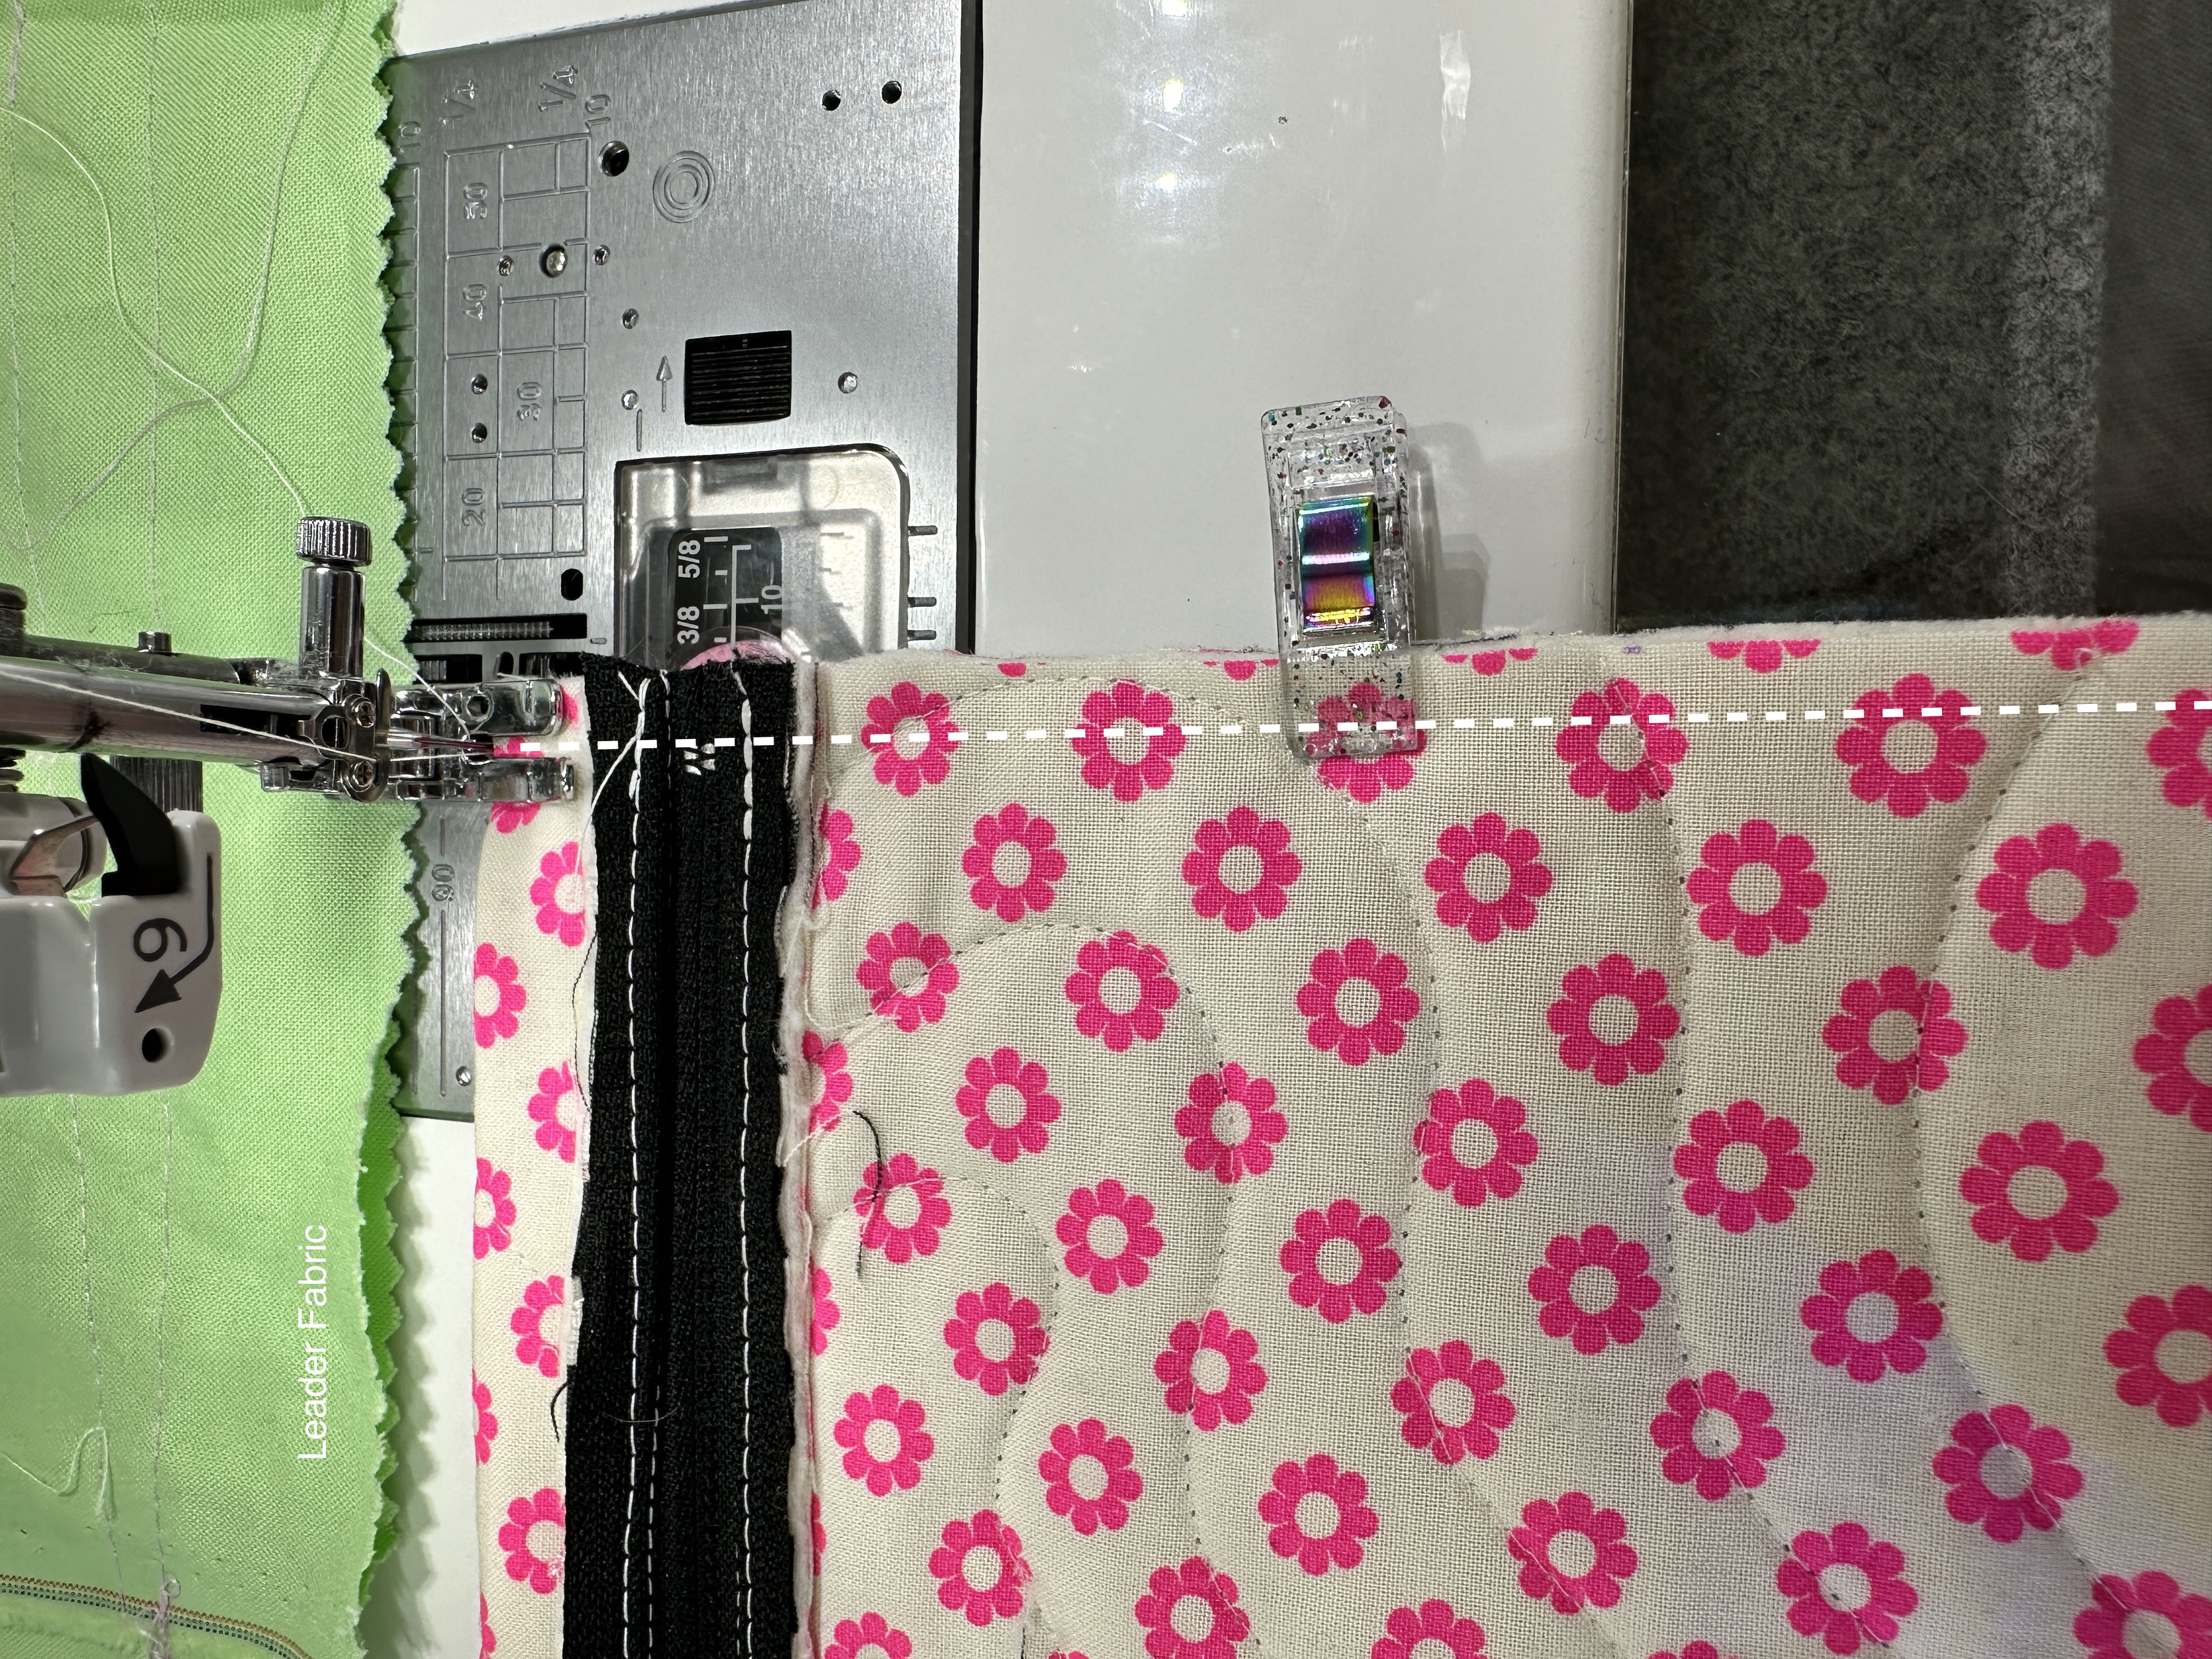
12. Aligning the right sides of your body panel and pocket panel, proceed to your sewing machine to affix the pocket to the body panel. With the raw edge of the pocket panel aligned with the marked line on the body panel, sew using a ¼ inch seam allowance to secure the panel. Ensure that your body panel is laid open flat to facilitate pocket attachment. The pocket panel should be affixed to the shorter edge of your body panel, as illustrated in photo 16. Disregard the bright green scrap of fabric; it was utilized as a leader piece to prevent any nesting issues at the beginning of this seam.

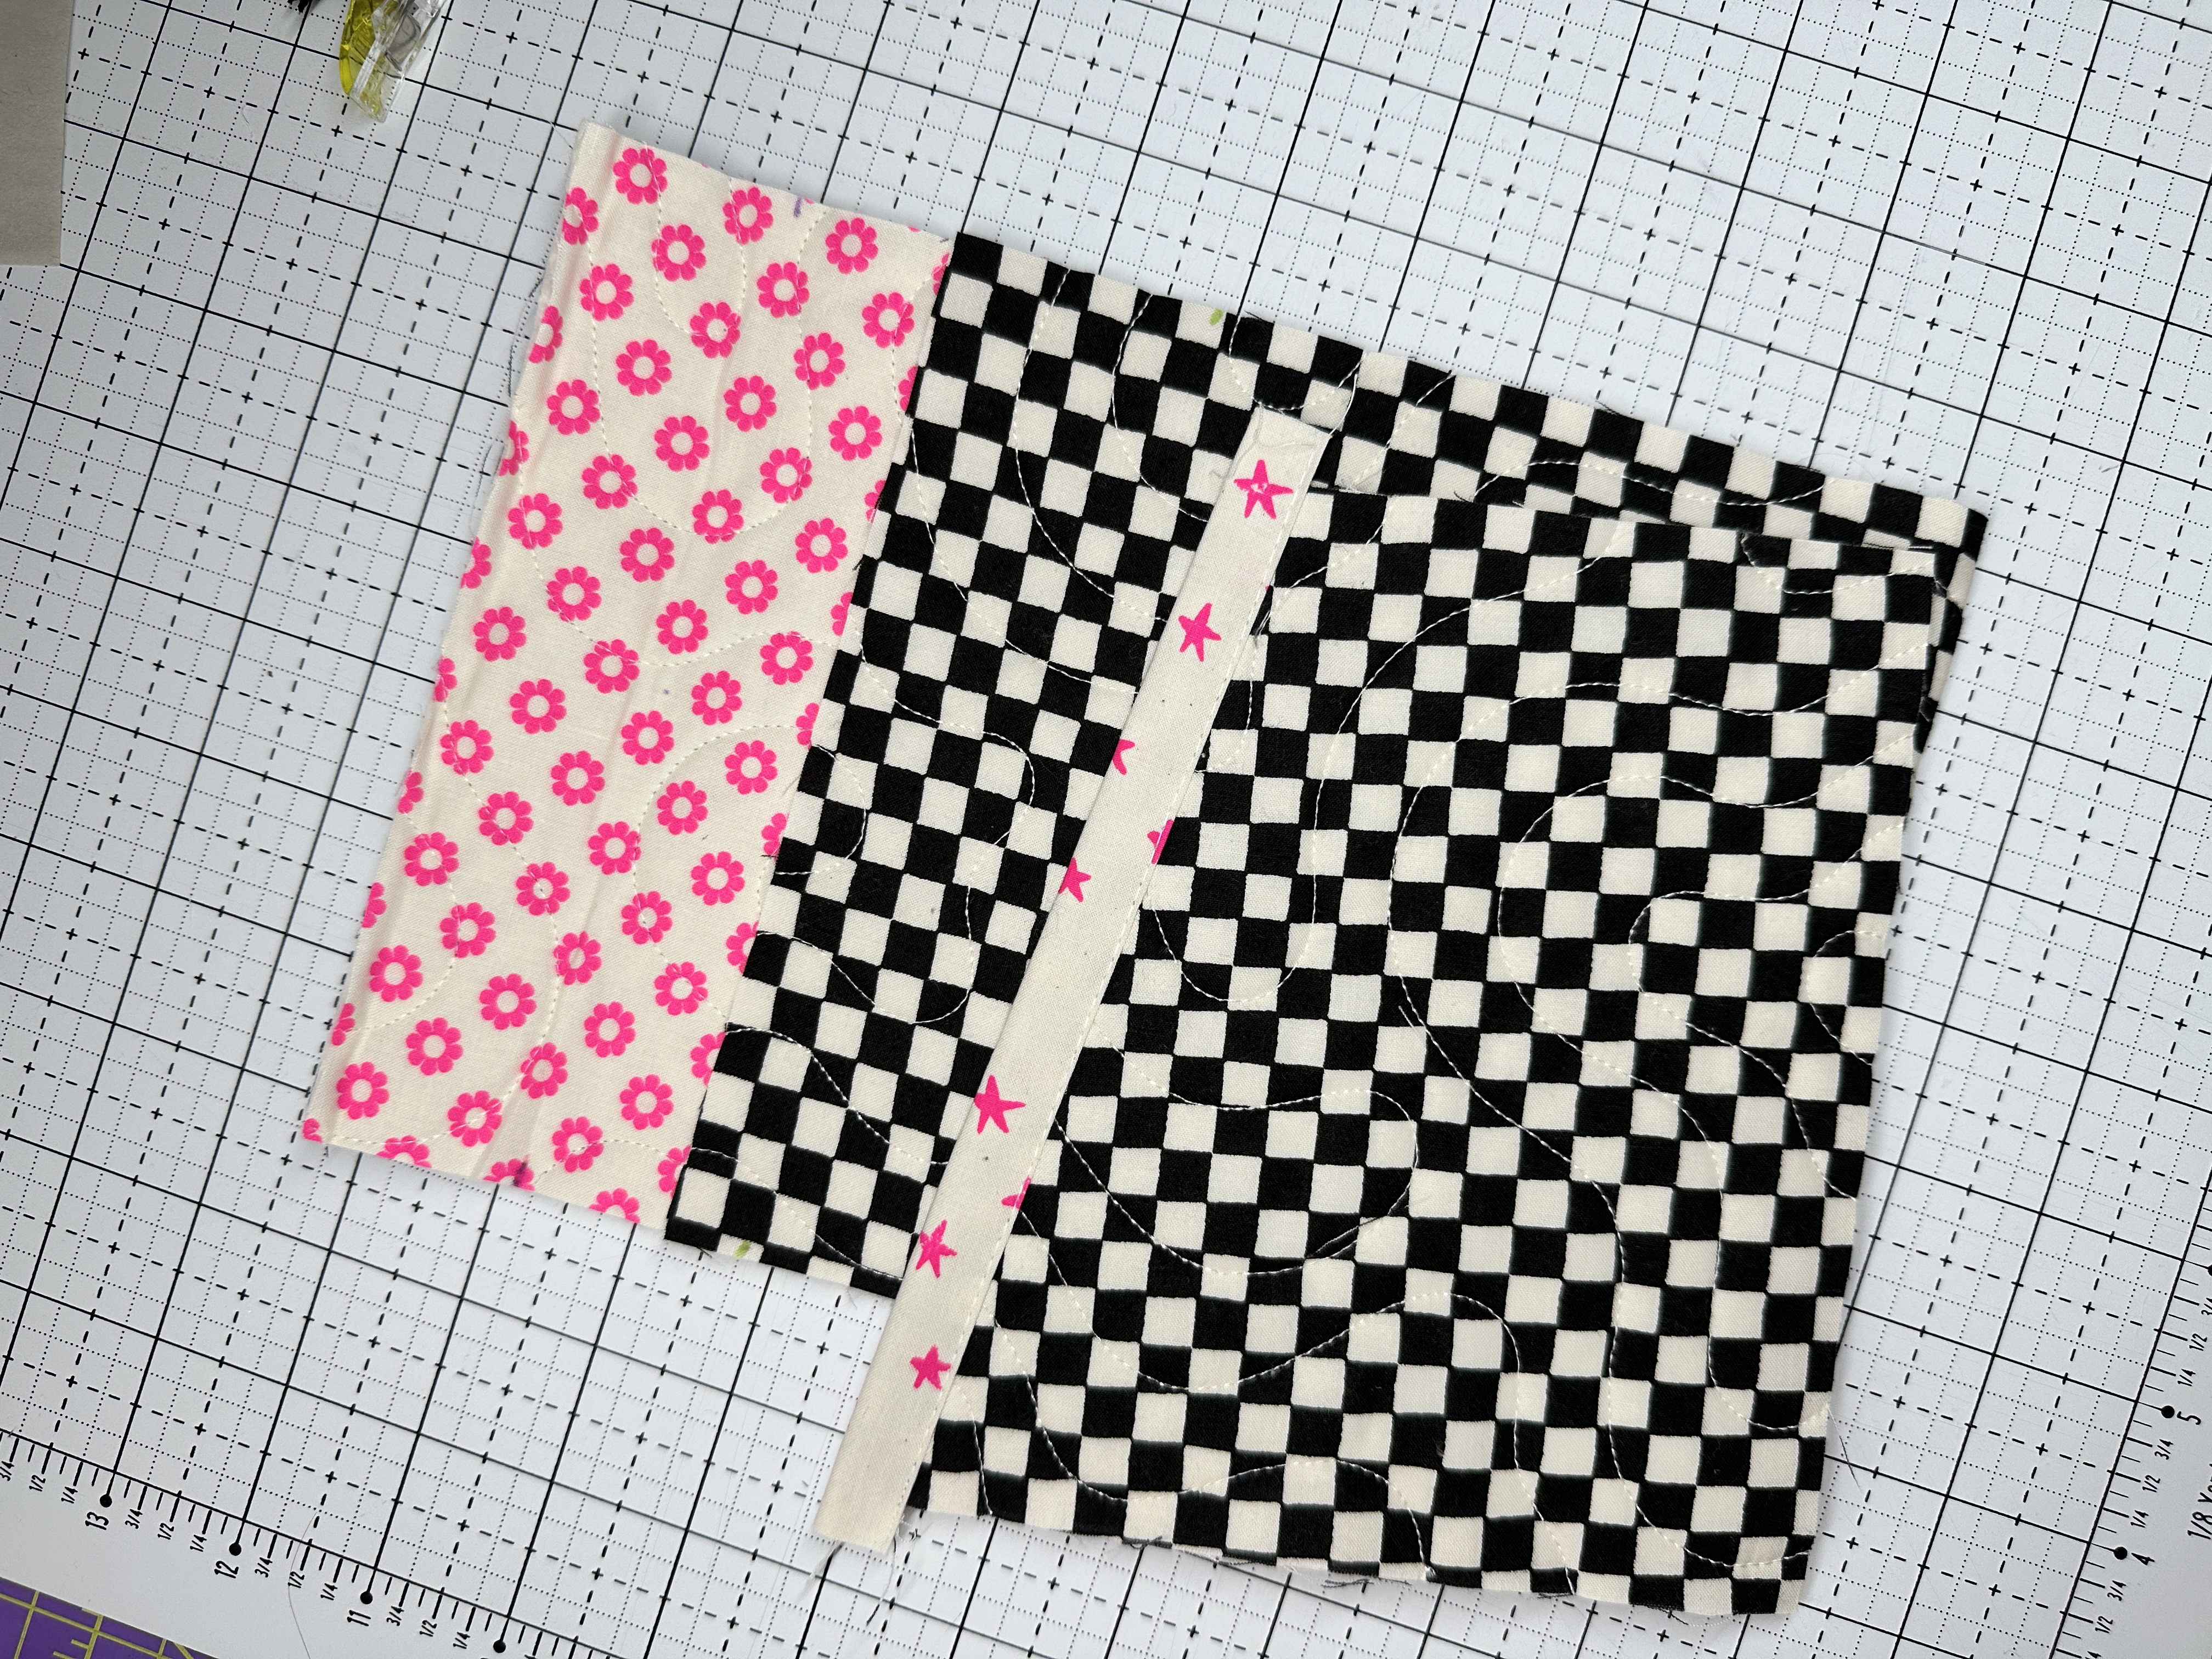
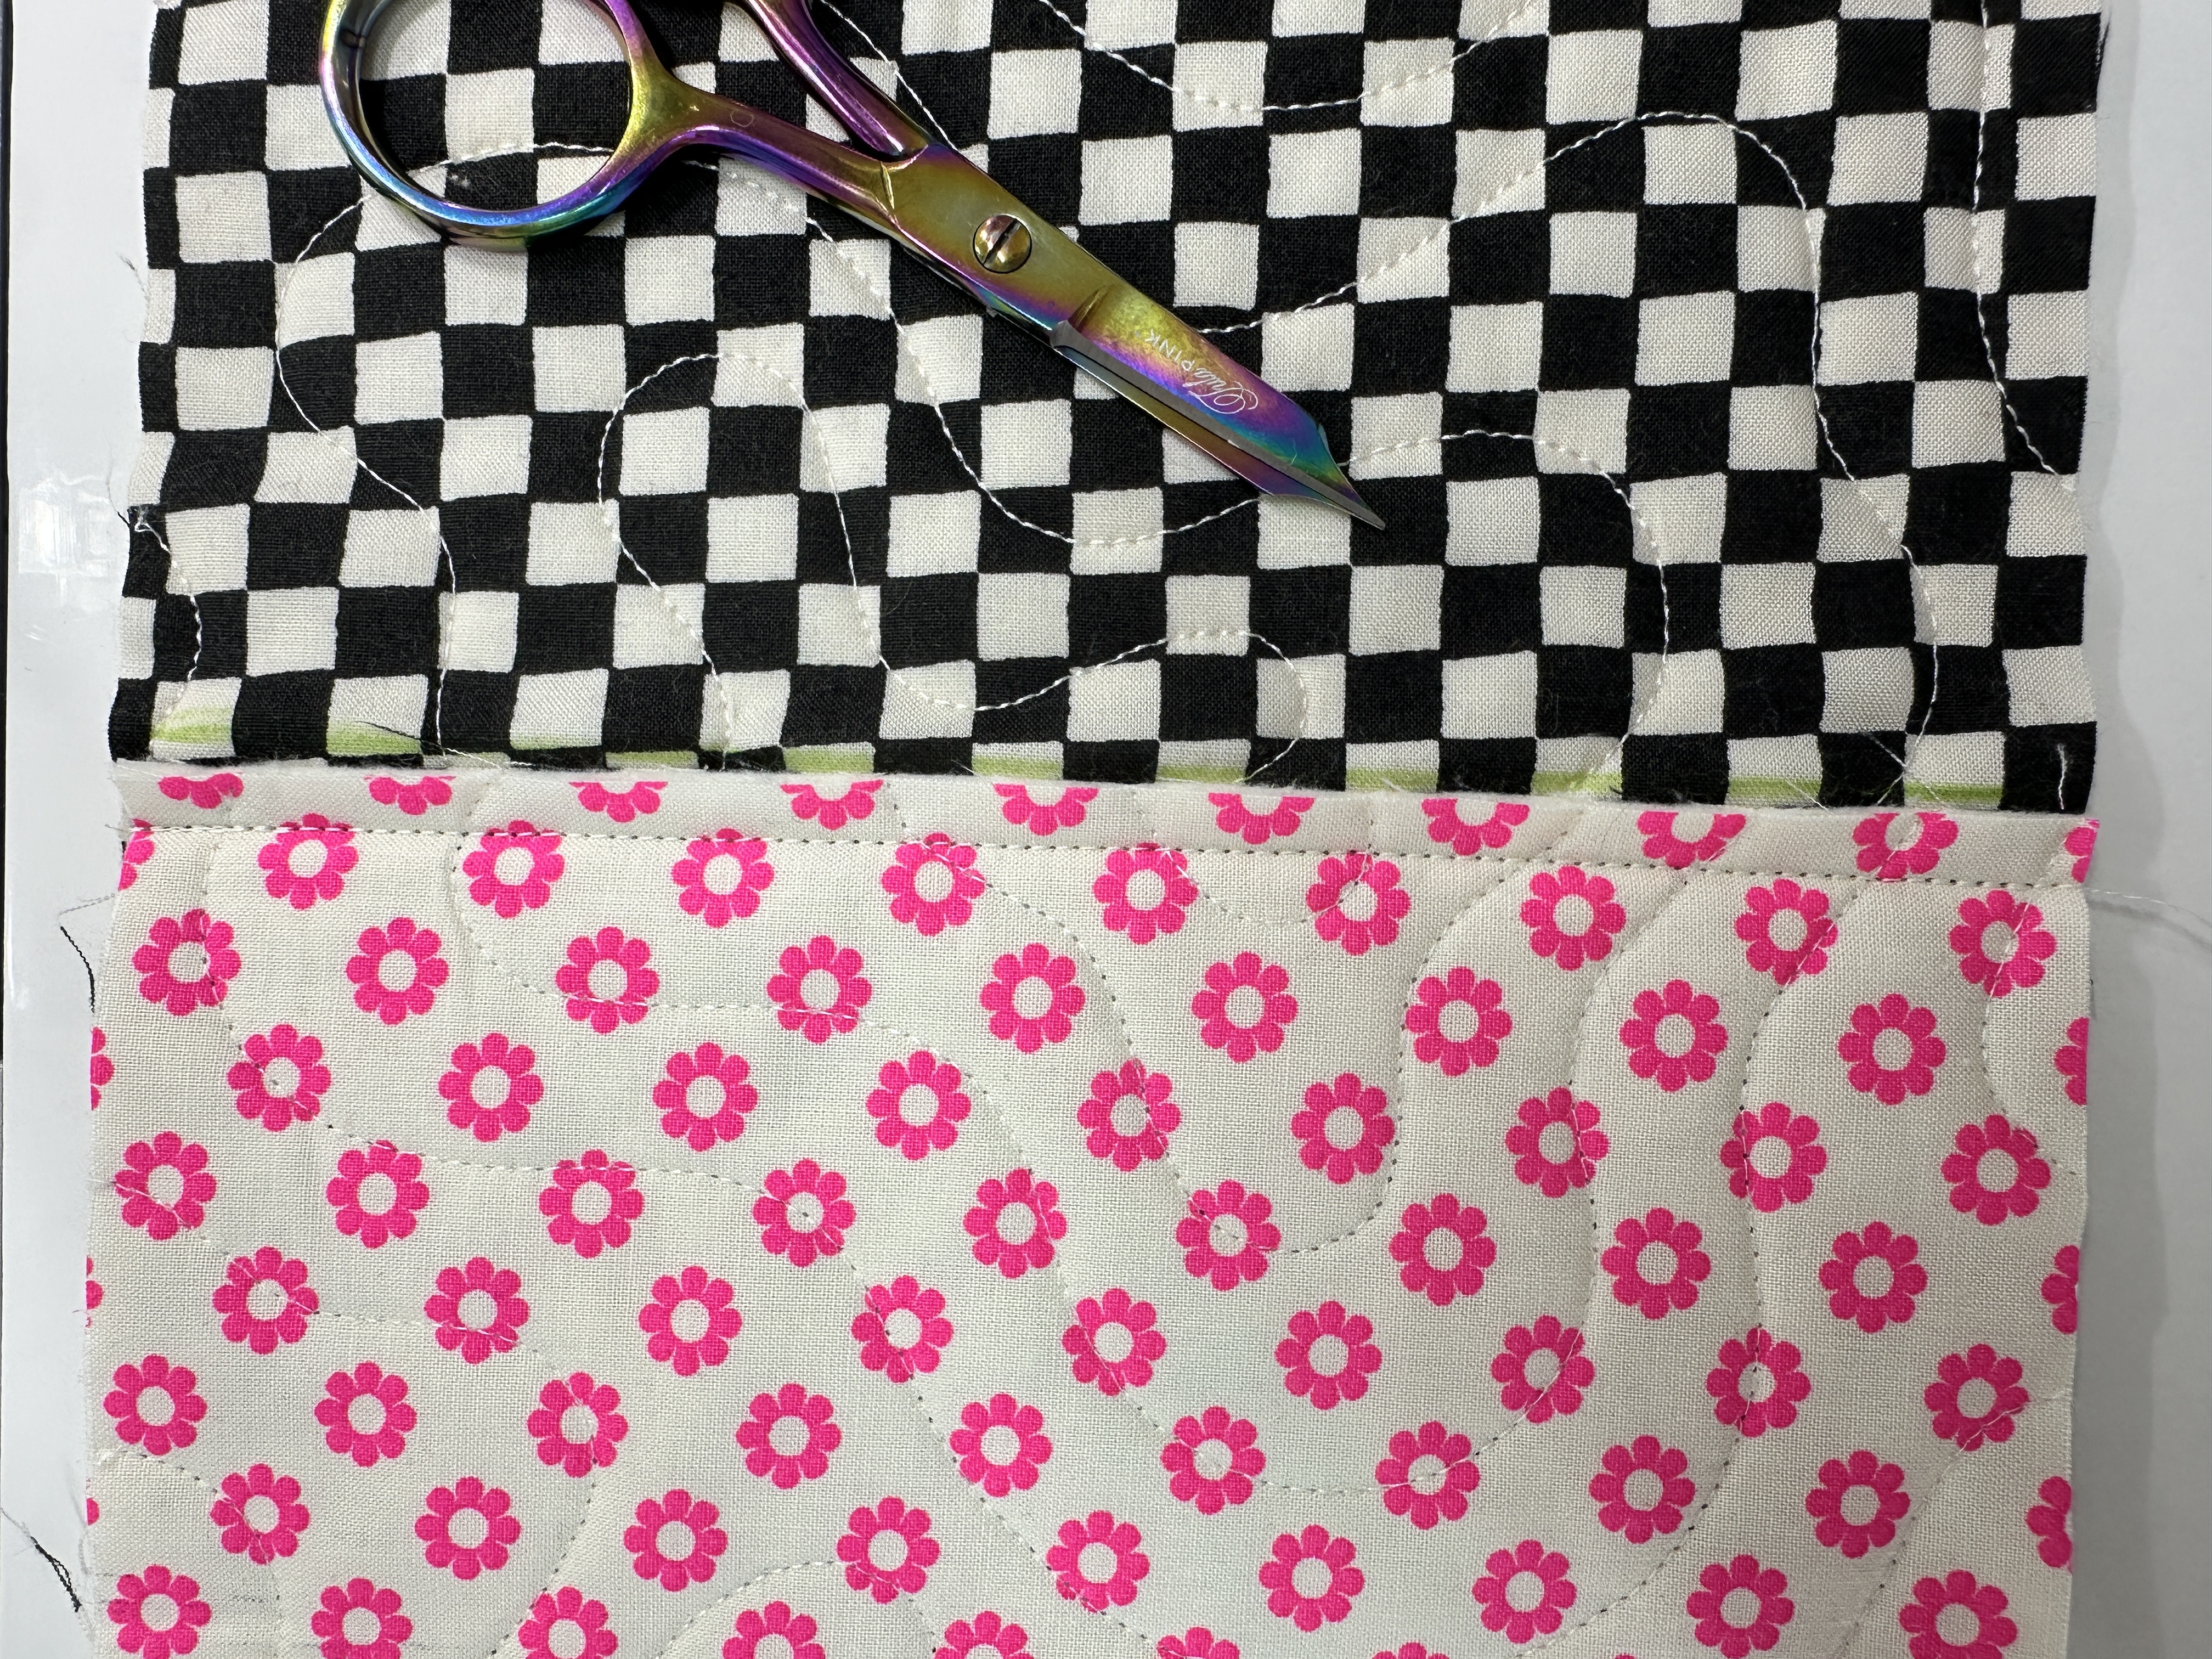
13. Take your panel over to your pressing station and press your pocket panel flipping it over to have all right sides facing upwards. Press this seam well to create as much flatness as possible. With your pocket panel attached to the body panel, it should look like photo 17. 

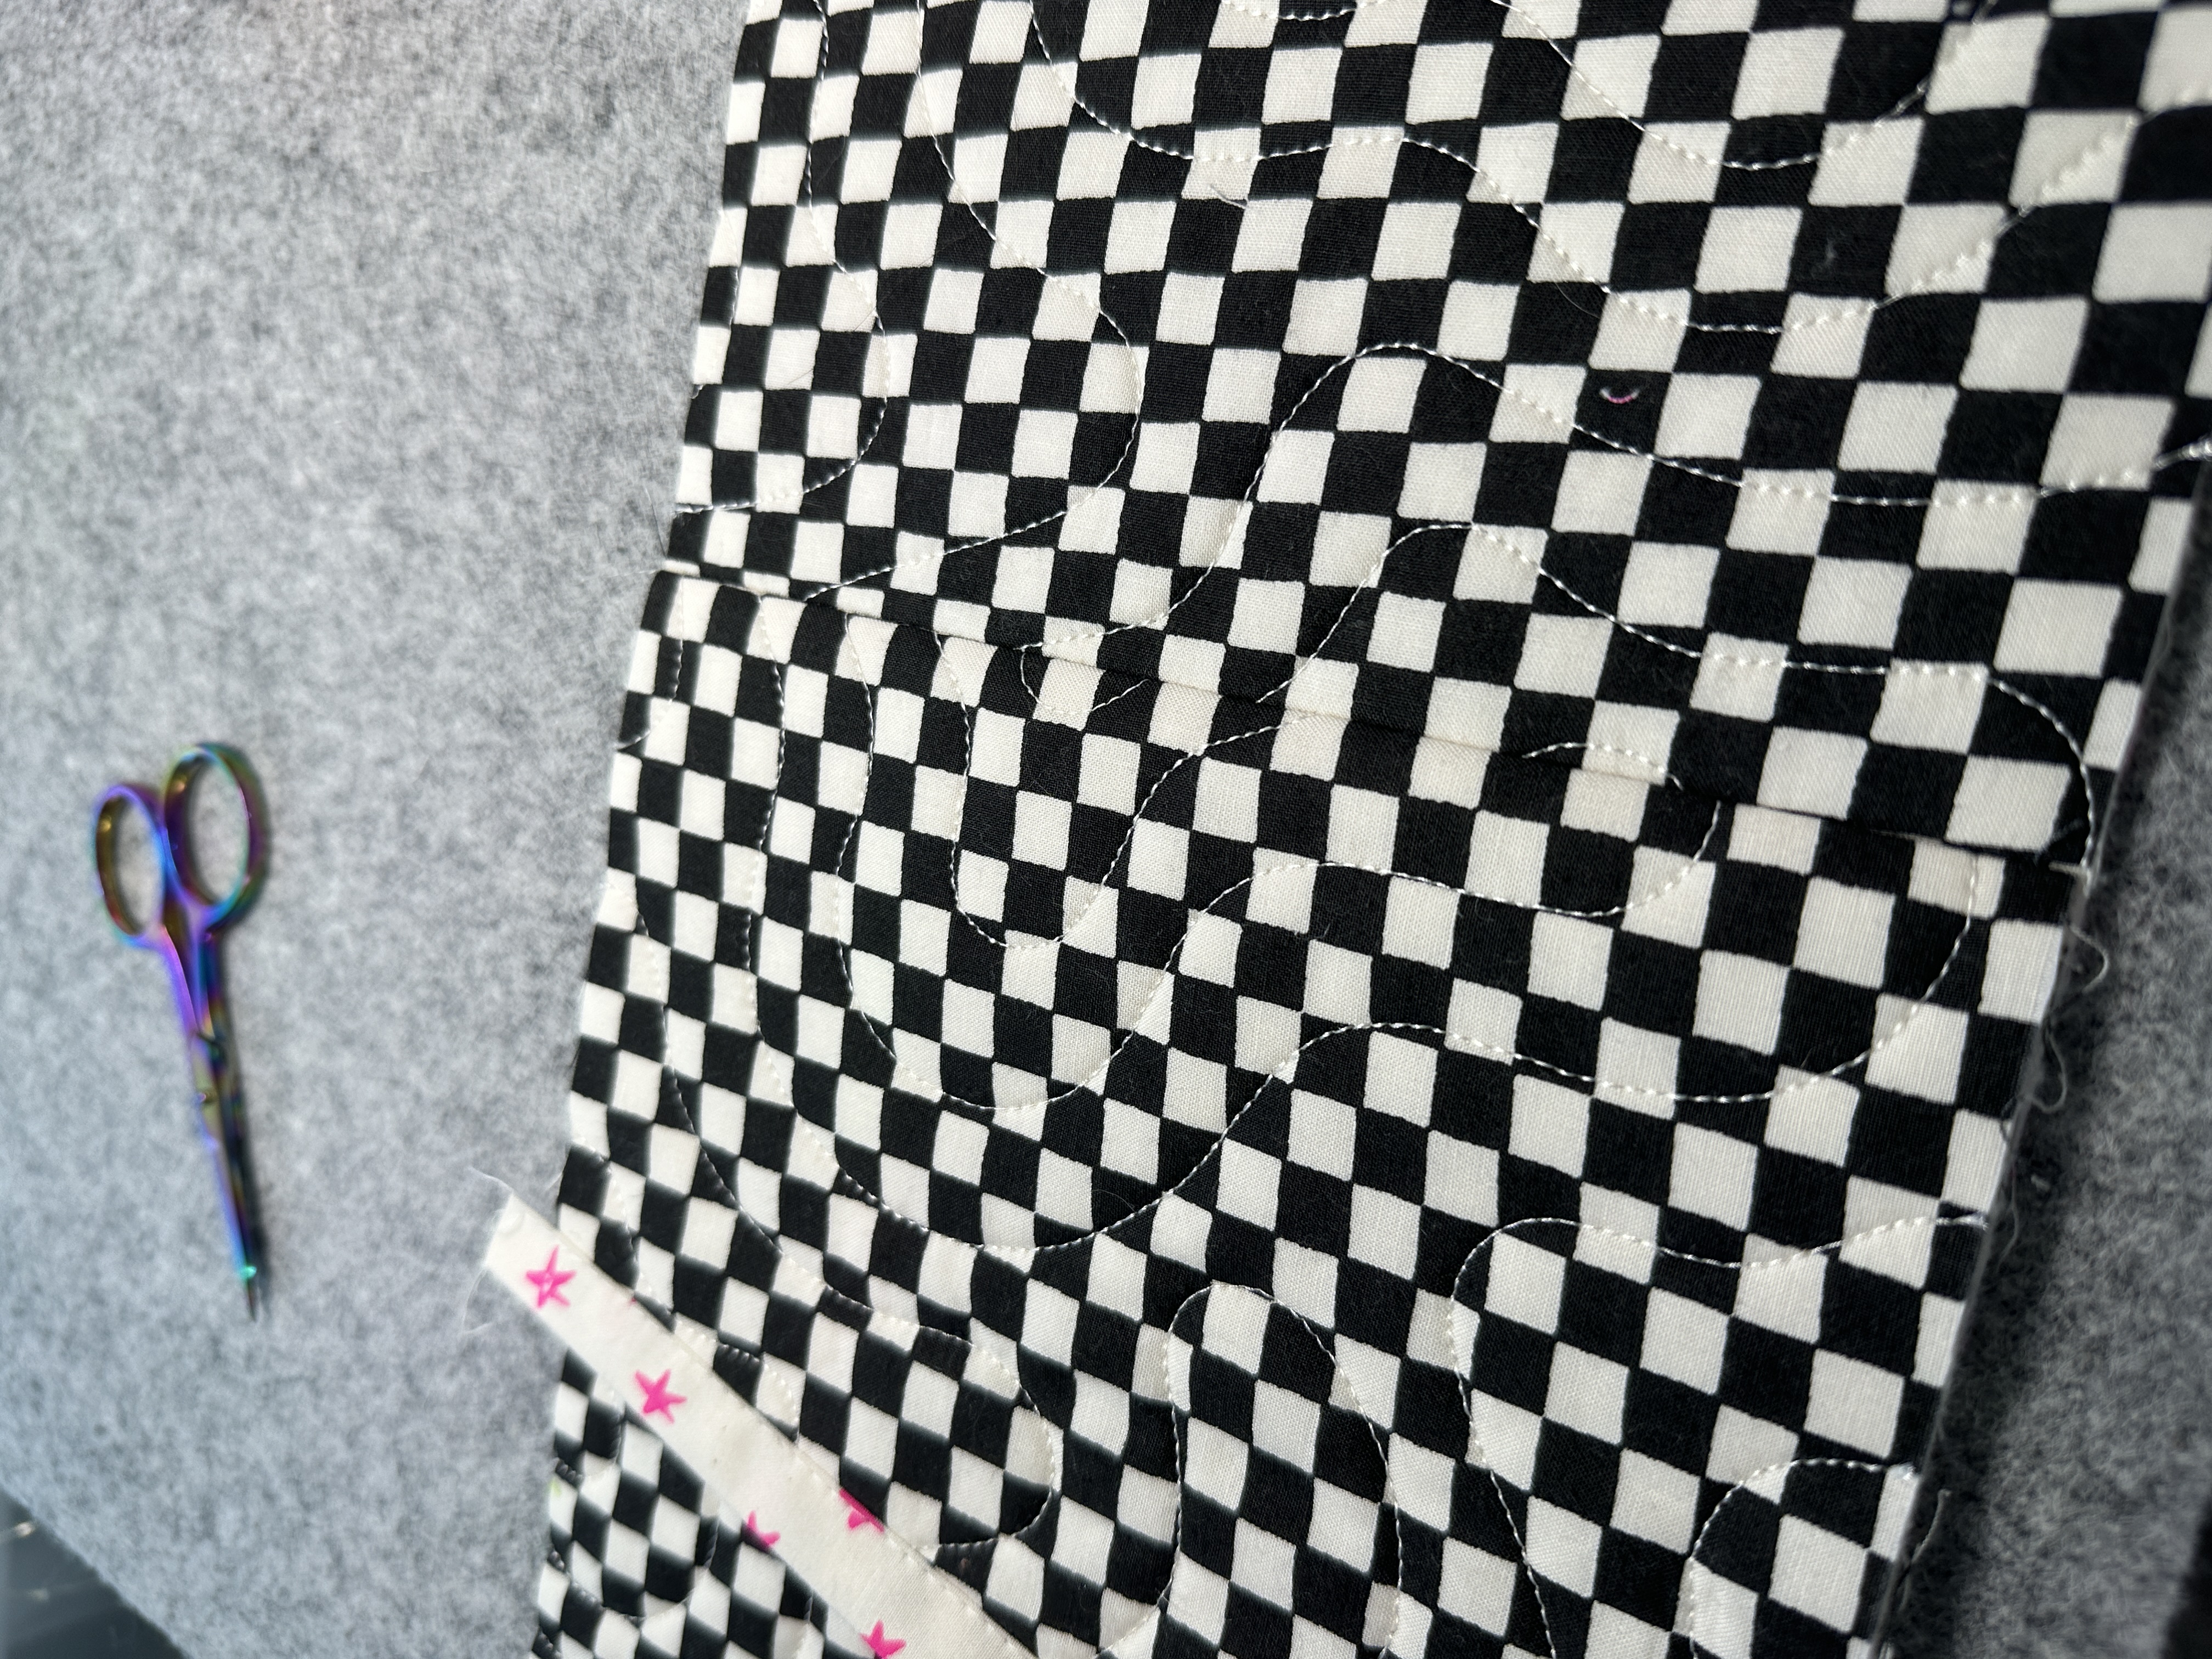
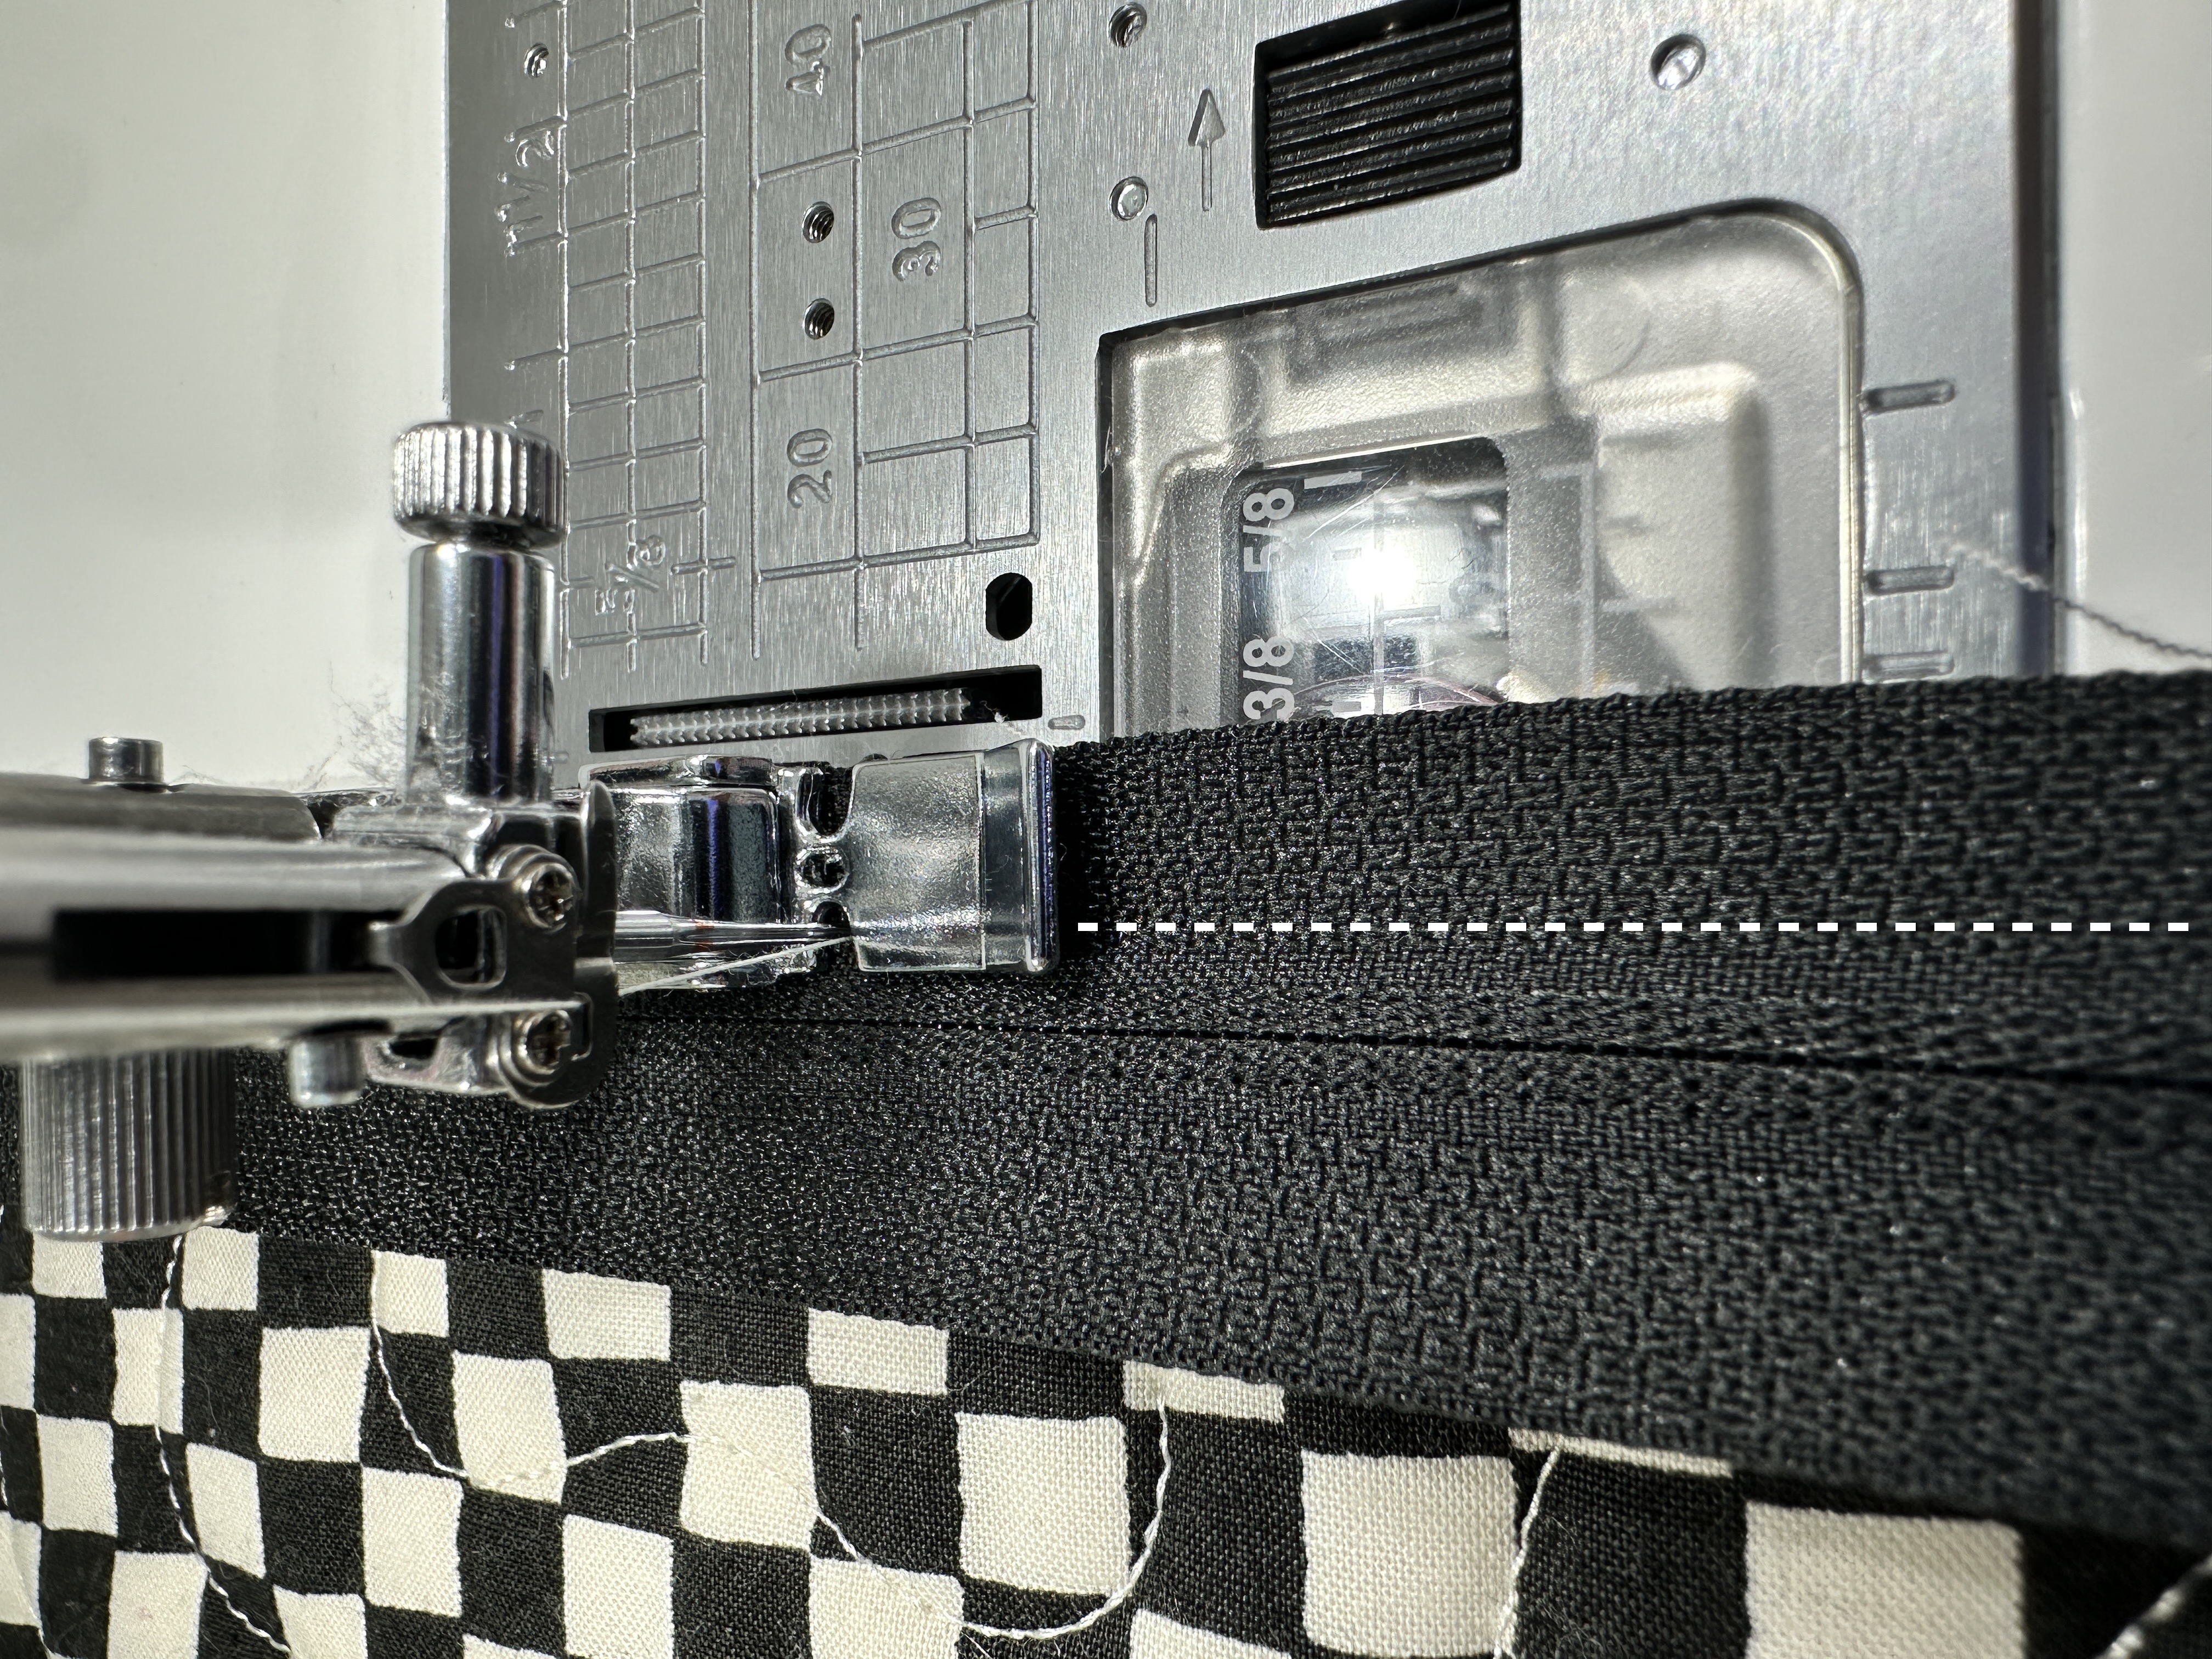
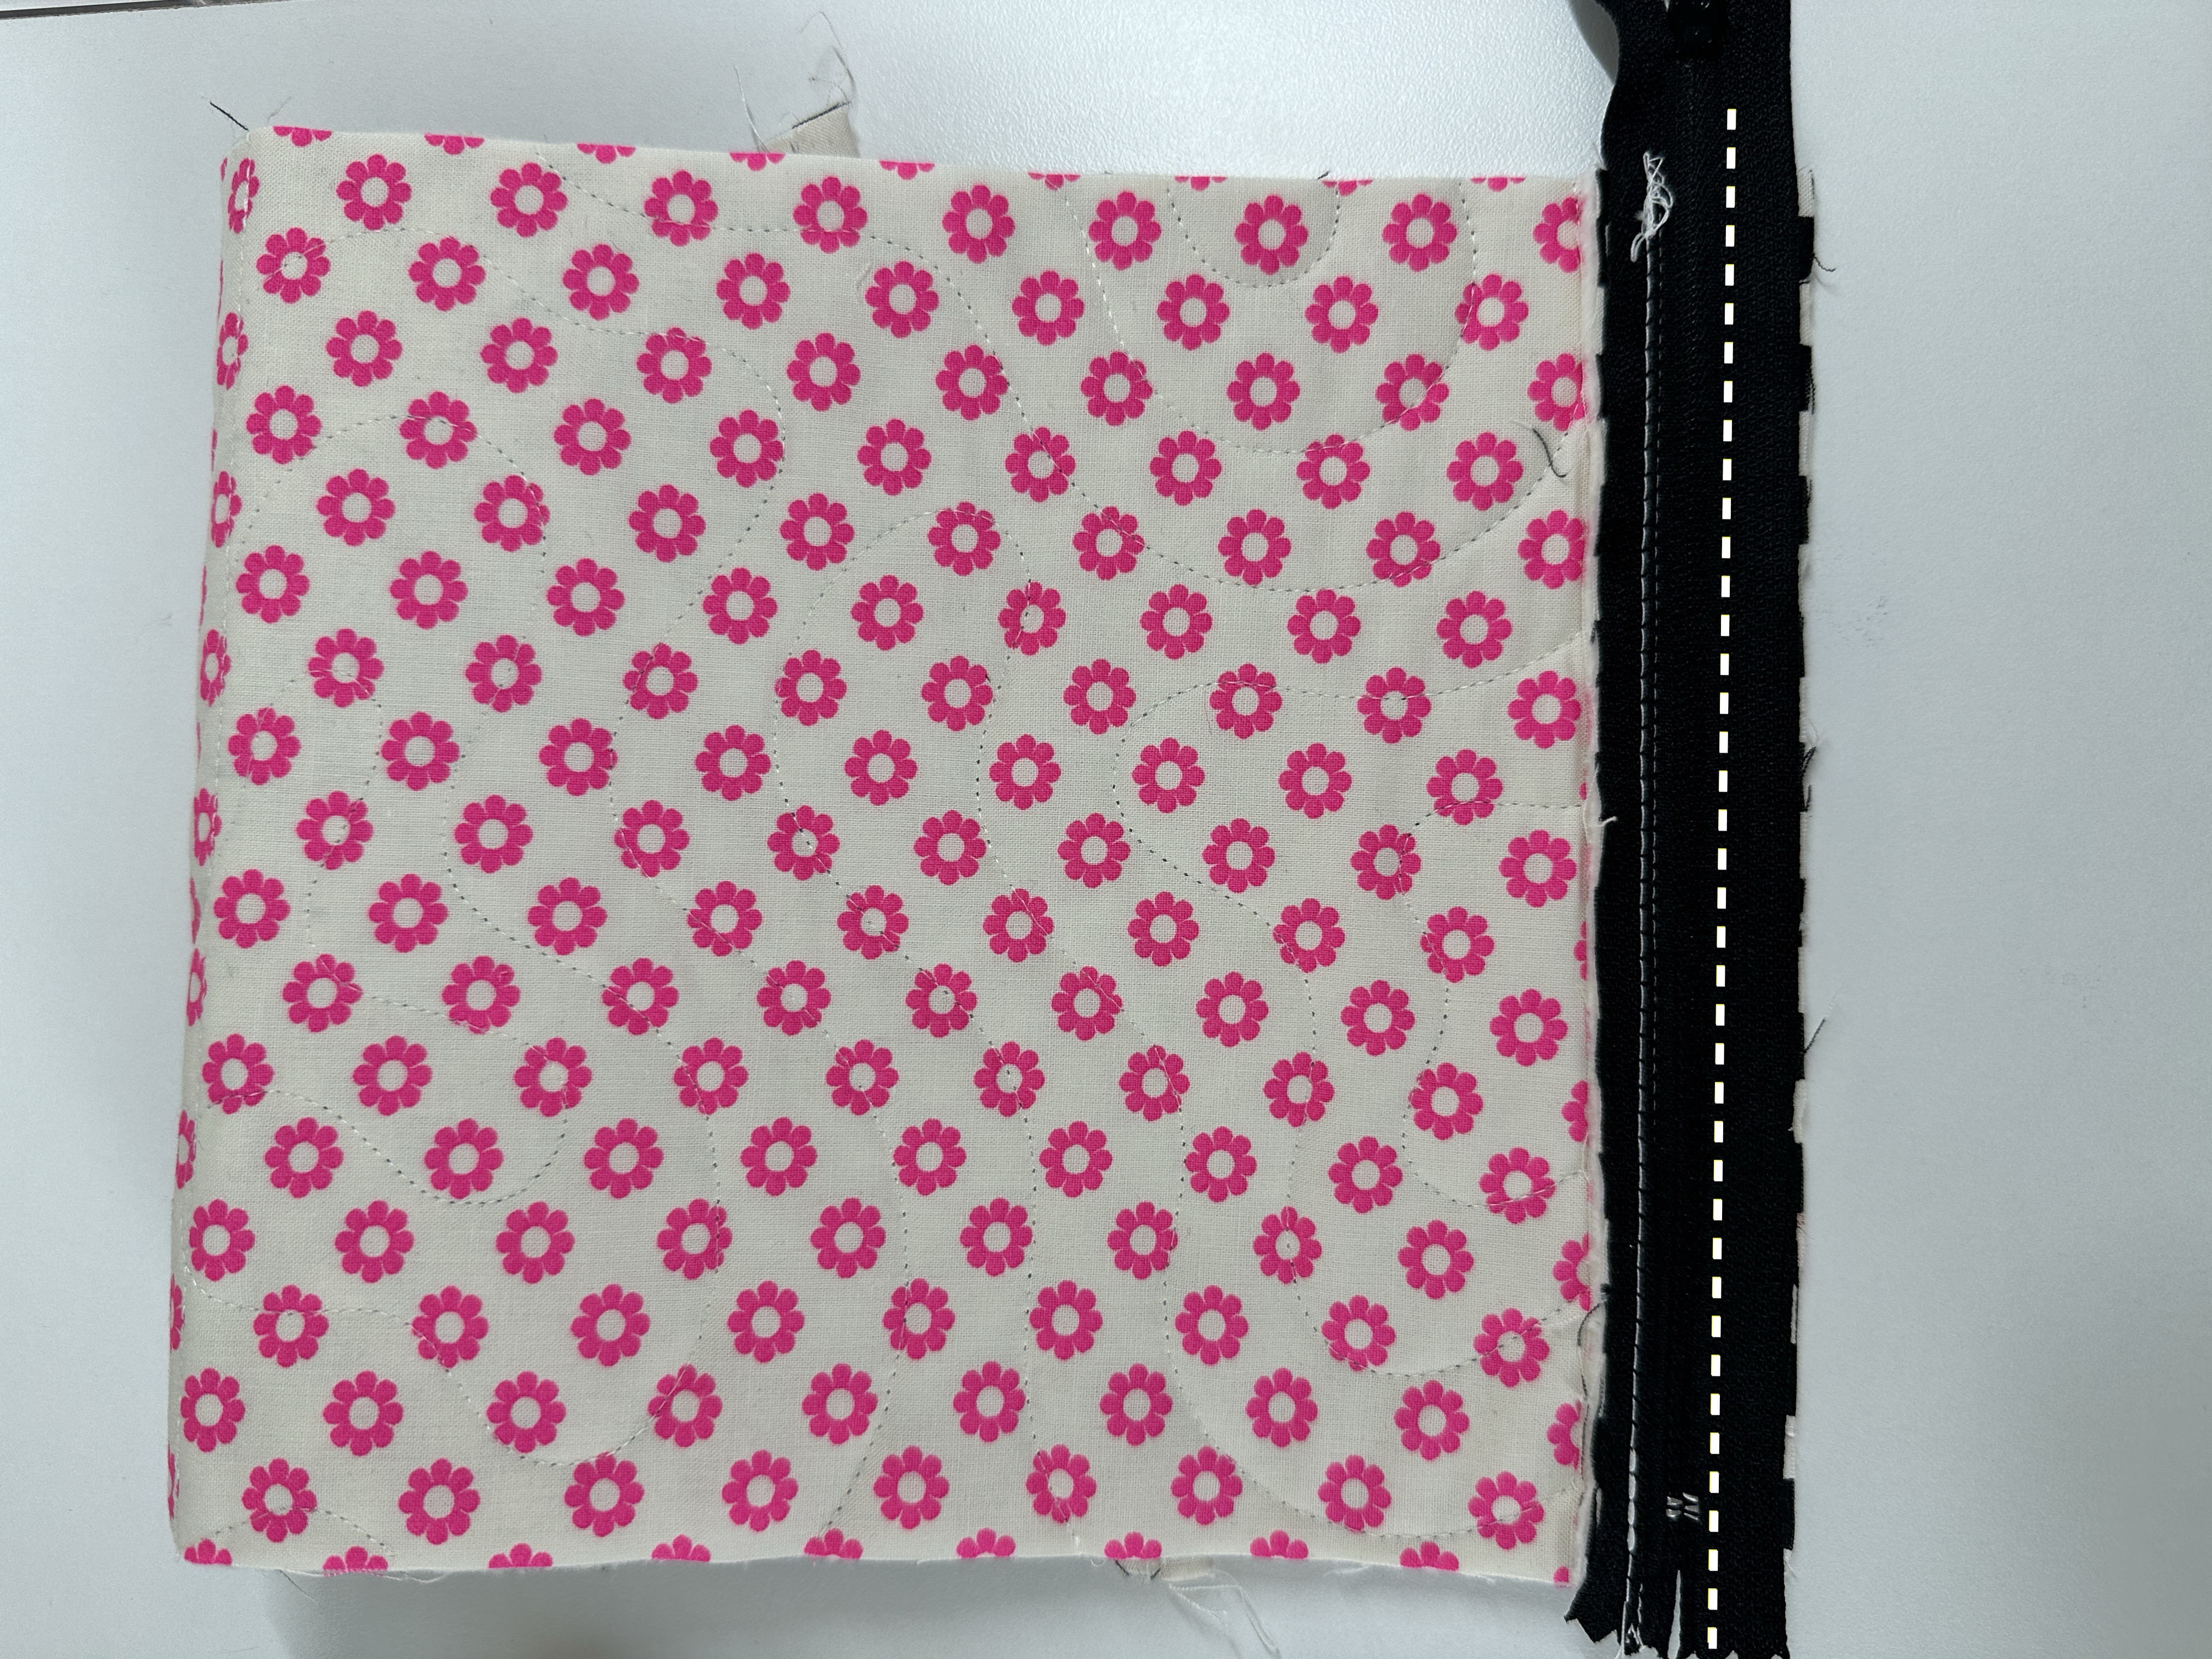
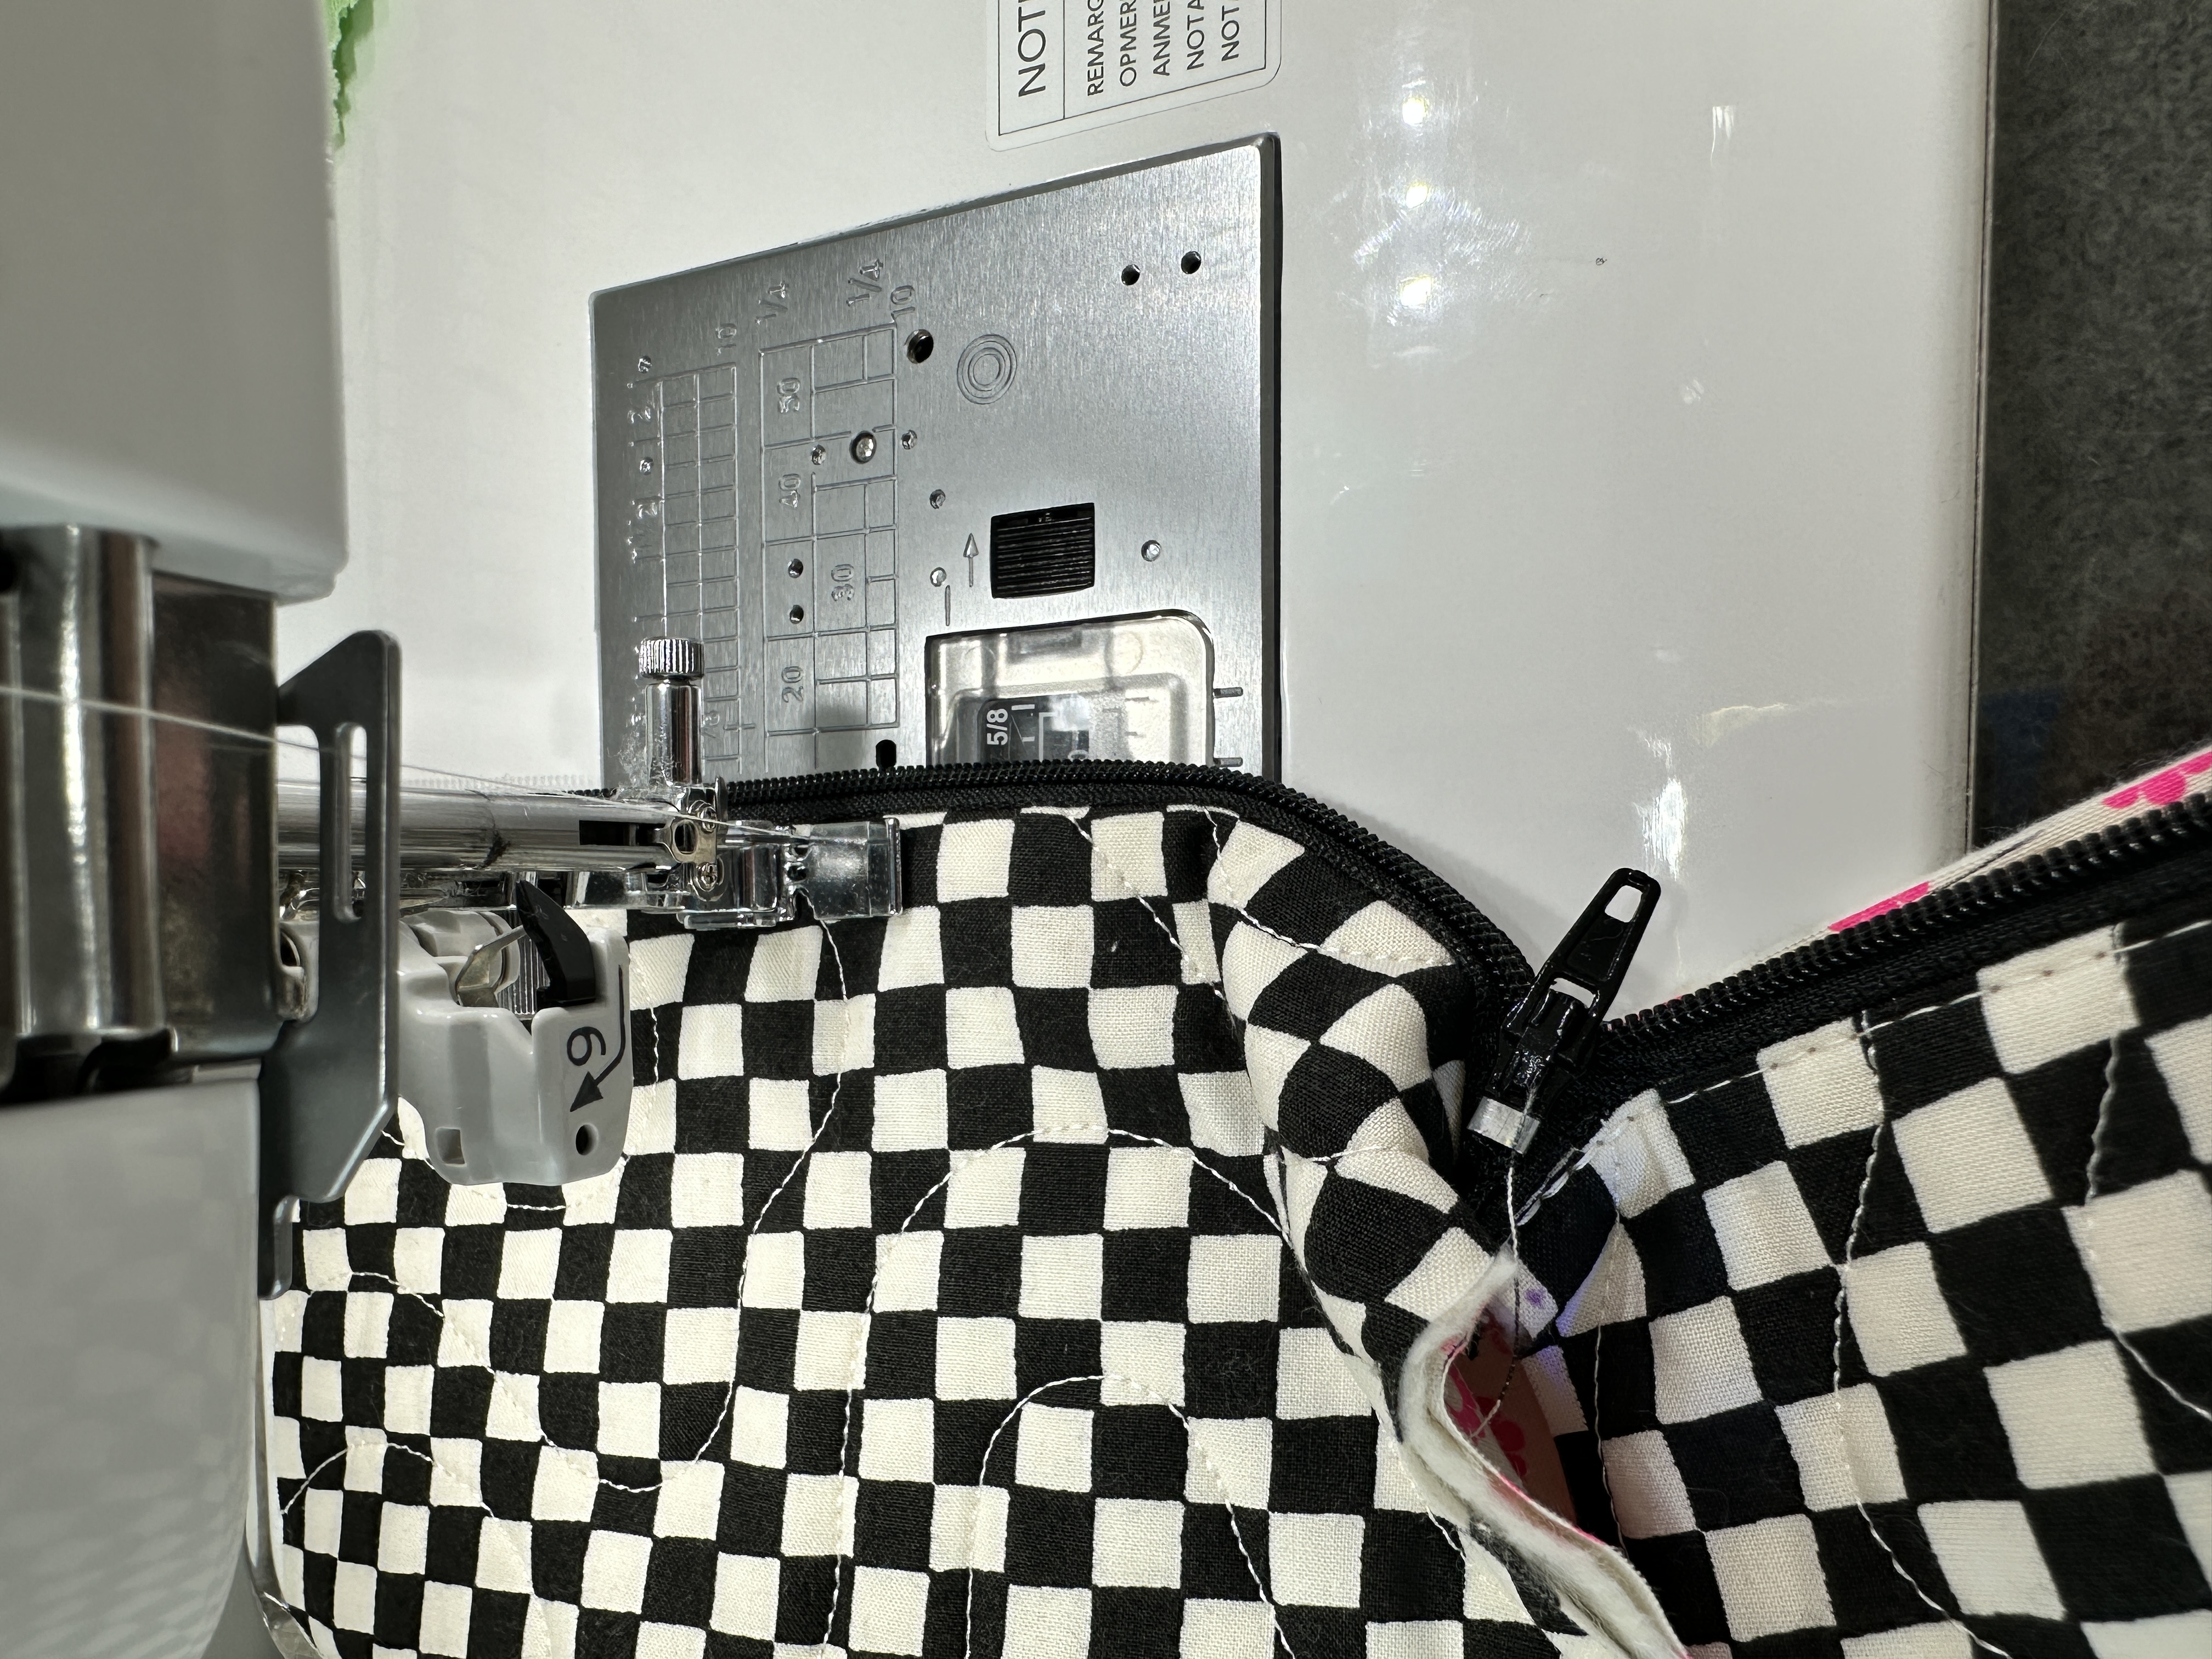
14. To start attaching your zipper to your panel, grab your clips and clip your zipper to the top raw edge of the body panel that your pocket is attached to. Flip back all layers leaving only the single raw edge of the body panel and the zipper. Sew as close to the zipper teeth as possible using your zipper foot. 


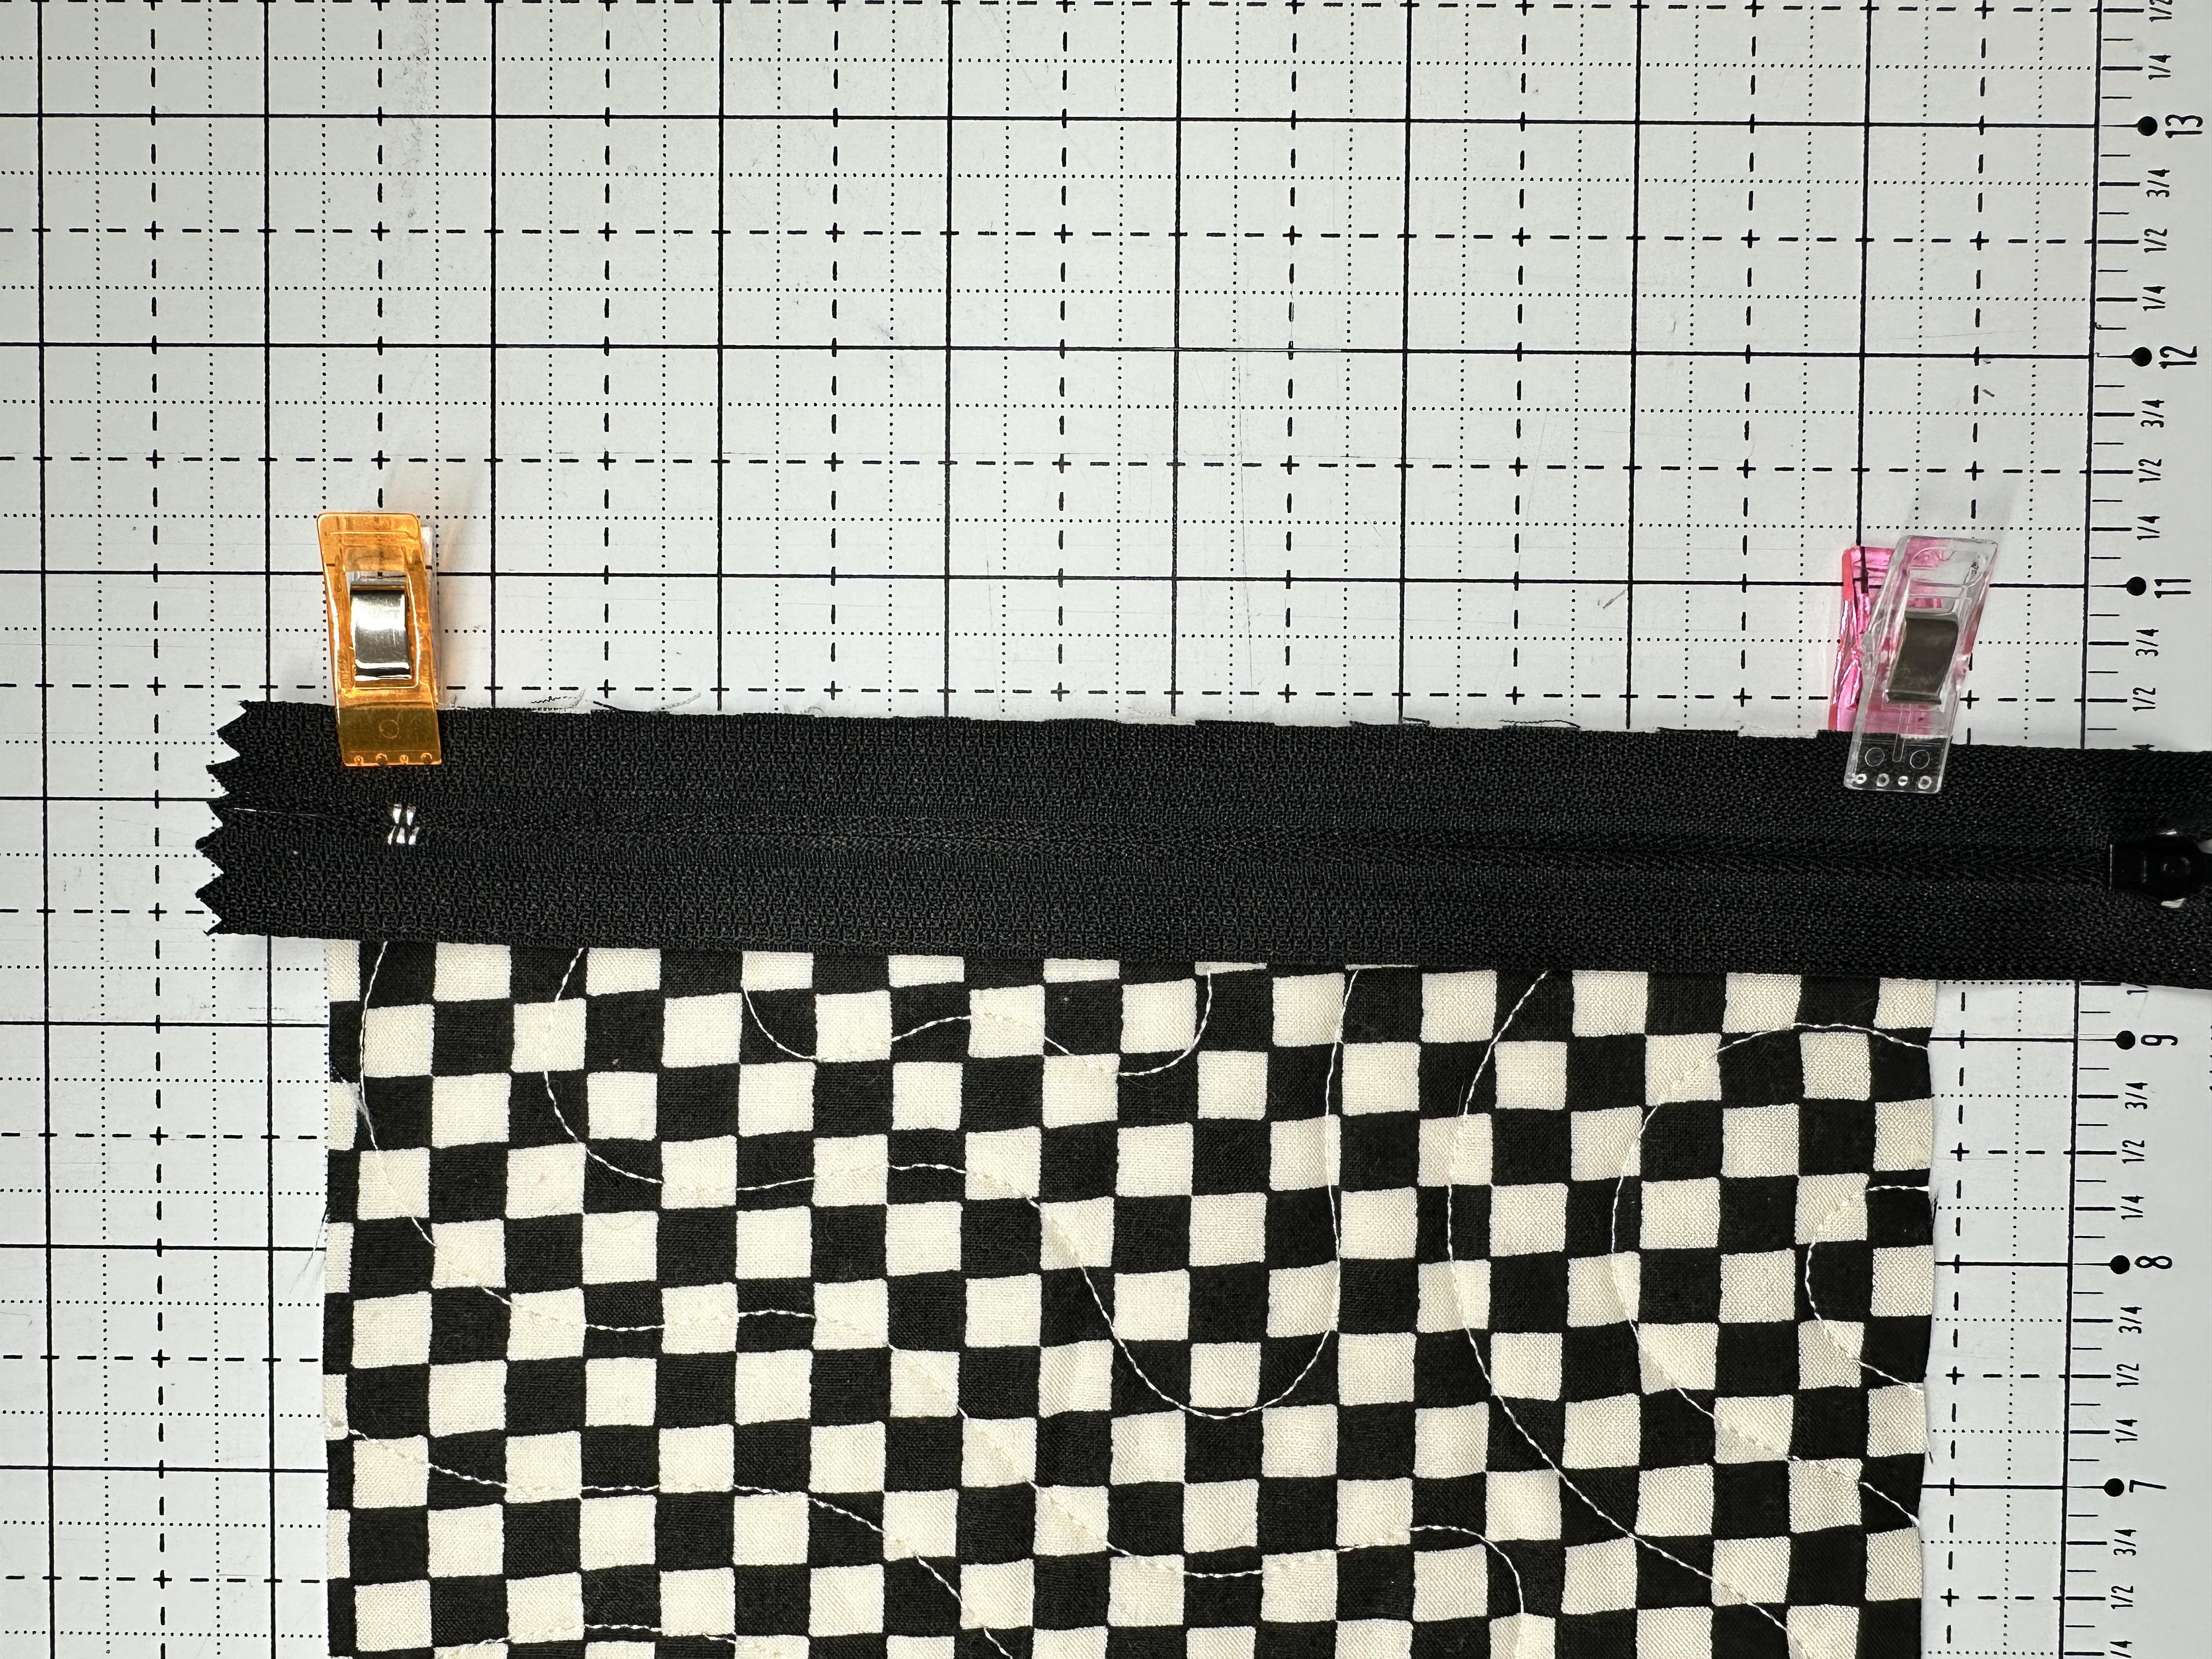
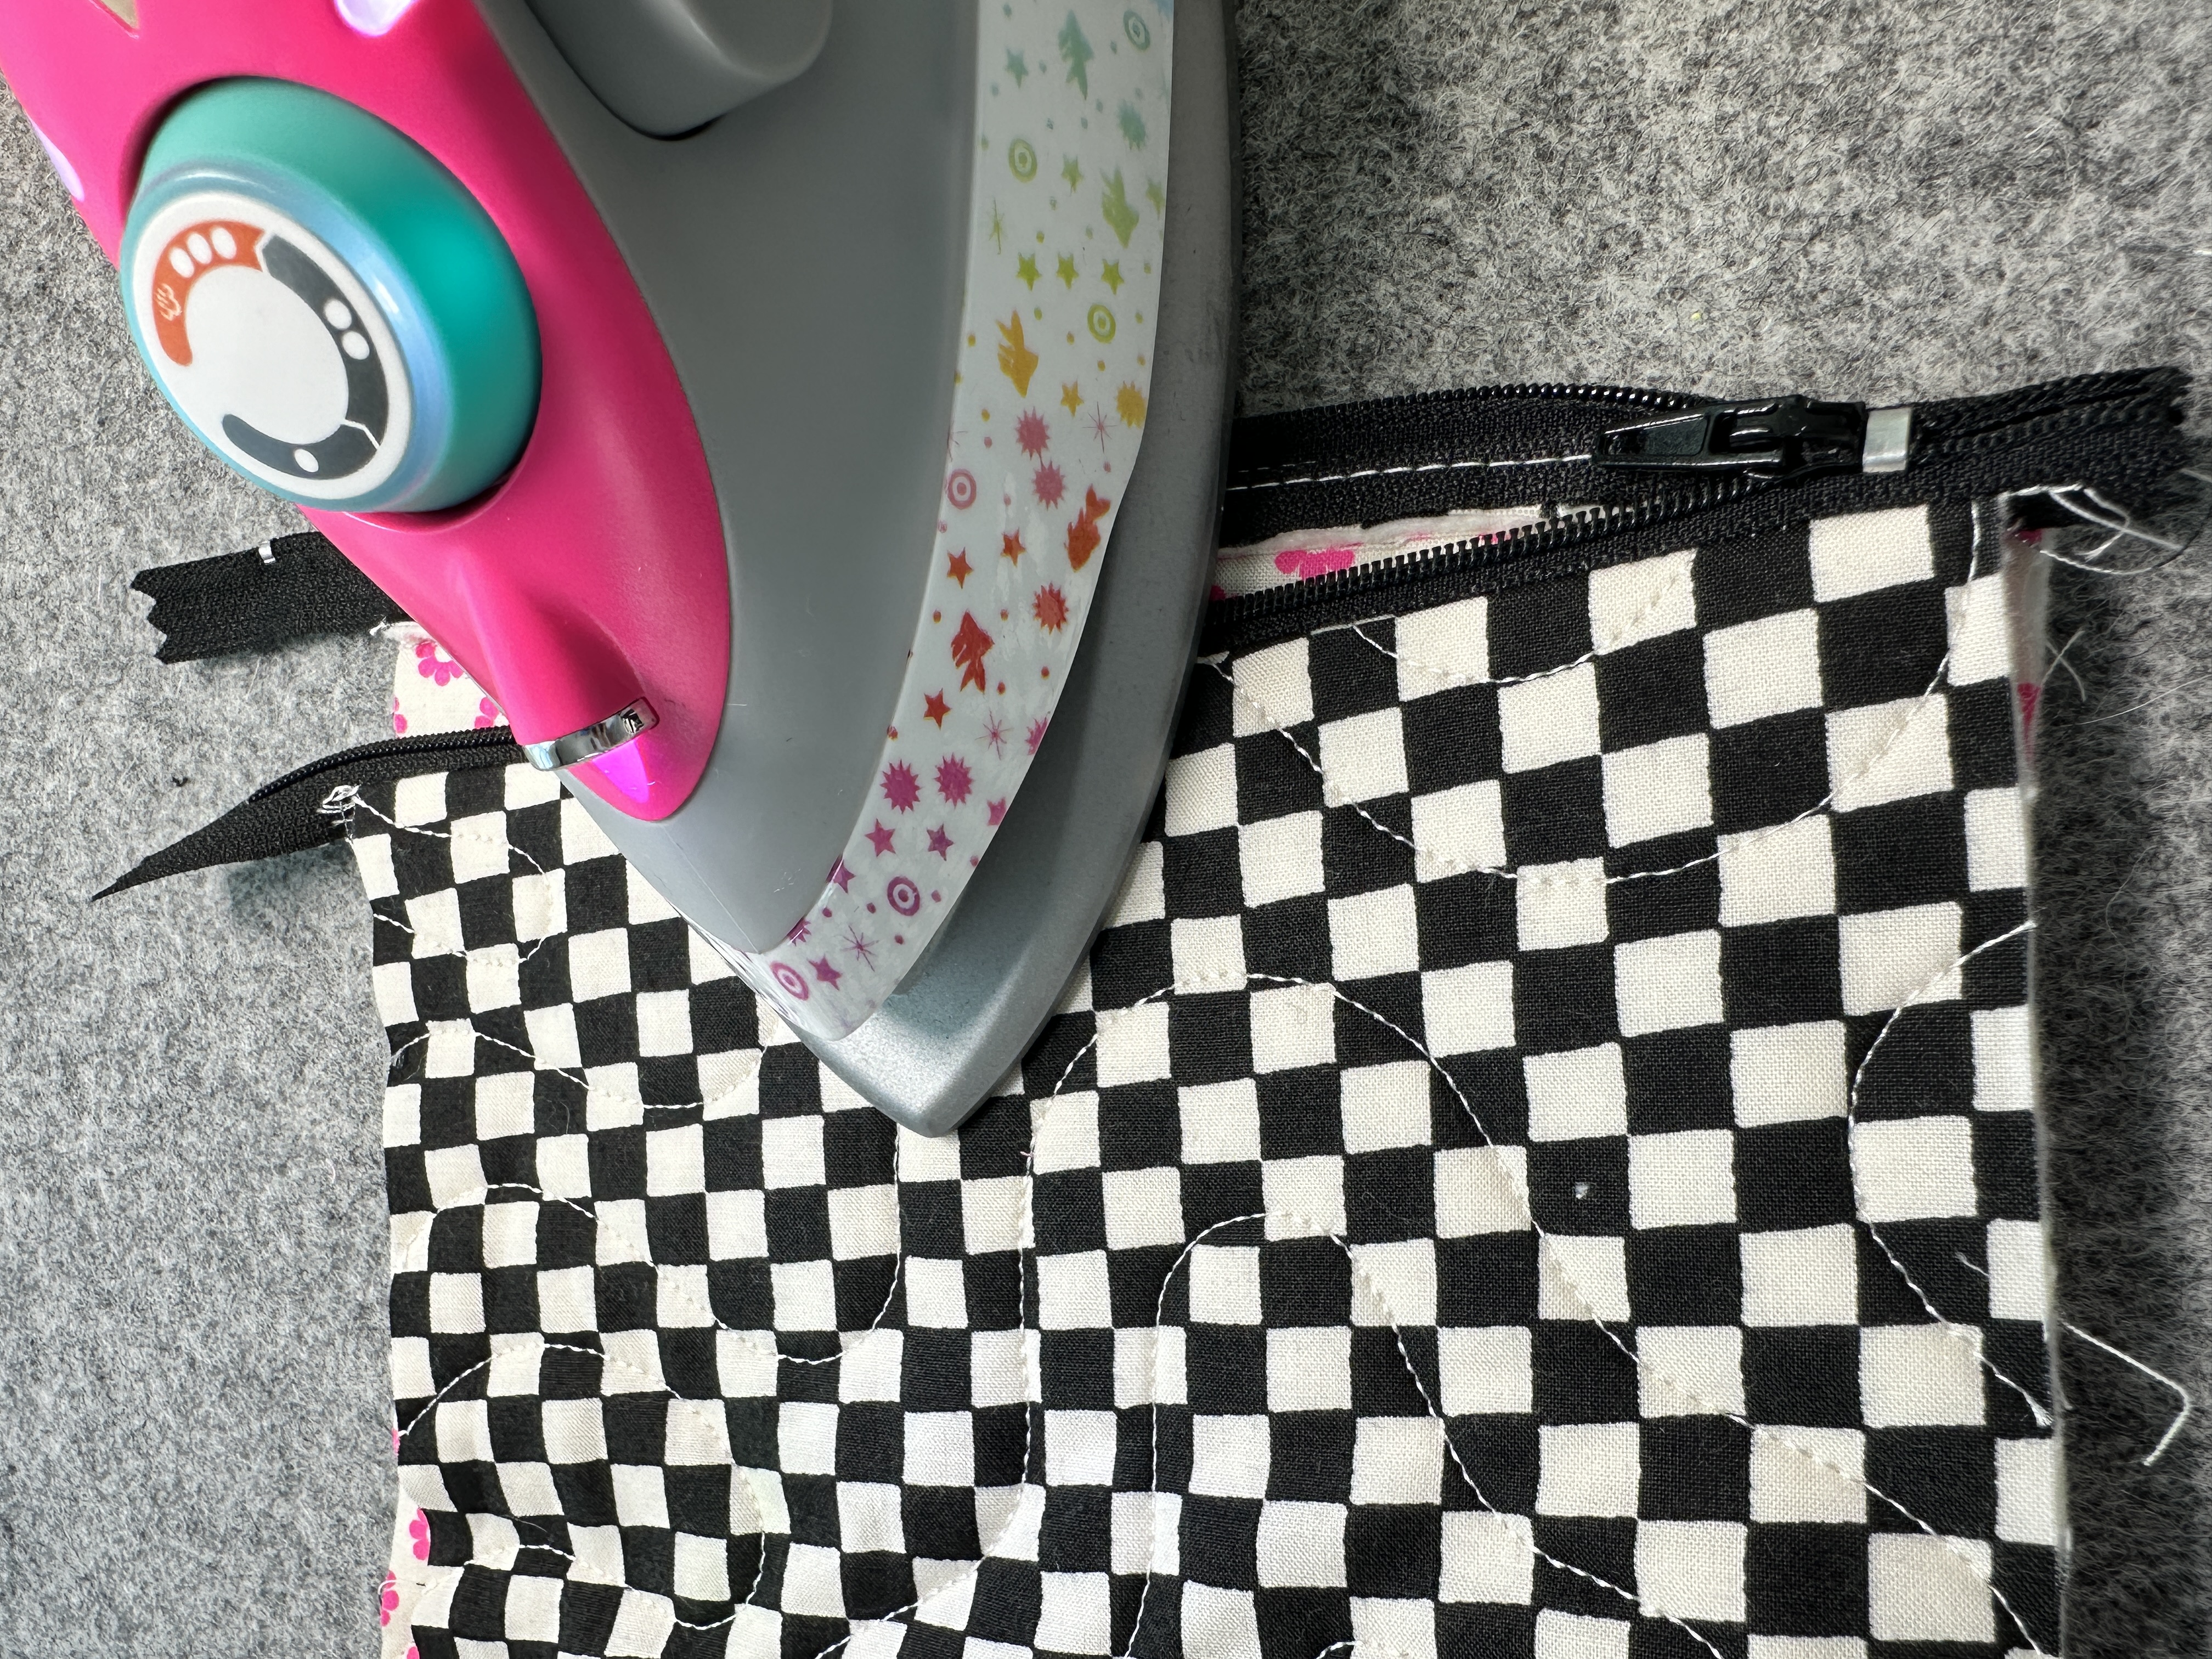
15. Press your zipper seam and top stitch. 


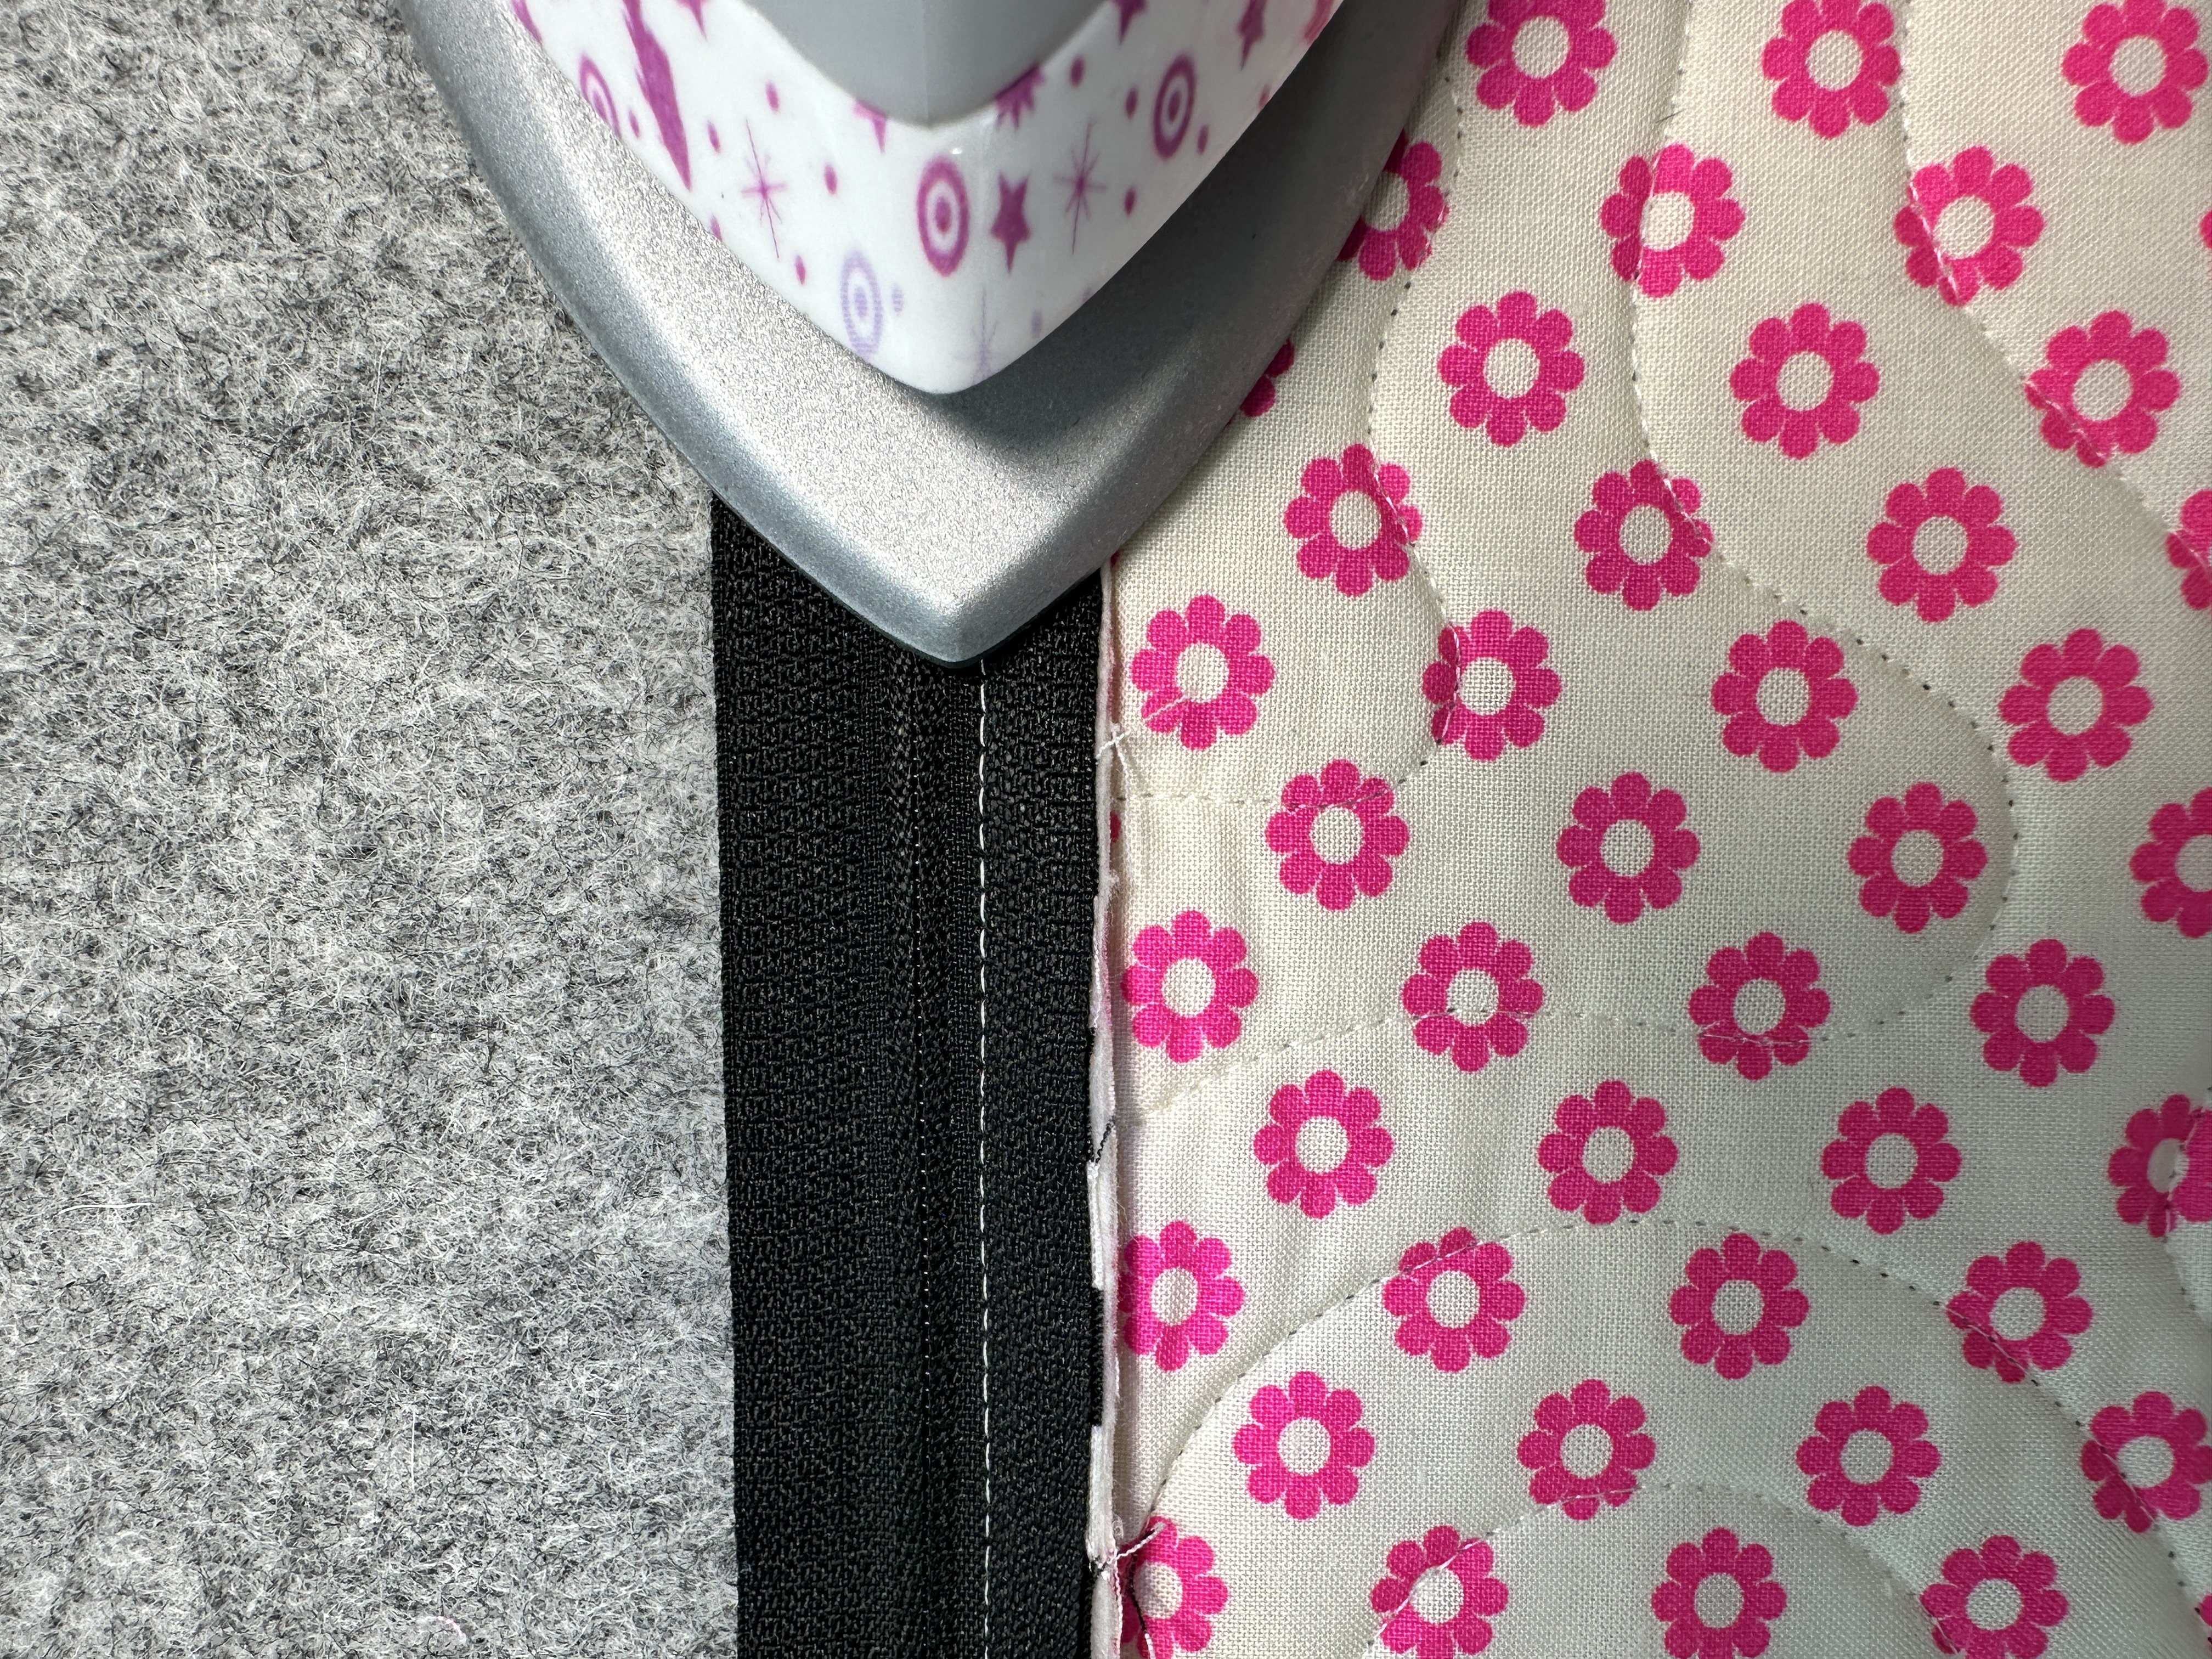
16. Flipping your pouch inside out, attach the zipper to the remaining raw edge using your zipper foot sewing as close to the edge of the zipper teeth as possible.


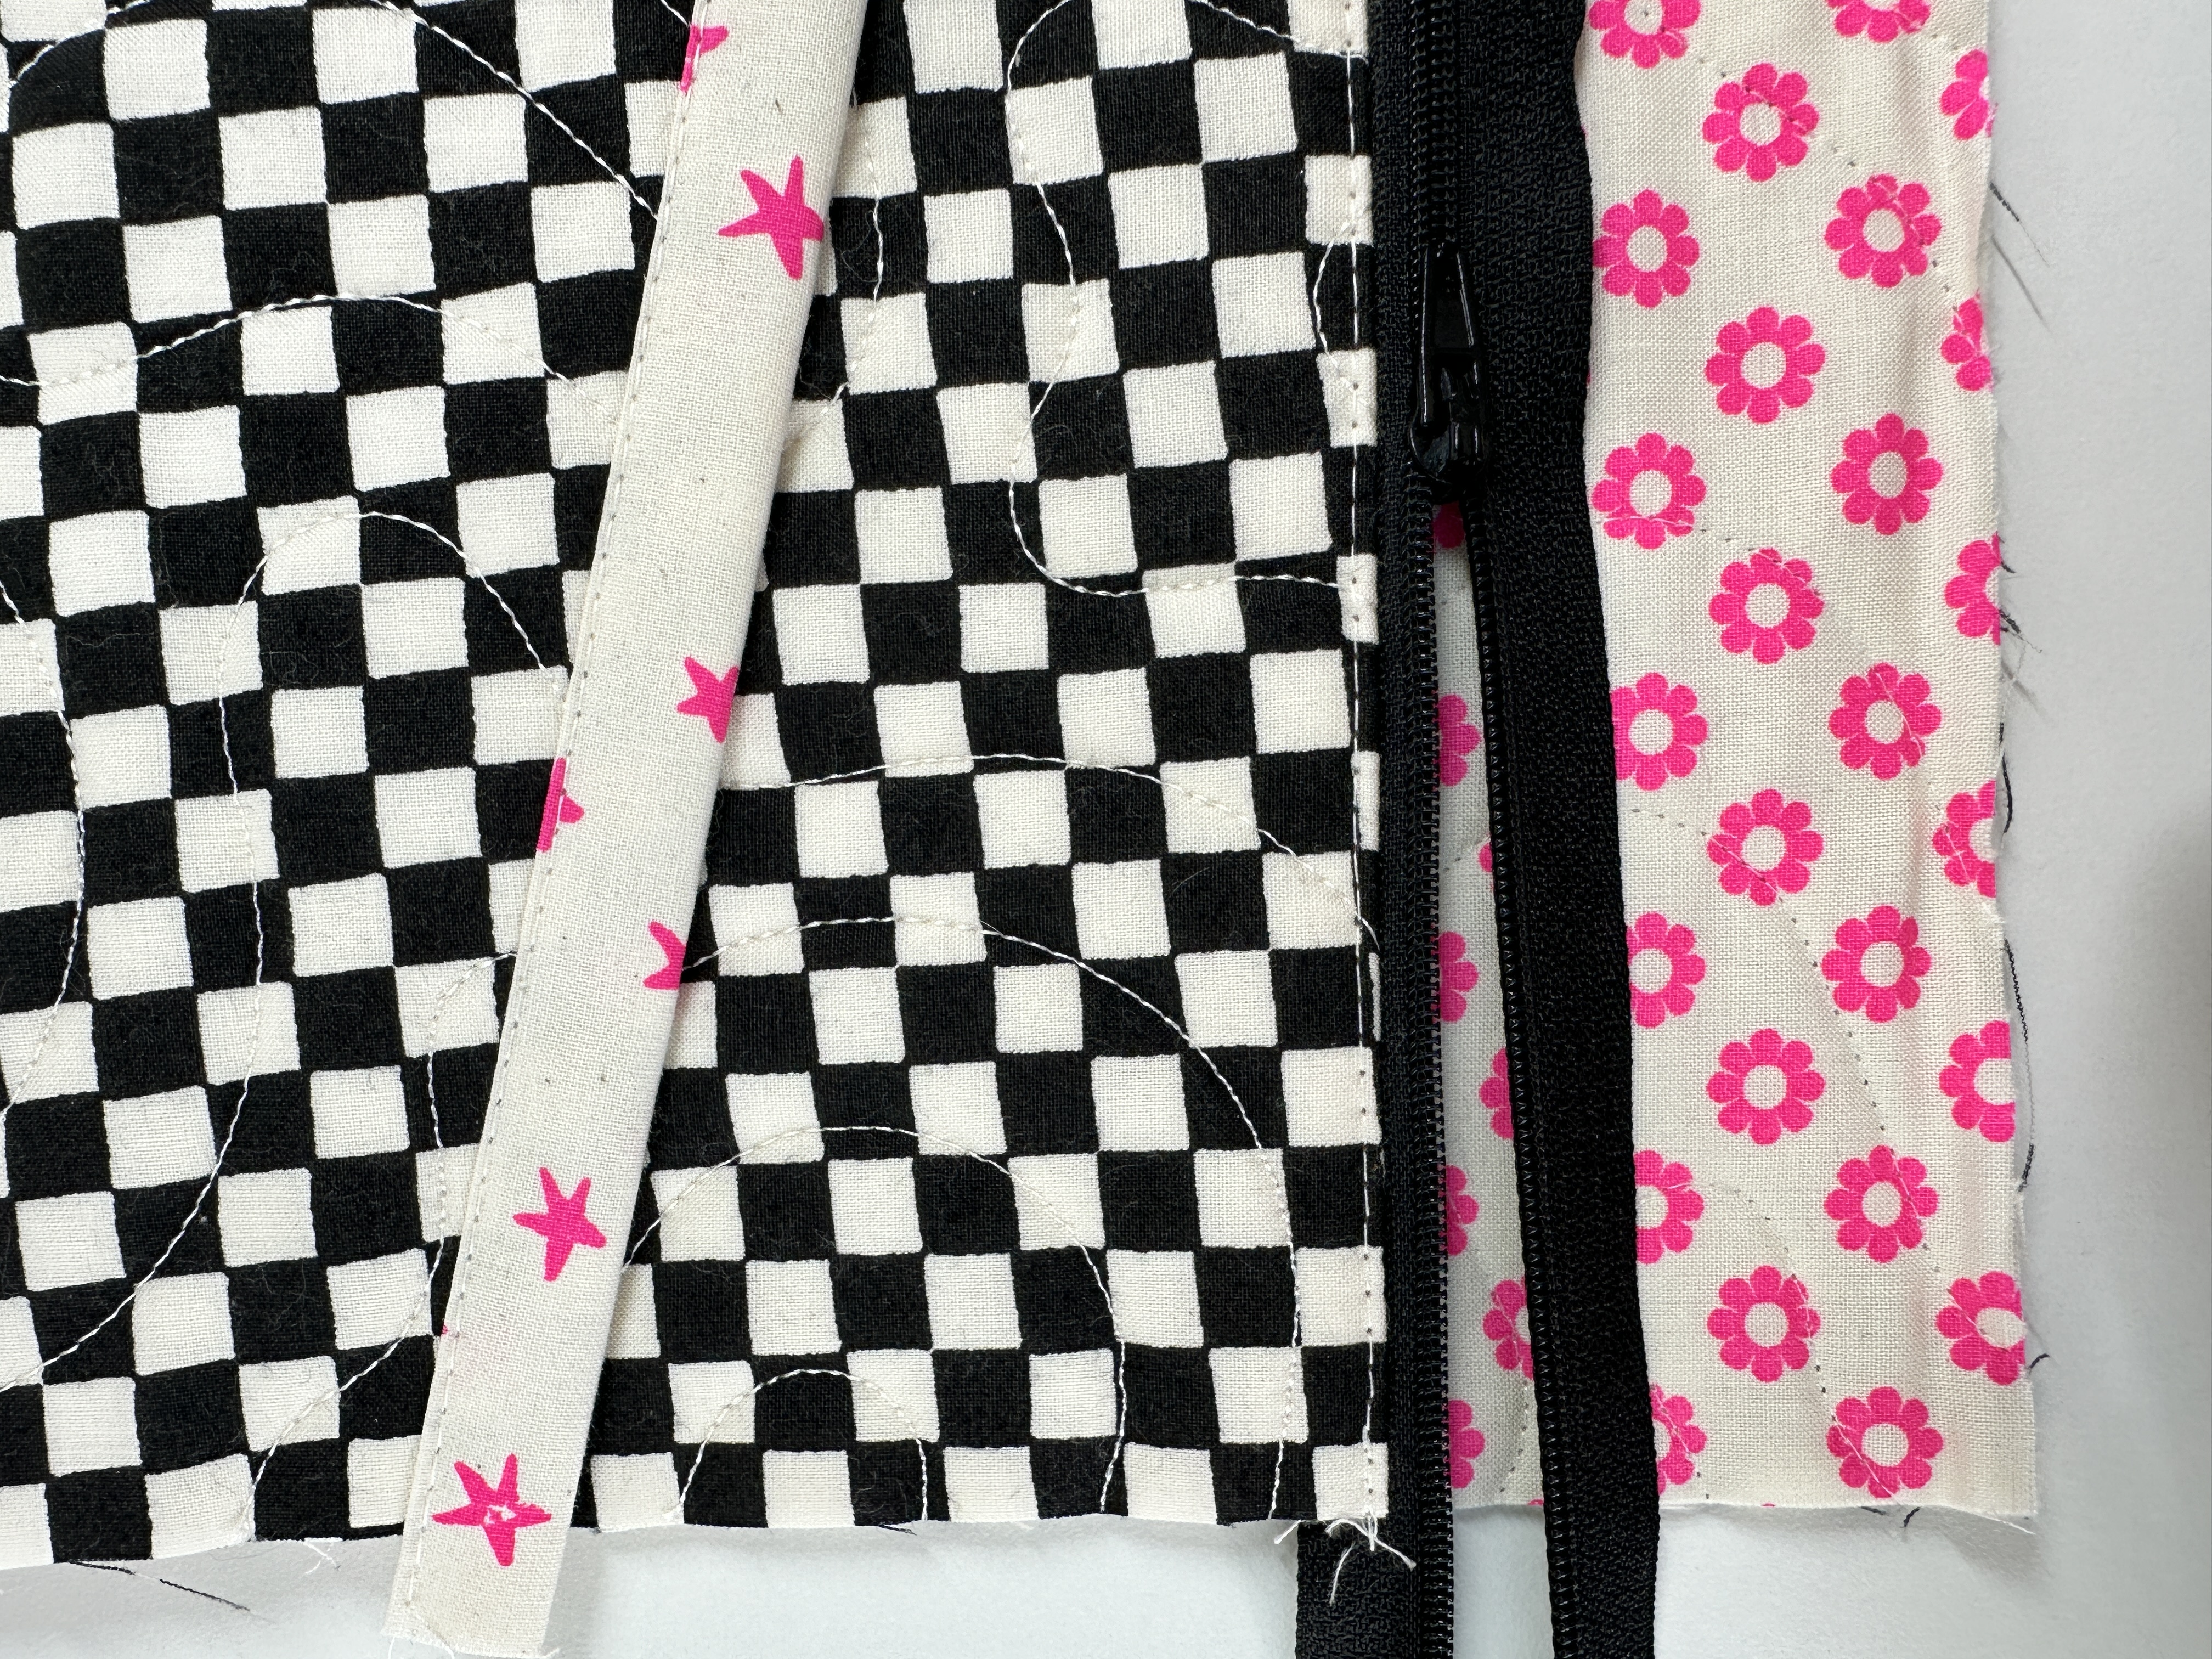
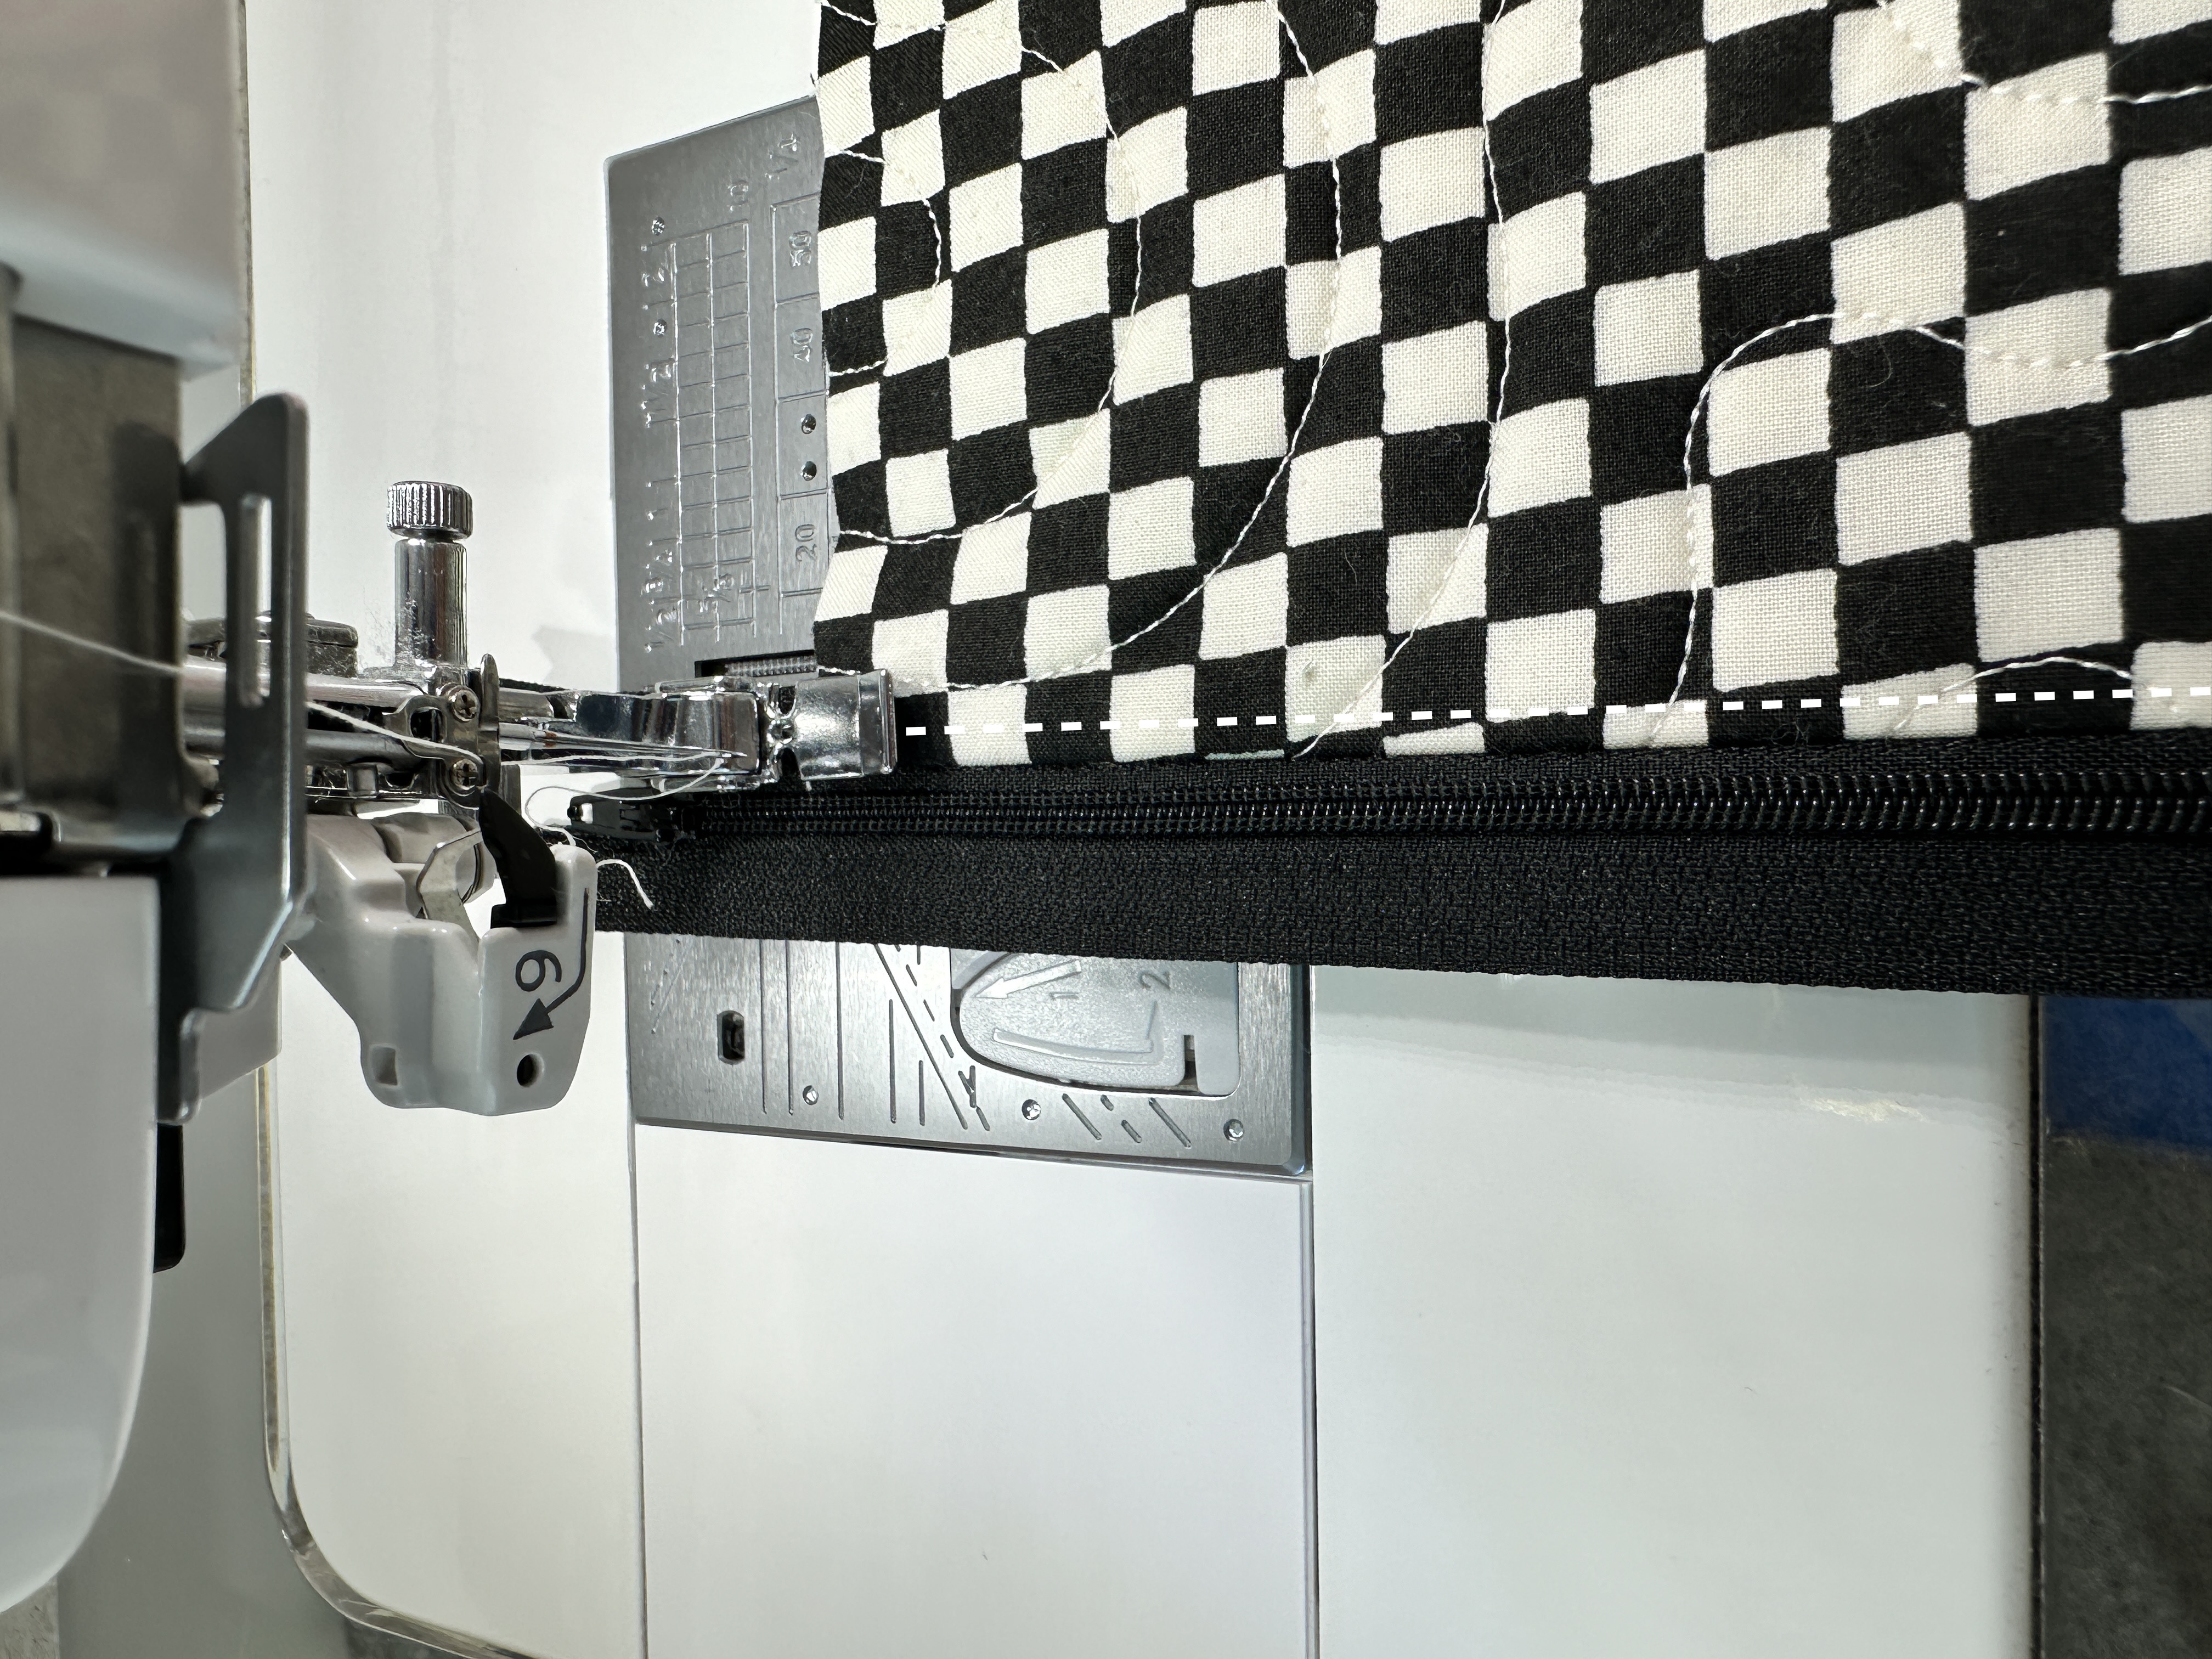
17. Flip pouch right side out to top stitch the latest zipper seam repeating the process in step 15. Press the zipper seam flat, open the zipper as much as you can and then top stitch ensuring you are only sewing on the single layer.. 


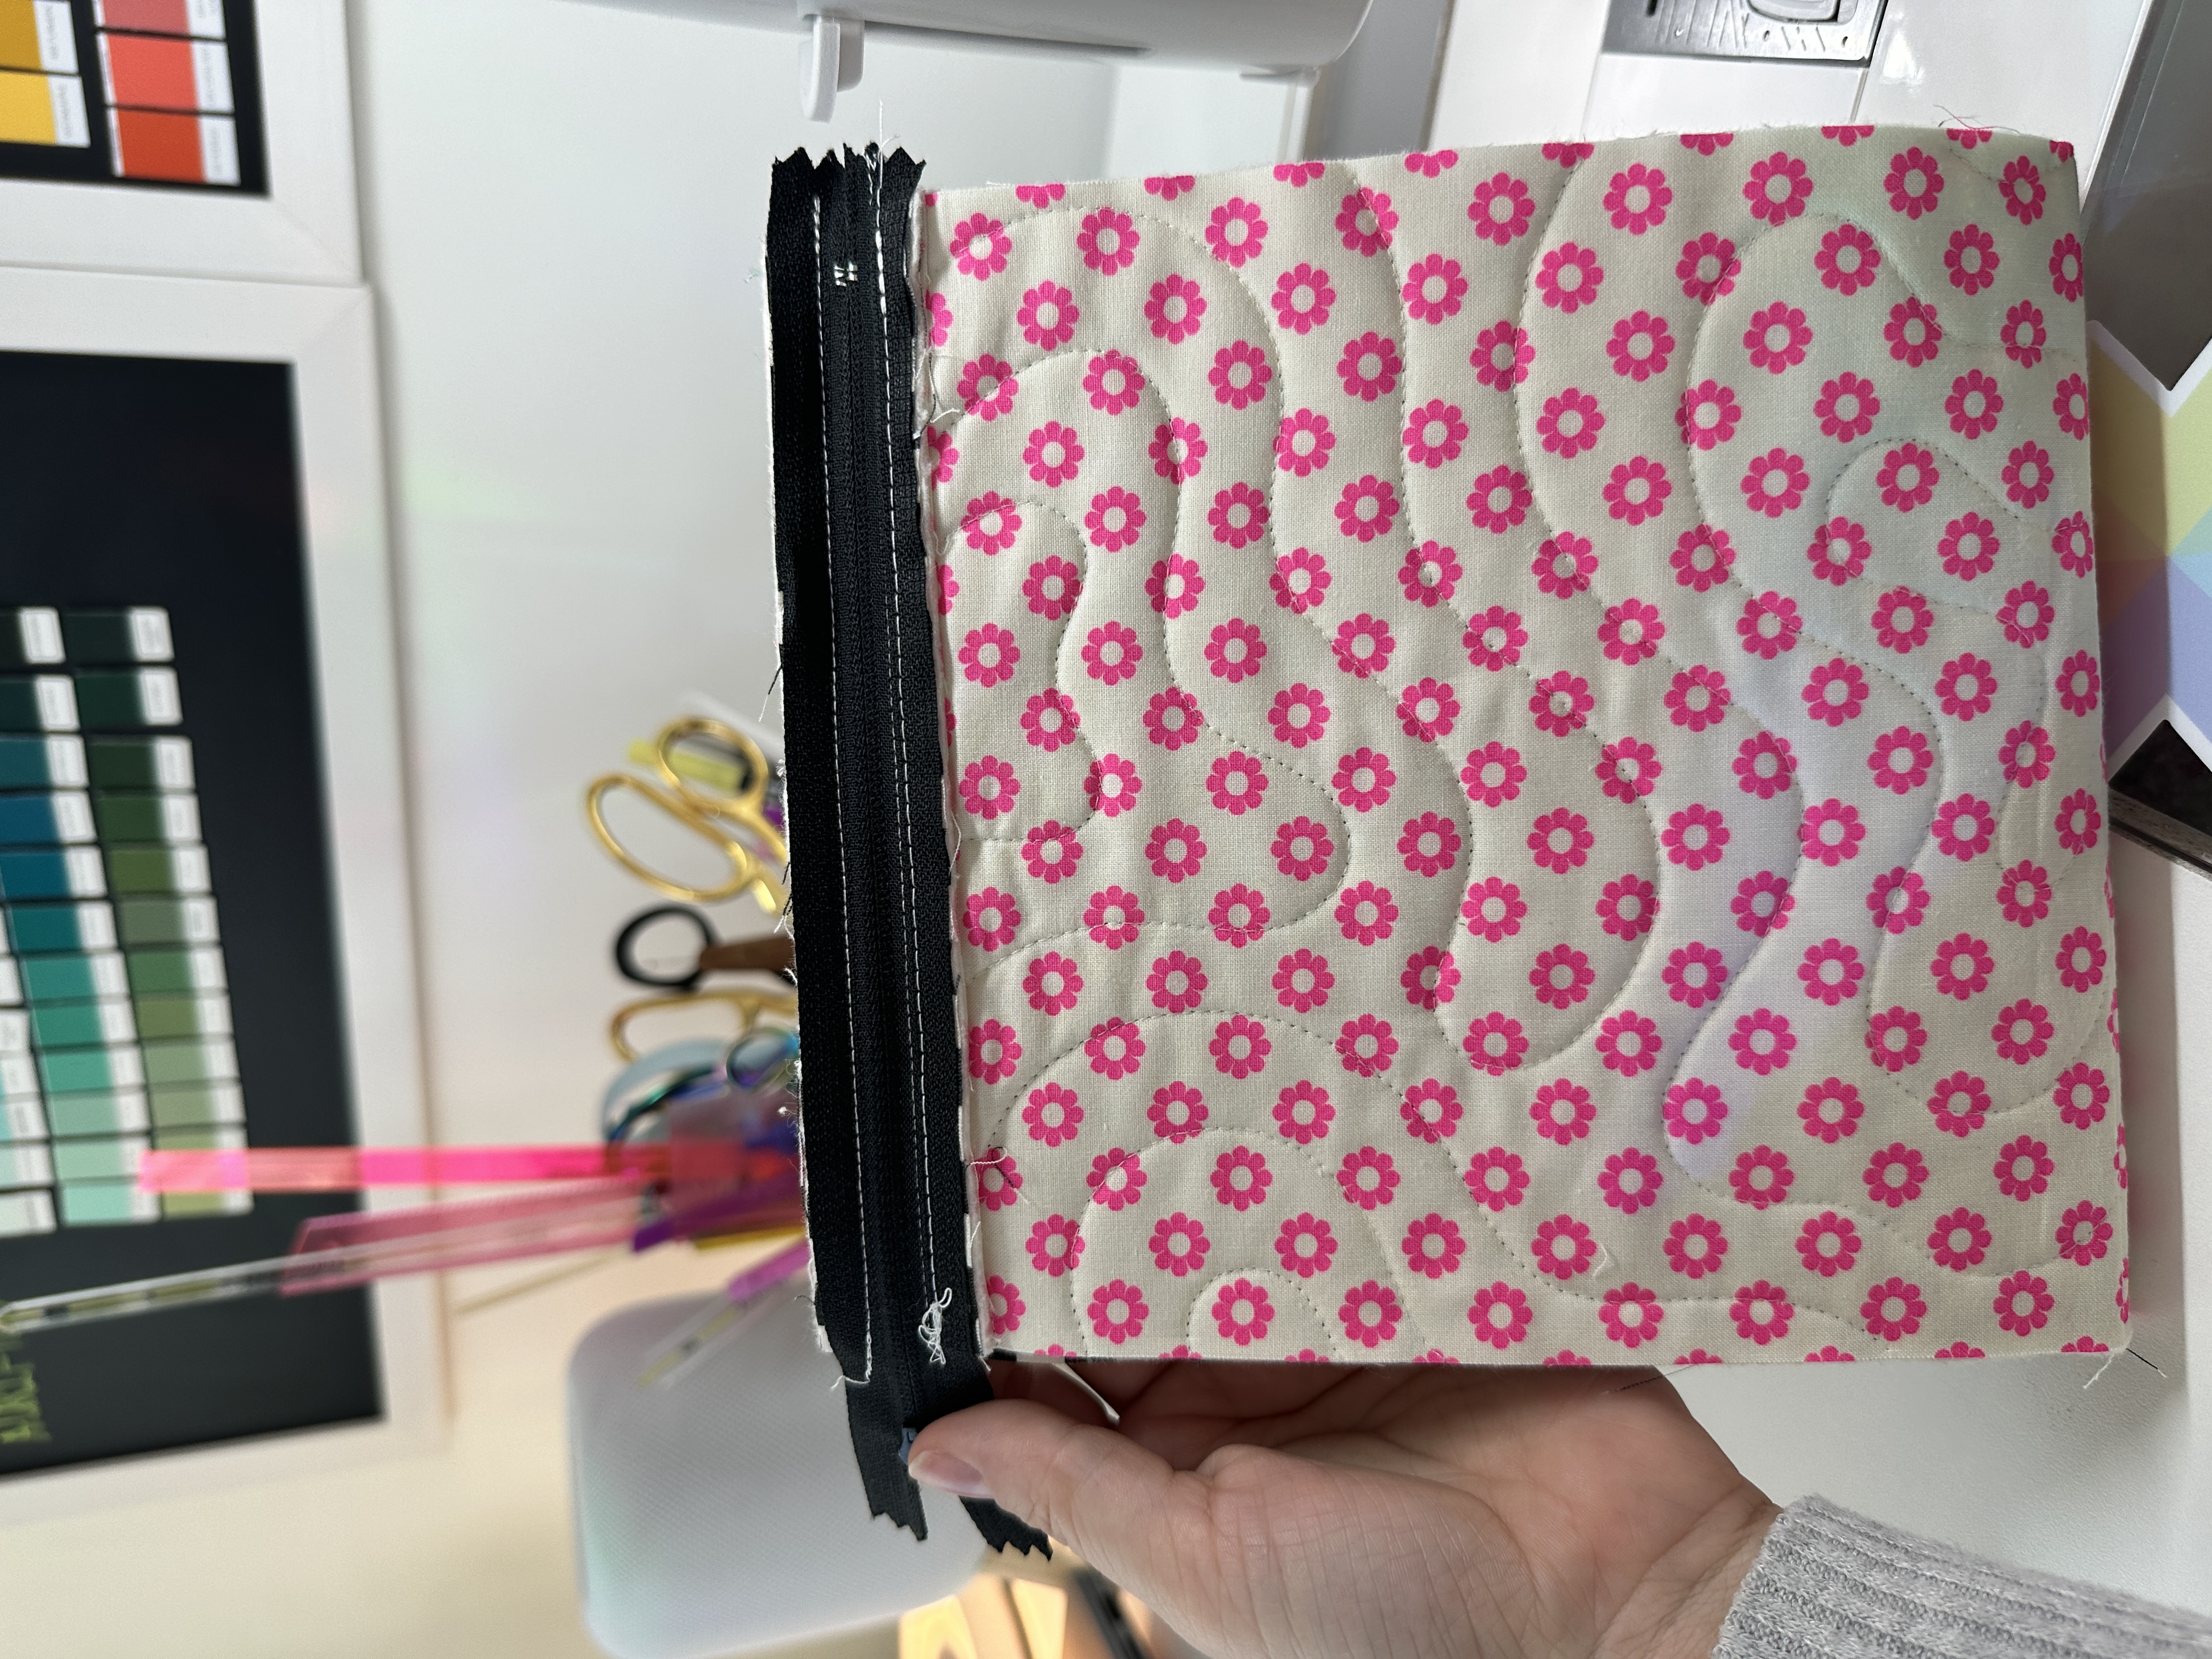
18. Keeping your pouch right side facing out, trim your zipper and binding edges. 


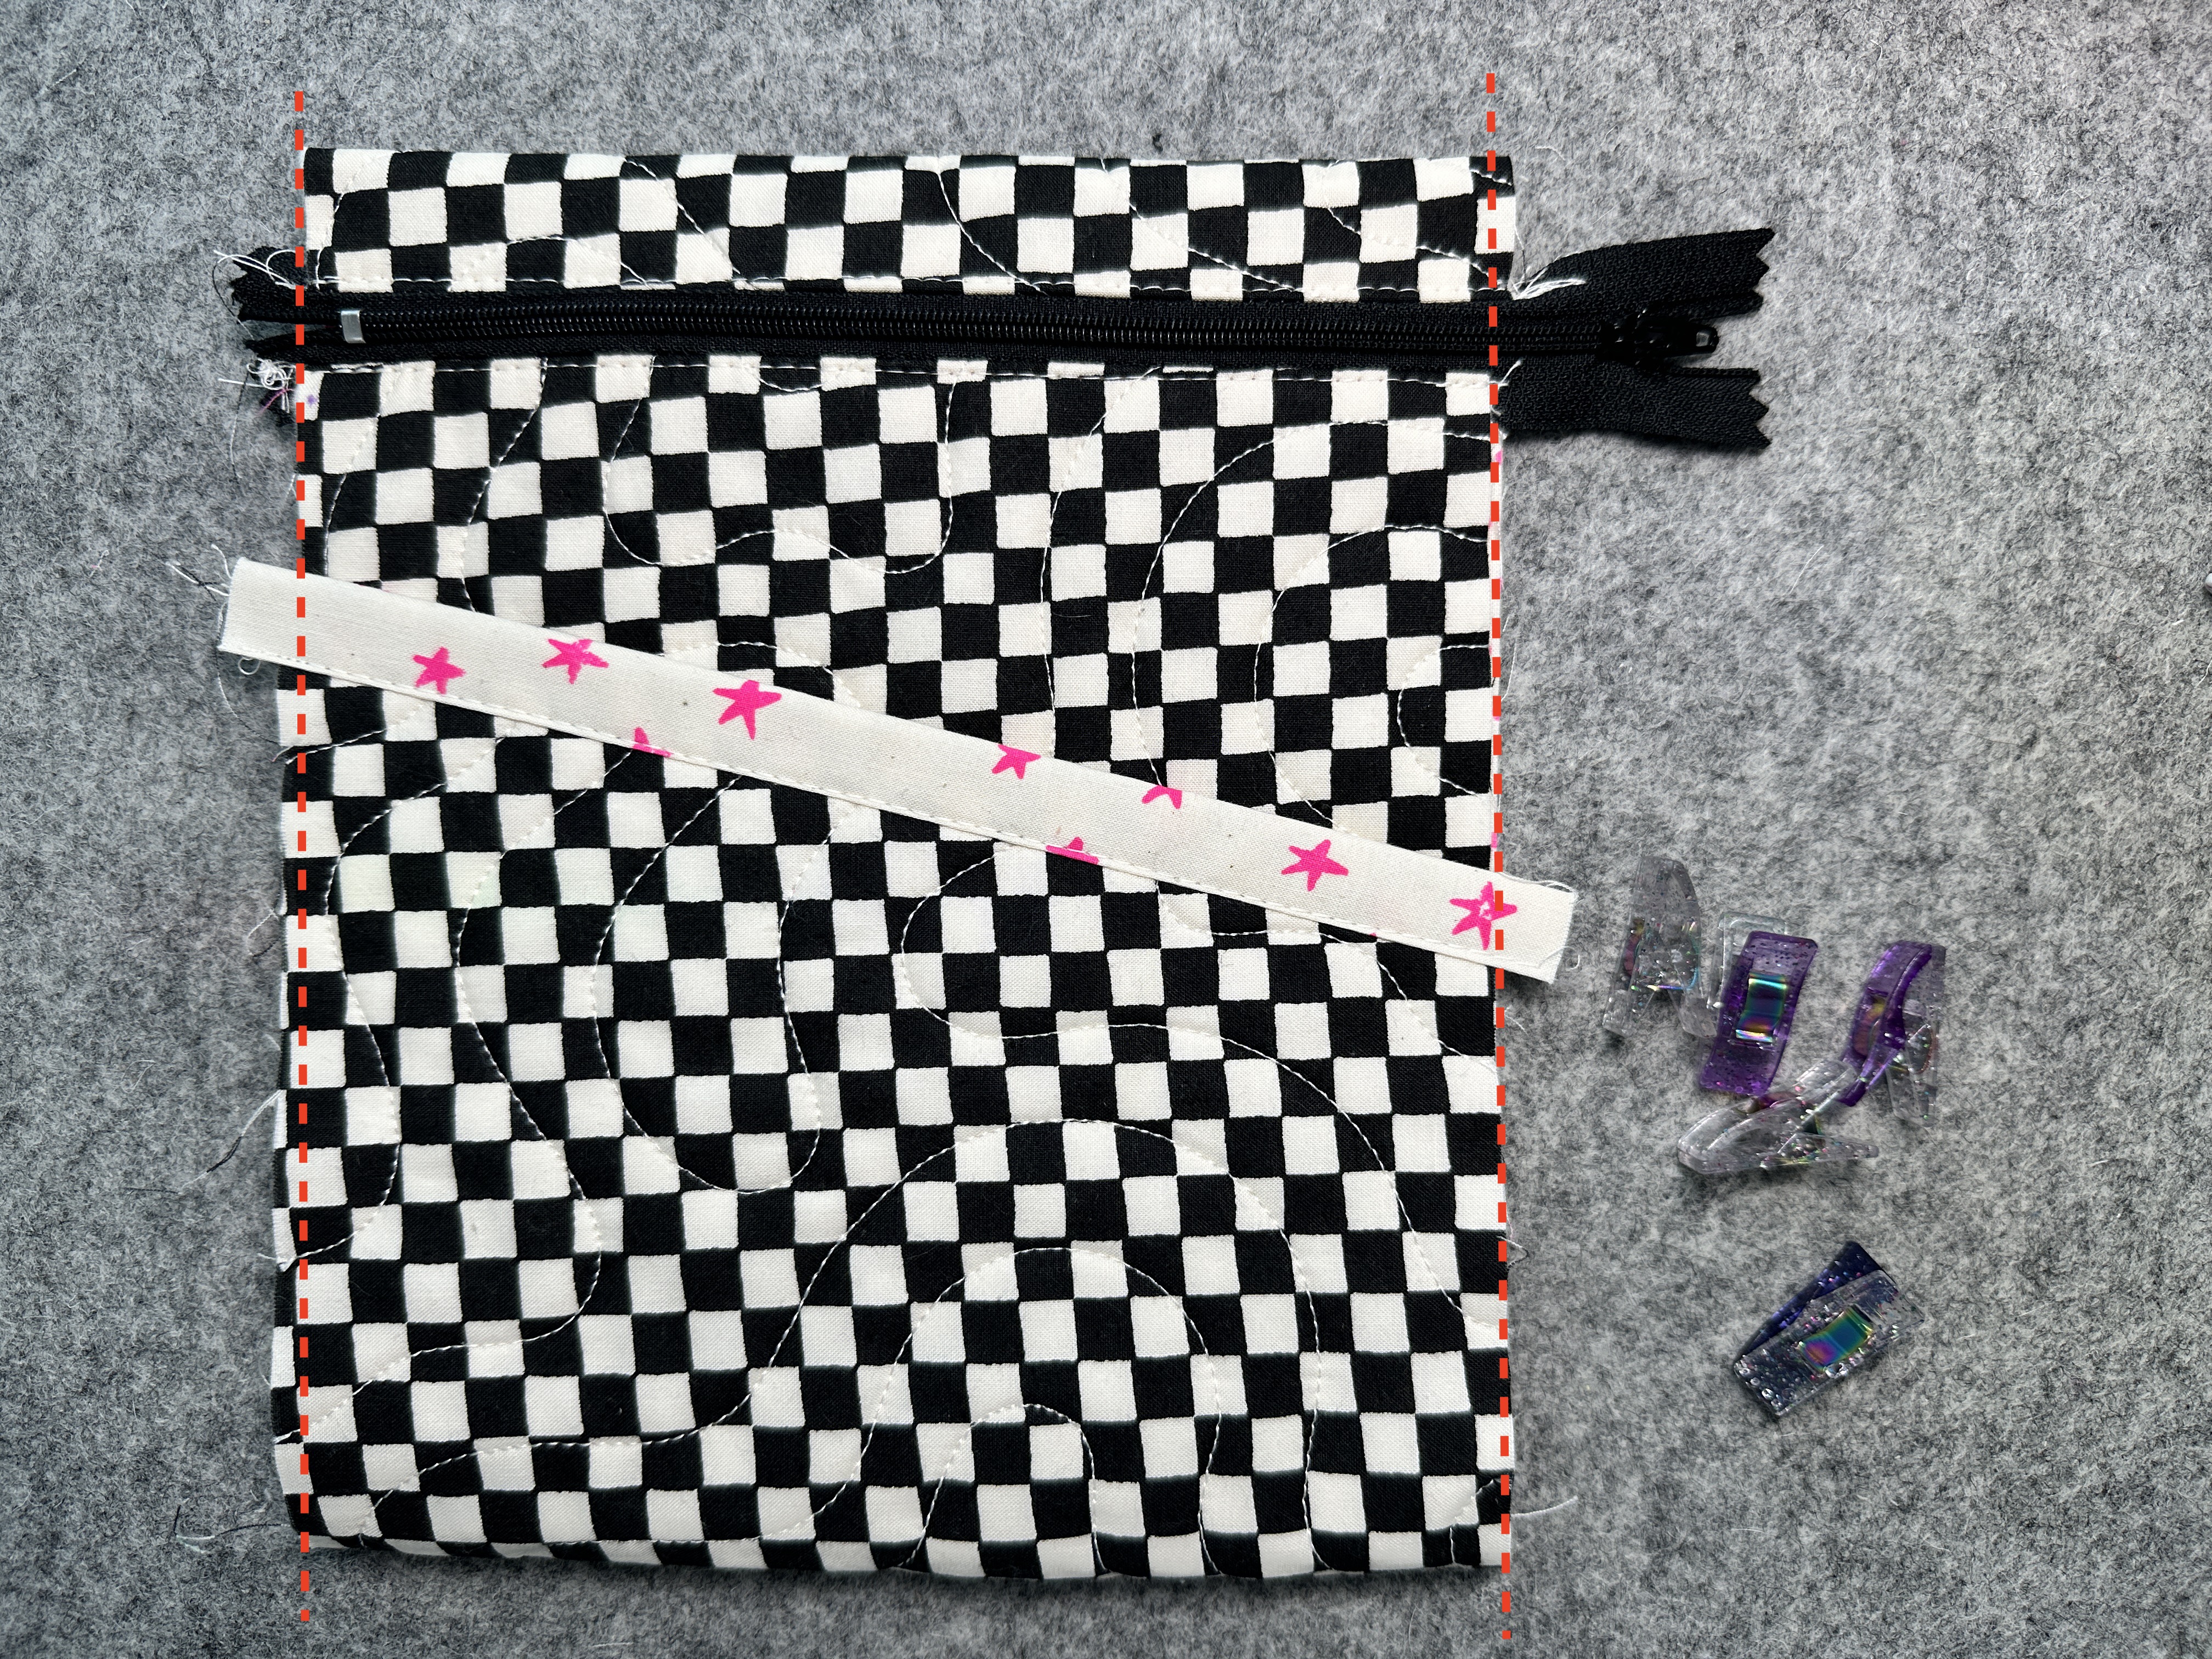
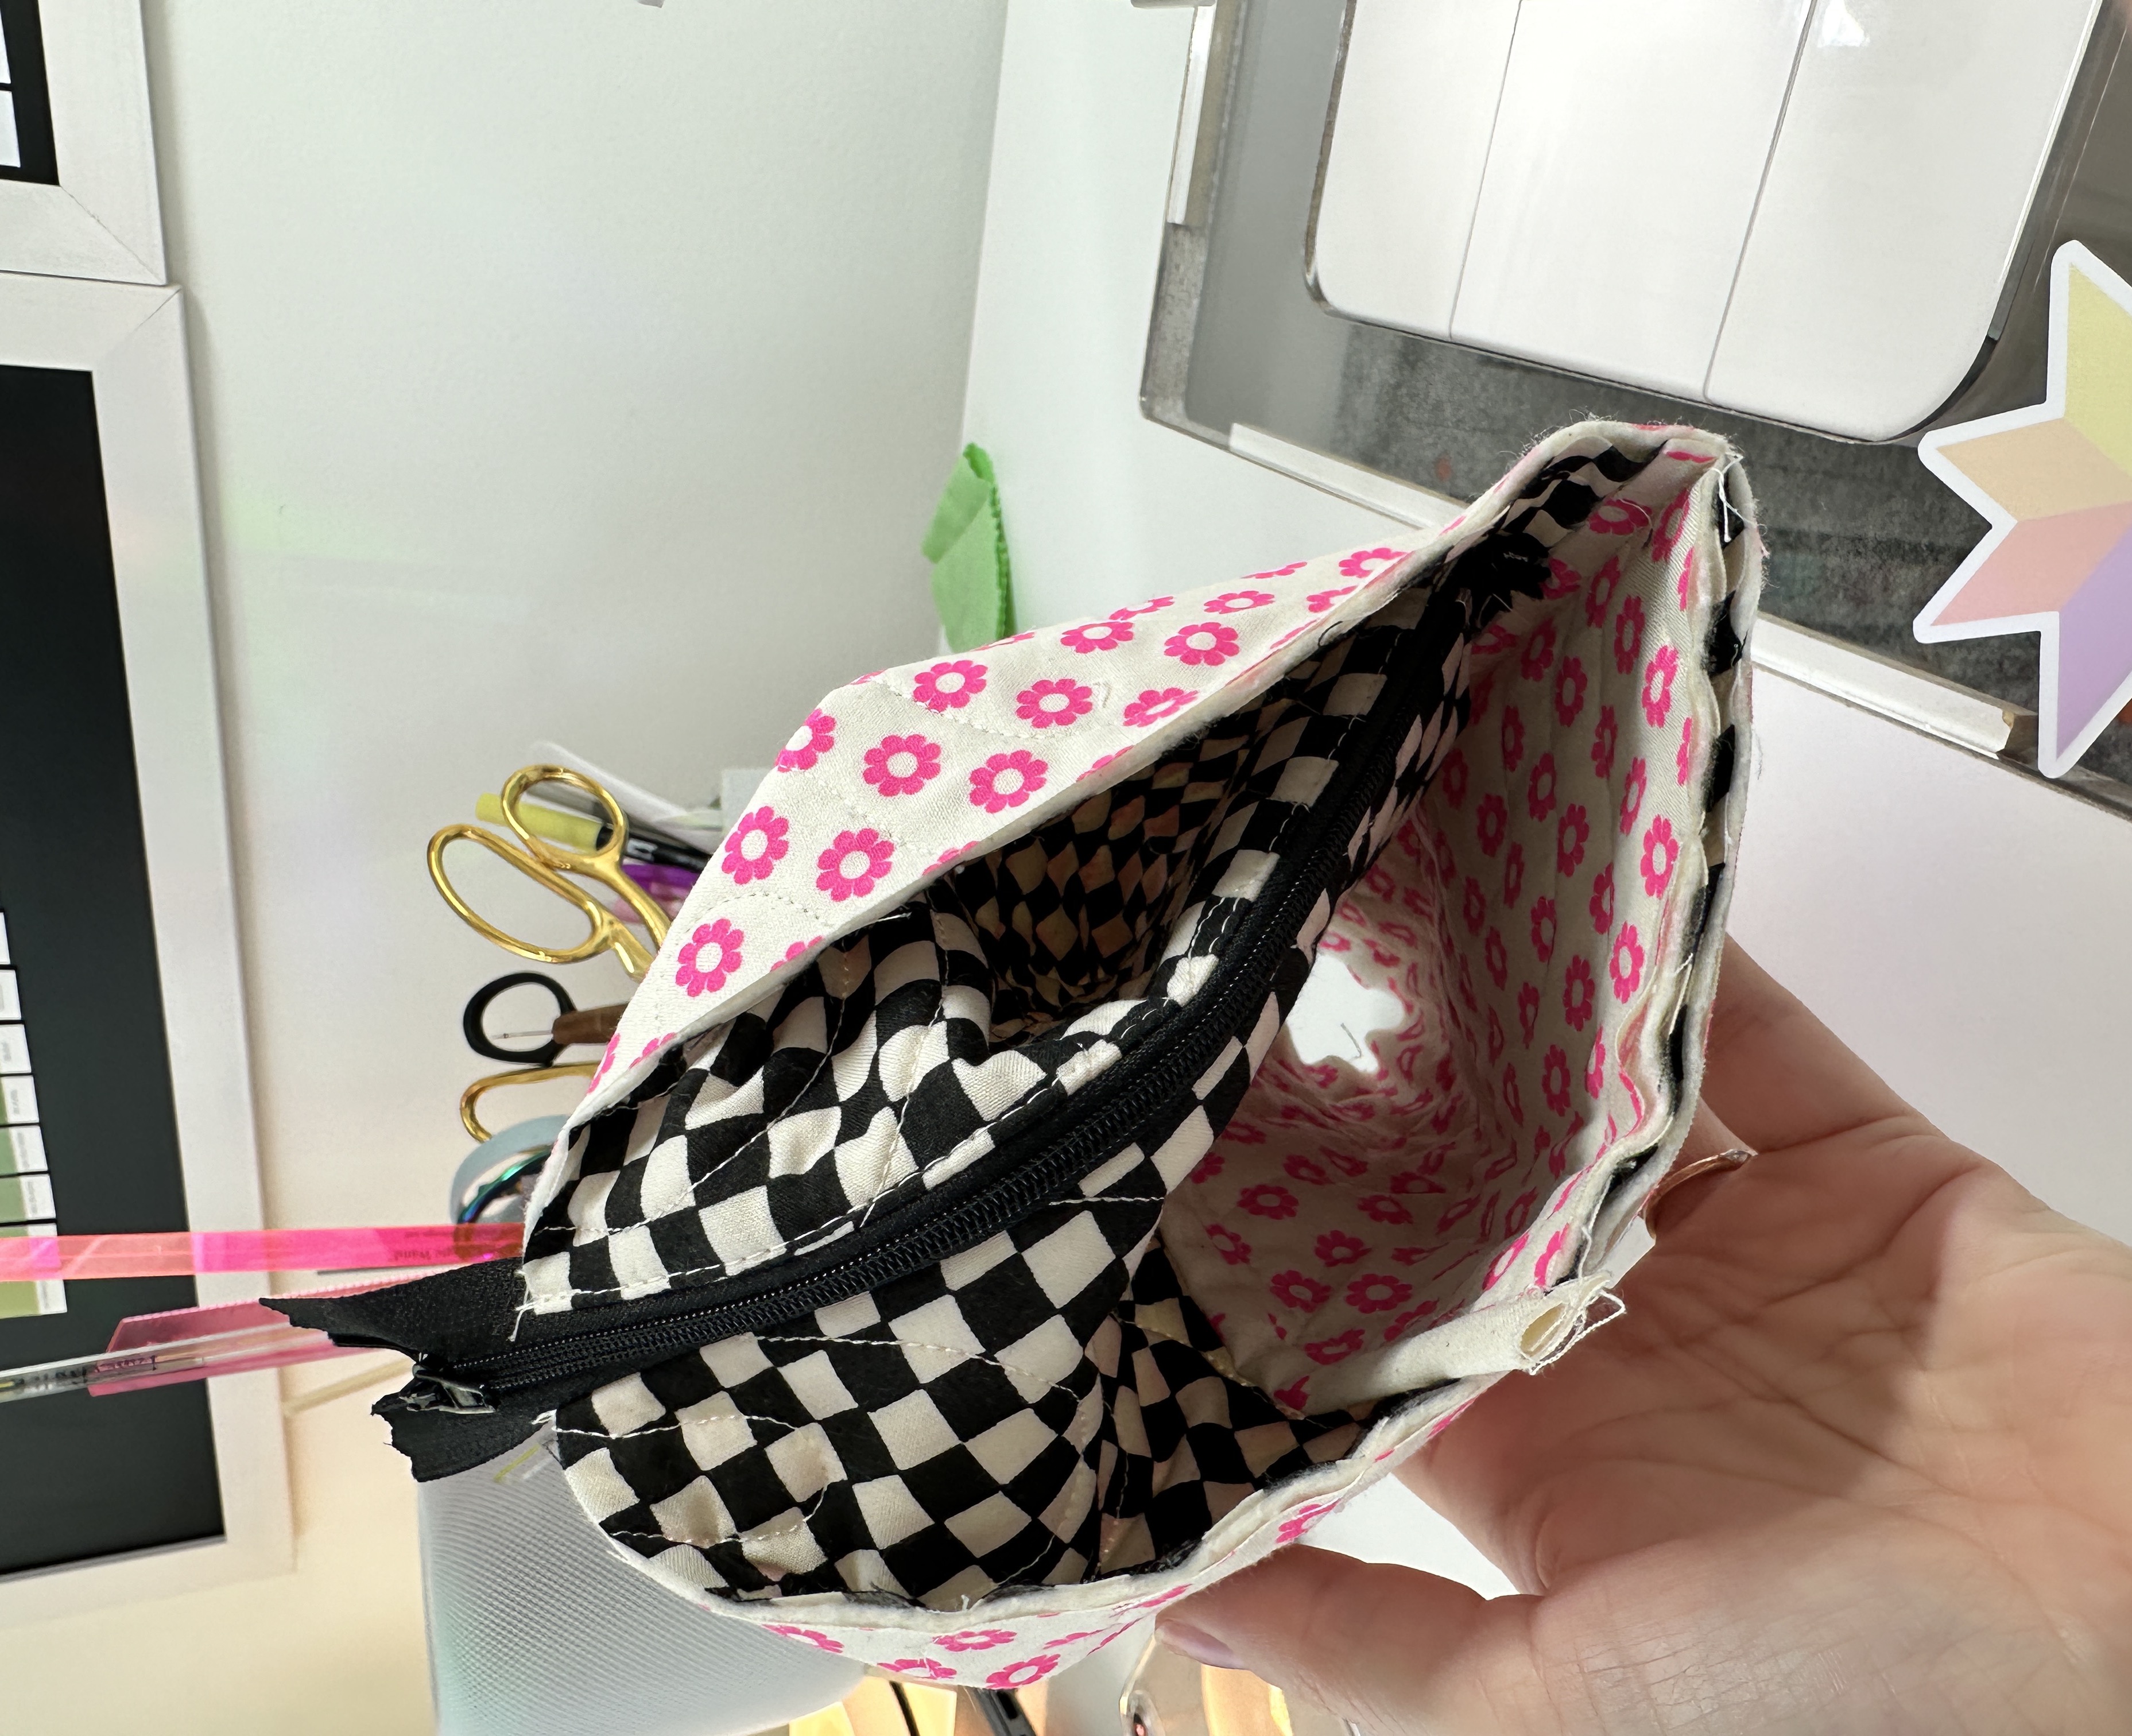
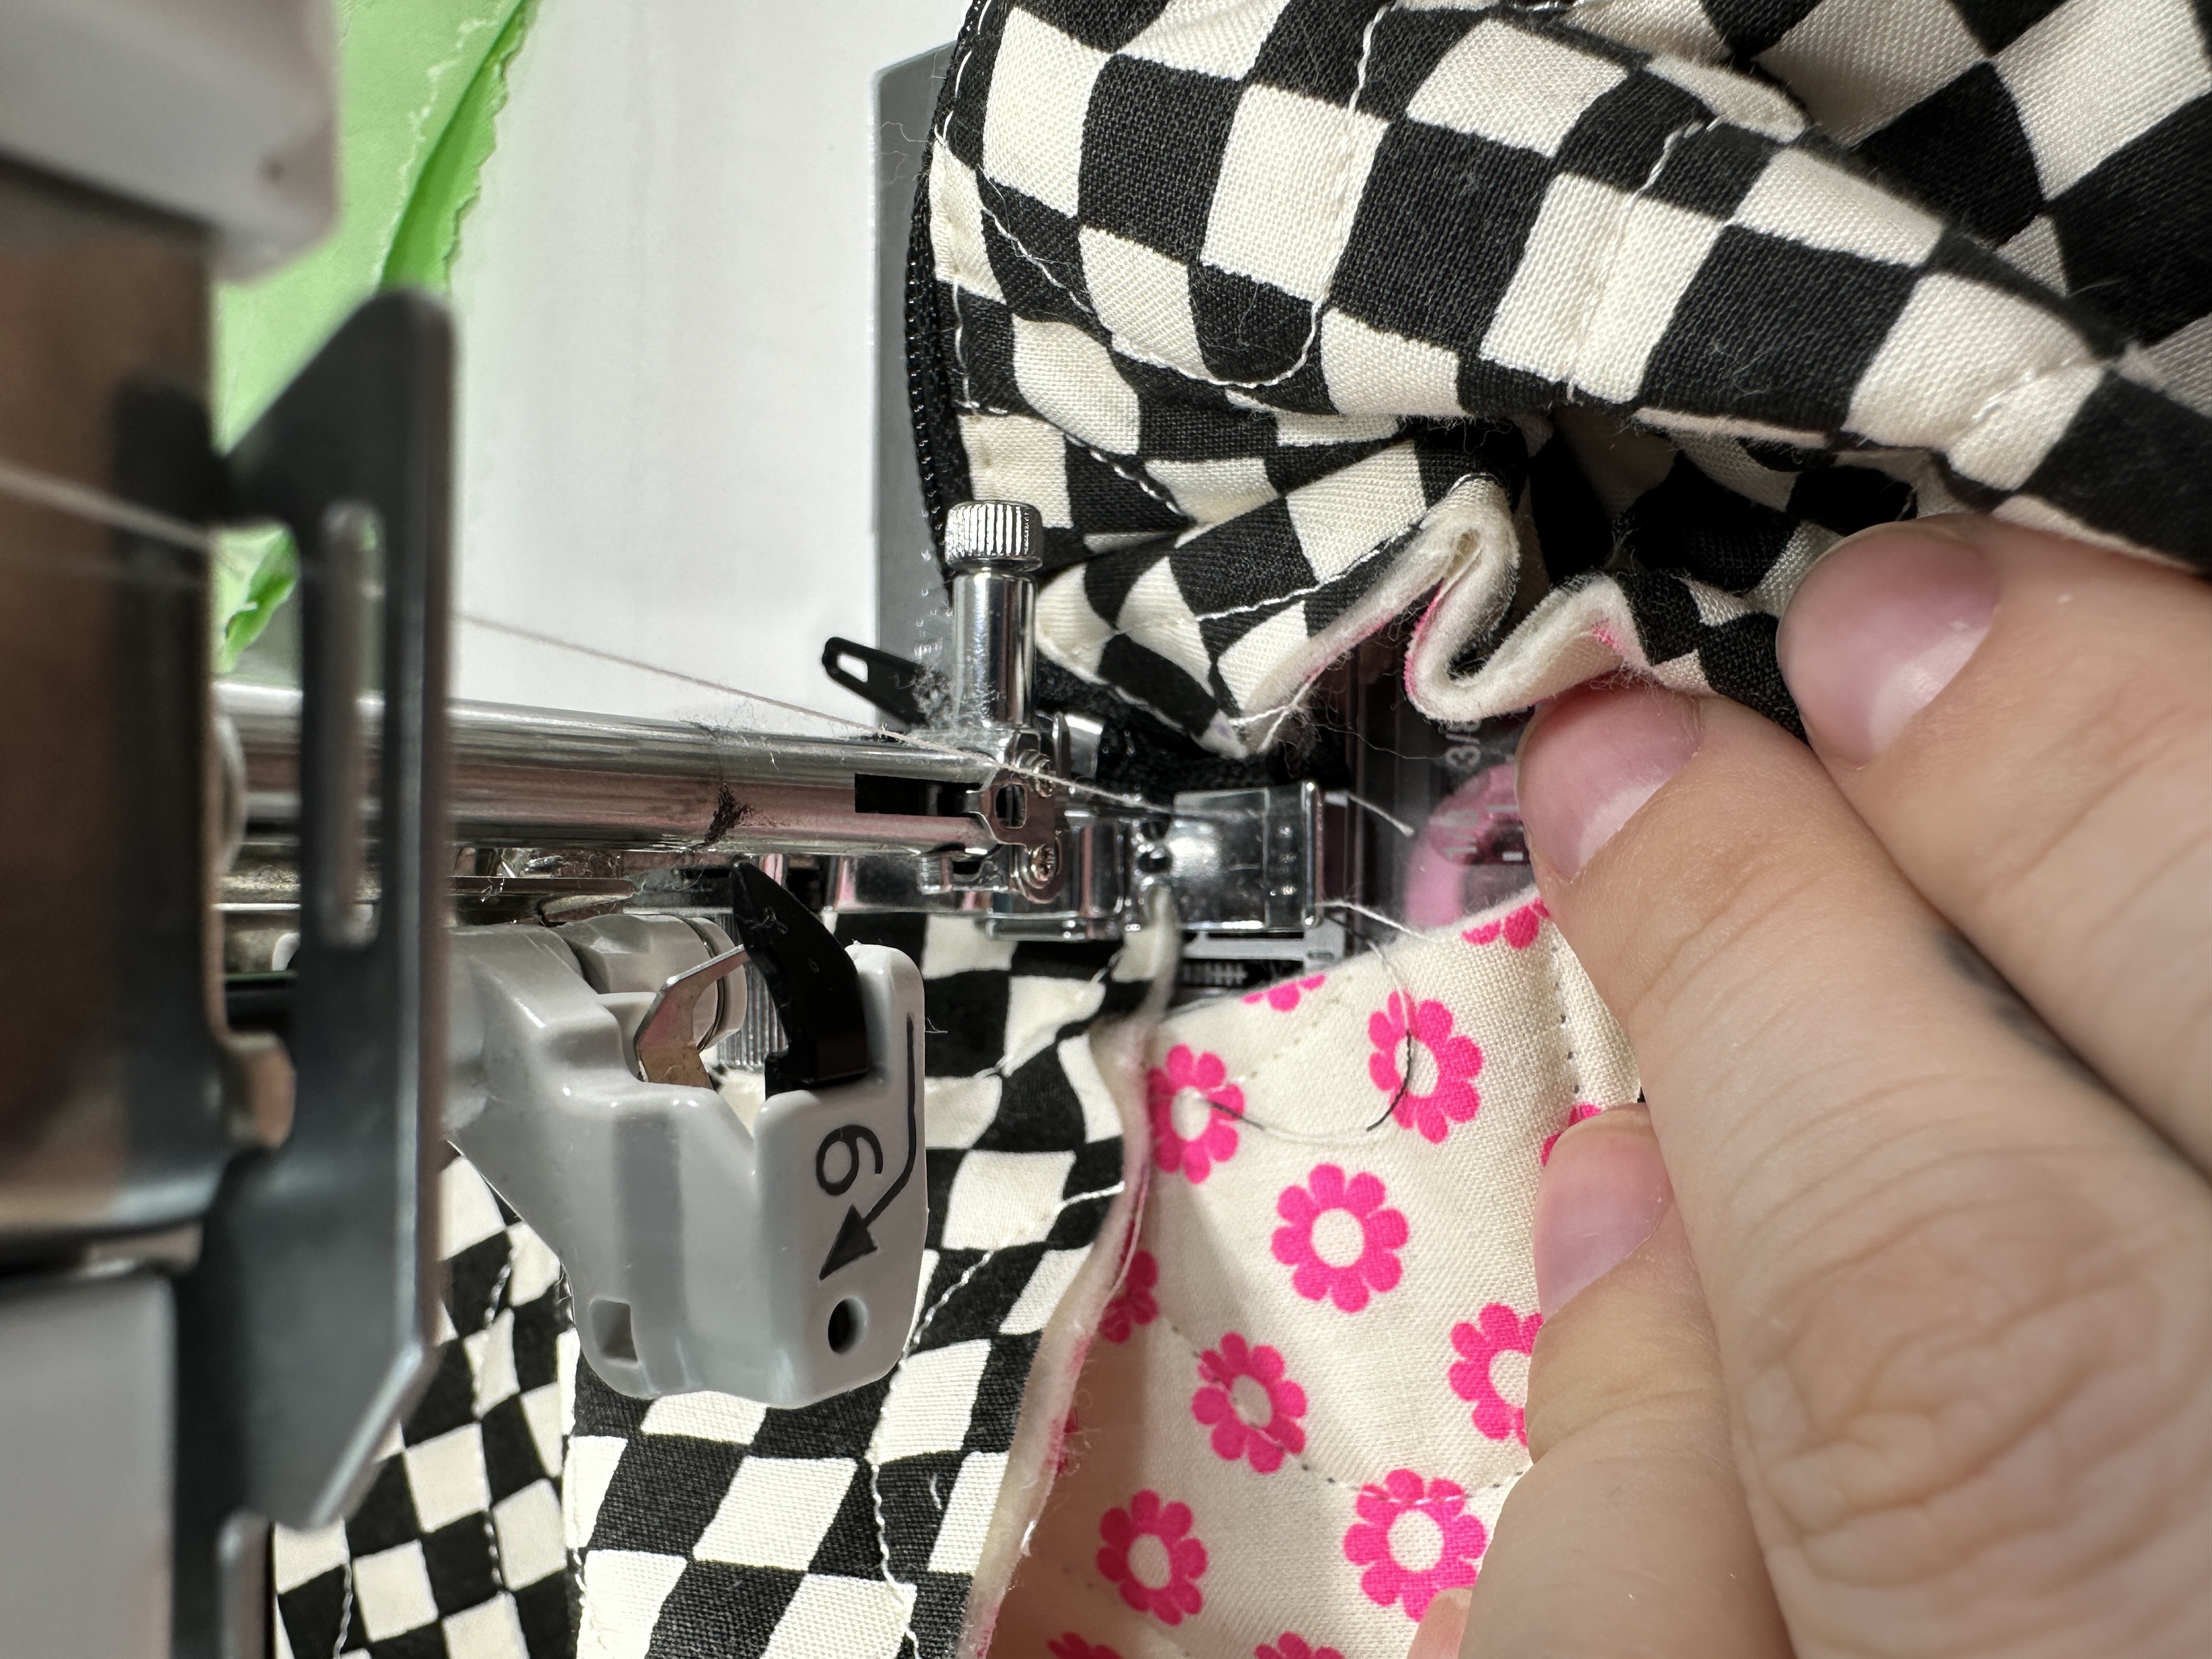
19. Flipping your pouch inside out, open your zipper as much as possible. Your zipper will need to be open as much as possible to make sure you can flip the pouch right side out at the end. Clip your edges ensuring the slanted pocket lays flat. Sew ¼” seam allowance down both sides backstitching at the start and end. 

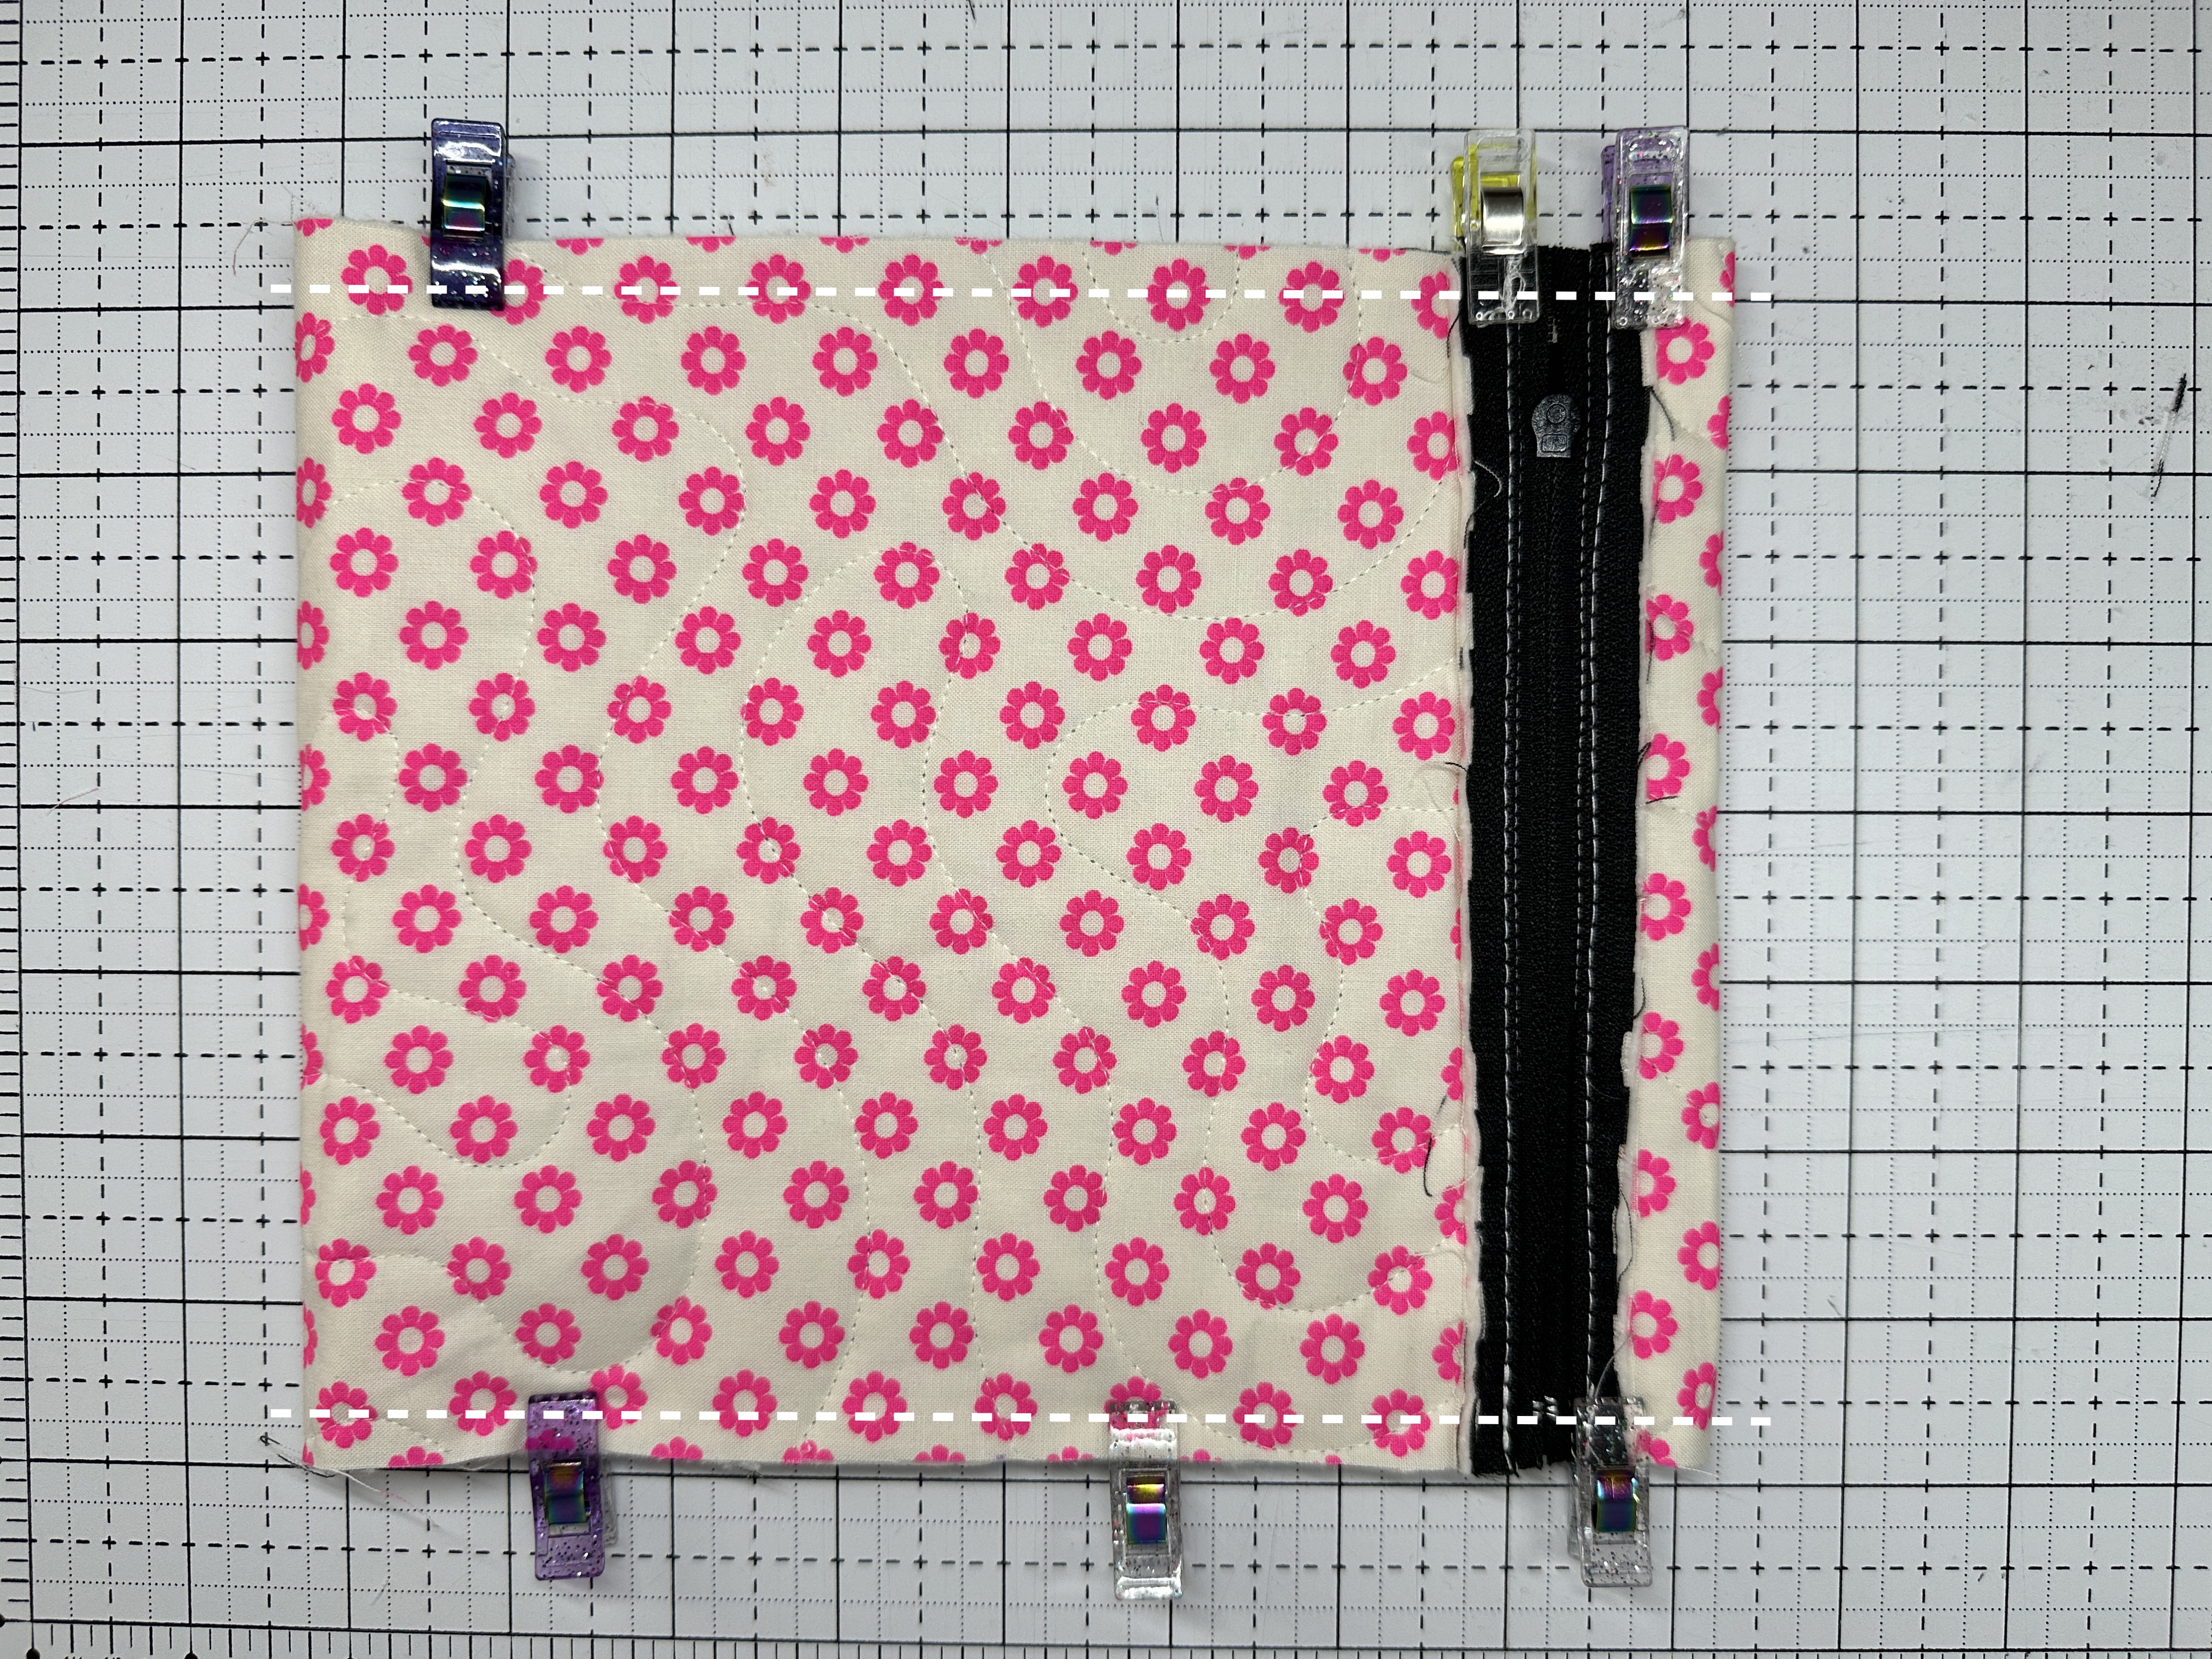
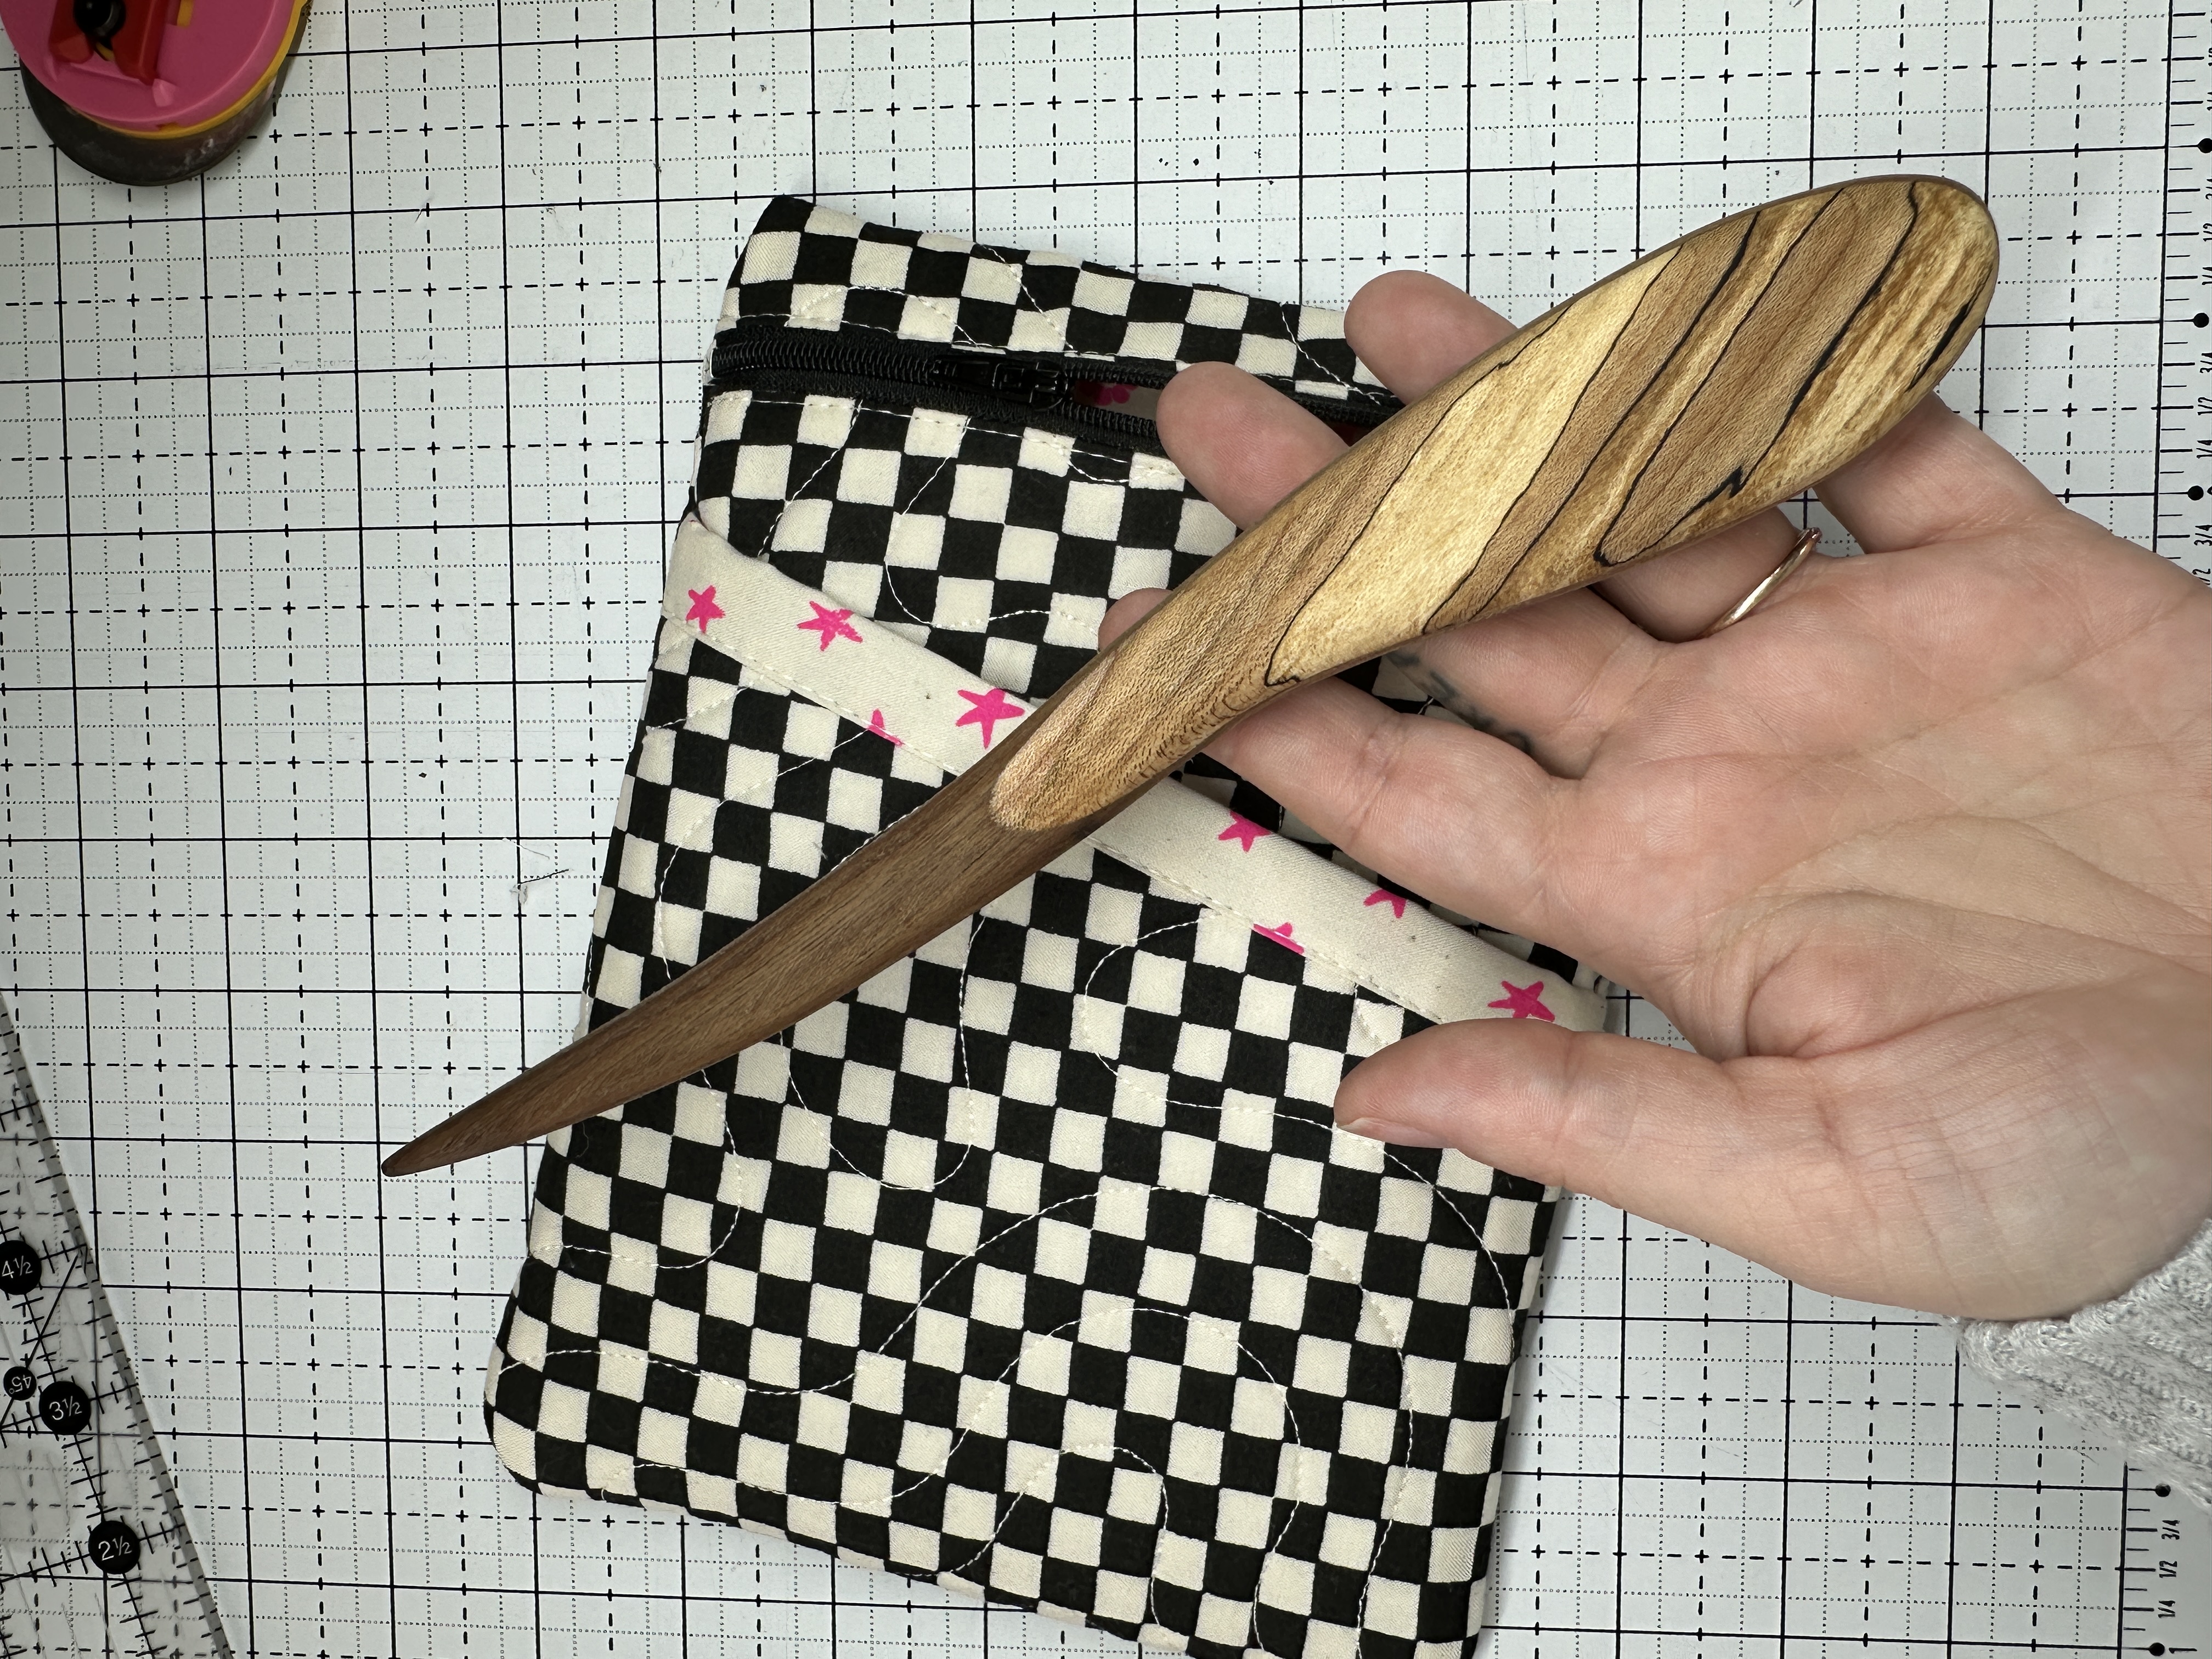
20. Now with both edges sewn, closing your pouch entirely excluding the zipper you can flip your pouch right side out. You can use a point tuner if necessary to push out your corners.


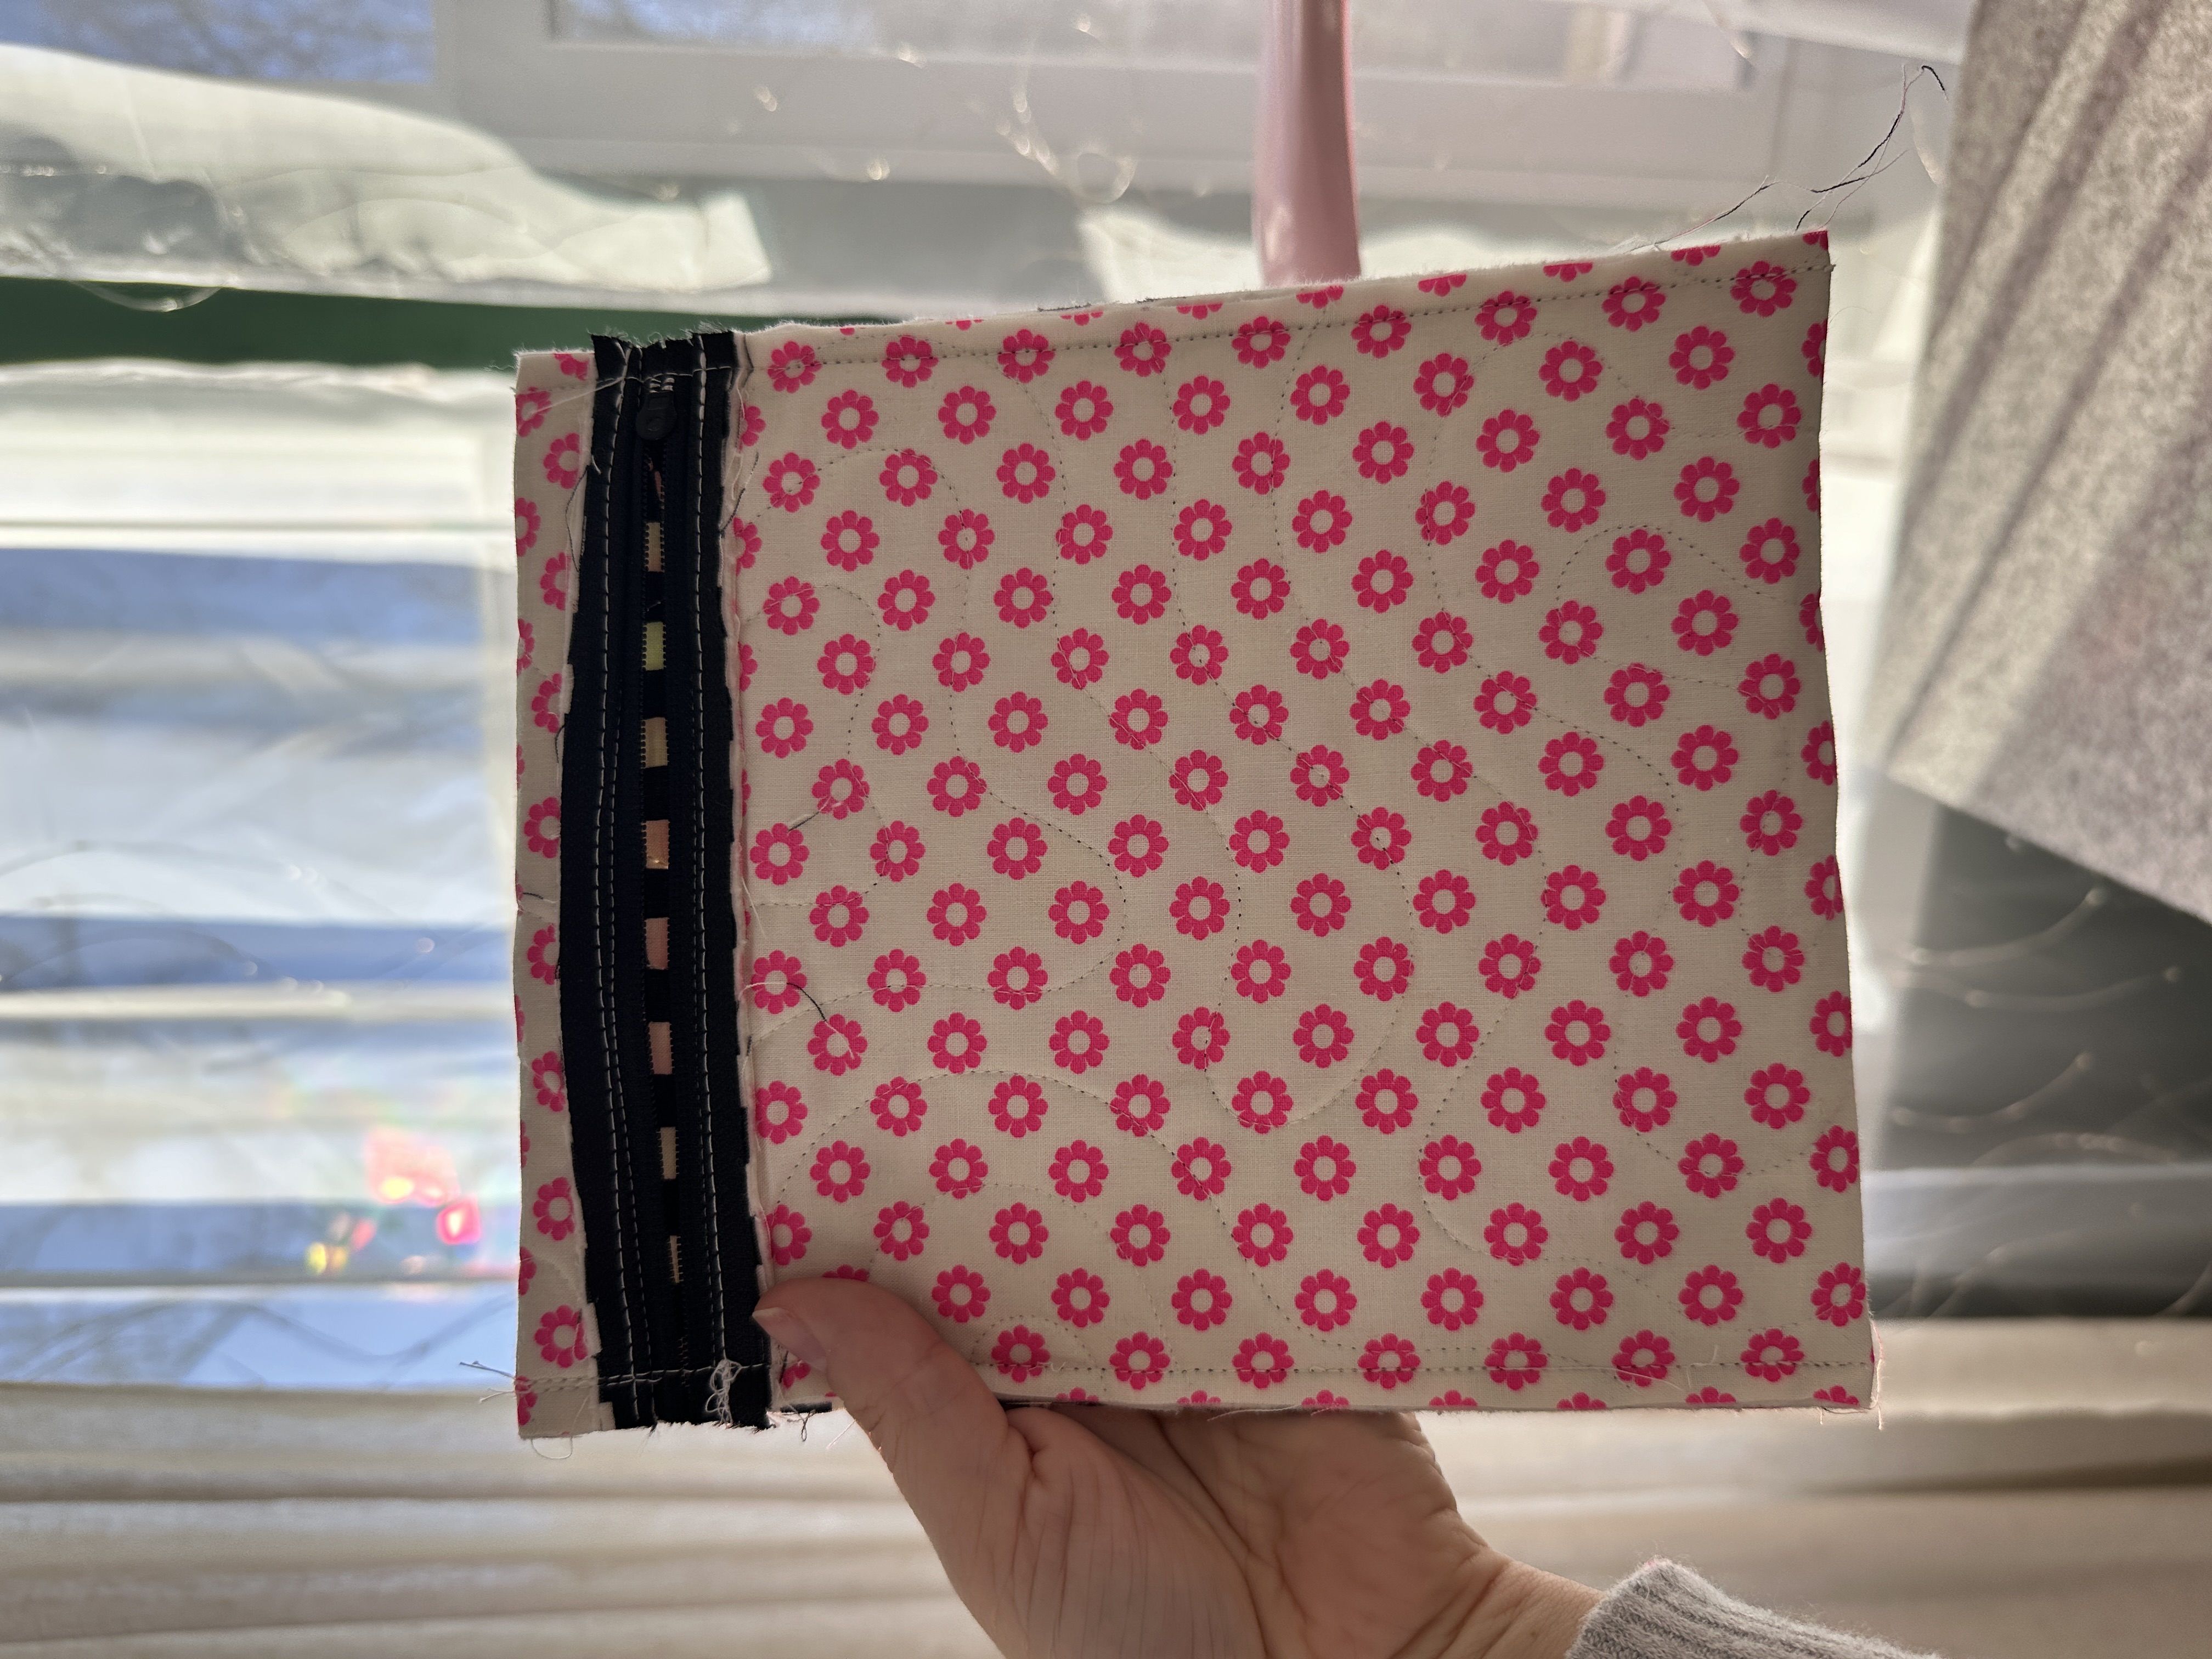
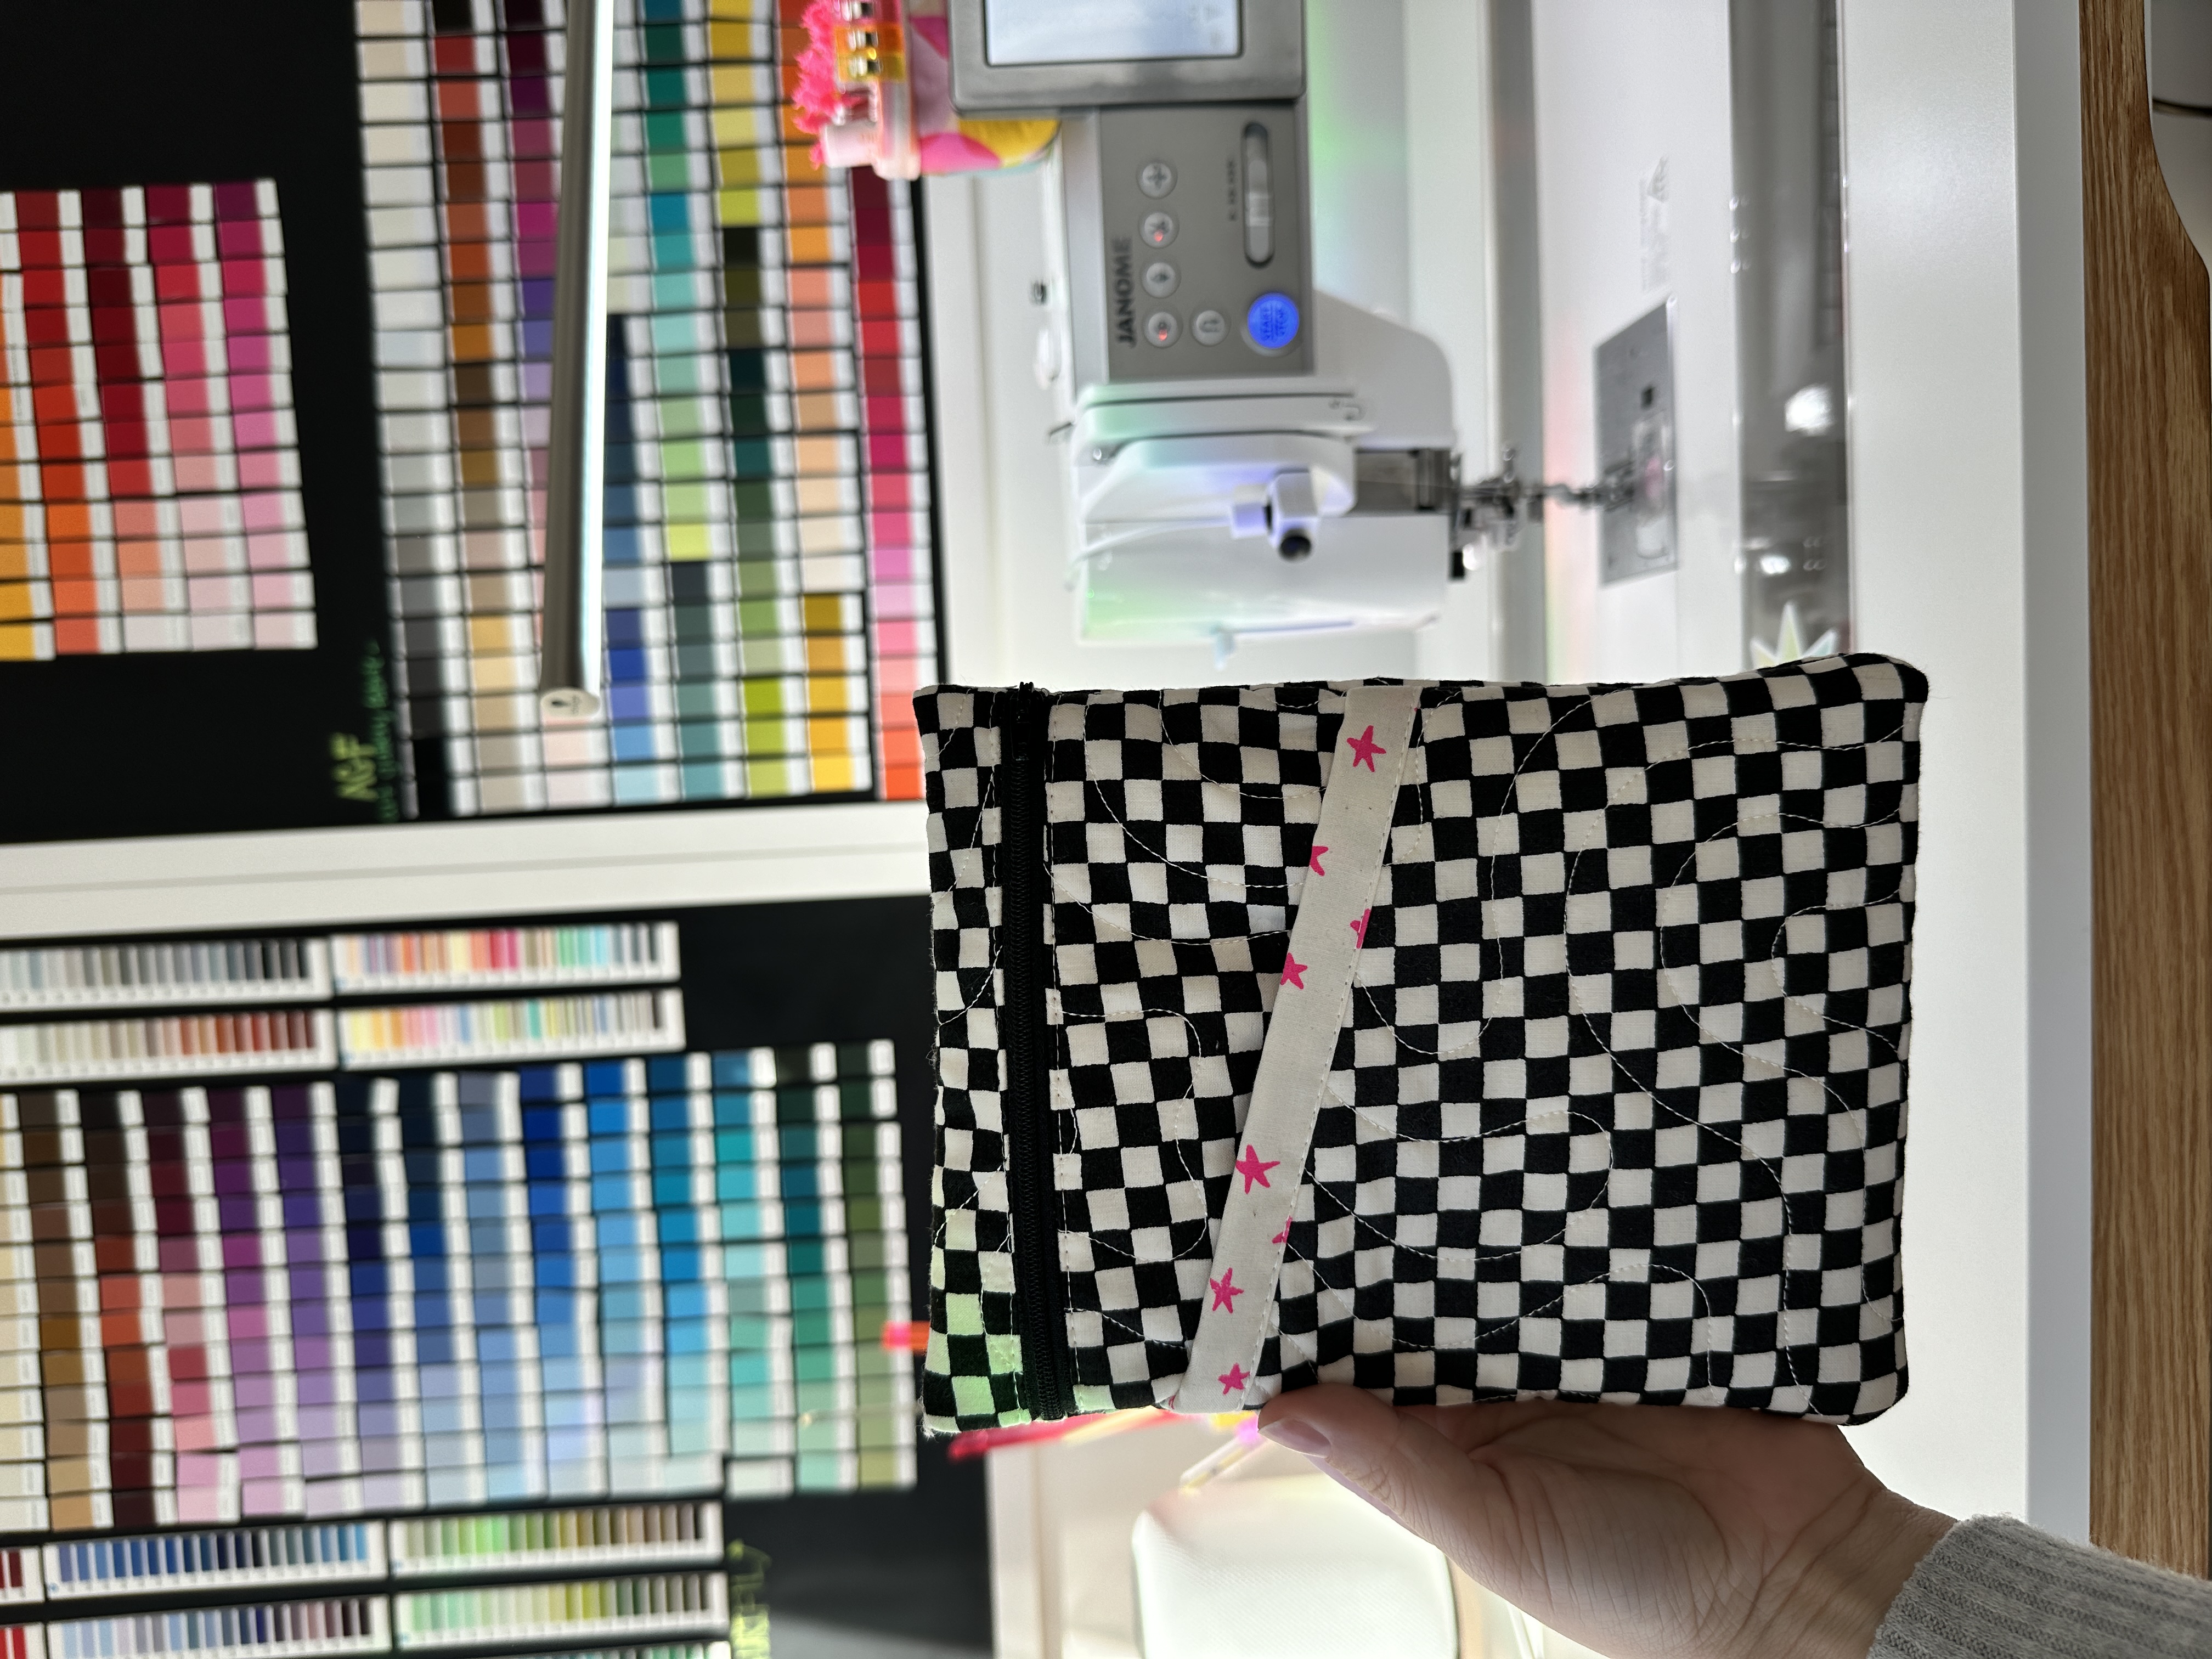
21. Enjoy reading on the go with your new e-reader Pouch!

Everyone is Talking about The Bookish Pouch
Reviews


Tako
Beautiful
Wednesday, November 23, 2016

cpindzola
Around the Table Dresden Placemats
Saturday, December 17, 2016

I like the concept, but the directions are "sloppy." Nowhere in the supply list does it mention the felt or the batting (how much?). Also, I would never use a high loft batting in a placemat, or a table runner, as I think that it would be too unstable for a glass. The next time I make these, I will cut out the batting (I use flannel) and spray baste it to the wrong side of the Dresden plate before I put the Dresden plate on the felt to cut out. I have not yet washed the finished placemat, and am hoping that the single layer of felt does not curl up, or become distorted after washing/drying.
Txmaid
Fun Great Gift!
Tuesday, February 21, 2017

MargieARK
Teatime Quilted Tablecloth
Friday, February 24, 2017

I made this today but your cutting directions need to be changed. You only need 4 of color 1 and color 3 4.5 squares for the triangles. Also the inner border, you only need 2 cuts as WOF is long enough to cut each in half to fit the sides.
MickelSews
Great Machine
Wednesday, August 30, 2017

I've had this machine for only a week now. I bought it used from a lady who makes her own clothes, but she no longer needed the machine. During the purchase, she noted that she is almost sad that it's better to give it away because of how well the machine performed. (I also bought it along side a computerized machine of another brand.} She demoed the machine for us, showing it worked and gave us everything (including the box it came in!) She took amazing care of this machine. I have used it a few times now, and the directions for threading were easy to follow (albeit my hands are quite large so the lower looper was a pain, but that is no fault to the machine or brand.) And I recommend this machine to anyone who wants to learn to serge and wants a machine that can grow with them. I will happily use this machine time and time again.
rvstan
S9 Review
Sunday, February 25, 2018

I love, love, love my S9! It's sews and embroiders beautifully and it's simplicity of use amazes me. I would recommend this machine for both a beginner and an experienced seamstress. If I would ask anything of Janome it would be to upgrade the programming to run a larger hoop size. I understand that it can't get much wider but there is most definitely room for it to go longer. That is the only limitation of this machine.
pjmnana
PJMNana
Monday, February 26, 2018

I purchased a Memorycraft 15000 a few years ago and it was the best purchase I ever made! This machine can do just about anything you would would ever want! I love the capability of using the Acuedit app to set up my embroidery pattern on my Ipad and then download it to the machine! I love how my embroidery looks upon completion and I love all the good lighting it has to light up your workspace. That way you don’t need to worry about where to set up your machine. It also has plenty of room to do machine embroidery on any size quilts! There are many decorative stitches from which to choose that are outstanding! It’s hard to choose which one to use! There are so many great features it is hard to decide what I love the most. If you want to buy only one machine to last a lifetime, I would recommend this one!
KLWash
S9 Review
Sunday, February 24, 2019

The S9 is amazing. I learned to sew by hand when I was just 5 and in my grandmothers way as she was quilting. I took seeing classes in high school until they would no longer let me sign up. The S9 makes me appreciate my current skills as well as motivate me to want to learn more. This machine is awesome.
SewSueMe2002
Horizon Memory Craft 15000
Thursday, November 19, 2020

My Janome Horizon Memory Craft 15000 is fantastic! I love, love, love this machine! When I came across the Eye for and Eye embroidery design today, I wanted to make it. However, the embroidery file is missing. Nothing downloads when I select the download button. Please help!
Jillfmischo
Treat Bag fun!
Monday, August 16, 2021

I made the Halloween treat bag for my new granddaughter and I’m sure it will last for years. No embroidery machine so I appliquéd the lettering. Need a little more skirt fabric for a better gathered look, and I used thin double-bias tape for the skirt hem, over edge stitch on skirt sides. I’m pleased with my results!
elenaz
Very helpful tutorial
Wednesday, October 25, 2023

I want to say thank you for teaching me this method of applique. I was able to do it with a small letters. This method is the best so far from all of those I've seen and tried.
plonkar
So useful
Thursday, November 30, 2023

I'd like to express my gratitude for teaching me this appliqué method. I successfully applied it with small letters, and, so far, it's the most effective among all the methods I've seen and tried.

DEALERS
The TWO Closest Dealers to you are:
196 Boston Post Road , Orange CT, 06477
203-878-1654
19 PUTNAM AVENUE , PORT CHESTER NY, 10573
914-934-2934
Find Additional Dealers