Projects

How to Sew Foam Bracers

Created By:

NipahDUBS

Skill Level: Intermediate

Do you want to dress as your favorite superhero or maybe your own original character that has bracers? Today I will show you how I went about making these bracers with some stretch lycra fabric and craft foam. There are many ways to go about making these but this is a way to do it so the fabric of the bracers will match the fabric of your suit.

Instructions

Here is the basic pattern I have made for bracers, the length of the straps will vary depending on the thickness of your wrist so be sure to measure them and adjust as needed, for mine the straps are 12 1/2 inches wide and the bracer is 7 inches in length. Again, adjust these as needed for your own size, though be sure to leave atleast an inch of room for overlap on where the straps will connect.


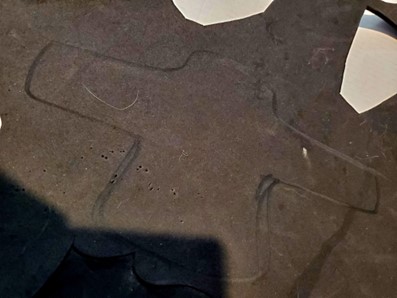
I transferred the pattern over to 2mm craft foam by freehand using a sharpie. The reason I use foam for this is because it is flexible, cheap, lightweight and easy to work with.


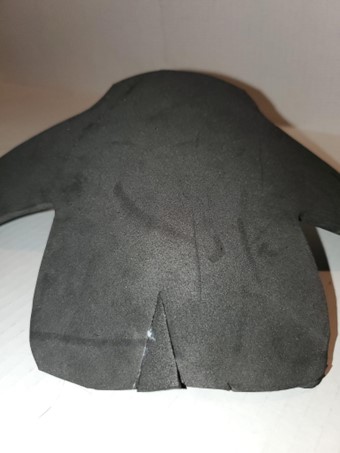
After cutting out the foam using a pair of scissors I decided I wanted the bracer to have some more form to it and not be as flat, so I altered the pattern slightly, you can choose to have it as it was before but I wanted to show this as an option as well, its up to your own preference.


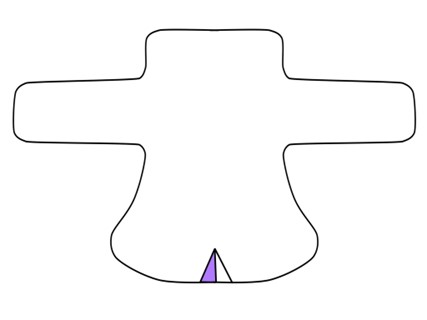
As you can see I have added a triangle at the bottom of the bracer, what you will need to do is cut out that triangle and proceed to cut that triangle in half. Afterwards you will need to glue one of the half triangles back into place, the reason for this is we are creating a curved along the edge of the foam to create a more interesting form for the bracer. For this I used super glue but any glue of your preference is fine as this will all be covered in fabric later.


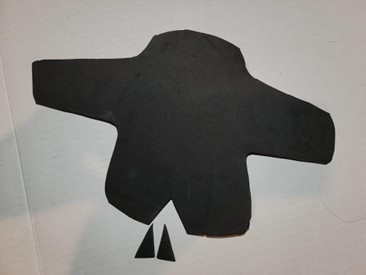
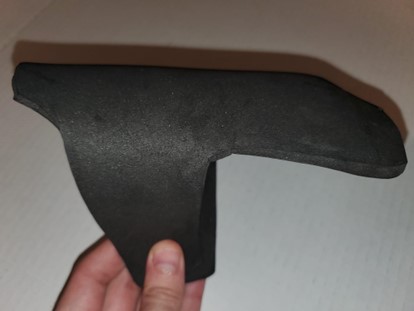
As I showed earlier, you can now see the the foam has a curved profile when put on its side, this will help the bracer to not look flat while you are wearing it.


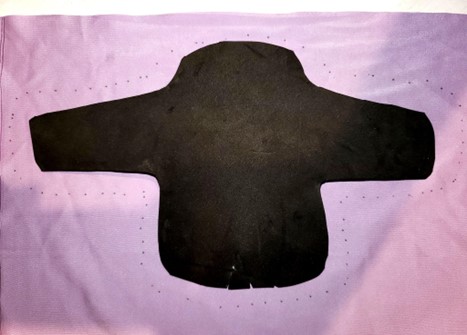
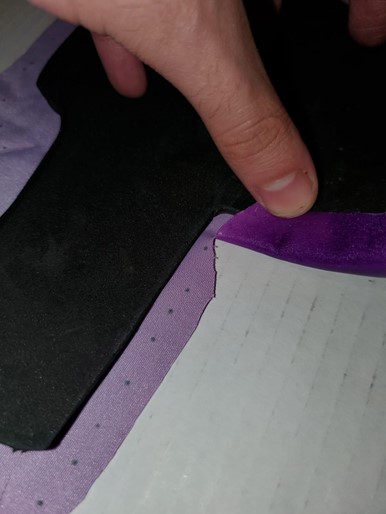
With your foam bracer finished place it along the backside of your lycra fabric and outline the basic shape of the bracer, remember to leave atleast an inch and half of seam allowance so the fabric can fully overlap the foam. To mark this I use a sharpie and leave small dots along where I will be cutting, I do this instead of drawing a line so that the ink does not bleed through the fabric.


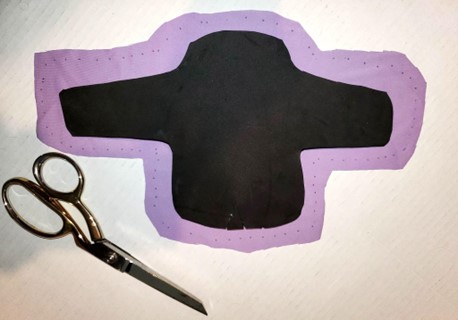
With your fabric now cut out you are going to want to cut small darts at each curved edge, this way the fabric will fold over the edge of the foam properly, at the end of this you should have four dart cuts in total.


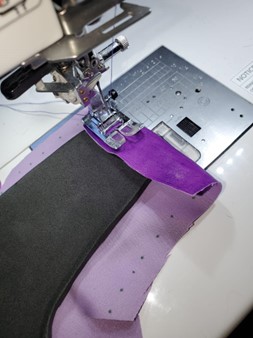
Now that your fabric is cut its time for the fun part, sewing! For this I use a simple straight stitch with my Janome M7 continental, I start by doing a short straight stitch along the end of the strap on the under side of the foam and fabric. I recommend using a leather needle for this as you are sewing through a thick layer of foam, go slowly during this process.


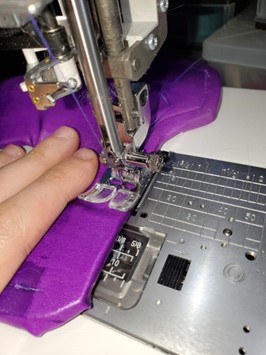
With that first stitch done we can now top stitch the entirety of the foam to the gauntlet, go slowly around the edges and gather the fabric under the foam as you go, be sure to keep the lycra fabric as tight as you can underneath the foam, this way you get the cleanest appearance with little puckering on the gauntlet.


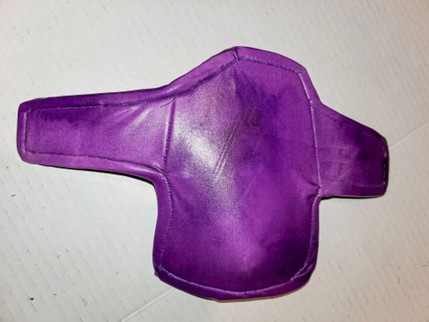
Once you have finished sewing along the edges you can then chose to sew some detail lines atop the foam like I did by the straps, because we have a foam base for the braces it makes every line you sew appear more in depth in appearance.


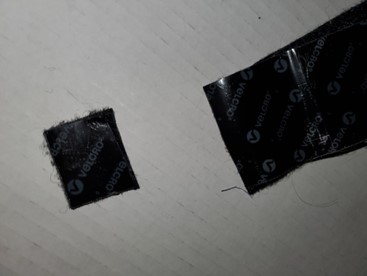
Lastly I used a small bit of industrial velcro to secure the straps together, you can choose to sew this on or glue it down, for mine I glued them into place.


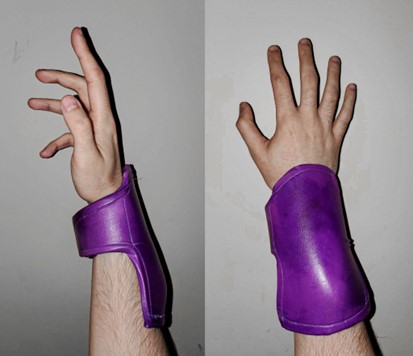
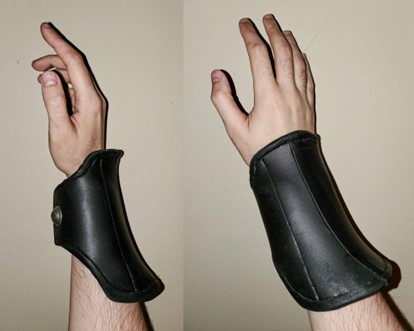
And there you have it, arm bracers for whatever your needs may be! I have used this method many times for superhero suits that have raised pieces ( The bottom photo is from a previous superhero costume I made! )  and they really do compliment the overall look of your cosplay in my opinion! I hope this tutorial helps and shows how creative you can be with a bit of foam and fabric.


Everyone is Talking about How to Sew Foam Bracers
Reviews


Tako
Beautiful
Wednesday, November 23, 2016

cpindzola
Around the Table Dresden Placemats
Saturday, December 17, 2016

I like the concept, but the directions are "sloppy." Nowhere in the supply list does it mention the felt or the batting (how much?). Also, I would never use a high loft batting in a placemat, or a table runner, as I think that it would be too unstable for a glass. The next time I make these, I will cut out the batting (I use flannel) and spray baste it to the wrong side of the Dresden plate before I put the Dresden plate on the felt to cut out. I have not yet washed the finished placemat, and am hoping that the single layer of felt does not curl up, or become distorted after washing/drying.
Txmaid
Fun Great Gift!
Tuesday, February 21, 2017

MargieARK
Teatime Quilted Tablecloth
Friday, February 24, 2017

I made this today but your cutting directions need to be changed. You only need 4 of color 1 and color 3 4.5 squares for the triangles. Also the inner border, you only need 2 cuts as WOF is long enough to cut each in half to fit the sides.
MickelSews
Great Machine
Wednesday, August 30, 2017

I've had this machine for only a week now. I bought it used from a lady who makes her own clothes, but she no longer needed the machine. During the purchase, she noted that she is almost sad that it's better to give it away because of how well the machine performed. (I also bought it along side a computerized machine of another brand.} She demoed the machine for us, showing it worked and gave us everything (including the box it came in!) She took amazing care of this machine. I have used it a few times now, and the directions for threading were easy to follow (albeit my hands are quite large so the lower looper was a pain, but that is no fault to the machine or brand.) And I recommend this machine to anyone who wants to learn to serge and wants a machine that can grow with them. I will happily use this machine time and time again.
rvstan
S9 Review
Sunday, February 25, 2018

I love, love, love my S9! It's sews and embroiders beautifully and it's simplicity of use amazes me. I would recommend this machine for both a beginner and an experienced seamstress. If I would ask anything of Janome it would be to upgrade the programming to run a larger hoop size. I understand that it can't get much wider but there is most definitely room for it to go longer. That is the only limitation of this machine.
pjmnana
PJMNana
Monday, February 26, 2018

I purchased a Memorycraft 15000 a few years ago and it was the best purchase I ever made! This machine can do just about anything you would would ever want! I love the capability of using the Acuedit app to set up my embroidery pattern on my Ipad and then download it to the machine! I love how my embroidery looks upon completion and I love all the good lighting it has to light up your workspace. That way you don’t need to worry about where to set up your machine. It also has plenty of room to do machine embroidery on any size quilts! There are many decorative stitches from which to choose that are outstanding! It’s hard to choose which one to use! There are so many great features it is hard to decide what I love the most. If you want to buy only one machine to last a lifetime, I would recommend this one!
KLWash
S9 Review
Sunday, February 24, 2019

The S9 is amazing. I learned to sew by hand when I was just 5 and in my grandmothers way as she was quilting. I took seeing classes in high school until they would no longer let me sign up. The S9 makes me appreciate my current skills as well as motivate me to want to learn more. This machine is awesome.
SewSueMe2002
Horizon Memory Craft 15000
Thursday, November 19, 2020

My Janome Horizon Memory Craft 15000 is fantastic! I love, love, love this machine! When I came across the Eye for and Eye embroidery design today, I wanted to make it. However, the embroidery file is missing. Nothing downloads when I select the download button. Please help!
Jillfmischo
Treat Bag fun!
Monday, August 16, 2021

I made the Halloween treat bag for my new granddaughter and I’m sure it will last for years. No embroidery machine so I appliquéd the lettering. Need a little more skirt fabric for a better gathered look, and I used thin double-bias tape for the skirt hem, over edge stitch on skirt sides. I’m pleased with my results!
elenaz
Very helpful tutorial
Wednesday, October 25, 2023

I want to say thank you for teaching me this method of applique. I was able to do it with a small letters. This method is the best so far from all of those I've seen and tried.
plonkar
So useful
Thursday, November 30, 2023

I'd like to express my gratitude for teaching me this appliqué method. I successfully applied it with small letters, and, so far, it's the most effective among all the methods I've seen and tried.

DEALERS
The TWO Closest Dealers to you are:
1900 CENTRE ST , WEST ROXBURY MA, 02132
(617)323-6200
443 MOODY STREET , WALTHAM MA, 02453
781-893-3331
Find Additional Dealers