A How to Guide to Copying Your FAVORITE Sweater!
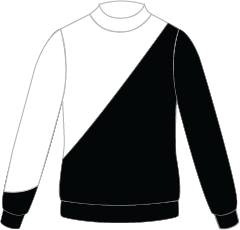
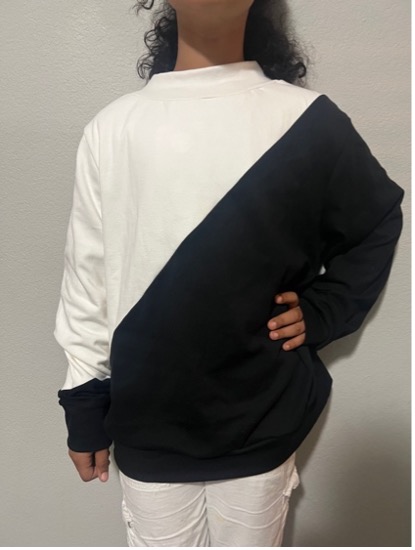
If you’re like me, you find one perfect fit and want to duplicate that a million times over. One problem, right? Who has the time! You’re in luck because this project comes together so quickly, and once you have made one you will have to make them over and over. Here’s how I created a chic contrasting diagonal sweater that I copied from my favorite hoodie!
I used PONTE KNIT fabrics in black and cream. I did double up the cream because I didn't want to have to always wear an undershirt with this project. Wash and launder your fabric correctly before cutting to avoid any shrinkage! This is a sweater I PLAN TO WEAR regularly.
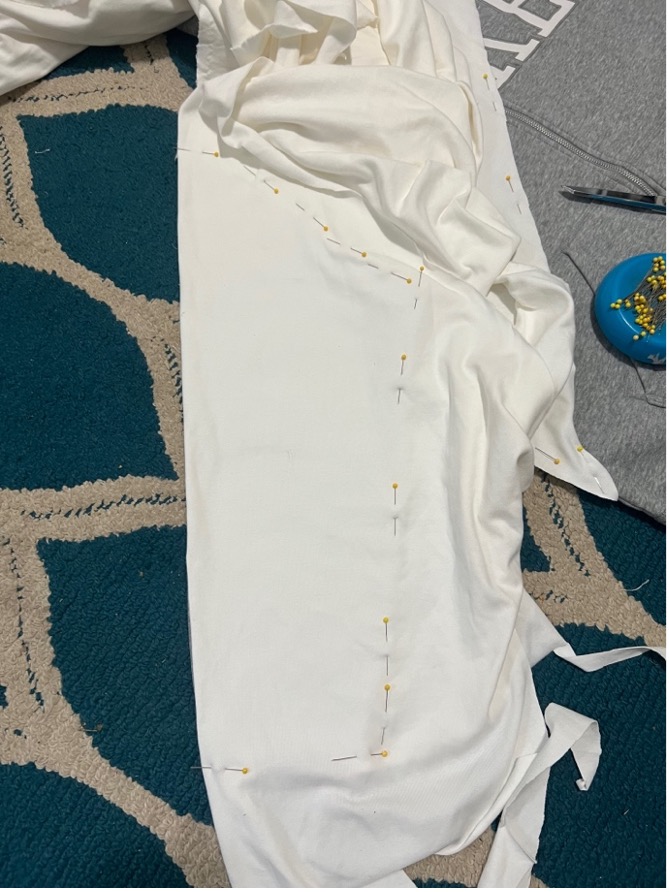
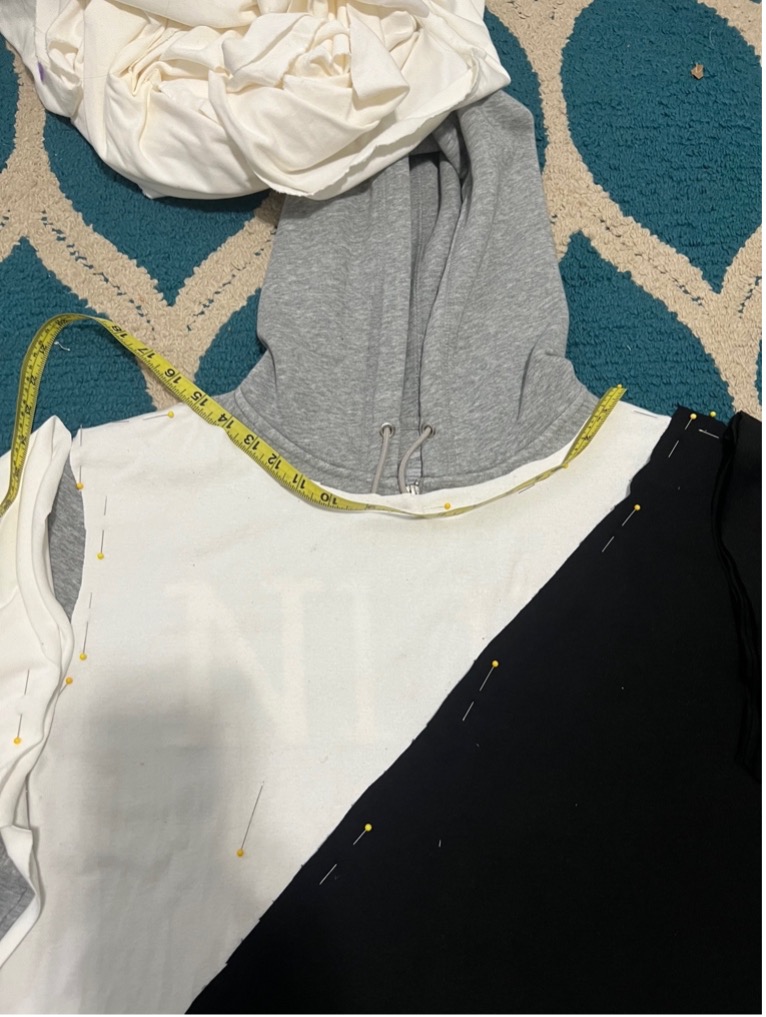
First grab your favorite sweater or hoodie and lay on a flat even surface.
Smooth out any wrinkles to avoid copying the pattern piece incorrectly.
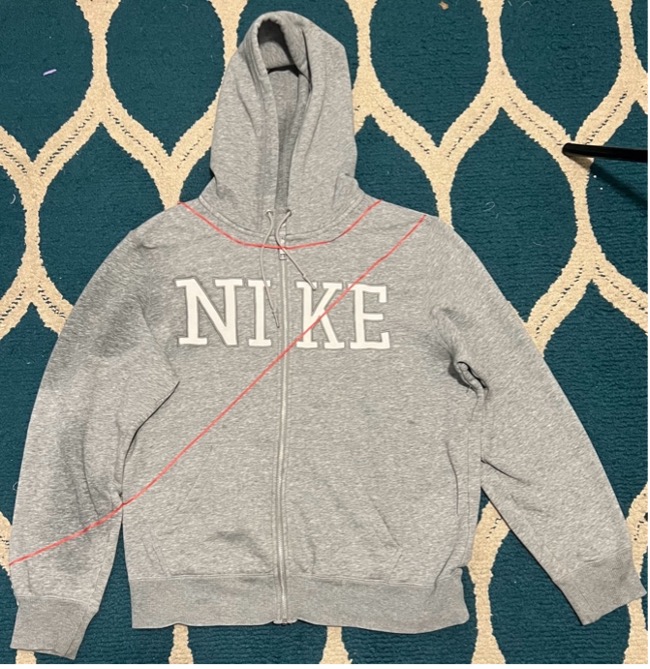
Use tape or pins to mark out your design lines, I have chosen to do this diagonal design but you could do anything you want and you can make it your own.
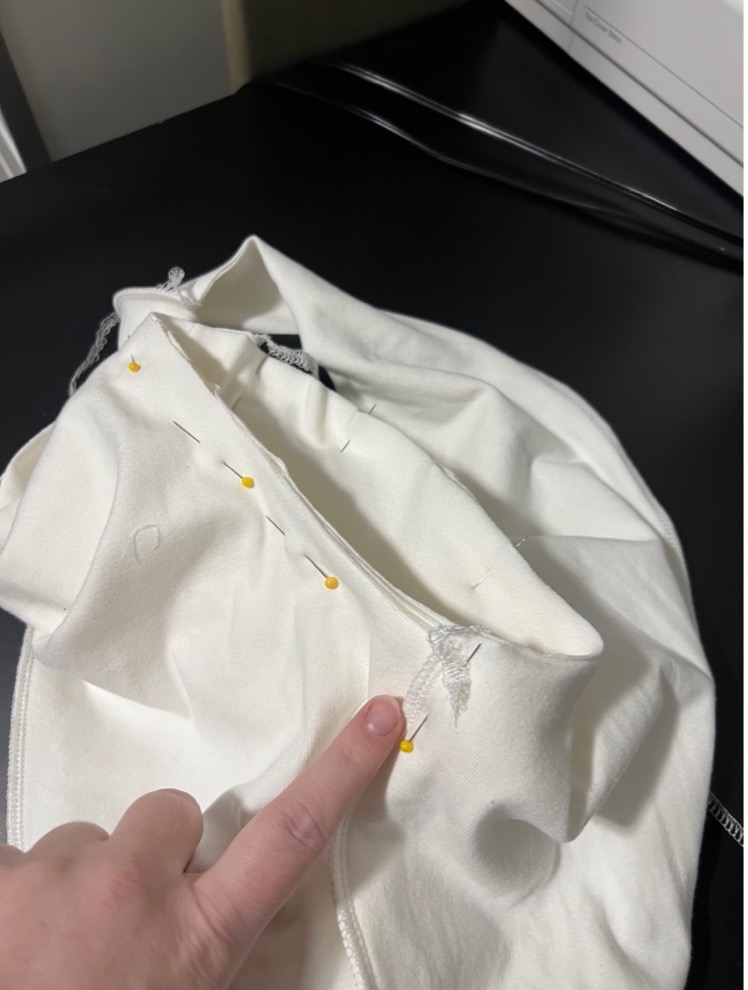
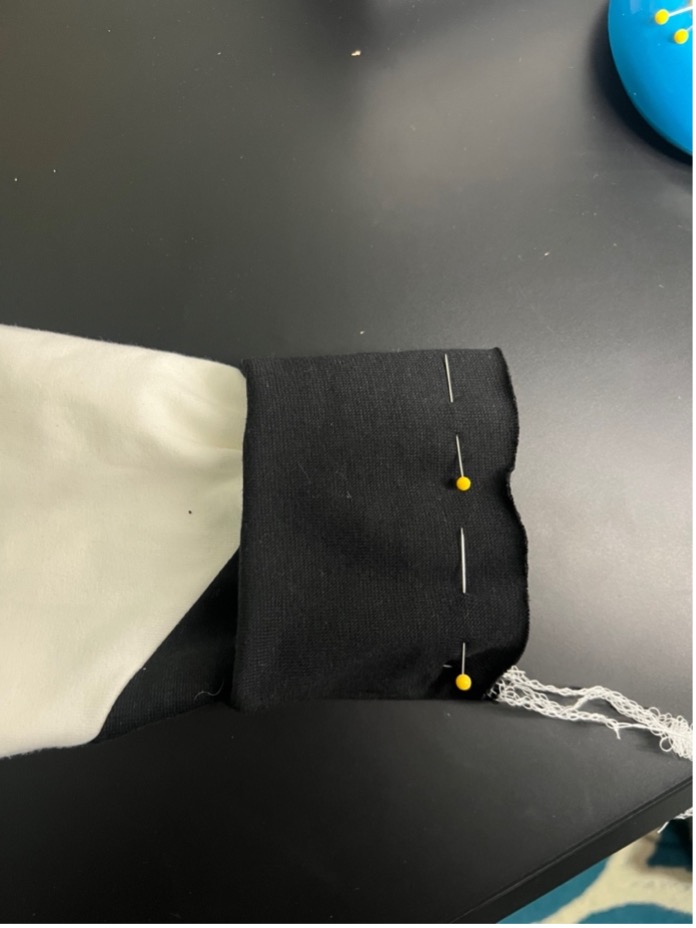
You can lay down and trace out on paper or pin your fabric on top of or under your garment. I chose to lay my fabric flat on top and use pins to mark the outside edge of the pieces. Then I added the seam allowance around the outside of this line (of pins) you can also use your fabric marker or any method of fabric safe transfer method that you prefer.
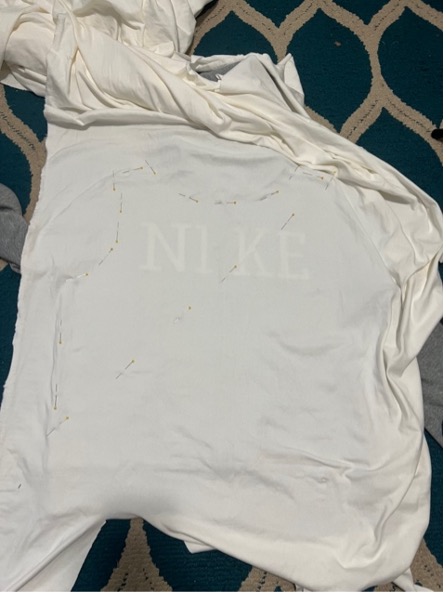
When you cut out your pattern pieces, be sure to leave yourself seam allowance all the way around where you will be sewing the piece back together. HINT everywhere there is a seam you will need to leave 5/8" - 1/2" (1/2" minimum) to account for any error in cutting.
I will be sewing with my serger so I chose ½” seam allowance.
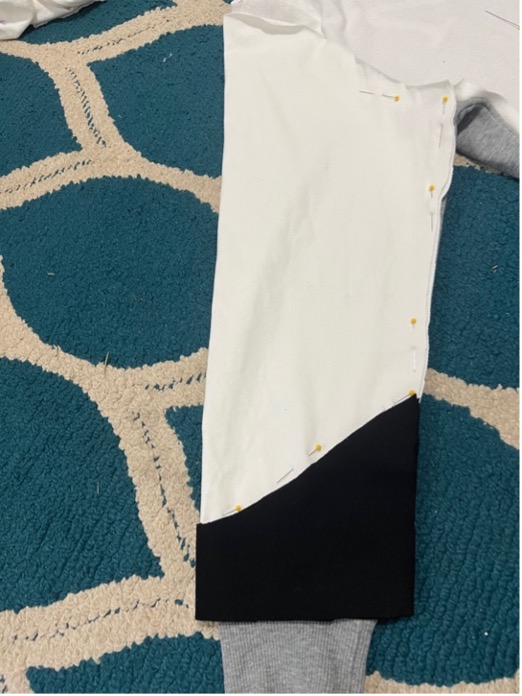
Repeat this process for every piece of your puzzle until you have pieces for every part of your sweater. For the sleeve, do not forget to fold your fabric in half and place the fold on the sleeve fold. REMINDER your sleeve is folded in half as it lays on the table.
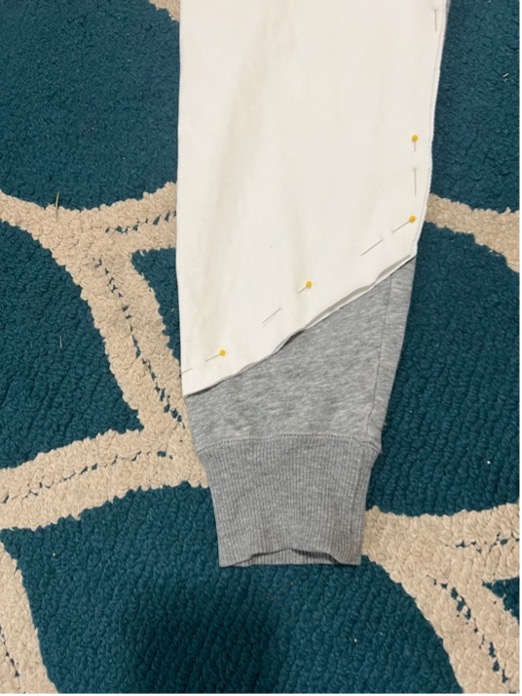
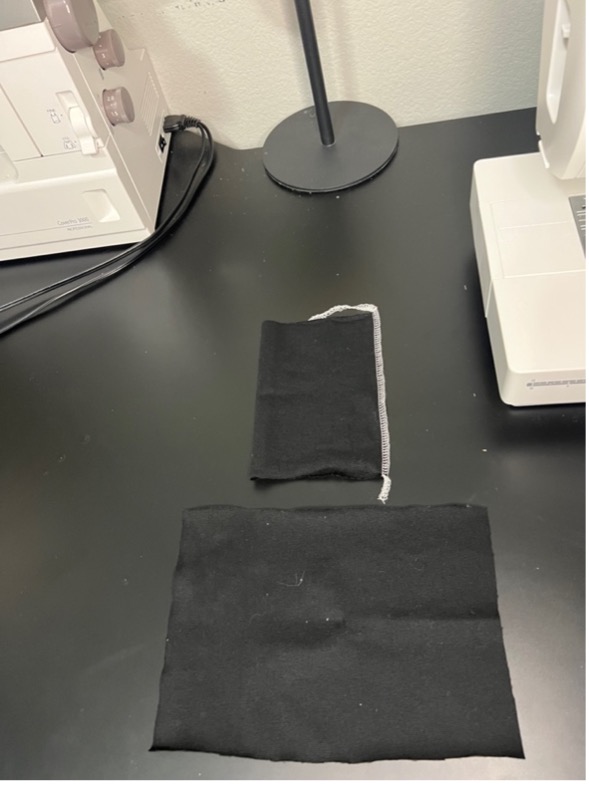
Measuring the Cuffs and Waistband.
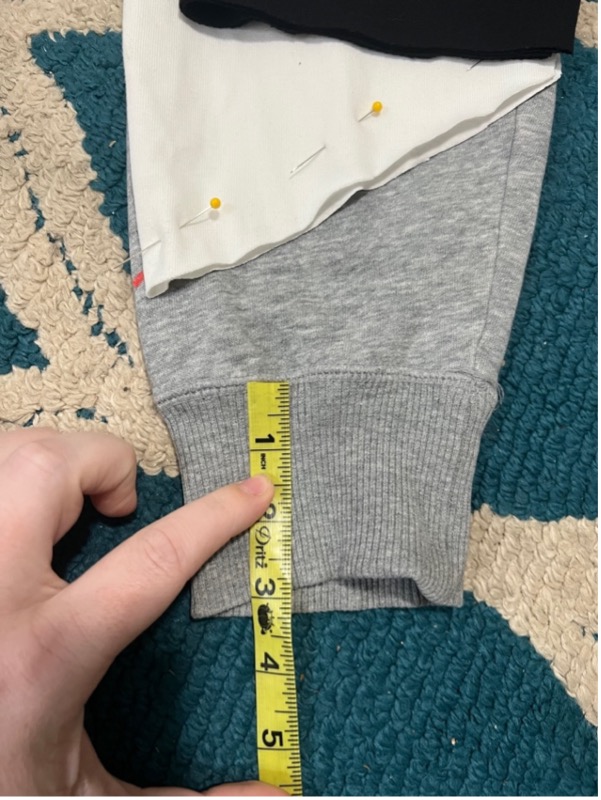
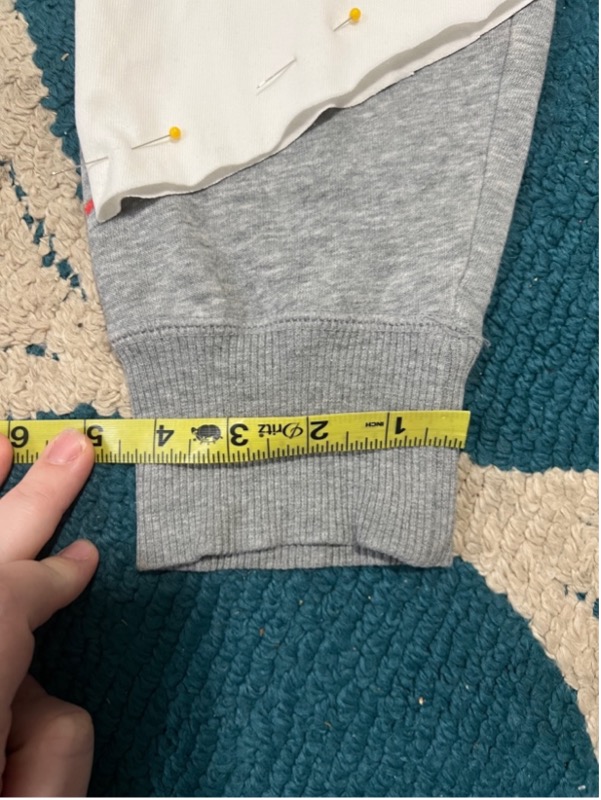
To make the cuffs you will measure how wide and tall your current cuff is. Remember you’re your cuff is already folded in half both ways. Then double that measurement in each direction and add seam allowance to both sides of the rectangle.
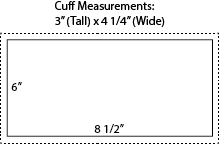
Here is a diagram of what this piece will look like to cut out:
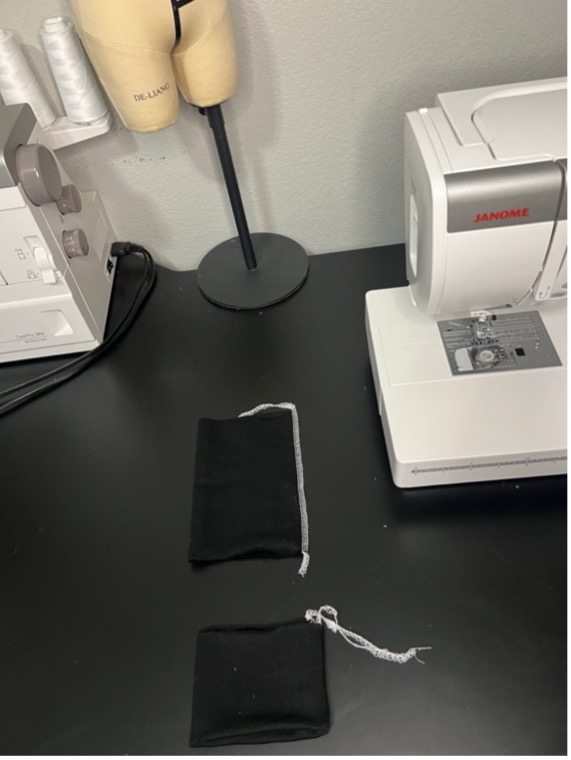
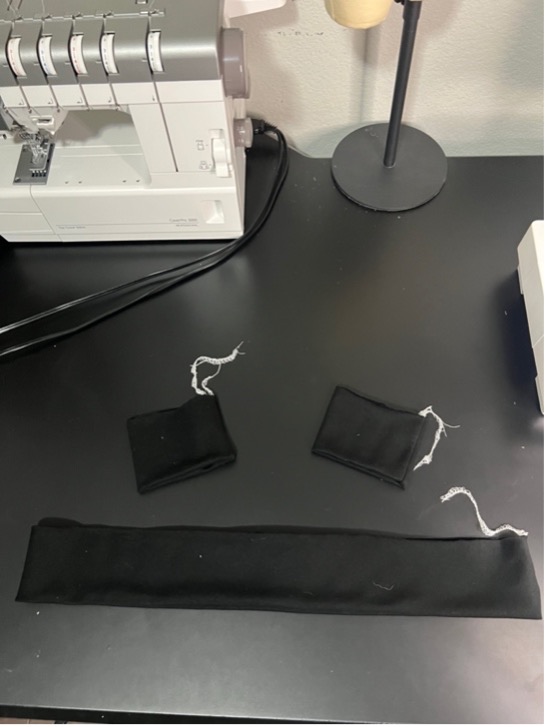
You will repeat the same process for the waistband.
(If you are making a zip up sweater just be sure that you account for the seam allowance for the zipper area in the front.)
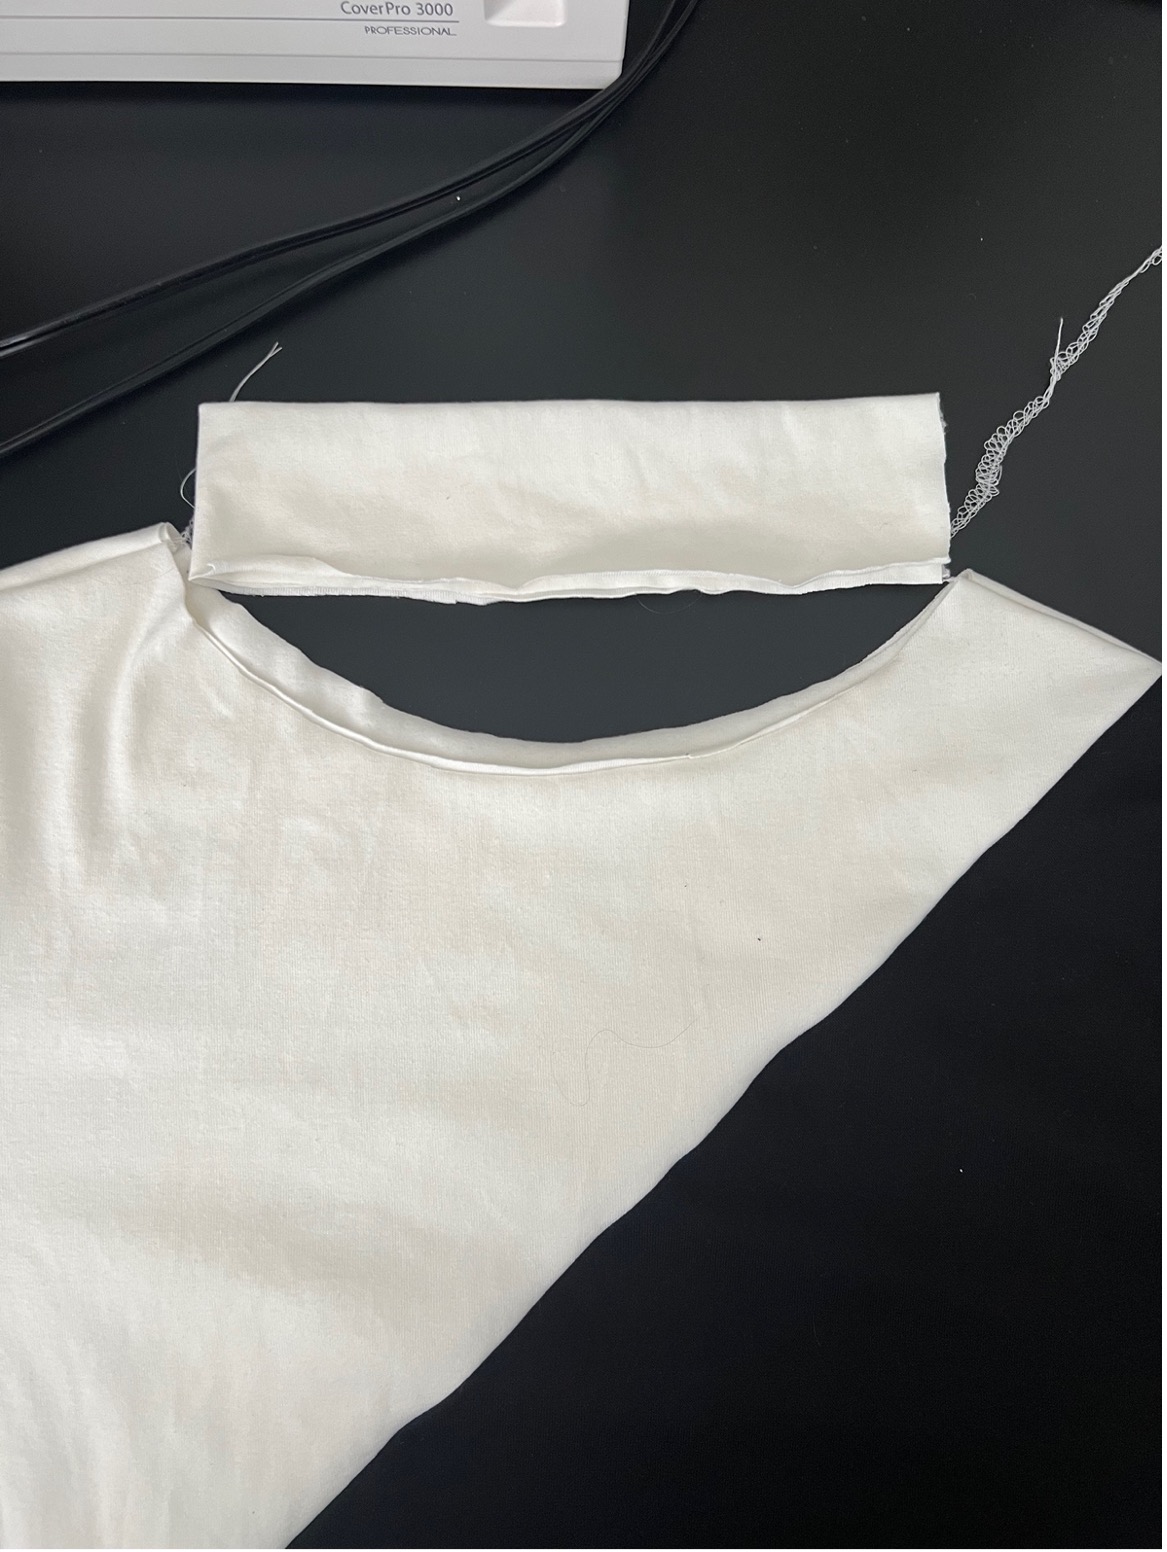
Neck Opening
If you want a neck binding (turtle neck) you will not copy and cut the hood (if you have one). Instead, you will repeat the process for the cuff but with the neck opening. A neck binding will appear to be much smaller than the opening sometimes.
You will measure the neck hole opening and then make a binding piece that is at least an inch smaller than that measurement. I planned my neck binding 2" tall and so I cut my long rectangle just like the waistband and then I folded it in half both ways and placed it against the neck opening to see if I liked the way it would look finished (size).
The Assembly
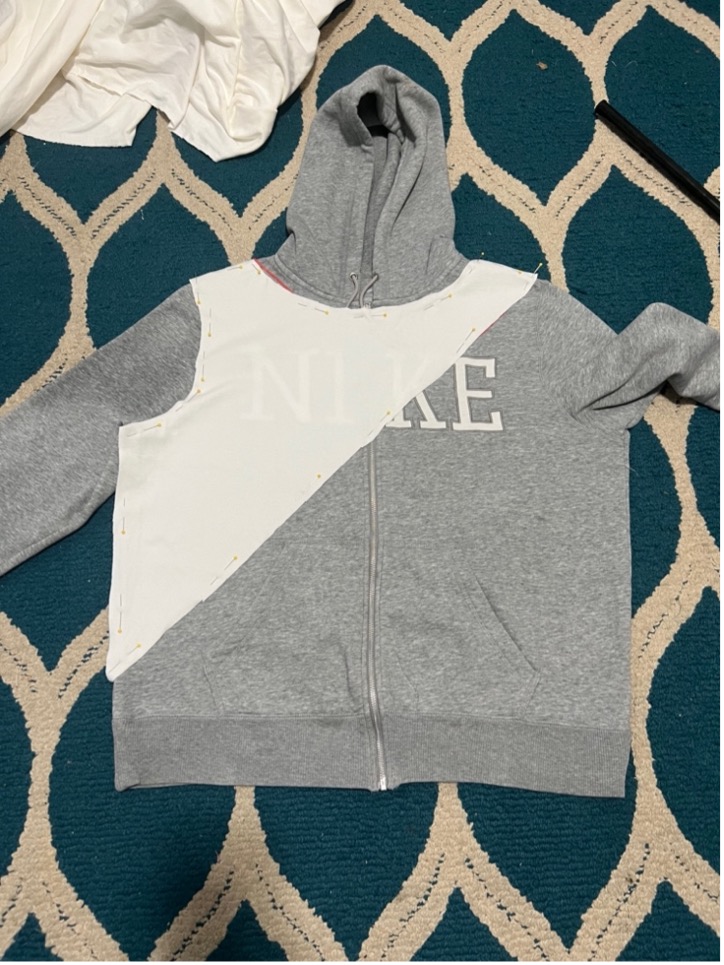
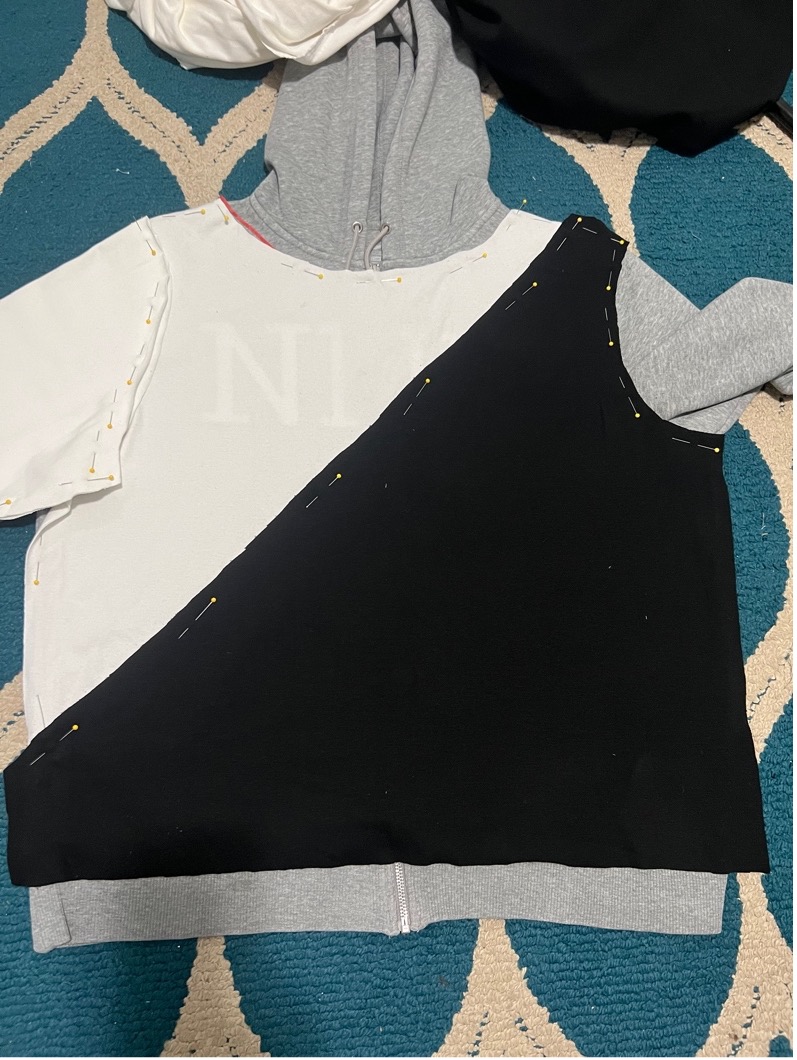
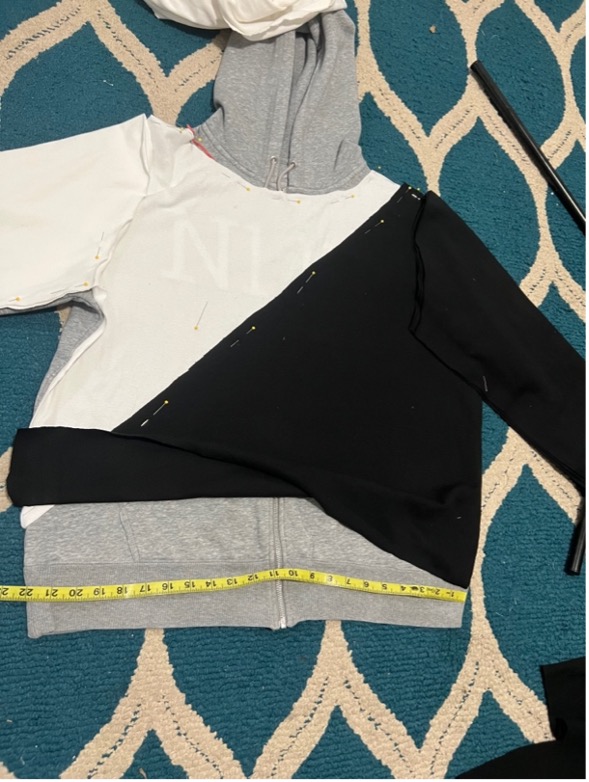
Lay your pieces out (like a puzzle) as they will be put together so you can visually see what you need to sew.
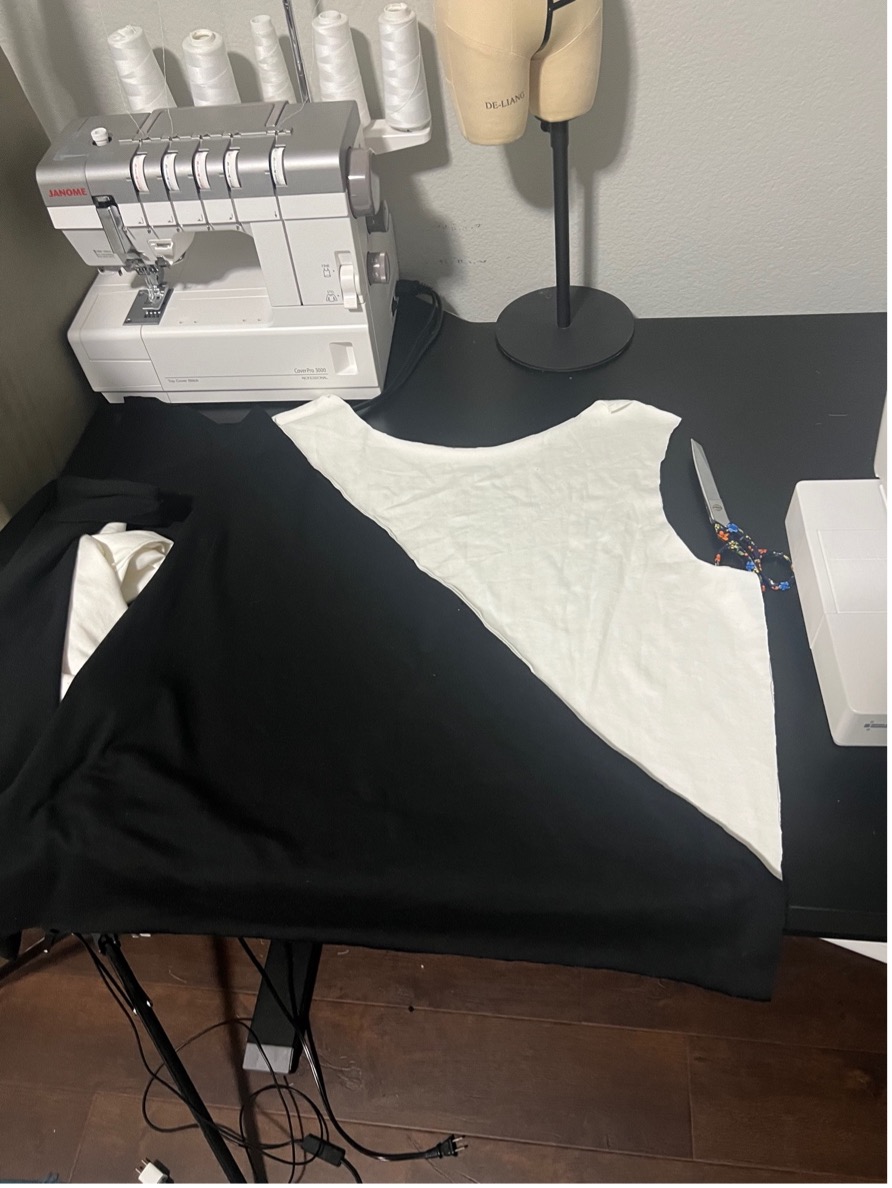
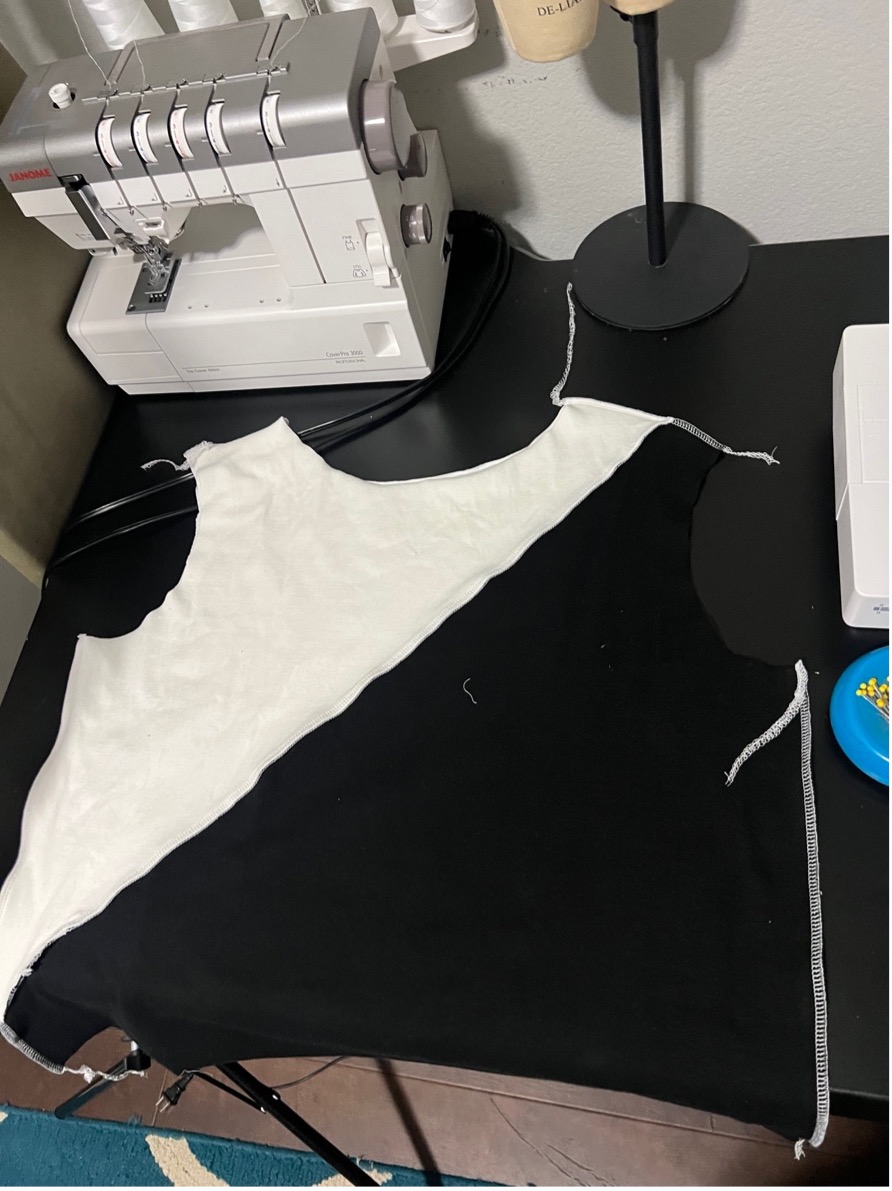
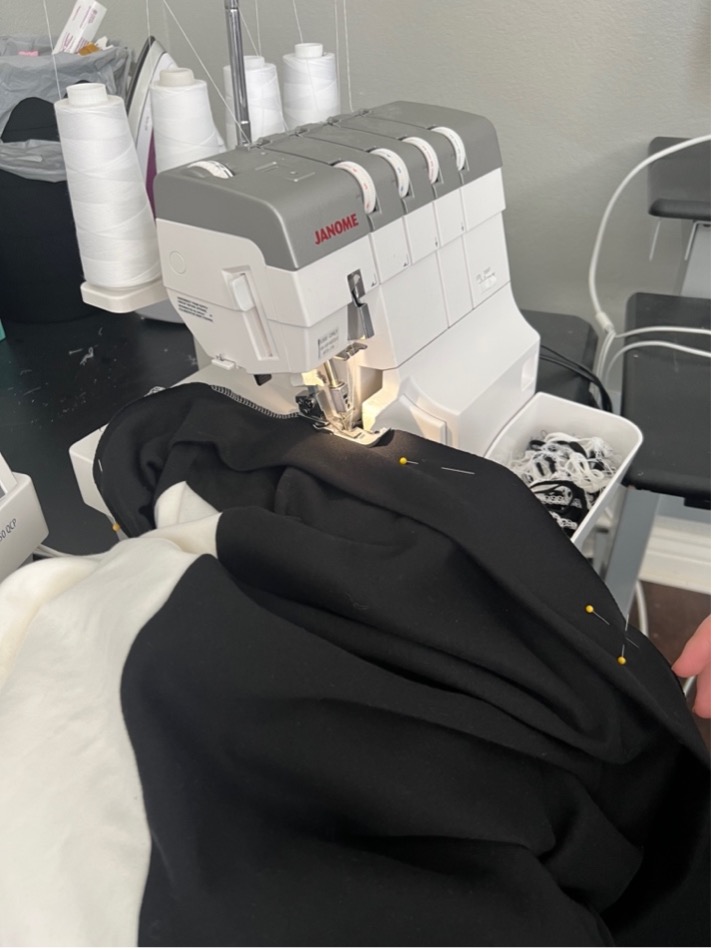
On my project I started with the long contrasting diagonal seam (front and back). I placed the top front and bottom front together and used my Janome Air Thread 2000D serger to sew the seam. If you do not have a serger, you can use a stretch stitch on your sewing machine and zig zag the edge or do an overlock stitch on your machine along the edge to finish it off. I chose to sew this entire project with my serger to accommodate the stretch of the fabric as well as the stretch needs of the garment.
Next, I placed the front sweater and back sweater with right sides together. Matching up any style lines I stitched the shoulders and side seams together. HINT where the diagonal line meets at the shoulder and side seam pin the intersections so that when the garment is worn these spots line up perfect. These small details help to make your garment appear more professional.
SLEEVES
Time to set in the sleeves. line the sleeves up with your garment so you know which one is which. Then place the sleeve inside the garment. I like to have my bodice or sweater inside out and then stick the sleeve (RSO, Right side out) into the arm hole. I find it easier to sew and manage when it is set up this way. I start by Matching up the under arm and the shoulder tip to the sleeve. then I pin the armpit area smooth (in a traditional pattern this is where there would be notches. Then I take my time to ease in any fullness at the top portions of the sleeve.
when I am serging a sleeve on in the round I like to start at the underarm seam. Also, when sewing multiple layers with the serger it is important to continuously be checking that you have all of the layers together as you're going around. It is VERY EASY to lose a layer in the middle as your stretching the layers to sew them together.
After the sleeves it is just time for the bindings and cuffs and then BOOM you have made an entire sweater.
To sew cuffs and bindings that are "in the round" You will fold your binding piece in half-length wise with right sides together and sew the short side. this will give you a circle piece. Then fold the piece in half so that your right side is on the outside. you will have a piece that looks like a folded tube.
Next decide where you will line up your binding seam. If you have a CB seam on your garment, always line it up there or on the cuffs I line up to the sleeve seam and the waistband I lined up to the opposite side as the diagonal so that it was "tucked away" Seams are also "lost" in dark colors much more easily.
To line up the bindings and cuffs You must find the quarter marks. This may also be called dividing it into 4 equal parts. I first fold in half and half and again to put pins in both pieces at the quarter marks.
Then I match up the pins on each side and pin the garment and binding together.
Then I stretch the binding to ease it into the garment and pin all the way around. When I am sewing on my serger I like to pin the pins perpendicular to the fabric/ seam allowance.
Next! Time to sew and finish up your new sweater.
If you are not familiar with sewing a seam in the round on the serger or sewing machine, it is time to catch you up. Because you will be stretching the binding and garment while you are sewing it will be SUPER important to make sure you are catching all layers in the process. Sewing the bindings and cuffs will be especially difficult as there will be at least three layers all the way around. It is very easy will stretching and sewing simultaneously to accidently let one layer “sneak off” and then it will not get caught in the seam properly. A WORD OF CAUTION. Pay attention to catching all layers for the entire length of the seam.
Finally, tie off any threads and clean up the inside of your garment.
Time to wear your creation!!
See you next time!
Find me @jacqulineterrydesigns on your favorite Socials