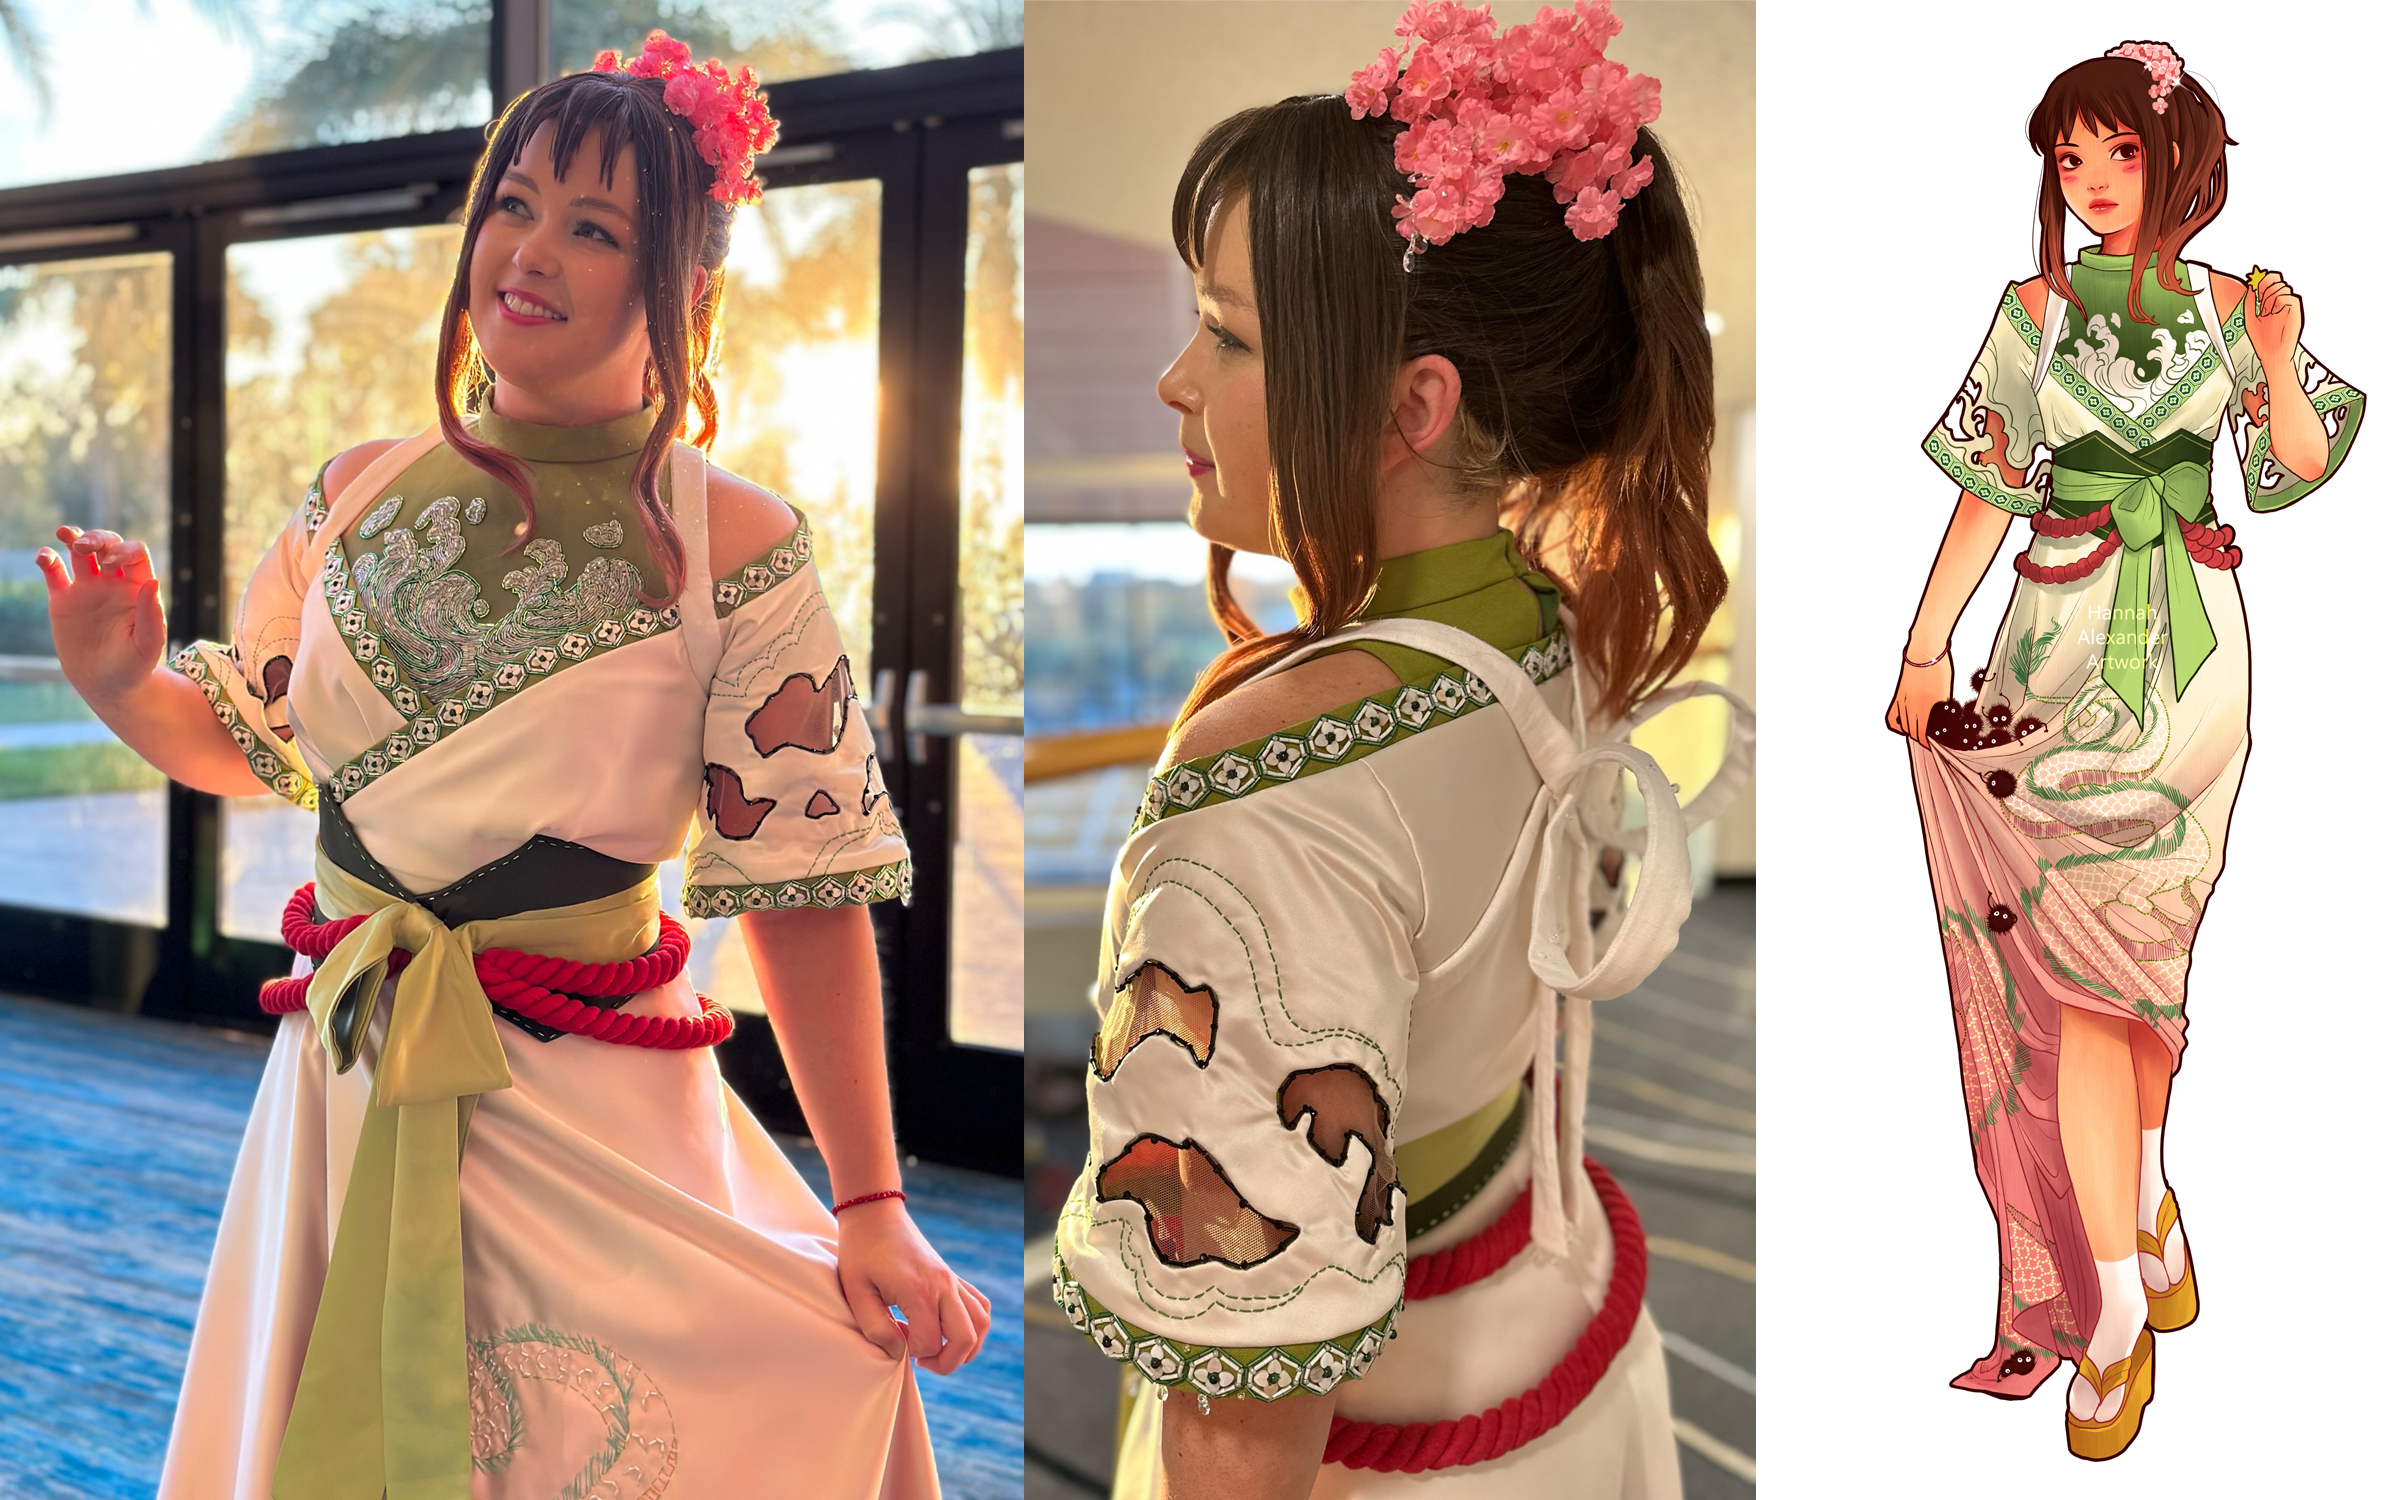
In December 2022, I competed in the Holiday Matsuri Winter Cosplay Championship with a Chihiro cosplay based on Hannah Alexander’s artwork. One of the biggest challenges in this design is her sleeves! They are a wide, off-the-shoulder kimono style with 5 or 6 cut outs per sleeve. Not only that, but they also have to support a heavily beaded edge and beading along the cutouts. Ill show you below how I achieved their structure!
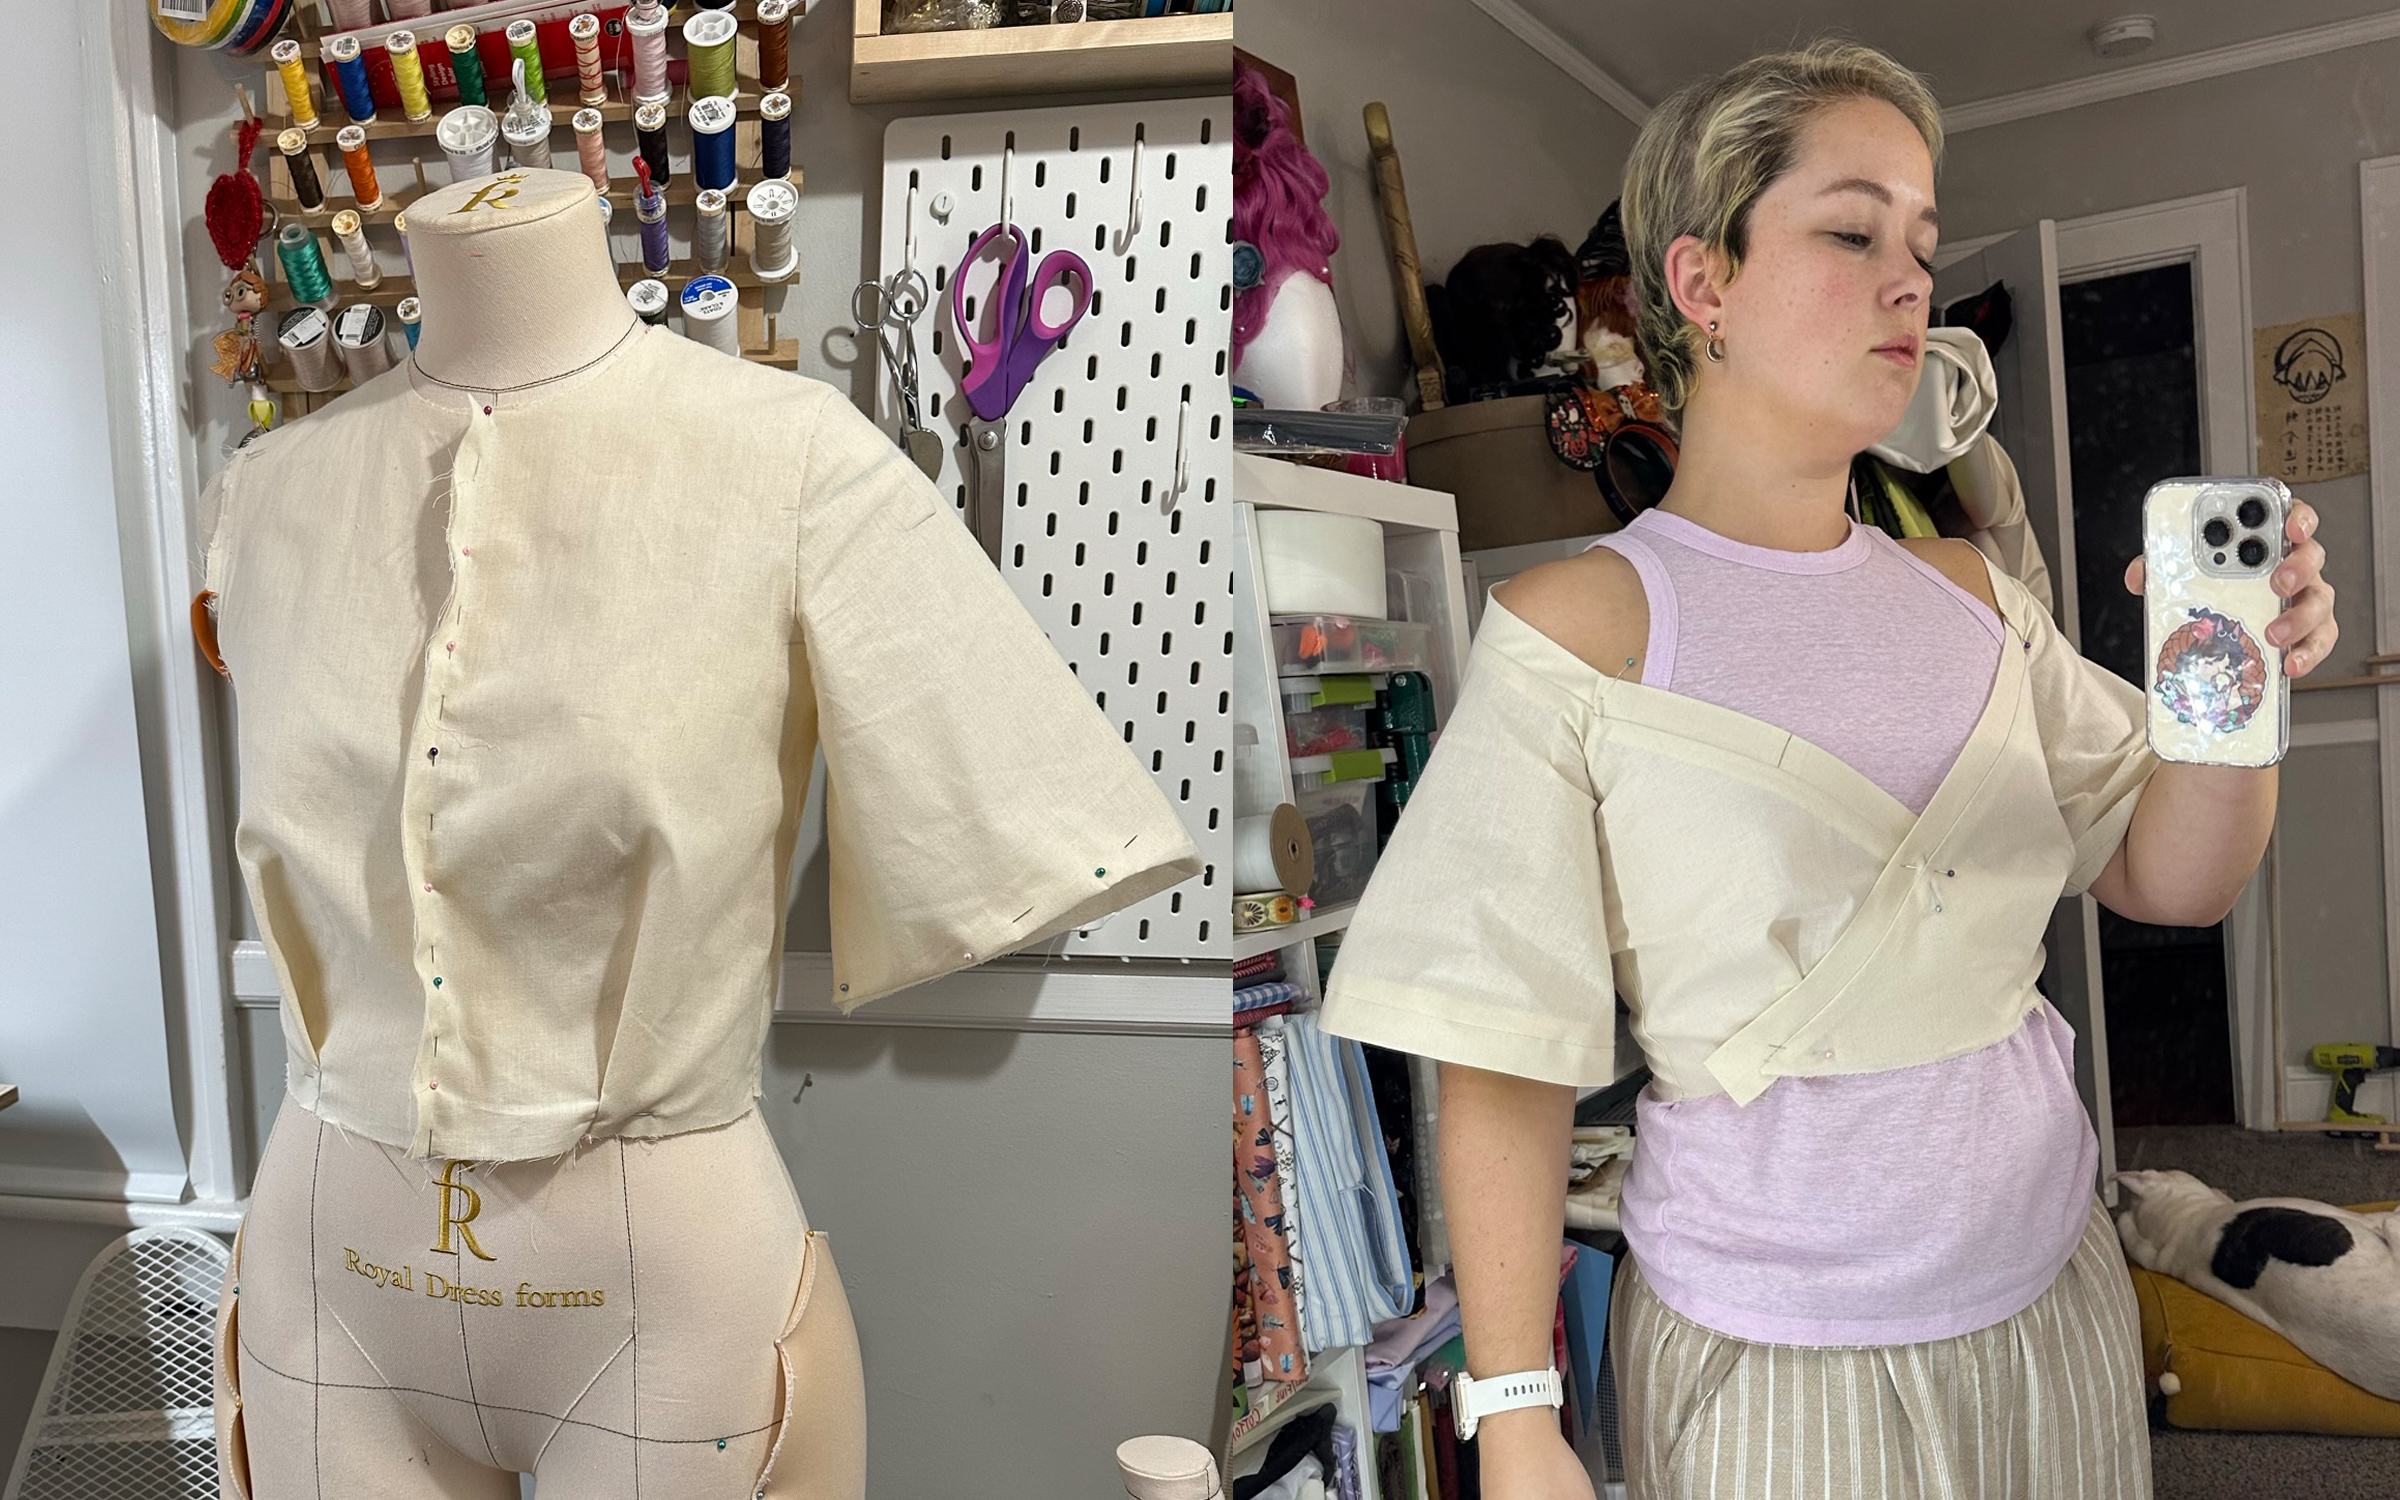
I began by drafting the pattern in muslin and deciding where I wanted the cut outs to be based on the original design. I drew the design with a sharpie and then unpicked the seam so I could lay each sleeve flat.
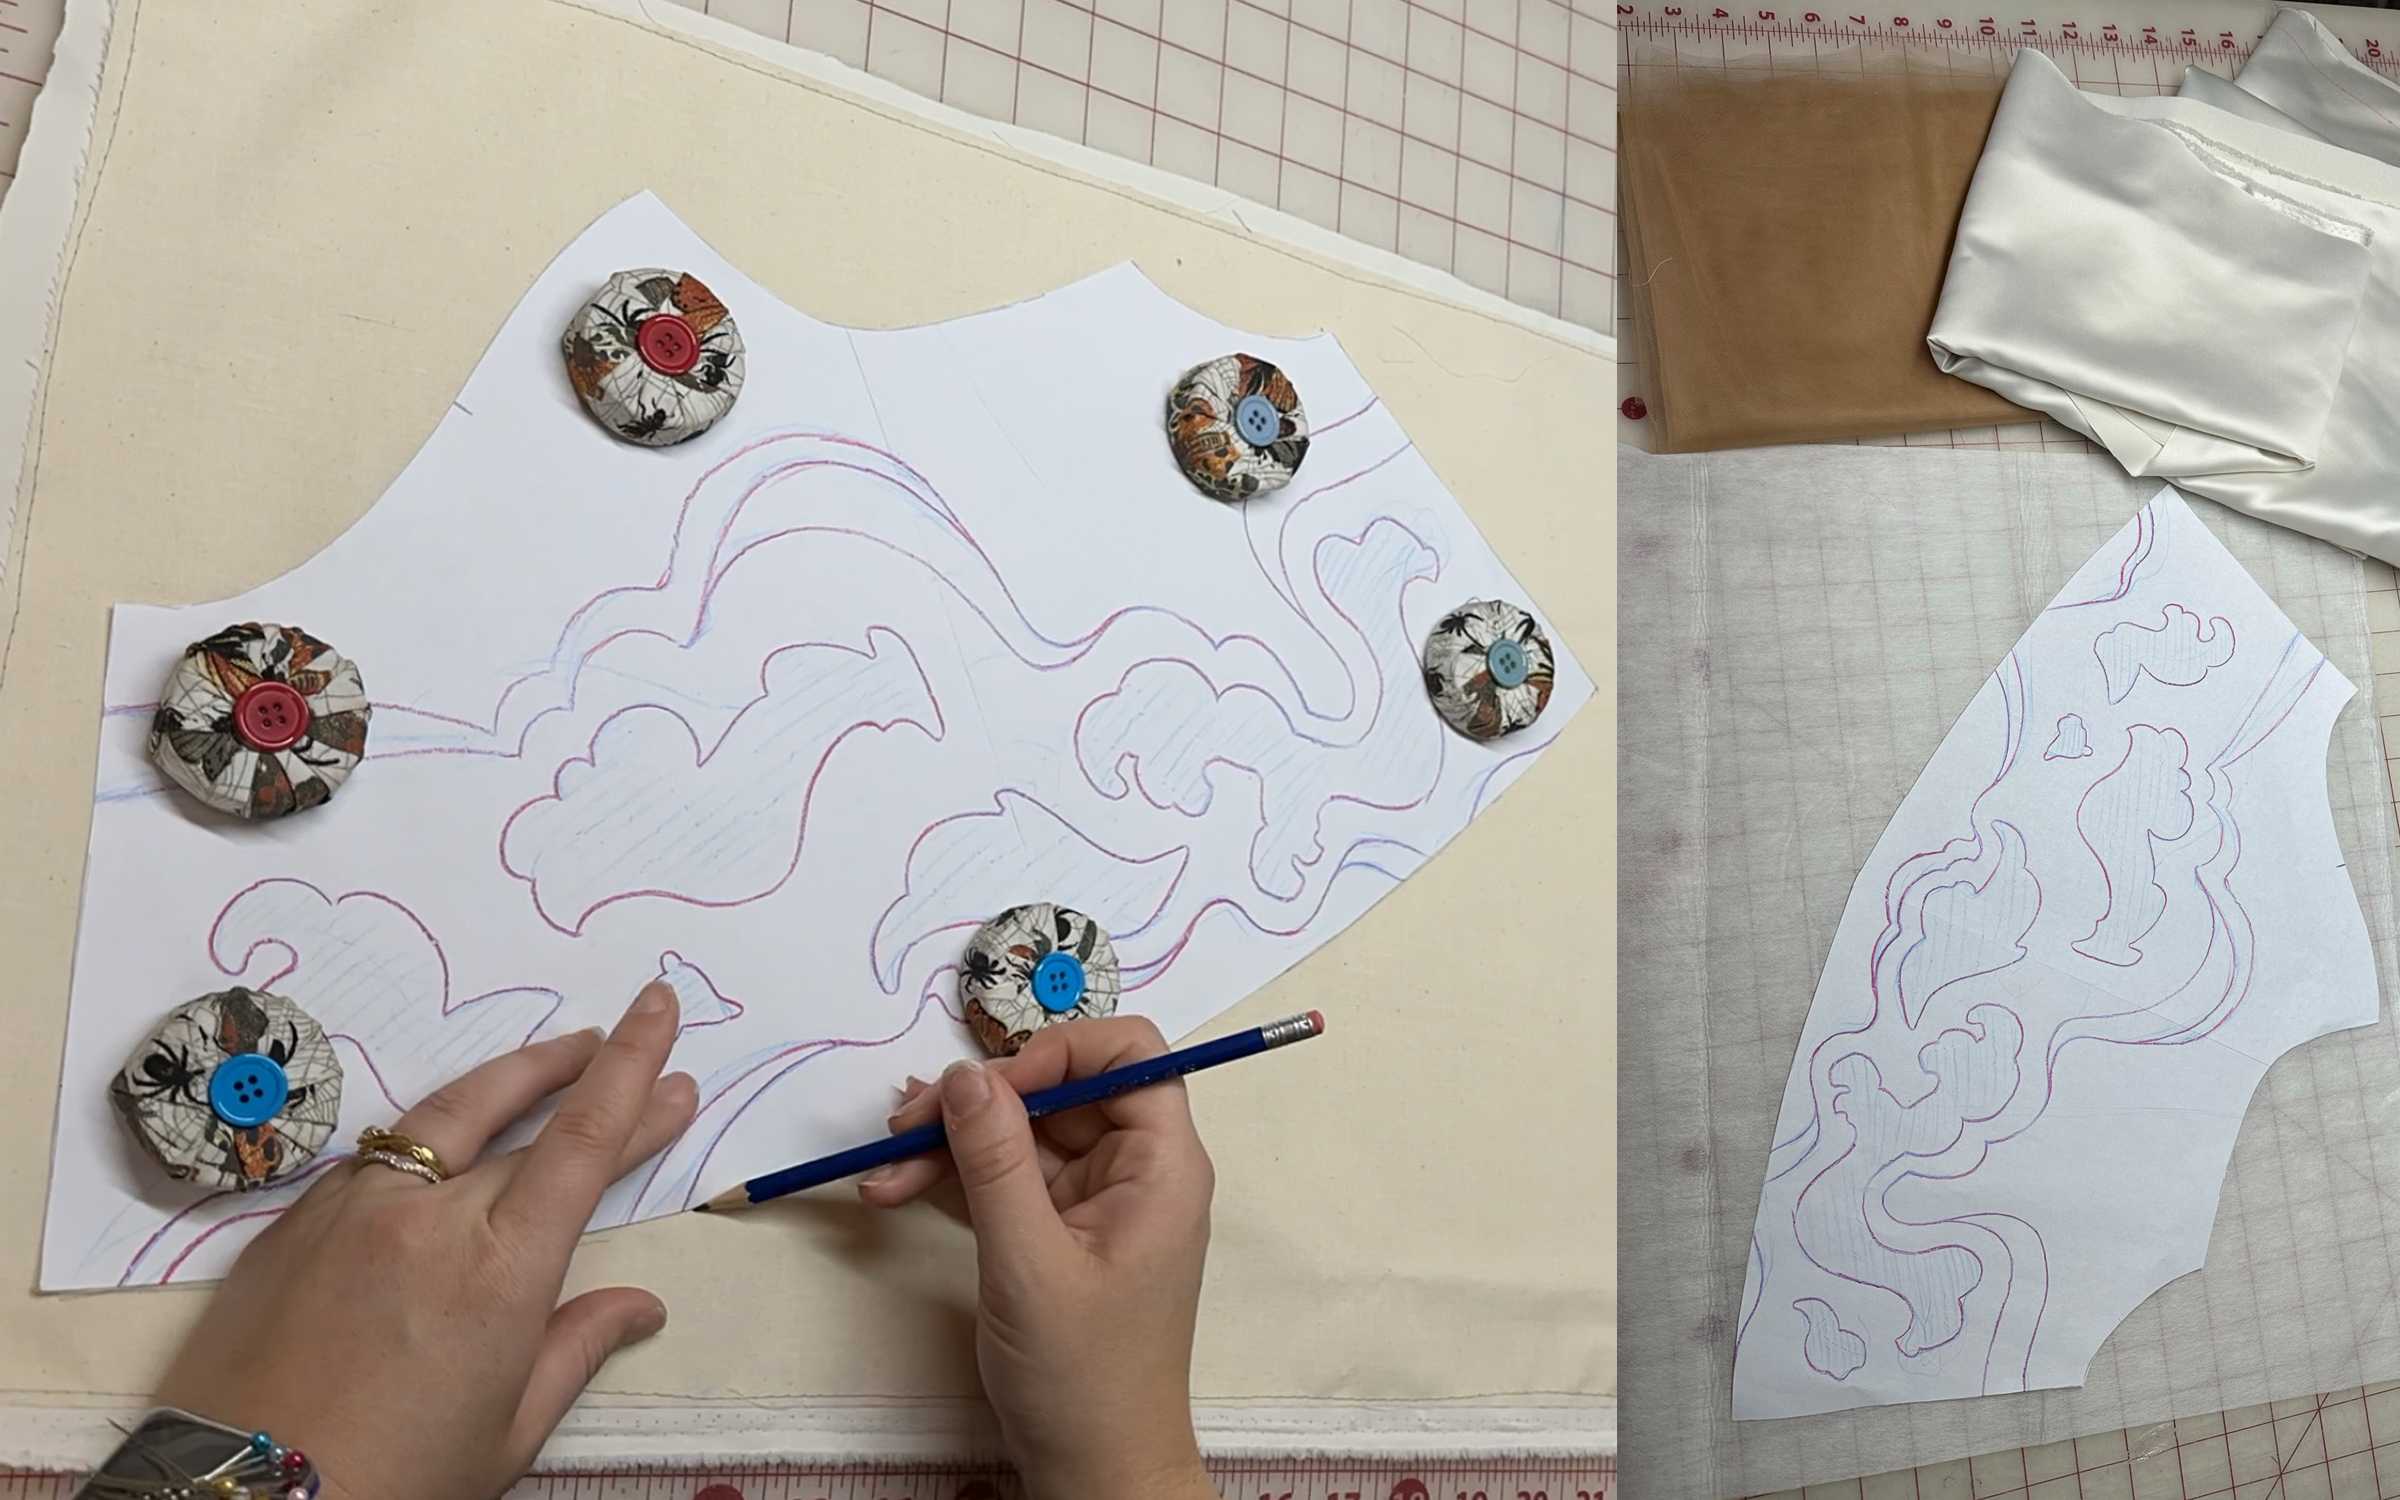
The next step was tracing the design onto paper patterns and cleaning up the lines. I did this by laying each sleeve onto my lightbox and placing a paper sleeve pattern on top. Once the design was finalized, I was able to move onto the real materials. My external layer was satin flat lined and basted with cotton muslin to give the fabric more body.
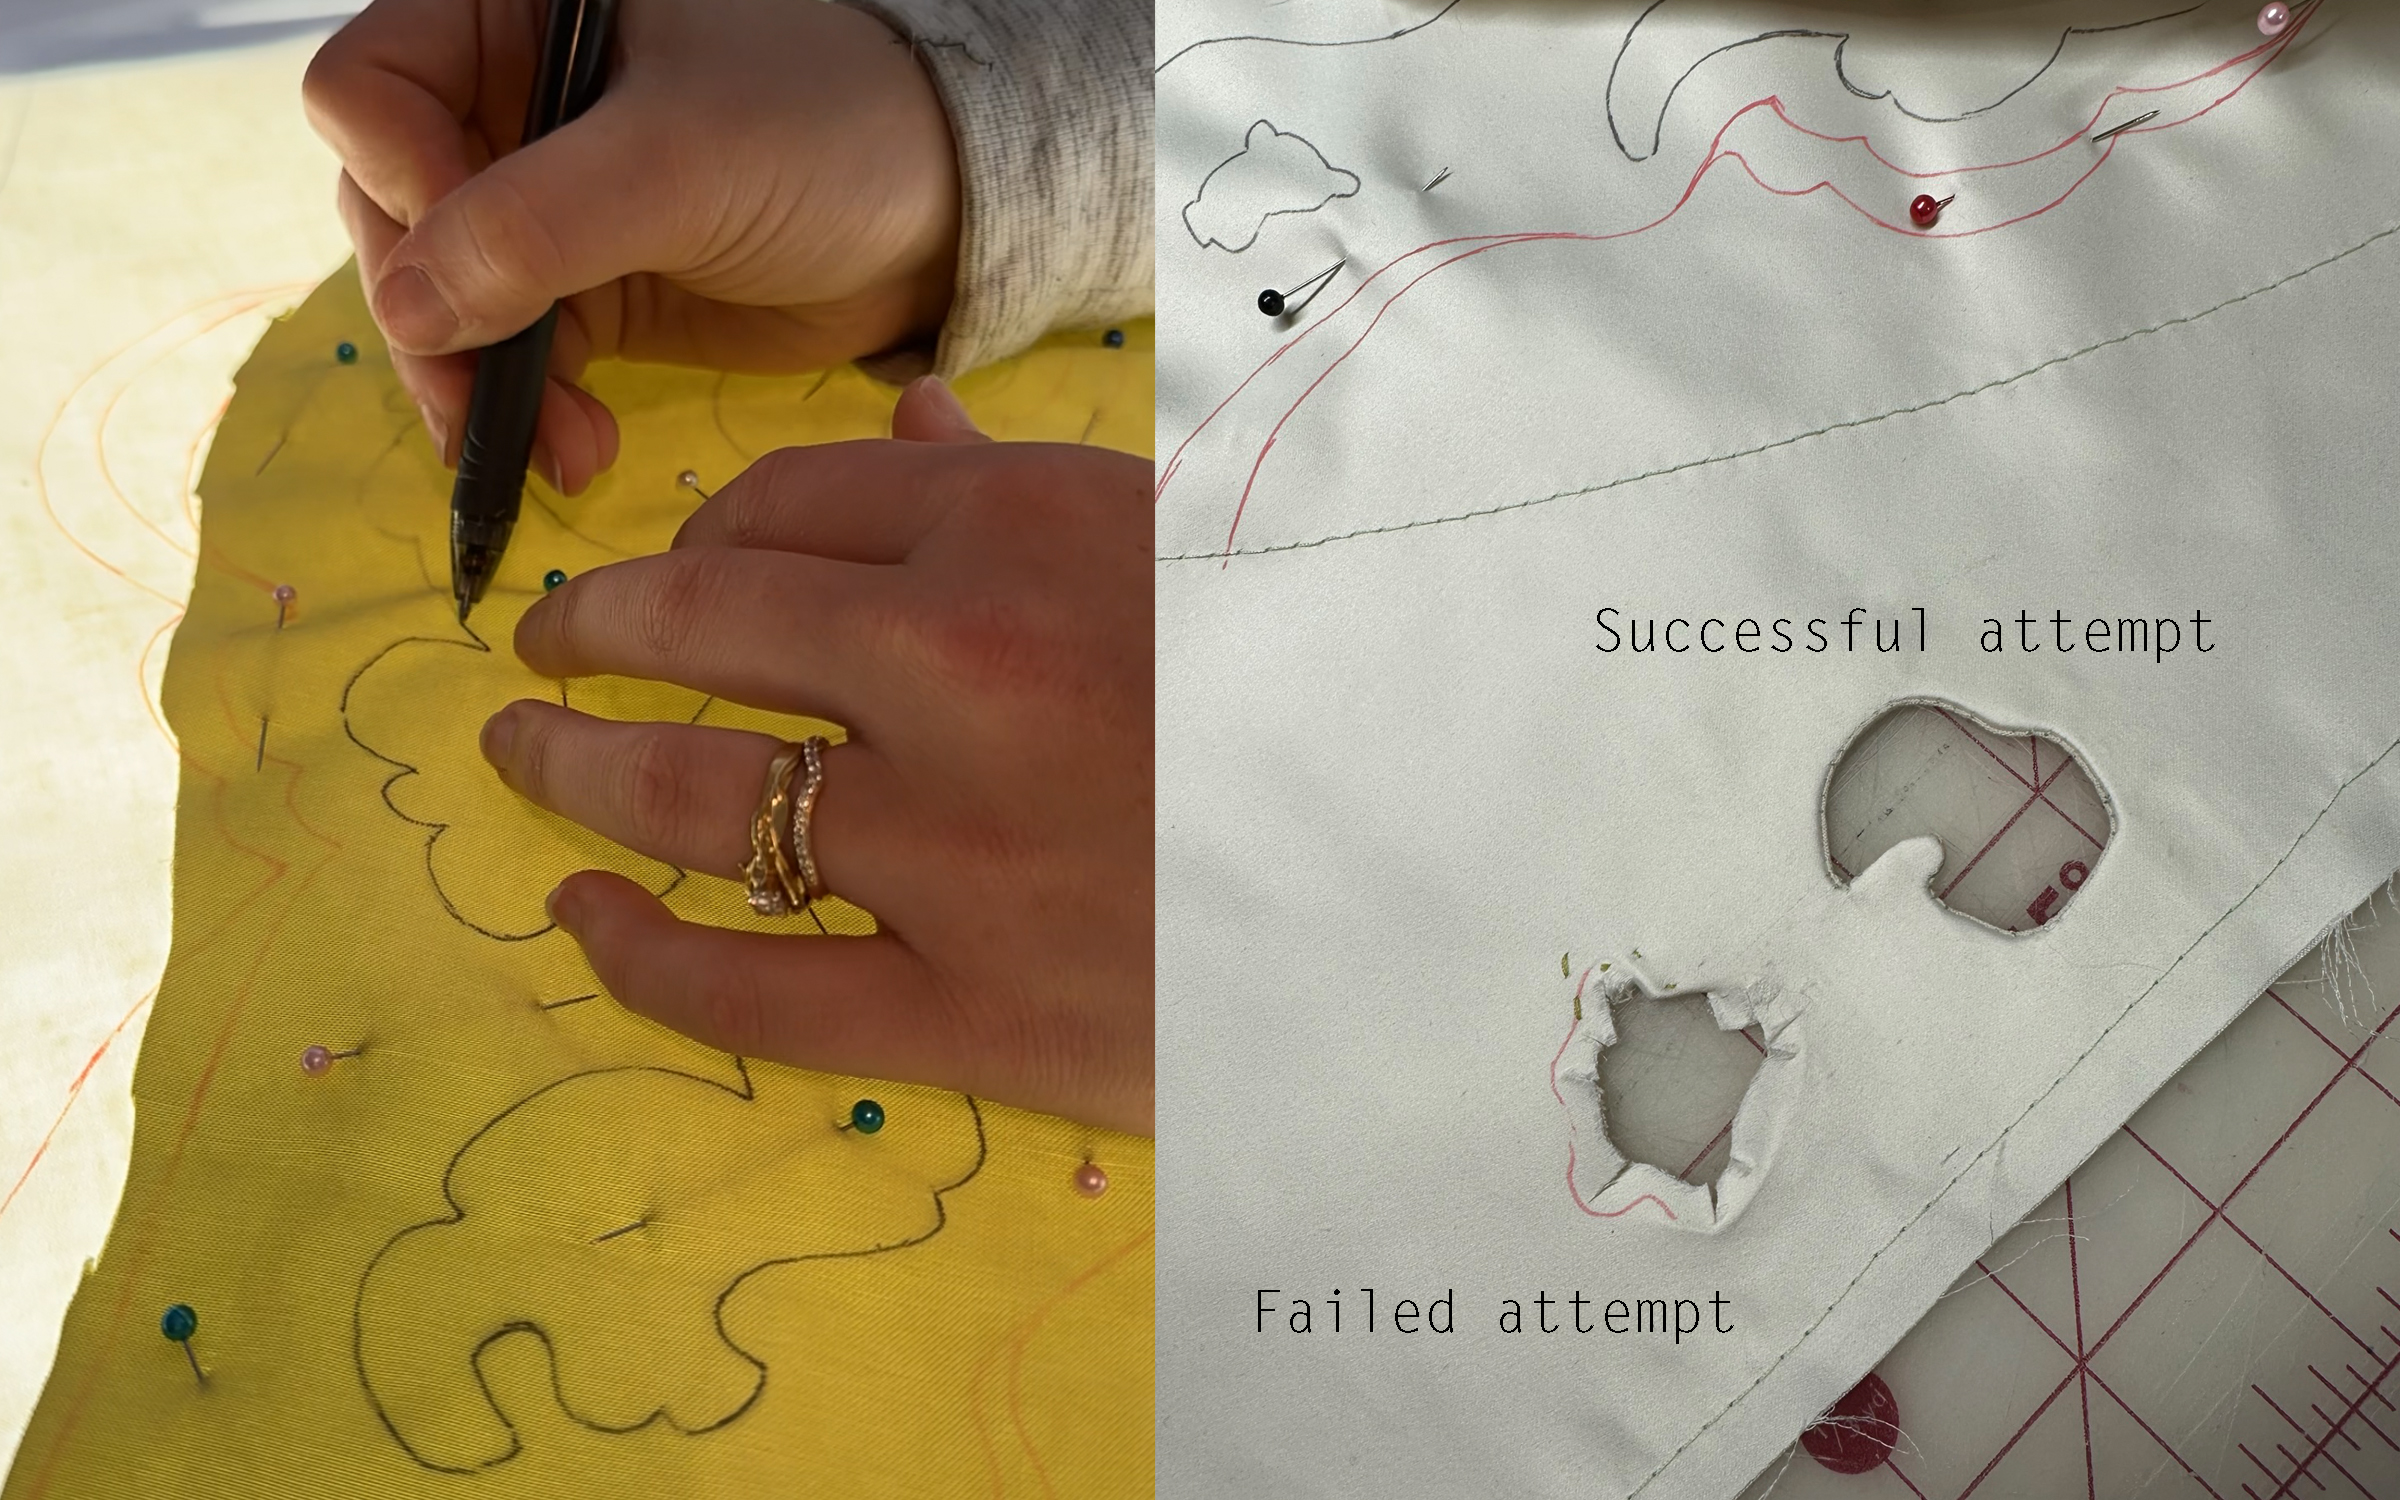
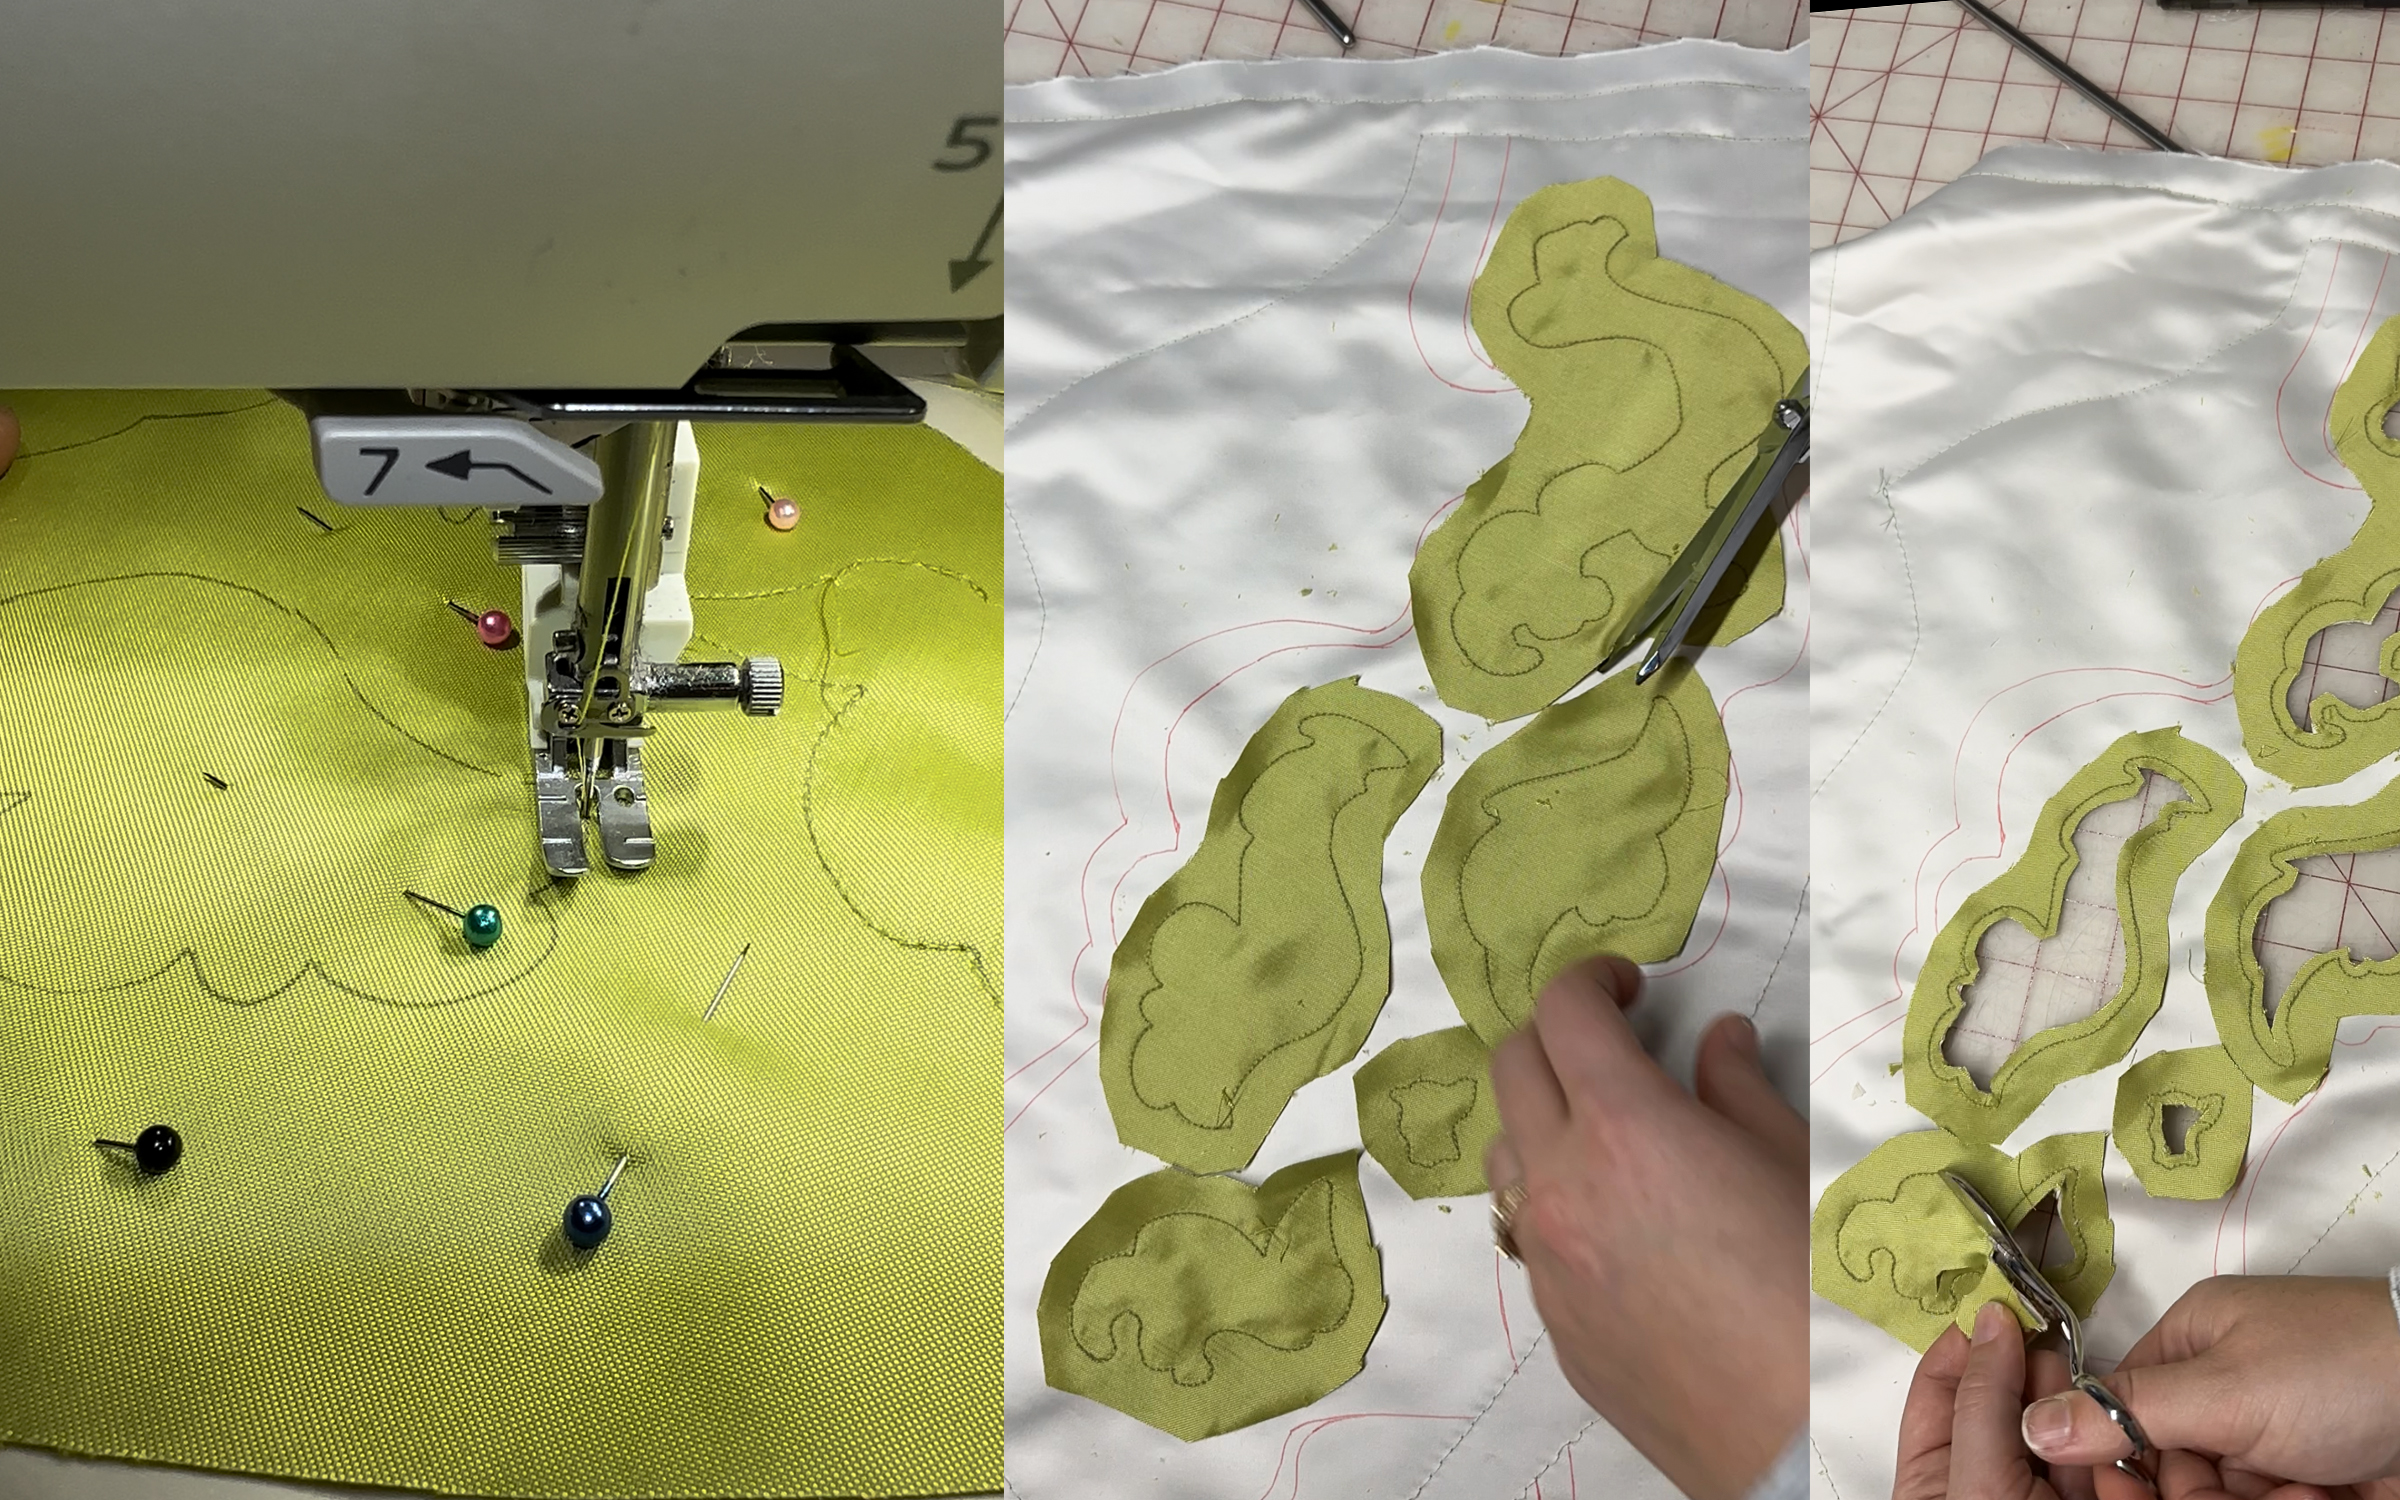
After transferring the cutout designs to the back of the sleeve, I flipped them right sides out and created individual “facings” for each hole. This was after a first failed attempt at simply cutting out the shape with a little seam allowance and trying to hand stitch the raw edges back. I created the facings by pinning a piece of lightweight green canvas on top of the right side of the sleeve and tracing the shapes onto the canvas using the lightbox.
The next steps of the cutouts were machine sewing (with very small stitches) along that traced line, cutting the interior of the shape out leaving ¼” seam allowance and snipping the curves. I then pushed the excess fabric through the opening, pressed the edges flat and glued the facing flat with fabri-tac.
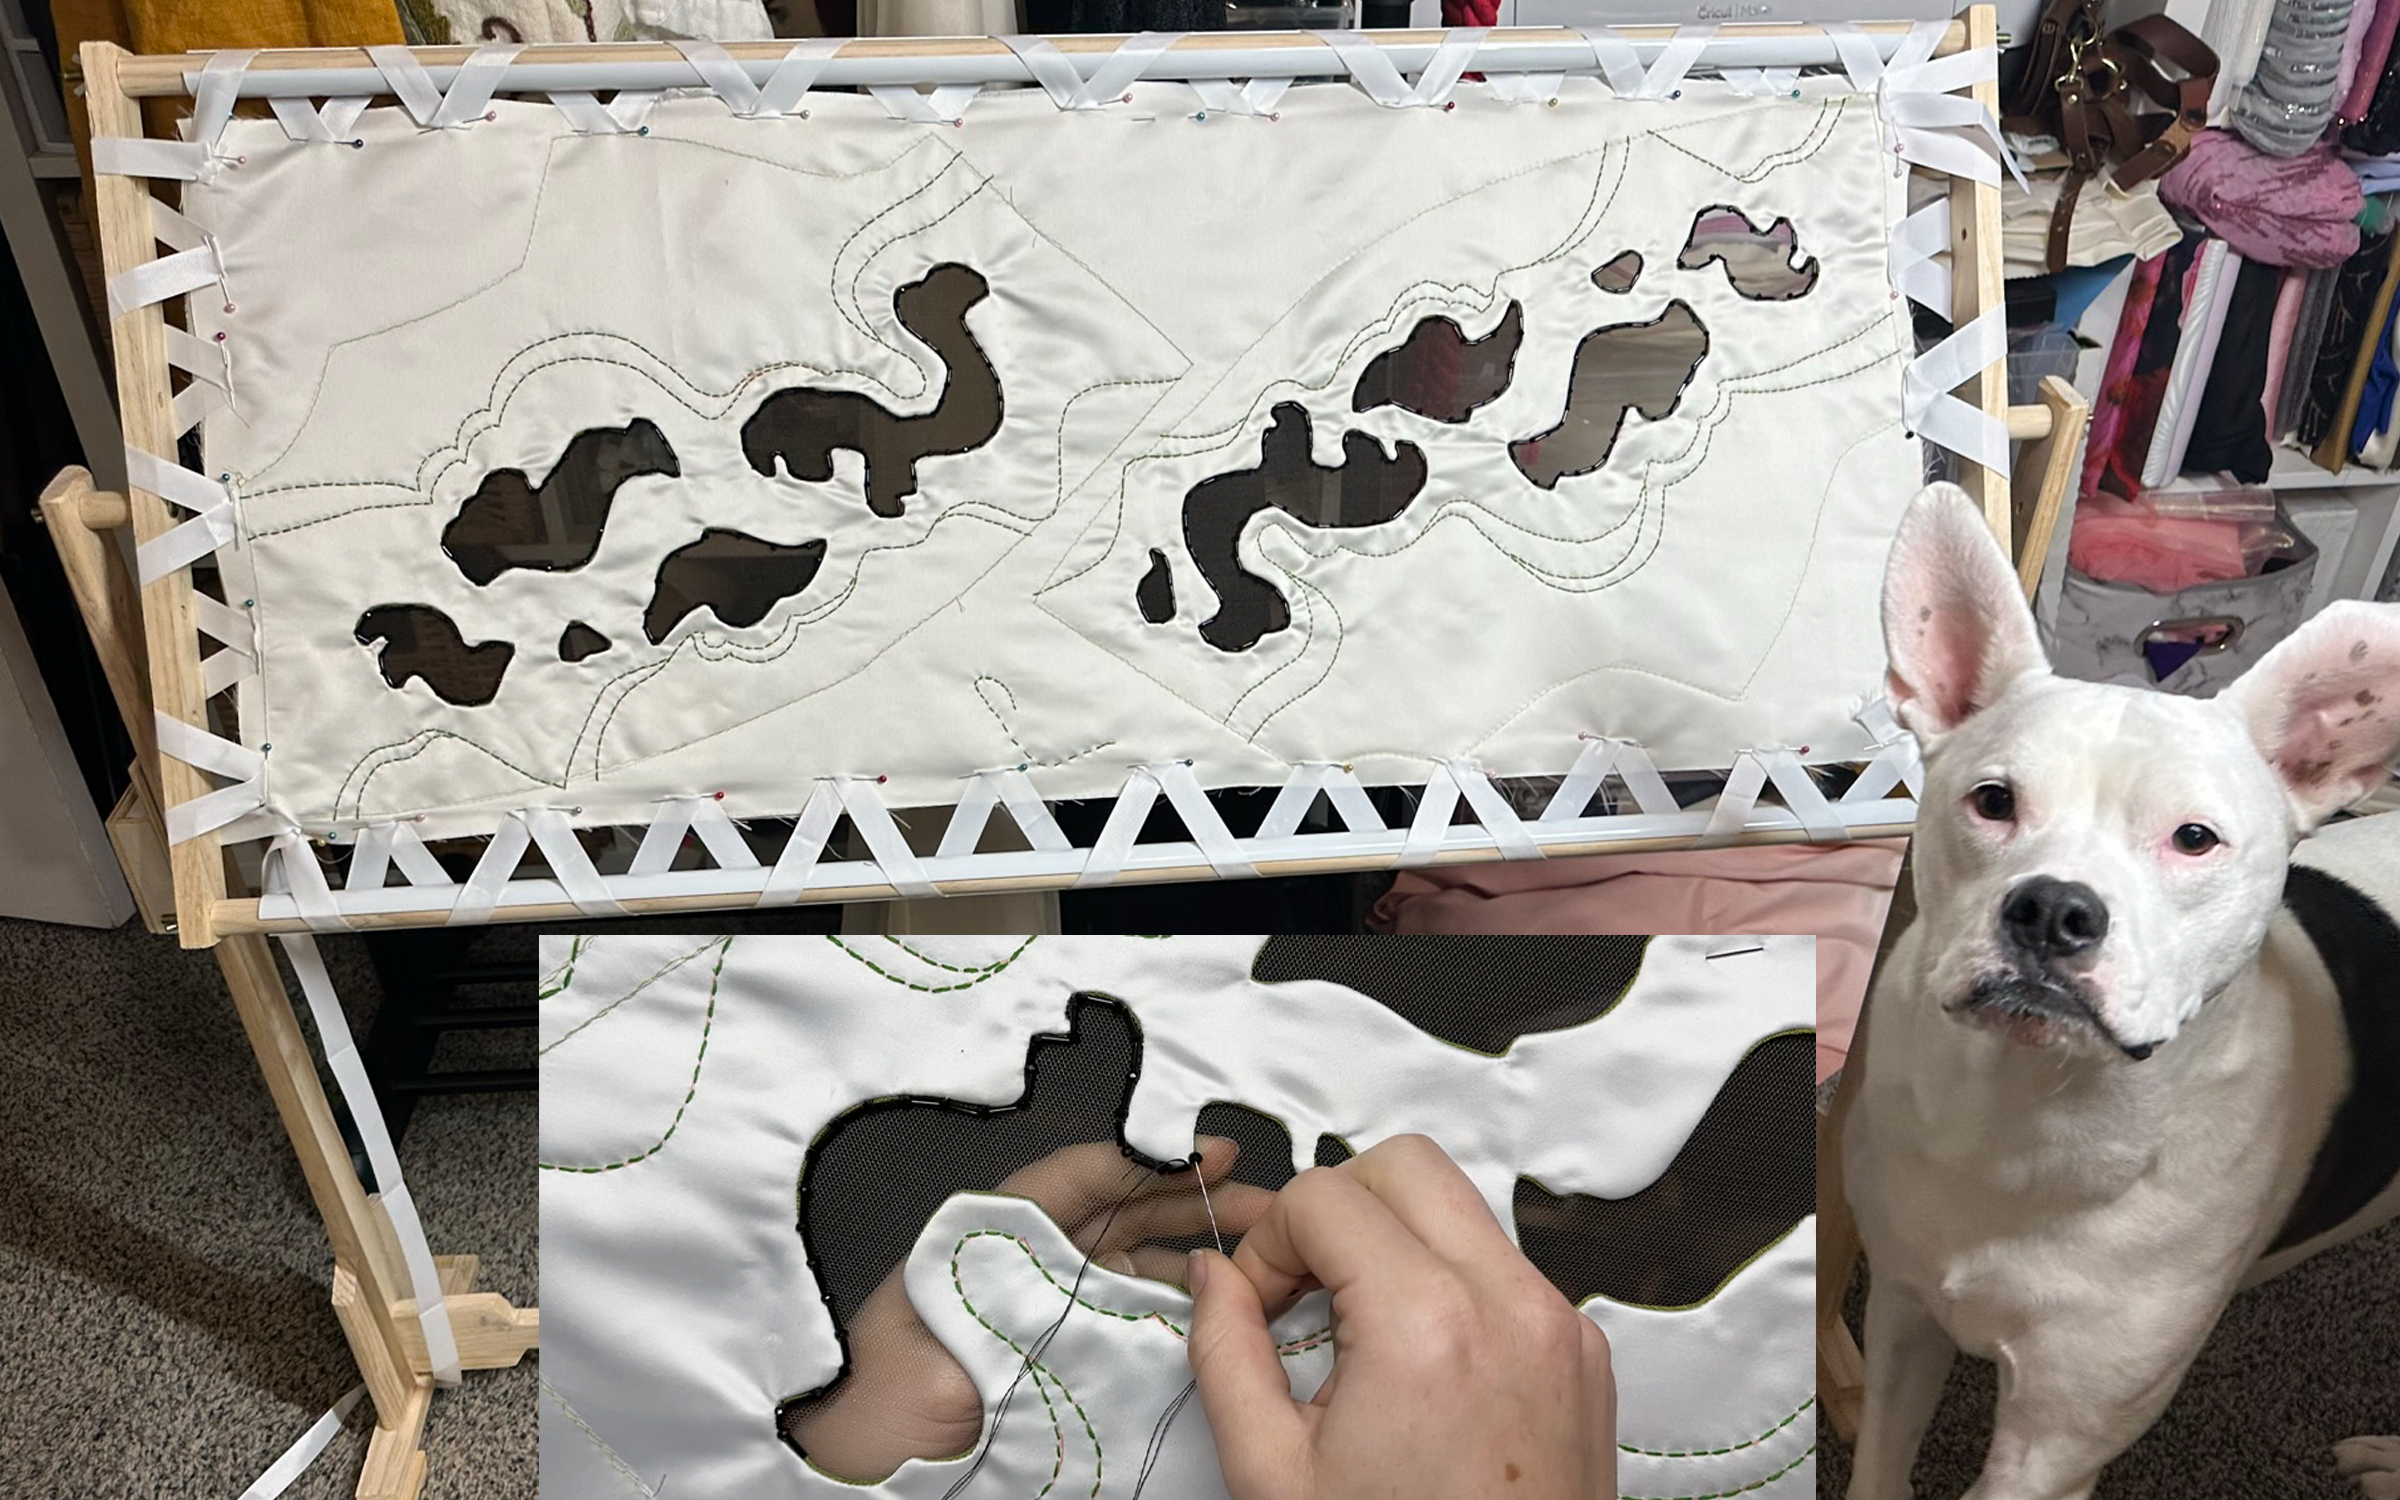
To create support for the cut outs, I used skin toned mesh as another flat-lined layer. I placed this on the back of the sleeves, covering the entire backsides and then attached the entire panel to my tambour frame to complete the beading and stitching. I started with the surrounding dashed-line sashiko (dashed lines) stitching to hold the mesh in place before beading.
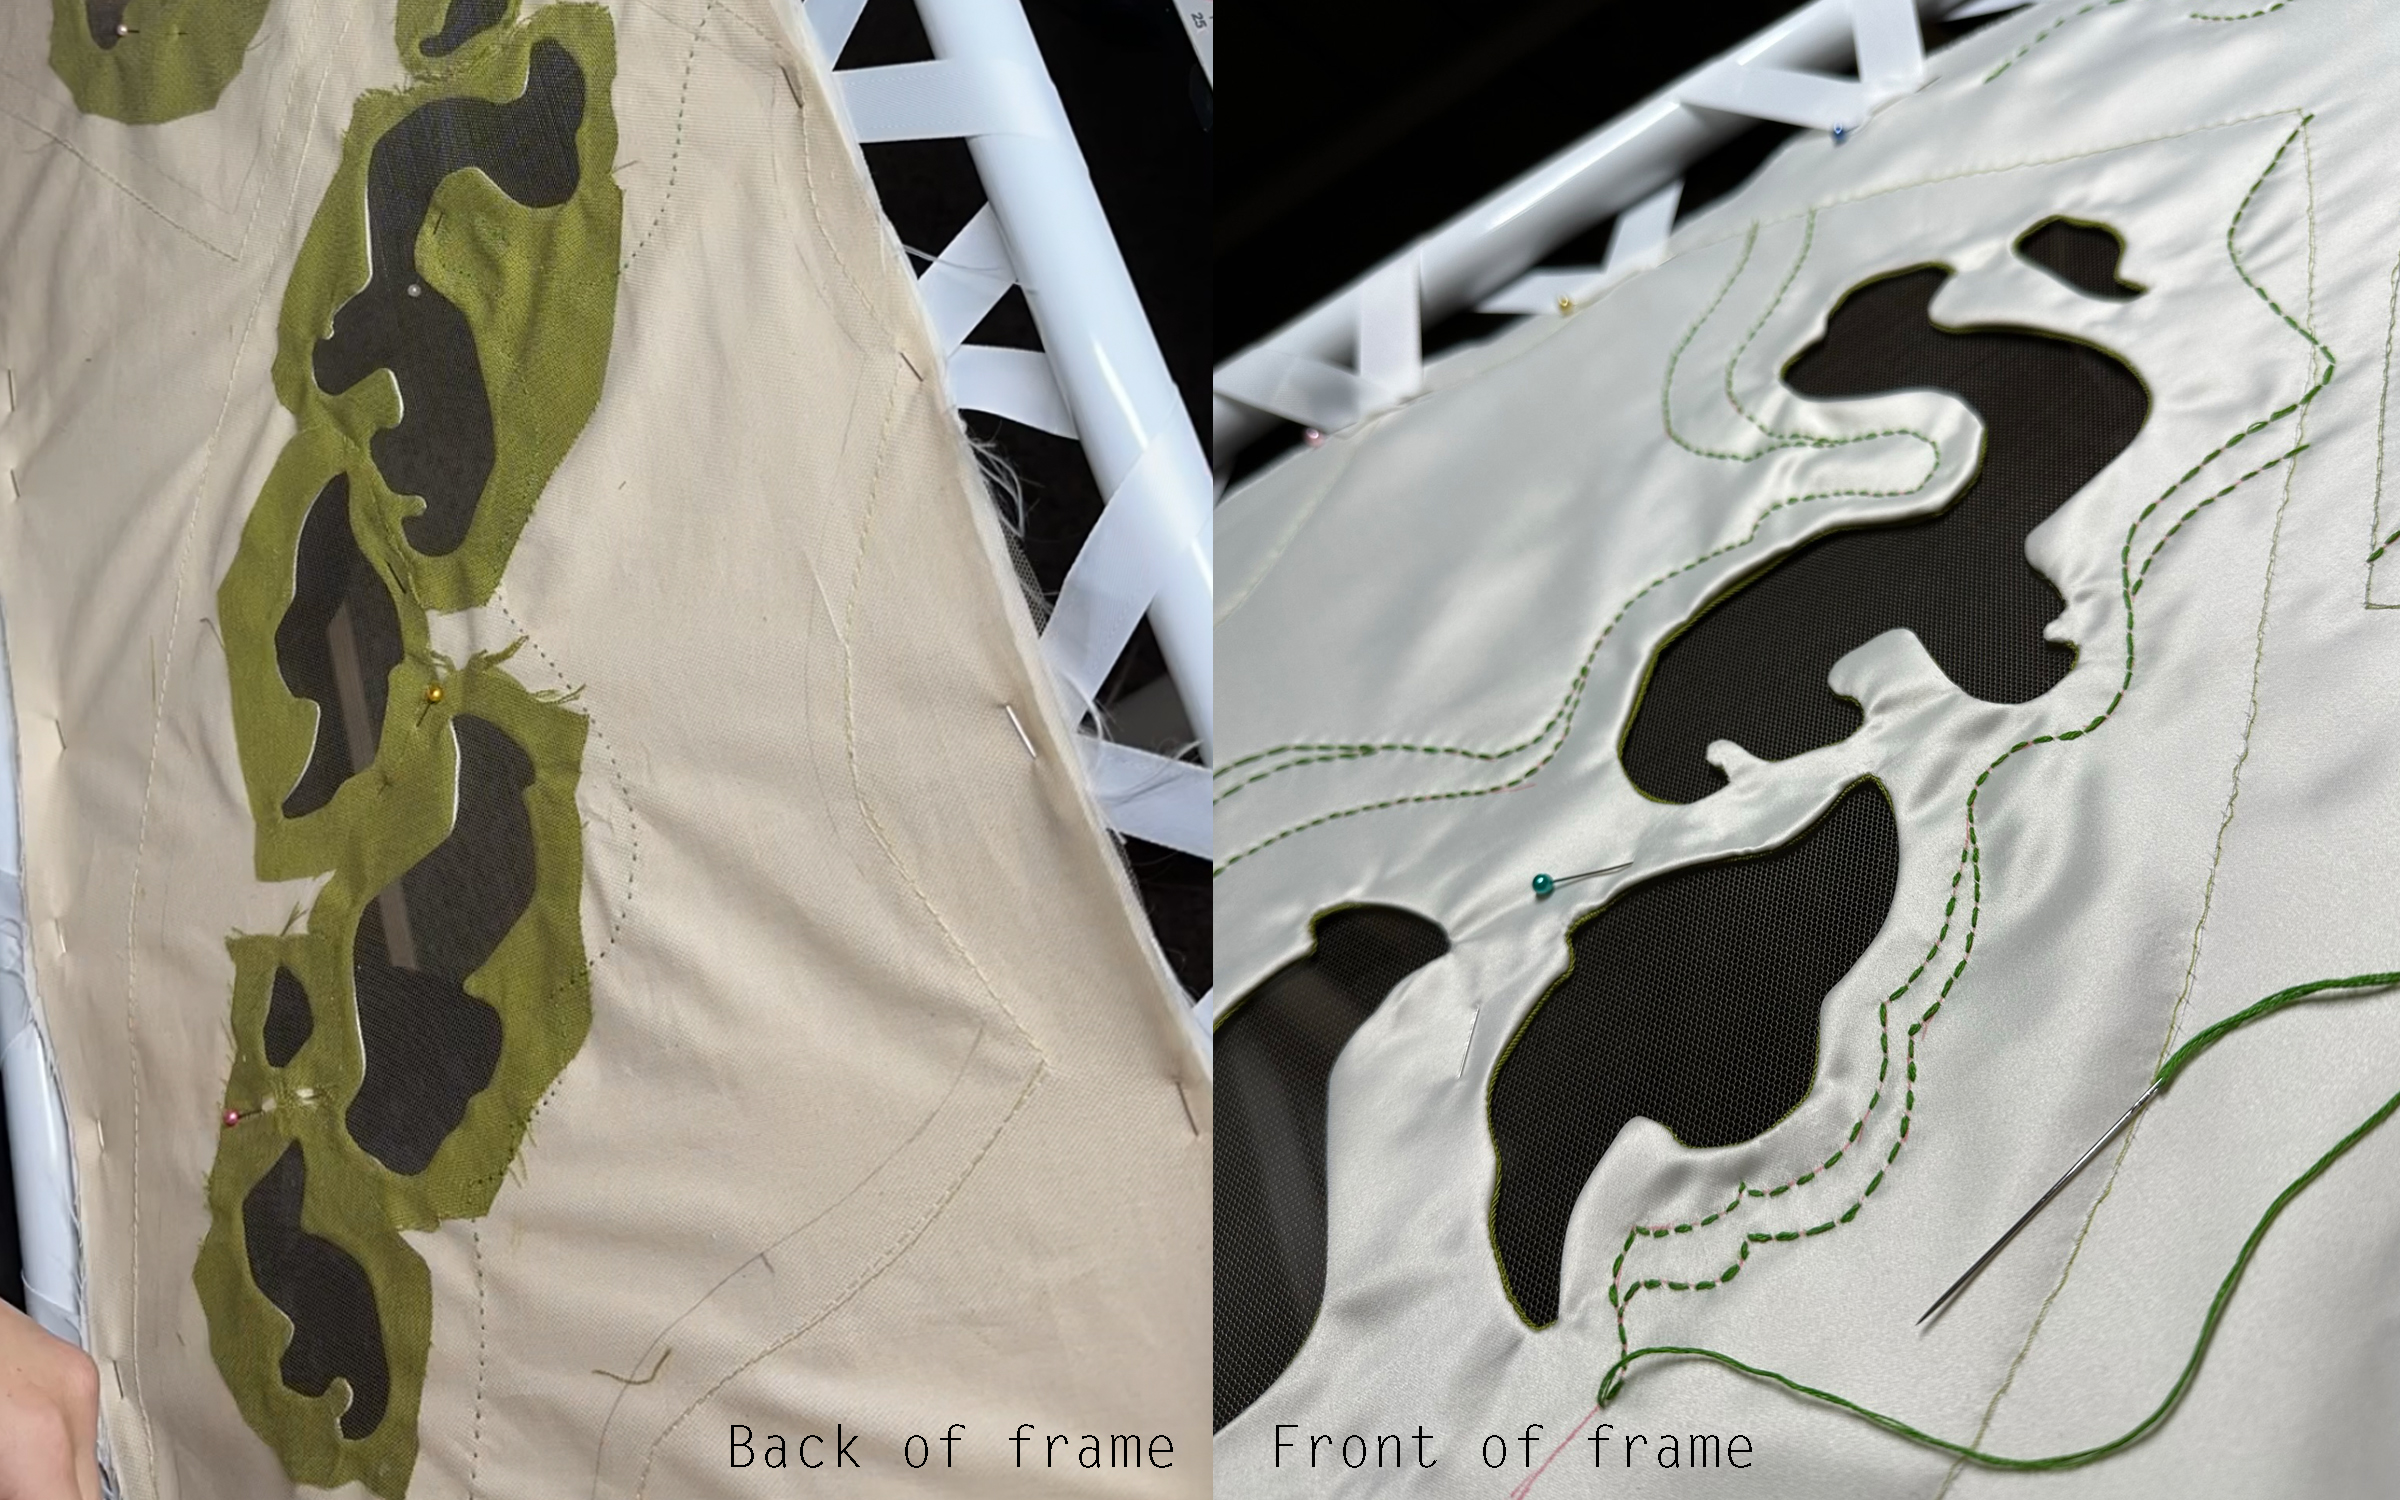
The final step of the embellishing of the cutouts was the beading. I added black bugle and seed beads around all the edges of each cutout. This not only looked beautiful, but had the added benefit of joining the mesh and satin more securely together as I made sure to catch both with my needle.
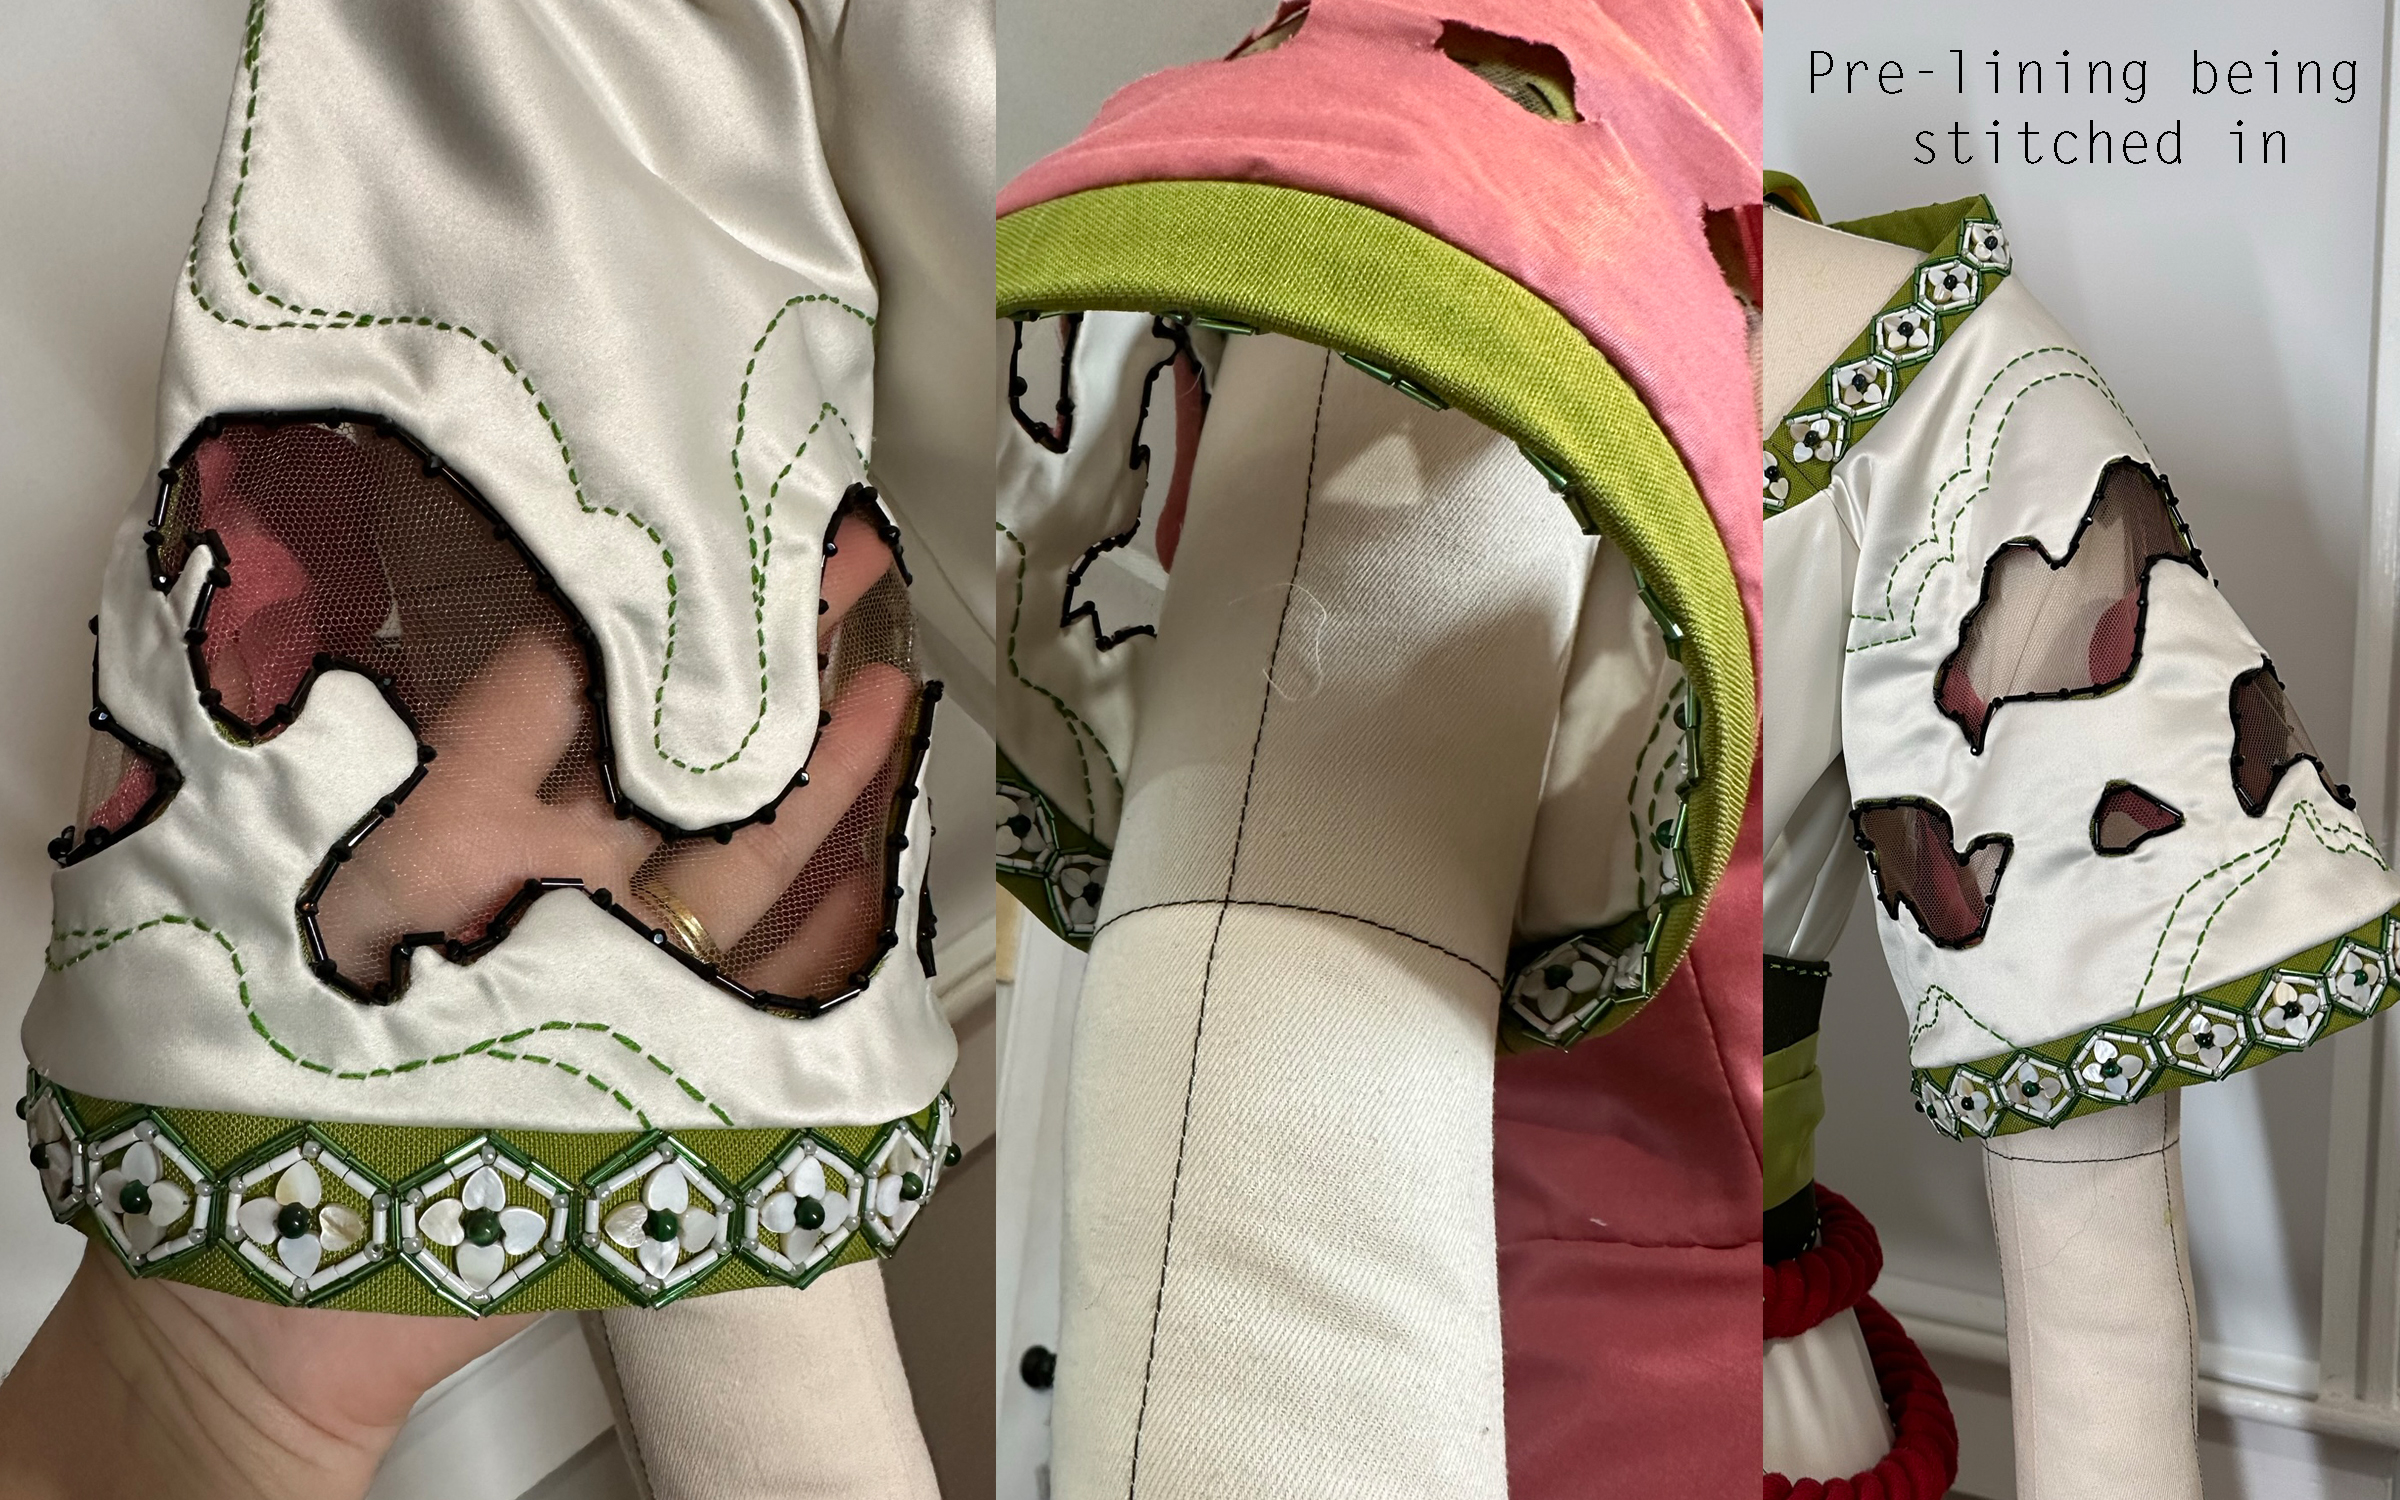
From here, the body of the sleeve is ready to be cut out. Since I beaded the sleeve’s hems so heavily, I added sewable boning into the hem. This made sure the sleeve’s opening would stay open and round like the illustration. The hems were sewn into rings with the boning inside and added to the bodies of the sleeves.
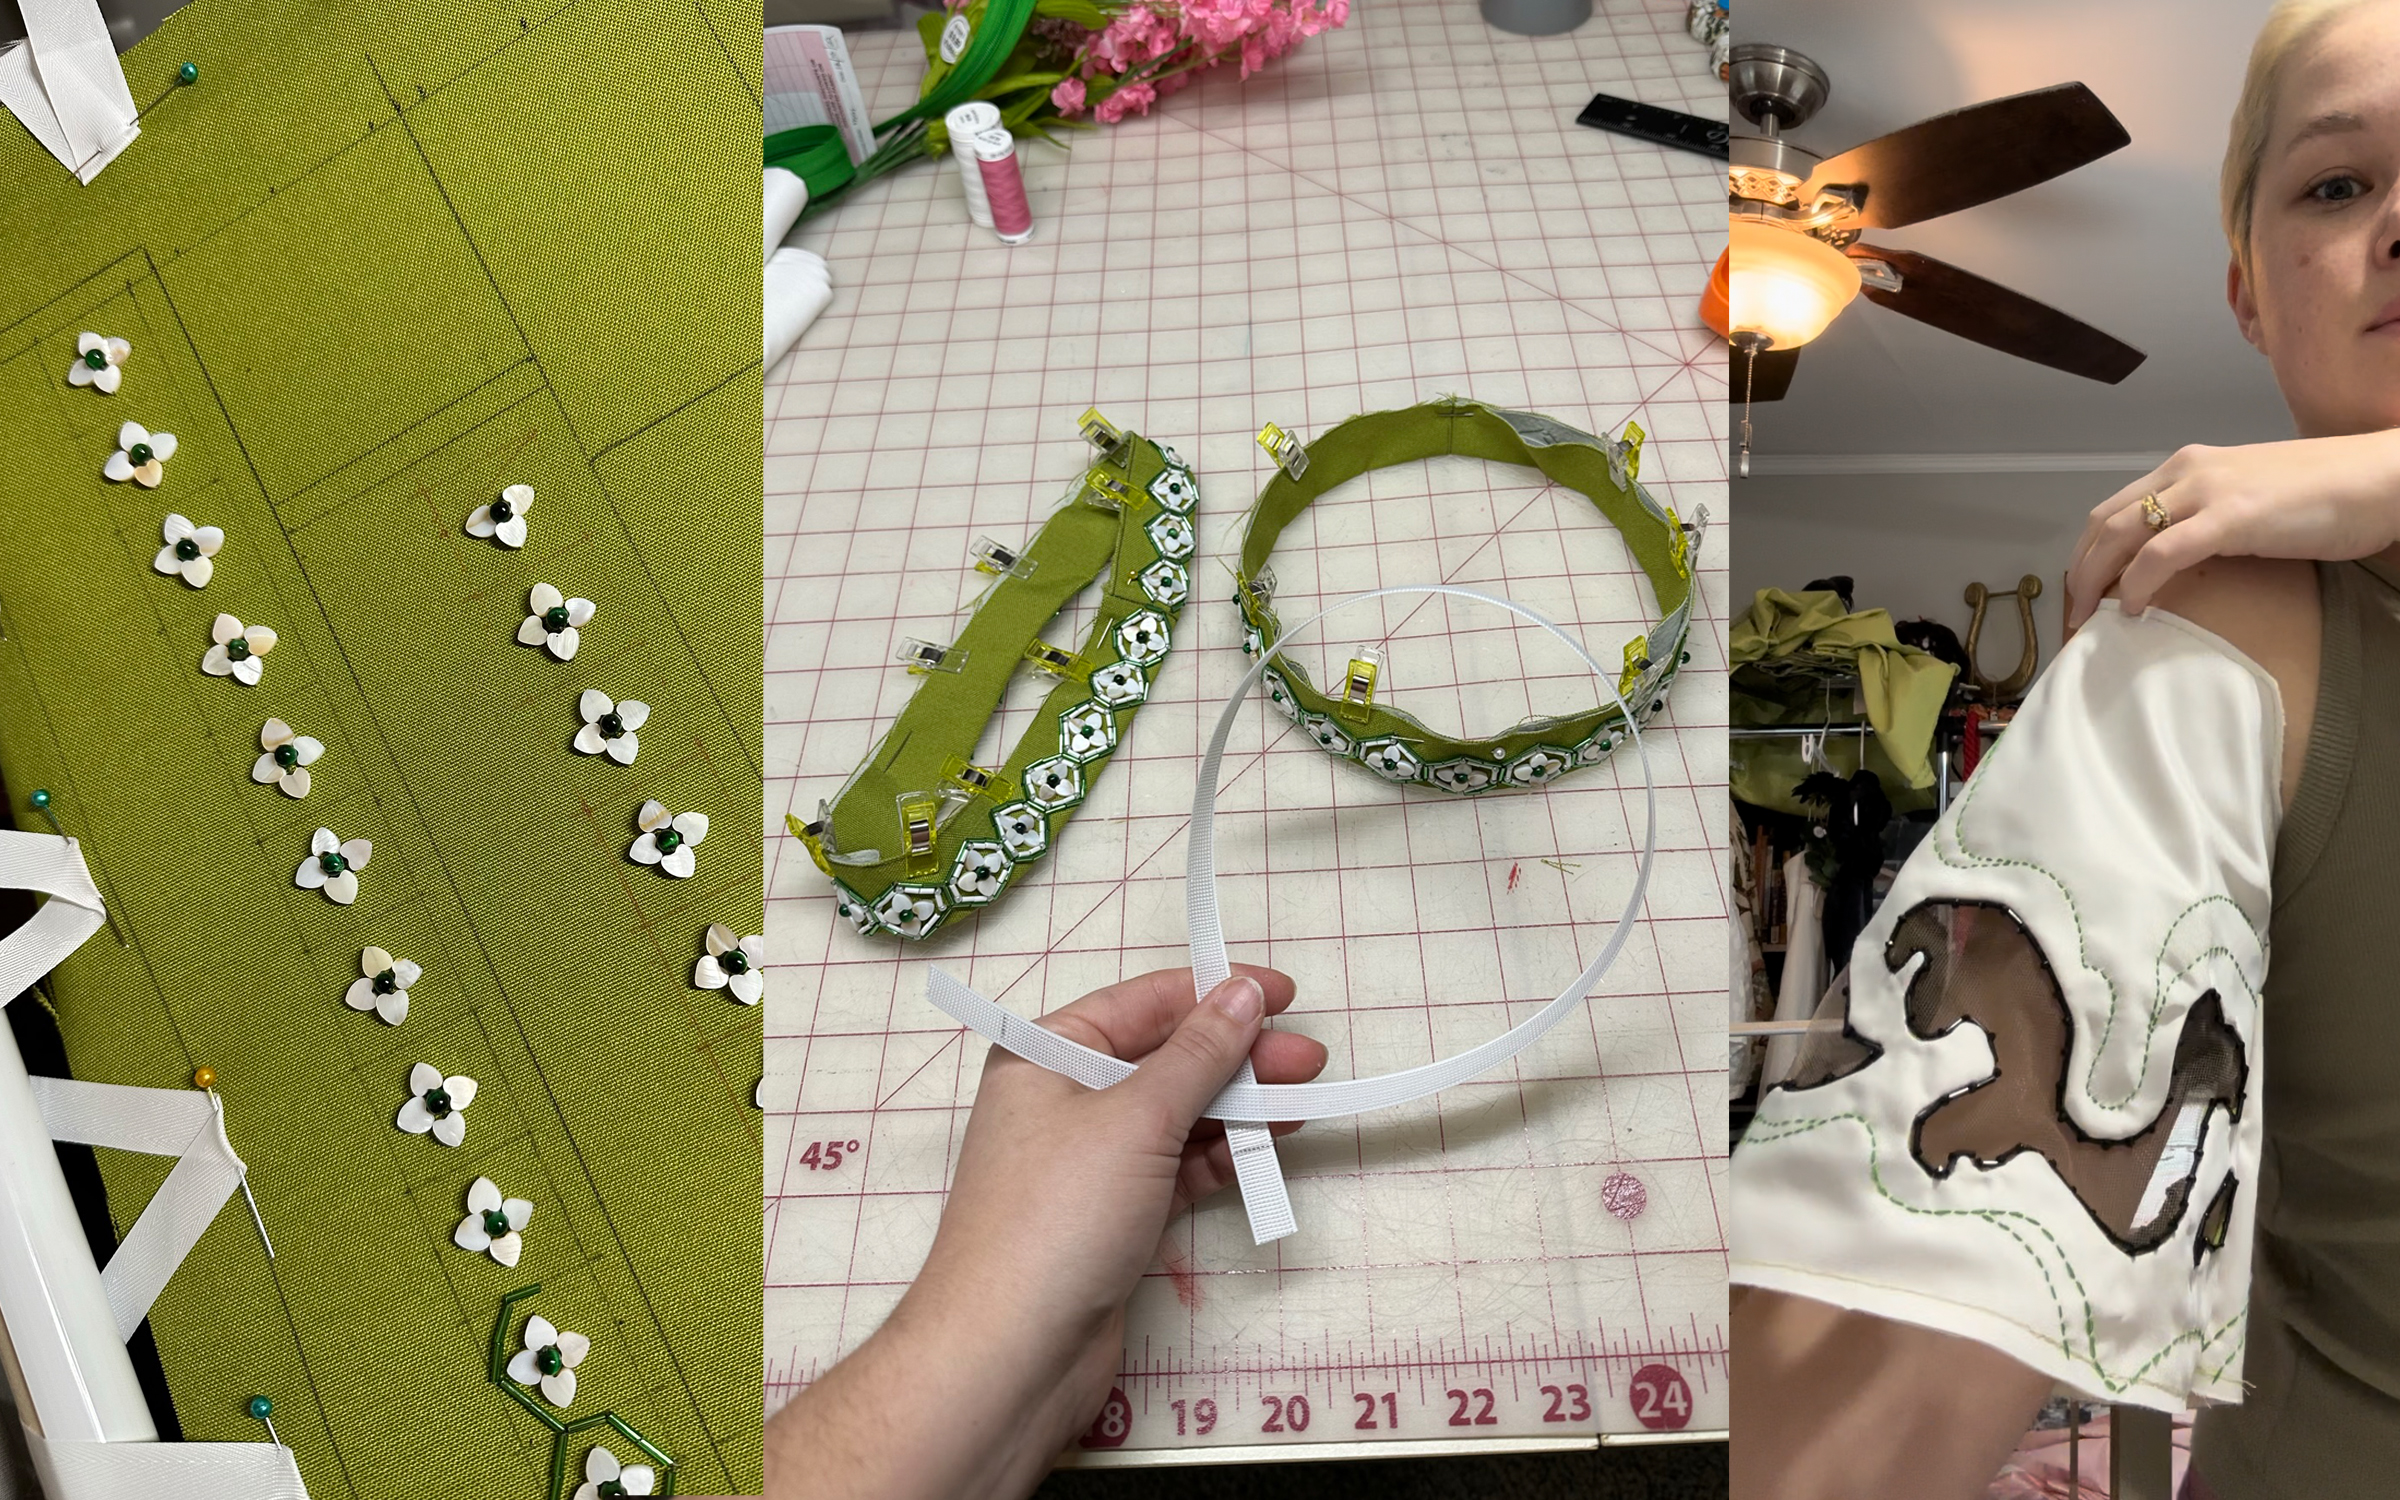
That's it! The sleeves were then able to be attached to the bodice as normal and the lining was hand stitched in after assembly to accommodate the cut outs!
I hope you found this helpful and it has given you some good tips and tricks to approach your next project with! My biggest lesson from this project was the usefulness of mixing different types of textiles to achieve structure. I also really enjoyed learning how to use the tambour frame! Also, I was awarded the Runner Up in the competition! A huge honor amongst so many talented and skilled creators.