Projects

Denim Jacket Upcycle

Created By:

Meredith Daniel

Skill Level: Intermediate

When I think about what I most love about sewing, its the ability to be able to add color and beauty to things we use everyday. The project I’m sharing with you today perfectly embodies this philosophy. Anyone with a machine and the desire to do so can sew up this project! Its very beginner friendly.

After Layla used my Janome Skyline S9 to personalize her denim jacket , I have loved the idea of having a personalized staple piece in the wardrobe. It’s the perfect blank canvas on which to play, and there are a million different ways to do it. Rather than using embroidery, I added my own little quilt block to William’s new jacket.

You can do so many things to customize a jacket or even a sweatshirt. Many can be done right on a sewing machine- whether its adding patches or embroidery or applique. Perhaps you will  find a method you like to add some personality to your garment. I am going to show you how I did this, and you can use that as a starting point for your own jacket!

Janome Supplies Required

Materials:
A denim jacket or some other garment
Fabrics you love
Ribbon (optional)
Coordinating thread
A piece of paper and a pencil
INSERT PHOTO: choose fabrics.jpeg

Instructions

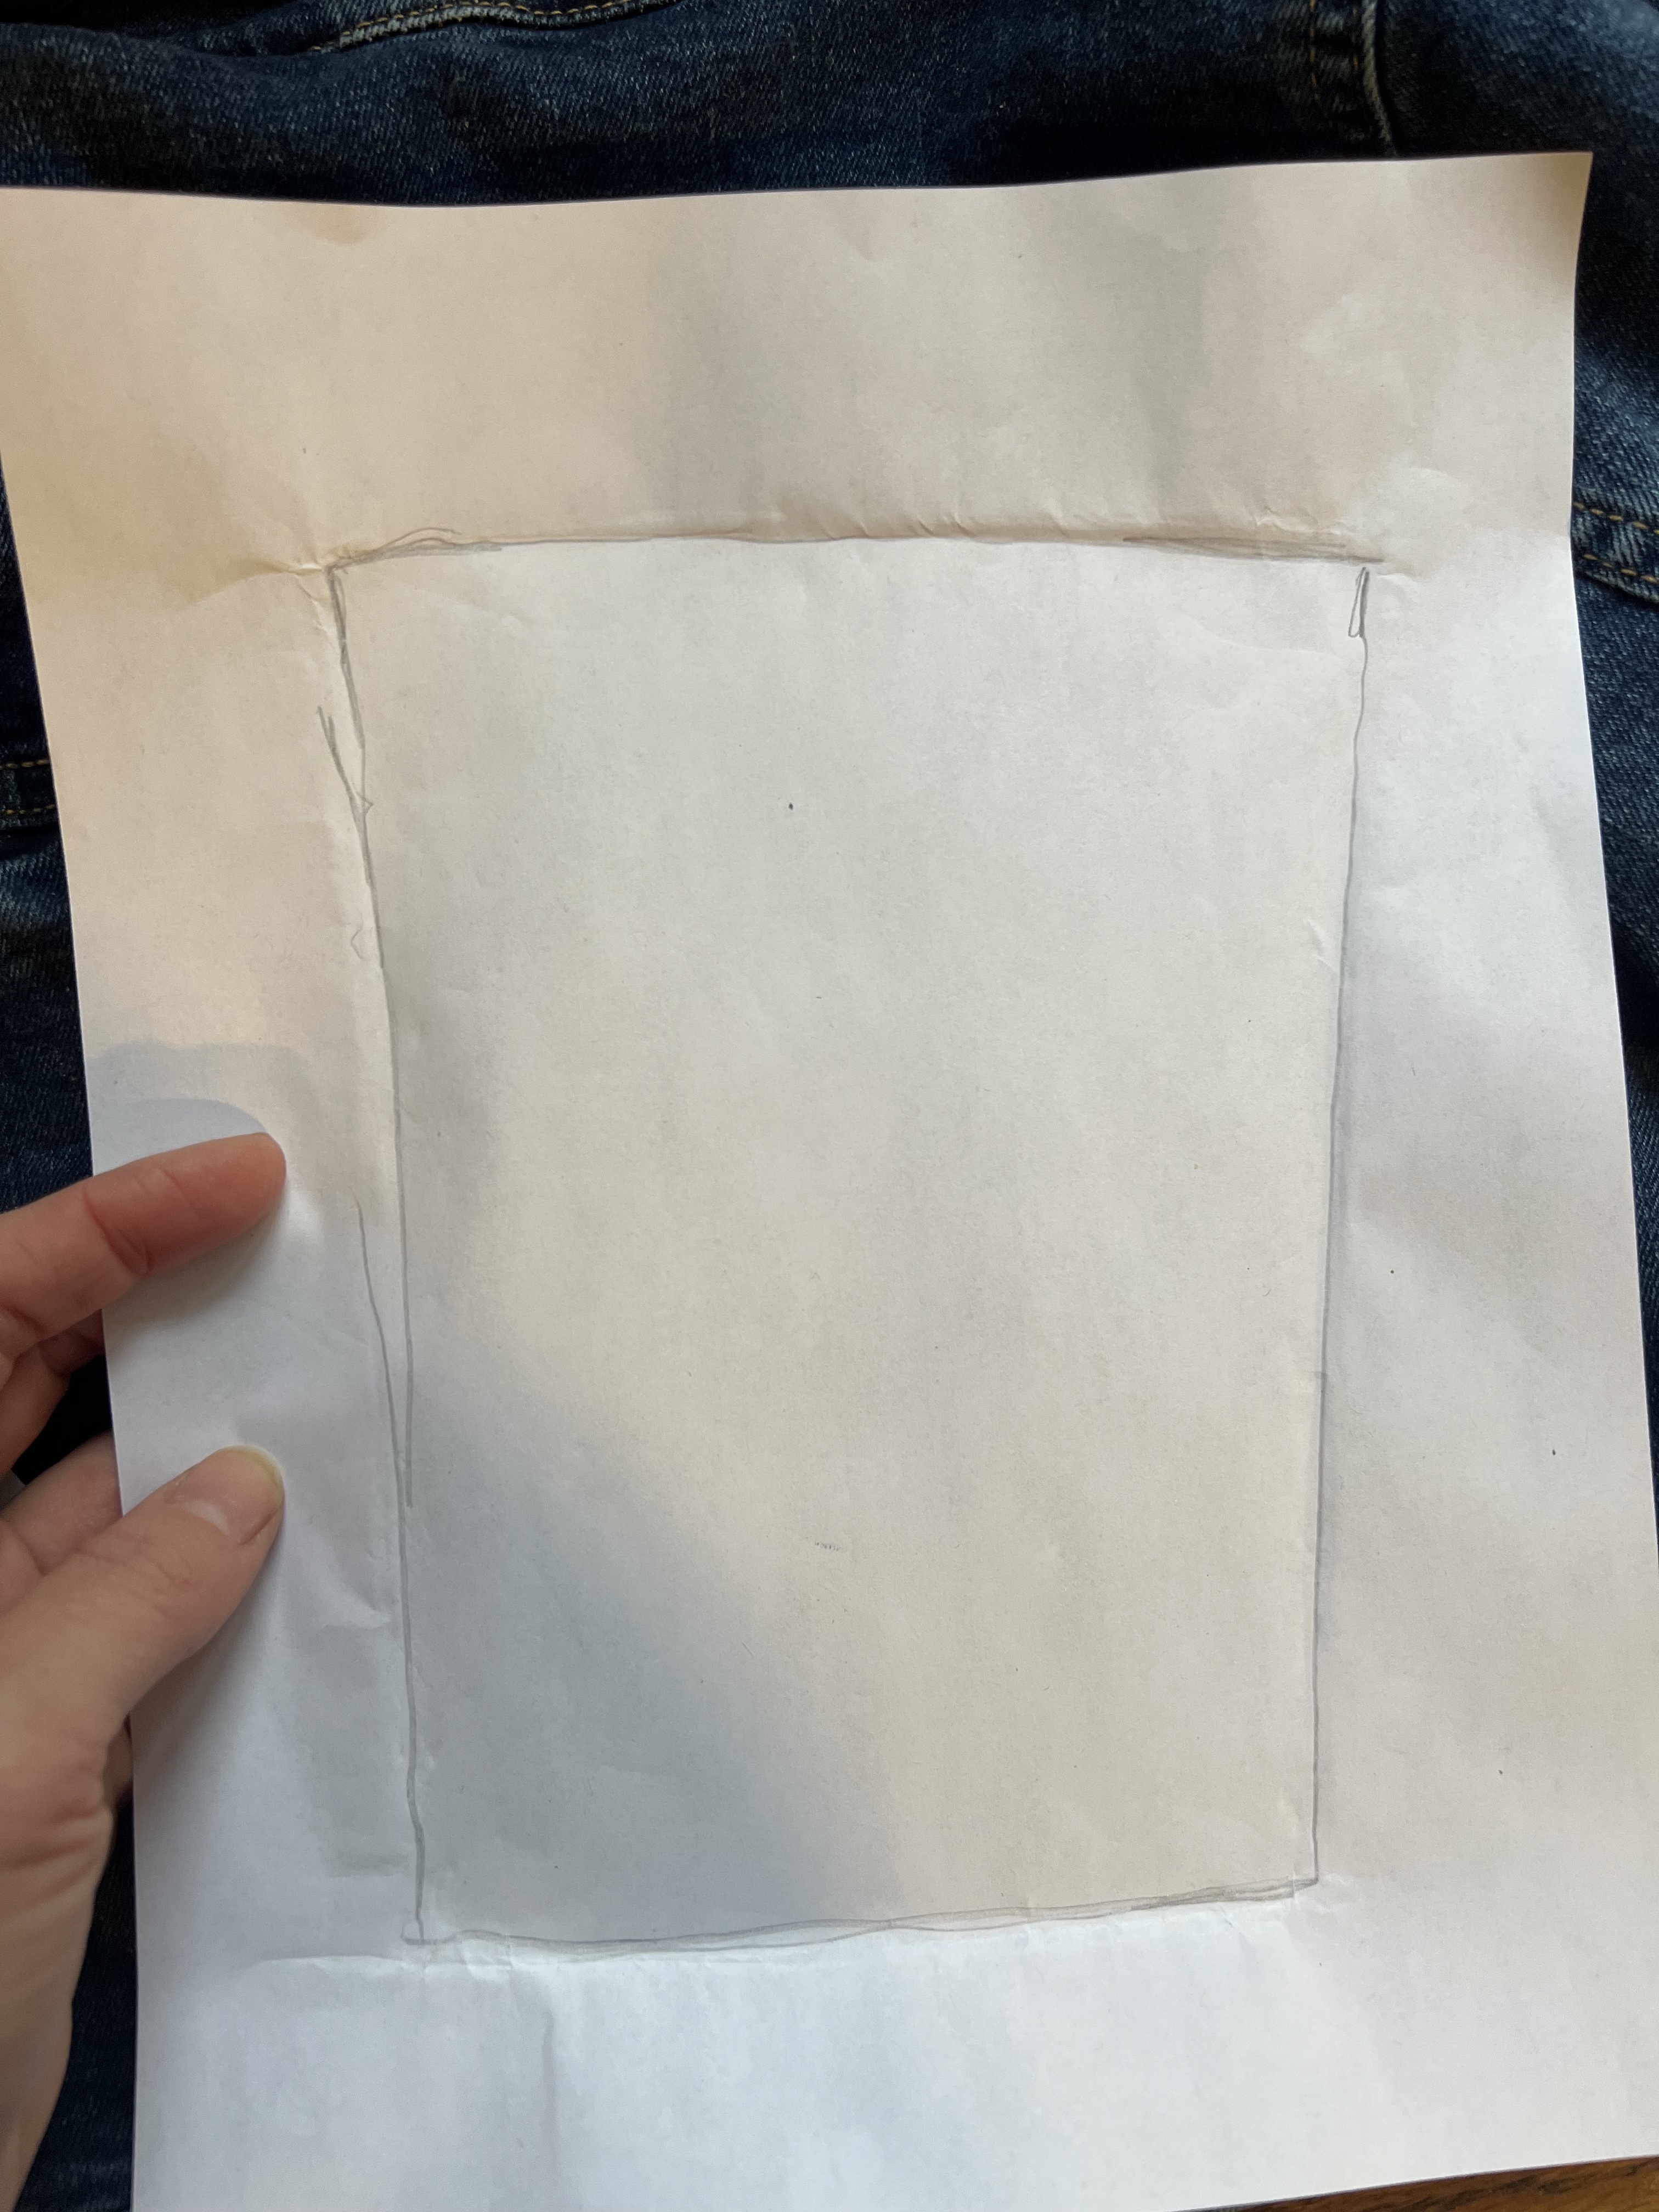
To begin, lay out your jacket. I will be working on the center panel on the backside, so that is what I have face up.


You can either measure the area with a ruler, or you can create your own paper pieced quilt block based on the jacket itself. Alternatively, you could use a quilt block that you have made already. If you are paper piecing, simply place your paper over the jacket and run your finger along the seams that you want your block to be inside of. This gives you a good perimeter to work with, especially if your jacket has curves seams like the one I’m working with.


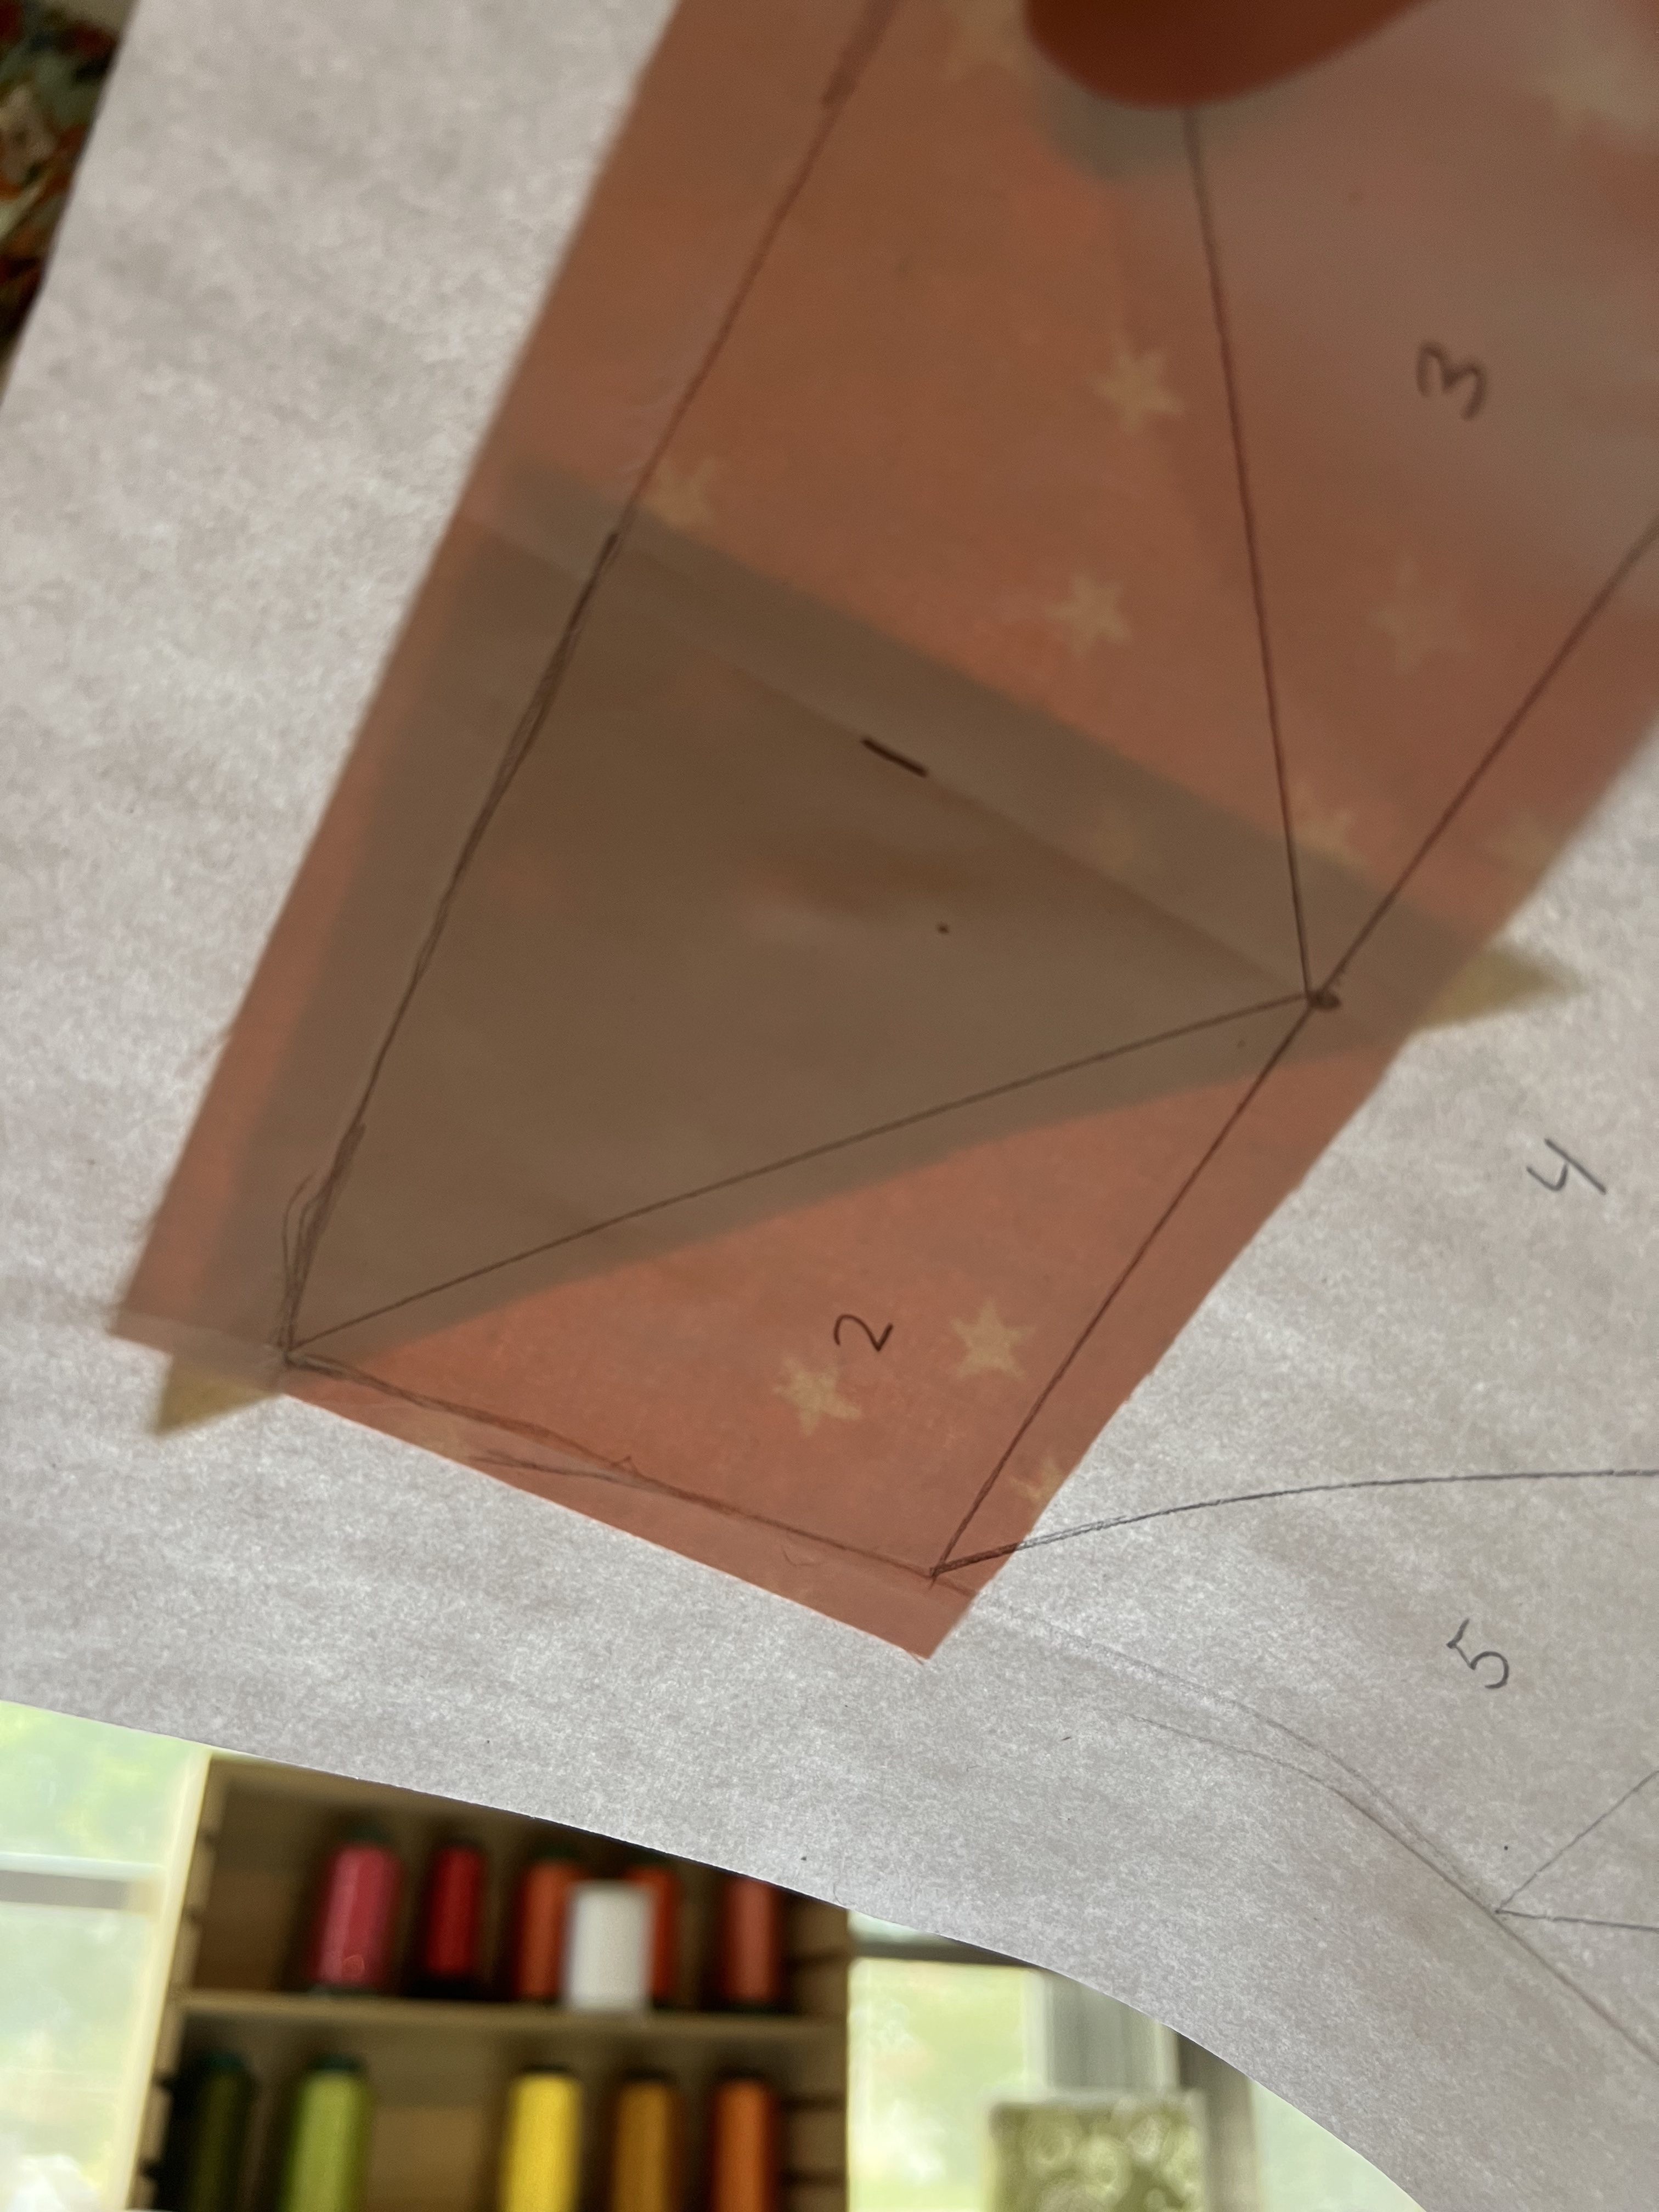
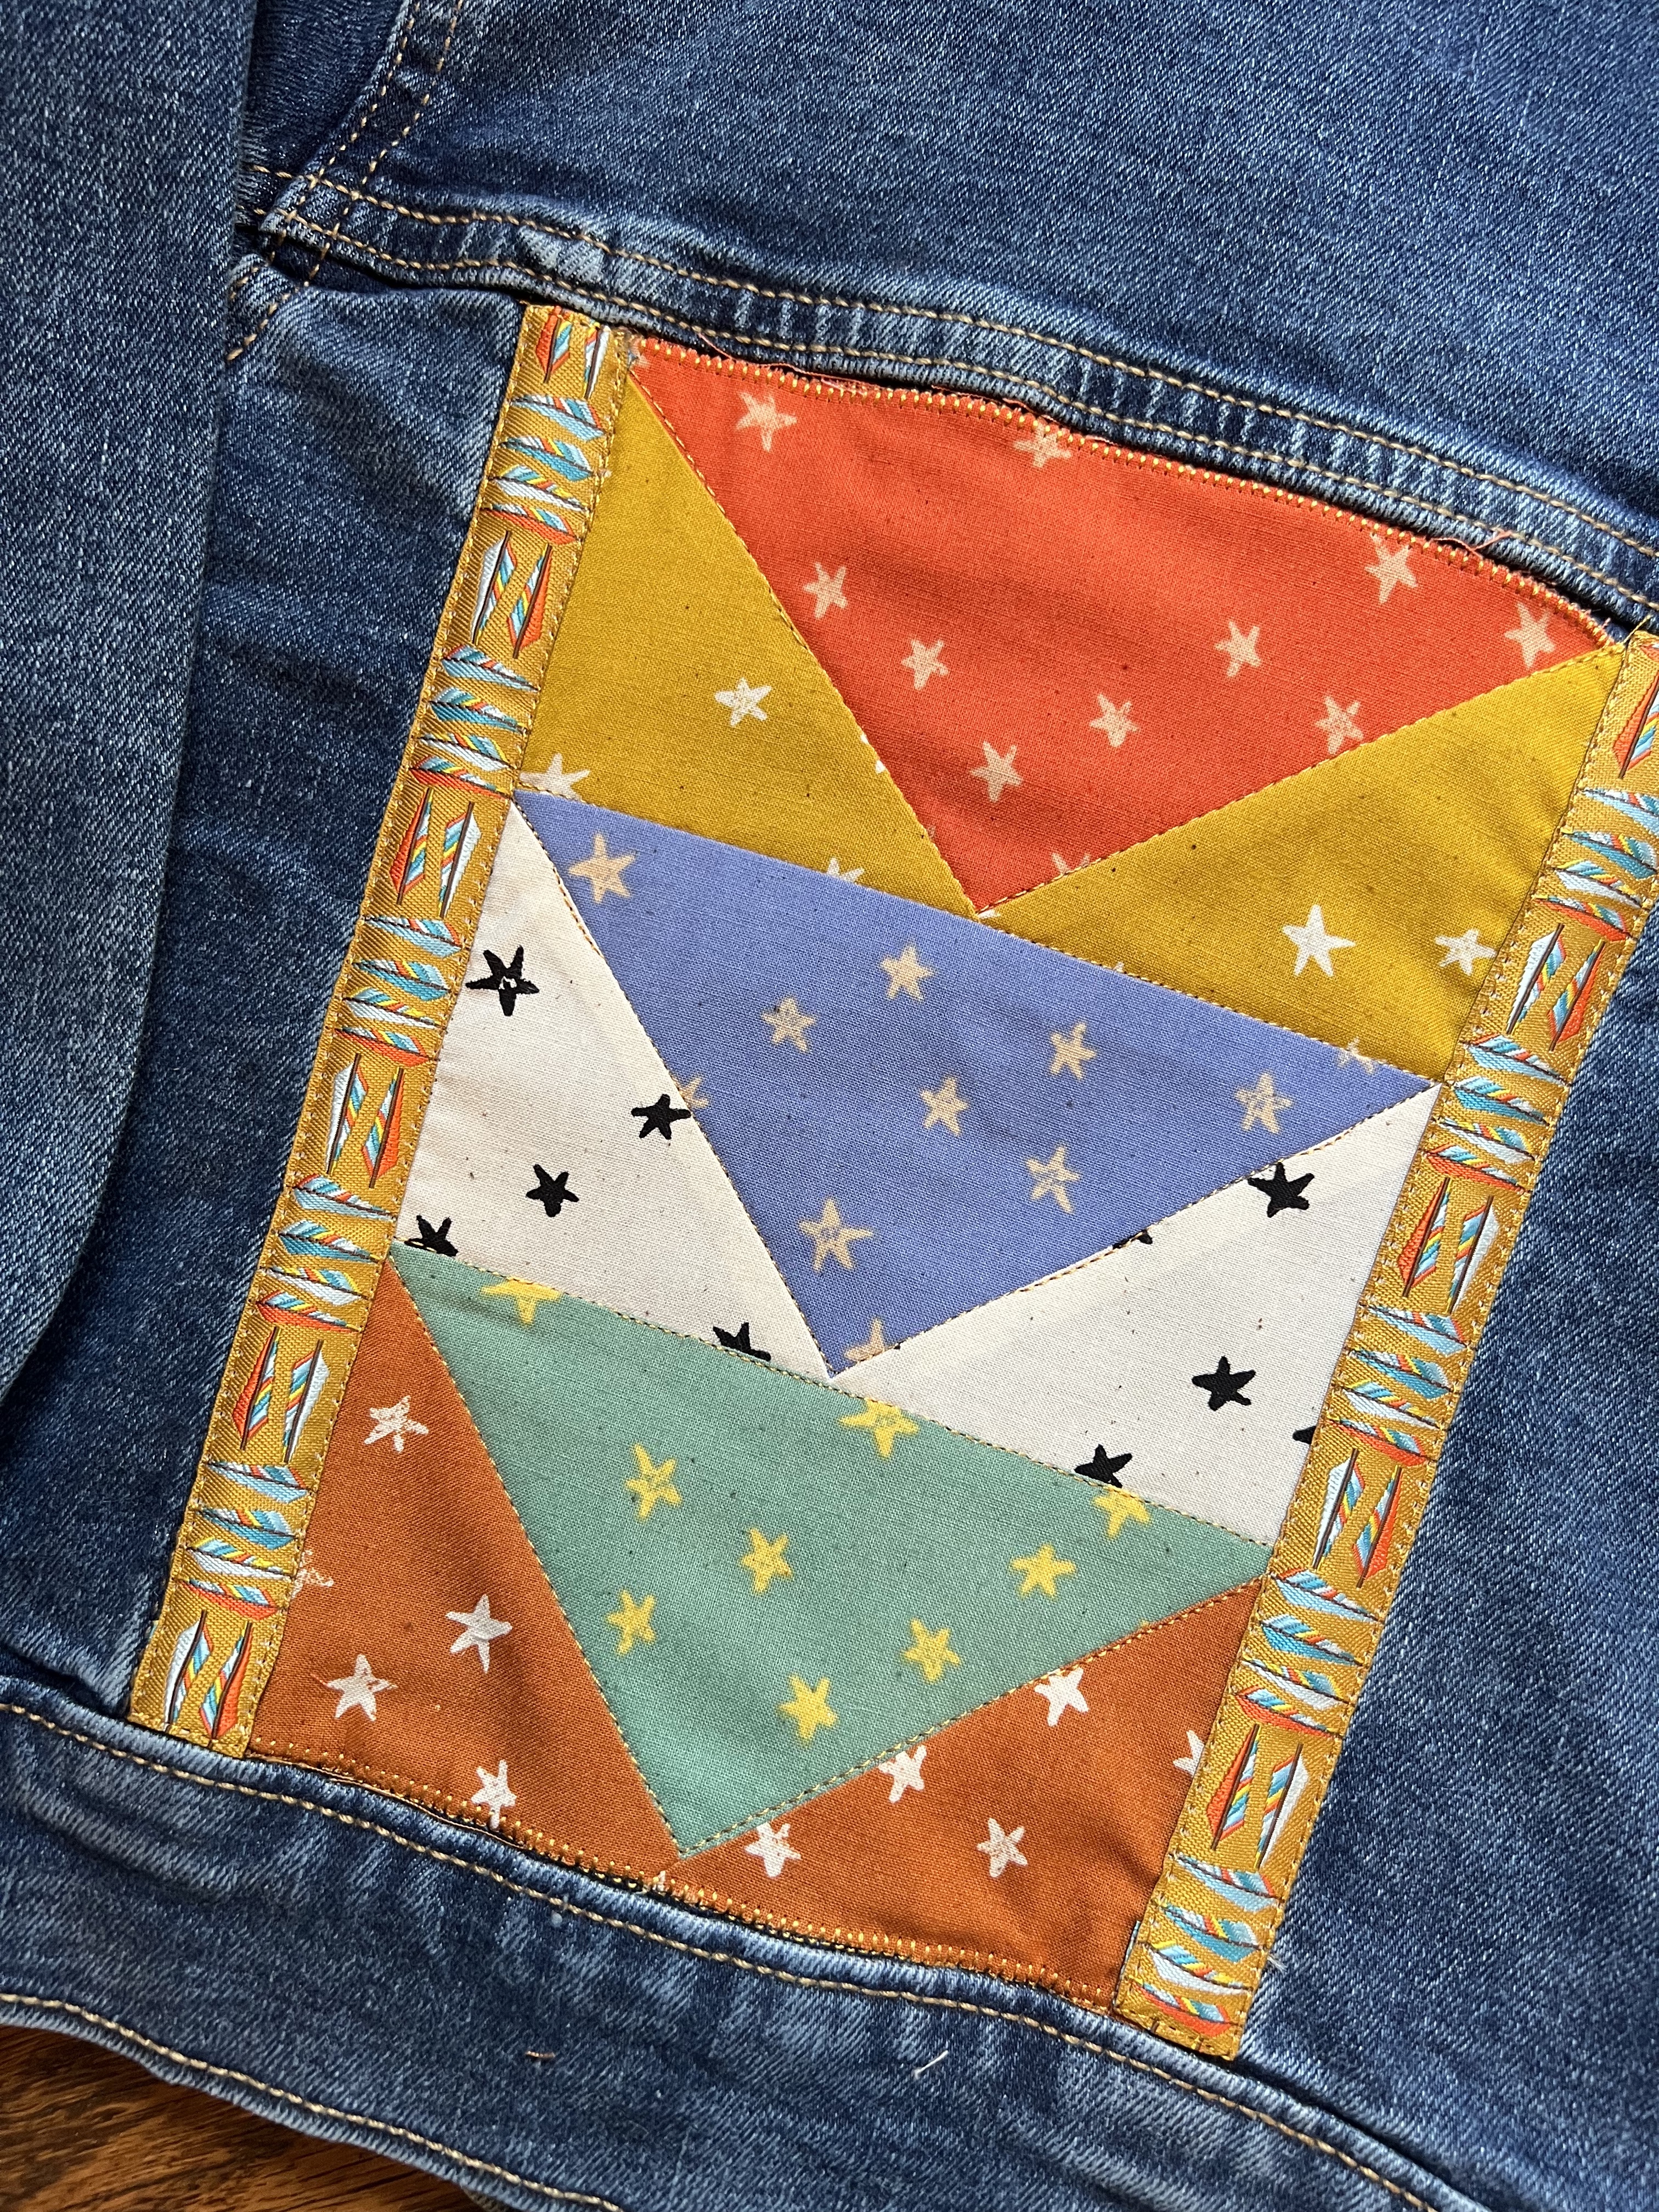
Now trace over your lines with a pencil and draw out the pattern you’d like to follow. I am making flying geese, so I divided the area into three sections, and then marked out the proper order for sewing the pieces.


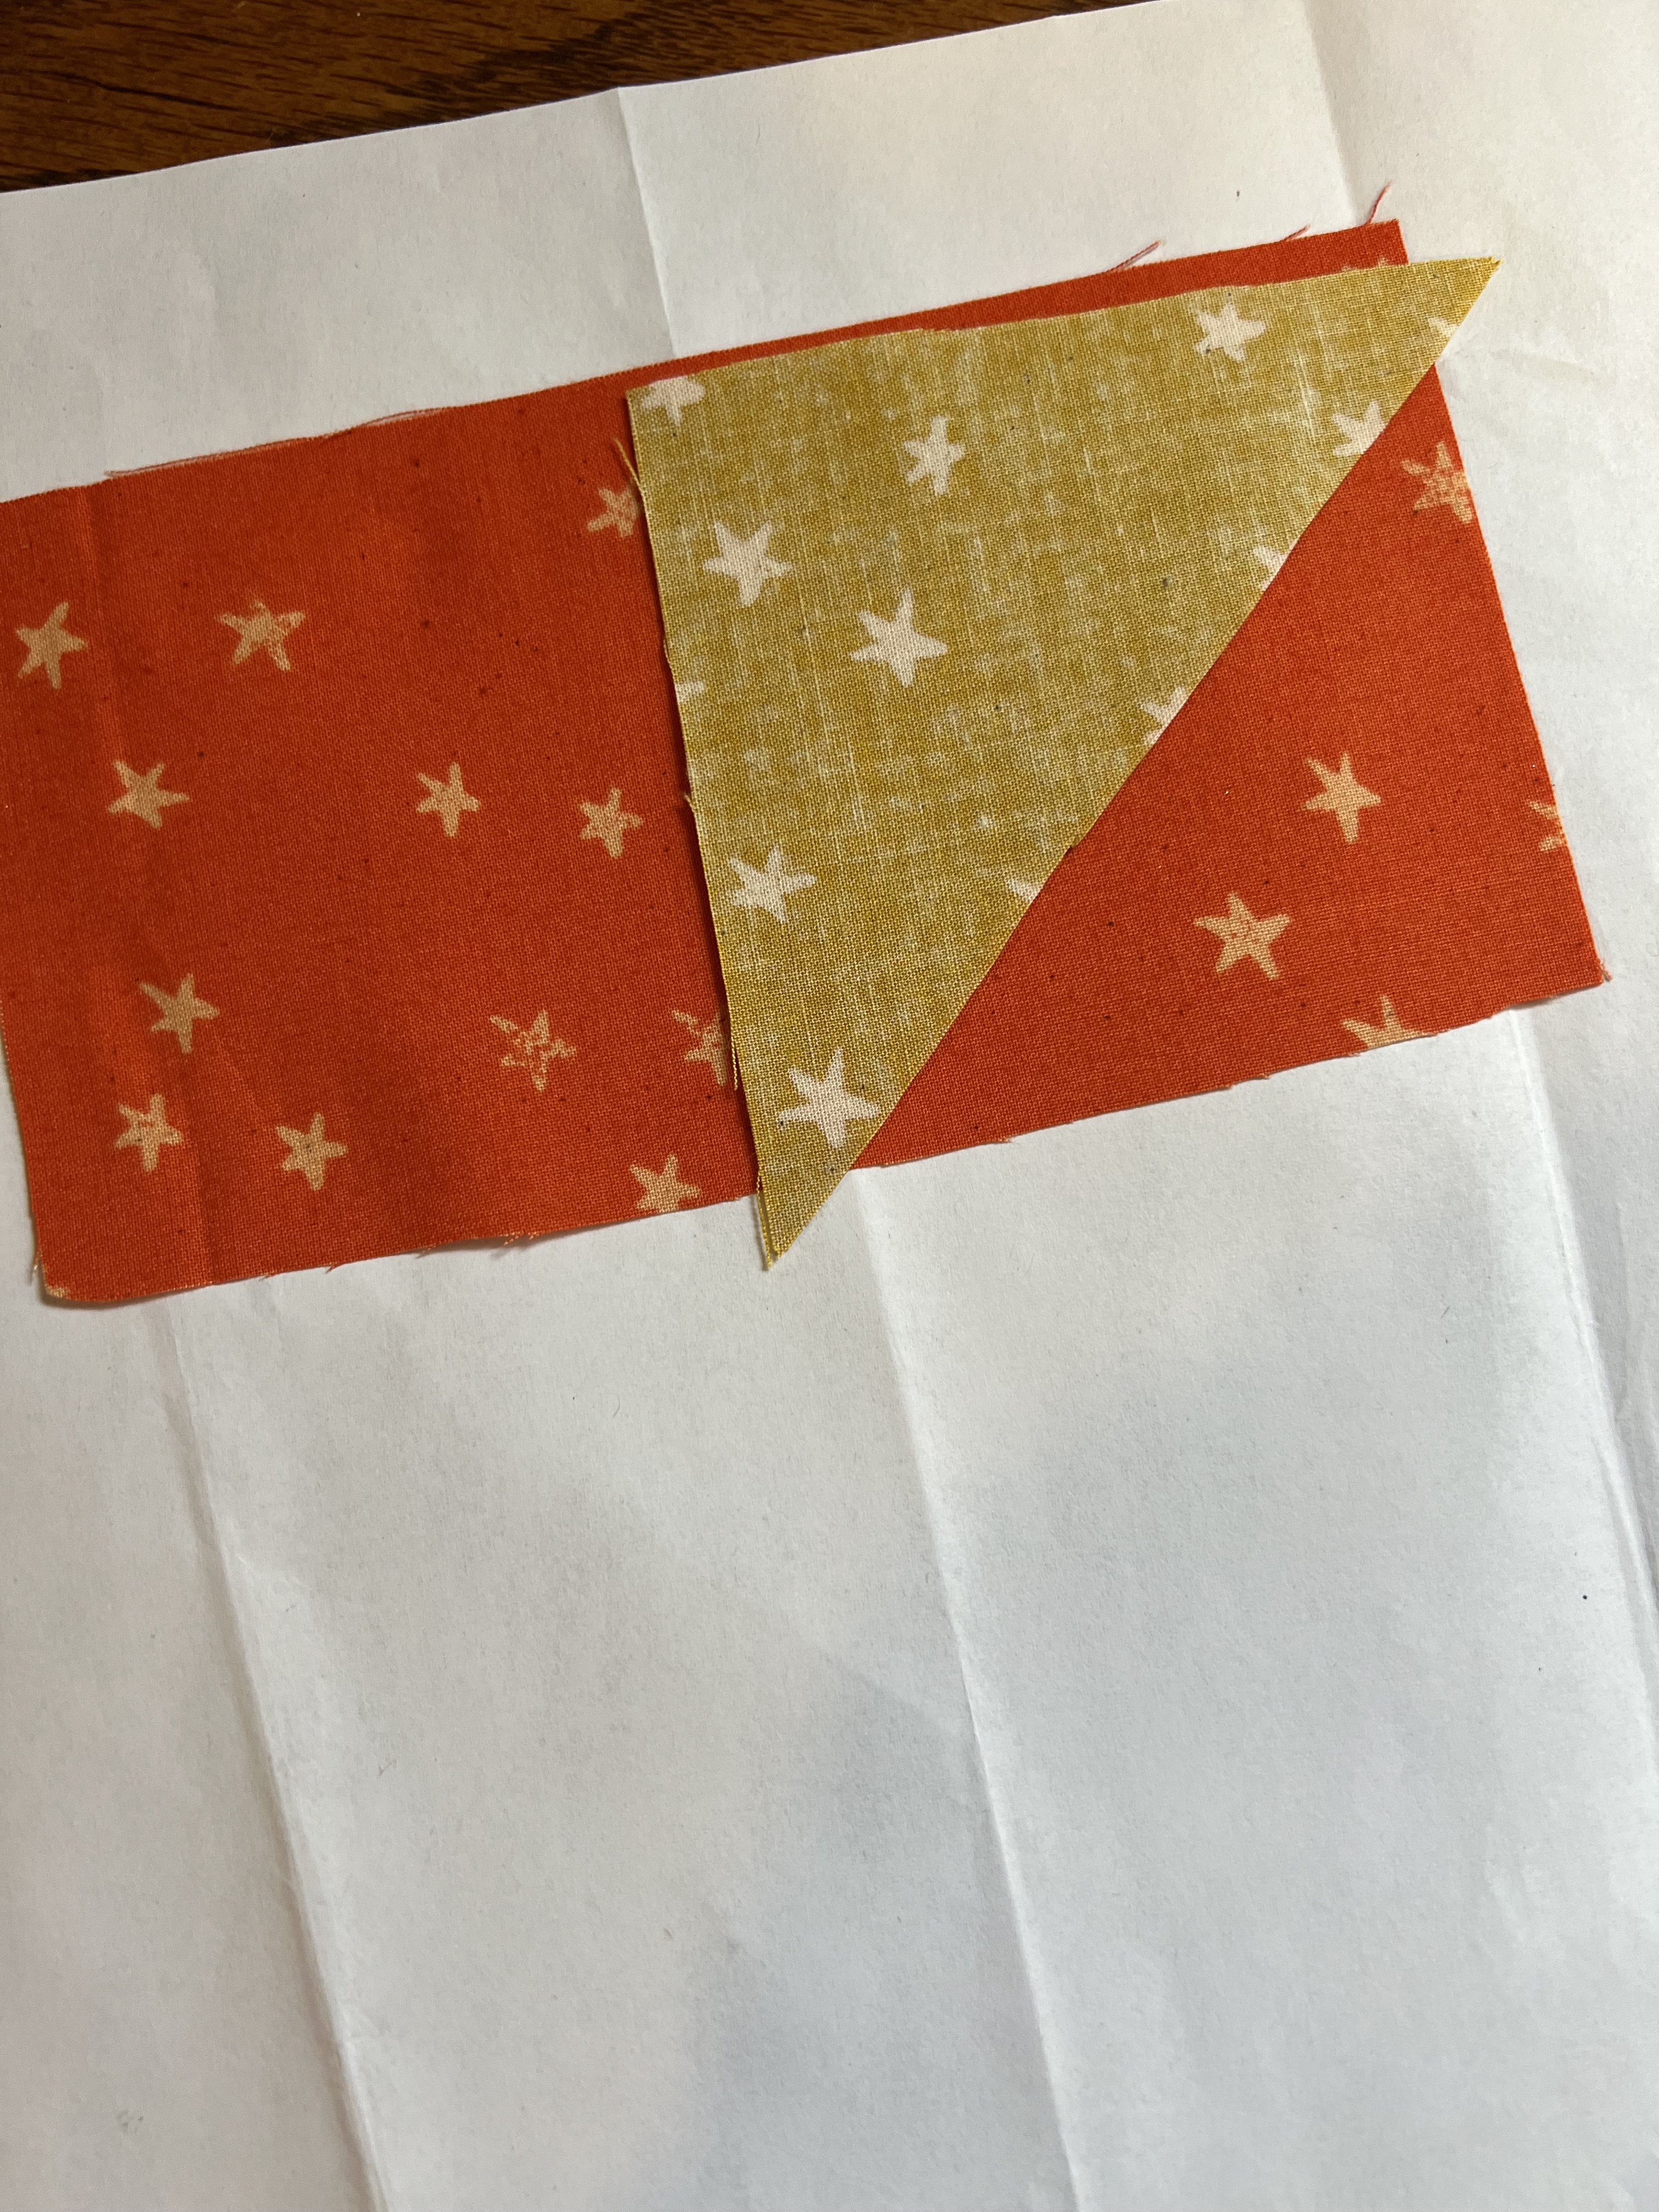
Cut your fabrics to fit in the area you want, and do be generous. Paper piecing is pretty accurate as far as being able to sew nice crisp lines, but it is less exact when cutting fabric and laying it out. You’ll see what I mean here in a moment. You’re actually going to line the fabrics up UNDER the paper, and then sew directly through the
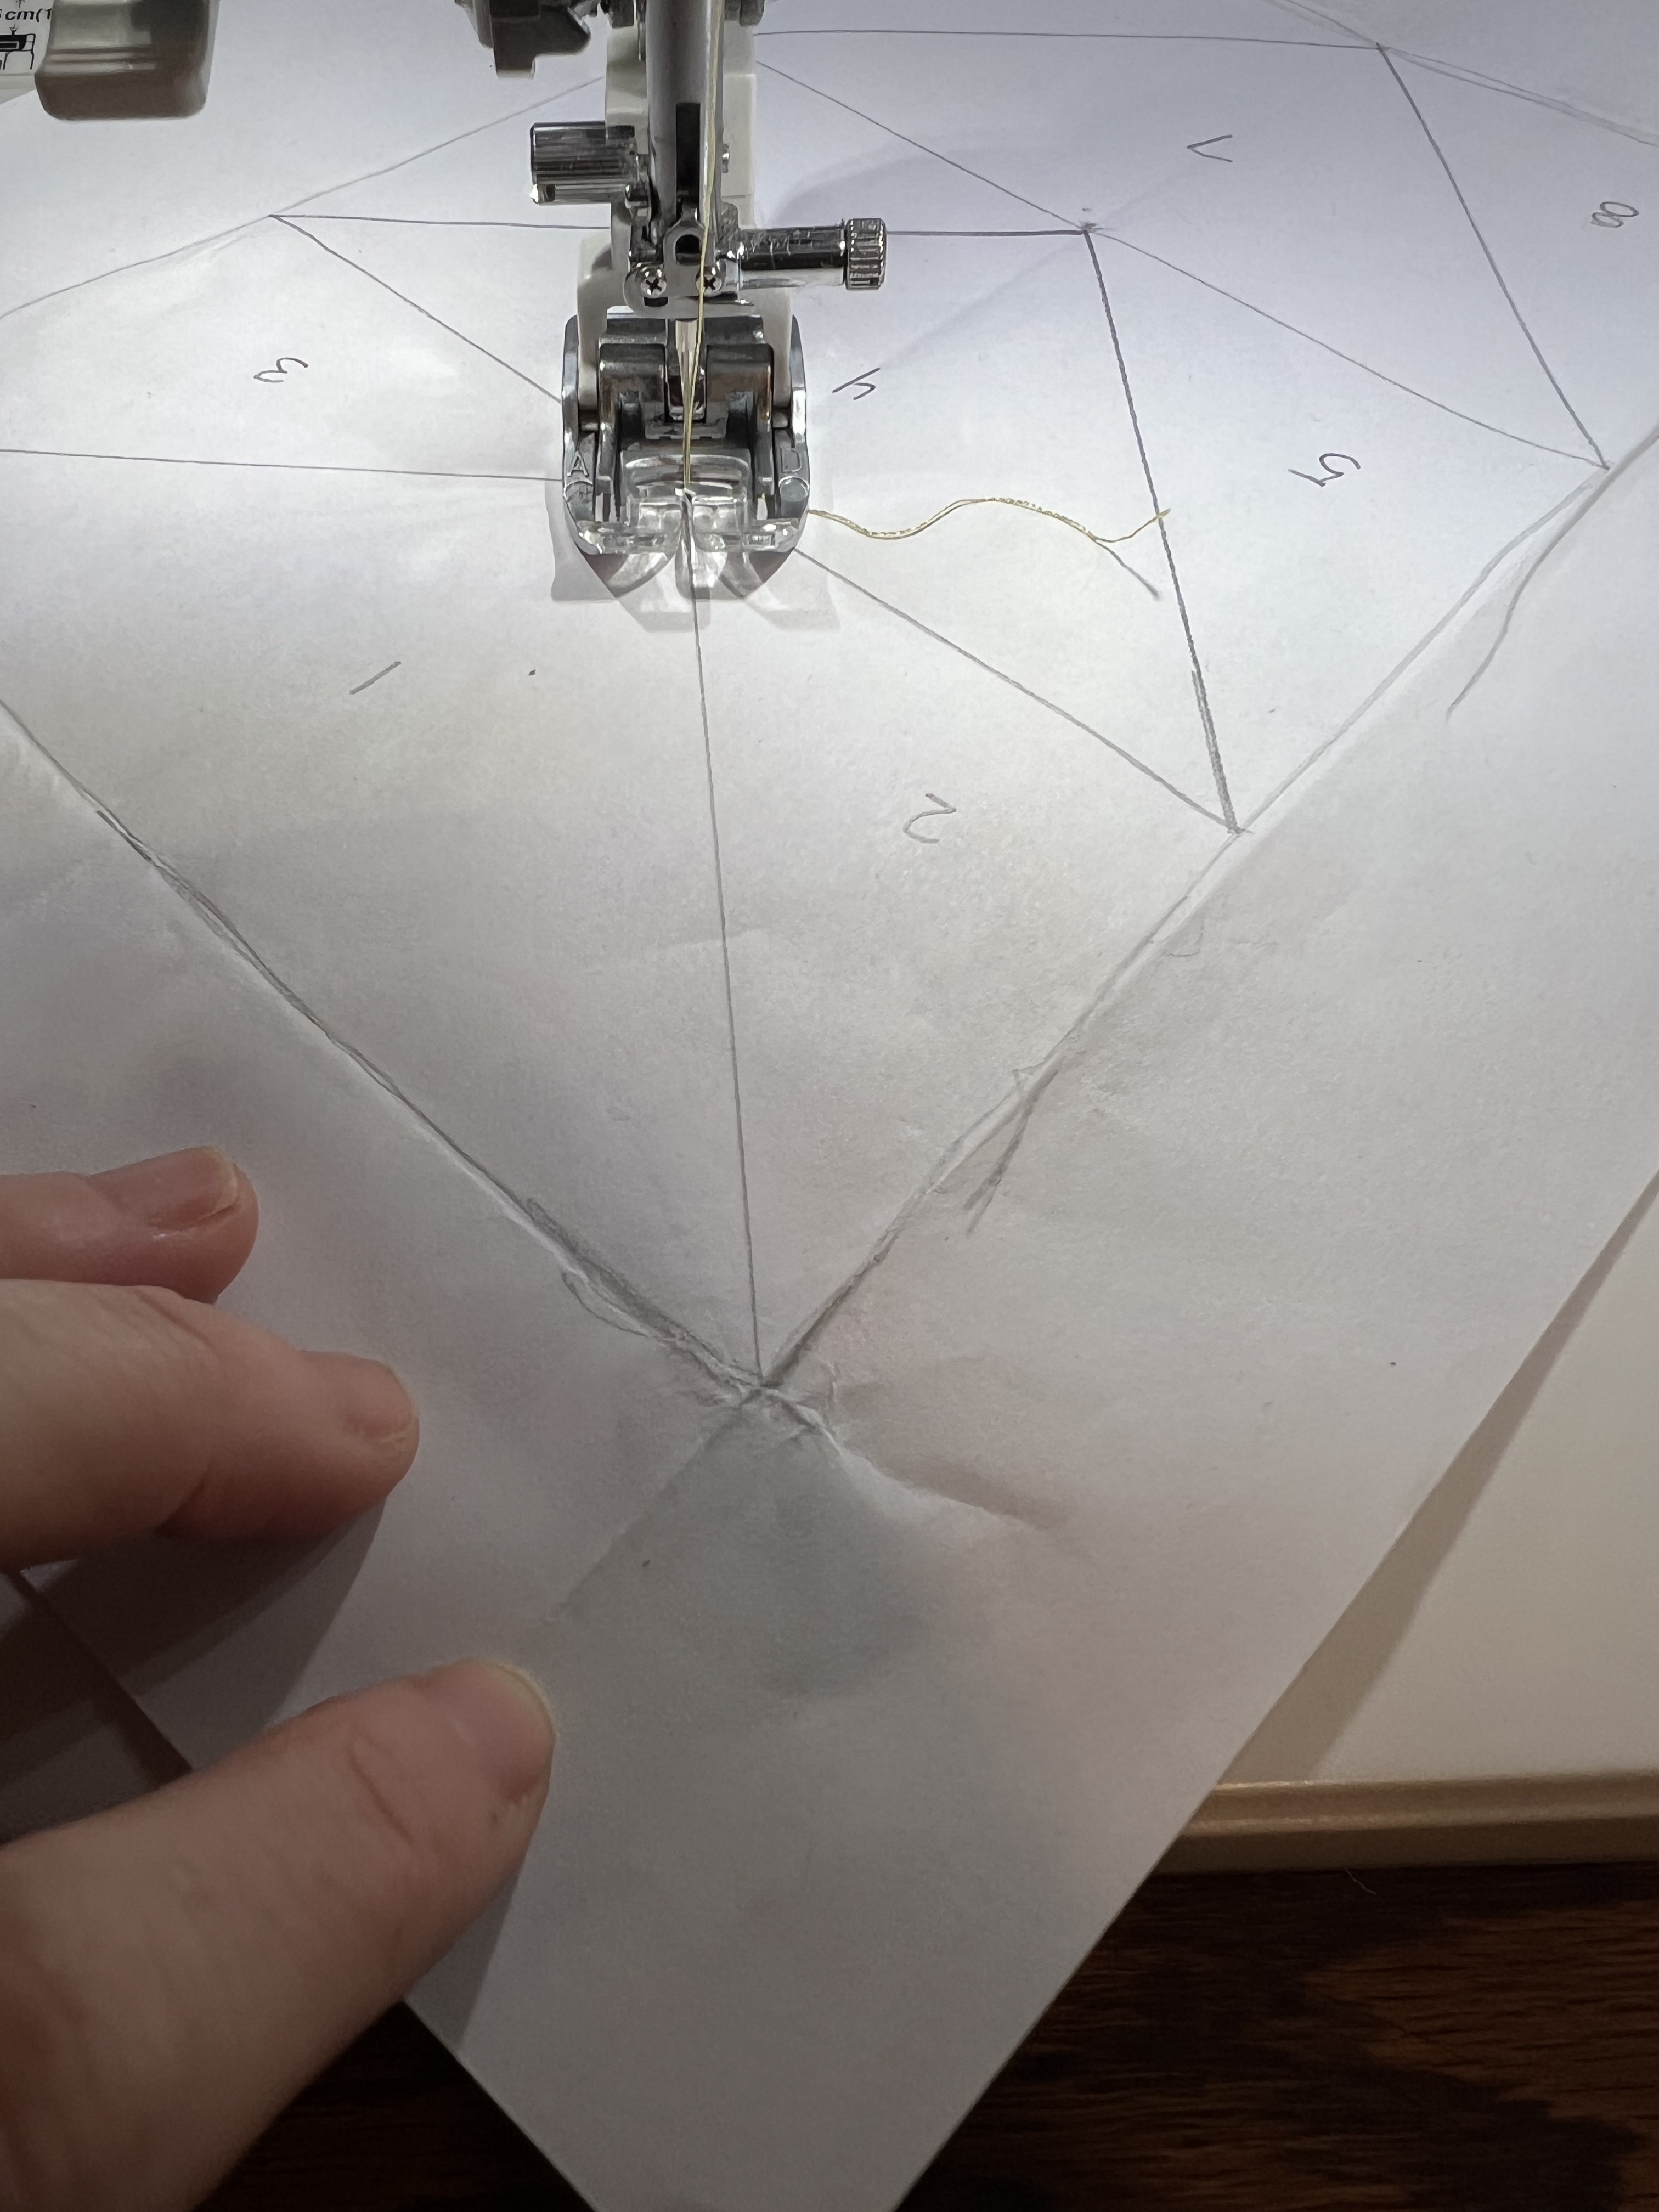
paper and fabric following the lines you’ve drawn. The trick to doing this is to take piece 1 and place it centered in the one area. You can hold your paper up to a light source so you can see the lines through the fabric. Line up piece two along the seam that joins 1&2 face down on the first fabric. If you are confused here, definitely look at the photos because this is a sewing method best learned through seeing versus reading.


Steadily hold those fabrics still under the paper and slide them under the presser foot on your machine.


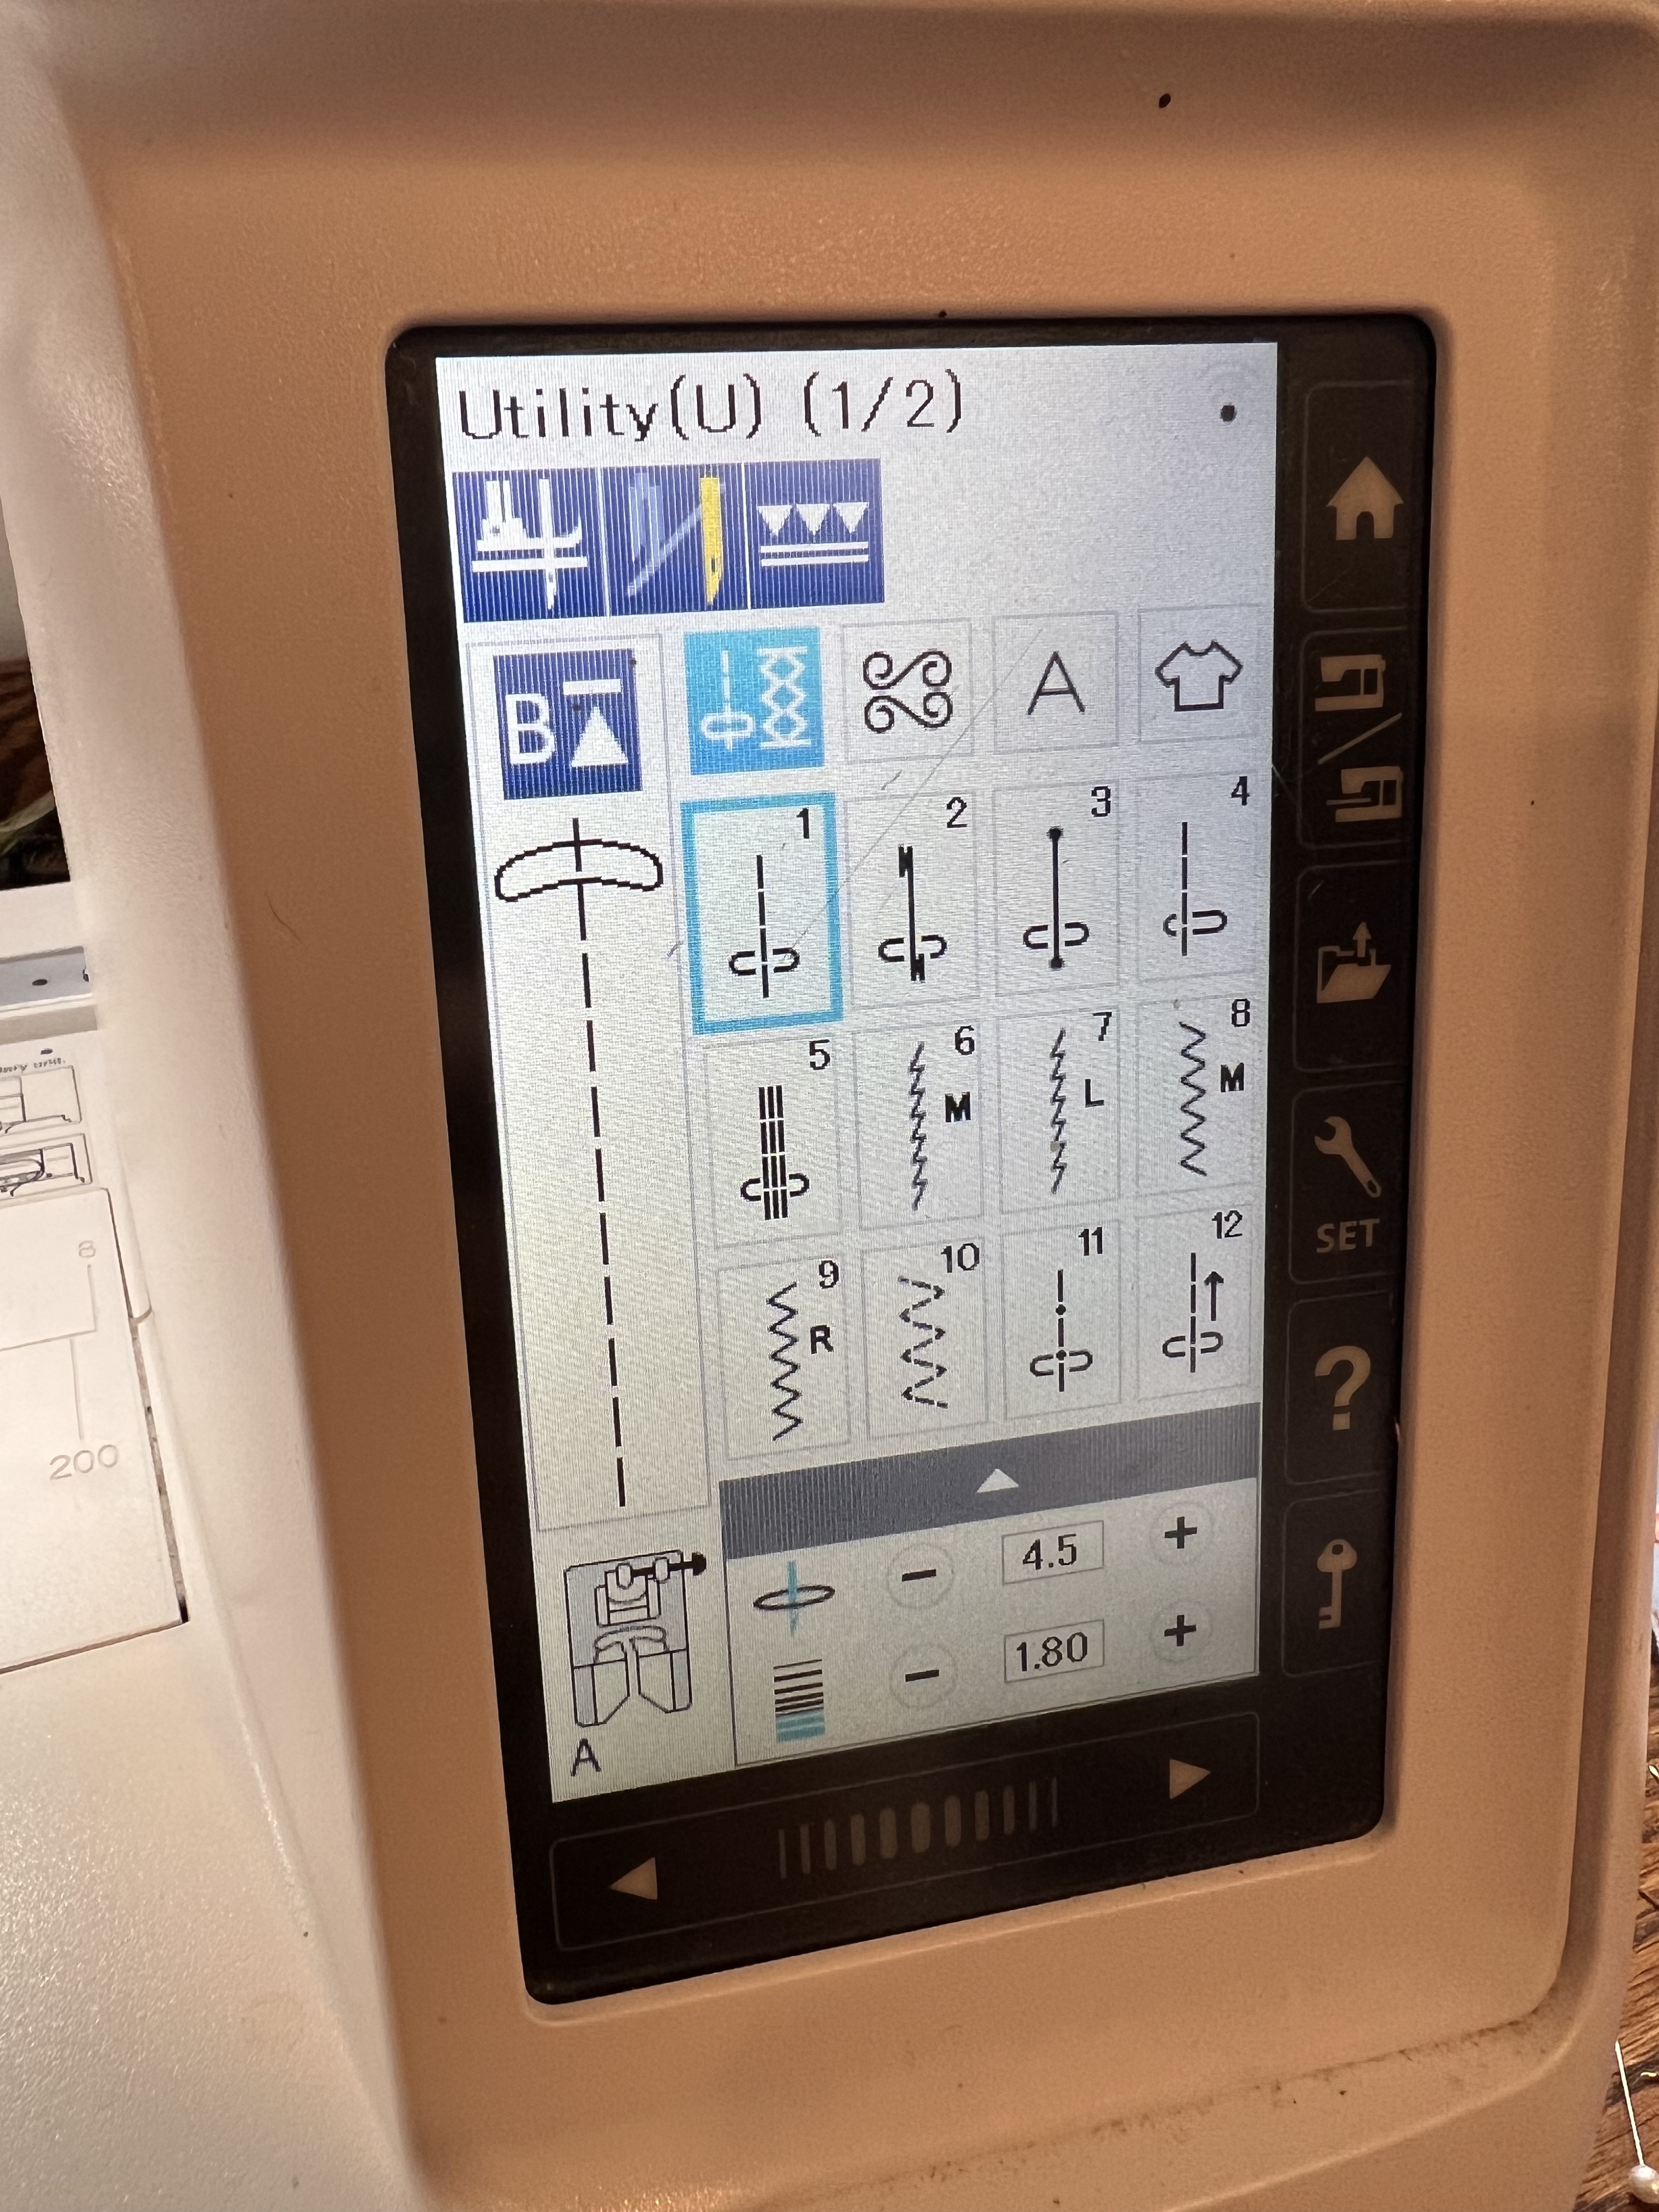
Use a shortened stitch length, and then sew along the line between piece 1 and 2.


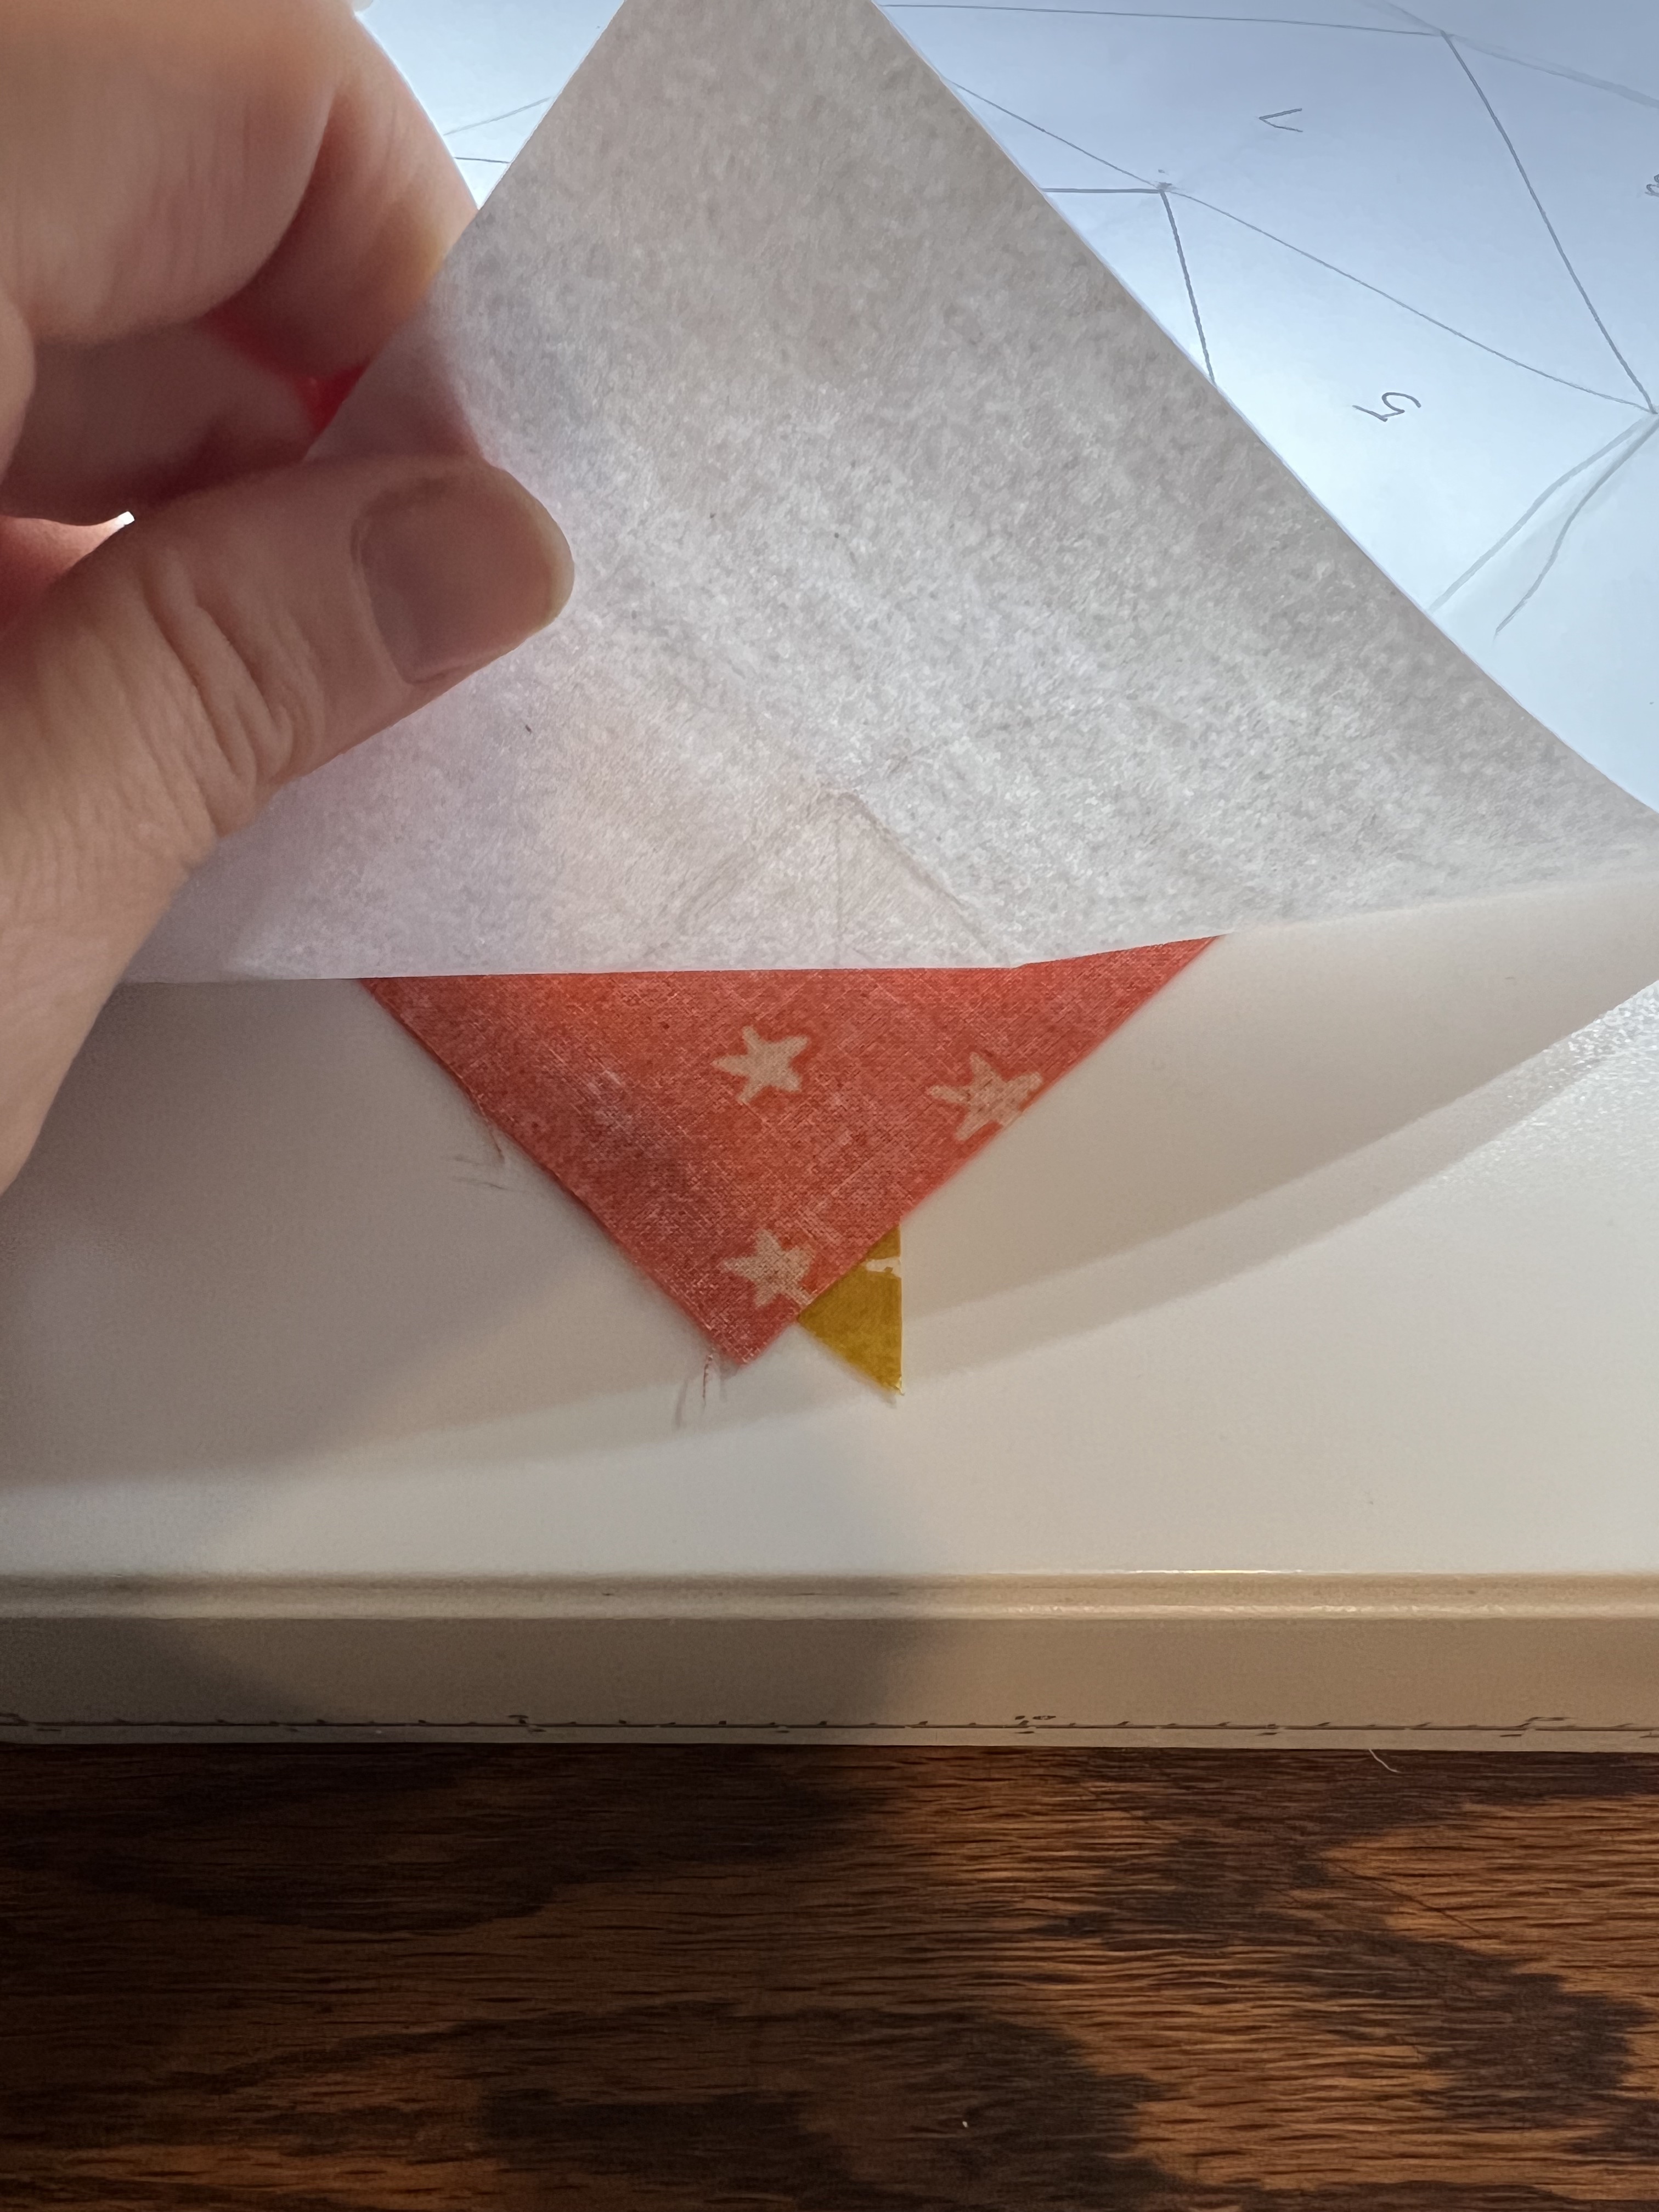
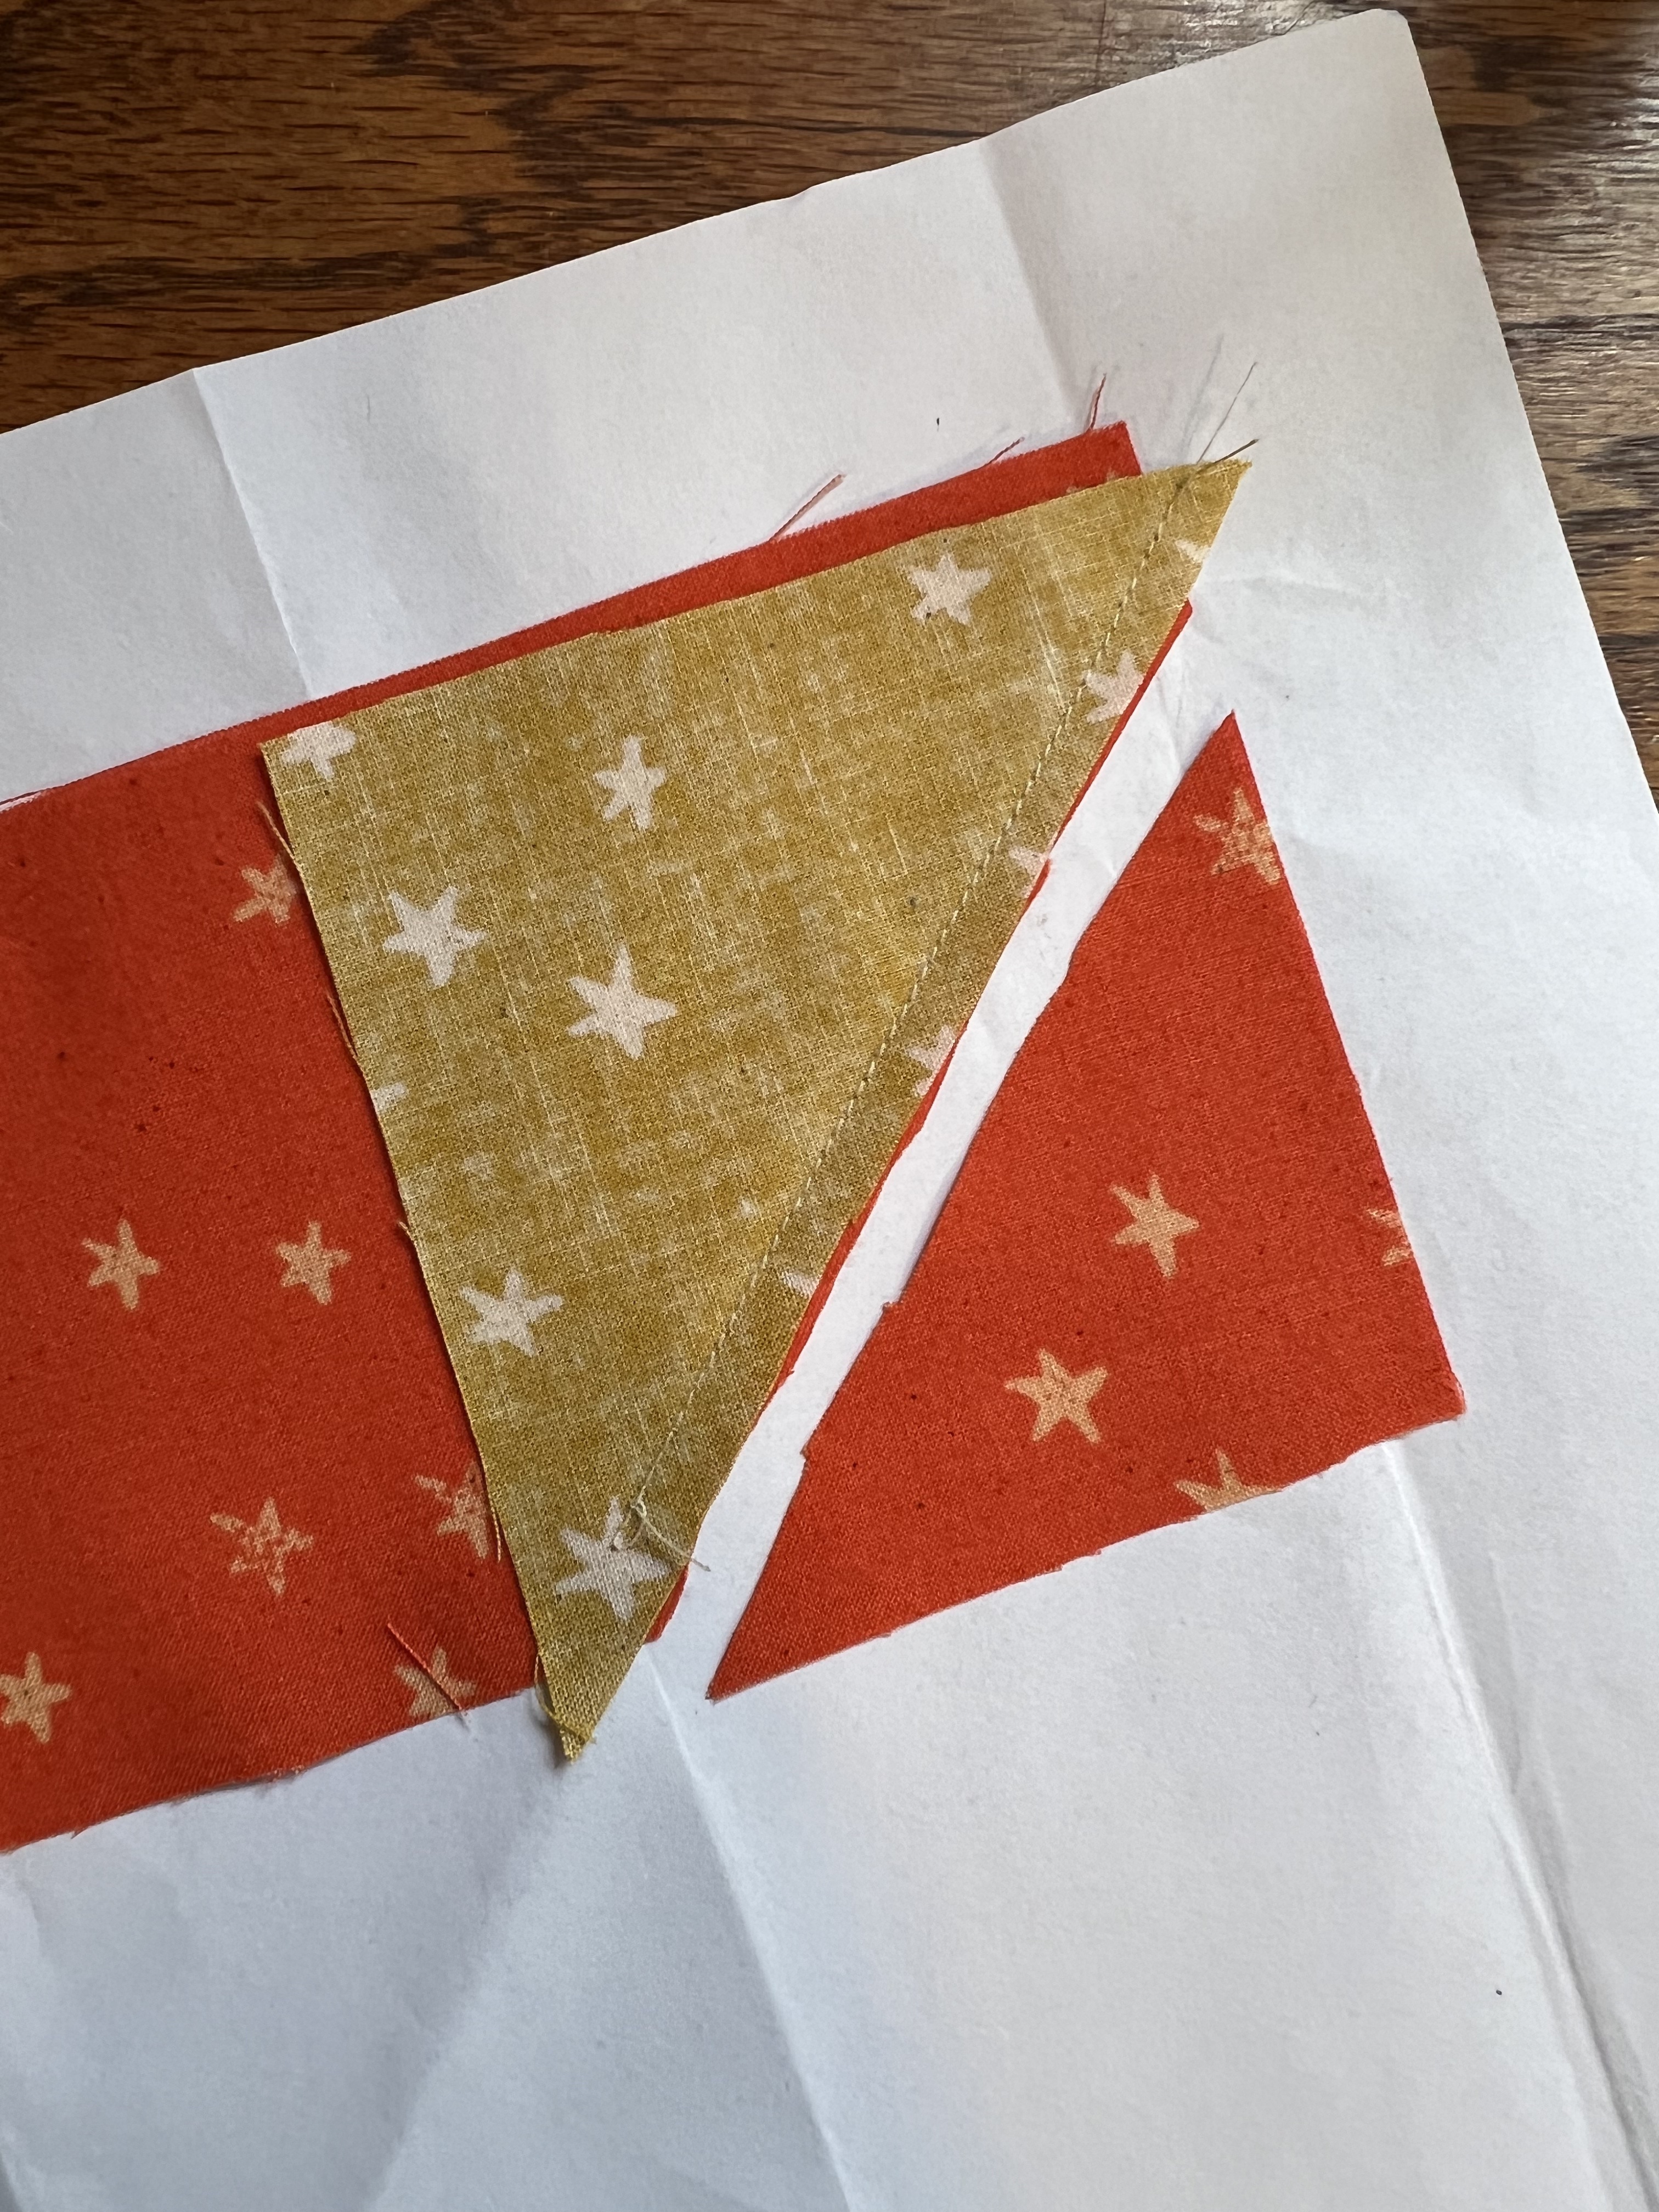
Trim off the excess fabric like so:


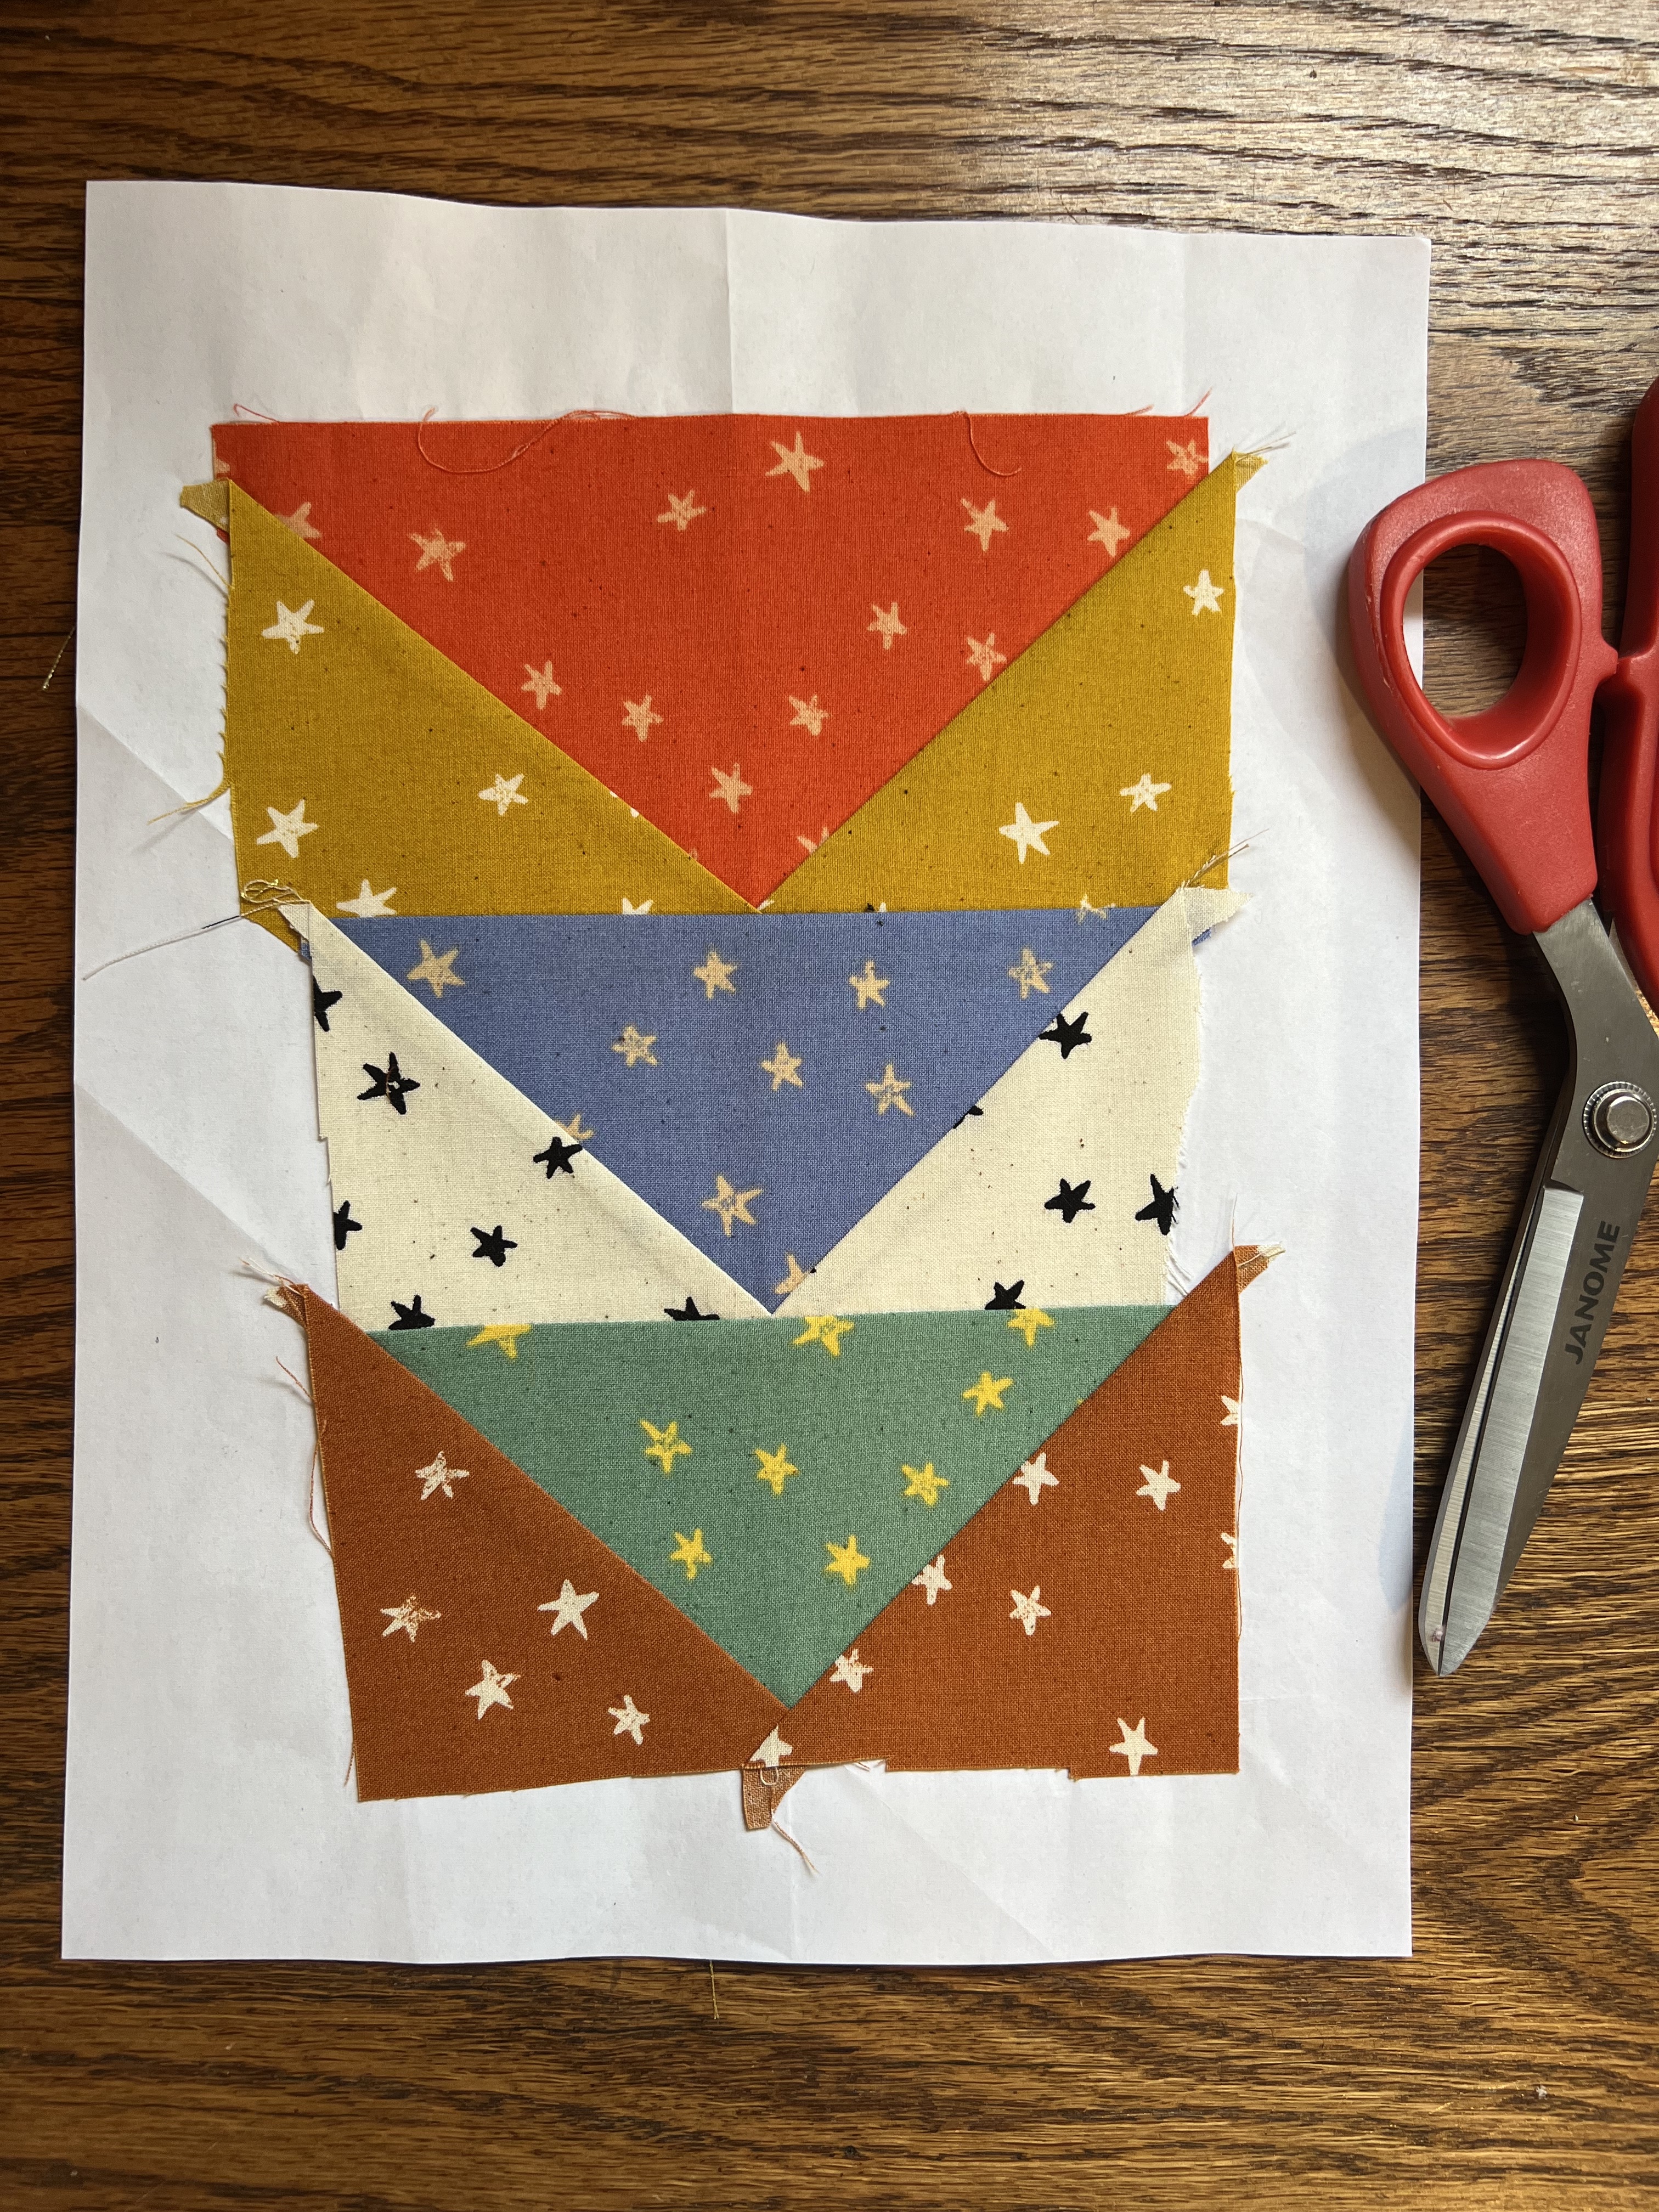
Continue stitching each new section in this order until you are finished. It should look something like this on each side:


You’ll want to make sure your design fits prior to cutting, so double check now. If you are happy, trim up your fabric and set it in place.


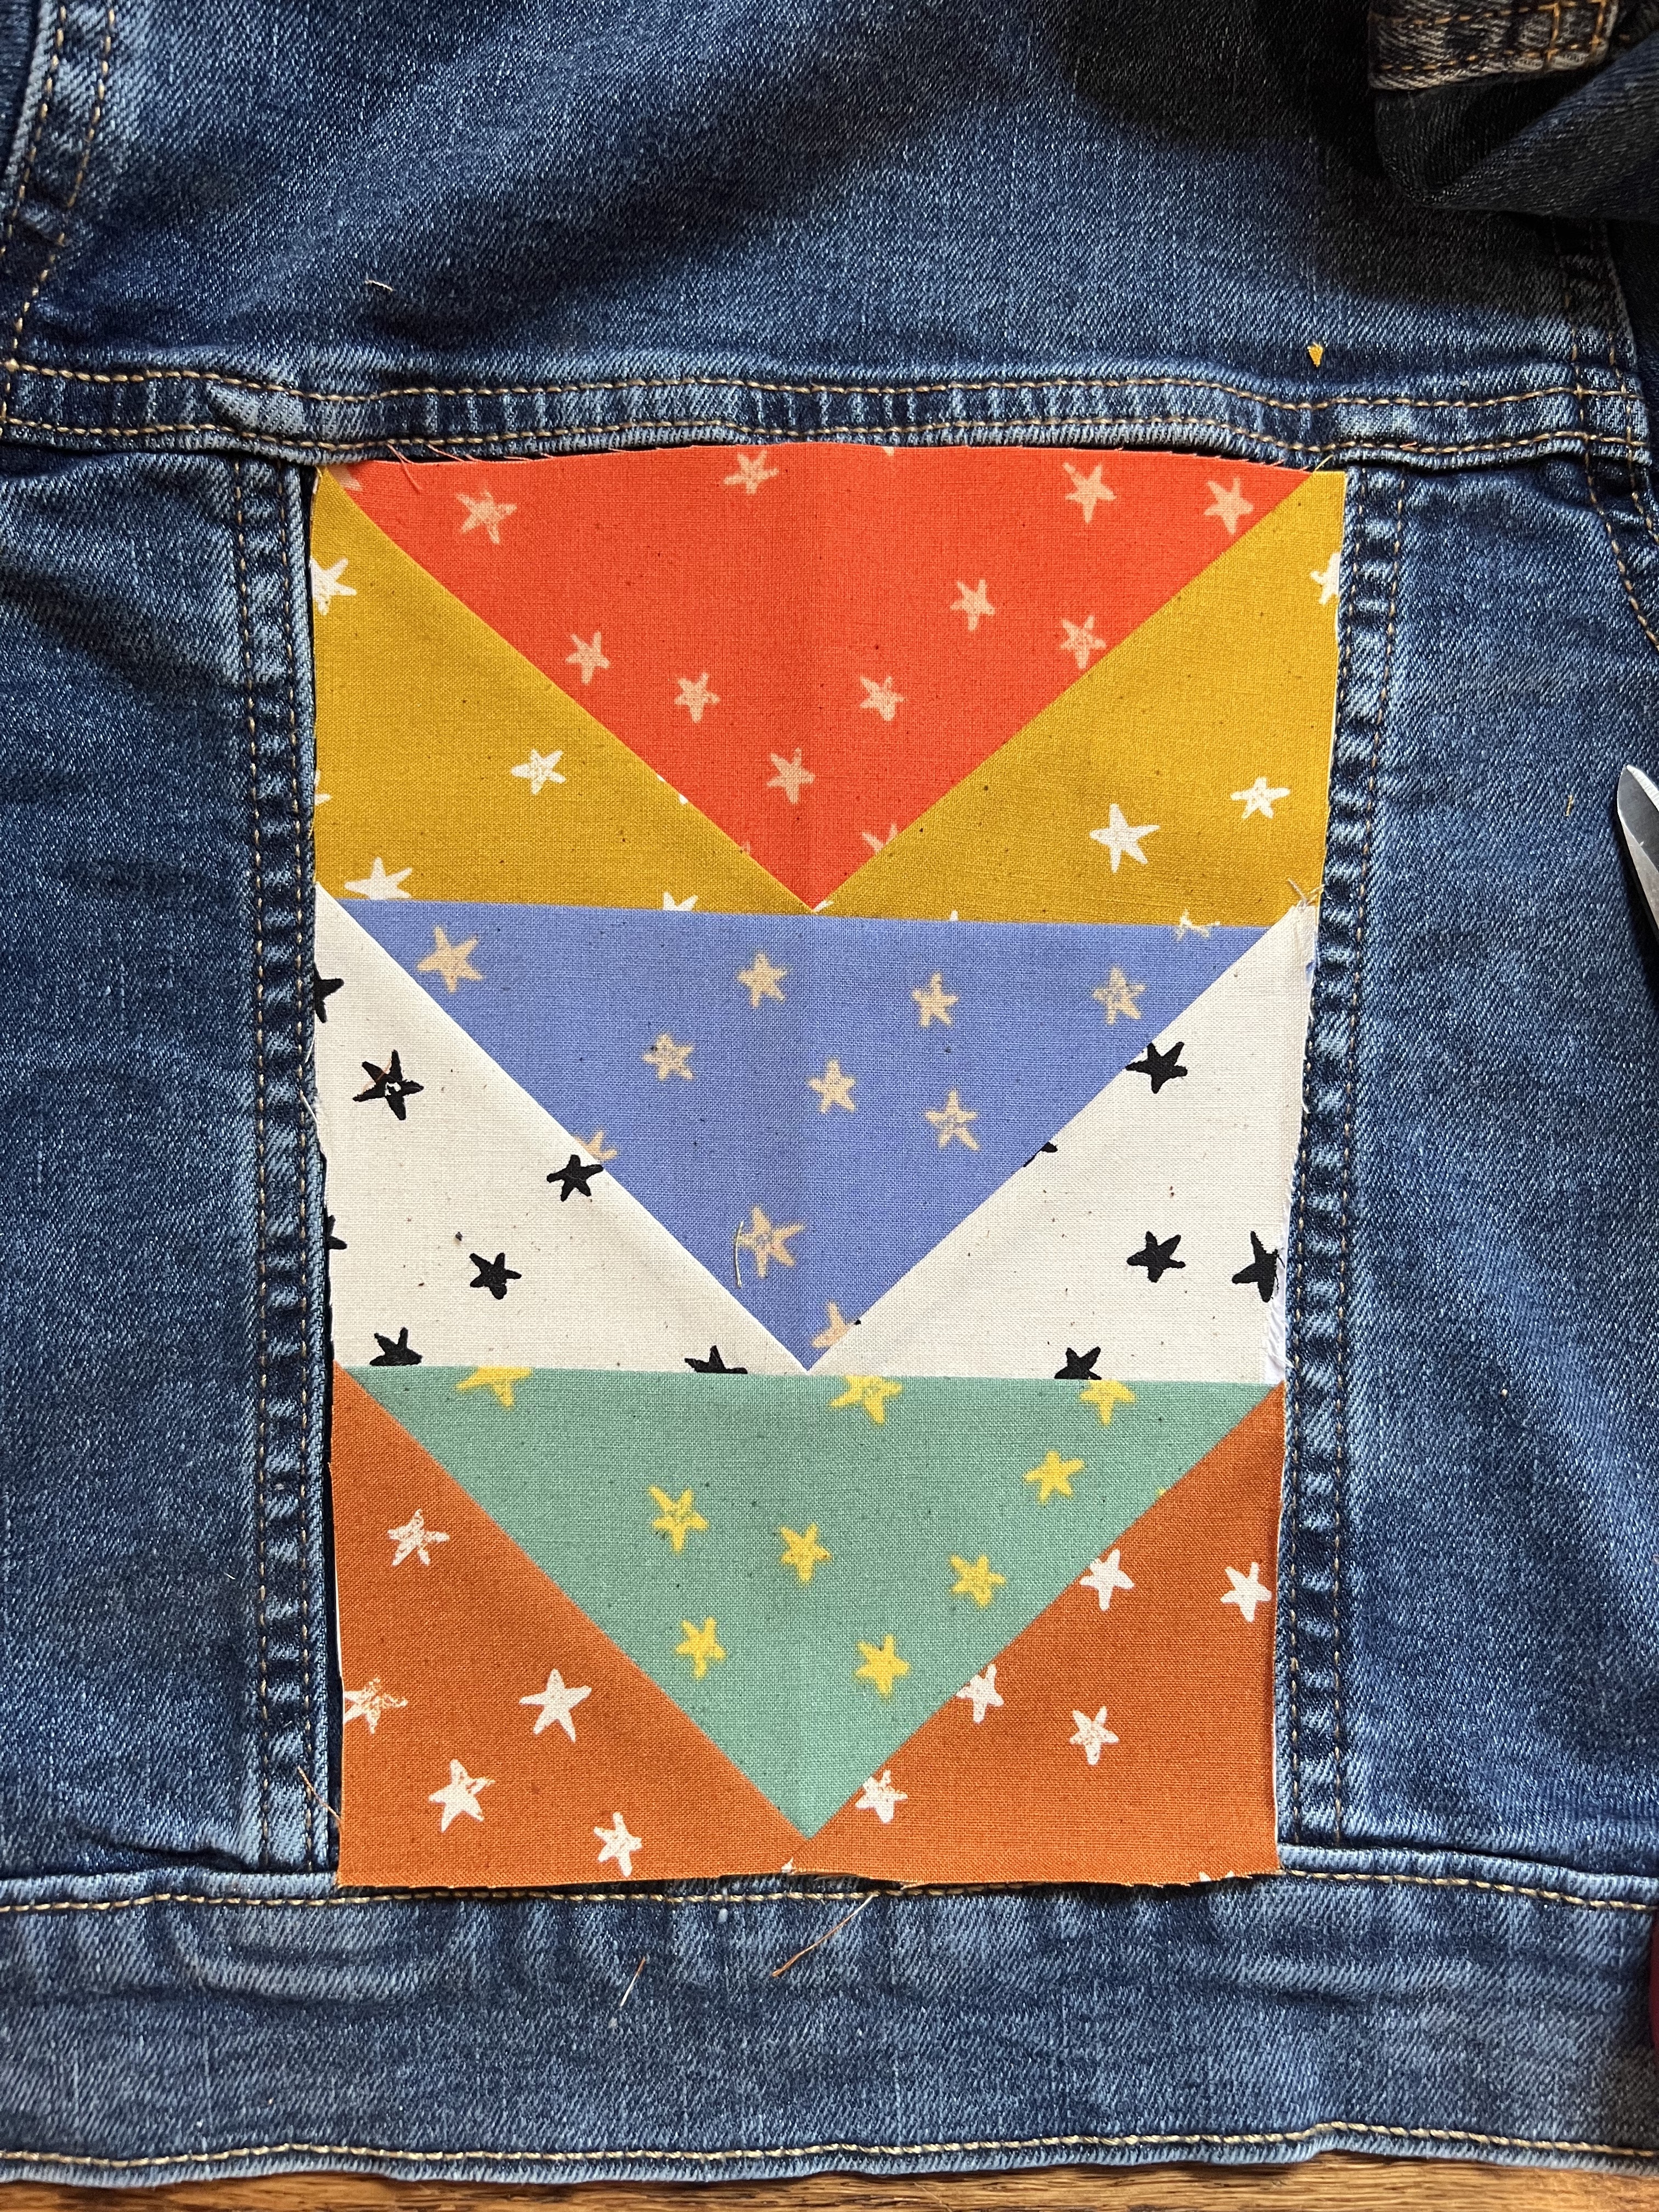
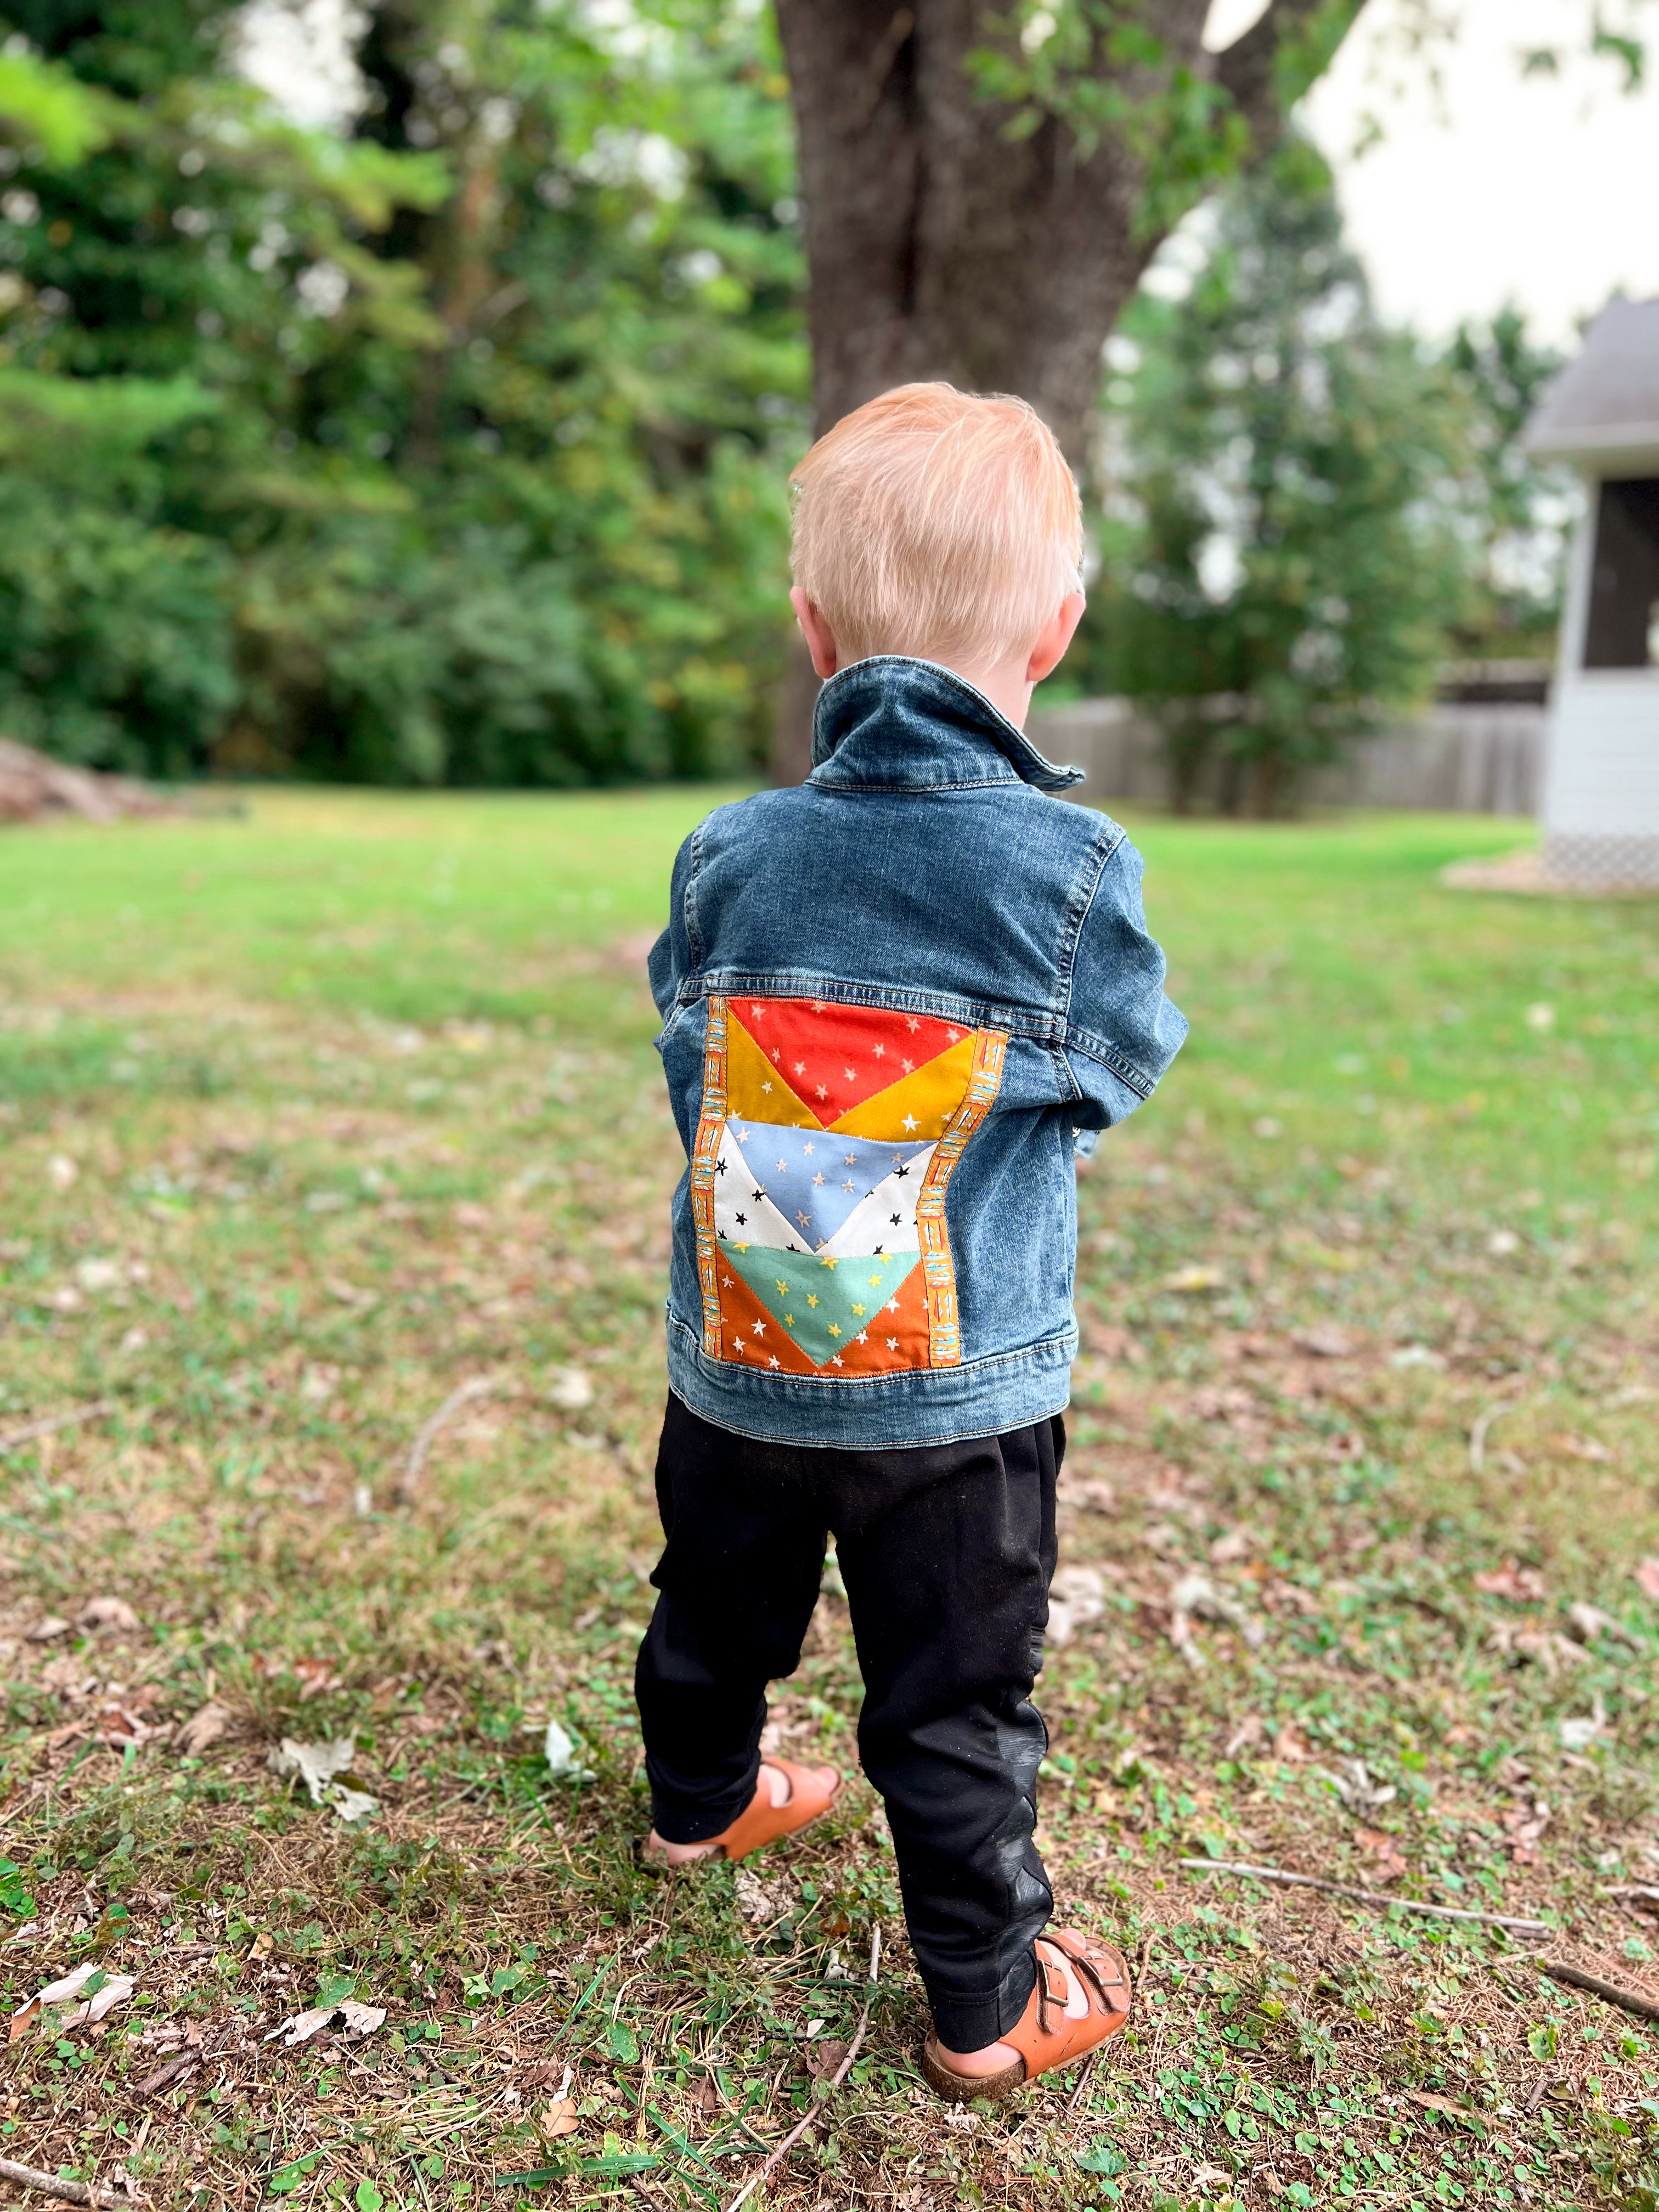
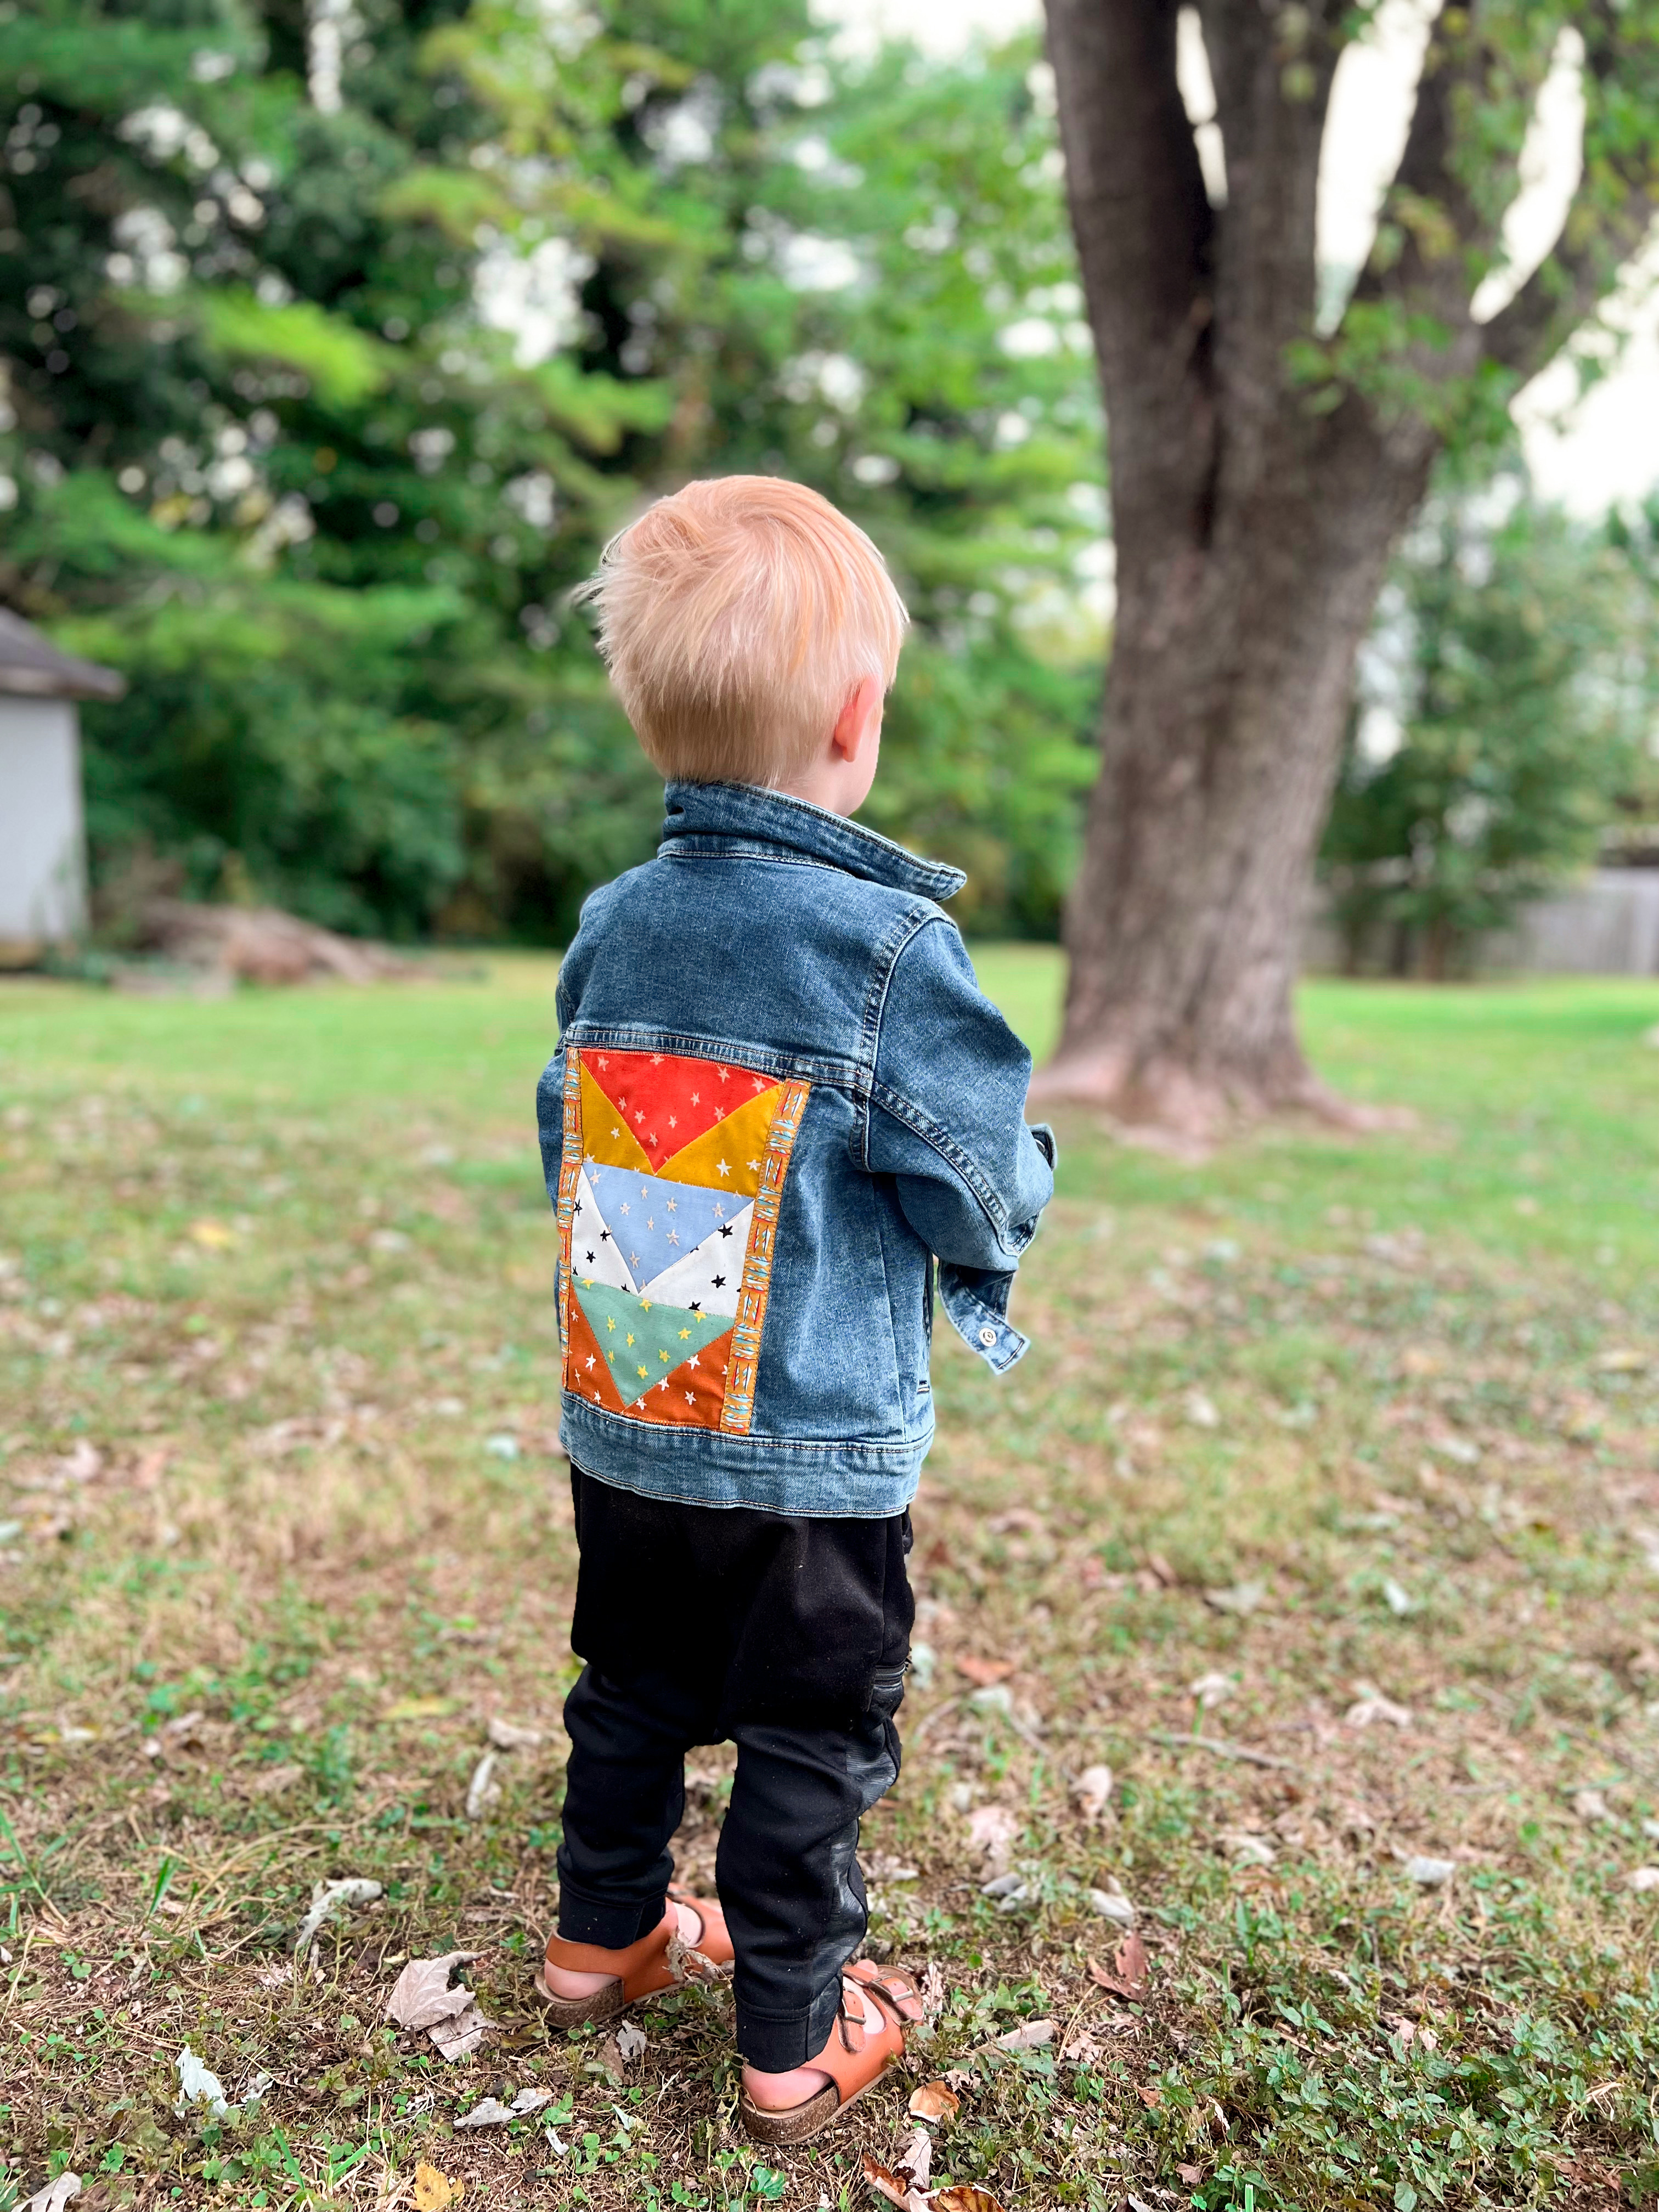
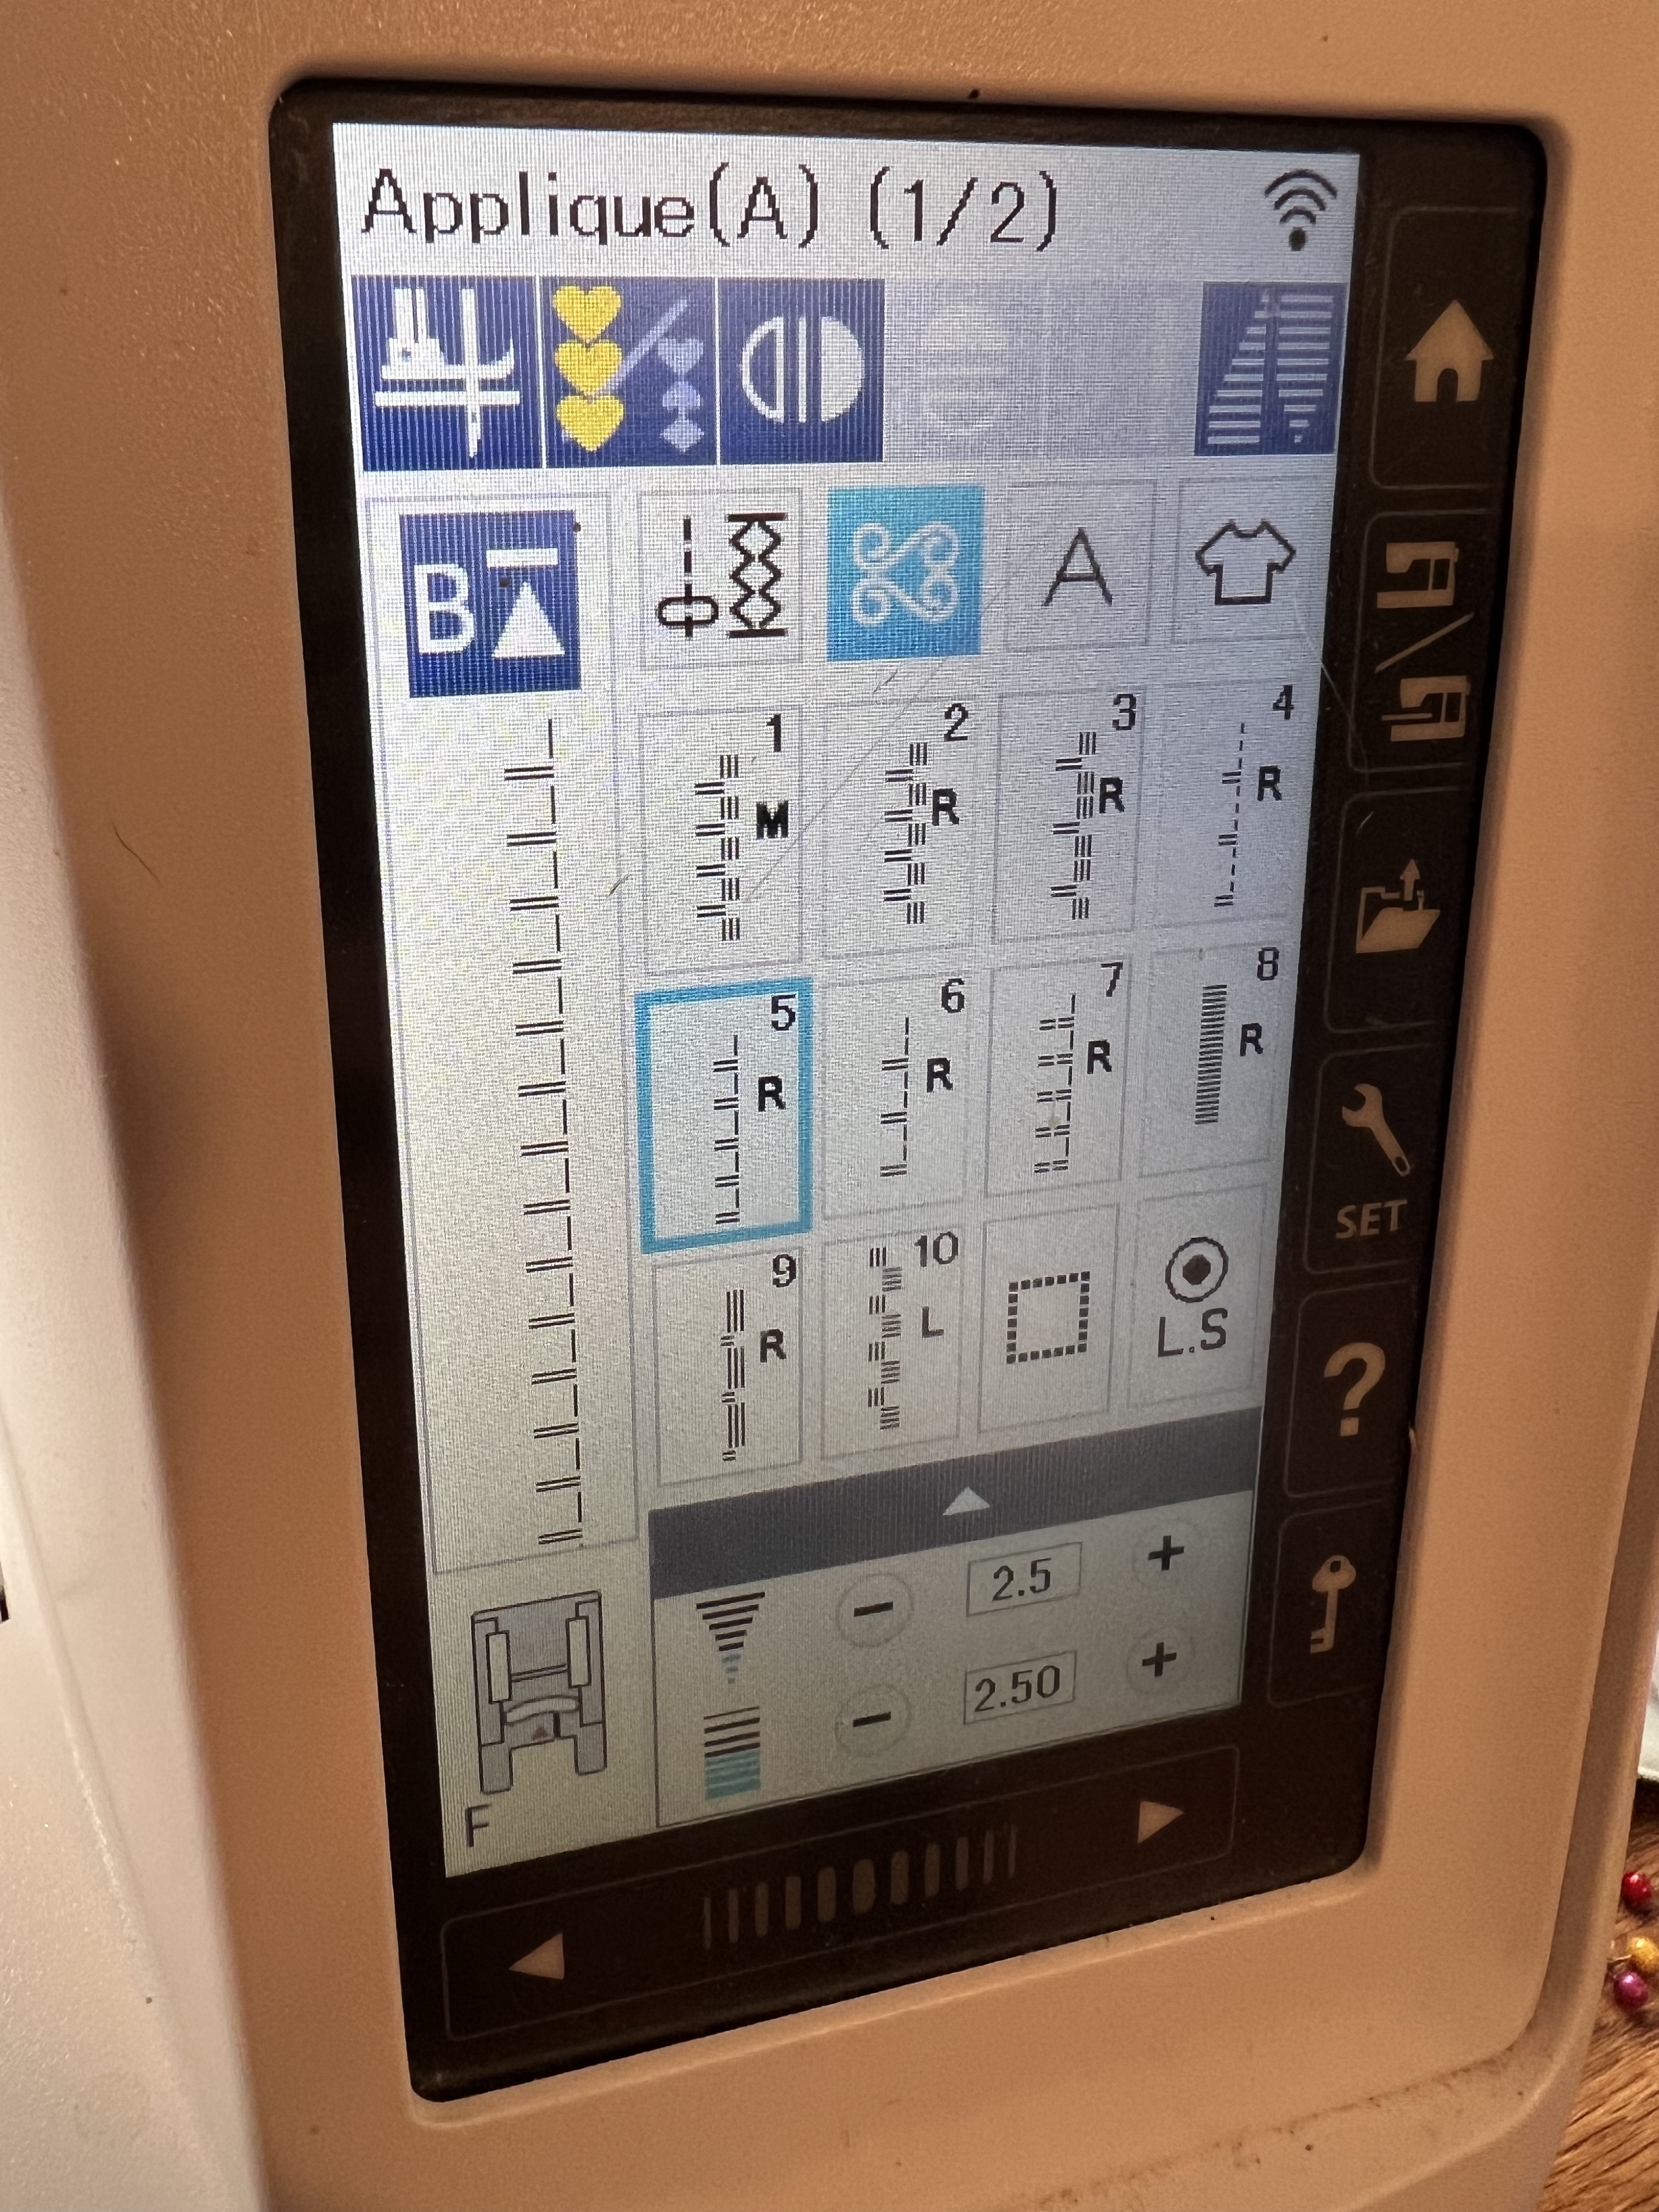
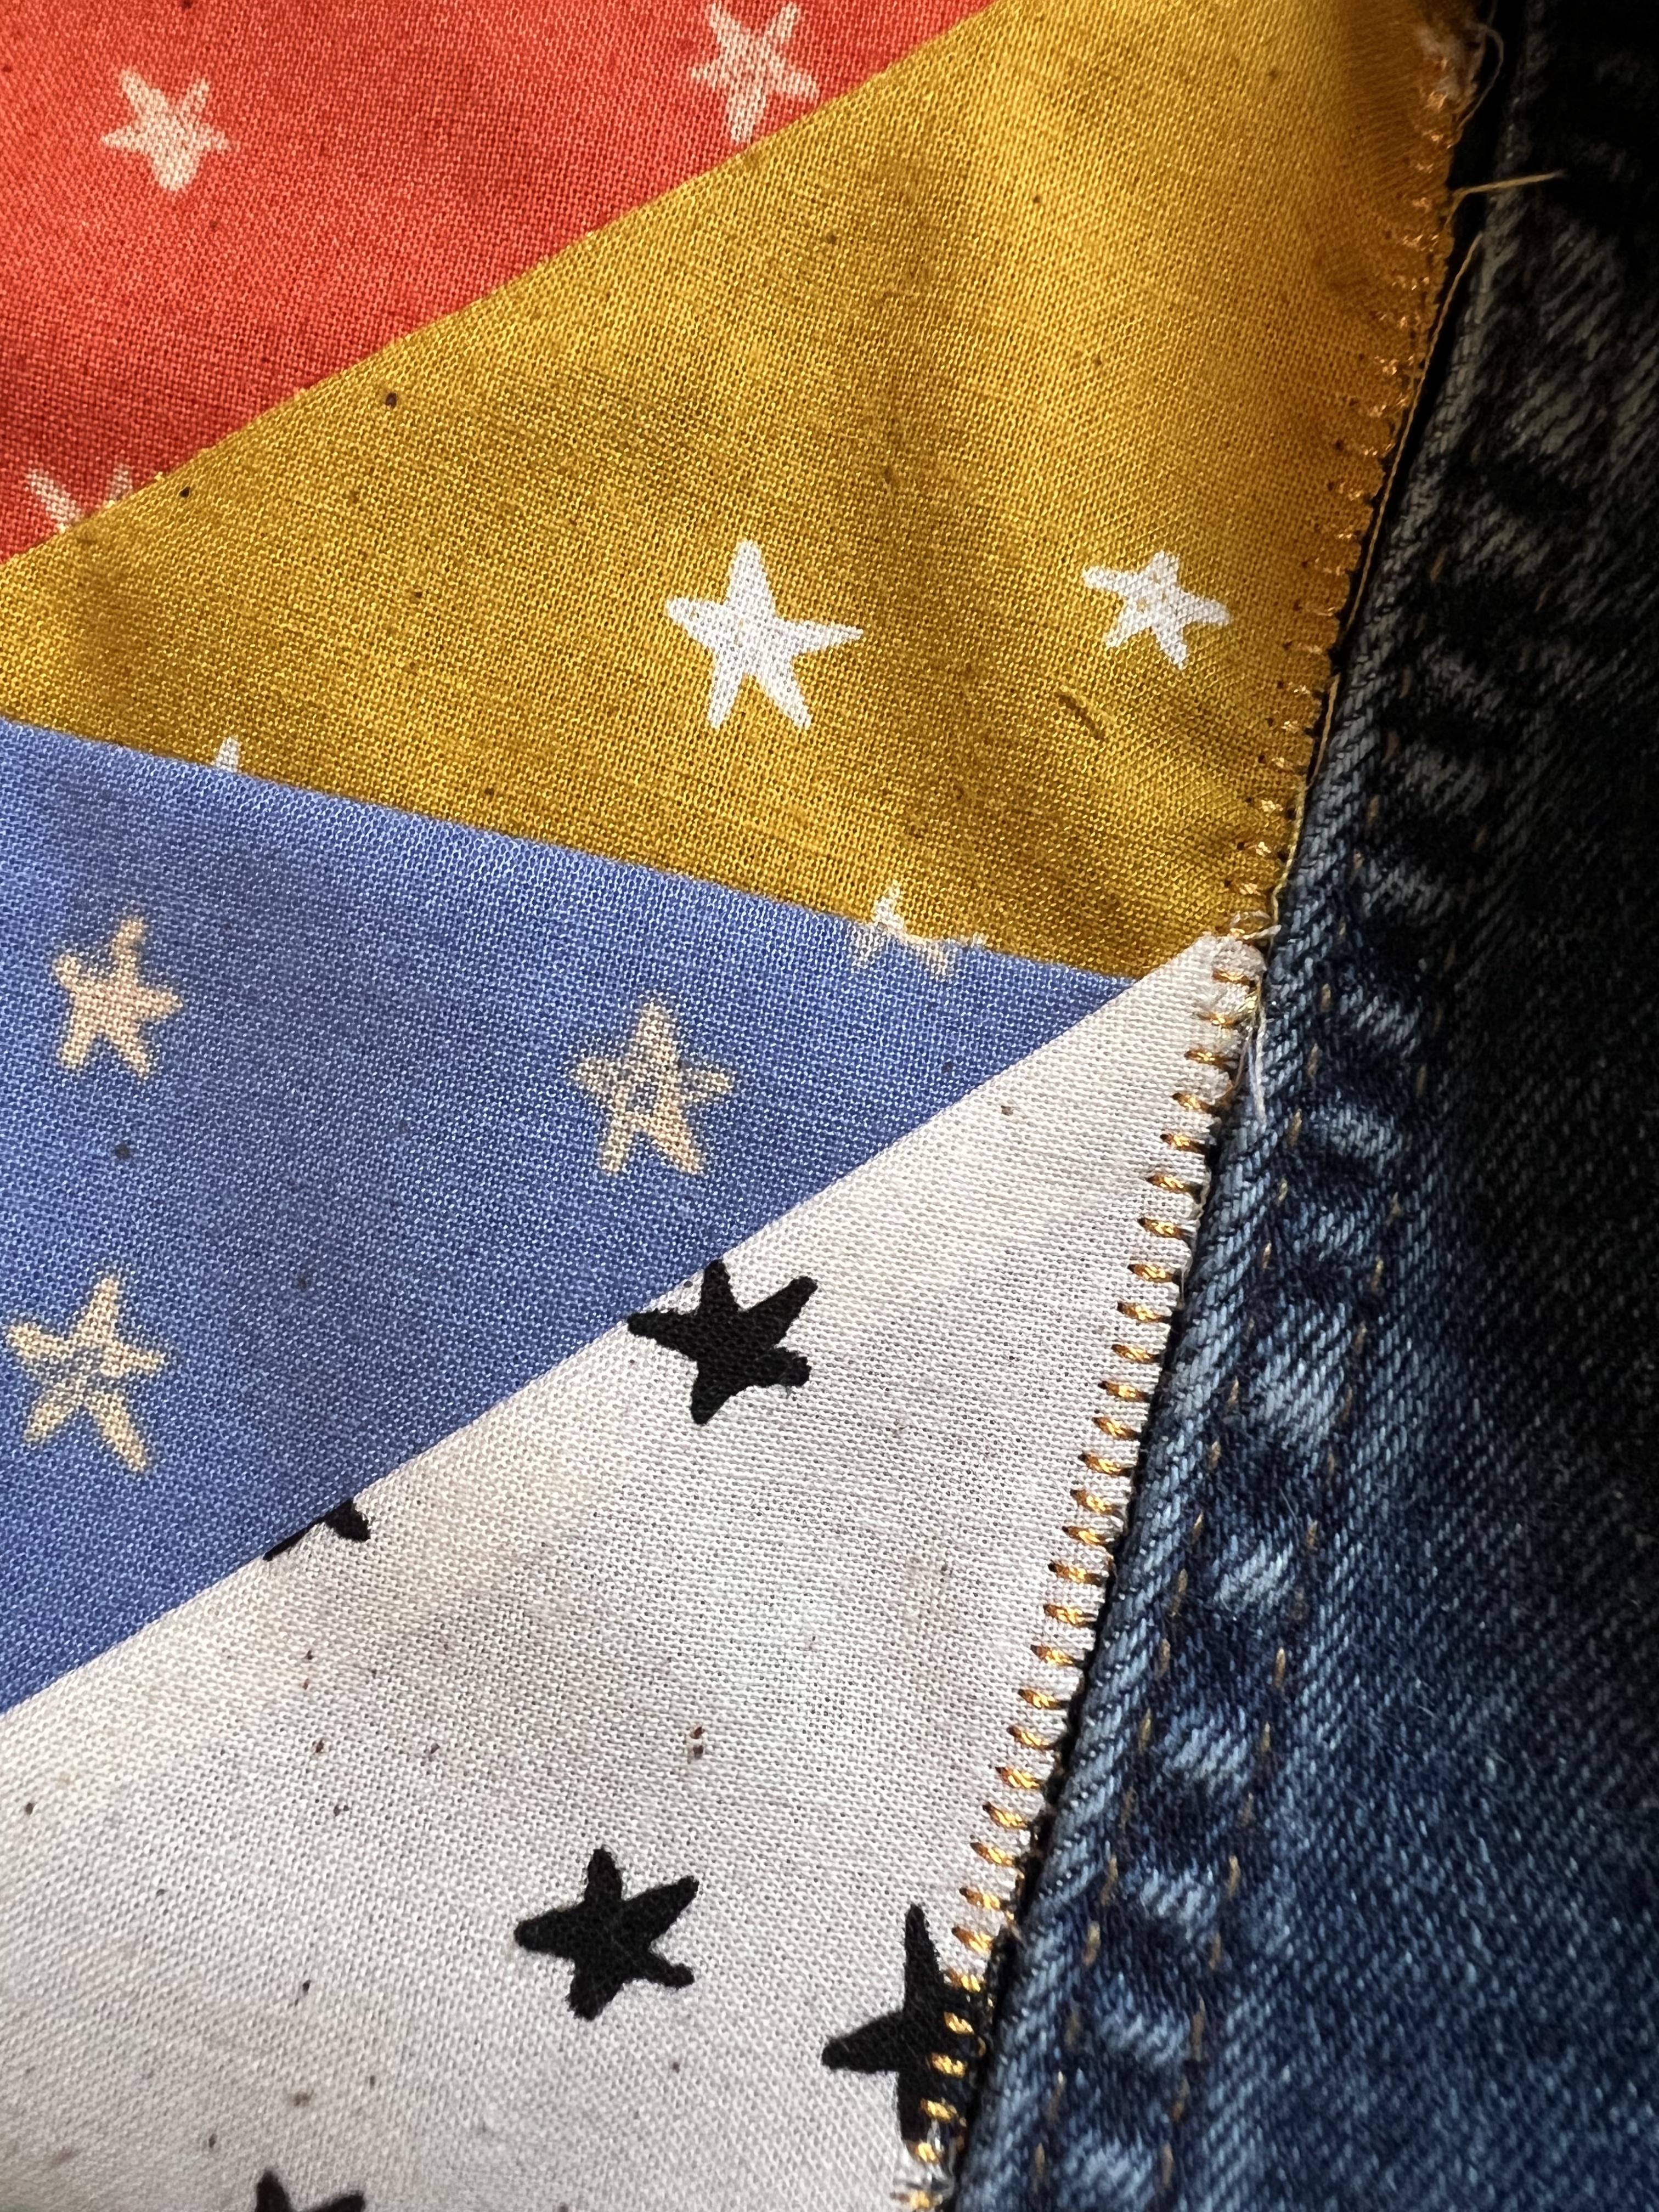
Now its time to applique! If you are working with an already made quilt block, this is where you want to get started. I began by stitching in the ditch around my geese so I wouldn’t have fabric bagging away from the jacket. Then I used my machine’s applique stitch to stitch around the perimeter of my block just inside of the jacket’s seams.


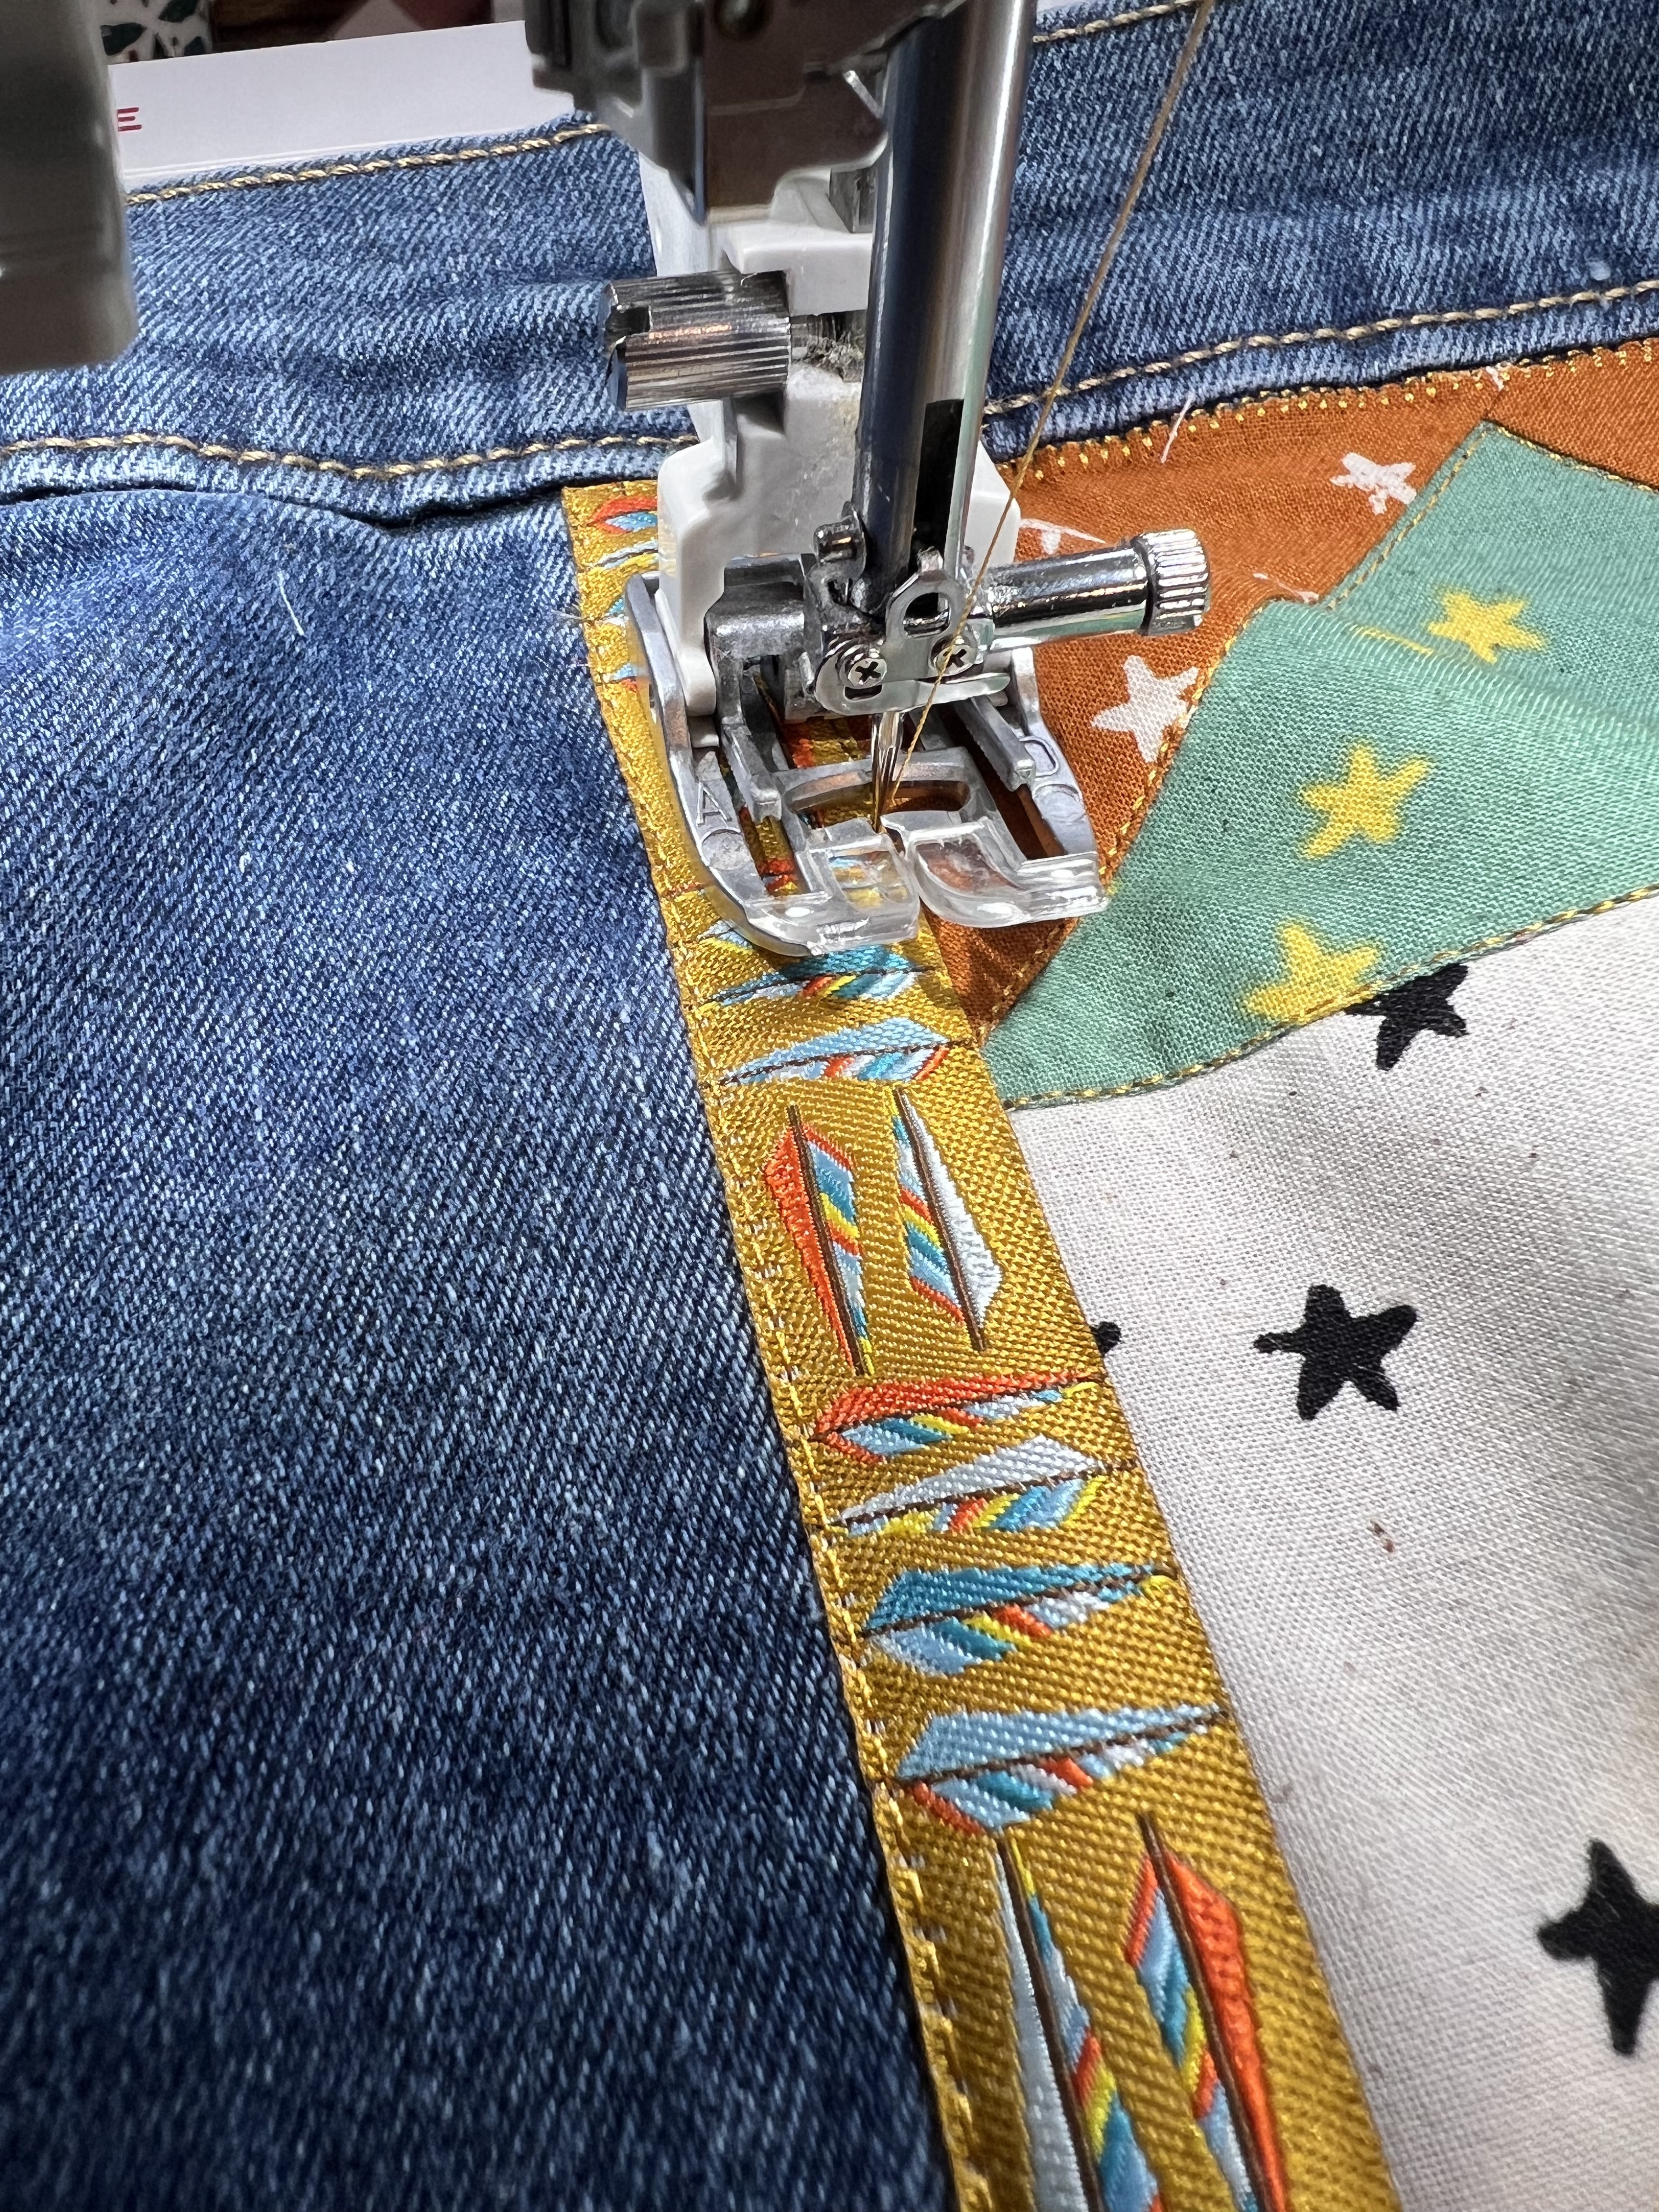
If you are going to use ribbon, switch back to a straight stitch. Tuck under the raw edges, and then stitch down to the jacket.


Et viola! You are finished! Though I suspect this may just be the first of many custom touches.


Its a great start, and already my boy’s jacket has gone from ordinary to so much fun!

Everyone is Talking about Denim Jacket Upcycle
Reviews


Tako
Beautiful
Wednesday, November 23, 2016

cpindzola
Around the Table Dresden Placemats
Saturday, December 17, 2016

I like the concept, but the directions are "sloppy." Nowhere in the supply list does it mention the felt or the batting (how much?). Also, I would never use a high loft batting in a placemat, or a table runner, as I think that it would be too unstable for a glass. The next time I make these, I will cut out the batting (I use flannel) and spray baste it to the wrong side of the Dresden plate before I put the Dresden plate on the felt to cut out. I have not yet washed the finished placemat, and am hoping that the single layer of felt does not curl up, or become distorted after washing/drying.
Txmaid
Fun Great Gift!
Tuesday, February 21, 2017

MargieARK
Teatime Quilted Tablecloth
Friday, February 24, 2017

I made this today but your cutting directions need to be changed. You only need 4 of color 1 and color 3 4.5 squares for the triangles. Also the inner border, you only need 2 cuts as WOF is long enough to cut each in half to fit the sides.
MickelSews
Great Machine
Wednesday, August 30, 2017

I've had this machine for only a week now. I bought it used from a lady who makes her own clothes, but she no longer needed the machine. During the purchase, she noted that she is almost sad that it's better to give it away because of how well the machine performed. (I also bought it along side a computerized machine of another brand.} She demoed the machine for us, showing it worked and gave us everything (including the box it came in!) She took amazing care of this machine. I have used it a few times now, and the directions for threading were easy to follow (albeit my hands are quite large so the lower looper was a pain, but that is no fault to the machine or brand.) And I recommend this machine to anyone who wants to learn to serge and wants a machine that can grow with them. I will happily use this machine time and time again.
rvstan
S9 Review
Sunday, February 25, 2018

I love, love, love my S9! It's sews and embroiders beautifully and it's simplicity of use amazes me. I would recommend this machine for both a beginner and an experienced seamstress. If I would ask anything of Janome it would be to upgrade the programming to run a larger hoop size. I understand that it can't get much wider but there is most definitely room for it to go longer. That is the only limitation of this machine.
pjmnana
PJMNana
Monday, February 26, 2018

I purchased a Memorycraft 15000 a few years ago and it was the best purchase I ever made! This machine can do just about anything you would would ever want! I love the capability of using the Acuedit app to set up my embroidery pattern on my Ipad and then download it to the machine! I love how my embroidery looks upon completion and I love all the good lighting it has to light up your workspace. That way you don’t need to worry about where to set up your machine. It also has plenty of room to do machine embroidery on any size quilts! There are many decorative stitches from which to choose that are outstanding! It’s hard to choose which one to use! There are so many great features it is hard to decide what I love the most. If you want to buy only one machine to last a lifetime, I would recommend this one!
KLWash
S9 Review
Sunday, February 24, 2019

The S9 is amazing. I learned to sew by hand when I was just 5 and in my grandmothers way as she was quilting. I took seeing classes in high school until they would no longer let me sign up. The S9 makes me appreciate my current skills as well as motivate me to want to learn more. This machine is awesome.
SewSueMe2002
Horizon Memory Craft 15000
Thursday, November 19, 2020

My Janome Horizon Memory Craft 15000 is fantastic! I love, love, love this machine! When I came across the Eye for and Eye embroidery design today, I wanted to make it. However, the embroidery file is missing. Nothing downloads when I select the download button. Please help!
Jillfmischo
Treat Bag fun!
Monday, August 16, 2021

I made the Halloween treat bag for my new granddaughter and I’m sure it will last for years. No embroidery machine so I appliquéd the lettering. Need a little more skirt fabric for a better gathered look, and I used thin double-bias tape for the skirt hem, over edge stitch on skirt sides. I’m pleased with my results!
elenaz
Very helpful tutorial
Wednesday, October 25, 2023

I want to say thank you for teaching me this method of applique. I was able to do it with a small letters. This method is the best so far from all of those I've seen and tried.
plonkar
So useful
Thursday, November 30, 2023

I'd like to express my gratitude for teaching me this appliqué method. I successfully applied it with small letters, and, so far, it's the most effective among all the methods I've seen and tried.

DEALERS
The TWO Closest Dealers to you are:
1900 CENTRE ST , WEST ROXBURY MA, 02132
(617)323-6200
443 MOODY STREET , WALTHAM MA, 02453
781-893-3331
Find Additional Dealers