Projects

Christmas Fabric Bows

Created By:

Victoria Newmyer

Skill Level: Beginner

Anyone who knows me well will tell you that my favorite part of Christmas decorating is the Christmas tree!  I love a big, real tree and love pulling out the ornaments every year and remembering all the Christmases we have celebrated.

One of my favorite ways to decorate is to put bows on the tree.  Normally I buy them and I realized that I should just be making my own!  So I set about learning how to make the bows and how to make them reusable.  I didn’t want to just use twist ties or hot glue.

I ordered some of the new Christmas collection from Art Gallery Fabrics, Wintertale.  This lovely collection was designed by Katarina Roccella.

I chose prints that would go with any décor.  Whether you love classic peppermint stripes, modern florals or wanted something that looked quilter-ish, I’ve got you covered!

Fabric and Notions Required

-Makes one bow

One fat eighth of quilting fabric

Matching thread

Quilting Ruler

Zipper Foot for your sewing machine (recommended, but not essential).

Binder clips or string for holding the bow until you make the middle.

Instructions

Cutting Instructions: 

1.  From the fat eighth, cut the following pieces.

(1) 6” x 21” rectangle for the bow portion

(1) 2.5” x 12” rectangle for the center tie


Assembly Instructions:

For the bow:

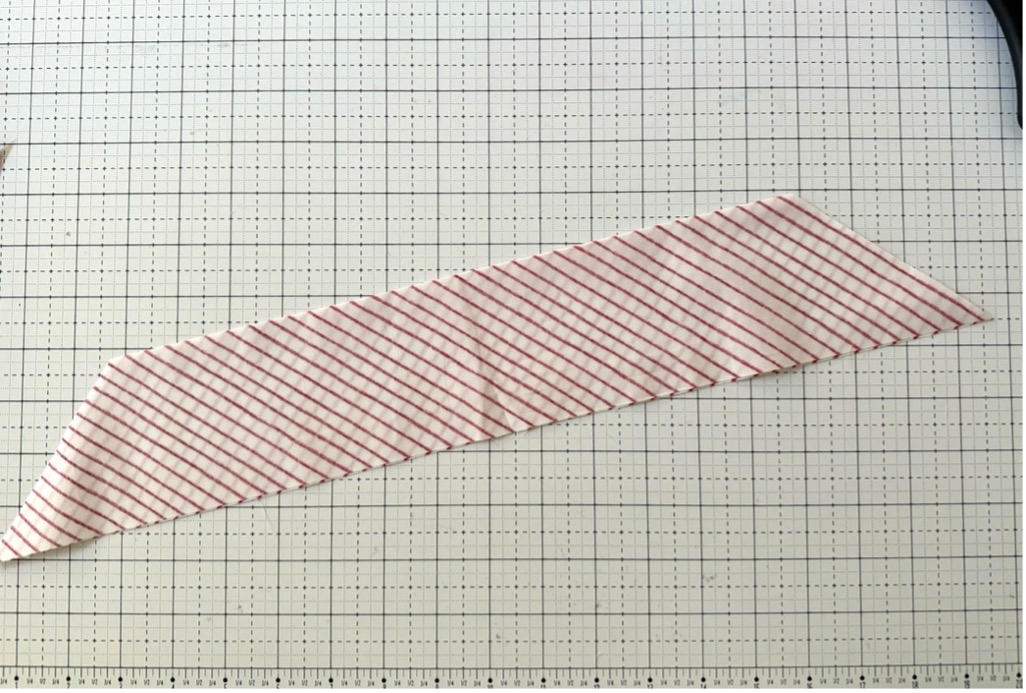
1.  Fold the 6” x 21” rectangle in half lengthwise, right sides together to form a 3” x 21” rectangle.

2.  Using a quilting ruler, create a 45 degree angle on each end as shown.  Your raw edges should be at the top, while you line up your quilt ruler on the corner along the folded edge.

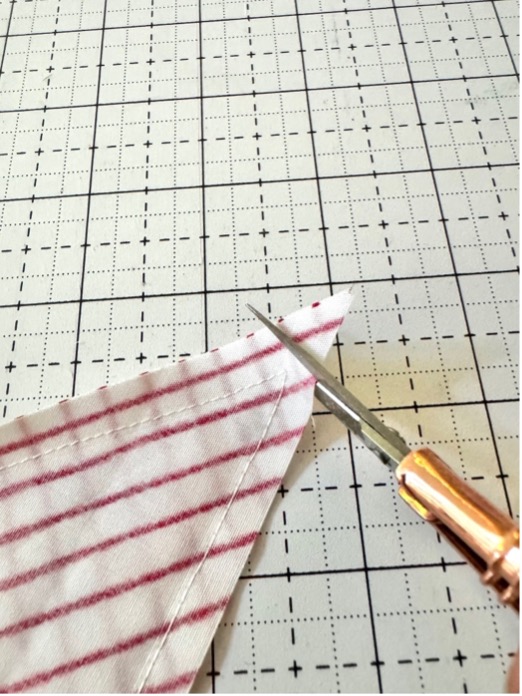
3.  Once your angles are cut, take your piece over to your sewing machine and sew along the raw edges using a ¼” seam allowance.  Be sure to leave a 3” opening at the top center (where the raw edges are)  so you can turn your bow inside out.

4.  Snip the ends of your pointed pieces for easier turning. Be careful not to snip the stiches.

5.  Turn your bow inside out and use a pencil or other pointy tool to get your points nice and sharp.  Press flat.

6.  Sew the opening shut using an edge stitch (1/8” or less).  Use coordinating thread as the stitching will show.

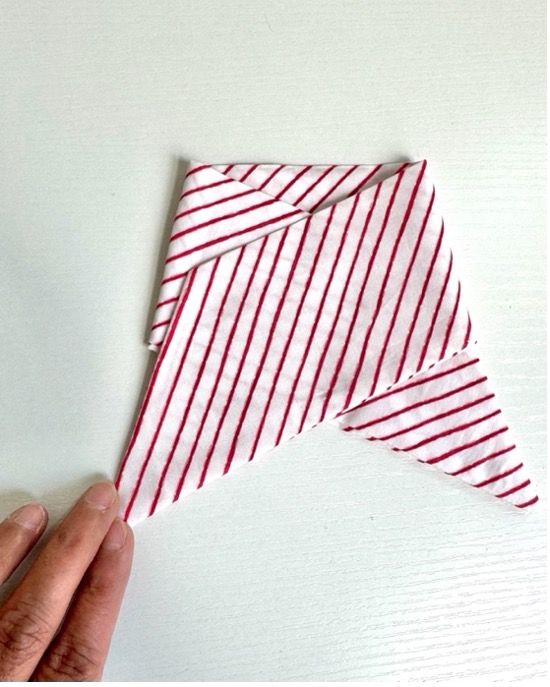
7.  Take your piece and fold each end across as shown below.


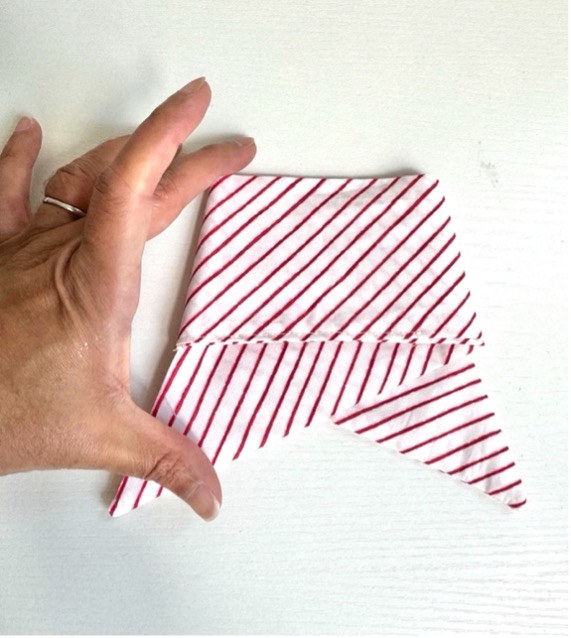
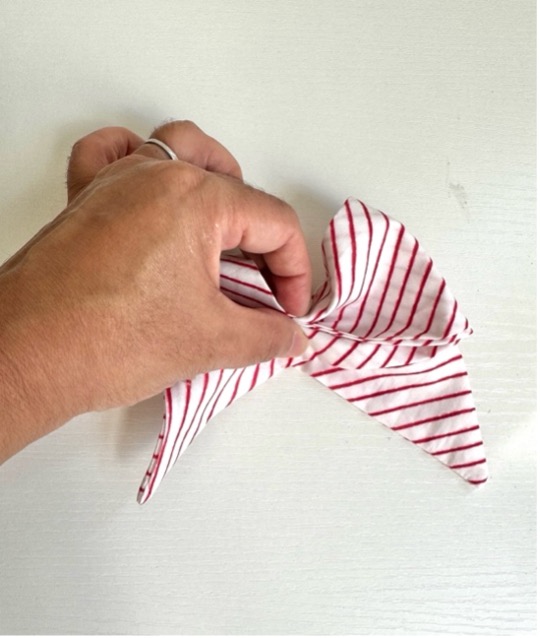
8.  Flip the folded piece over and fold/pinch towards the middle.  Use a binder clip or piece of string to hold the folds in place.


For the center tie:

1.  Take your 2.5” x 12” rectangle and fold end the short ends ¼” in, wrong sides together, and press.

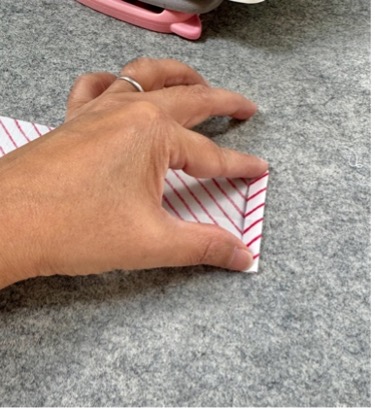
2.  Then fold the rectangle is half lengthwise and press, wrong sides together, to create a crease along the center.

3.  Take your long raw edges and fold towards the center crease you just created. 

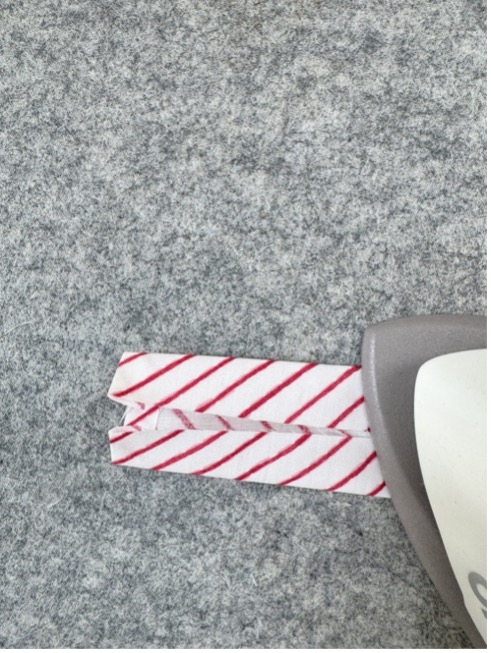
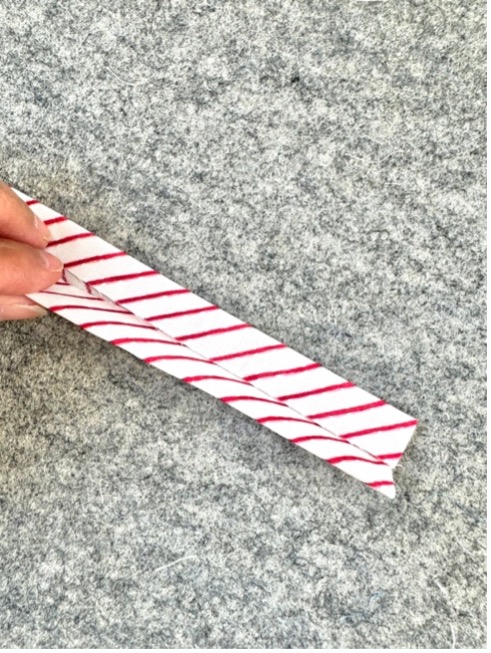
4.  Fold again so all the raw edges are enclosed.

5.  Take to your machine and using an edge stitch, sew around all the edges.


Final Assembly

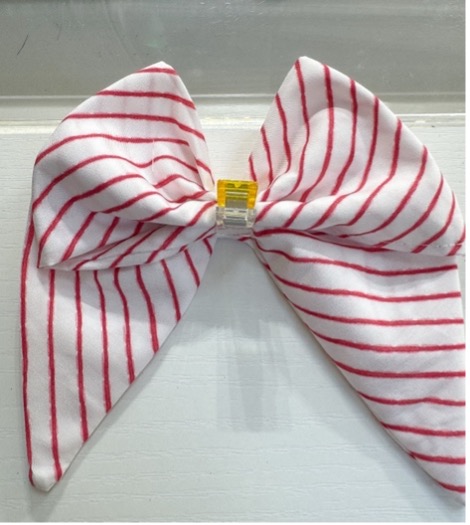
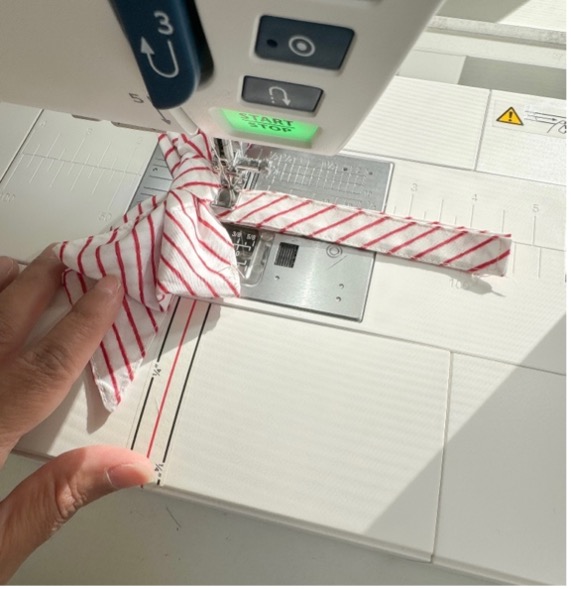
1.  Remove the binder clip or string from the bow section. Wrap the center tie you just created so the bow is in the middle of the tie.

2.  Arrange the tie neatly and hold the tie so that it is as tight as possible around the bow’s middle.

3.  Using the zipper foot on your machine, sew a seam as close as possible to the bow, being sure not to sew into the bow.  Make sure to backstitch at the beginning and end.

4.  Once the seam is complete, you can fluff the bow again and straighten it out. 


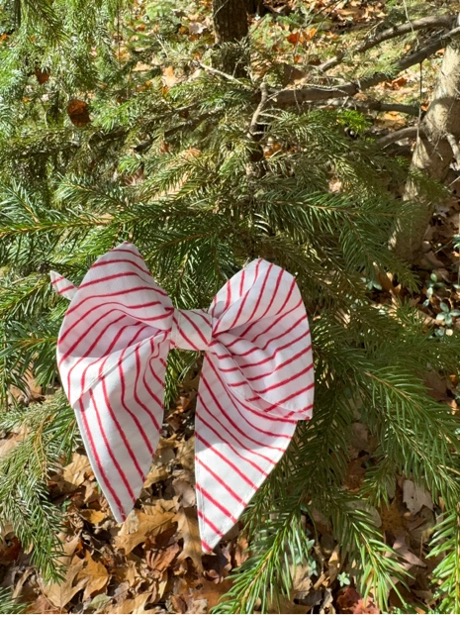
There you go!  A pretty fabric bow that can be used as a Christmas decoration or for any occasion that calls for bow.


You can even use them on gifts.  Just shorten the middle tie and use hot glue to glue the tie around the middle instead of sewing it.  The hot glue method would also work to attach your bow to a barrette.  Perfect for a holiday portrait!


I would love to see your finished bows and how you use them.  Be sure to tag me on Instagram using @midlife_quilter so I can see and share!


From my family to yours, I wish you the happiest of holidays.

Everyone is Talking about Christmas Fabric Bows
Reviews


Tako
Beautiful
Wednesday, November 23, 2016

cpindzola
Around the Table Dresden Placemats
Saturday, December 17, 2016

I like the concept, but the directions are "sloppy." Nowhere in the supply list does it mention the felt or the batting (how much?). Also, I would never use a high loft batting in a placemat, or a table runner, as I think that it would be too unstable for a glass. The next time I make these, I will cut out the batting (I use flannel) and spray baste it to the wrong side of the Dresden plate before I put the Dresden plate on the felt to cut out. I have not yet washed the finished placemat, and am hoping that the single layer of felt does not curl up, or become distorted after washing/drying.
Txmaid
Fun Great Gift!
Tuesday, February 21, 2017

MargieARK
Teatime Quilted Tablecloth
Friday, February 24, 2017

I made this today but your cutting directions need to be changed. You only need 4 of color 1 and color 3 4.5 squares for the triangles. Also the inner border, you only need 2 cuts as WOF is long enough to cut each in half to fit the sides.
MickelSews
Great Machine
Wednesday, August 30, 2017

I've had this machine for only a week now. I bought it used from a lady who makes her own clothes, but she no longer needed the machine. During the purchase, she noted that she is almost sad that it's better to give it away because of how well the machine performed. (I also bought it along side a computerized machine of another brand.} She demoed the machine for us, showing it worked and gave us everything (including the box it came in!) She took amazing care of this machine. I have used it a few times now, and the directions for threading were easy to follow (albeit my hands are quite large so the lower looper was a pain, but that is no fault to the machine or brand.) And I recommend this machine to anyone who wants to learn to serge and wants a machine that can grow with them. I will happily use this machine time and time again.
rvstan
S9 Review
Sunday, February 25, 2018

I love, love, love my S9! It's sews and embroiders beautifully and it's simplicity of use amazes me. I would recommend this machine for both a beginner and an experienced seamstress. If I would ask anything of Janome it would be to upgrade the programming to run a larger hoop size. I understand that it can't get much wider but there is most definitely room for it to go longer. That is the only limitation of this machine.
pjmnana
PJMNana
Monday, February 26, 2018

I purchased a Memorycraft 15000 a few years ago and it was the best purchase I ever made! This machine can do just about anything you would would ever want! I love the capability of using the Acuedit app to set up my embroidery pattern on my Ipad and then download it to the machine! I love how my embroidery looks upon completion and I love all the good lighting it has to light up your workspace. That way you don’t need to worry about where to set up your machine. It also has plenty of room to do machine embroidery on any size quilts! There are many decorative stitches from which to choose that are outstanding! It’s hard to choose which one to use! There are so many great features it is hard to decide what I love the most. If you want to buy only one machine to last a lifetime, I would recommend this one!
KLWash
S9 Review
Sunday, February 24, 2019

The S9 is amazing. I learned to sew by hand when I was just 5 and in my grandmothers way as she was quilting. I took seeing classes in high school until they would no longer let me sign up. The S9 makes me appreciate my current skills as well as motivate me to want to learn more. This machine is awesome.
SewSueMe2002
Horizon Memory Craft 15000
Thursday, November 19, 2020

My Janome Horizon Memory Craft 15000 is fantastic! I love, love, love this machine! When I came across the Eye for and Eye embroidery design today, I wanted to make it. However, the embroidery file is missing. Nothing downloads when I select the download button. Please help!
Jillfmischo
Treat Bag fun!
Monday, August 16, 2021

I made the Halloween treat bag for my new granddaughter and I’m sure it will last for years. No embroidery machine so I appliquéd the lettering. Need a little more skirt fabric for a better gathered look, and I used thin double-bias tape for the skirt hem, over edge stitch on skirt sides. I’m pleased with my results!
elenaz
Very helpful tutorial
Wednesday, October 25, 2023

I want to say thank you for teaching me this method of applique. I was able to do it with a small letters. This method is the best so far from all of those I've seen and tried.
plonkar
So useful
Thursday, November 30, 2023

I'd like to express my gratitude for teaching me this appliqué method. I successfully applied it with small letters, and, so far, it's the most effective among all the methods I've seen and tried.

DEALERS
The TWO Closest Dealers to you are:
1900 CENTRE ST , WEST ROXBURY MA, 02132
(617)323-6200
443 MOODY STREET , WALTHAM MA, 02453
781-893-3331
Find Additional Dealers