Projects

Merry & Bright Pillow

Created By:

Meredith Daniel

Skill Level: Intermediate

Christmastime is my favorite time of year. I began sewing Christmas pieces for my home about 13 years ago, and every year I like to add thoughtful pieces to my collection. This year I have made a decorative lumbar style pillow that will make a big, beautiful impact whether it’s on a bed or a couch. It features the words “Merry & Bright” in bold letters, but you can easily alter the text to say whatever you like! This is certainly a skillbuilding project using several techniques throughout including quilting, appliqué, invisible zipper installation, and even ruffle making with Janome’s ruffle foot.

Janome Supplies Required
Fabric and Notions Required
  • 1 yard of background fabric
  • 1 yard feature fabric for lettering and ruffle
  • 1/2 yard interfacing
  • 1 yard batting
  • 1/2 yard WonderUnder double sized fusible adhesive
  • 12” invisible zipper
  • straight pins
  • ruler
  • cutting mat
  • rotary cutter
  • optional: 1/2yd felt, Xacto knife, glue
Instructions

Project Time – 4-5 hours

Click Here to Download the Pattern

Read through the post before you get started. I give some tips for personalizing along the way which you might find useful!


Cut the following:

-  background fabric 28 x 38”

-   batting should be just larger than background fabric

-   feature fabric (same as lettering fabric) cut enough 4.5” x WOF (width of fabric) strips to create 200” once sewn together. For 44” fabric, cut (5) 4.5” x 44” or for 56” fabric, cut (4) 4.5 x 56” strips to make ruffle


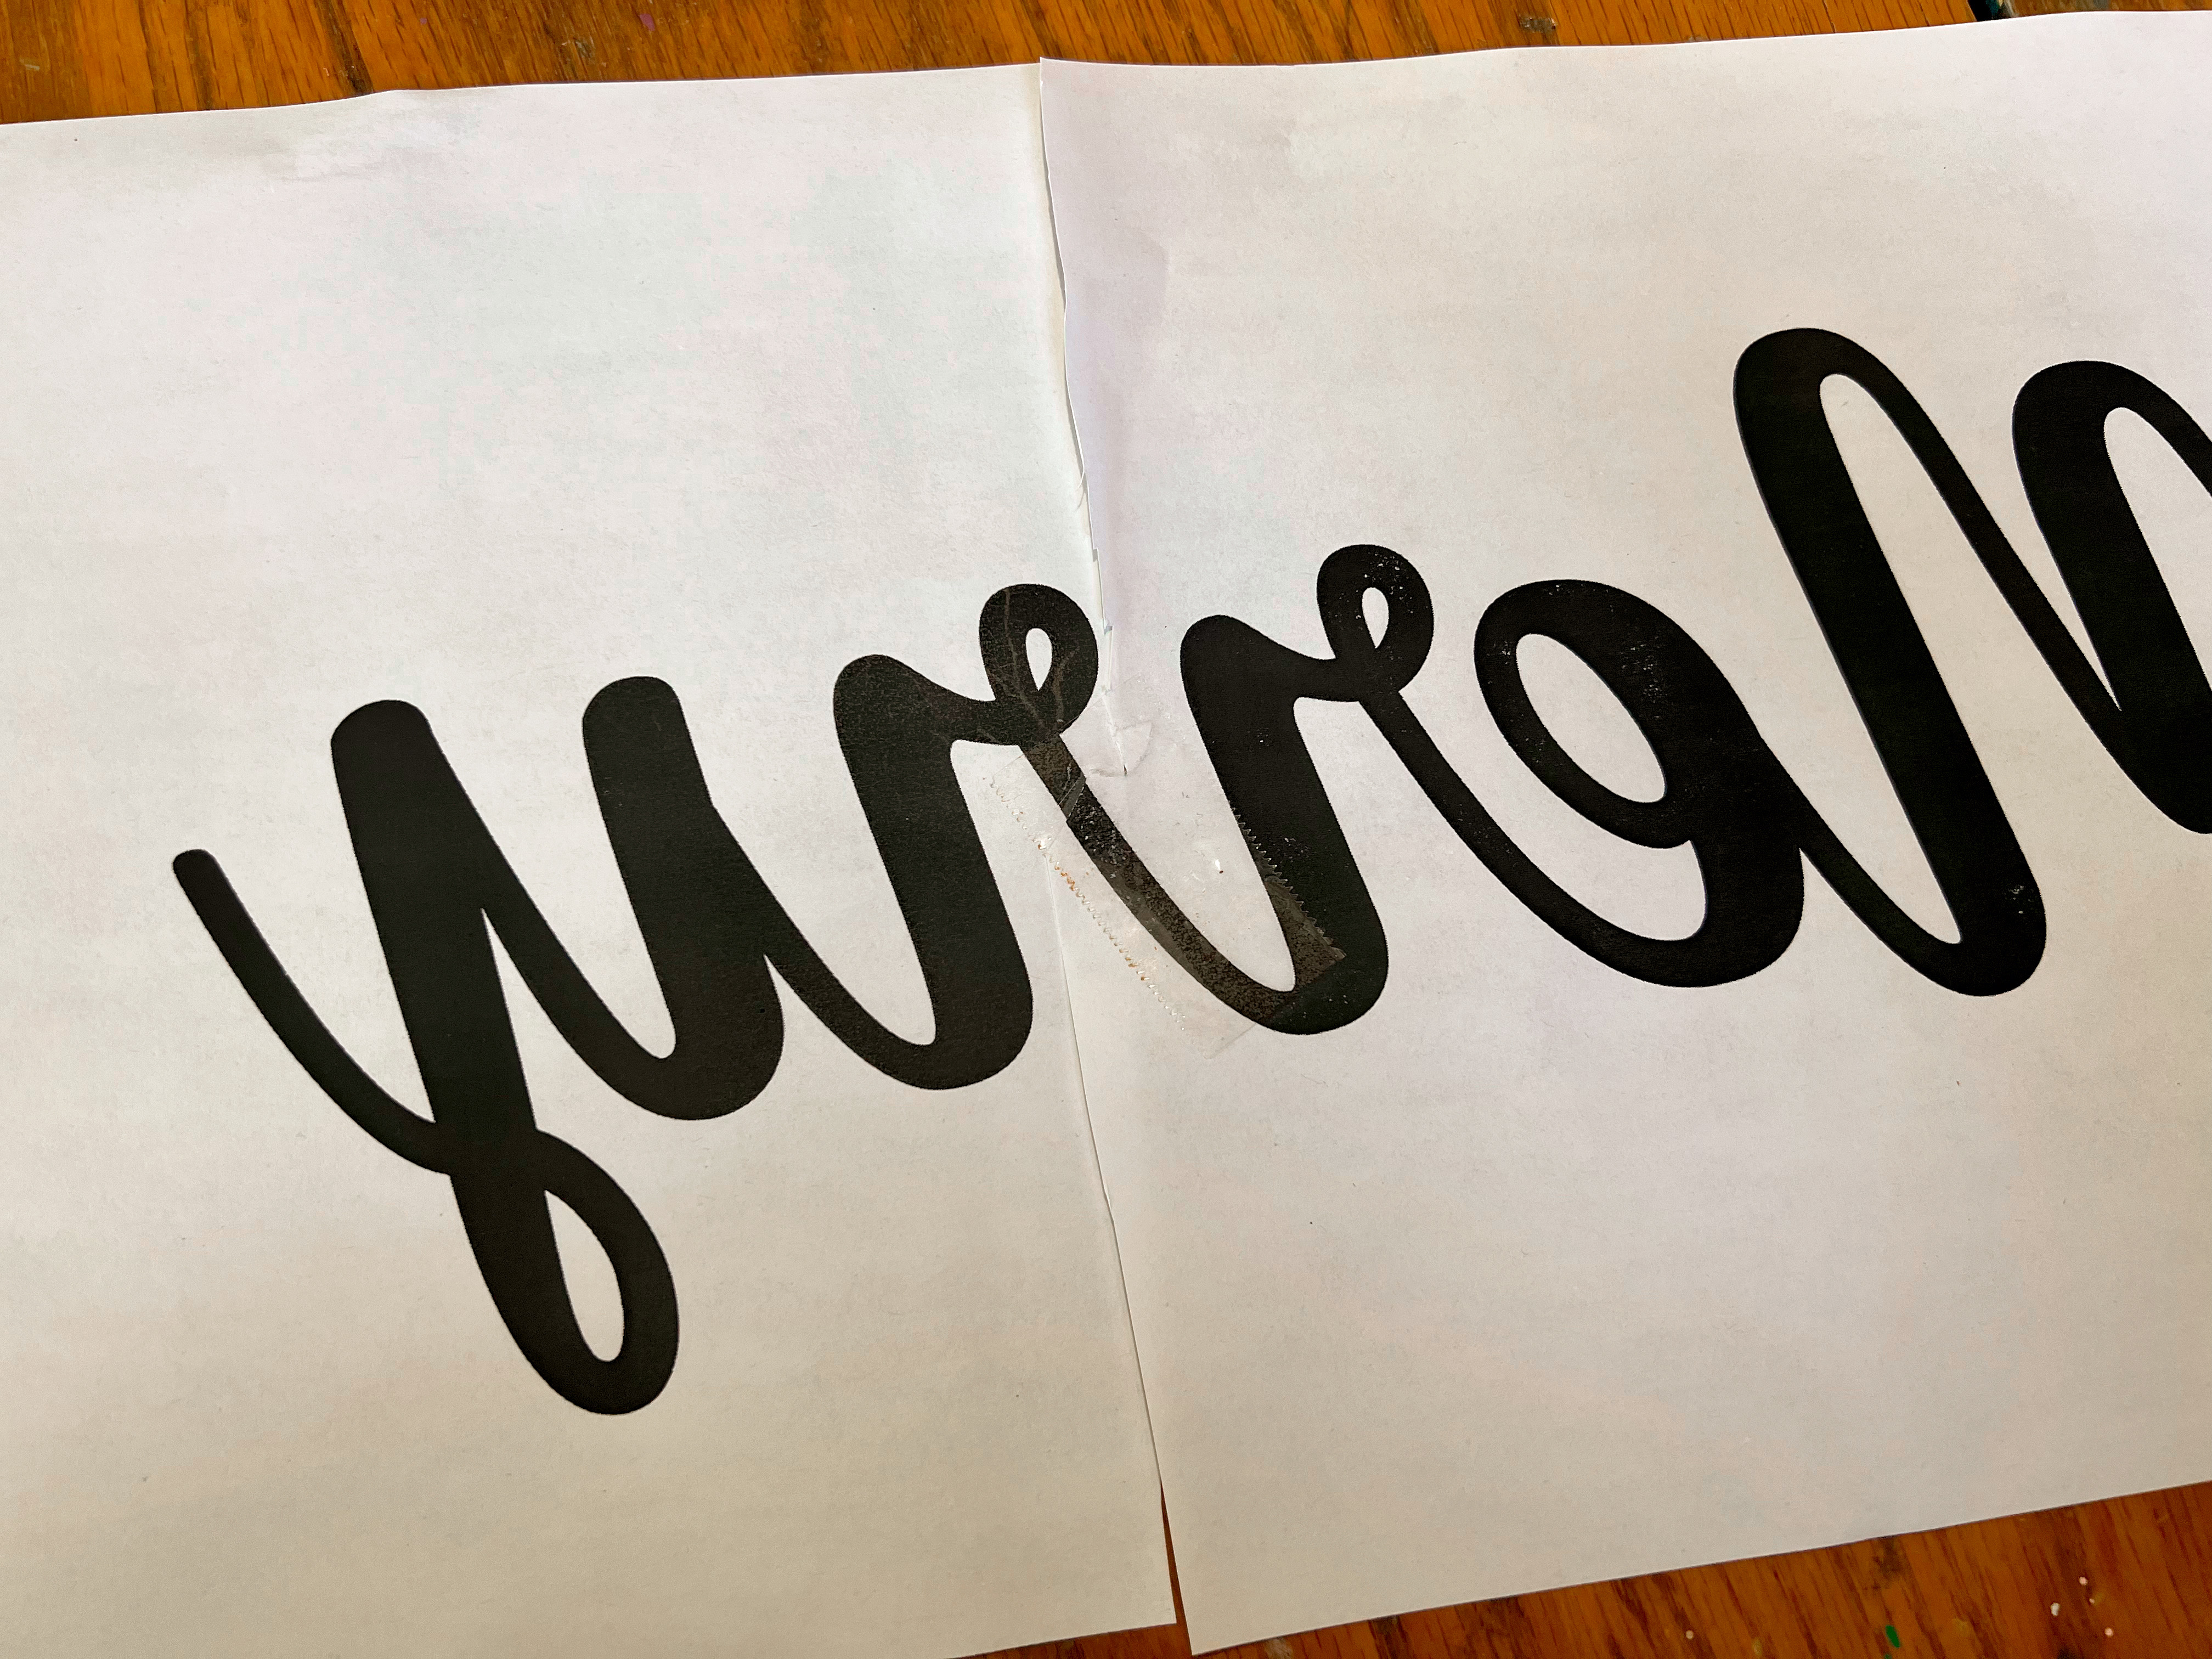
Step 1:The template is on four pages so that anyone can print it from home. Simply fold or cut the paper and align the lettering and tape to get the words to come together. It will say “Merry & Bright” backwards. I promise that is on purpose!


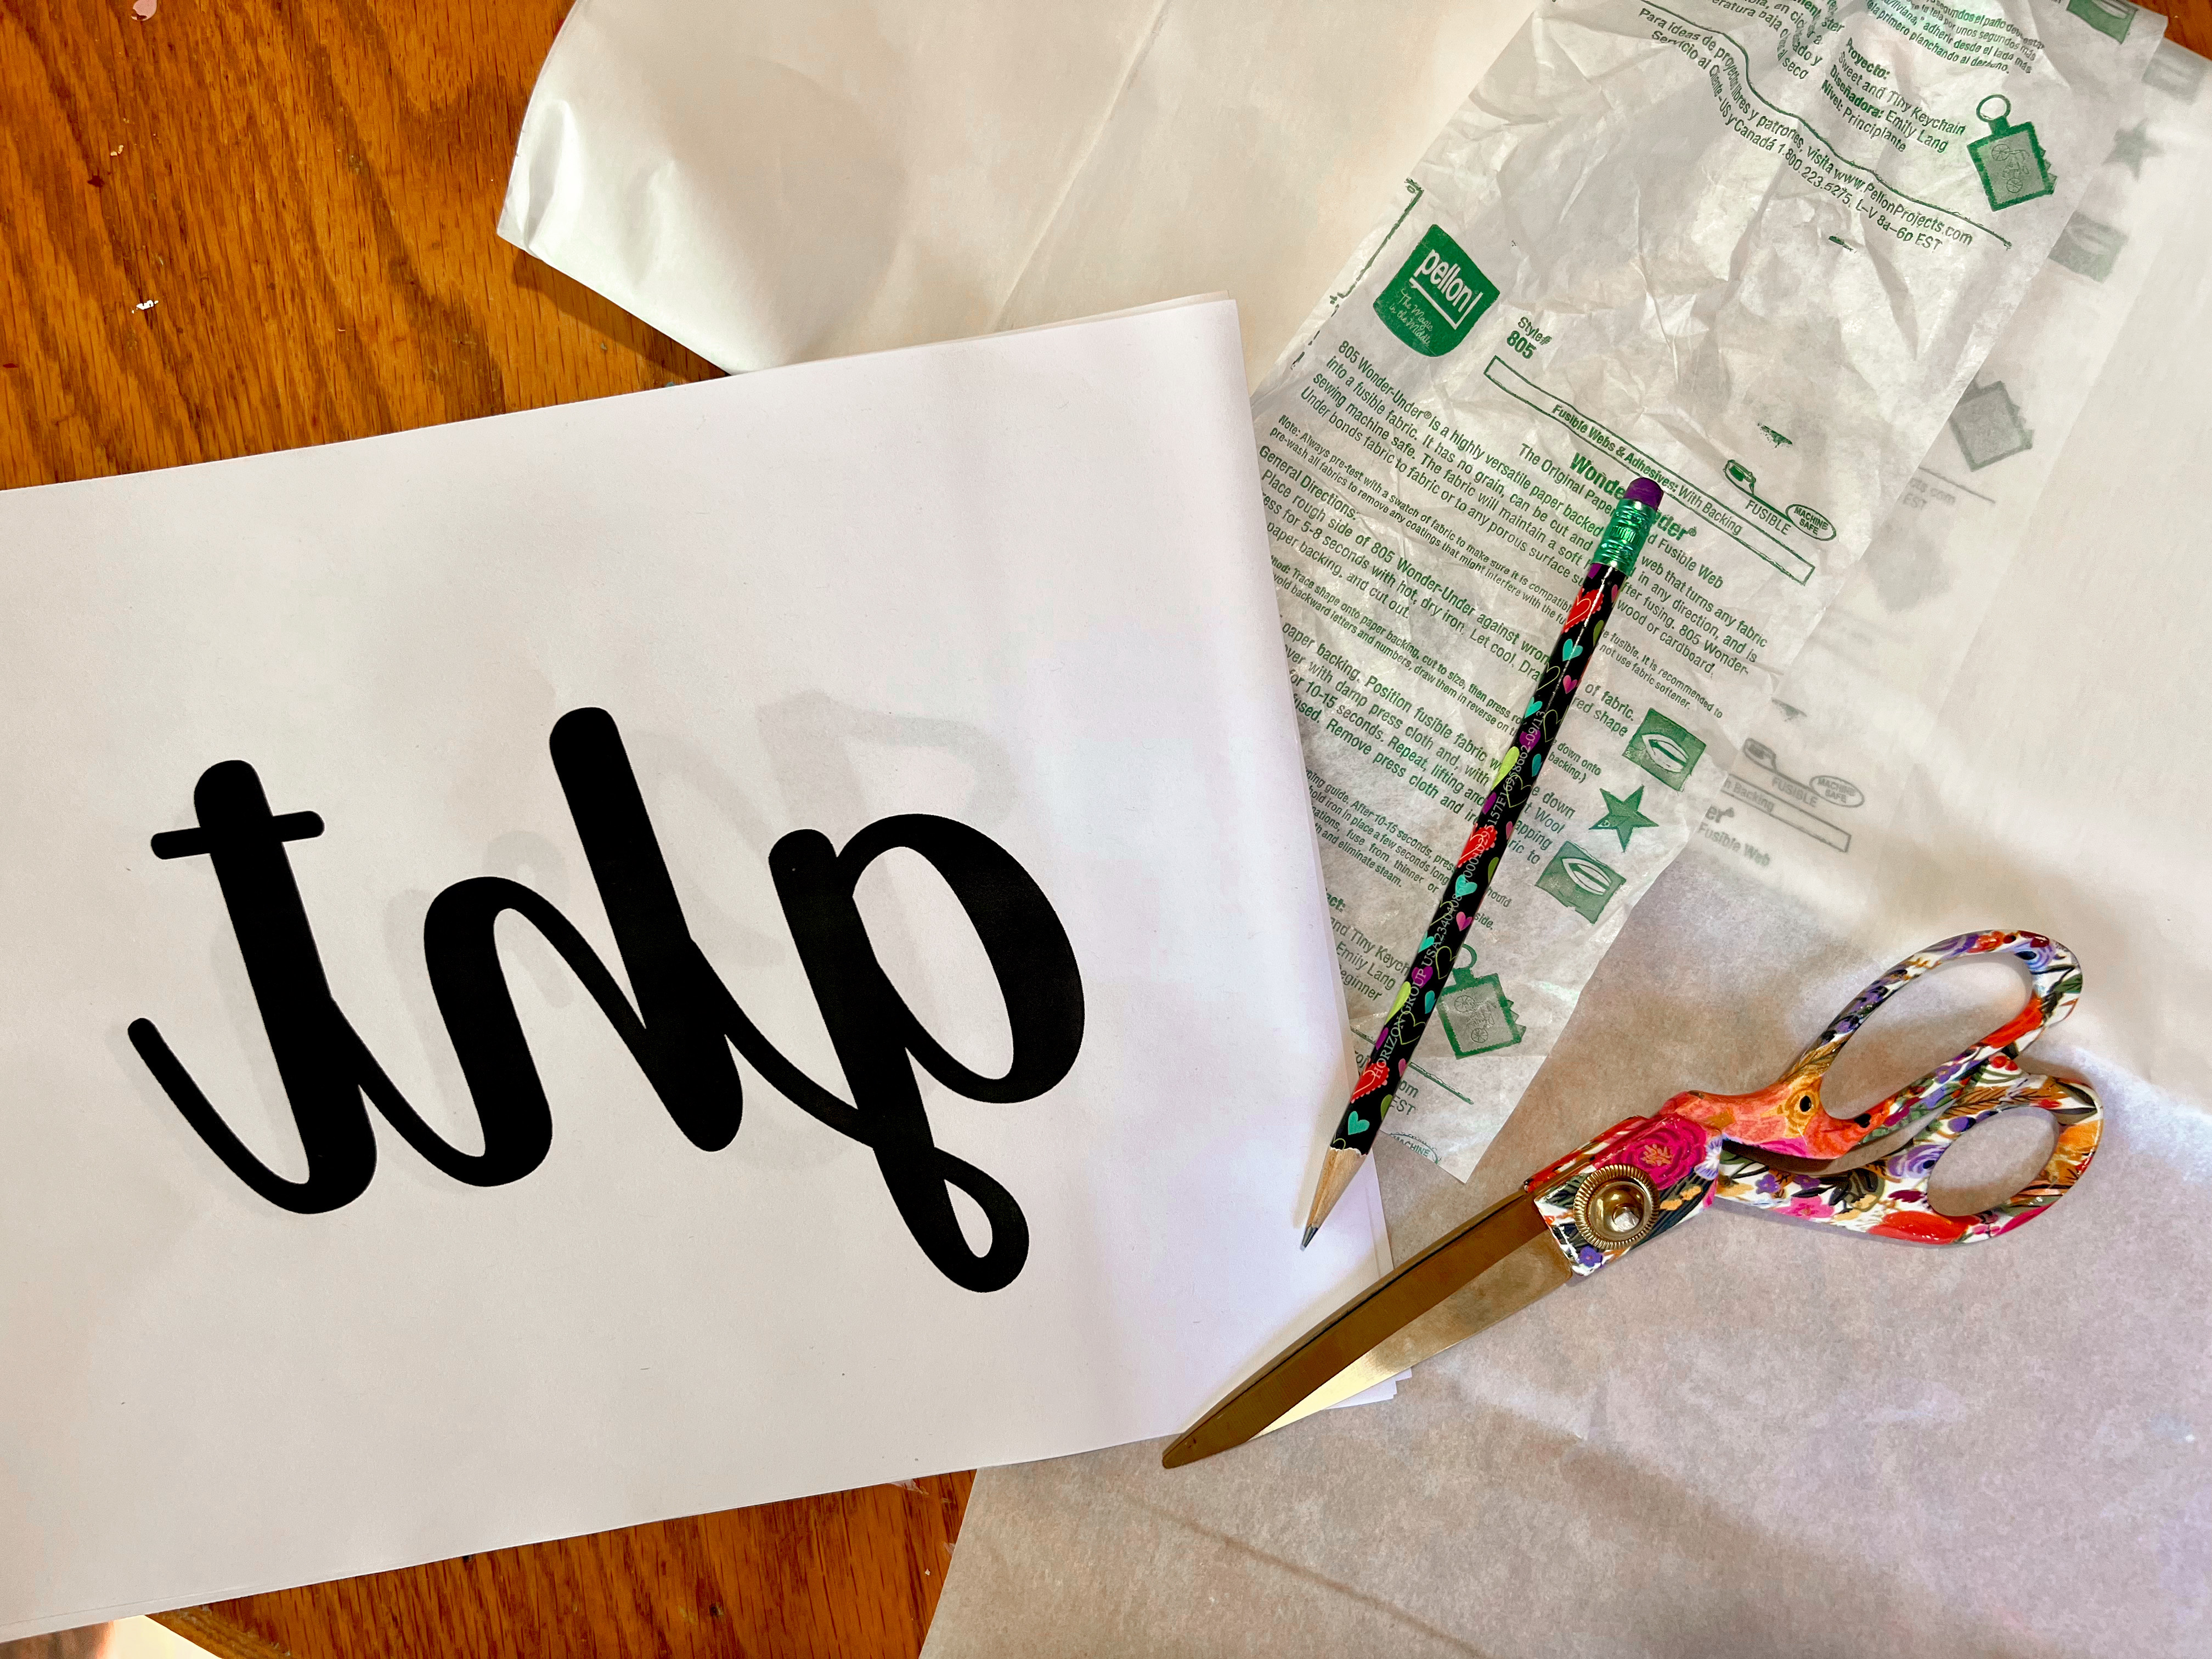
Trace out the Merry & Bright template onto the smooth side of the WonderUnder adhesive paper using a pencil. If you haven’t used this for appliqué before, this may seem strange, but I promise things will be right side out and forward when we are finished!


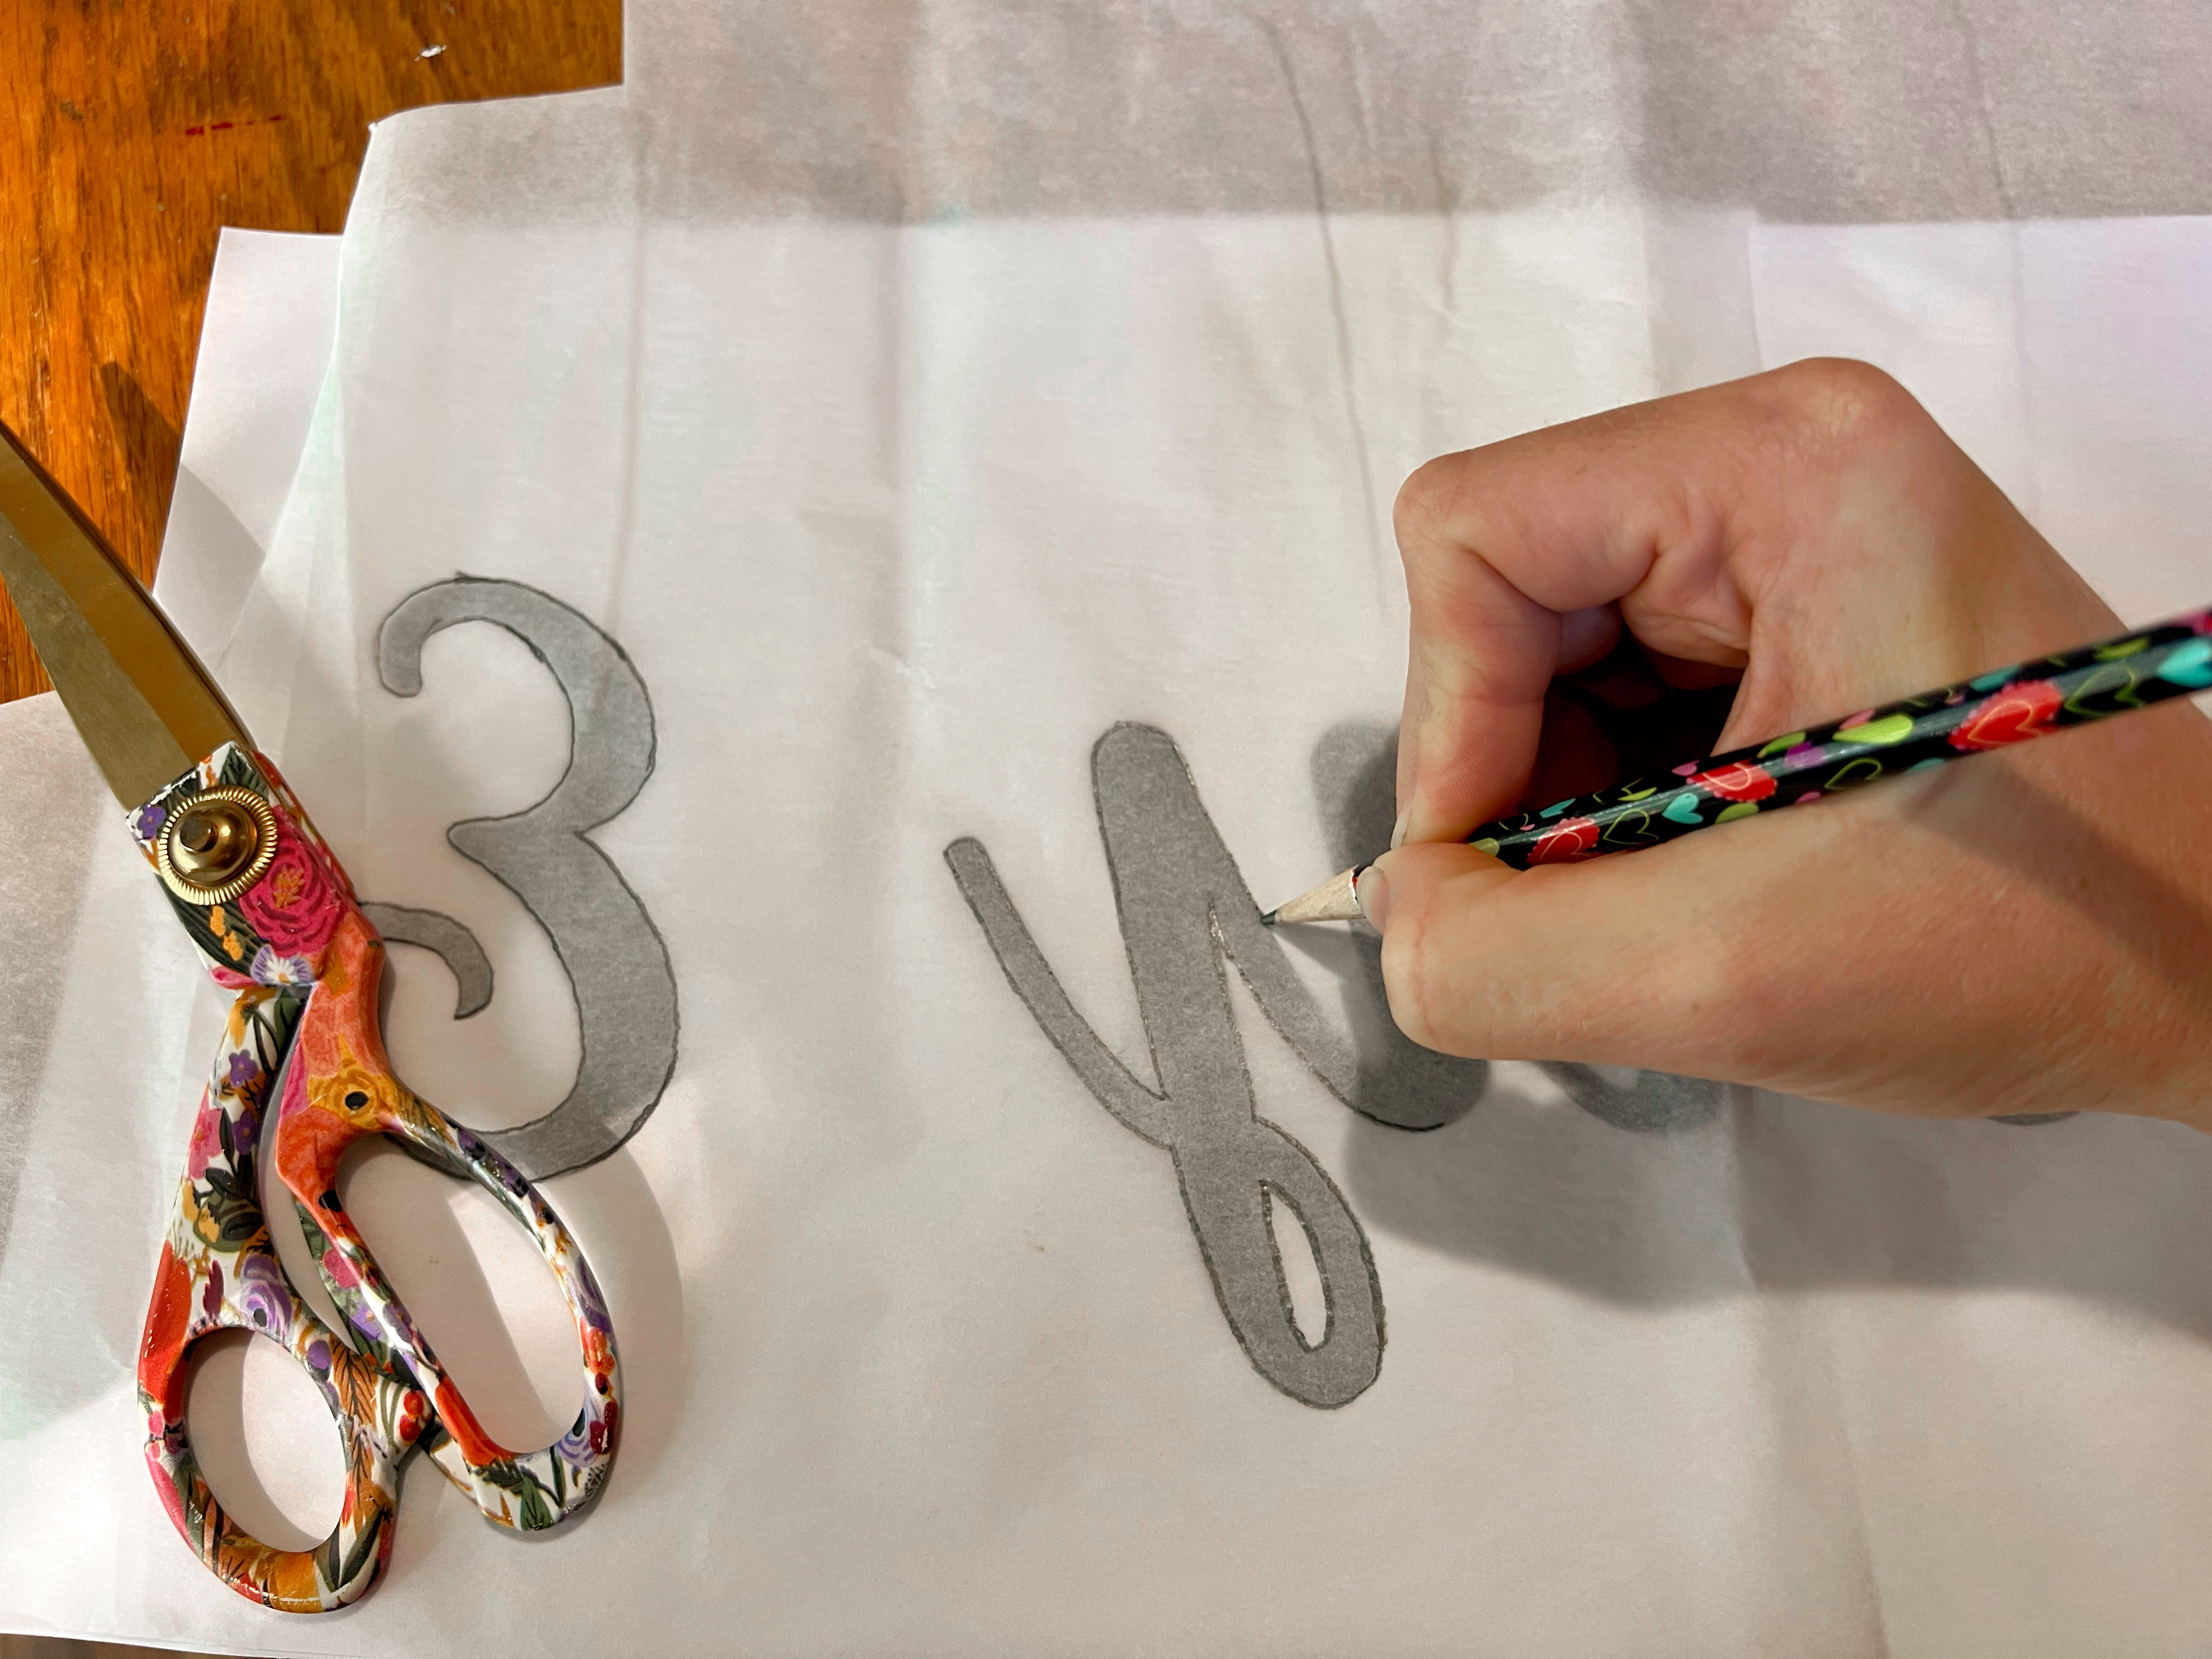
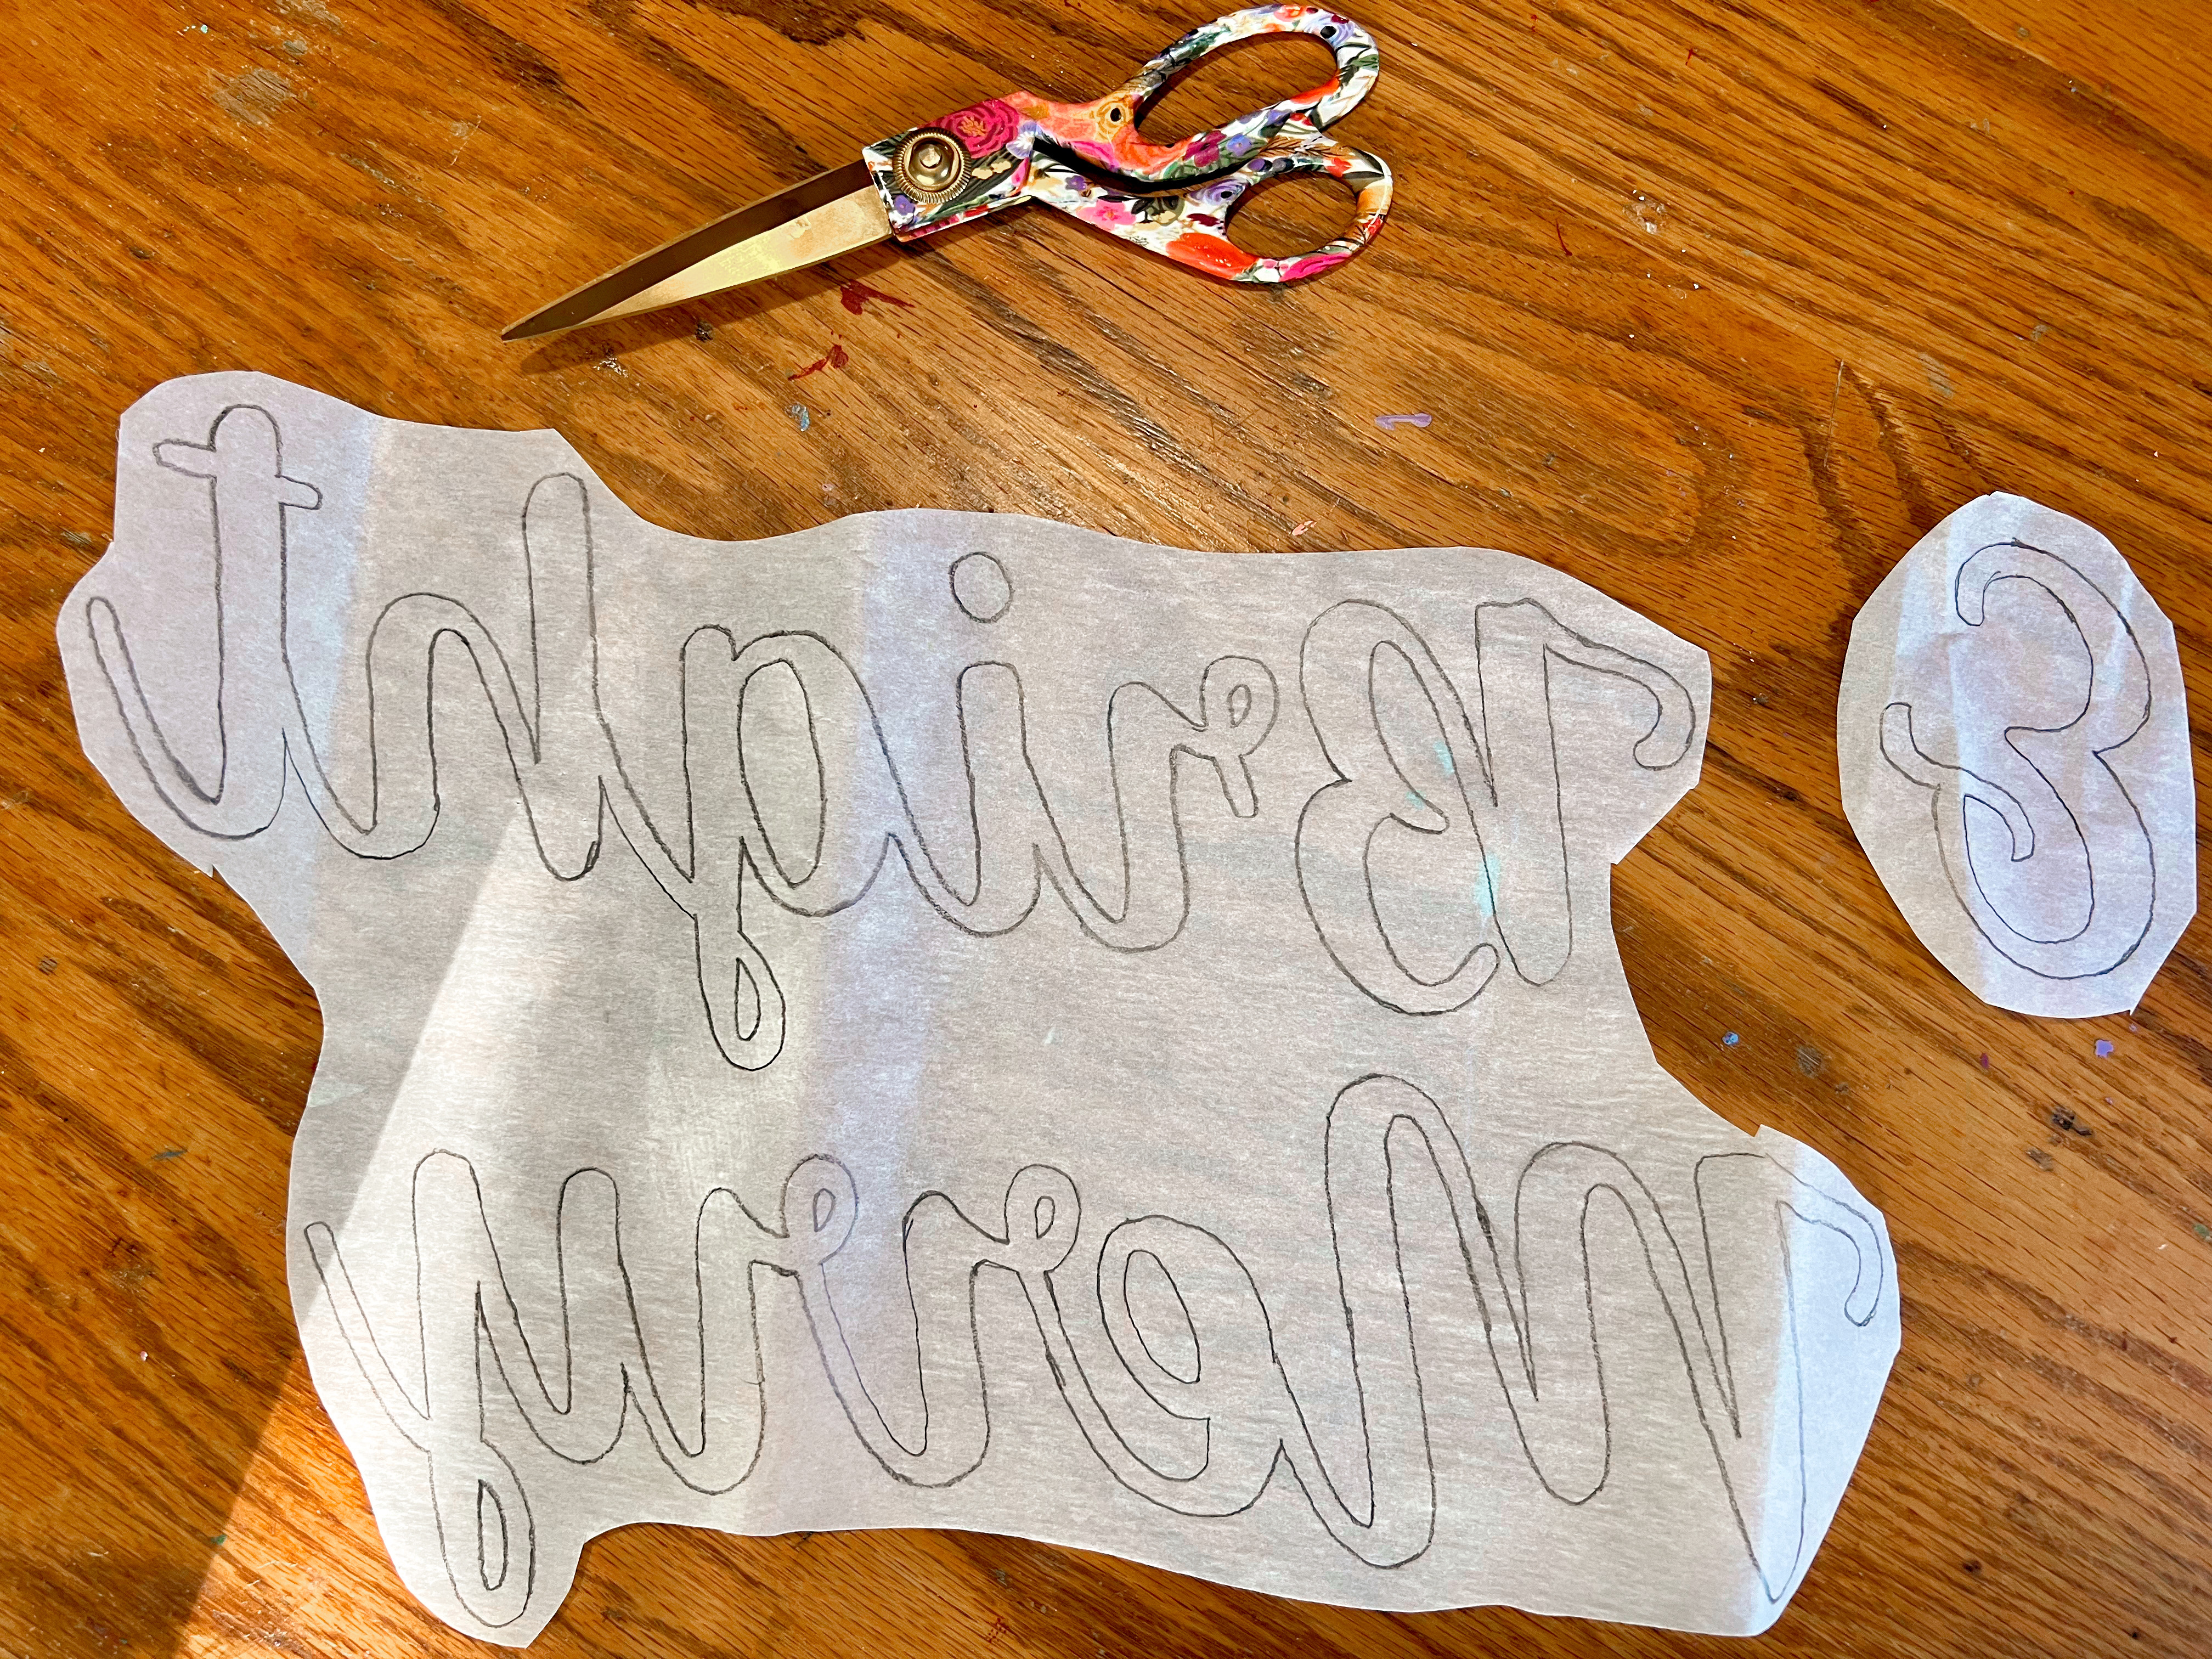
Cut out around the lettering when finished- but you do not have to cut along the lines yet. See my photo below:


Next, fuse your interfacing to your lettering fabric. Then, fuse the WonderUnder template to the back of the interfacing using your iron, pressing carefully over each section for about 5-8 seconds. DO NOT REMOVE THE PAPER BACKING YET.


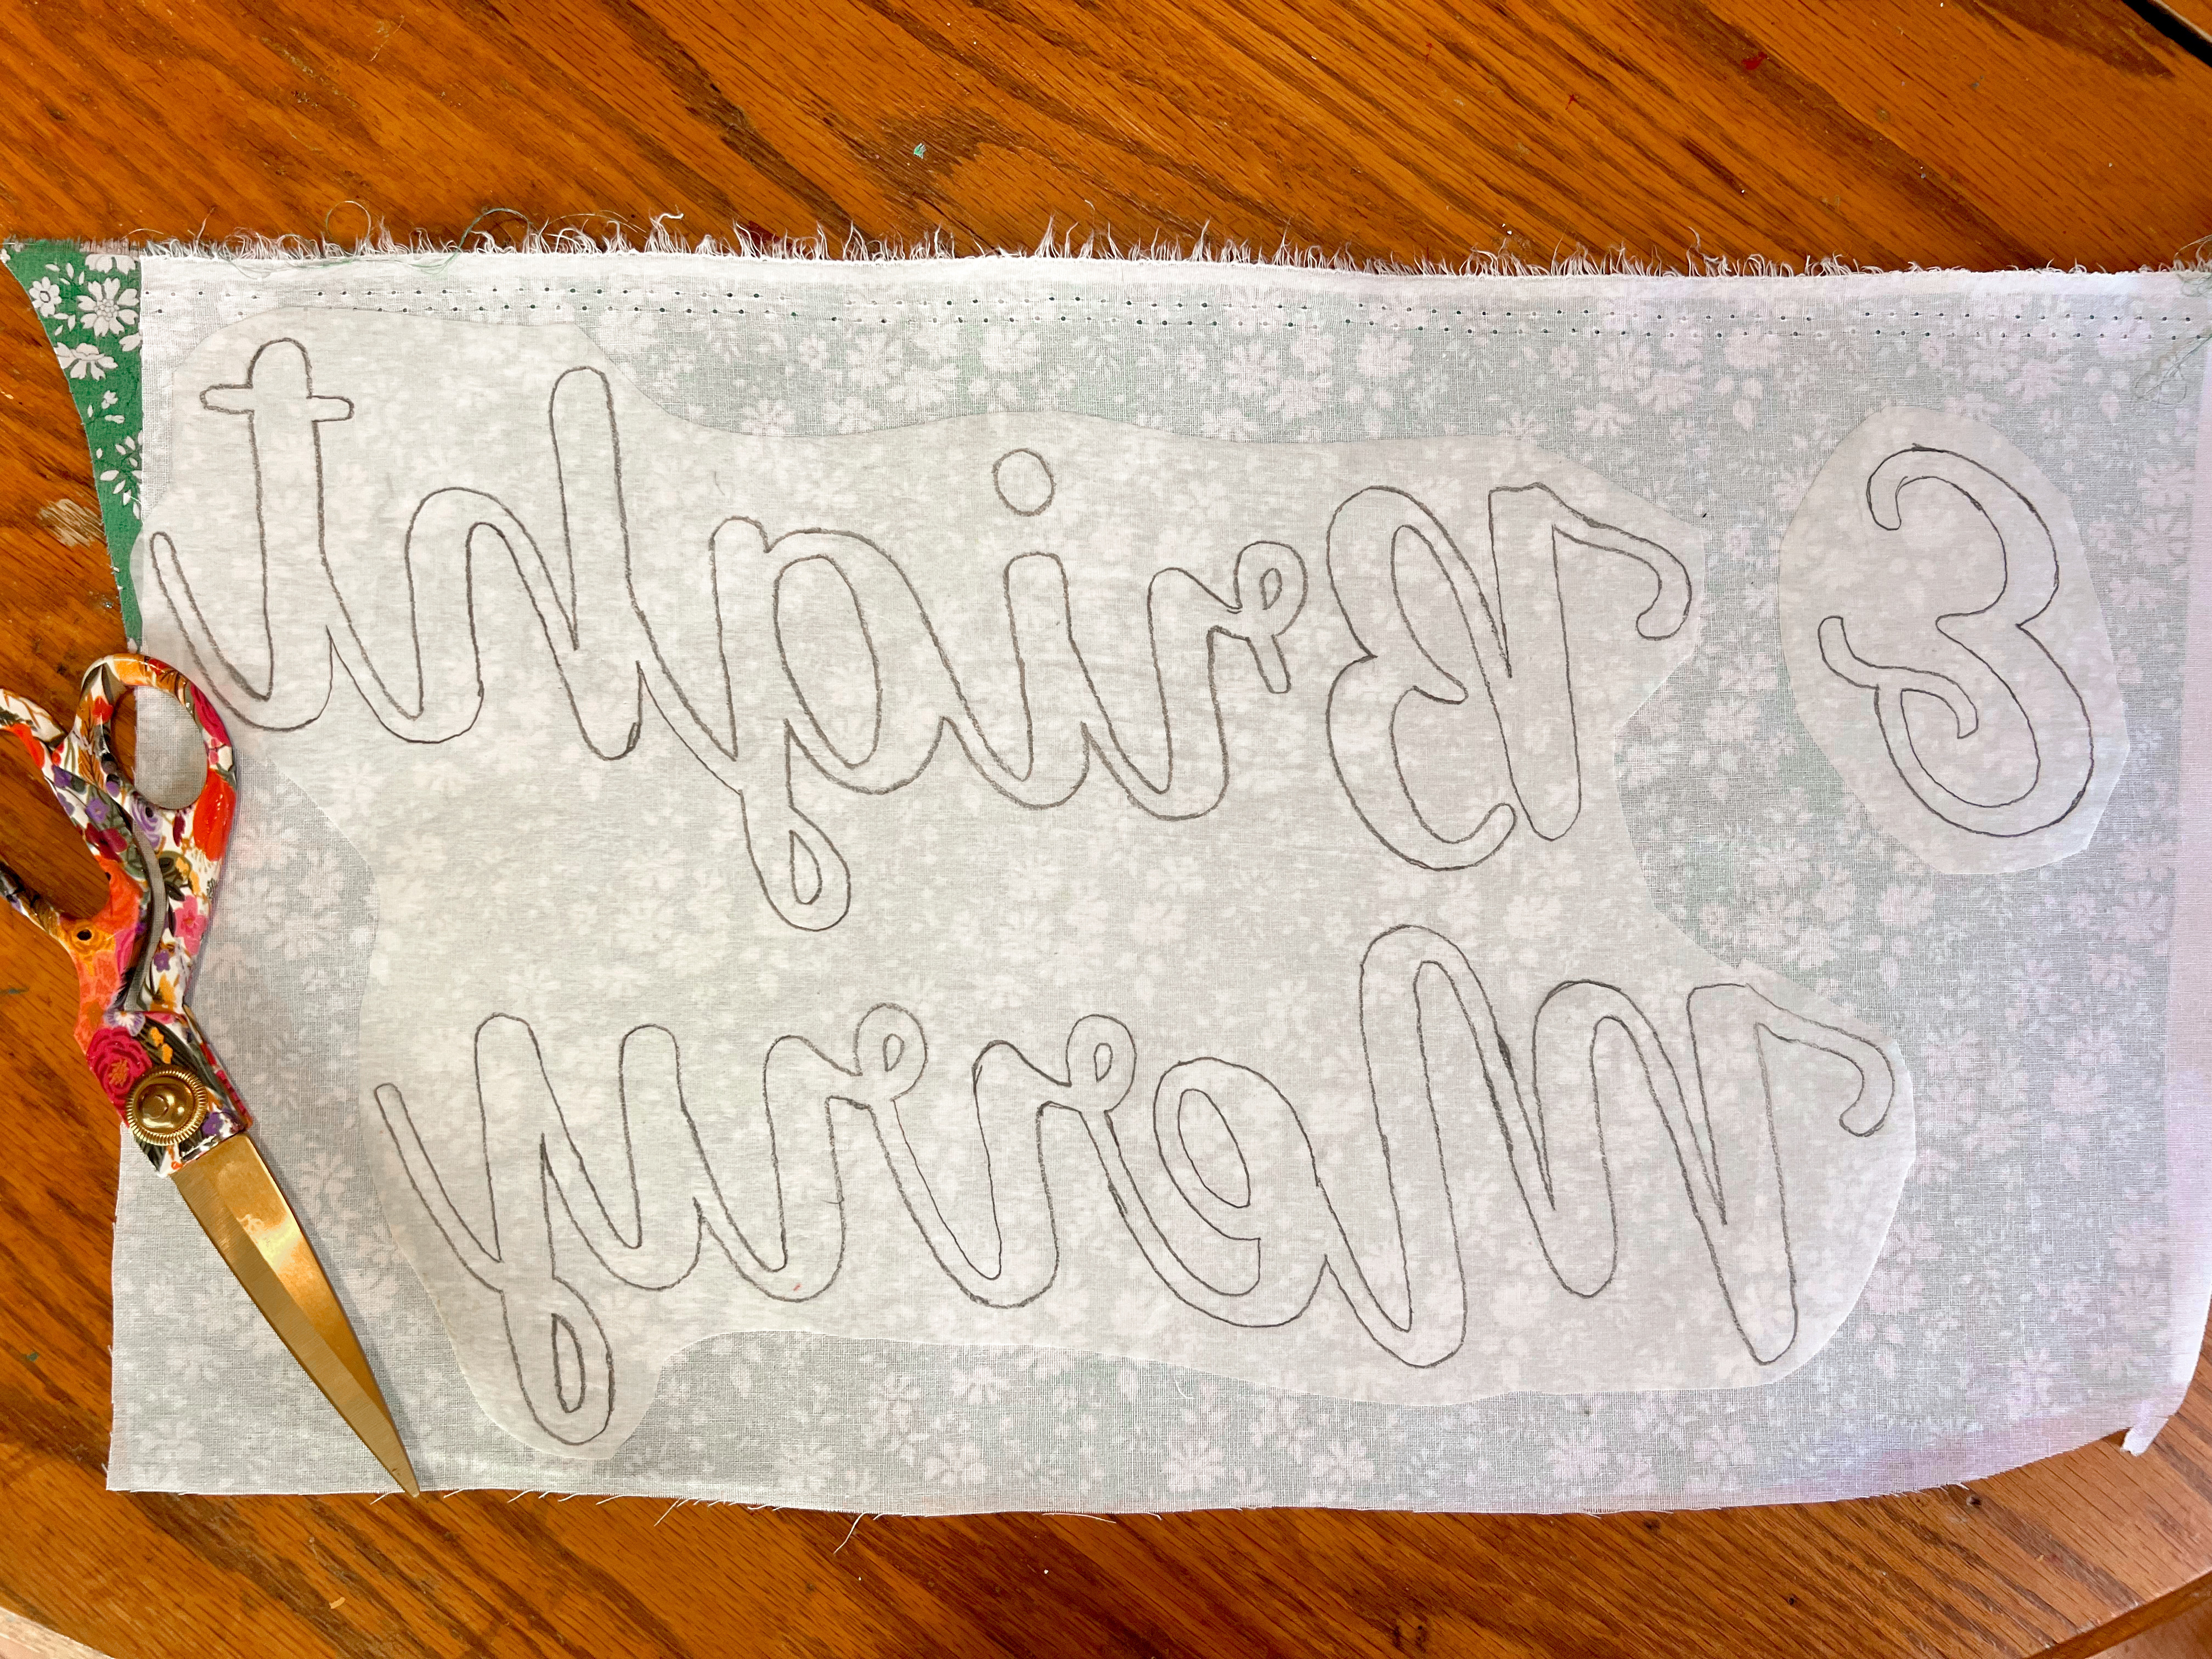
You should have three layers: fabric > interfacing > WonderUnder


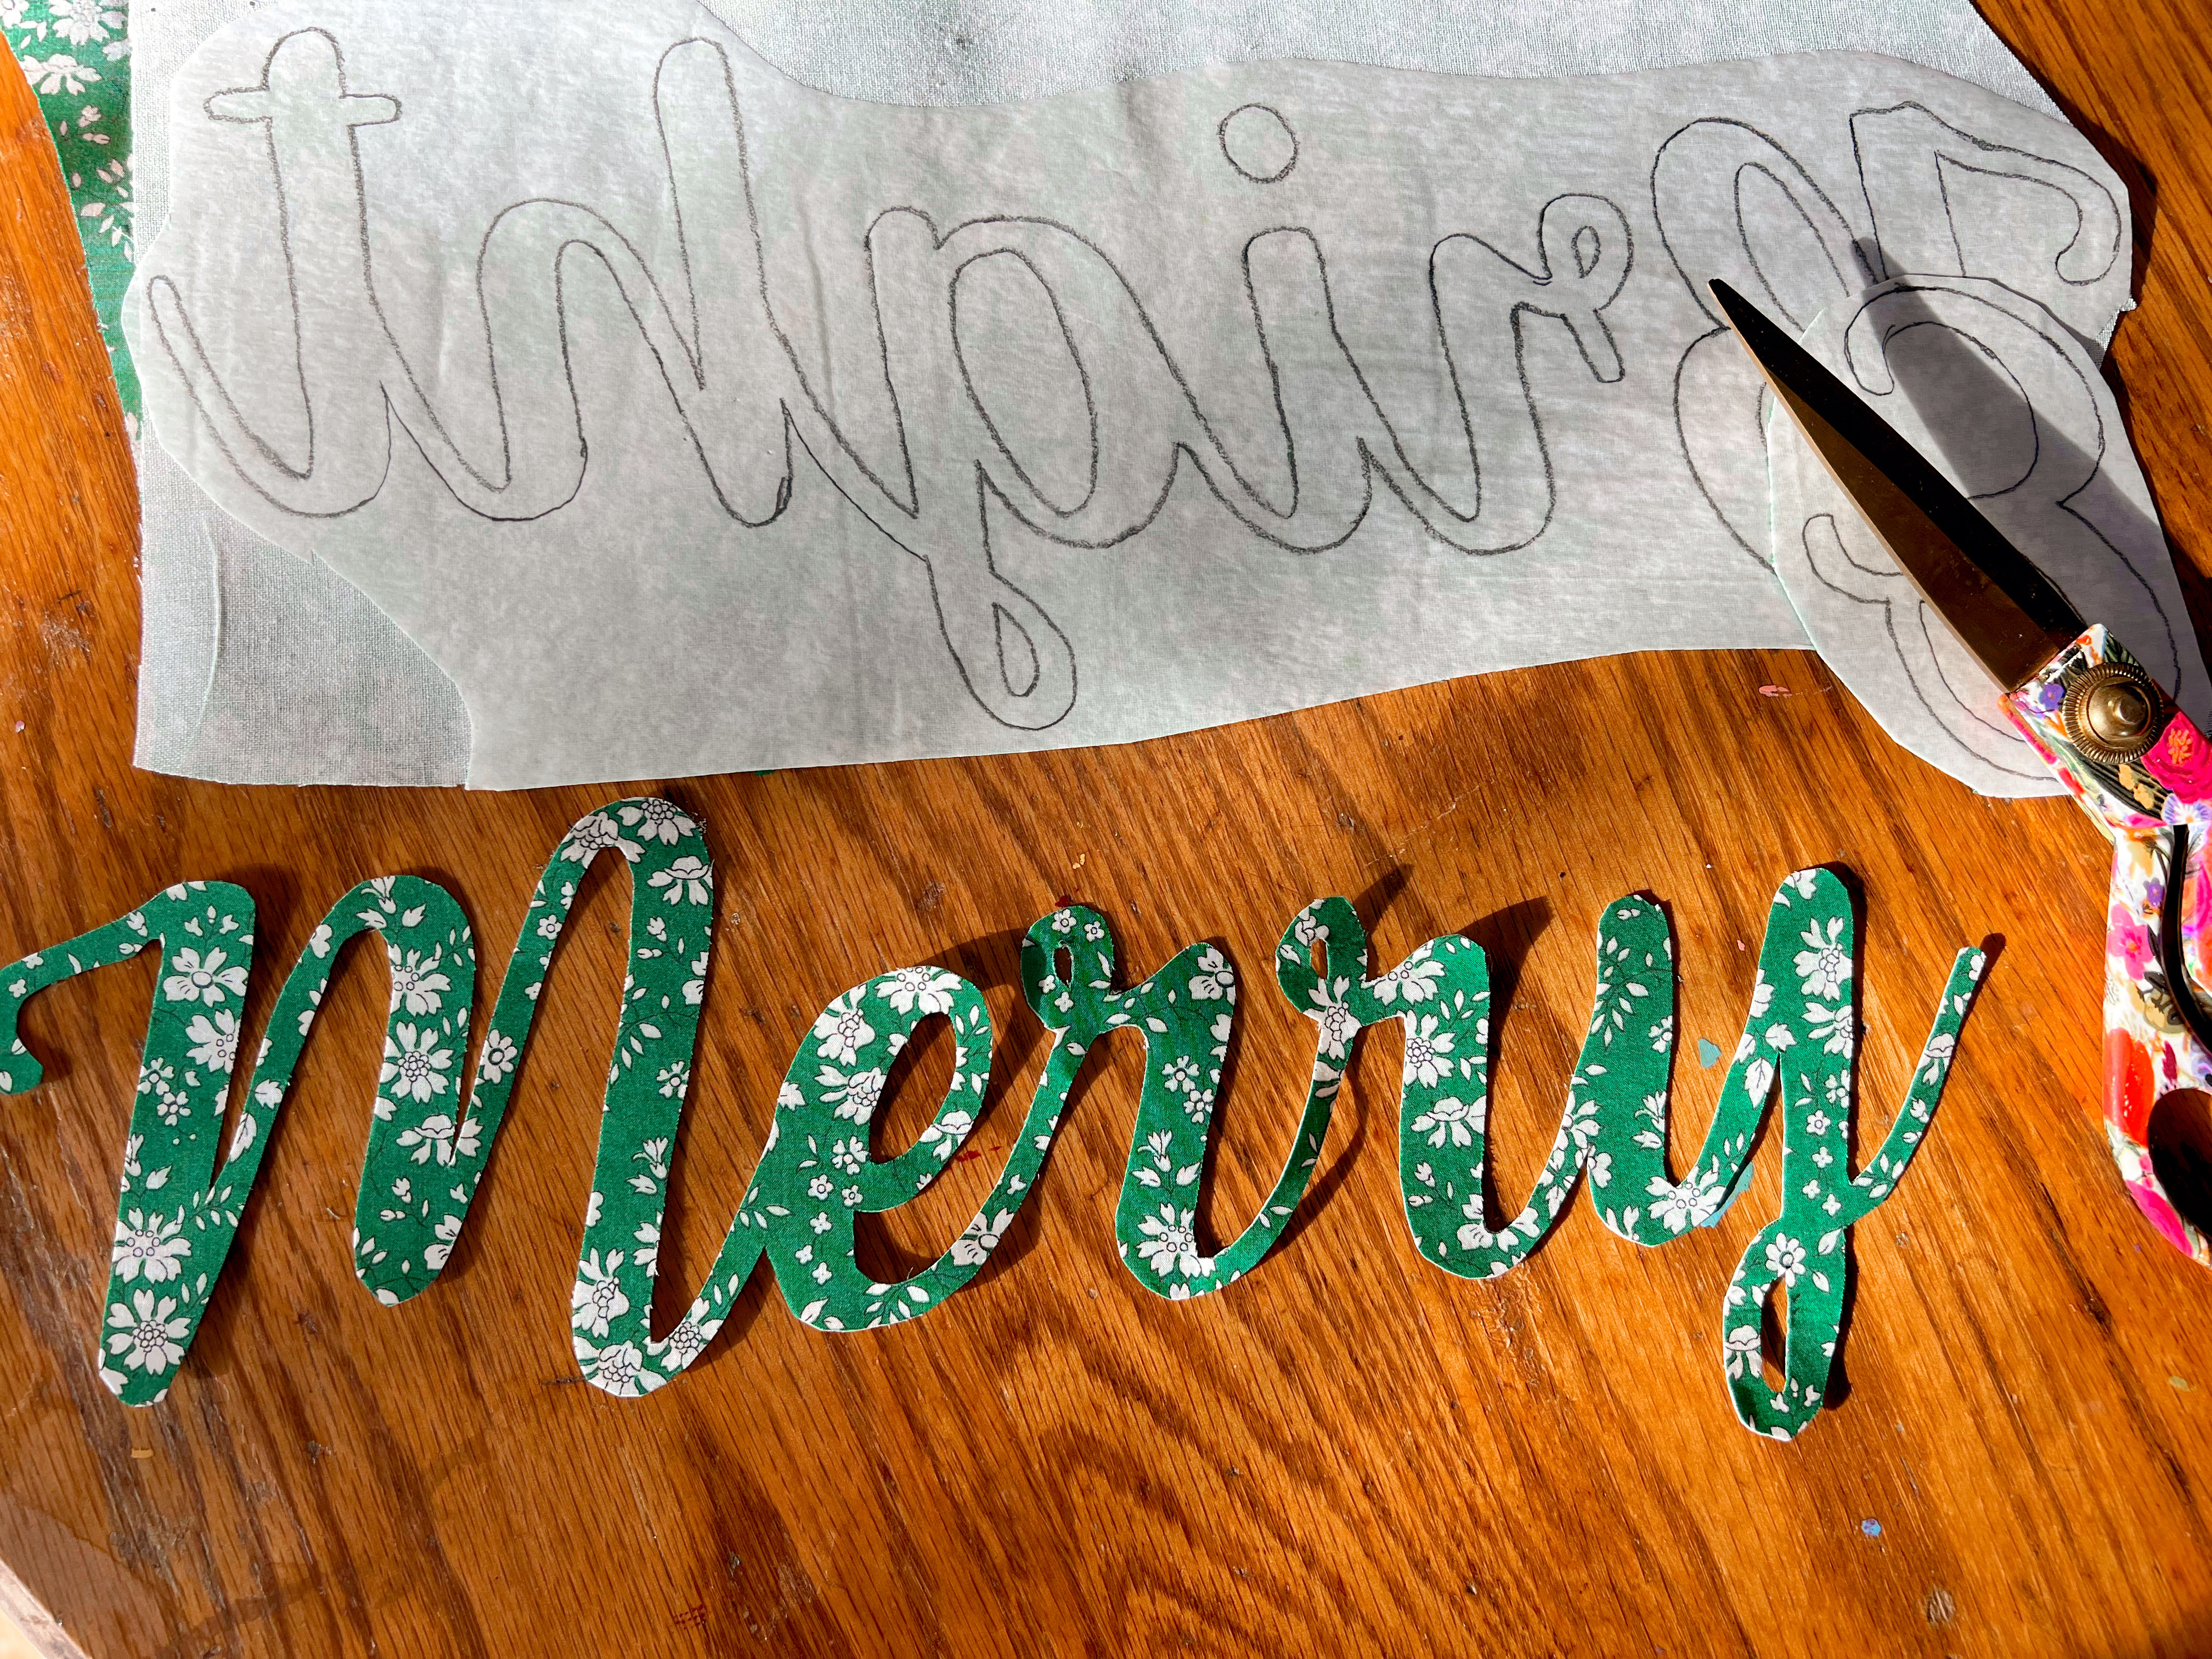
When you are certain they are well fused together, cut the lettering along the lines you marked out in pencil. Do not remove the paper from the lettered fabric yet. Set aside.


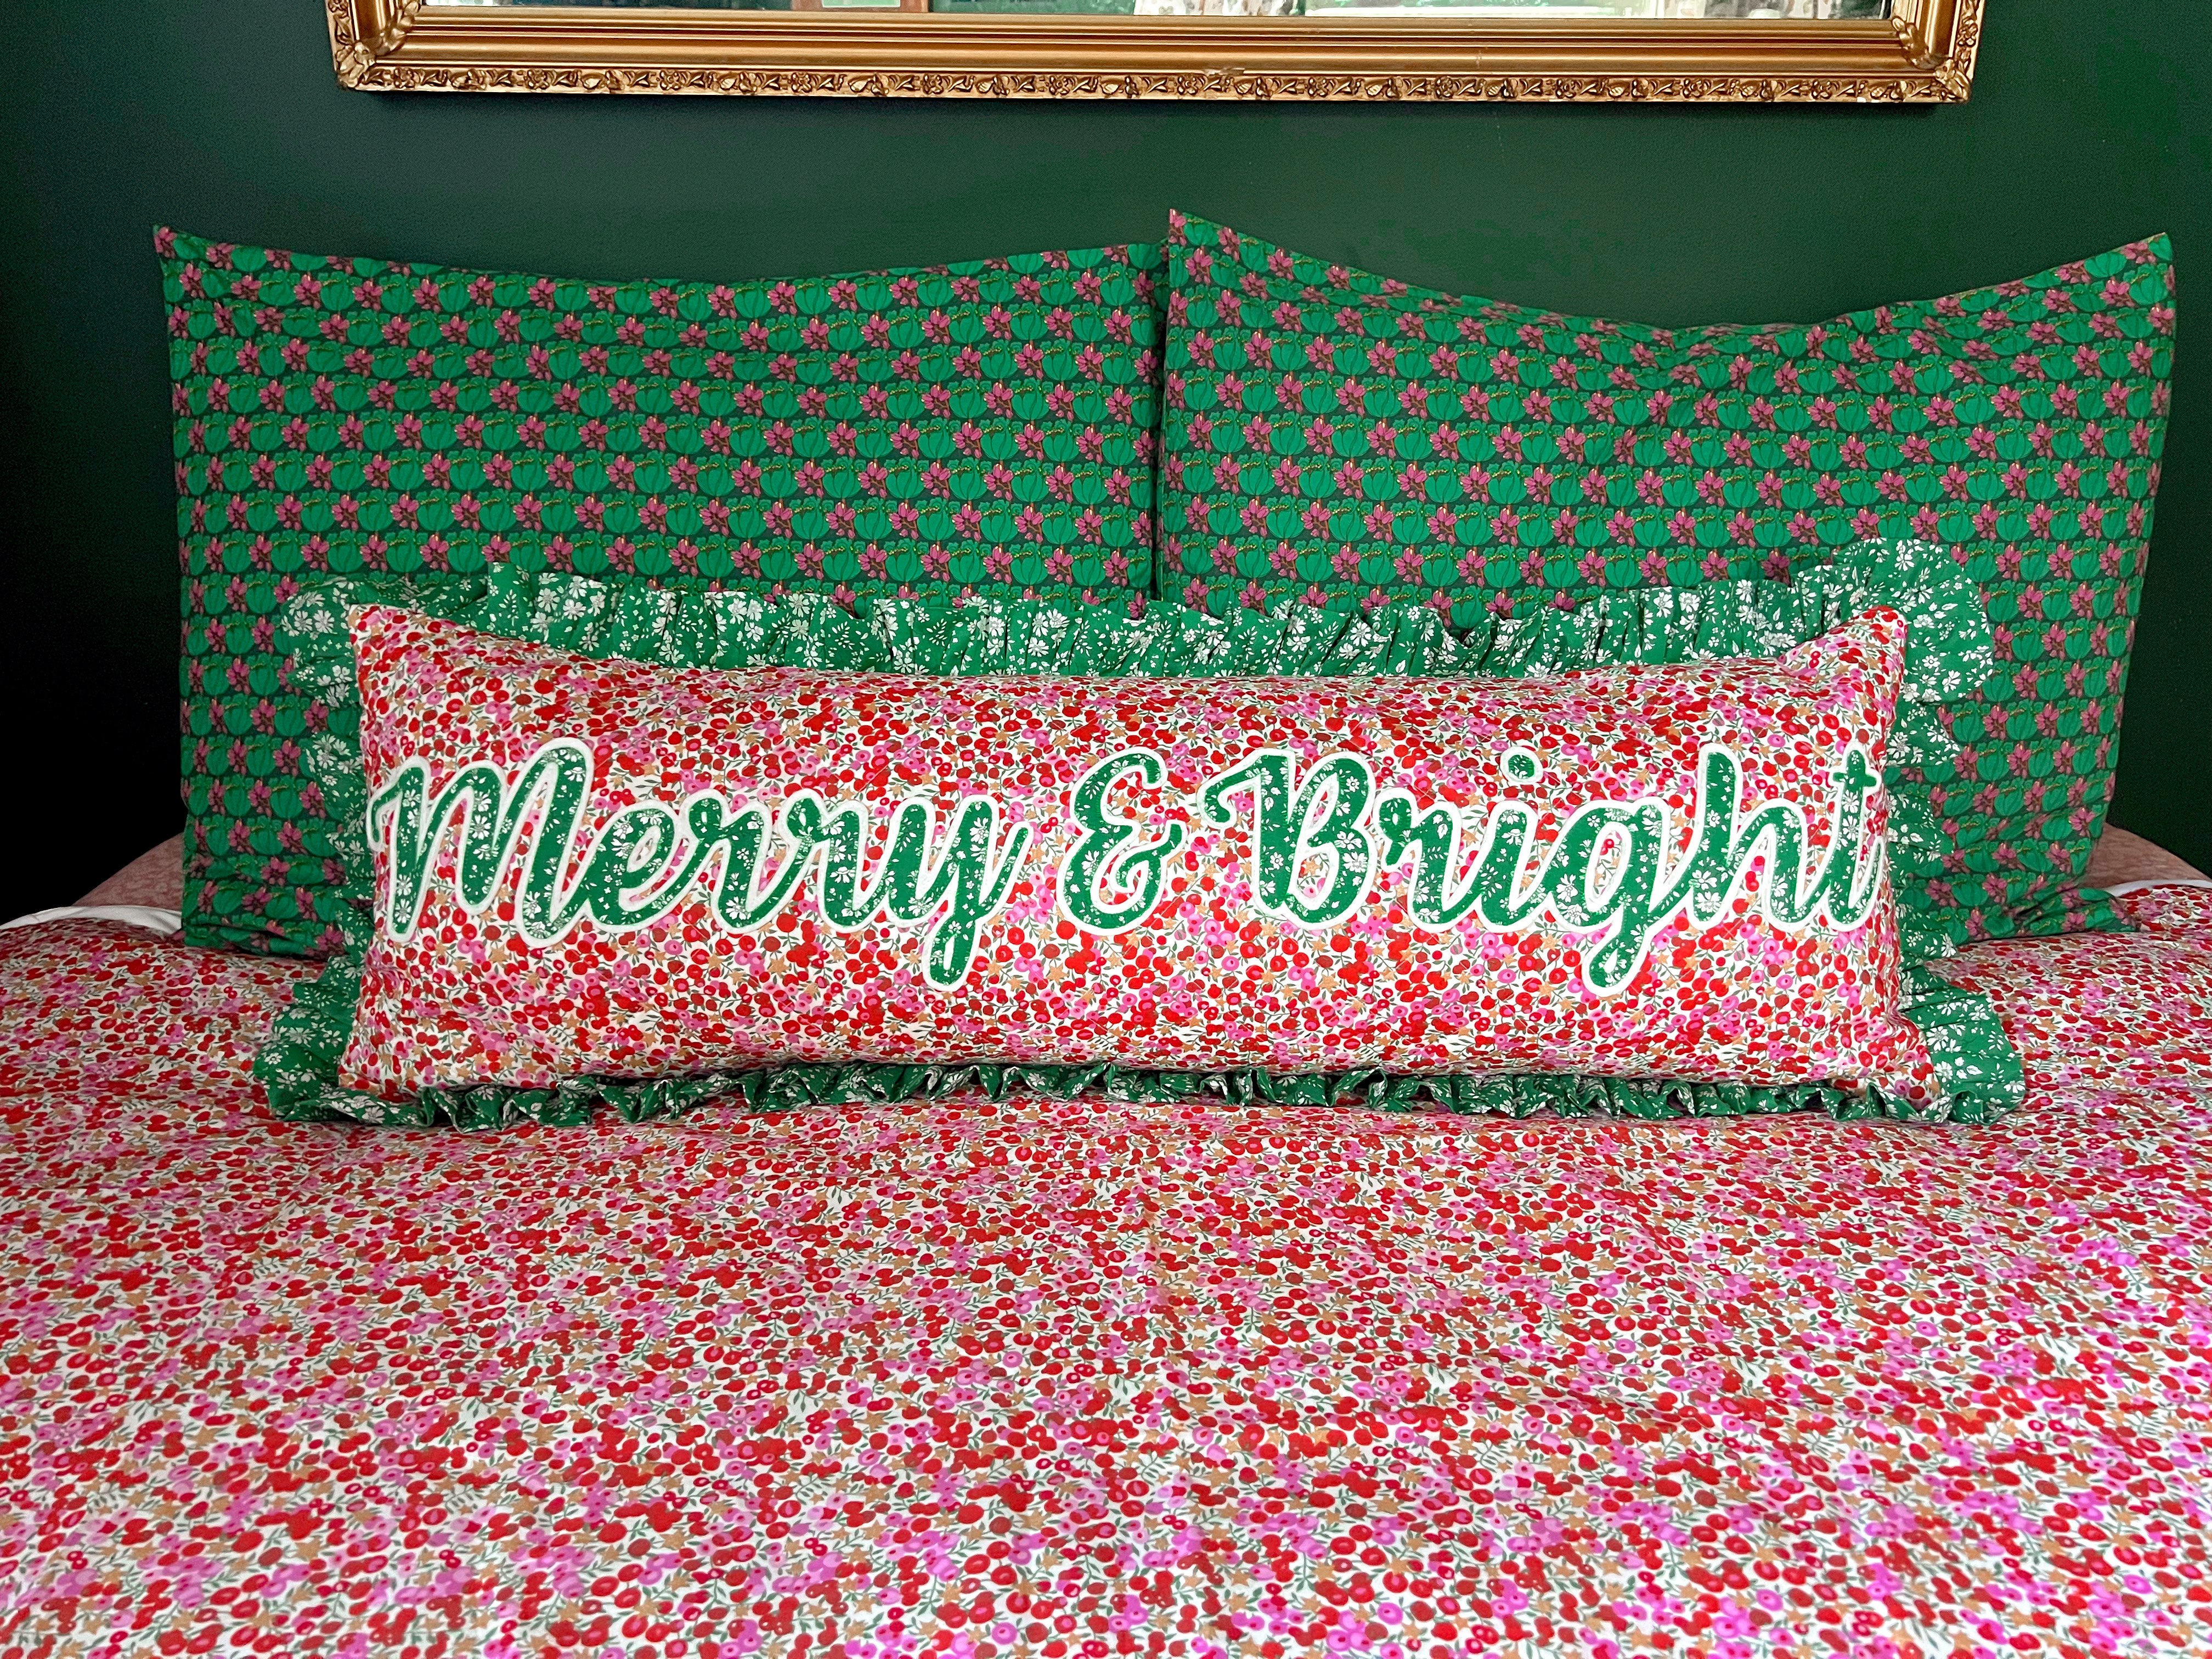
Step 2: Next, prepare the pillow background. Layer your fabric atop a piece of batting just larger than the background. Quilt as desired.


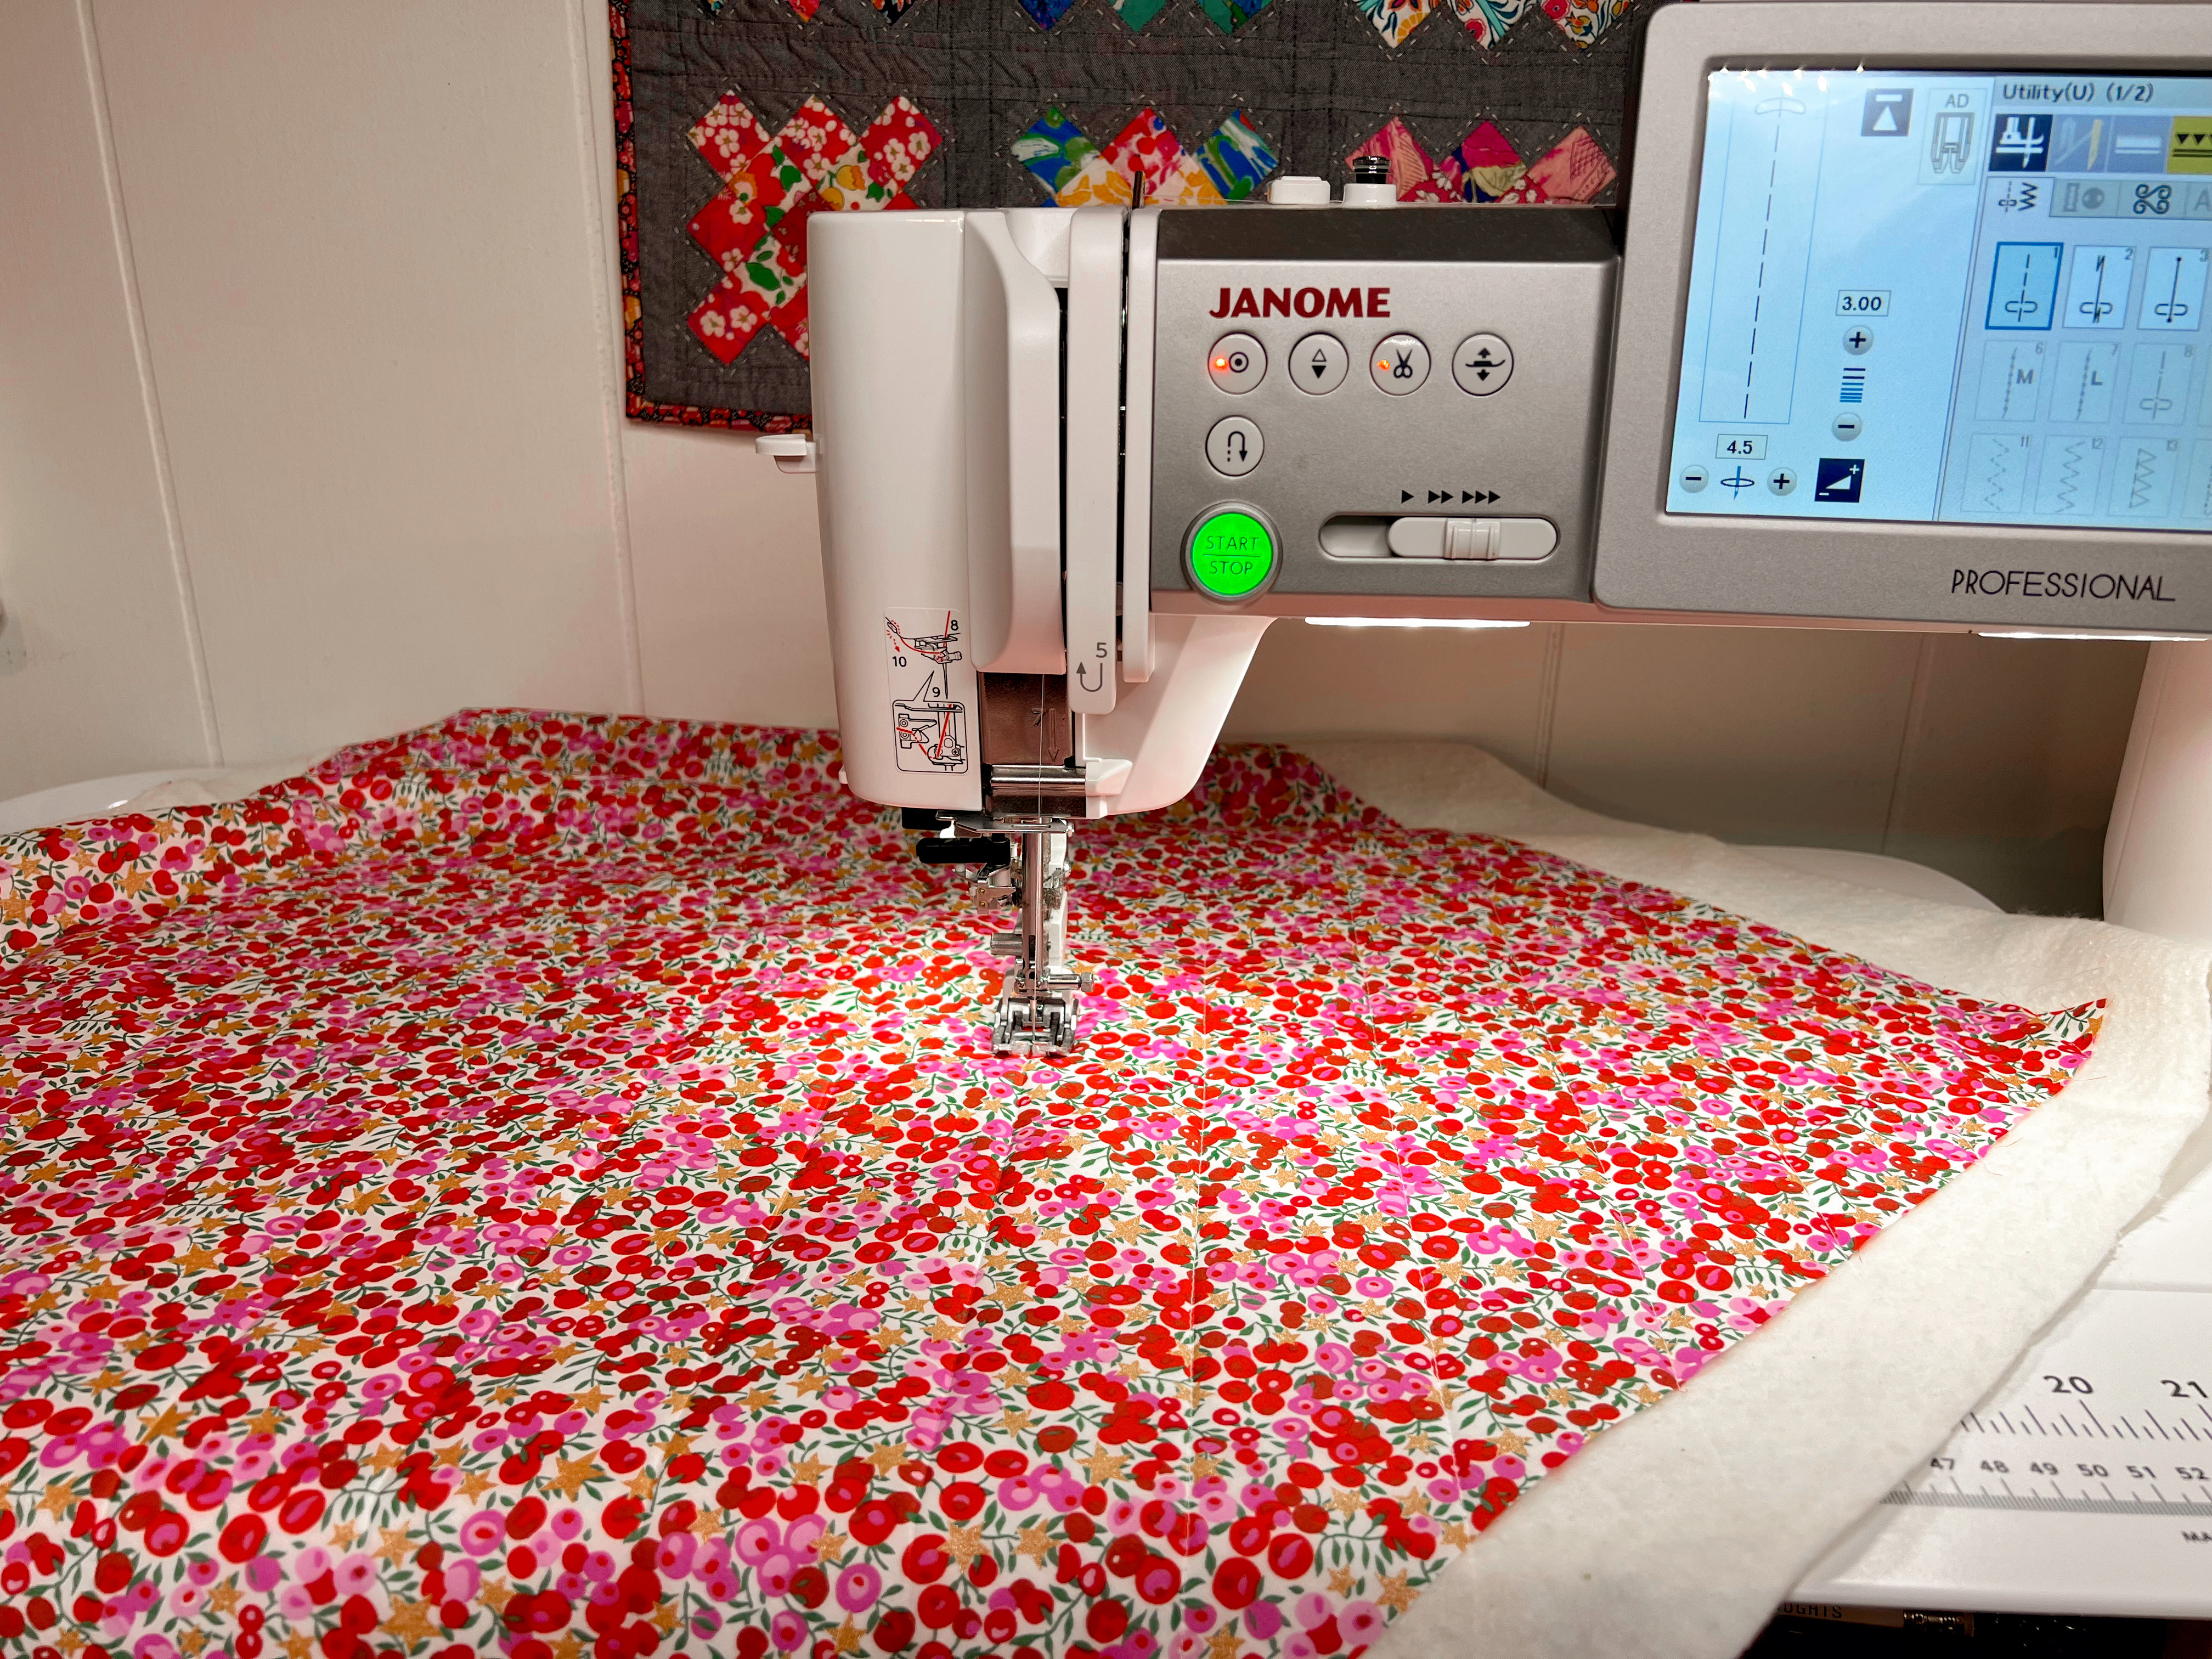
Cut into two pieces that are each 13x36” One will be the pillow front, and the other will be the pillow back. Alternatively, you can quilt to separate pieces if you would like a different front and back.


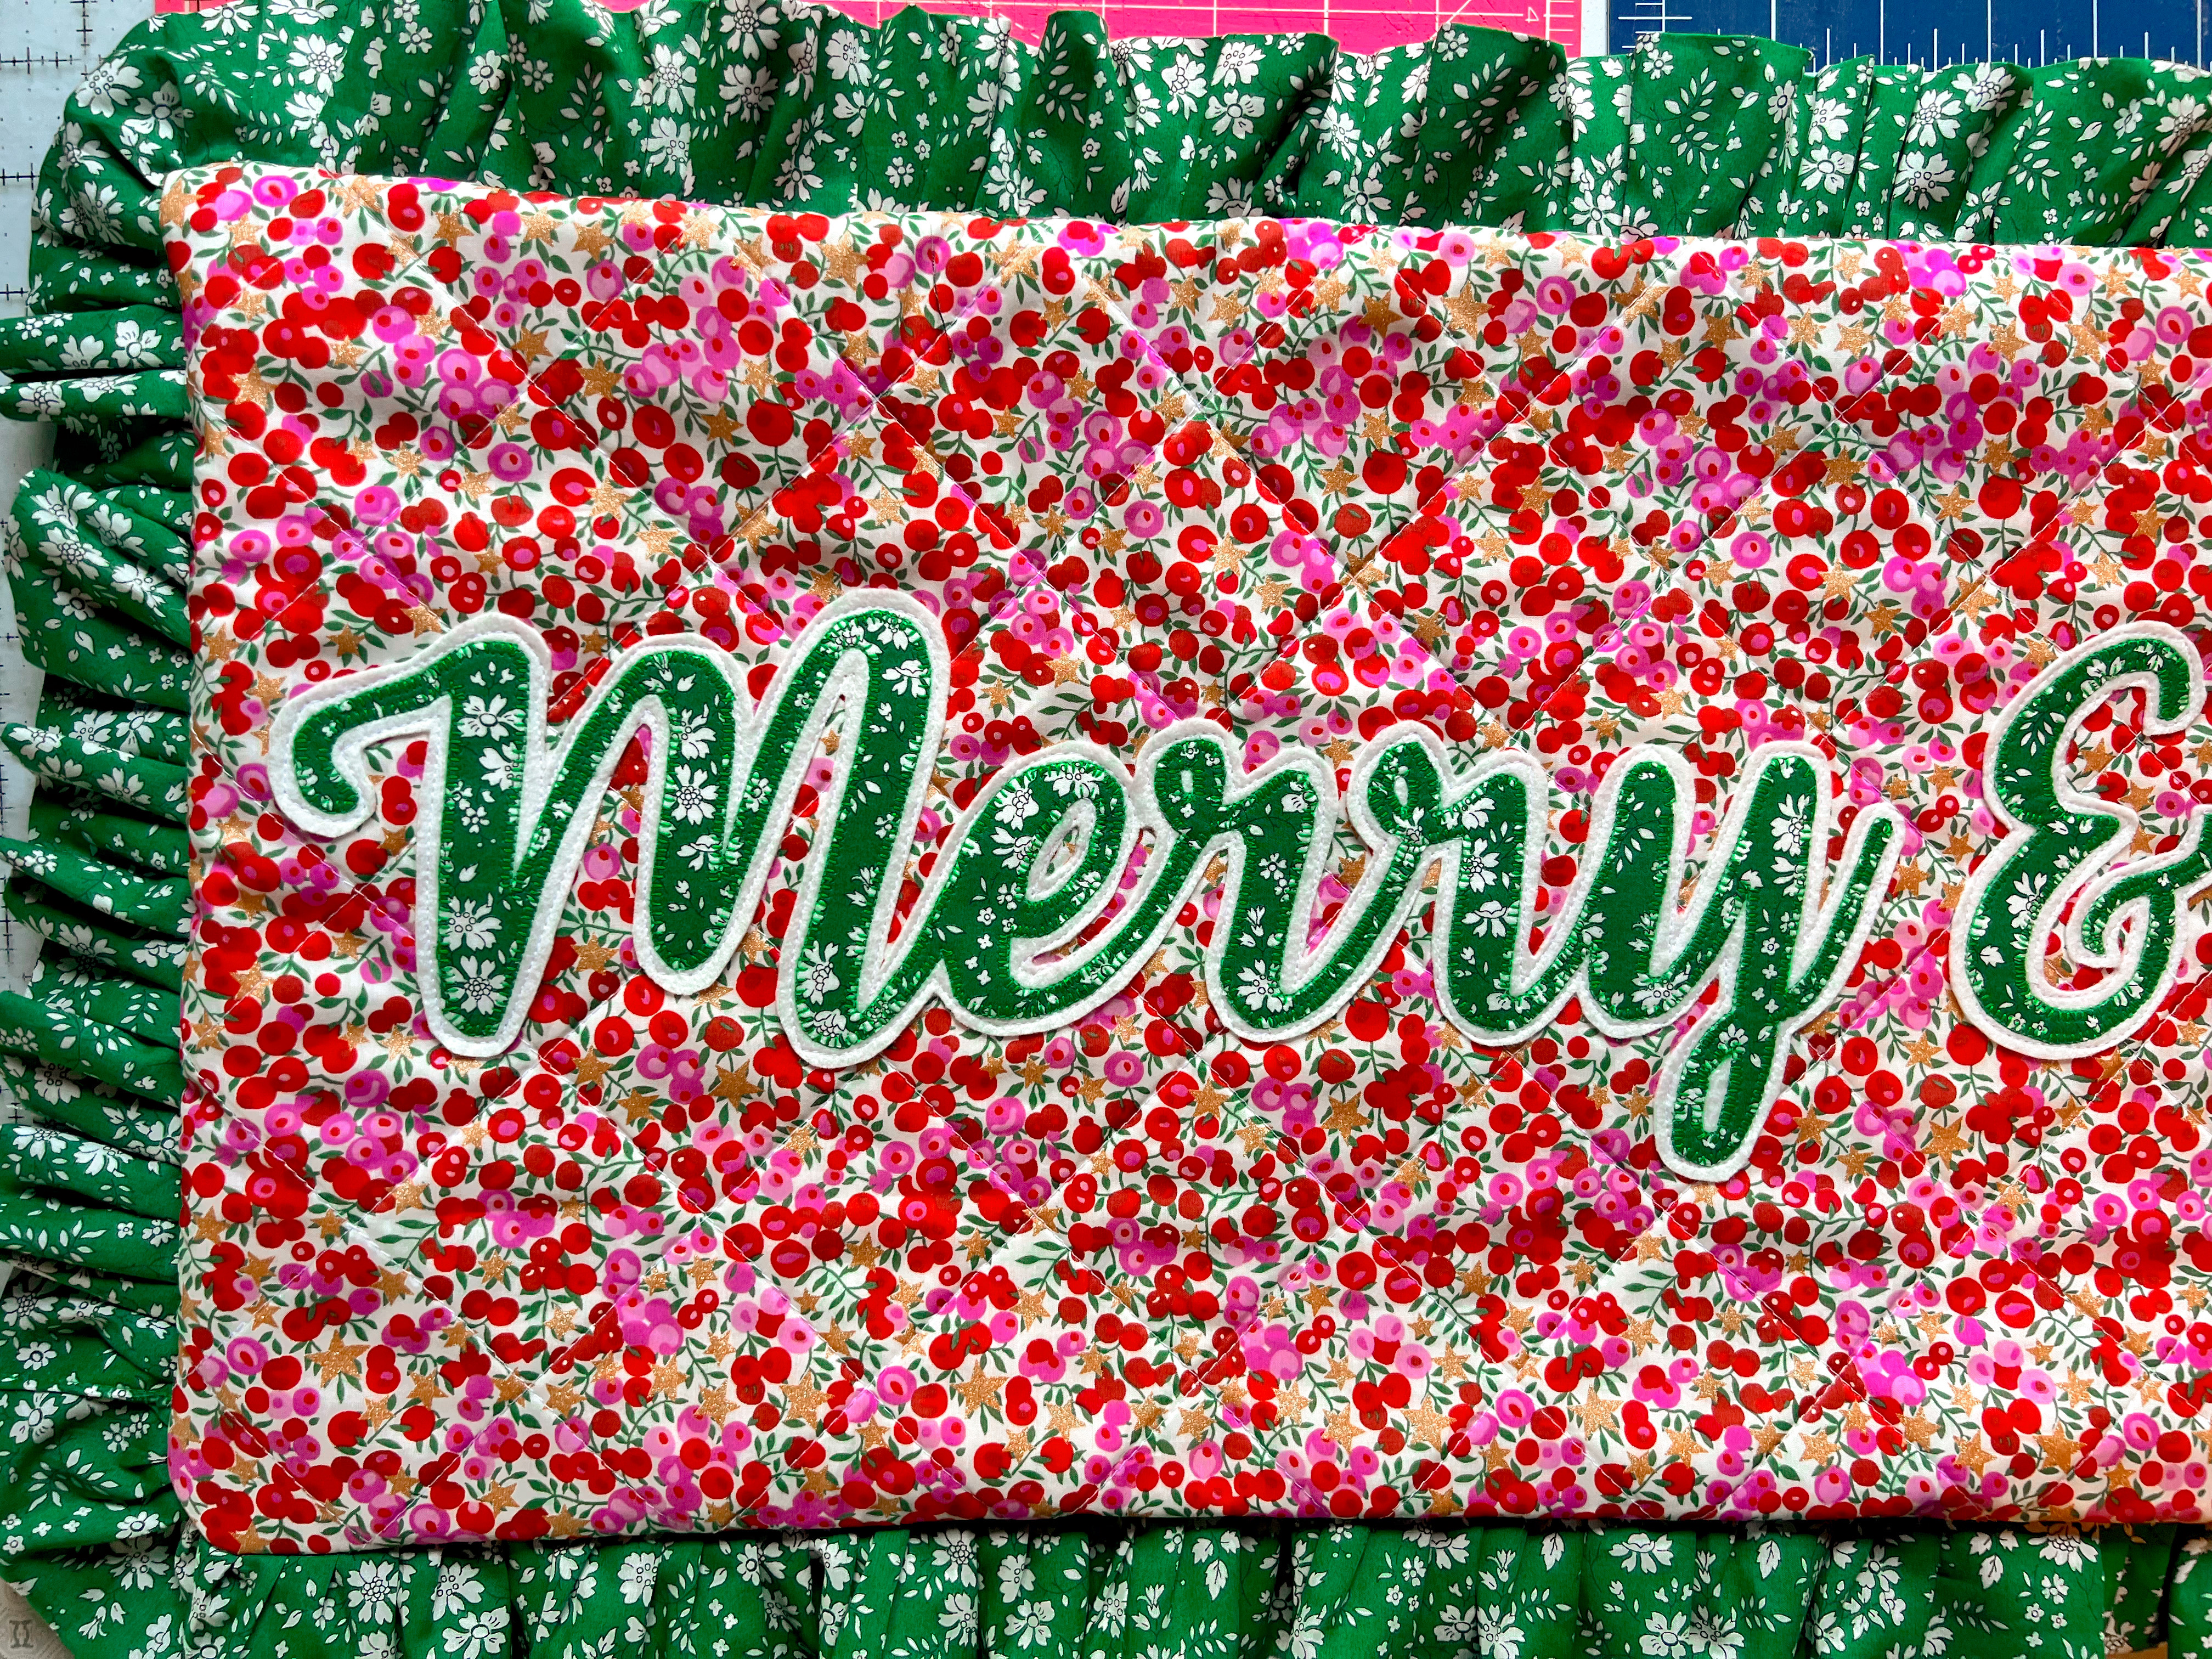
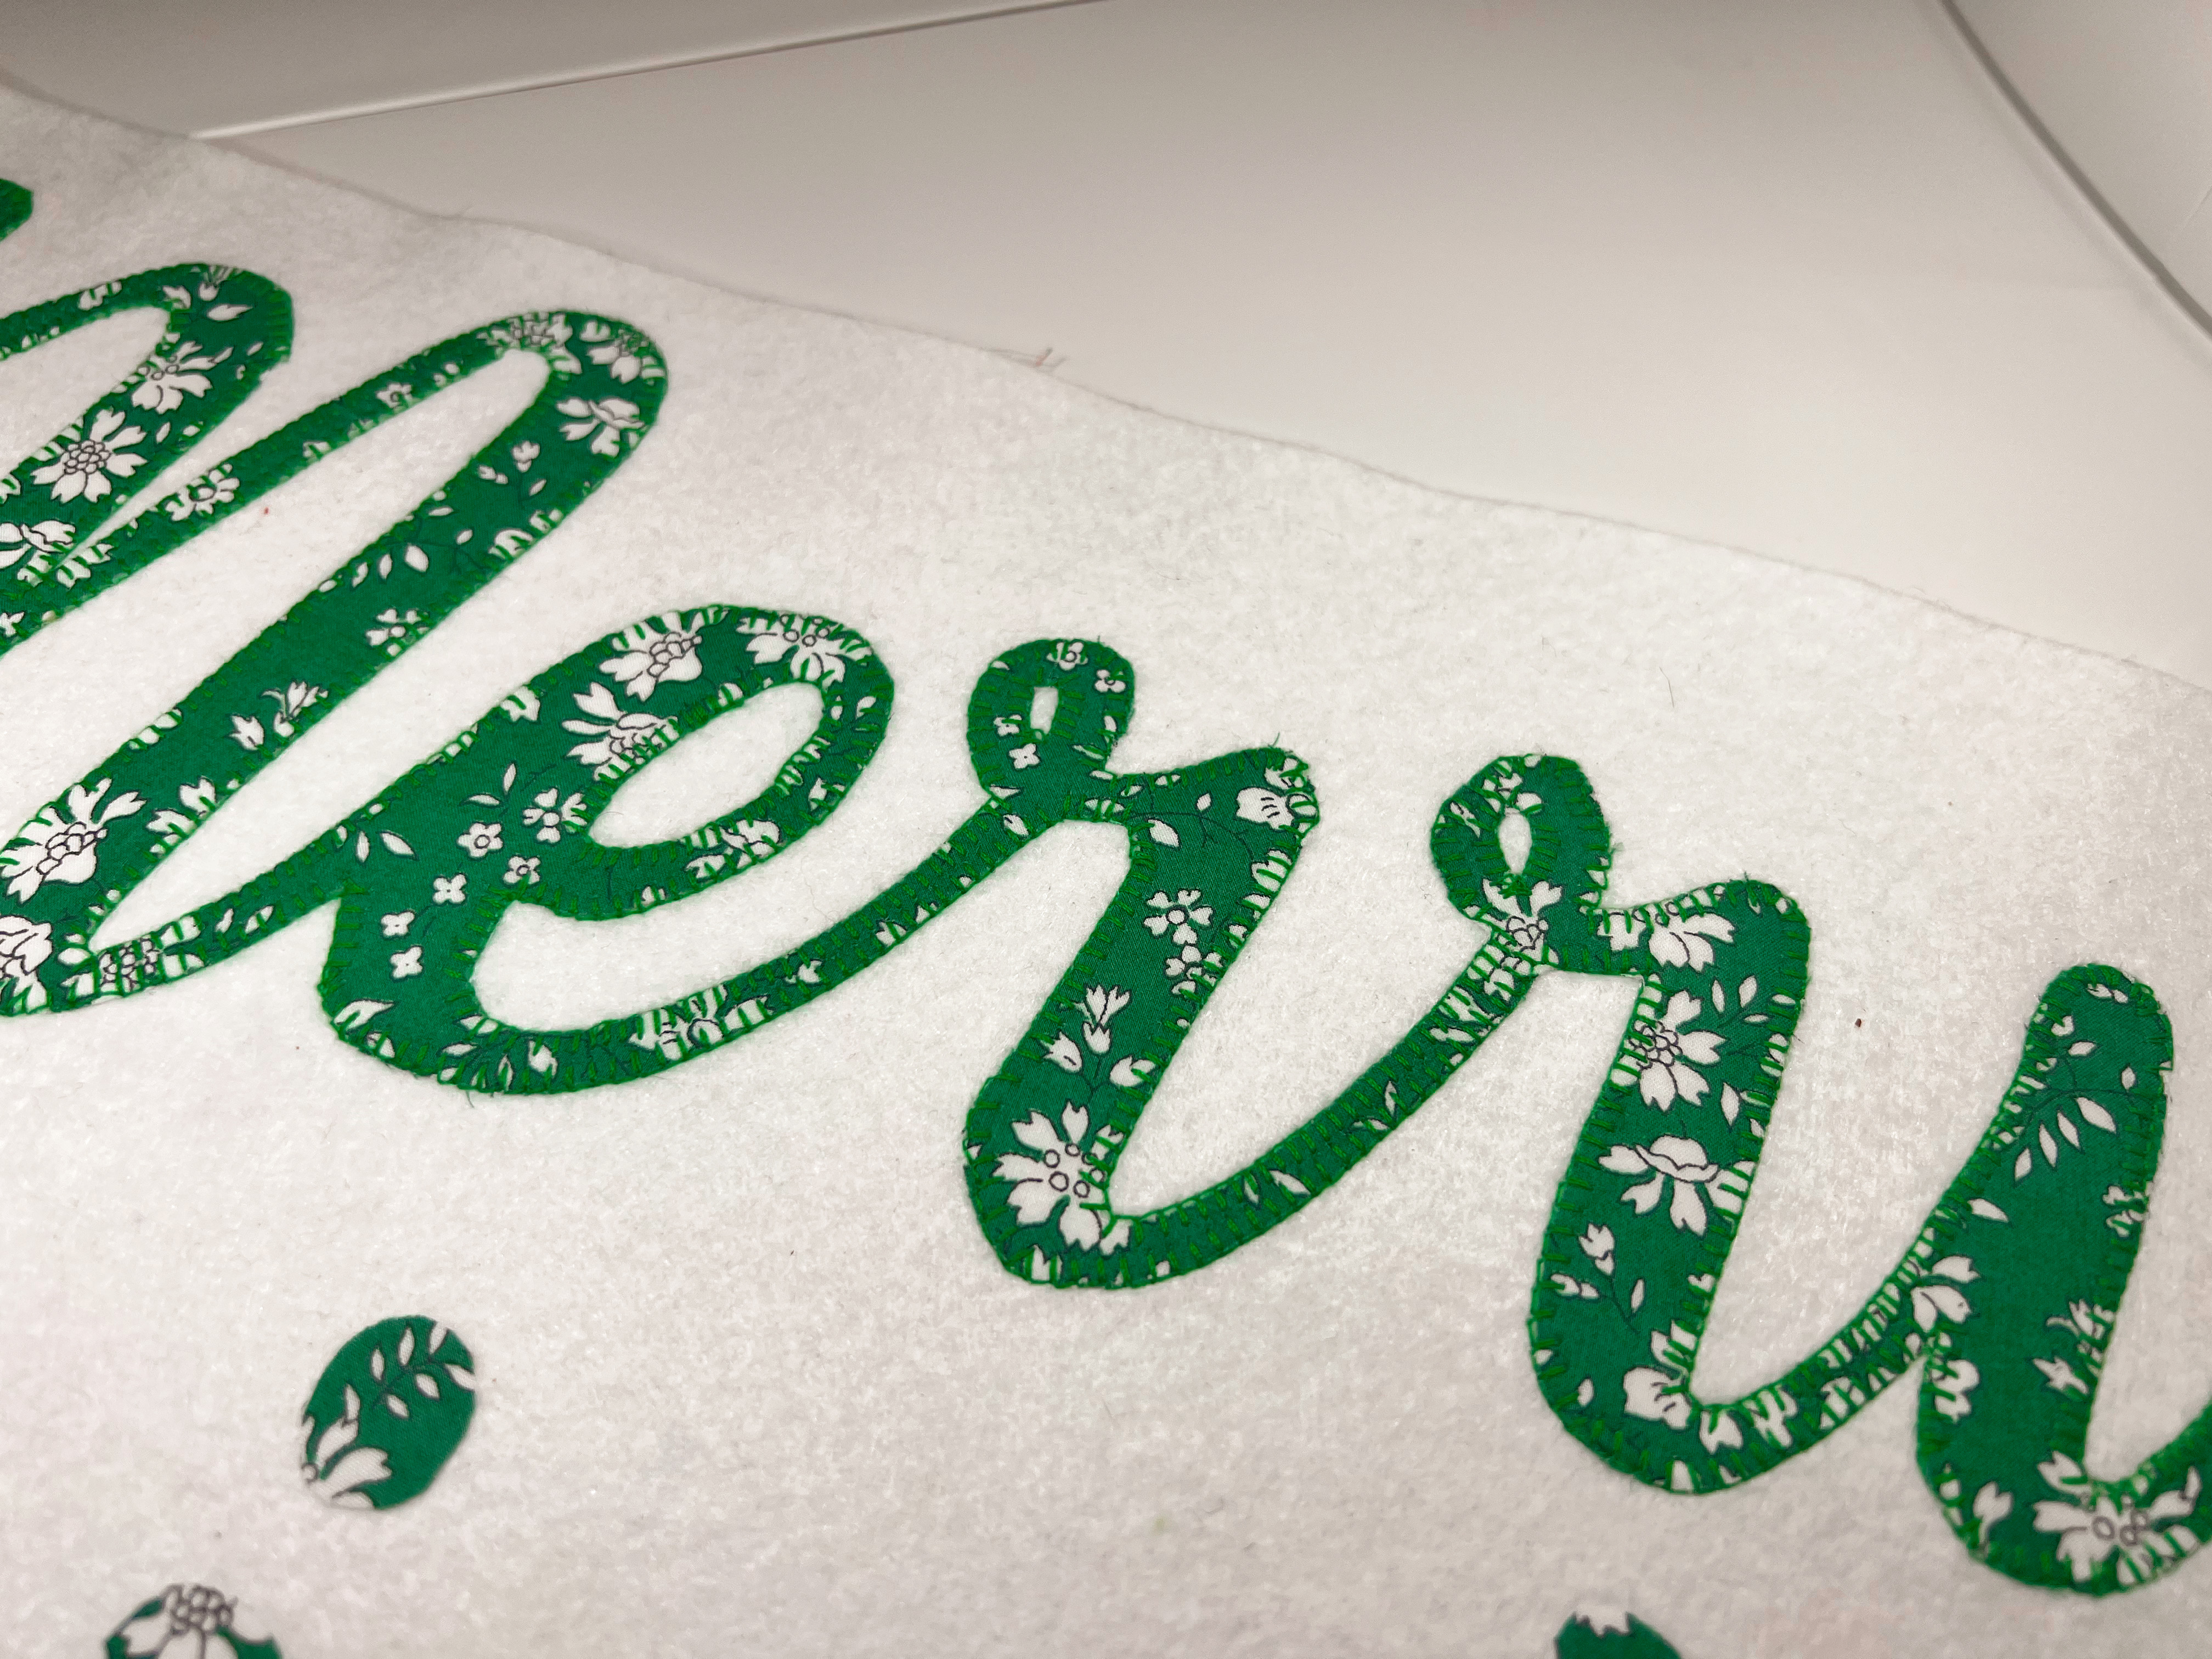
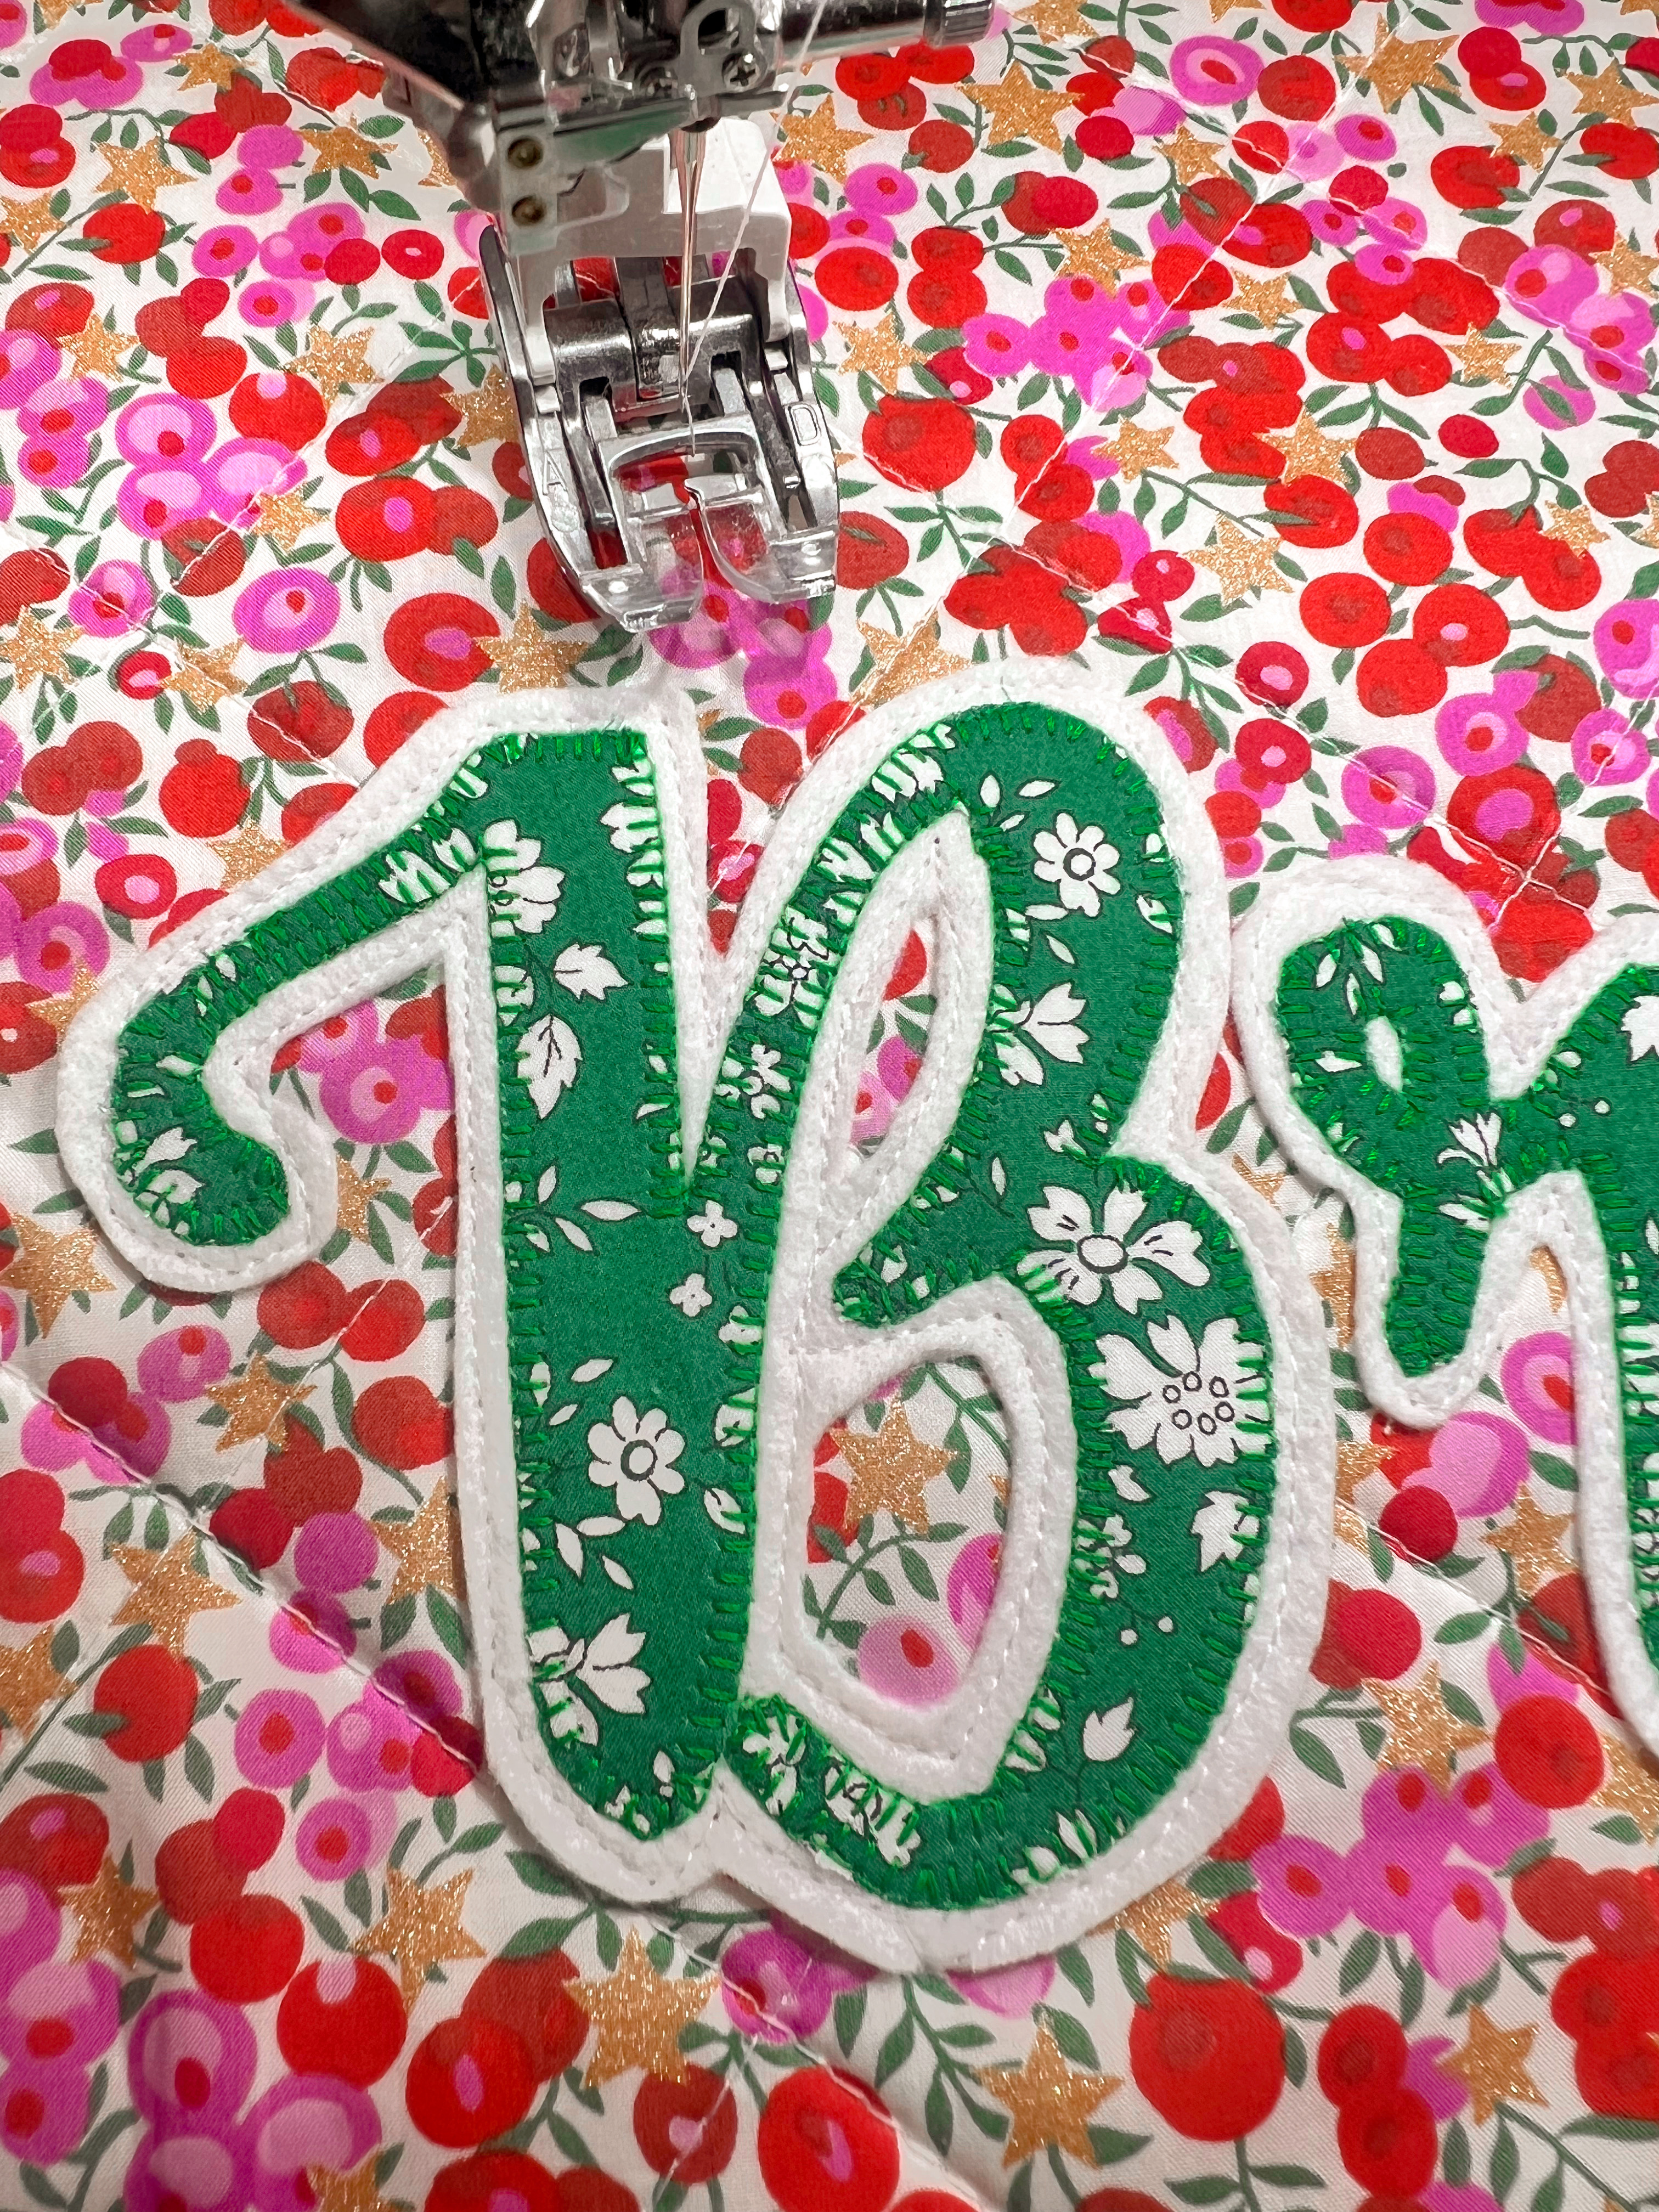
Step 3: place your fabric lettering onto one side of the pillow front. If you find that the lettering blends with your background (likely, if you use two busy prints like I did), you may want to first fuse your lettering to felt to help it to “pop” from the background.


If you find you need to do this, simply remove the paper backing from the lettering and carefully fuse to the felt using the wool setting on your iron.


If you do not need the felt, go ahead and remove the paper backing and fuse the lettering to the pillow background.


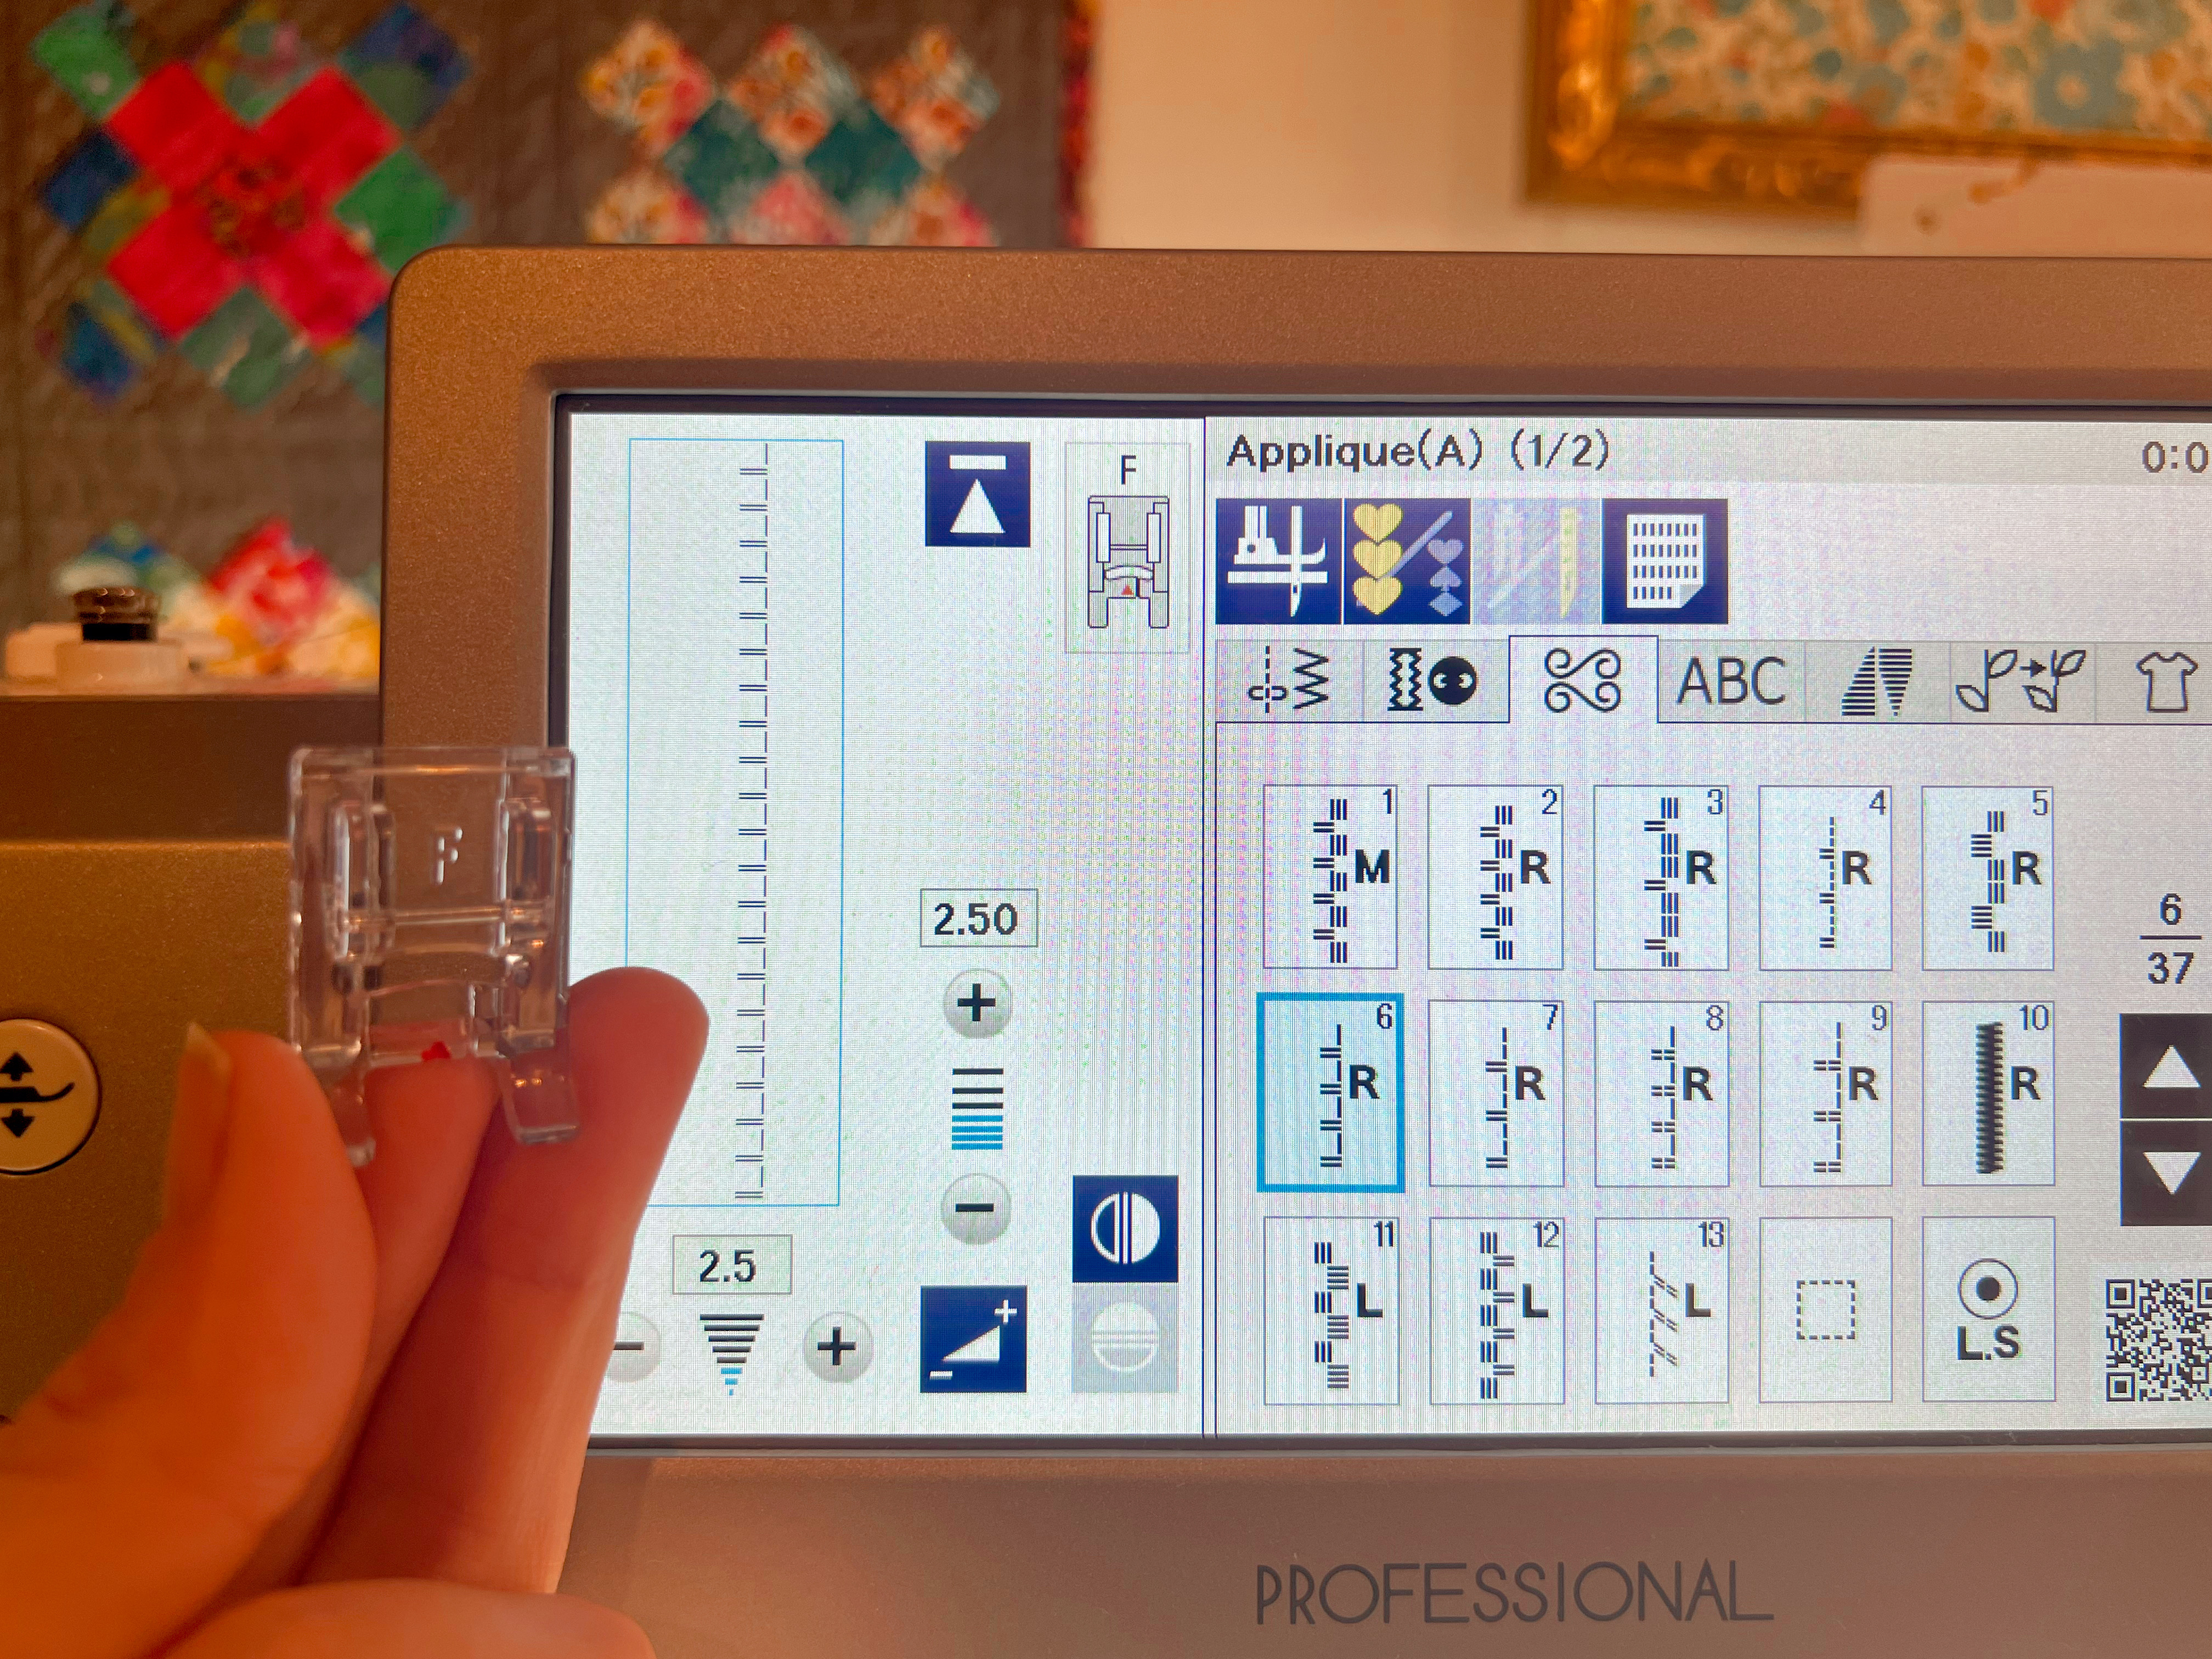
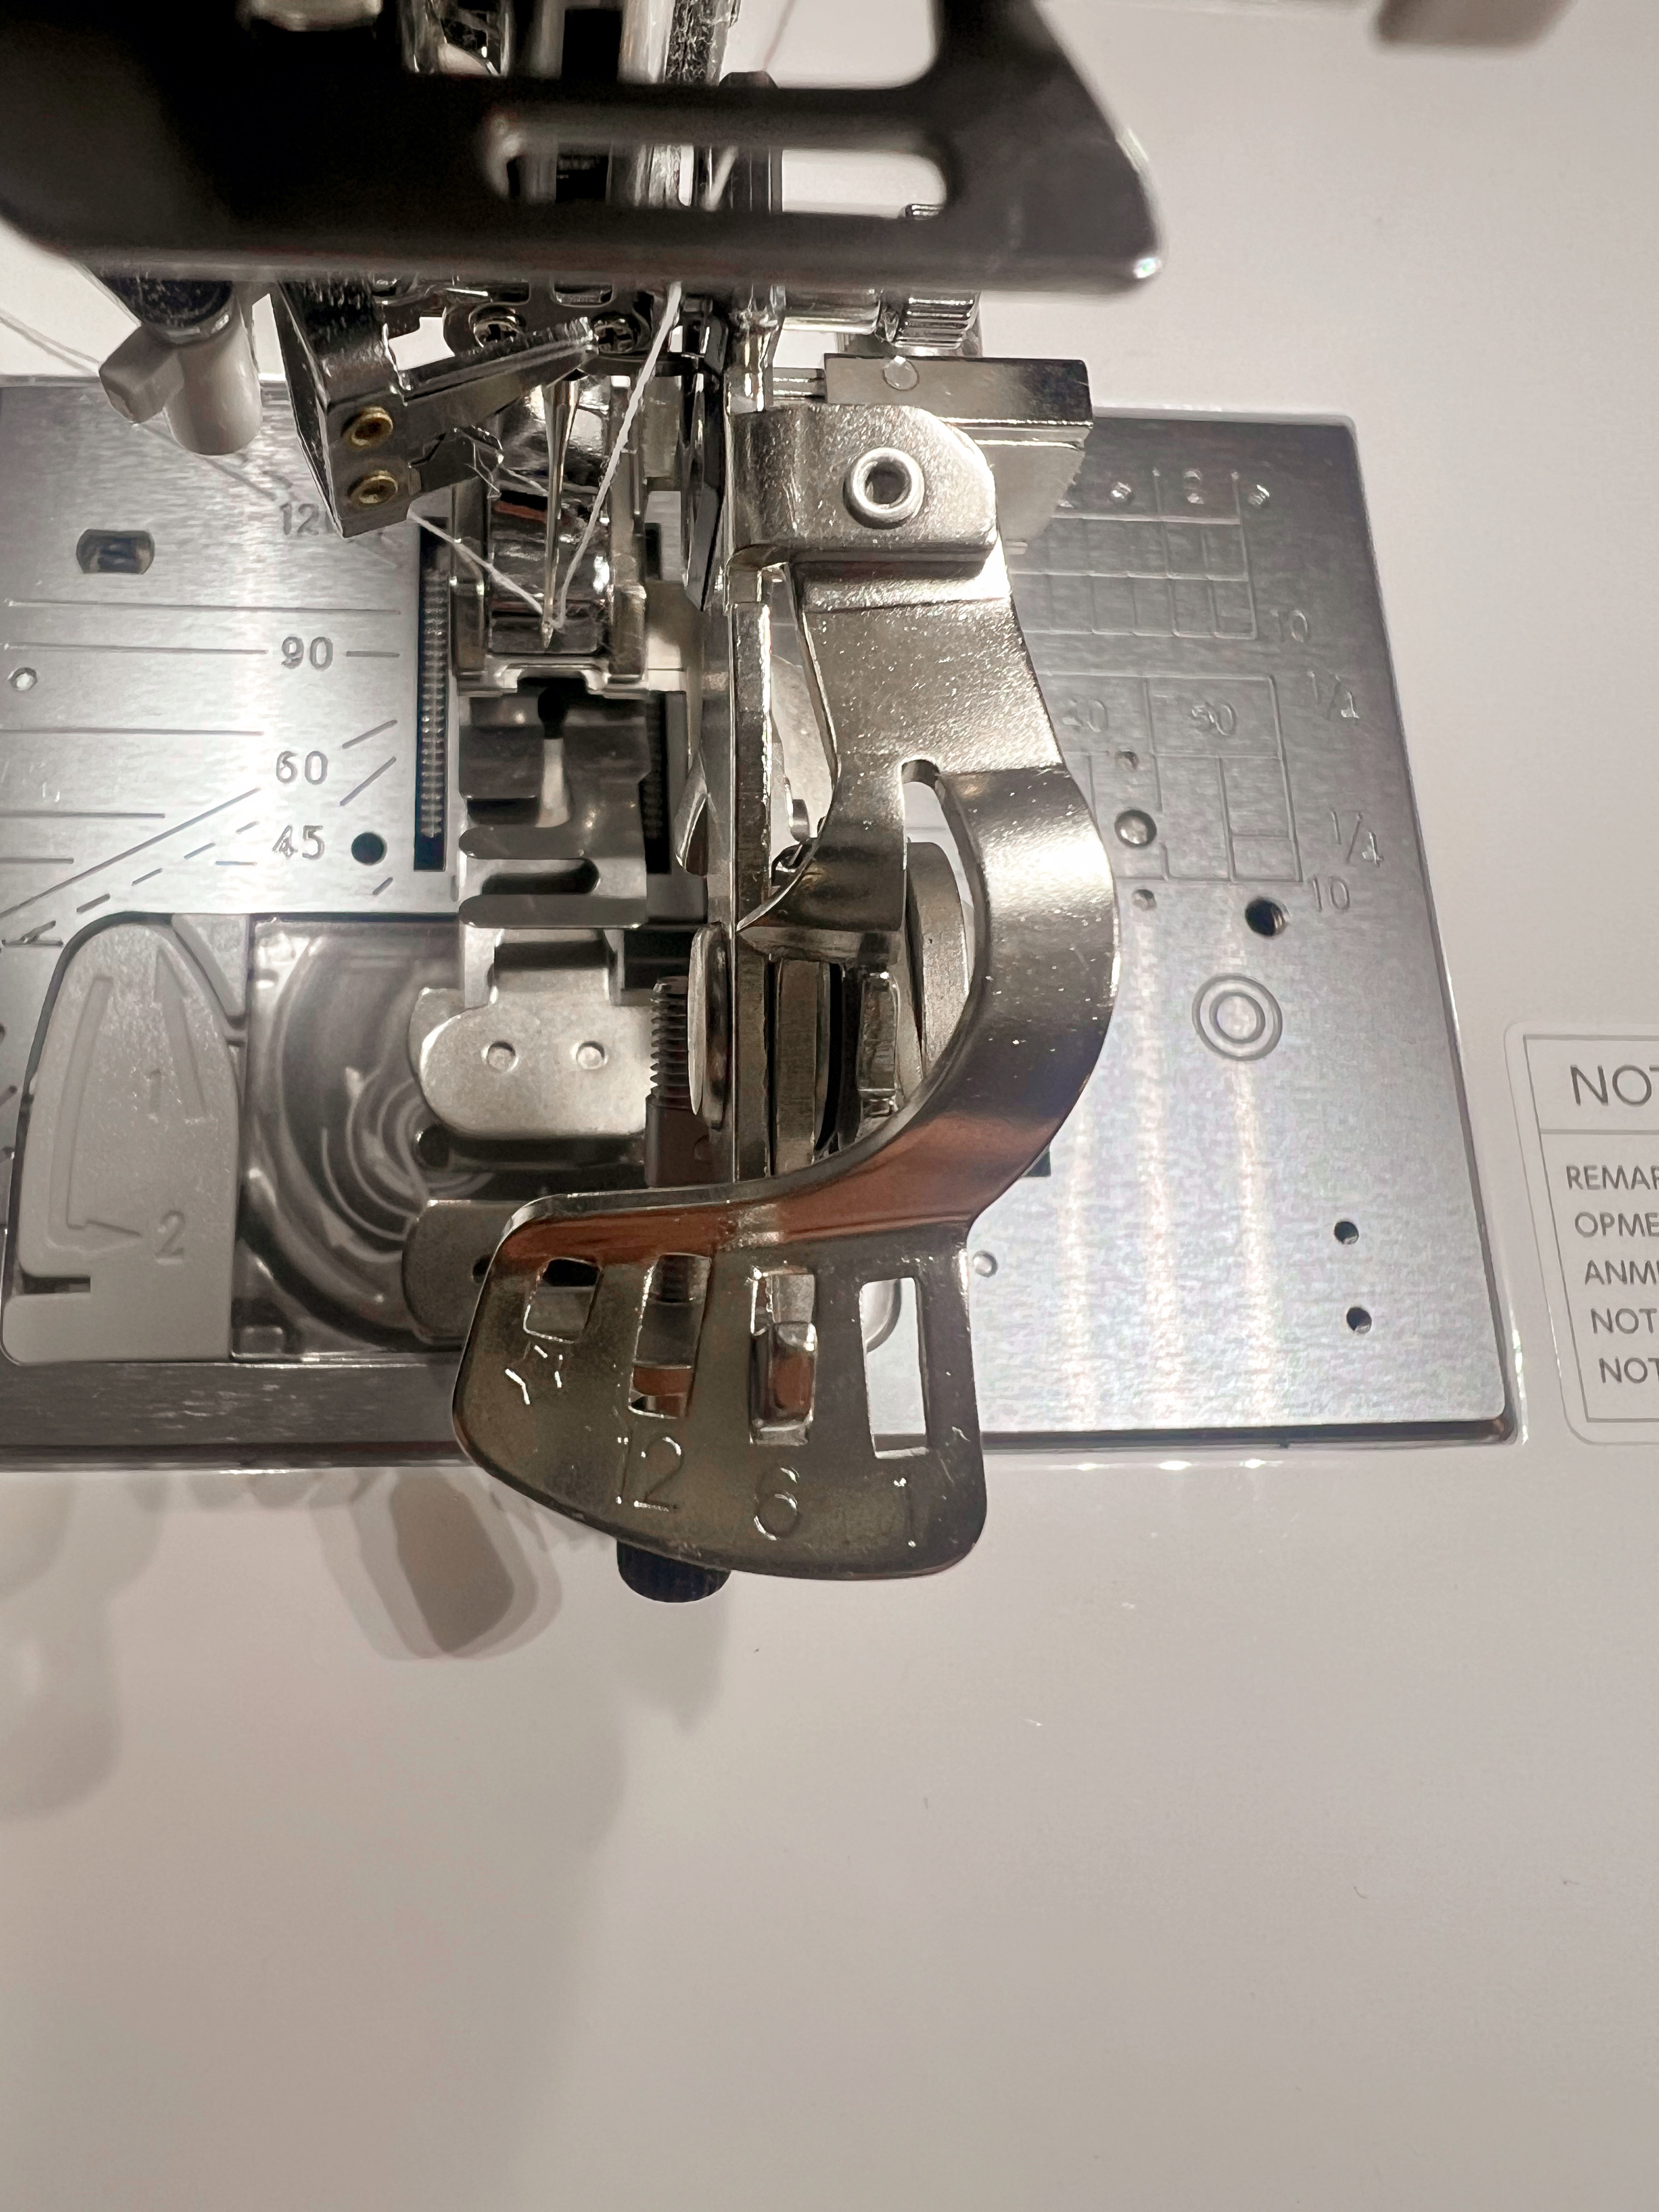
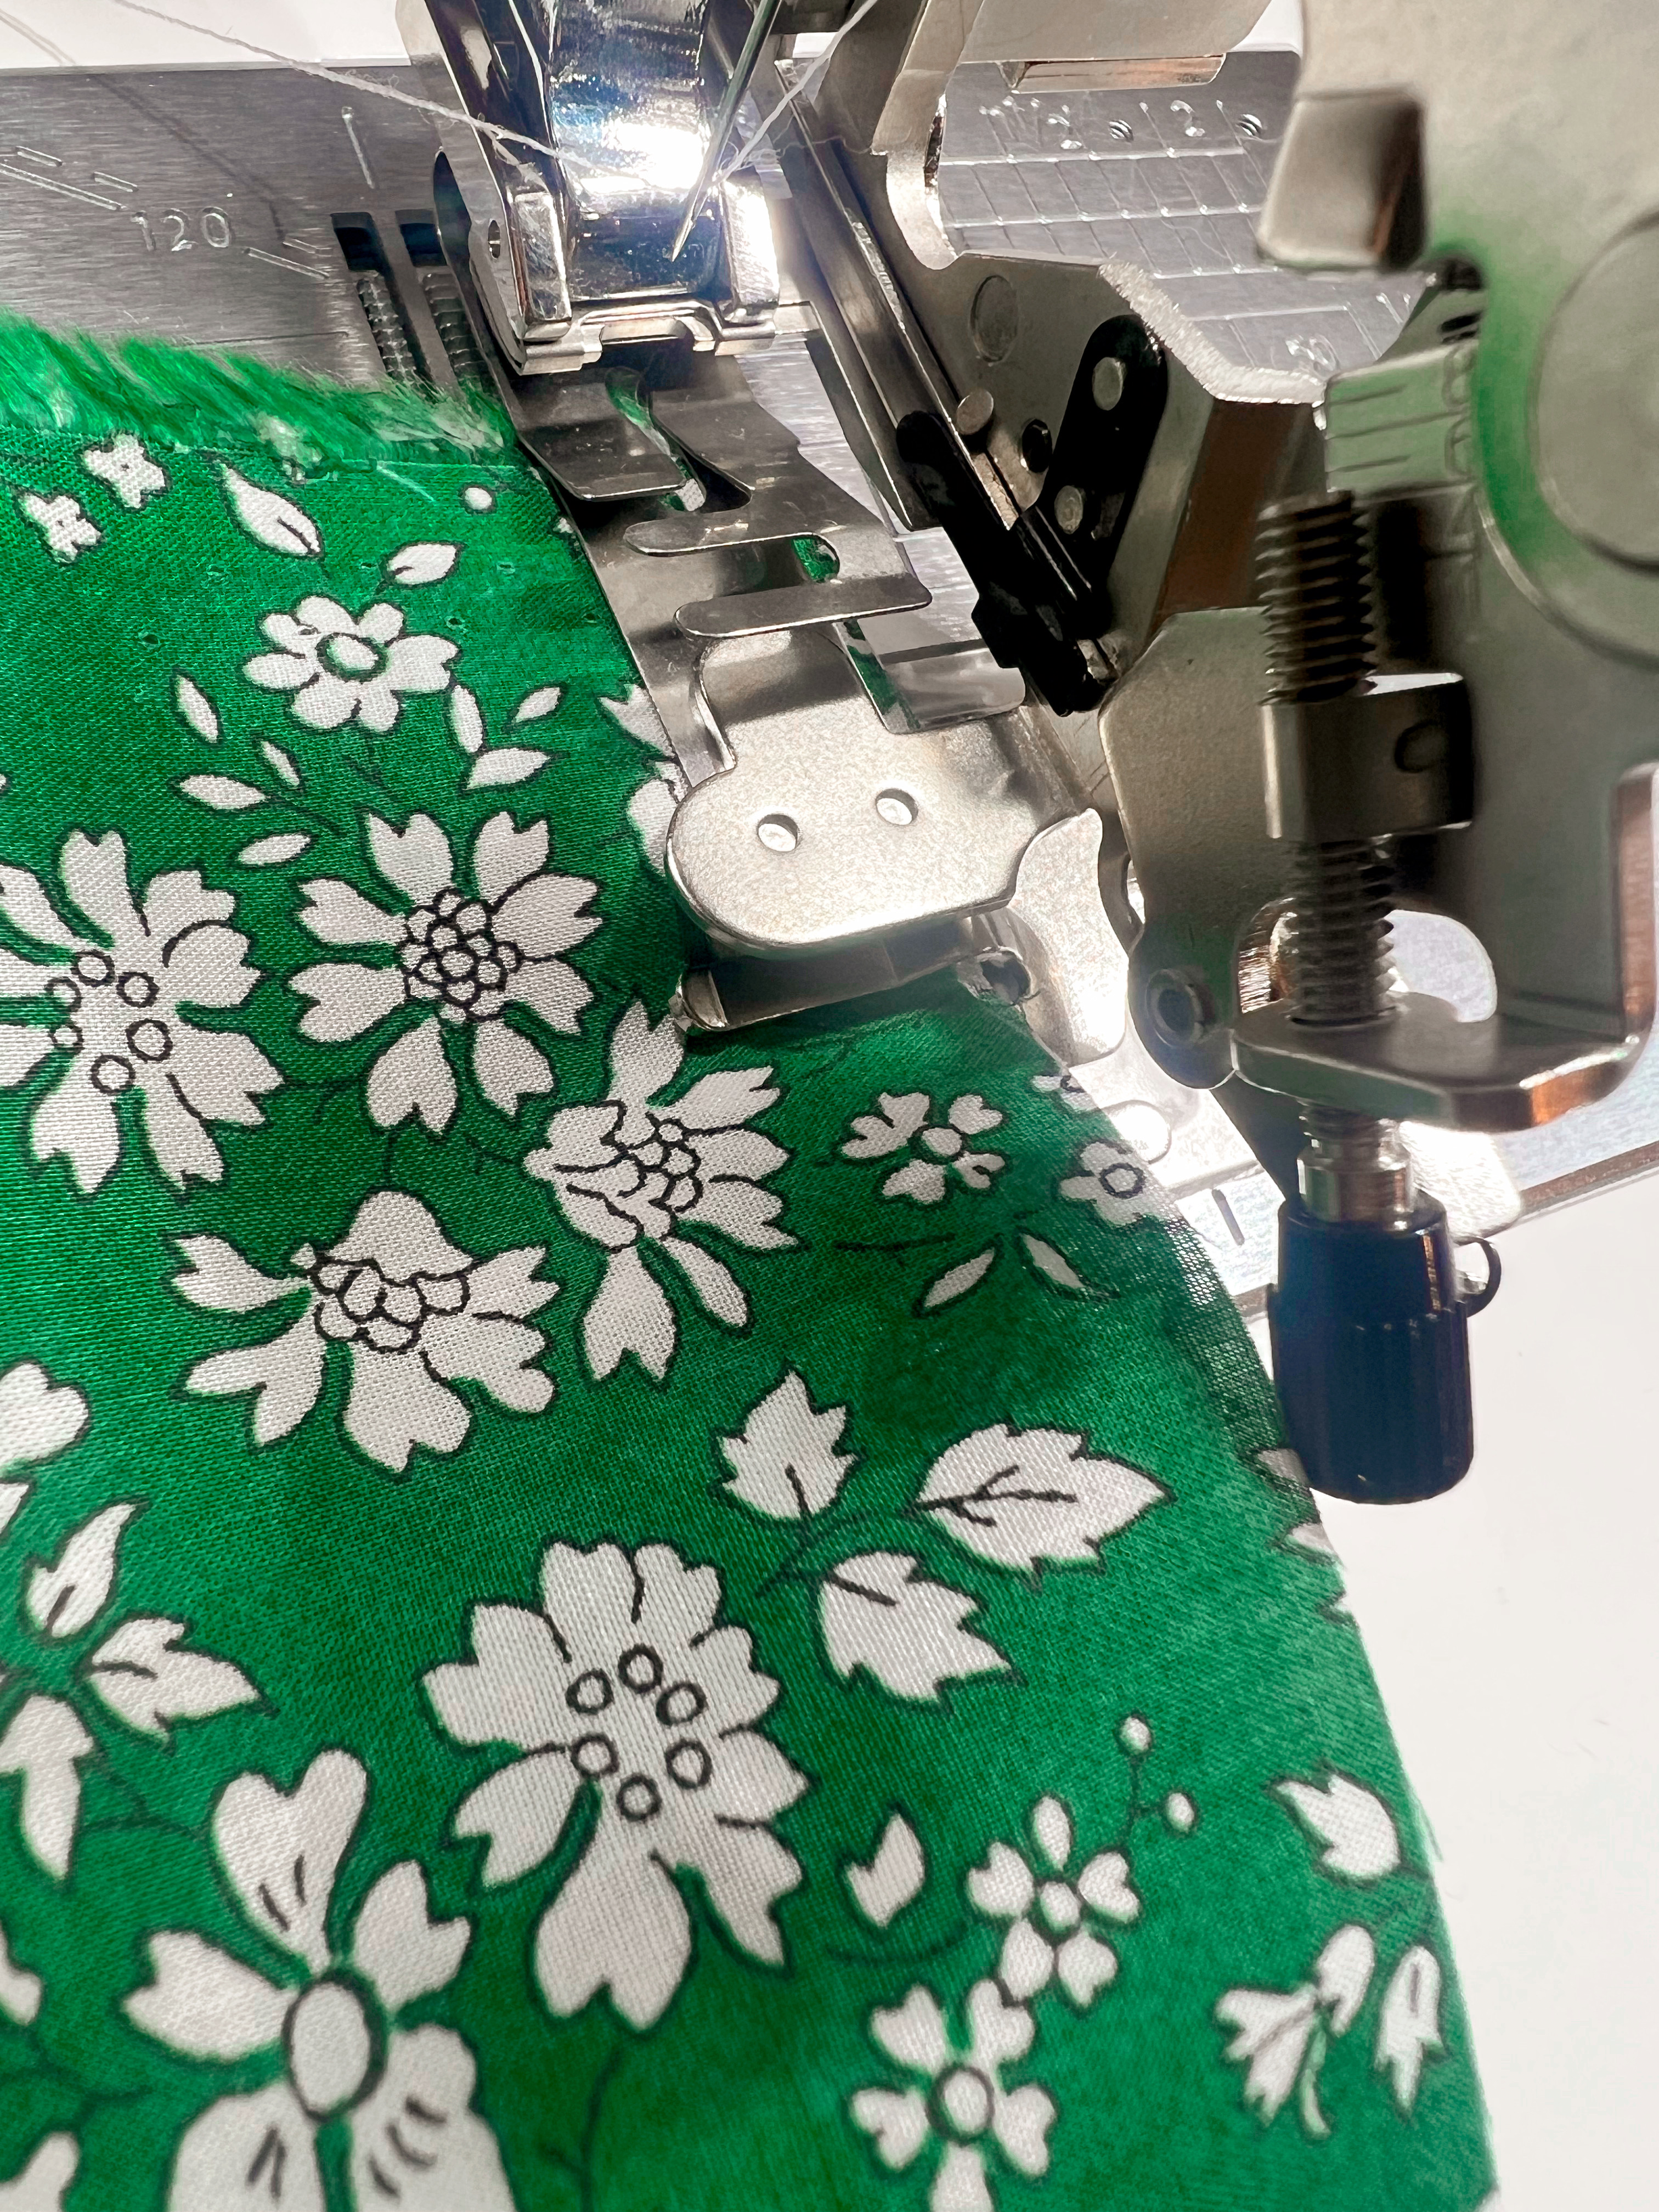
For either option, you will now use presser foot F for your machine, and select an appliqué stitch to adhere the lettering to either the felt or the background. You will want to use a thread that coordinates with the lettering, and line the right edge of the lettering along the slit in the presser foot.


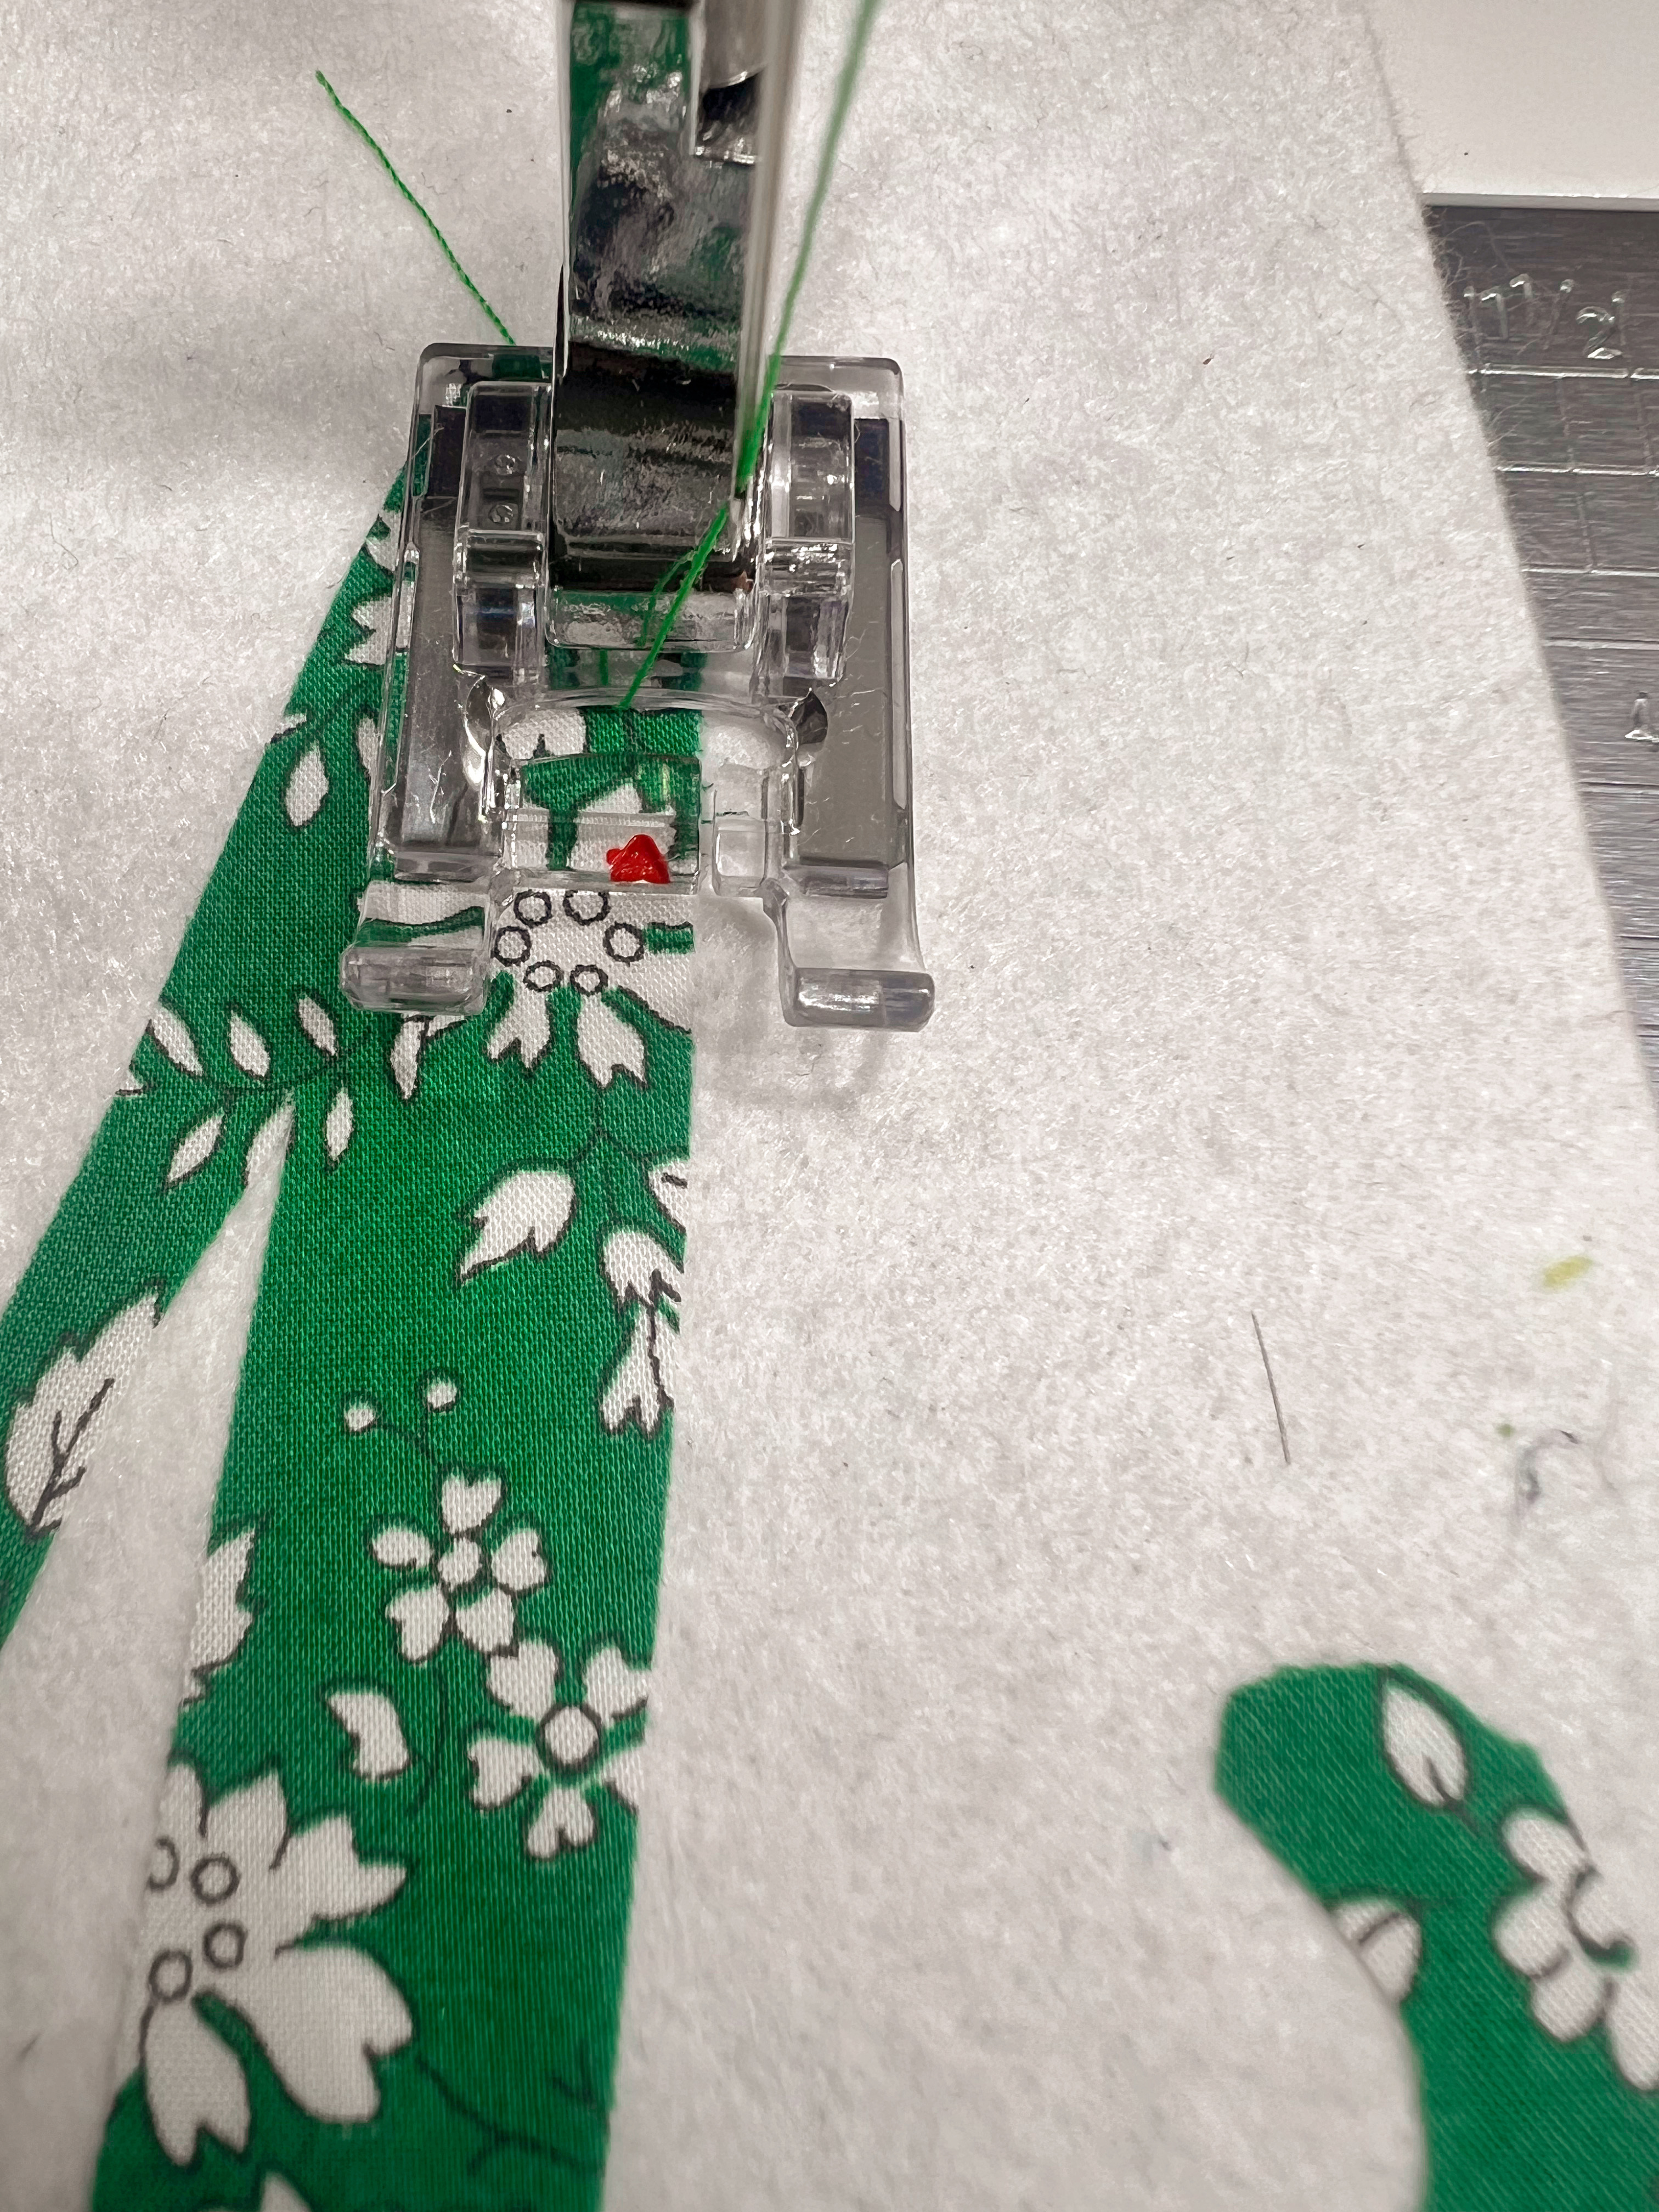
Sew slowly and carefully, lifting the foot and pivoting as often as needed. This step will take some time, so settle in and enjoy the process.


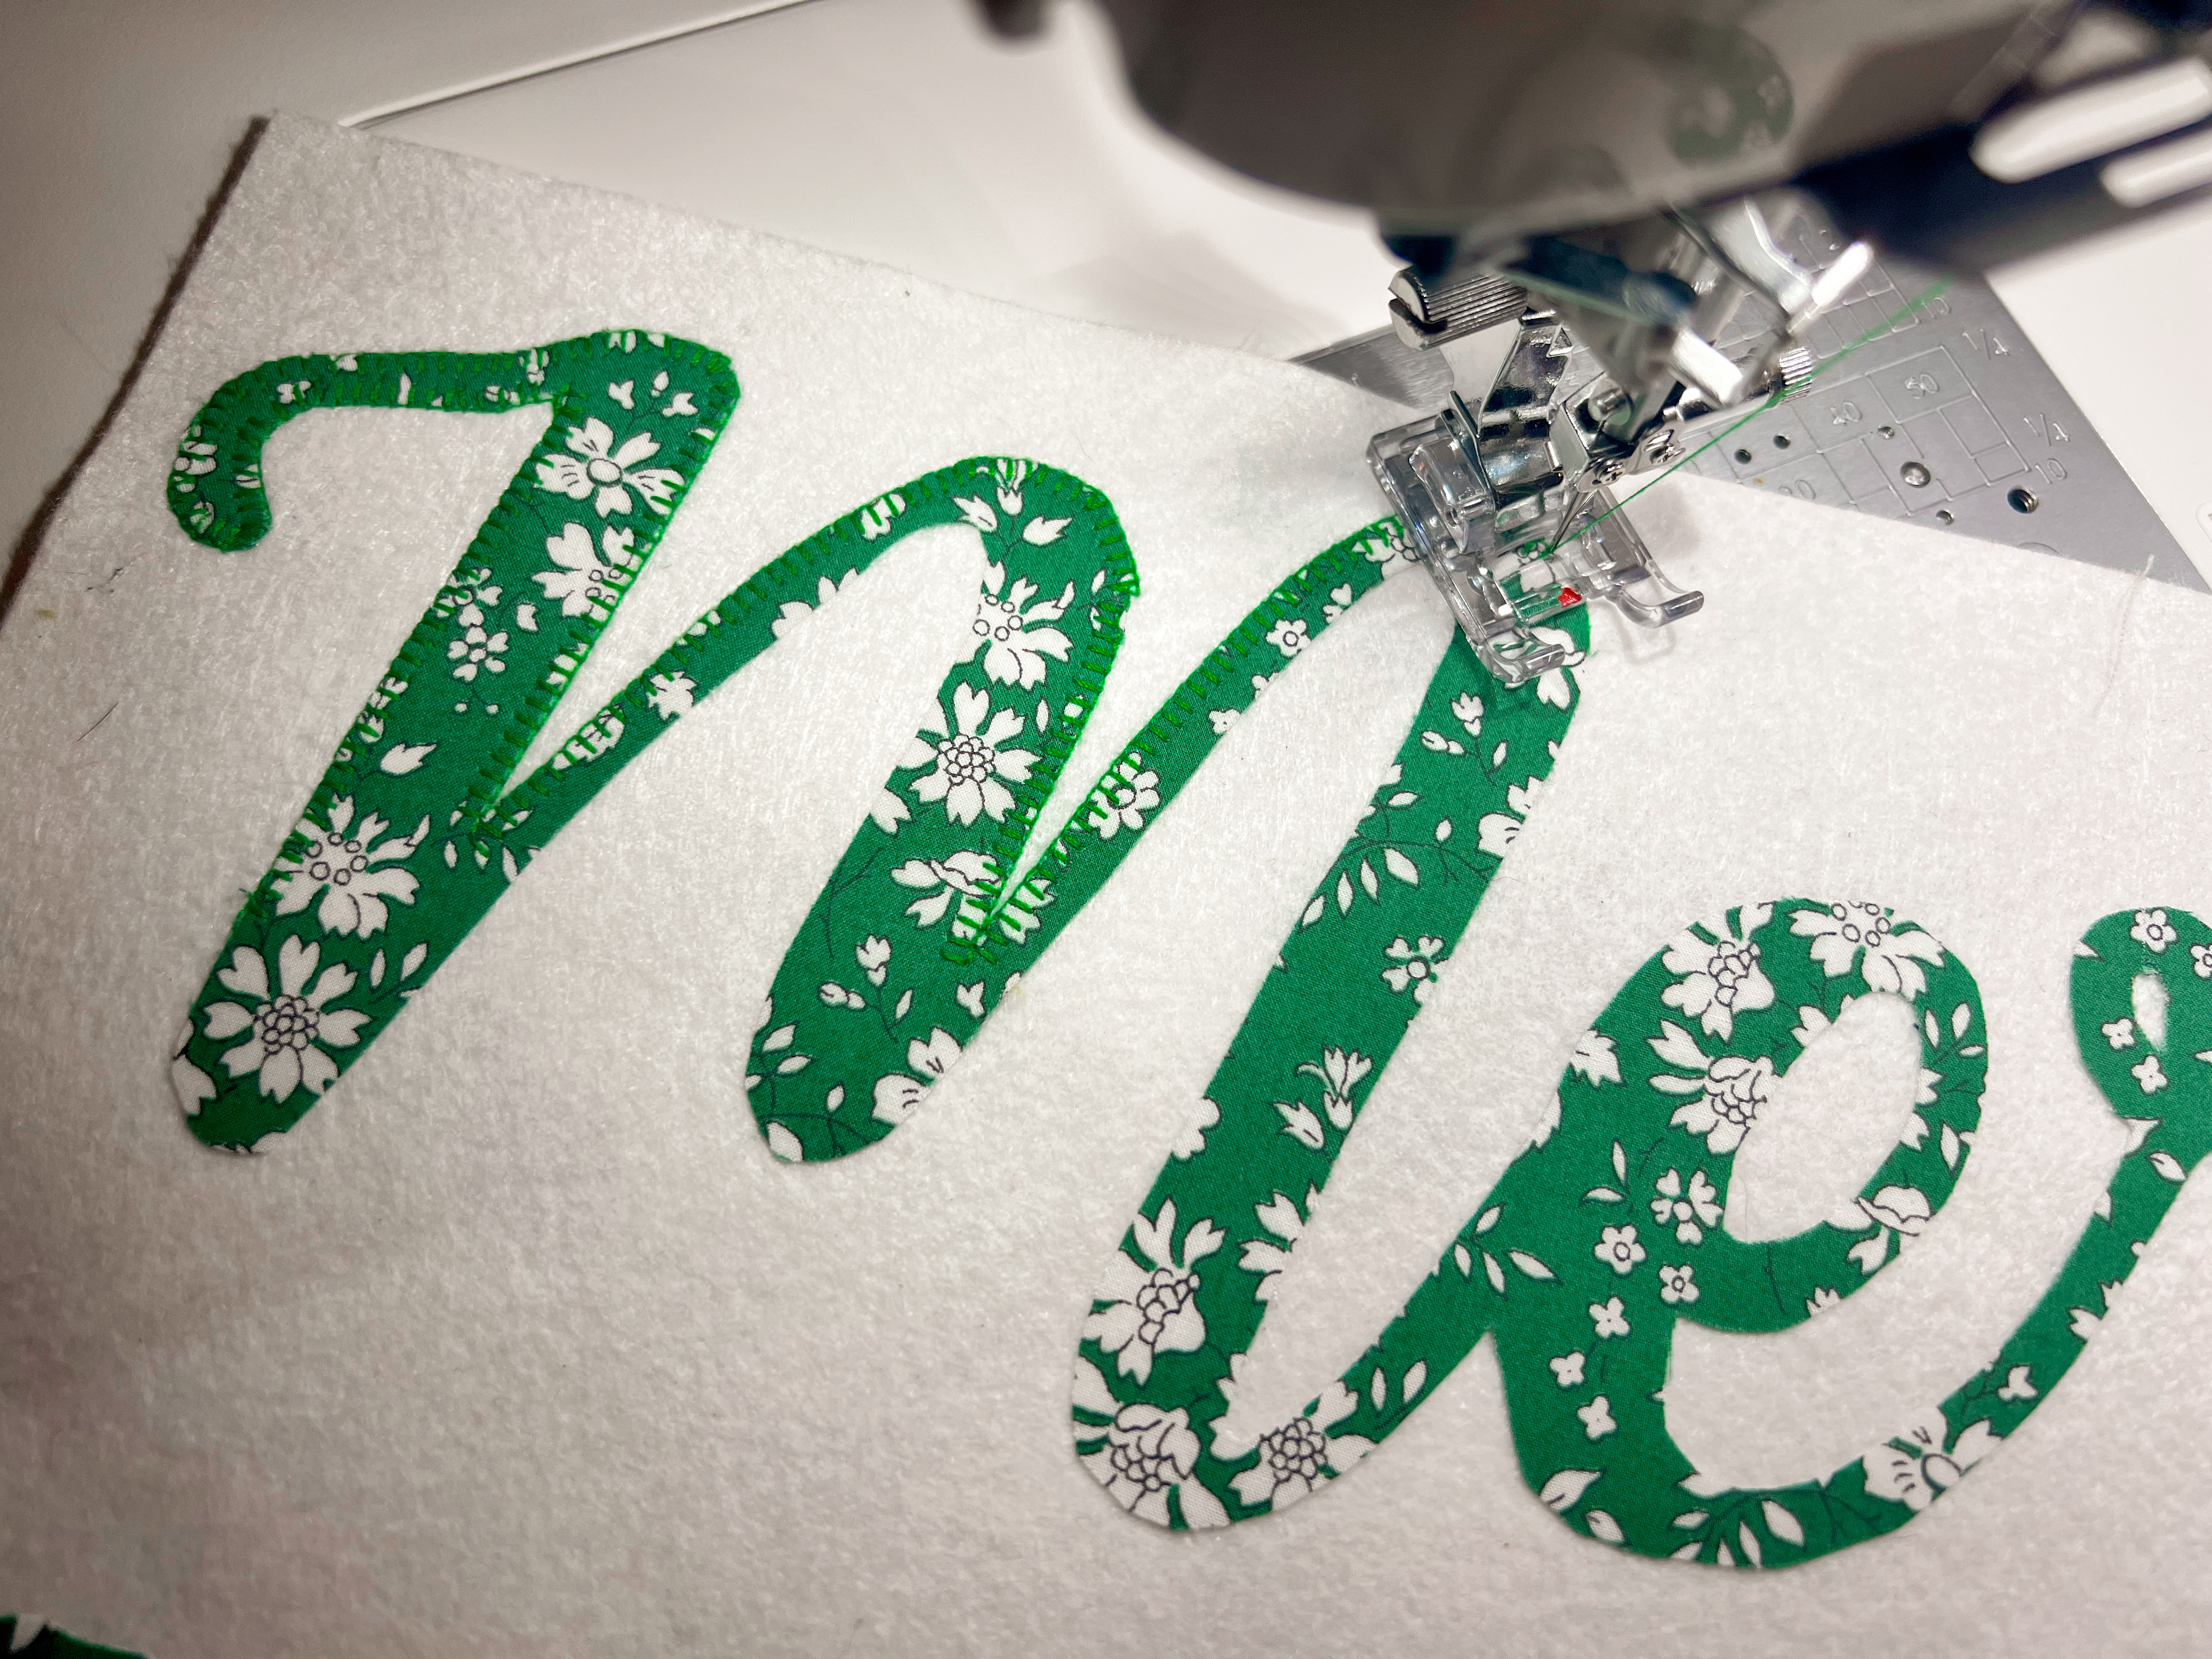
Don’t forget to appliqué inside the letters like the “e” and “g”.


If you appliquéd directly to the background fabric, skip ahead to Step 4.


If you appliquéd to felt, cut out the felt around the letters. You may find an Xacto knife helpful here. I eyeballed it, and cut about 1/4” away from the letters. Place the letters onto the fabric background and either use glue or pins to keep in place. Using your walking foot and a thread that coordinates with the felt, stitch the felt down to the background using a straight stitch.


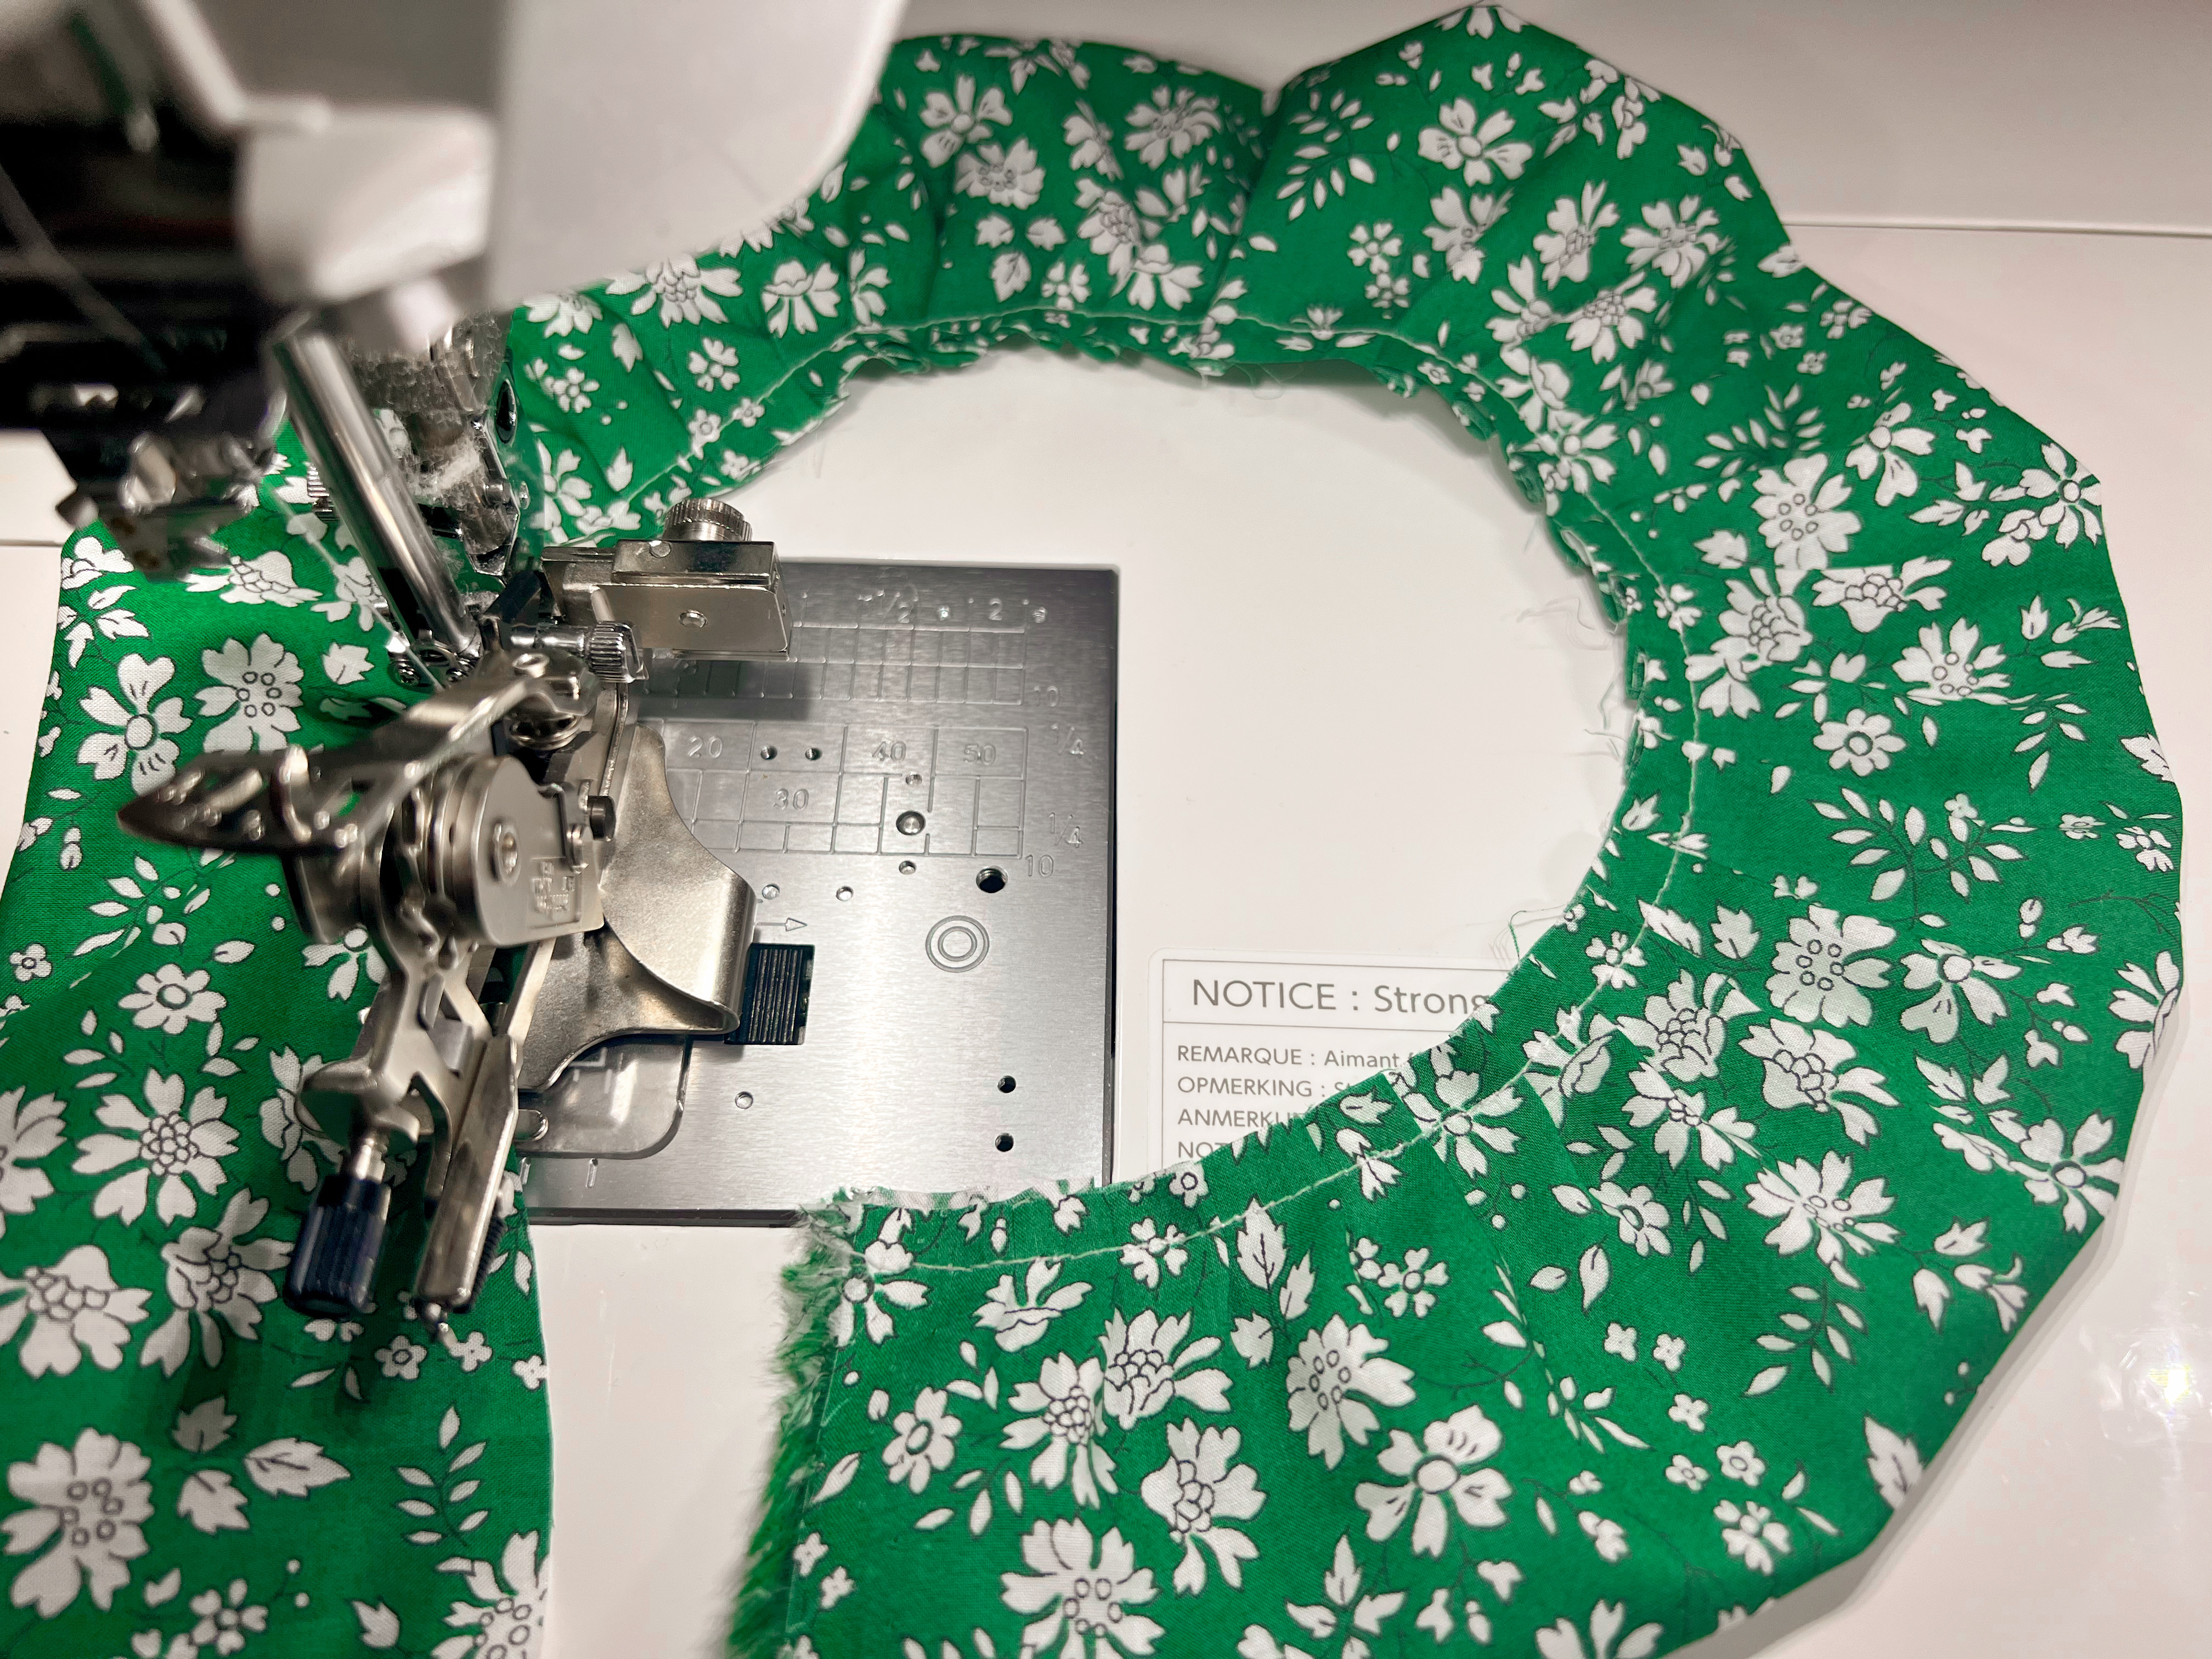
Step 4: It’s time to prepare the ruffle. If you don’t have a ruffler attachment, you can gather fabric by hand to achieve a similar result. Sew your strips into one long strip and press in half lengthwise. Attach the ruffler according to the directions included with the foot. I have set mine to ruffle every 6 stitches at 6mm. Ruffle the whole long strip on the narrower .8cm setting with the raw edges to the right (see picture).


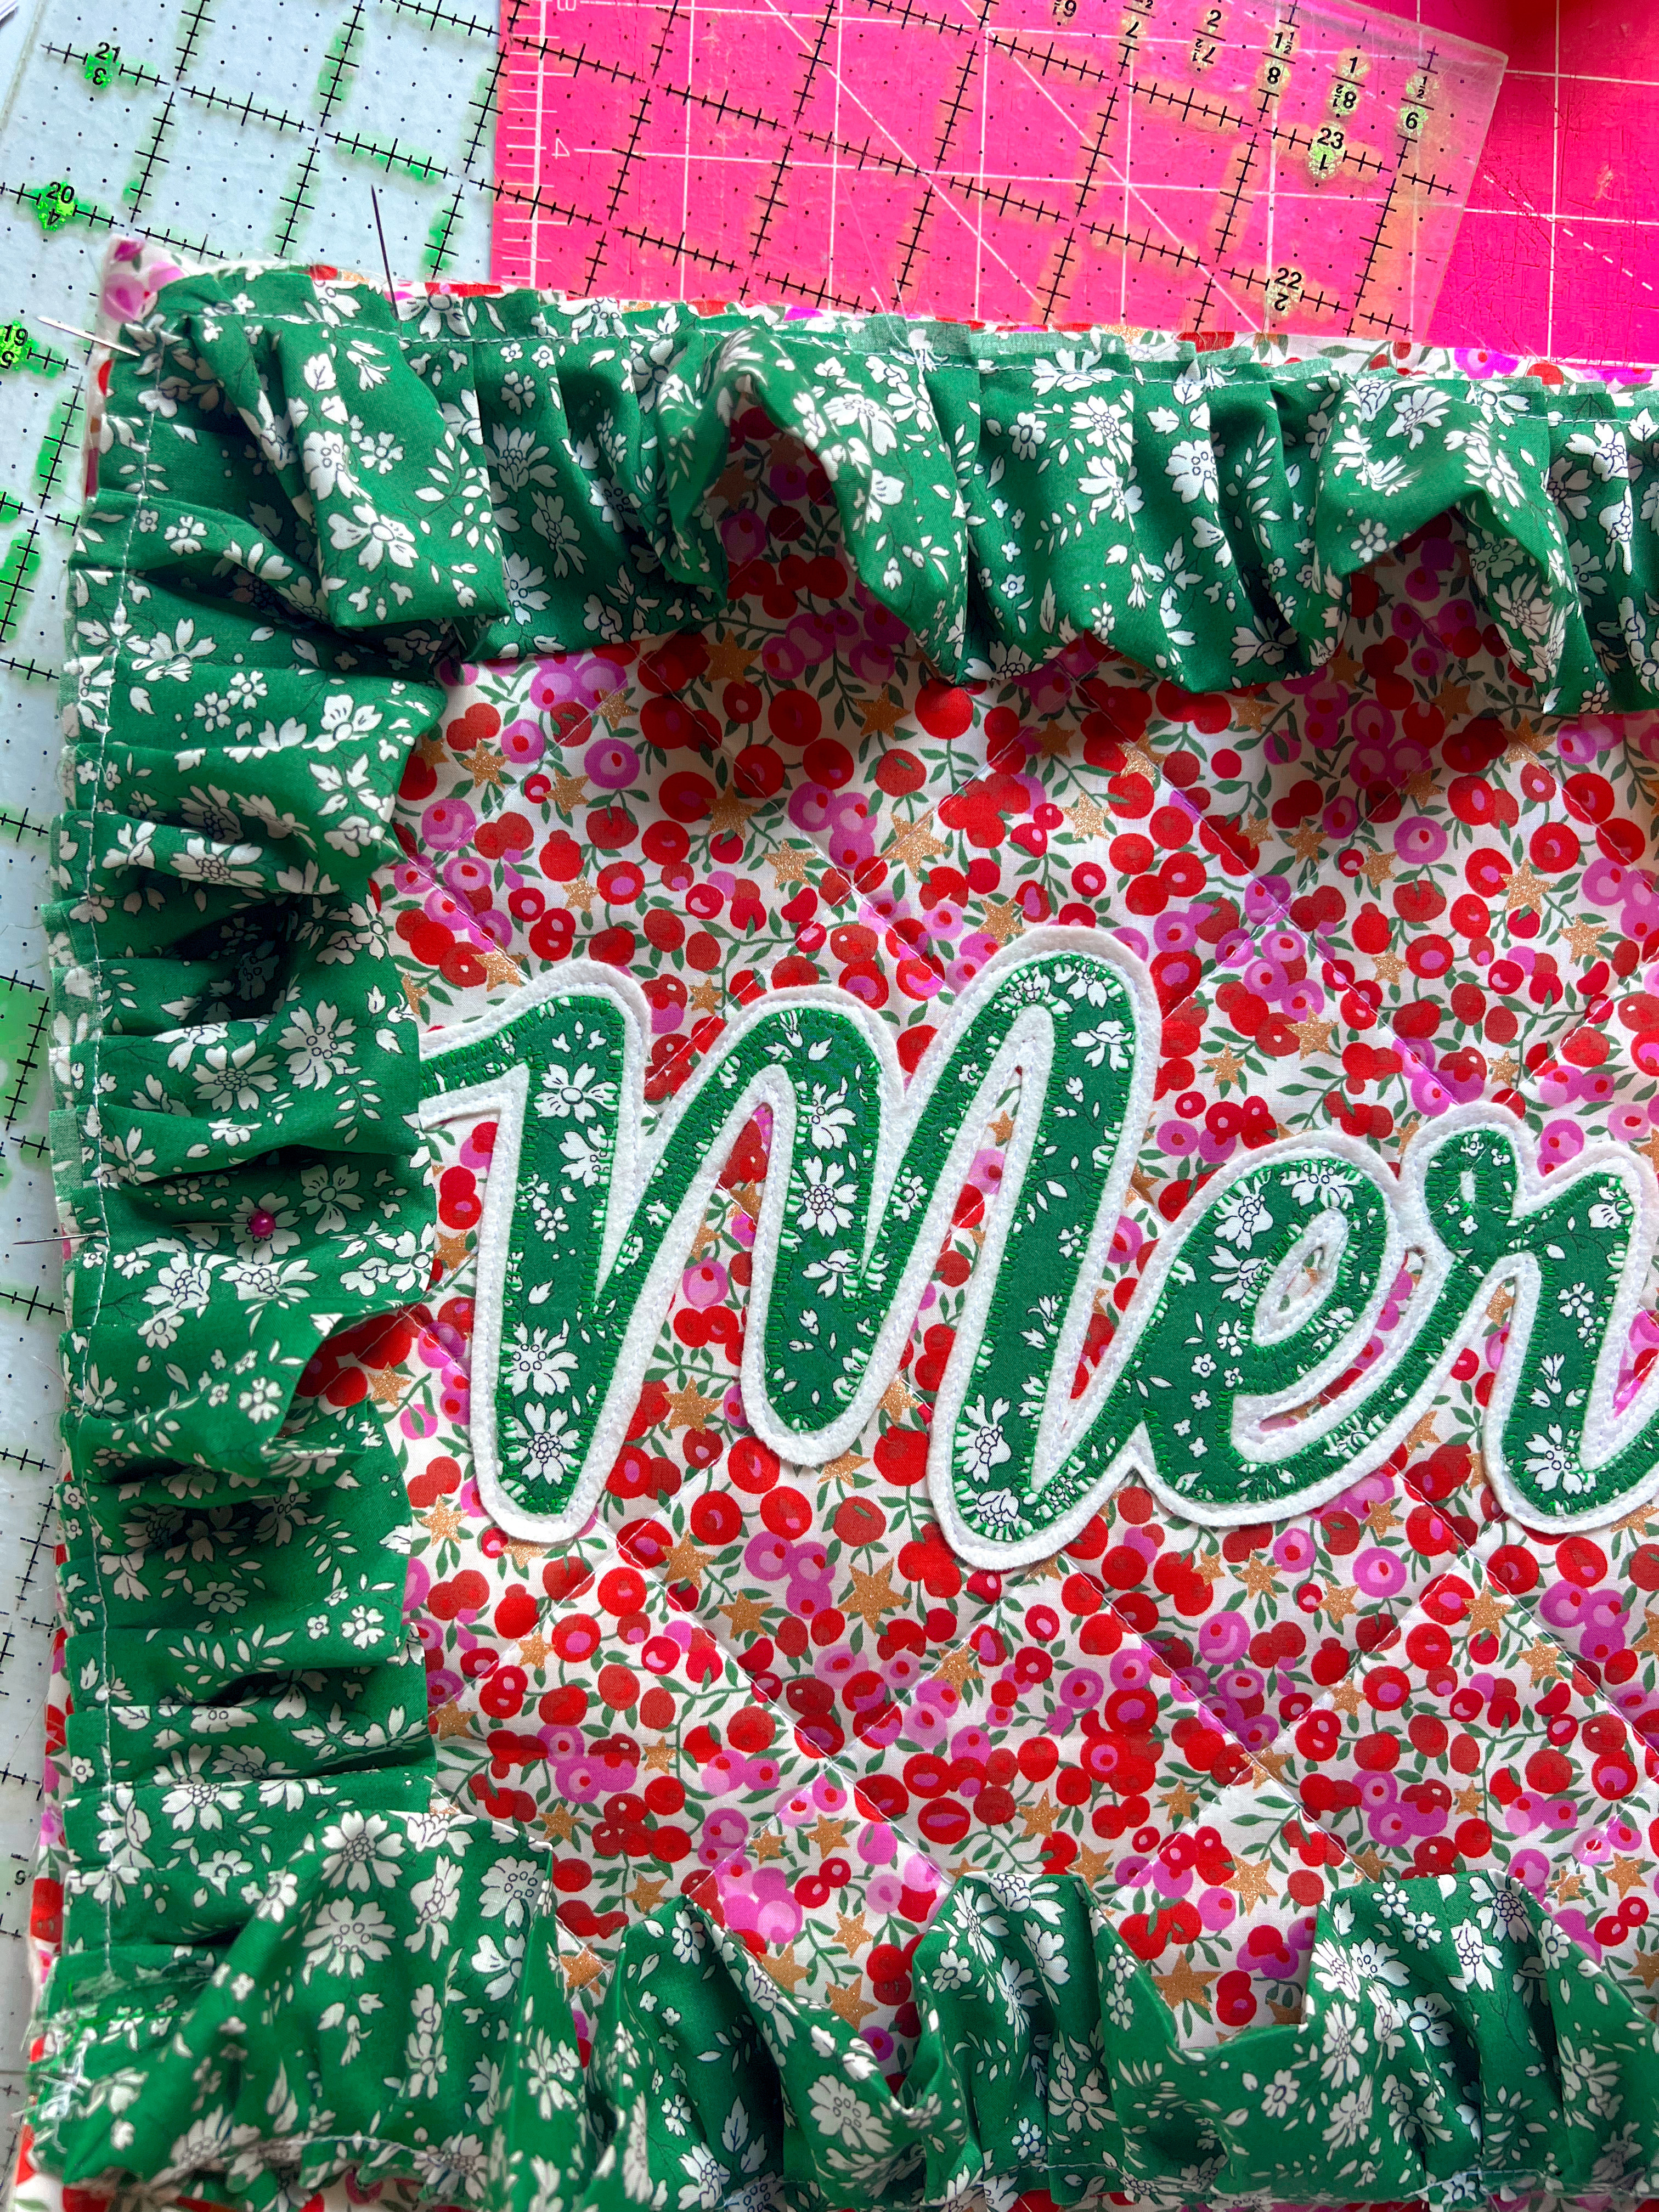
Pin completed ruffle to the pillow front like so, and stitch the two ends together. Finally, use a 3/8” seam allowance to stitch the ruffle to the pillow front. (Optional: finish raw edges using a serger)


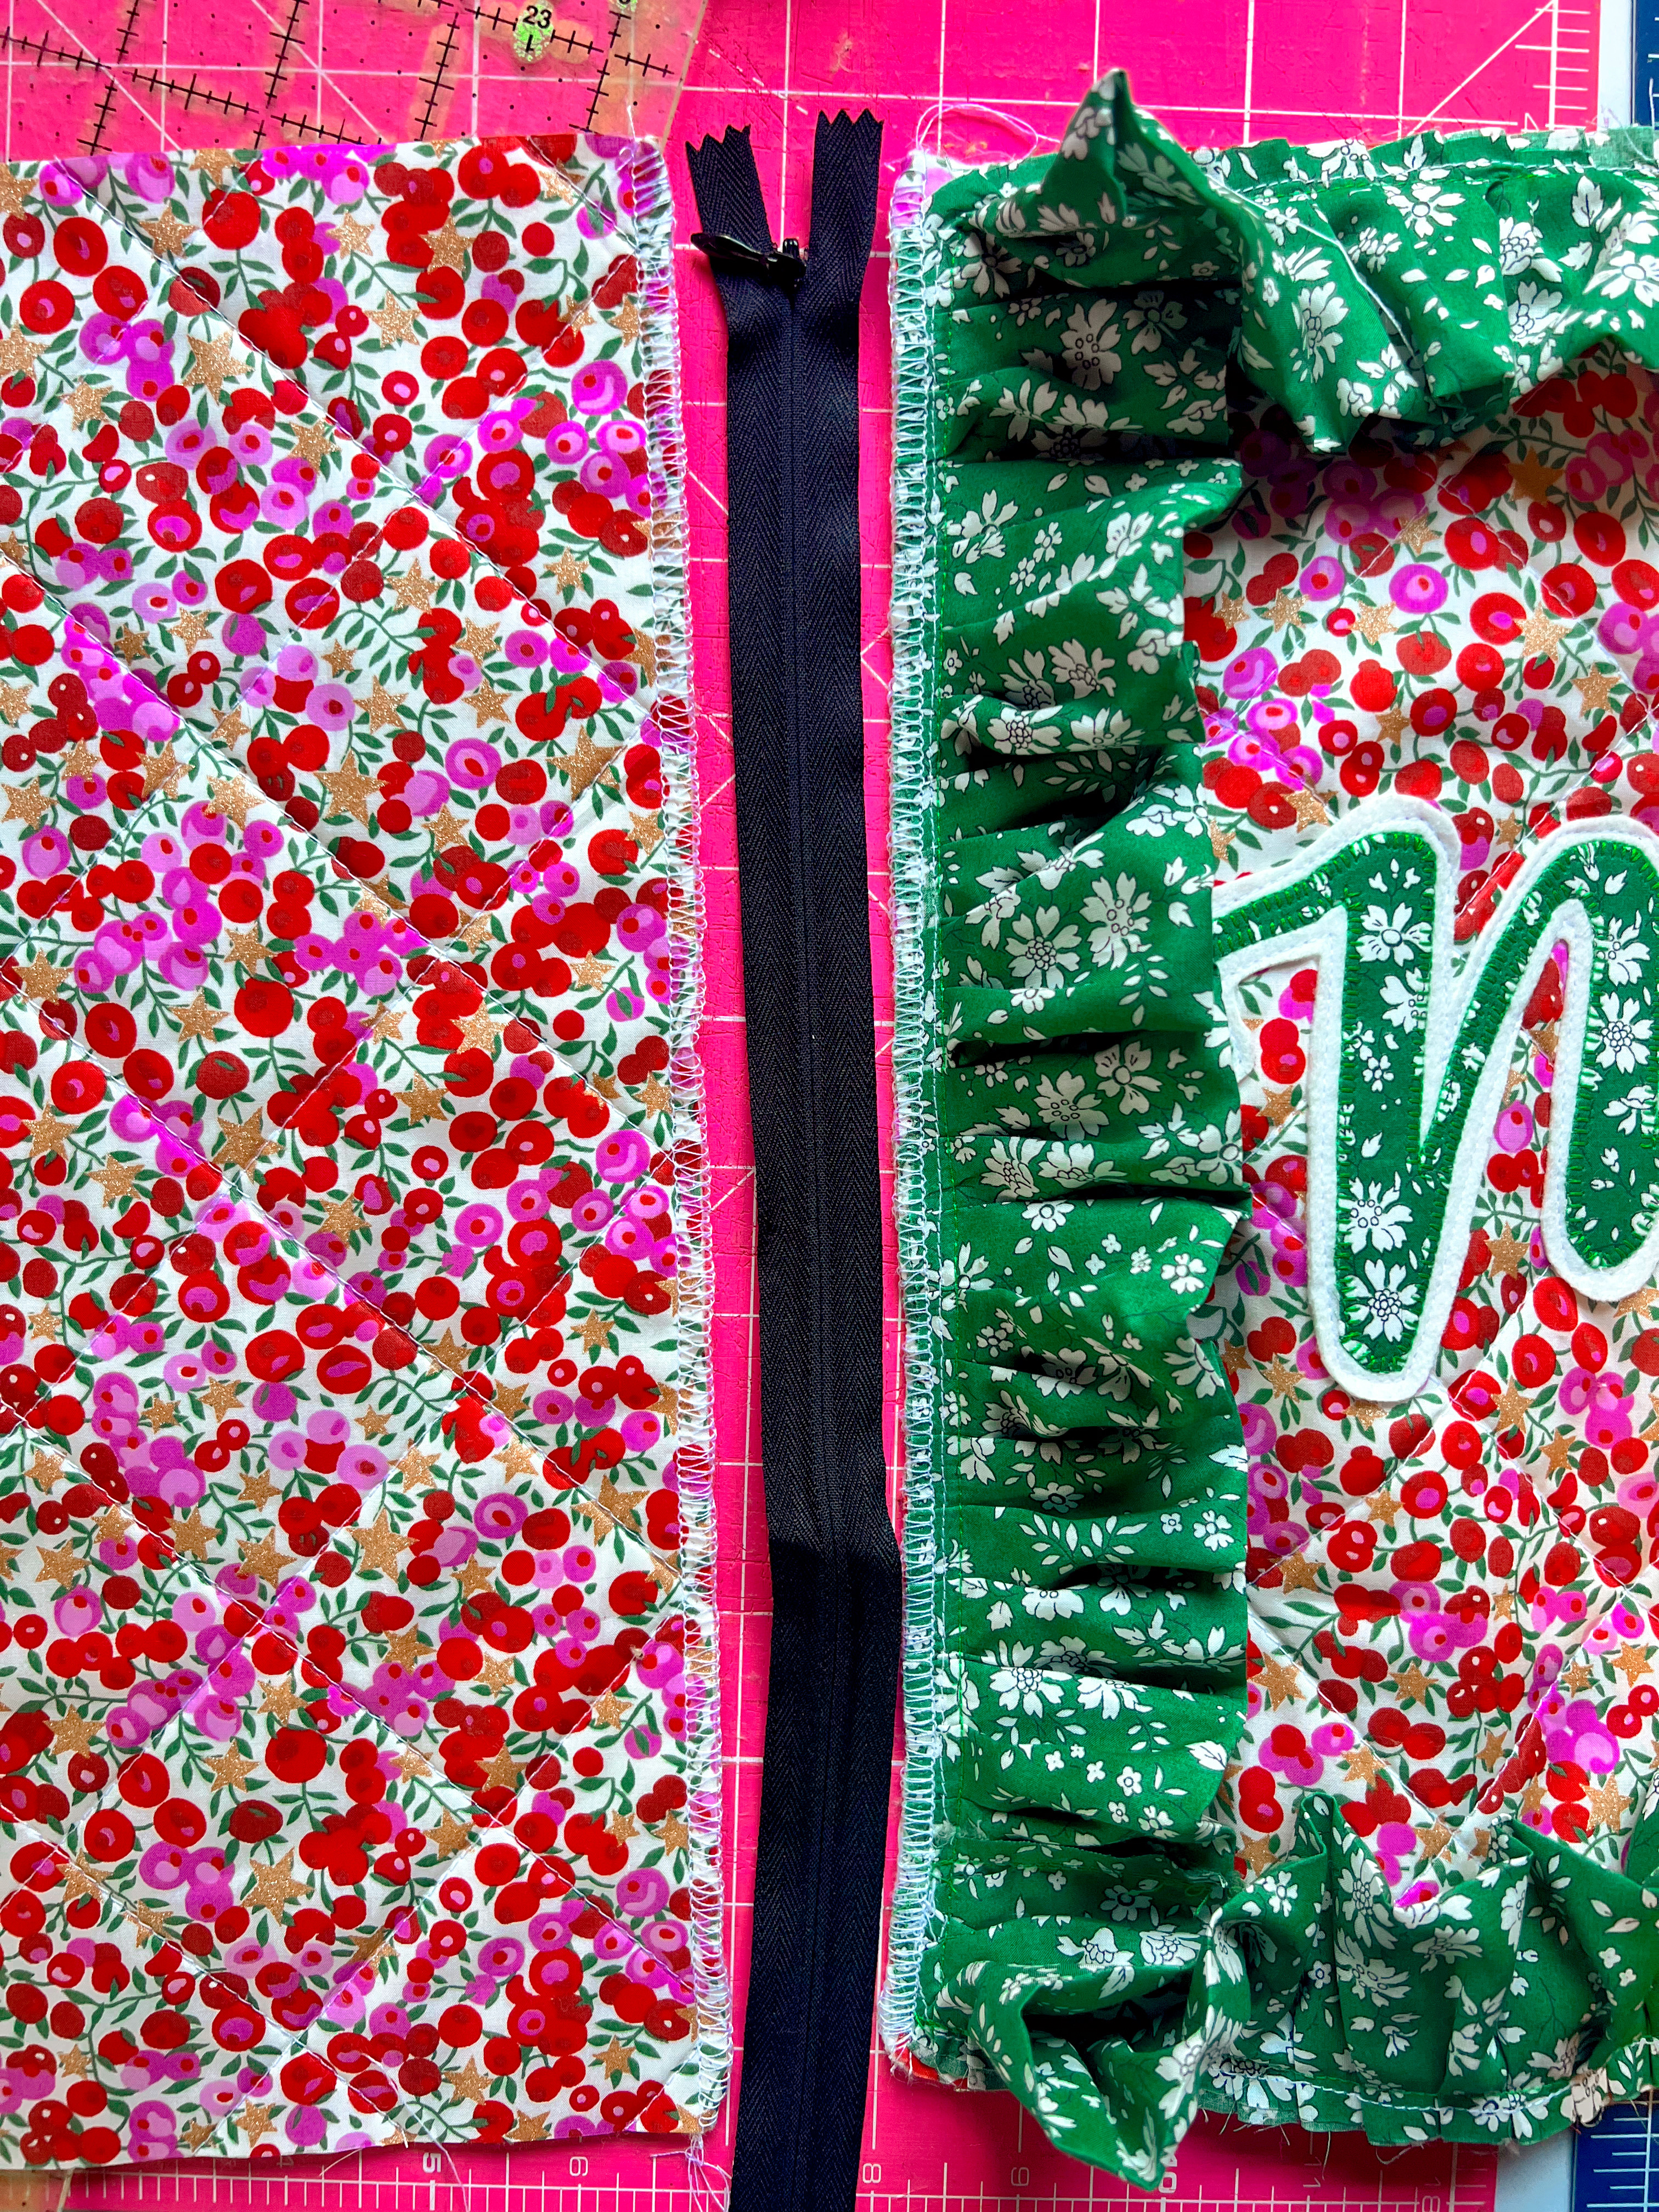
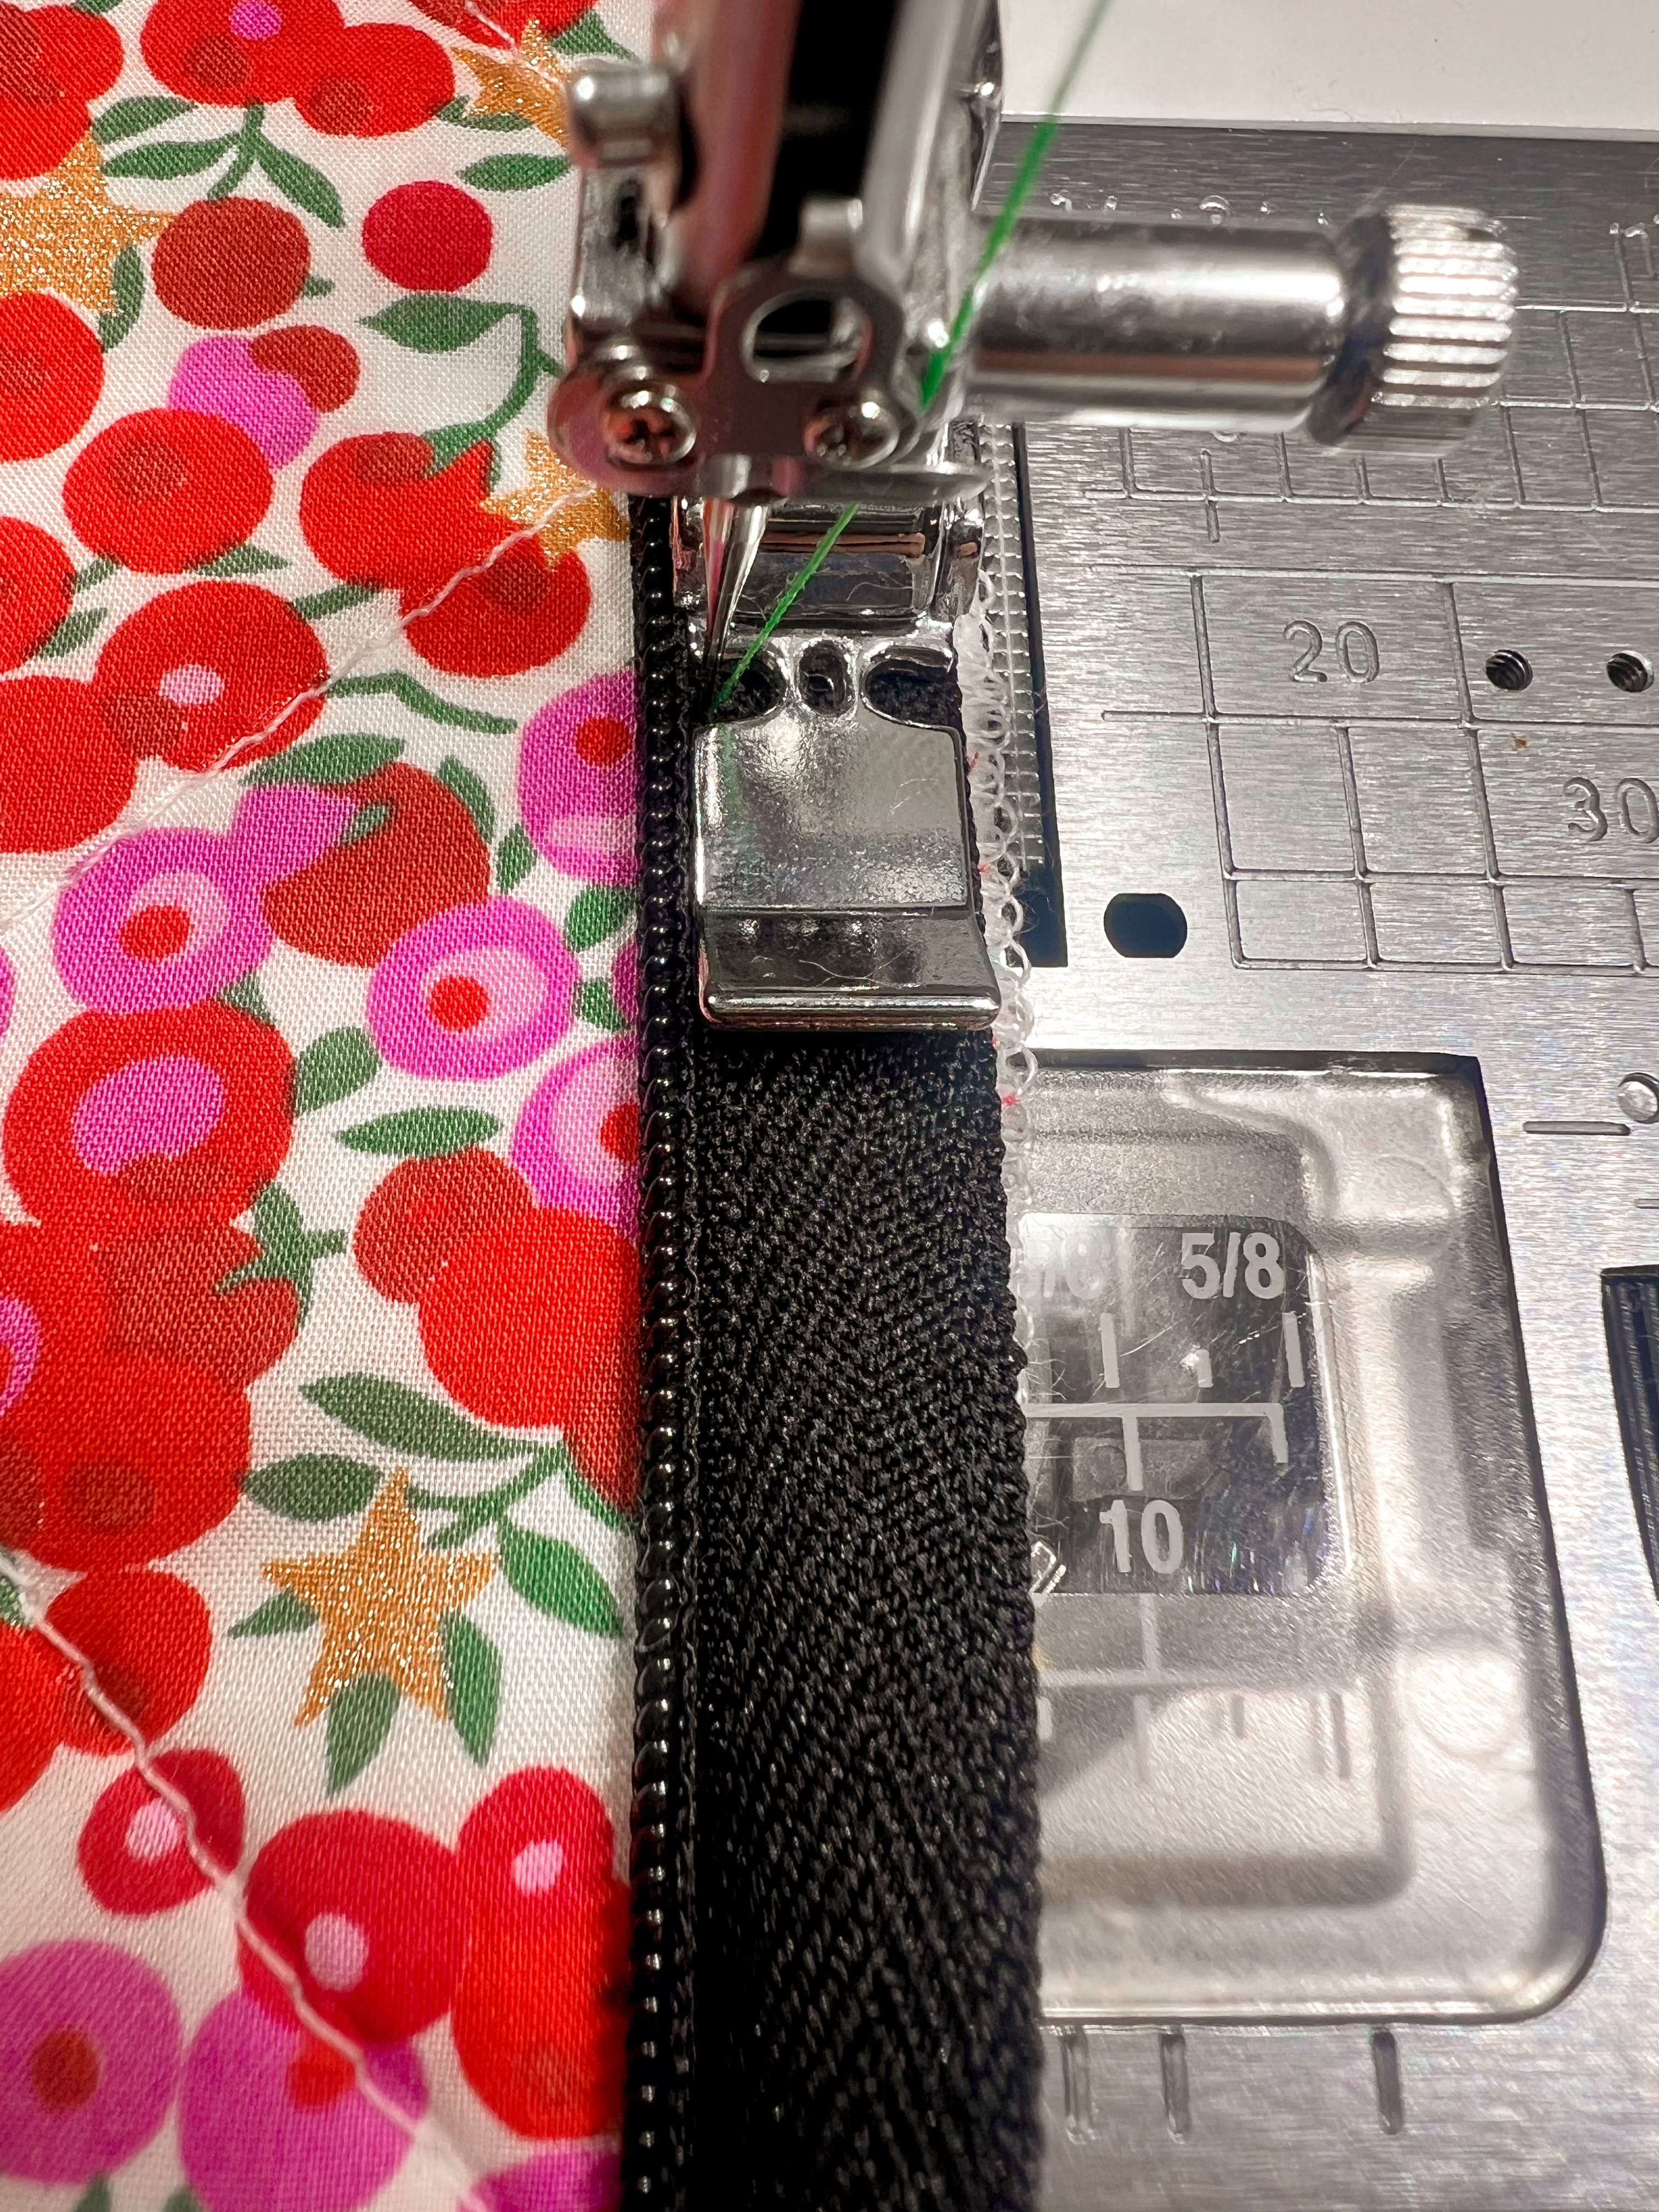
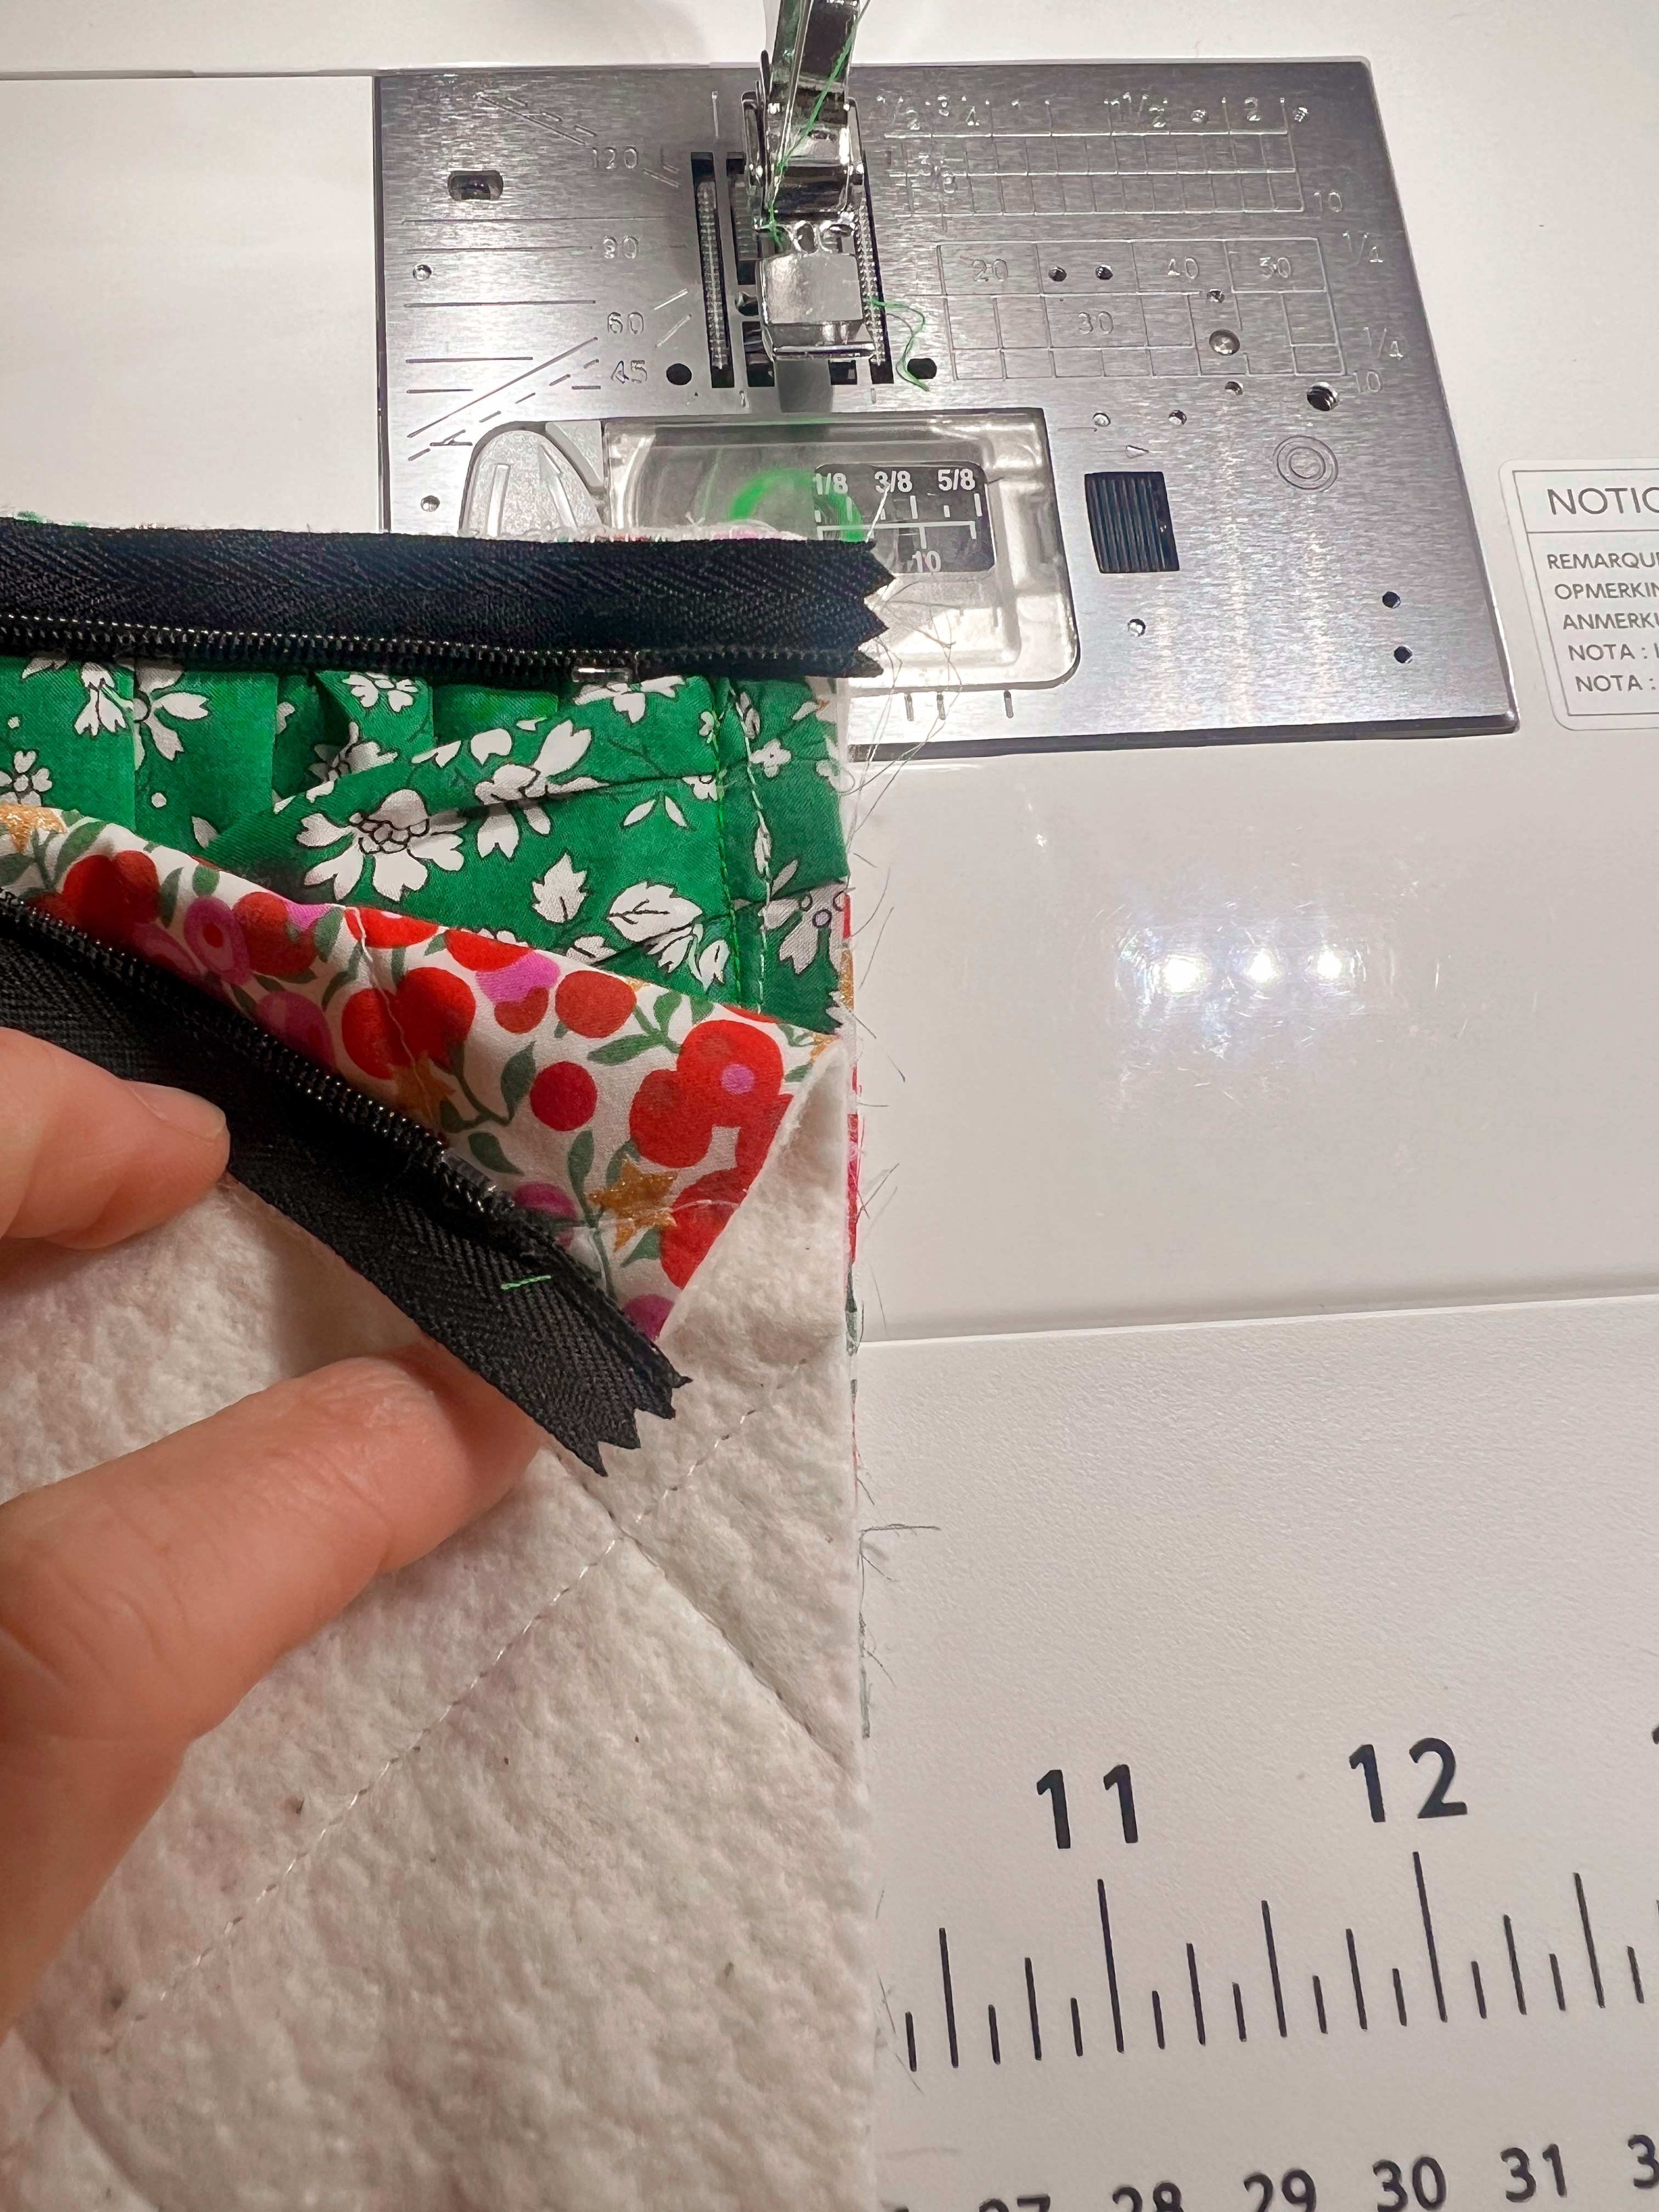
Step 5: Install invisible zipper to the left side of the pillow front and the right side of the pillow back using a zipper foot.


Step 6: Open zipper halfway, and sew around remaining three sides with a 1/2” seam allowance using a walking foot.


Flip pillow right side out and stuff with pillowform.


Everyone is Talking about Merry & Bright Pillow
Reviews


Tako
Beautiful
Wednesday, November 23, 2016

cpindzola
Around the Table Dresden Placemats
Saturday, December 17, 2016

I like the concept, but the directions are "sloppy." Nowhere in the supply list does it mention the felt or the batting (how much?). Also, I would never use a high loft batting in a placemat, or a table runner, as I think that it would be too unstable for a glass. The next time I make these, I will cut out the batting (I use flannel) and spray baste it to the wrong side of the Dresden plate before I put the Dresden plate on the felt to cut out. I have not yet washed the finished placemat, and am hoping that the single layer of felt does not curl up, or become distorted after washing/drying.
Txmaid
Fun Great Gift!
Tuesday, February 21, 2017

MargieARK
Teatime Quilted Tablecloth
Friday, February 24, 2017

I made this today but your cutting directions need to be changed. You only need 4 of color 1 and color 3 4.5 squares for the triangles. Also the inner border, you only need 2 cuts as WOF is long enough to cut each in half to fit the sides.
MickelSews
Great Machine
Wednesday, August 30, 2017

I've had this machine for only a week now. I bought it used from a lady who makes her own clothes, but she no longer needed the machine. During the purchase, she noted that she is almost sad that it's better to give it away because of how well the machine performed. (I also bought it along side a computerized machine of another brand.} She demoed the machine for us, showing it worked and gave us everything (including the box it came in!) She took amazing care of this machine. I have used it a few times now, and the directions for threading were easy to follow (albeit my hands are quite large so the lower looper was a pain, but that is no fault to the machine or brand.) And I recommend this machine to anyone who wants to learn to serge and wants a machine that can grow with them. I will happily use this machine time and time again.
rvstan
S9 Review
Sunday, February 25, 2018

I love, love, love my S9! It's sews and embroiders beautifully and it's simplicity of use amazes me. I would recommend this machine for both a beginner and an experienced seamstress. If I would ask anything of Janome it would be to upgrade the programming to run a larger hoop size. I understand that it can't get much wider but there is most definitely room for it to go longer. That is the only limitation of this machine.
pjmnana
PJMNana
Monday, February 26, 2018

I purchased a Memorycraft 15000 a few years ago and it was the best purchase I ever made! This machine can do just about anything you would would ever want! I love the capability of using the Acuedit app to set up my embroidery pattern on my Ipad and then download it to the machine! I love how my embroidery looks upon completion and I love all the good lighting it has to light up your workspace. That way you don’t need to worry about where to set up your machine. It also has plenty of room to do machine embroidery on any size quilts! There are many decorative stitches from which to choose that are outstanding! It’s hard to choose which one to use! There are so many great features it is hard to decide what I love the most. If you want to buy only one machine to last a lifetime, I would recommend this one!
KLWash
S9 Review
Sunday, February 24, 2019

The S9 is amazing. I learned to sew by hand when I was just 5 and in my grandmothers way as she was quilting. I took seeing classes in high school until they would no longer let me sign up. The S9 makes me appreciate my current skills as well as motivate me to want to learn more. This machine is awesome.
SewSueMe2002
Horizon Memory Craft 15000
Thursday, November 19, 2020

My Janome Horizon Memory Craft 15000 is fantastic! I love, love, love this machine! When I came across the Eye for and Eye embroidery design today, I wanted to make it. However, the embroidery file is missing. Nothing downloads when I select the download button. Please help!
Jillfmischo
Treat Bag fun!
Monday, August 16, 2021

I made the Halloween treat bag for my new granddaughter and I’m sure it will last for years. No embroidery machine so I appliquéd the lettering. Need a little more skirt fabric for a better gathered look, and I used thin double-bias tape for the skirt hem, over edge stitch on skirt sides. I’m pleased with my results!
elenaz
Very helpful tutorial
Wednesday, October 25, 2023

I want to say thank you for teaching me this method of applique. I was able to do it with a small letters. This method is the best so far from all of those I've seen and tried.
plonkar
So useful
Thursday, November 30, 2023

I'd like to express my gratitude for teaching me this appliqué method. I successfully applied it with small letters, and, so far, it's the most effective among all the methods I've seen and tried.

DEALERS
The TWO Closest Dealers to you are:
196 Boston Post Road , Orange CT, 06477
203-878-1654
19 PUTNAM AVENUE , PORT CHESTER NY, 10573
914-934-2934
Find Additional Dealers