Projects

Fiesta Weave Lunch Mats

Created By:

Heidi Proffetty

Skill Level: Intermediate

Nothing says bring on the party more than with these brightly colored weave lunch mats. All you’ll need to make your own set are a few basic sewing supplies, follow easy steps to create a simple plain fabric weave pattern, and finish your mats with neat mitered corners. Jazz up your mood and your table. Set down these colorful mats, grab a vase of fresh blooms, and plate up your favorite lunch or snack. You and your guests will definitely be feeling the urge to fiesta!  

Follow along with Heidi Proffetty as she uses her Continental M7

Janome Supplies Required

PROJECT SUPPLIES


4 – Fat Quarters of Bright Patterned Cotton or Batik Fabrics

8 – Fat Quarters of Bright Solid Cotton Fabrics

1 – Yard of Iron-On Woven Cotton Interfacing (Pellon Shape-Flex SF-101)

40 Wt Embroidery Thread in Coordinating Bright Colors

1 – 40 Yard Package of Double Stick Fusible ¼” Tape (Lite Steam-A-Seam2)

Spray Starch

Scissors

Cutting Mat, Rotary Cutter & Quilt Ruler

Iron & Ironing Surface

Mini clips or Straight pins

Painter’s Tape

Washable Elmer’s Glue Stick

Sewing Machine, Standard Straight Foot, Walking or Even Feed Foot or engage Acufeed Flex Fabric Feeding system with Dual Feed AD Foot on some Janome Sewing Machine Models.

Instructions


PART 1 – FABRIC CUTTING

For more precise cutting results, prior to starting, prepare all fabrics with starch & press.

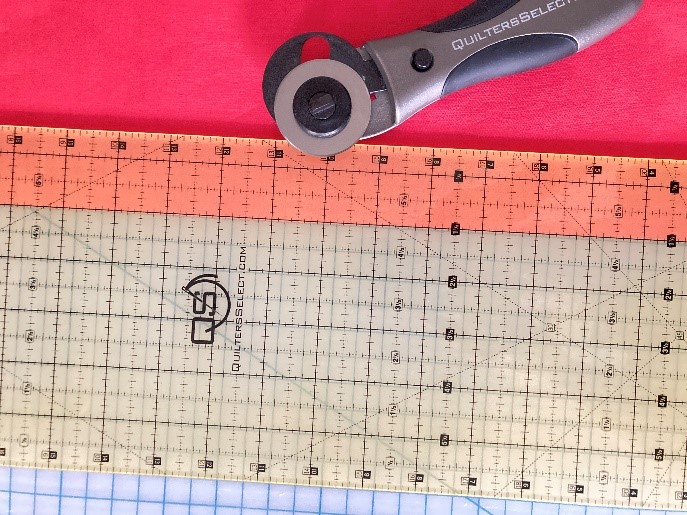
Use your rotary cutter, cutting mat, and quilt ruler.

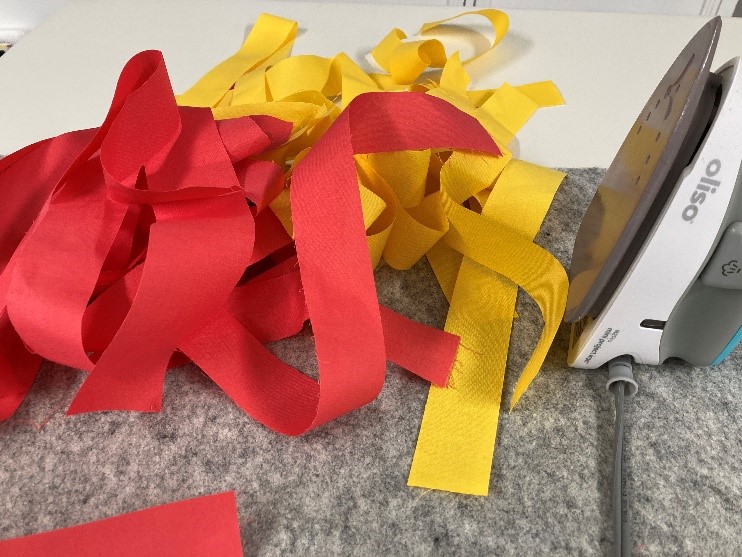
  1. Cut 14 – 1 ½” Strips from your first (red) solid colored fat quarter
  2. Cut 14 – 1 ½” Strips from your second (yellow) solid colored fat quarter


Cut 1 – 16” x 16” square from one of your patterned fat quarters. Set aside for now, this will be the mat base.


PART 2 – MAKE THE FABRIC WEAVE INSERT

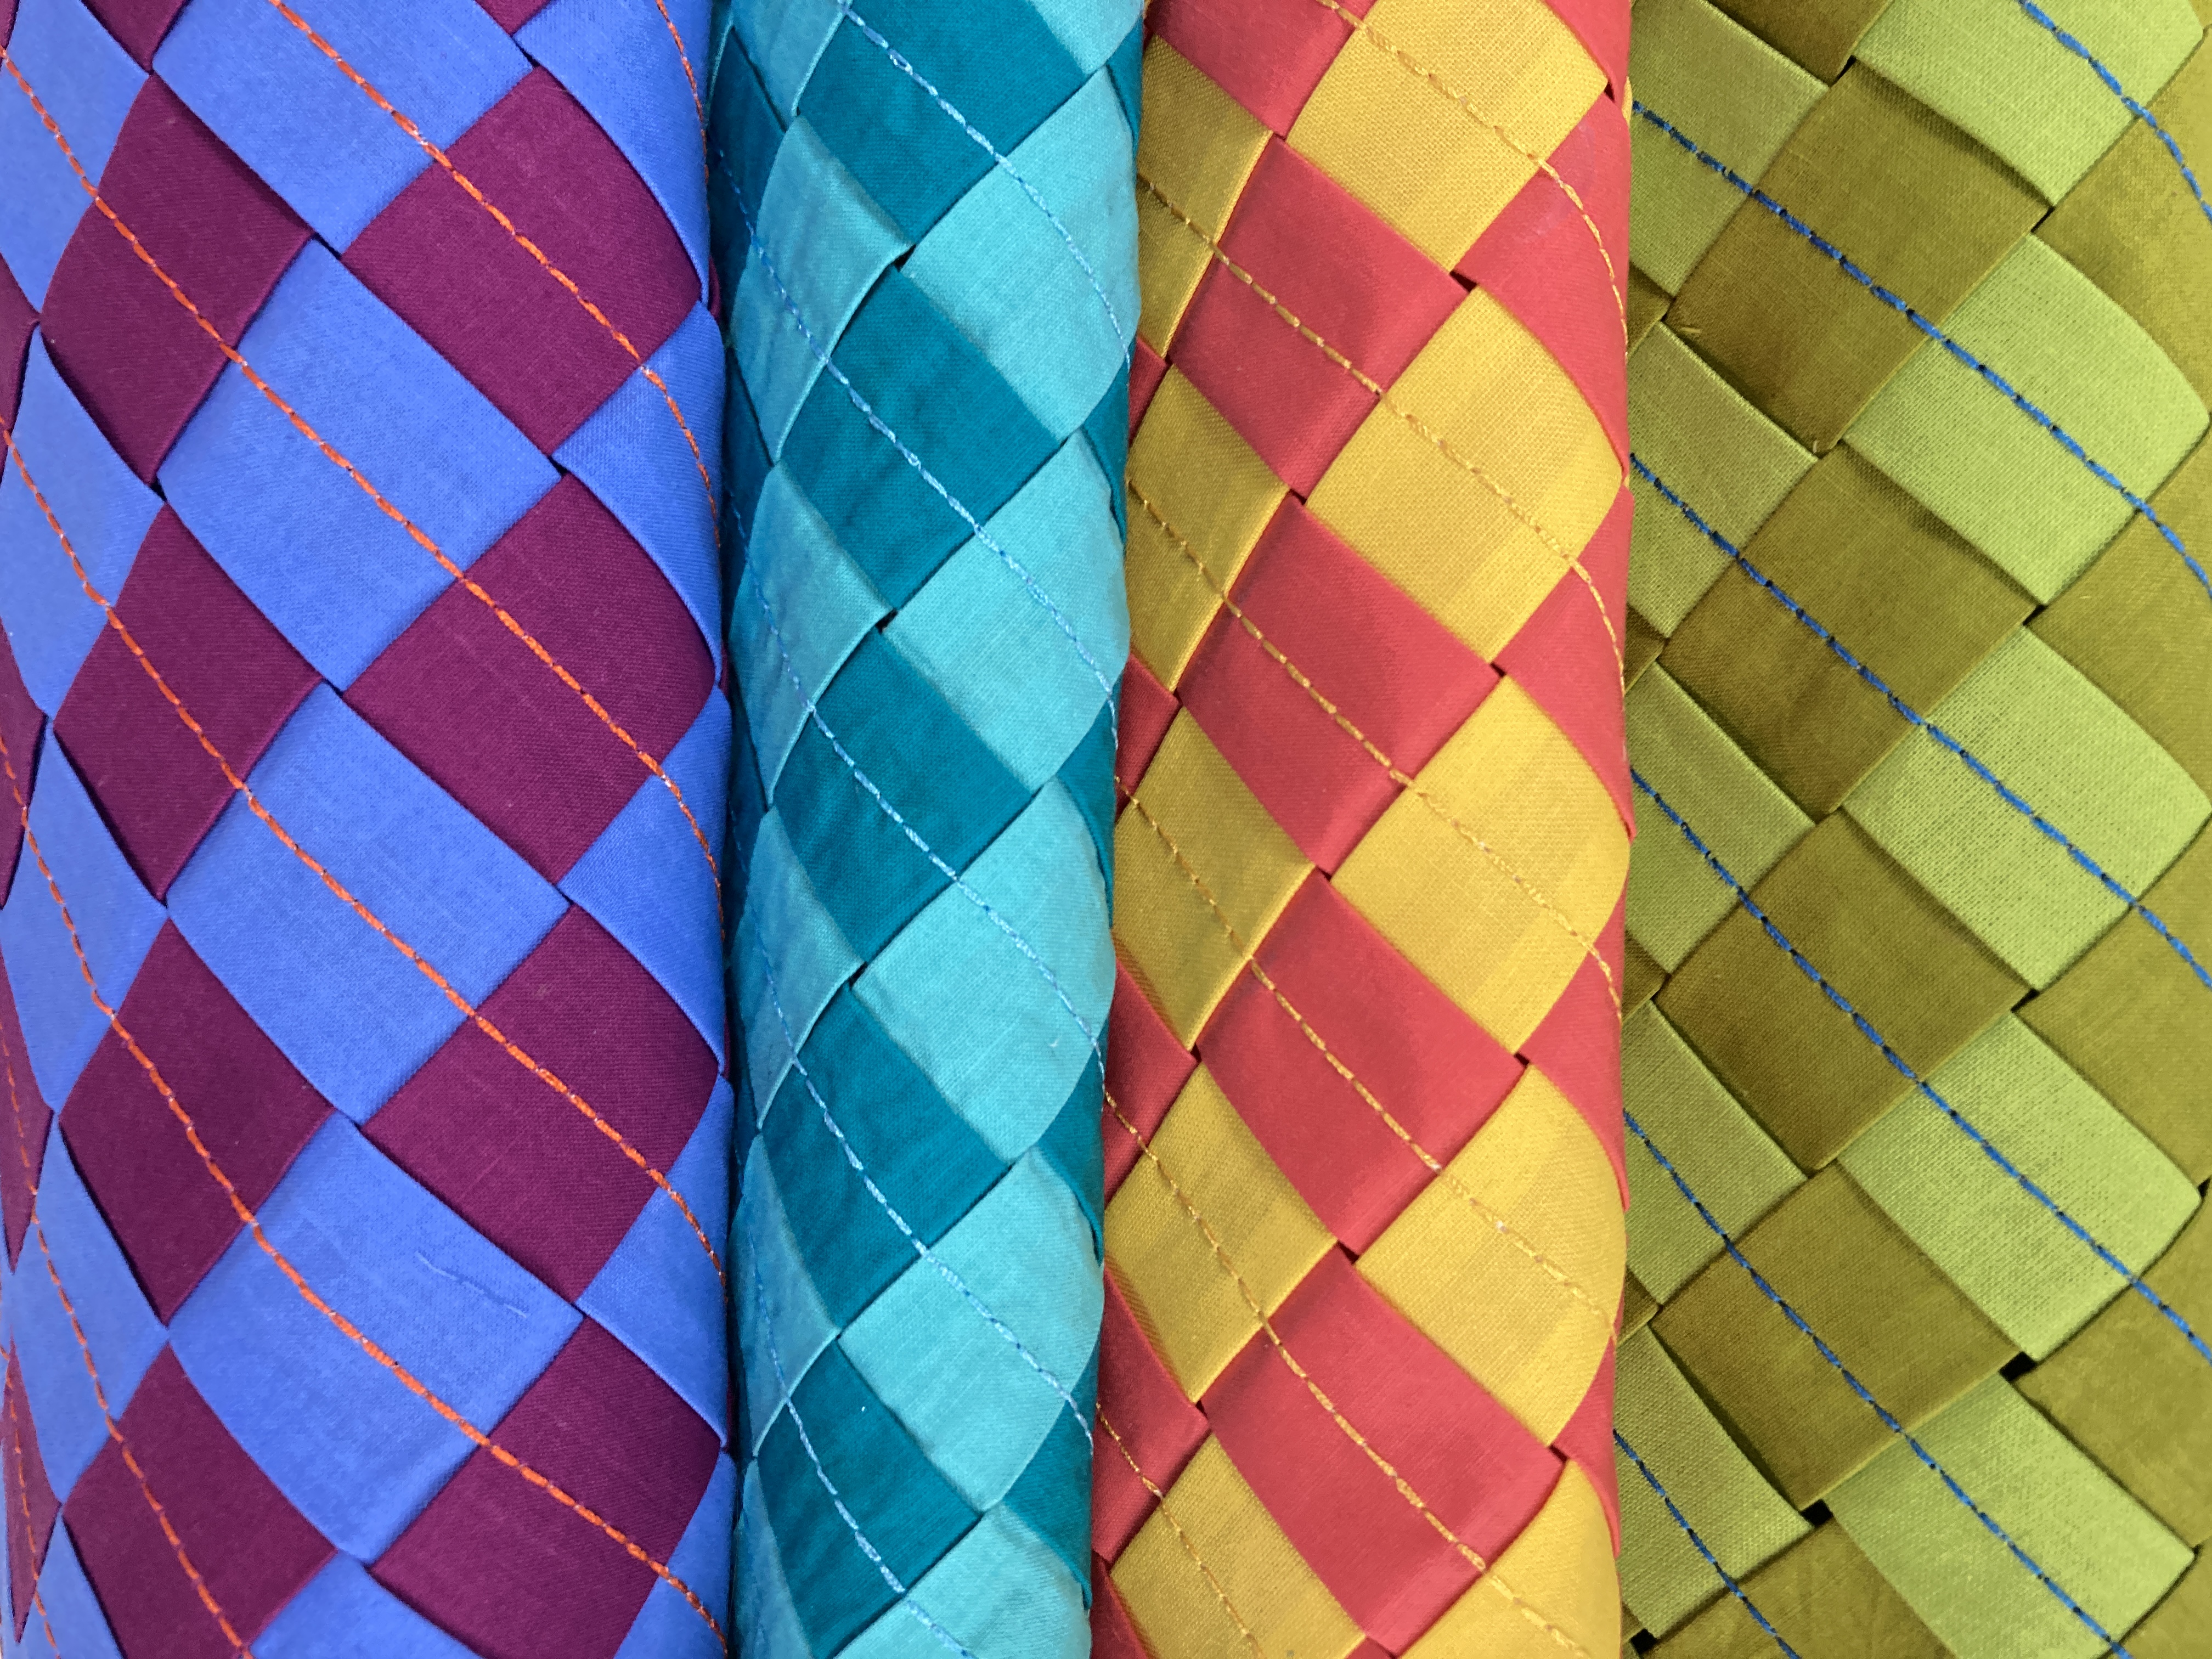
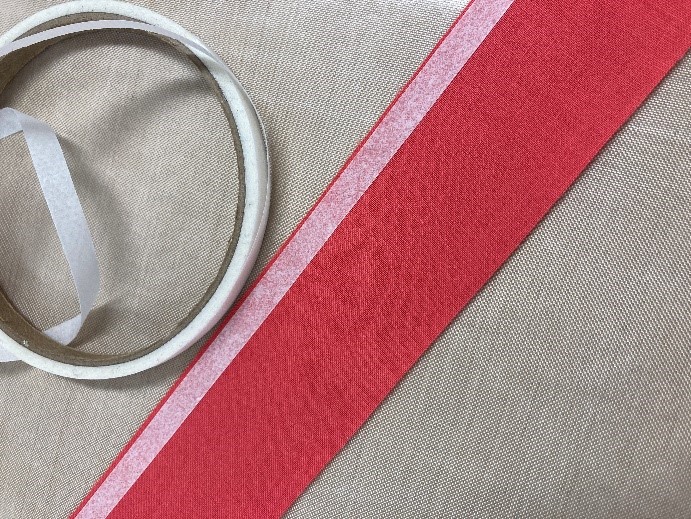
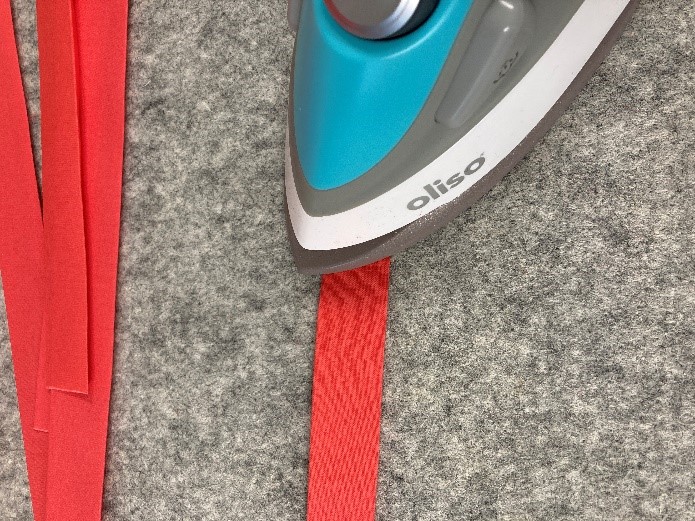
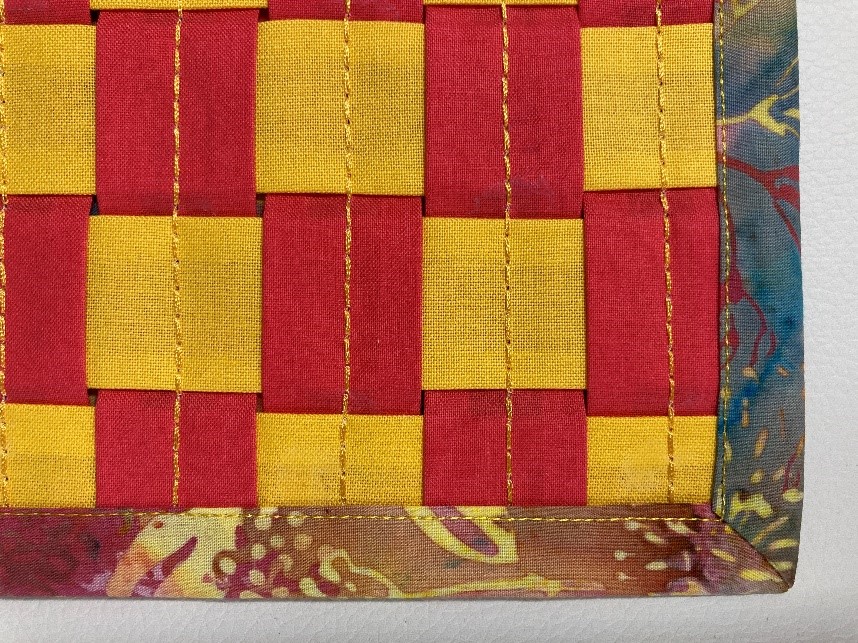
Prepare your strips by pressing the edges inward ¼” along the longest sides. To make this process easier, you can also try using a 1” bias tape maker, 1” Sasher tool, or try ¼” fusible tape. Not only can you use fusible tape to fuse down the raw edges but it’s super handy to use as a ¼” folding guide to ensure your strips finish straight. You will end up with a total of 28, 1” strips in two different colors.


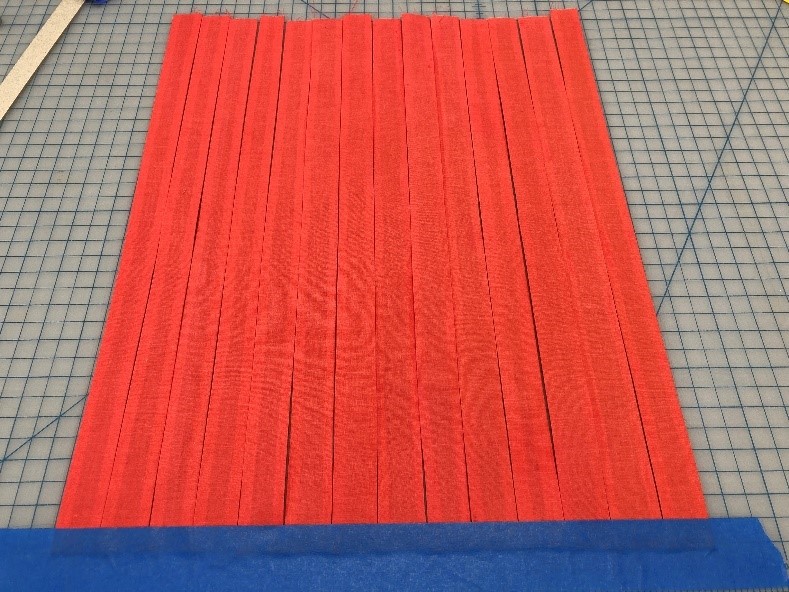
To create the simple plain weave pattern. Use the gridlines on your cutting mat to create an even horizontal edge. Start by placing 14 of the first colored or (red) strips evenly along the edge of one of your gridlines. Carefully put the edges of your fabric strips side by side (but don’t overlap the strips) with the raw edges face down on your cutting mat. Use approximately a 16” piece of painter’s tape and place it along the horizontal edge to hold the bottom edge of your strips securely in place.


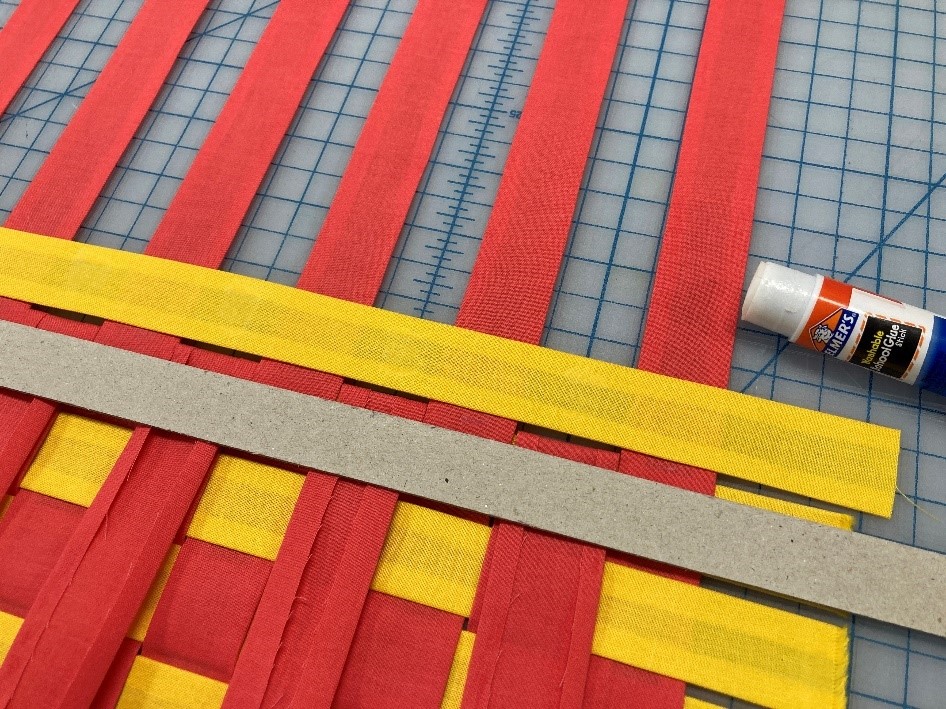
Start by folding alternating (red) strips backward (towards you) over the painter’s tape. Tip: You can use a cardboard strip as a weight to hold the folded strips in place as you weave. Pick up the first strip of your second color (yellow) and place it evenly along the horizontal edge using your painter’s tape as well as the gridlines on your cutting mat as guides.


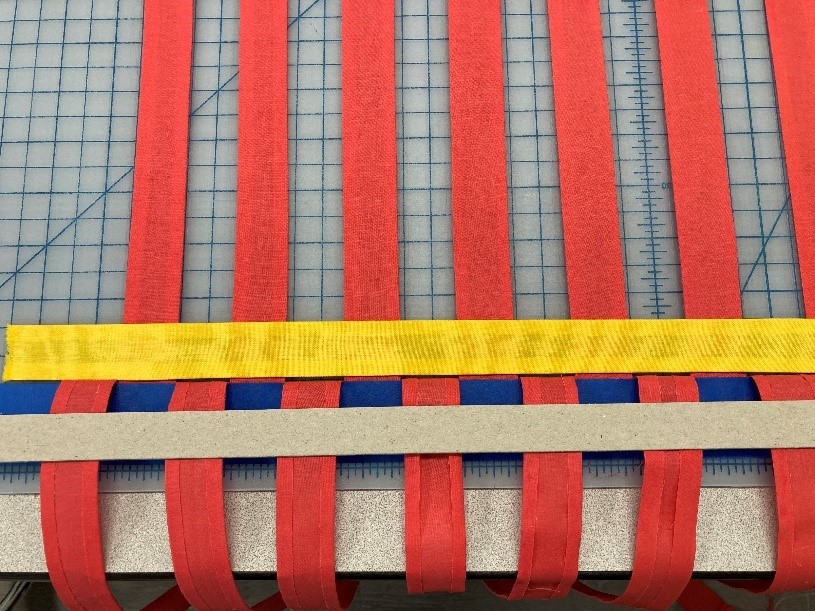
Fold the (red) strips forward back into the original position over the (yellow) strip you just placed down. Then fold the alternate (red) strips backward (or towards you) over the painter’s tape.


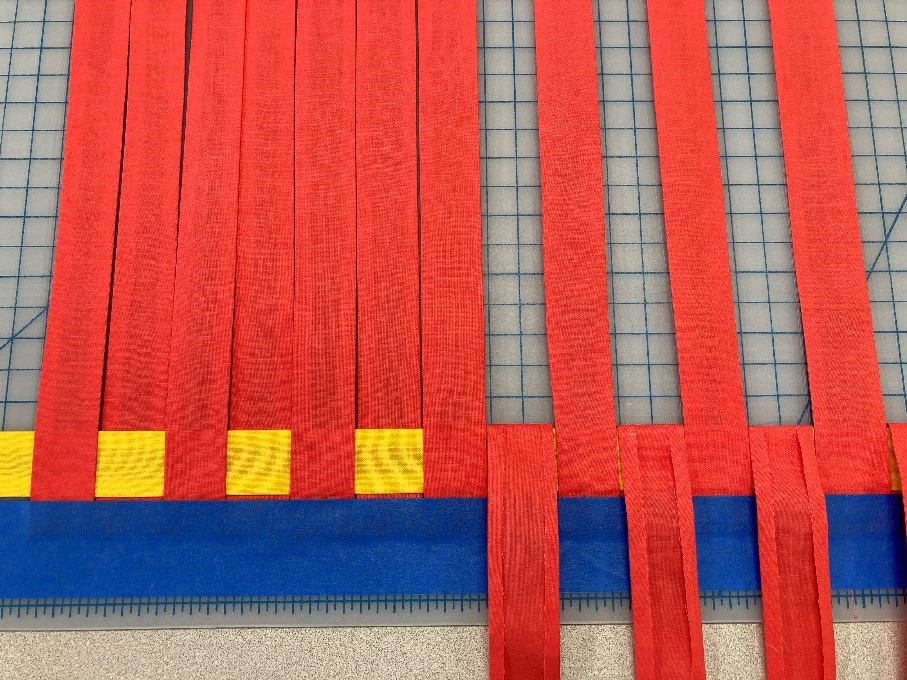
Place another (yellow) strip along the horizontal edge.  Continue this process by folding alternating (red) strips over the (yellow) strips essentially creating a checkerboard or simple weave pattern.


As you move along with your weaving, you can use a light dab of a washable glue stick to temporarily hold your fabric strips in place and to keep your overall alignment even as you weave. The glue will wash out when you launder your mats.


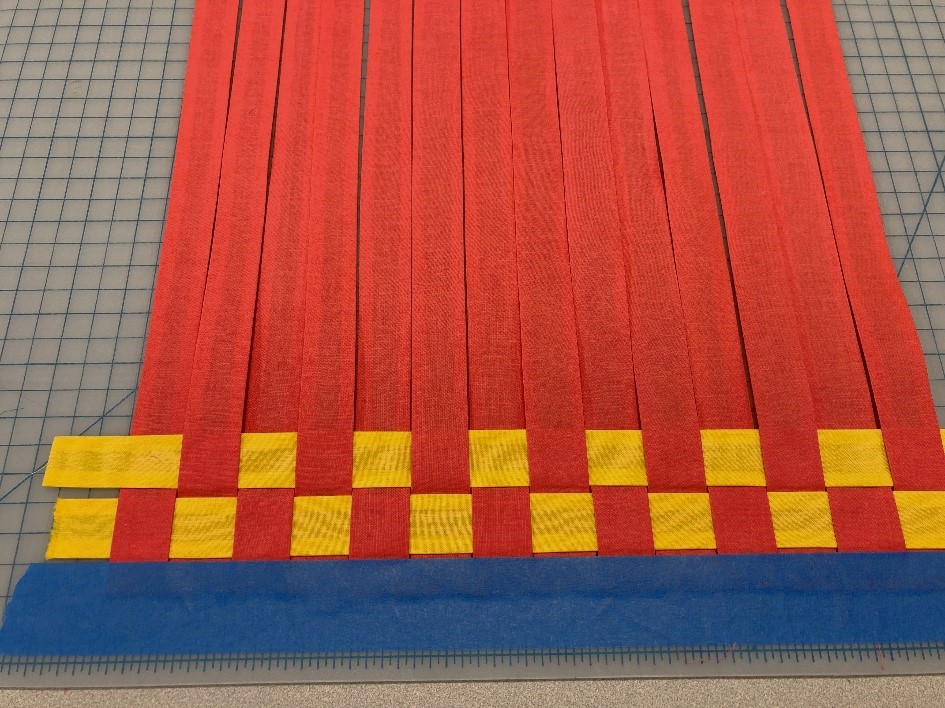
Continue the weaving process until all 14 (yellow) strips have been used.


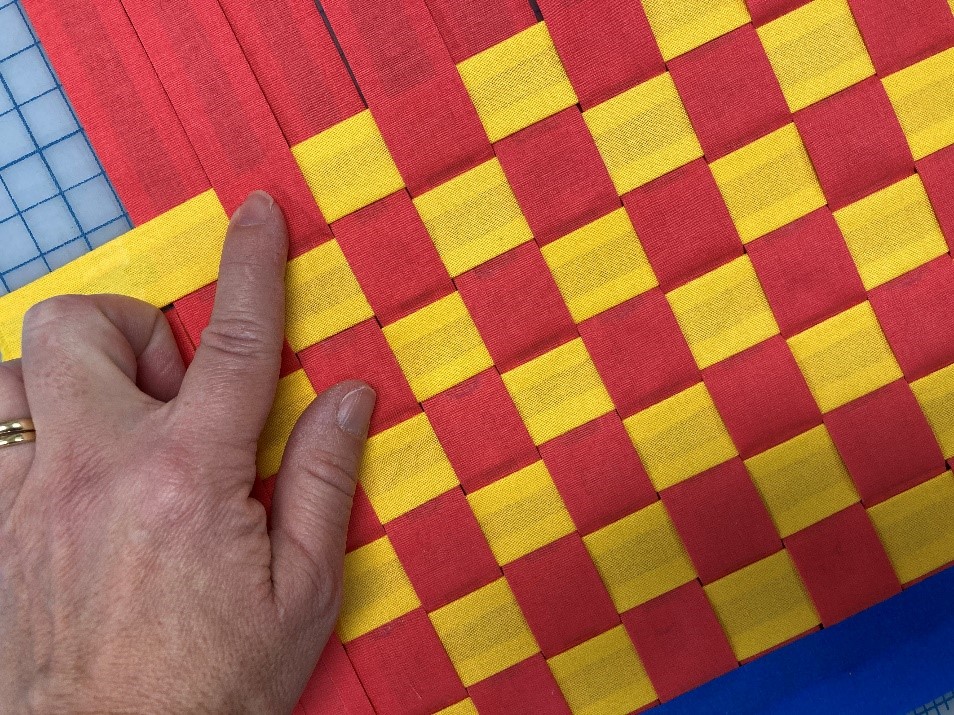
Once you have finished weaving, carefully remove the painter’s tape, trim the unwoven edges even, and then lift your weave from the cutting mat.


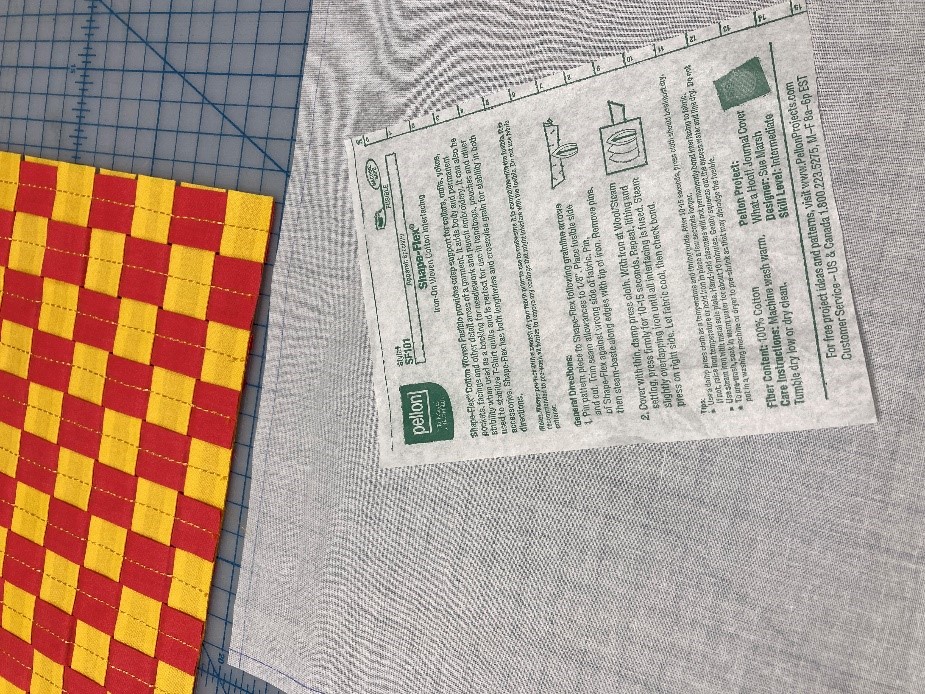
Next cut a 14” x 14” piece of iron-on woven cotton interfacing. From the cut edge, mark ¼” reference line for stitching around all 4 sides to do later in the project. Following the manufacturer’s instructions, align and fuse the interfacing to the backside of the weave.


PART 3 - AT YOUR SEWING MACHINE

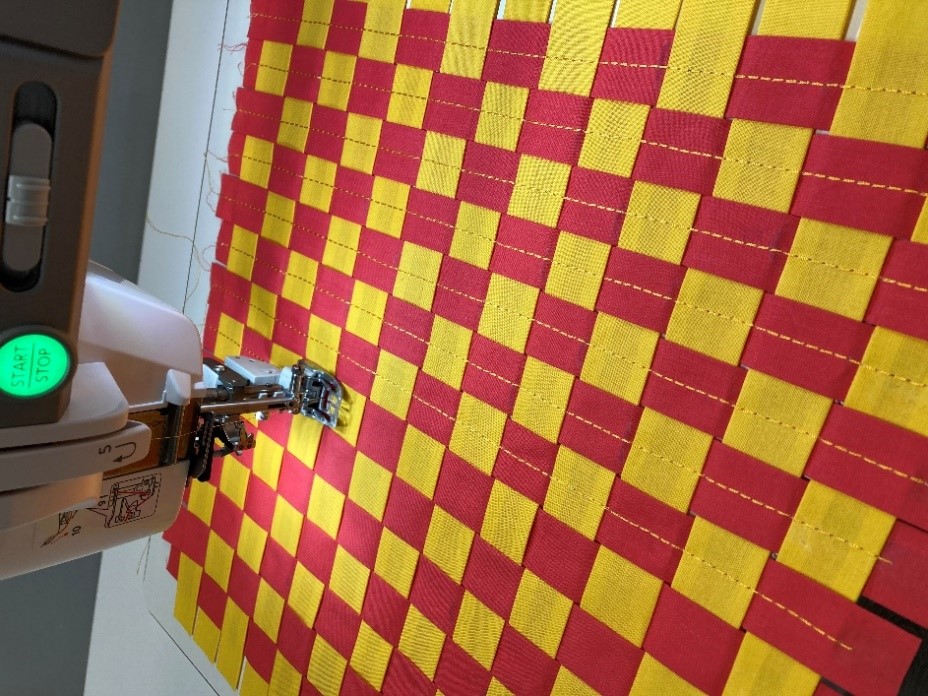
Activate Janome’s Acufeed Flex fabric feeding system or depending on your sewing machine attach a walking or even feed foot. Use a needle size of 14/90 or try a topstitch needle. Thread your sewing machine with matching 40 Wt embroidery thread for the top and bobbin and choose a thread color that pops. Use a triple straight stitch and lengthen the stitch to 4.0 for added interest.

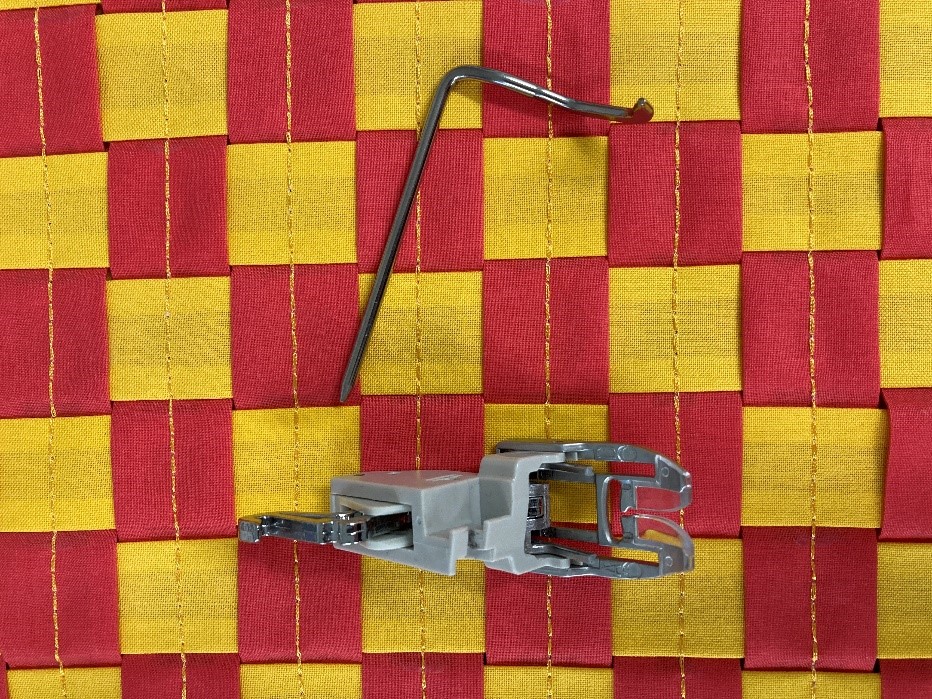
Starting in the center of a strip, sew a straight triple stitch down each of the 14 strips. Tip: Use the edges of your walking foot or the edges of Janome’s Acufeed Dual feed foot which is the perfect width to use as a guide to help keep your stitching aligned along the center. You can also try using a quilting guide bar or use a fabric marker and mark reference lines to also use as guides for accurate straight stitching.


Once your accent topstitching is done, to prevent your stitching from unraveling, flip your weave over, exposing the interfacing side. Sew ¼” along the marked line using a regular straight, reducing the stitch length to 2.0, and stitch along all four sides. This ¼” stitch will be hidden in the seam ½” hem of the mat. Tip: If your sewing machine has the following useful features, this would be a great time to use them. Needle down in fabric and Foot up for Pivoting functions.


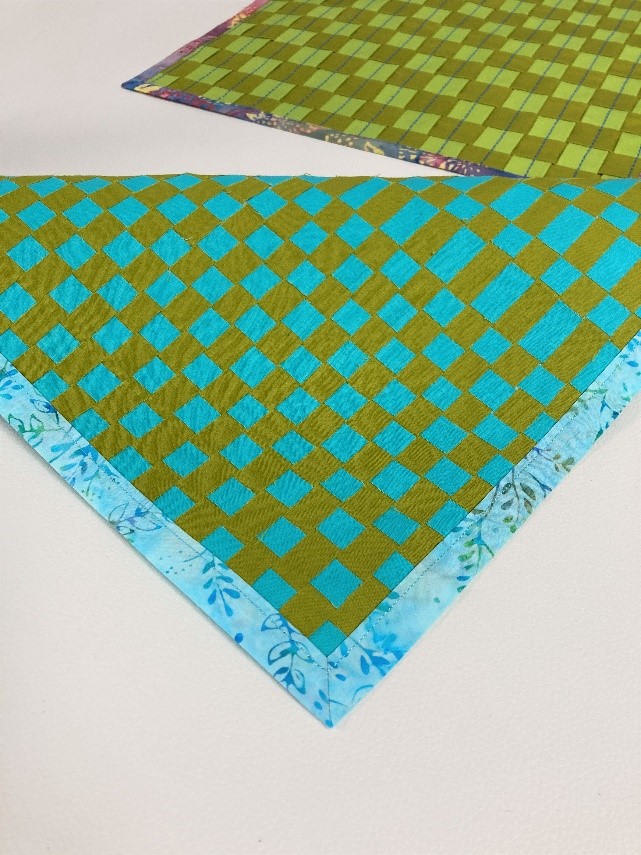
Set this completed fabric weave insert aside for now and move on to sewing the mat base with mitered corners.


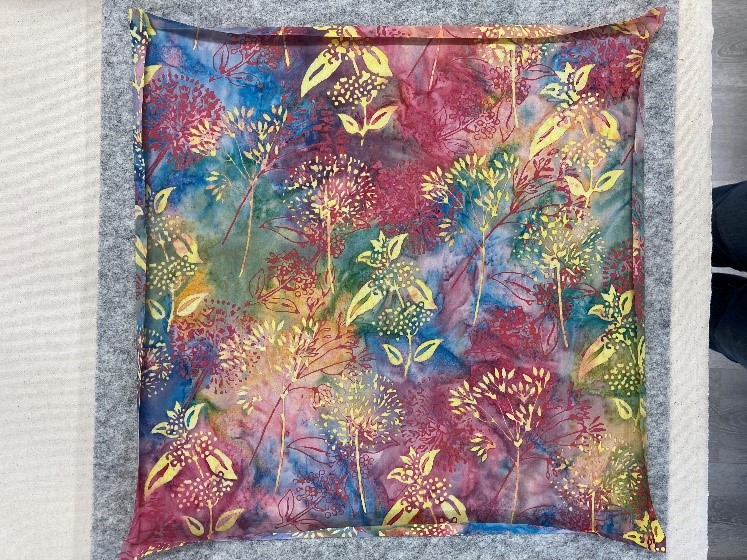
To make the mat base with mitered corners.

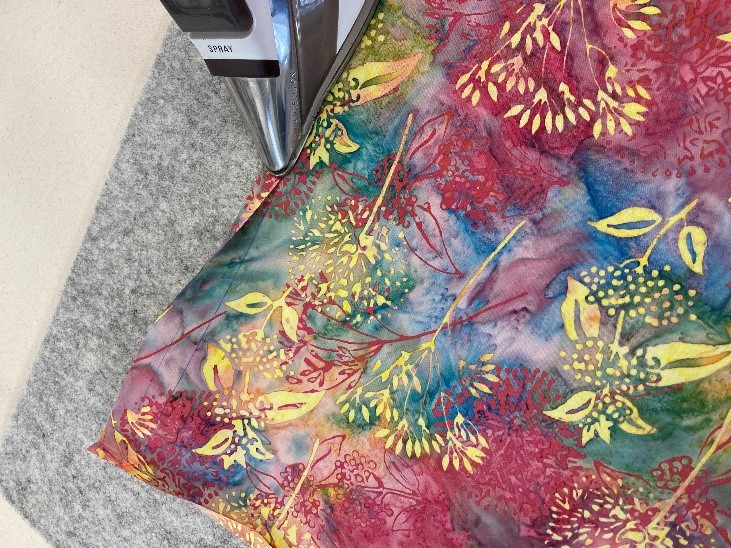
Use the previously cut 16” square piece of patterned fabric. Iron in ½” seam on all 4 sides. For better accuracy, while turning and pressing your edges, you can mark your fold lines in advance.


To make mitered corners.

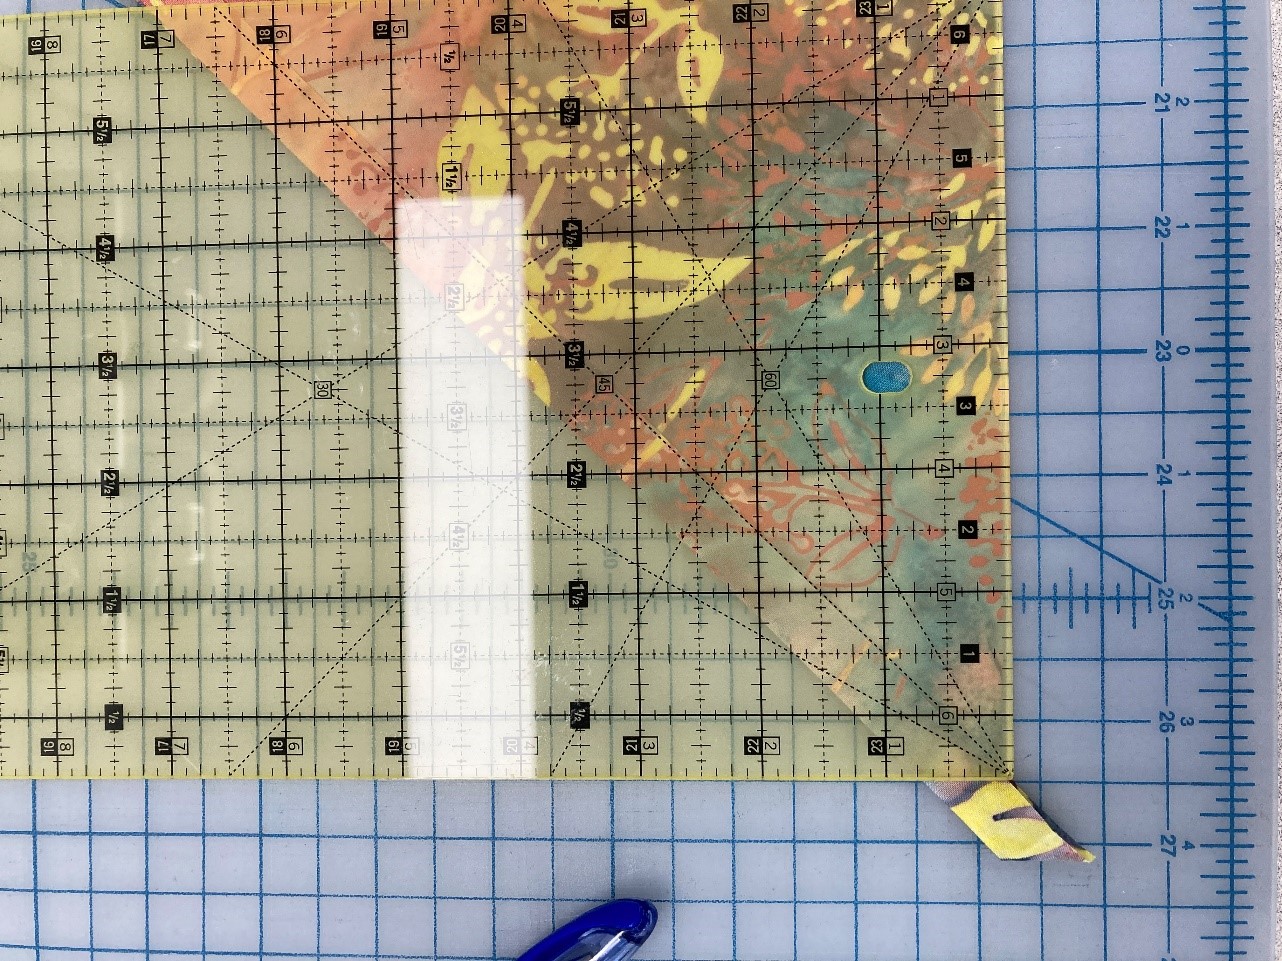
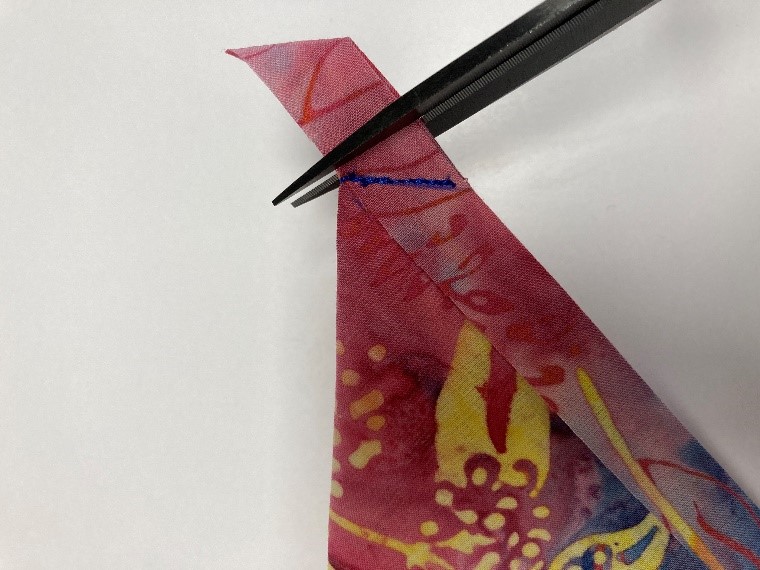
Fold your fabric square on the diagonal with right sides together. Take time to perfectly align the ½” folded edges evenly. Using a quilt ruler, line the edge of the ruler along the diagonally folded fabric stopping at the raw edge before the folded hem creating a right angle. Mark a straight stitching line on the hem. Repeat this step for all 4 corners.


At the sewing machine, use your standard presser foot, a straight stitch, and set your stitch length to 1.8. Stitch on your marked line, backstitching to secure at the beginning and end.


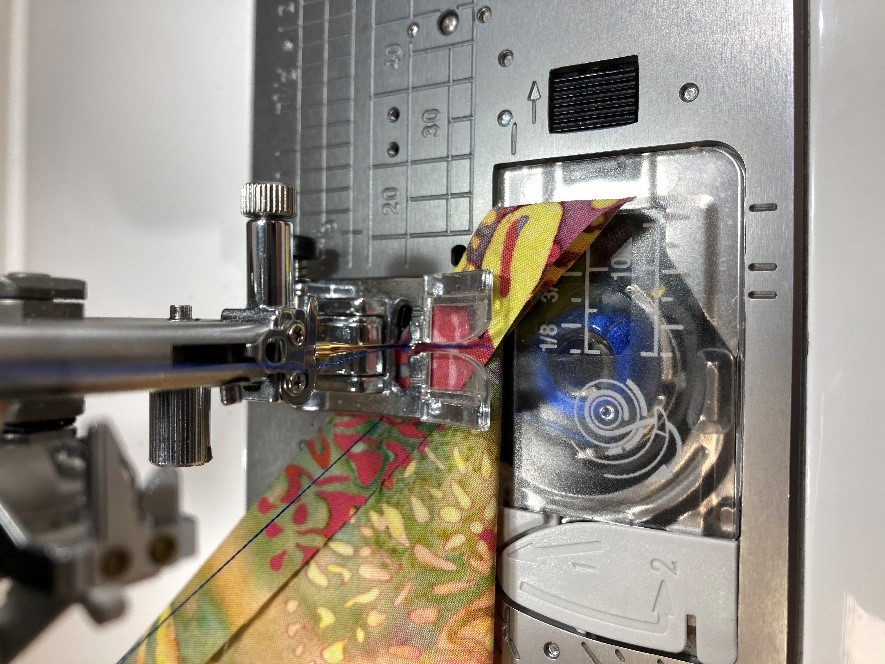
Clip all 4 corners at a slight angle, being careful not to clip too close to the corners.


Open the small seam made by the angle and finger press flat, then using your favorite point turning tool, flip the corner inside out and gently poke each point out.


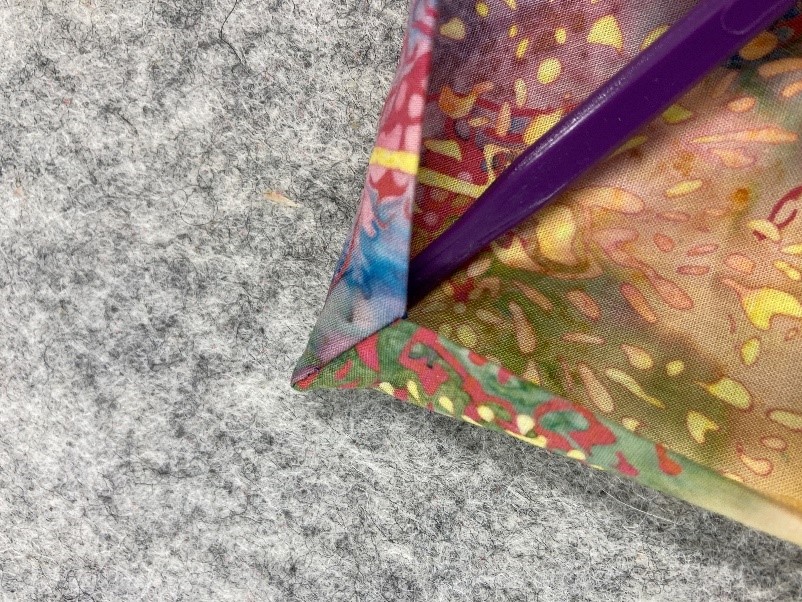
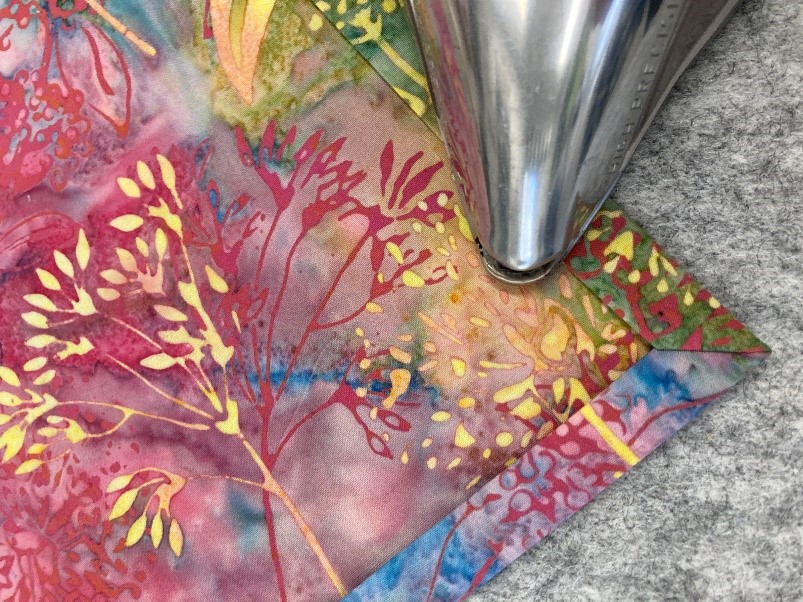
Repeat turning your points for all 4 corners to reveal nicely mitered corners. Next, press all 4 edges flat. Start by pressing from the corners out, then press along the edges.


To assemble the lunch mat.

Take your completed weave insert and place it inside the pressed, folded edges of your mat base.
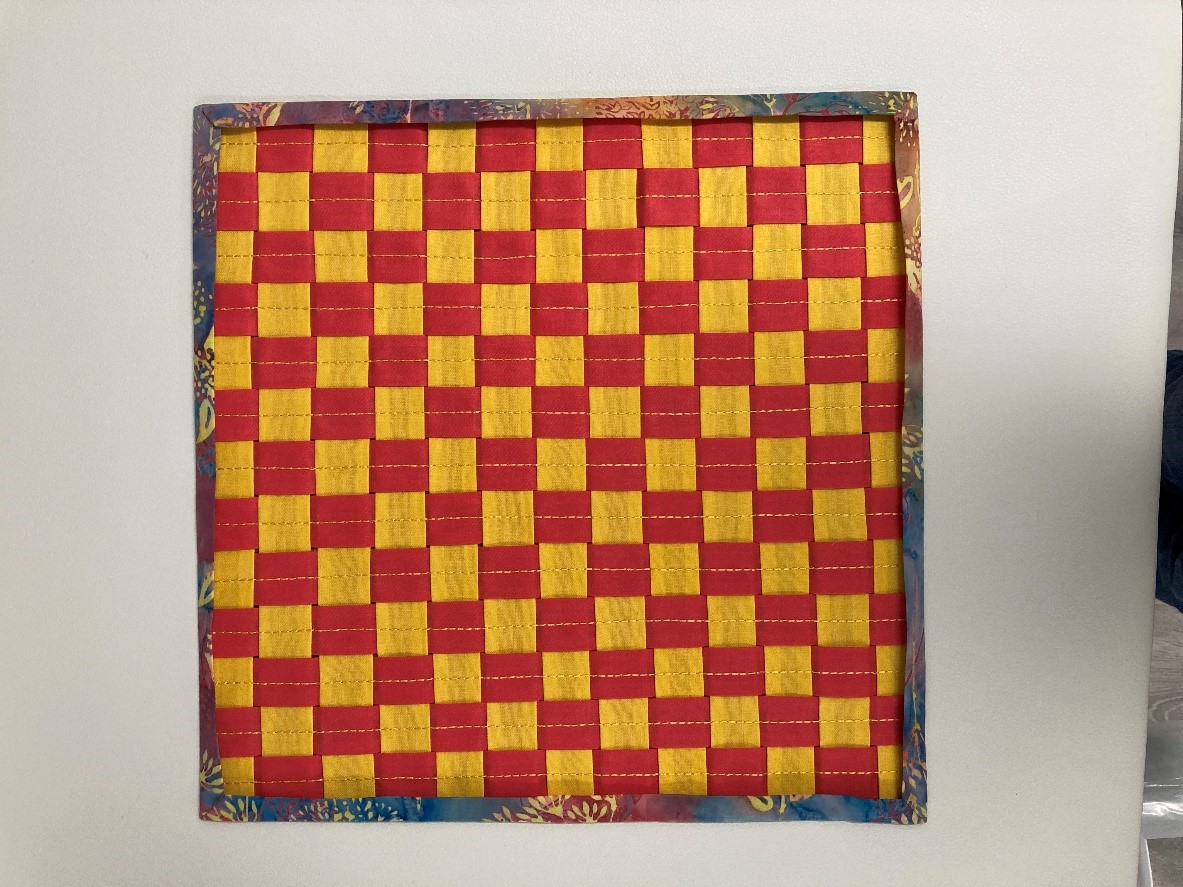


To finish the mat.

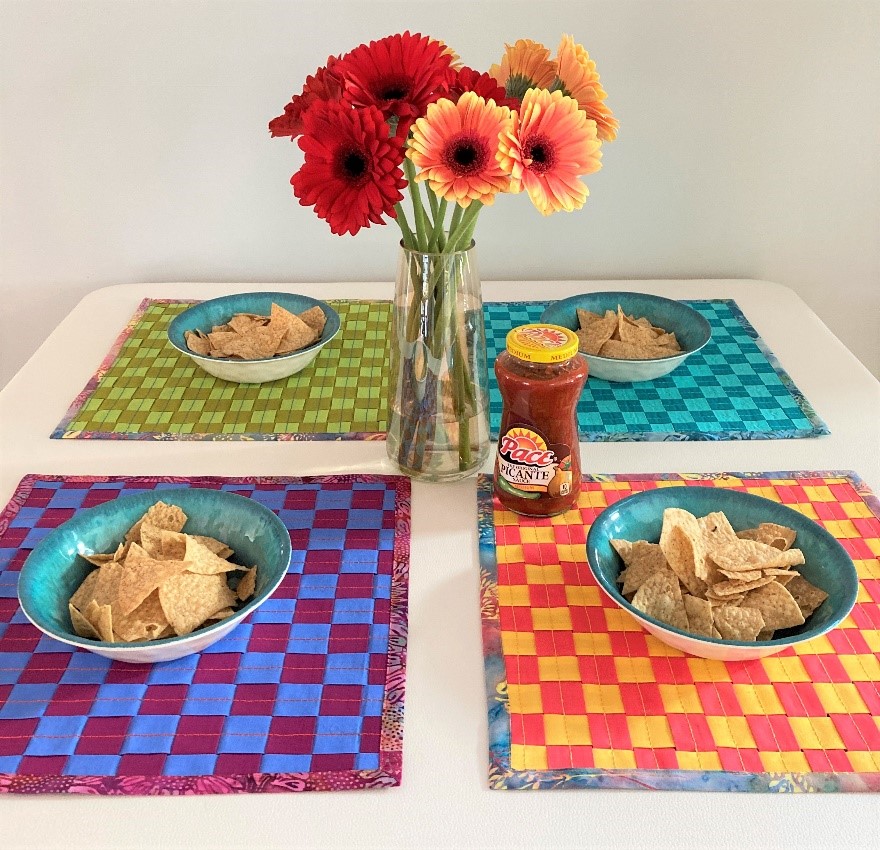
Using a straight stitch, edgestitch close to inside folded edge along all four sides. Repeat this process with the remaining fat quarters until you have completed a set of 4 lunch mats.


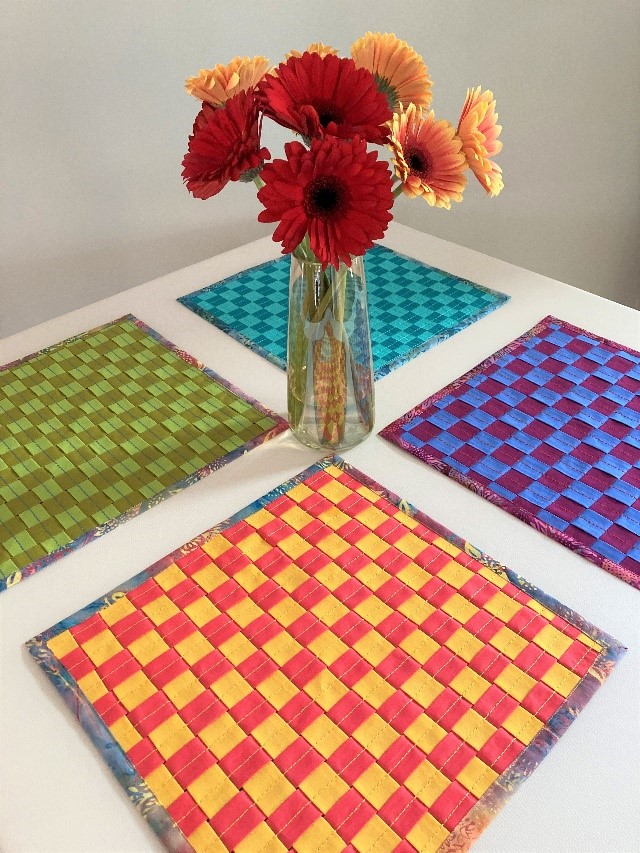
Play and experiment with other size strips and patterns, to create additional designs and appearances.


Everyone is Talking about Fiesta Weave Lunch Mats
Reviews


Tako
Beautiful
Wednesday, November 23, 2016

cpindzola
Around the Table Dresden Placemats
Saturday, December 17, 2016

I like the concept, but the directions are "sloppy." Nowhere in the supply list does it mention the felt or the batting (how much?). Also, I would never use a high loft batting in a placemat, or a table runner, as I think that it would be too unstable for a glass. The next time I make these, I will cut out the batting (I use flannel) and spray baste it to the wrong side of the Dresden plate before I put the Dresden plate on the felt to cut out. I have not yet washed the finished placemat, and am hoping that the single layer of felt does not curl up, or become distorted after washing/drying.
Txmaid
Fun Great Gift!
Tuesday, February 21, 2017

MargieARK
Teatime Quilted Tablecloth
Friday, February 24, 2017

I made this today but your cutting directions need to be changed. You only need 4 of color 1 and color 3 4.5 squares for the triangles. Also the inner border, you only need 2 cuts as WOF is long enough to cut each in half to fit the sides.
MickelSews
Great Machine
Wednesday, August 30, 2017

I've had this machine for only a week now. I bought it used from a lady who makes her own clothes, but she no longer needed the machine. During the purchase, she noted that she is almost sad that it's better to give it away because of how well the machine performed. (I also bought it along side a computerized machine of another brand.} She demoed the machine for us, showing it worked and gave us everything (including the box it came in!) She took amazing care of this machine. I have used it a few times now, and the directions for threading were easy to follow (albeit my hands are quite large so the lower looper was a pain, but that is no fault to the machine or brand.) And I recommend this machine to anyone who wants to learn to serge and wants a machine that can grow with them. I will happily use this machine time and time again.
rvstan
S9 Review
Sunday, February 25, 2018

I love, love, love my S9! It's sews and embroiders beautifully and it's simplicity of use amazes me. I would recommend this machine for both a beginner and an experienced seamstress. If I would ask anything of Janome it would be to upgrade the programming to run a larger hoop size. I understand that it can't get much wider but there is most definitely room for it to go longer. That is the only limitation of this machine.
pjmnana
PJMNana
Monday, February 26, 2018

I purchased a Memorycraft 15000 a few years ago and it was the best purchase I ever made! This machine can do just about anything you would would ever want! I love the capability of using the Acuedit app to set up my embroidery pattern on my Ipad and then download it to the machine! I love how my embroidery looks upon completion and I love all the good lighting it has to light up your workspace. That way you don’t need to worry about where to set up your machine. It also has plenty of room to do machine embroidery on any size quilts! There are many decorative stitches from which to choose that are outstanding! It’s hard to choose which one to use! There are so many great features it is hard to decide what I love the most. If you want to buy only one machine to last a lifetime, I would recommend this one!
KLWash
S9 Review
Sunday, February 24, 2019

The S9 is amazing. I learned to sew by hand when I was just 5 and in my grandmothers way as she was quilting. I took seeing classes in high school until they would no longer let me sign up. The S9 makes me appreciate my current skills as well as motivate me to want to learn more. This machine is awesome.
SewSueMe2002
Horizon Memory Craft 15000
Thursday, November 19, 2020

My Janome Horizon Memory Craft 15000 is fantastic! I love, love, love this machine! When I came across the Eye for and Eye embroidery design today, I wanted to make it. However, the embroidery file is missing. Nothing downloads when I select the download button. Please help!
Jillfmischo
Treat Bag fun!
Monday, August 16, 2021

I made the Halloween treat bag for my new granddaughter and I’m sure it will last for years. No embroidery machine so I appliquéd the lettering. Need a little more skirt fabric for a better gathered look, and I used thin double-bias tape for the skirt hem, over edge stitch on skirt sides. I’m pleased with my results!
elenaz
Very helpful tutorial
Wednesday, October 25, 2023

I want to say thank you for teaching me this method of applique. I was able to do it with a small letters. This method is the best so far from all of those I've seen and tried.
plonkar
So useful
Thursday, November 30, 2023

I'd like to express my gratitude for teaching me this appliqué method. I successfully applied it with small letters, and, so far, it's the most effective among all the methods I've seen and tried.

DEALERS
The TWO Closest Dealers to you are:
1900 CENTRE ST , WEST ROXBURY MA, 02132
(617)323-6200
443 MOODY STREET , WALTHAM MA, 02453
781-893-3331
Find Additional Dealers