Projects

Building a "Selvedge" Fabric Panel

Created By:

Maday Delgado

Skill Level: Intermediate

I’m always looking for creative and innovative ways to include sustainable sewing practices in my daily work. I’m also inspired by the resourcefulness of our ancestors and the “can do” attitude of the sewists I meet along the way. I don’t buy enough fabric to collect selvedges but recently, I was the recipient of a lovely scrap bag filled with colorful and inspiring selvedges. I knew just what I wanted to create as soon as I saw the contents! I hope you too, are curious to assemble your own Selvedge-able panel to create projects, big and small, for summer gatherings, playful “stained glass” windows, birthday parties, and even quilts. My finished panel is 48 ¼” x 52 ¼”. I will continue saving and adding selvedges I find along the way. 

Janome Supplies Required
Instructions

Helpful Hint: Keep a container just for collecting selvedges and take your time building the
panel slowly, as you receive them. It can be an ongoing project. Friends can also collect them on
your behalf, making it a collaborative initiative even for those that live far away.

1. Start by sorting your selvedges by color and/or design. Hint: Inviting your family
to help you sort can make a “low key” activity more dynamic.


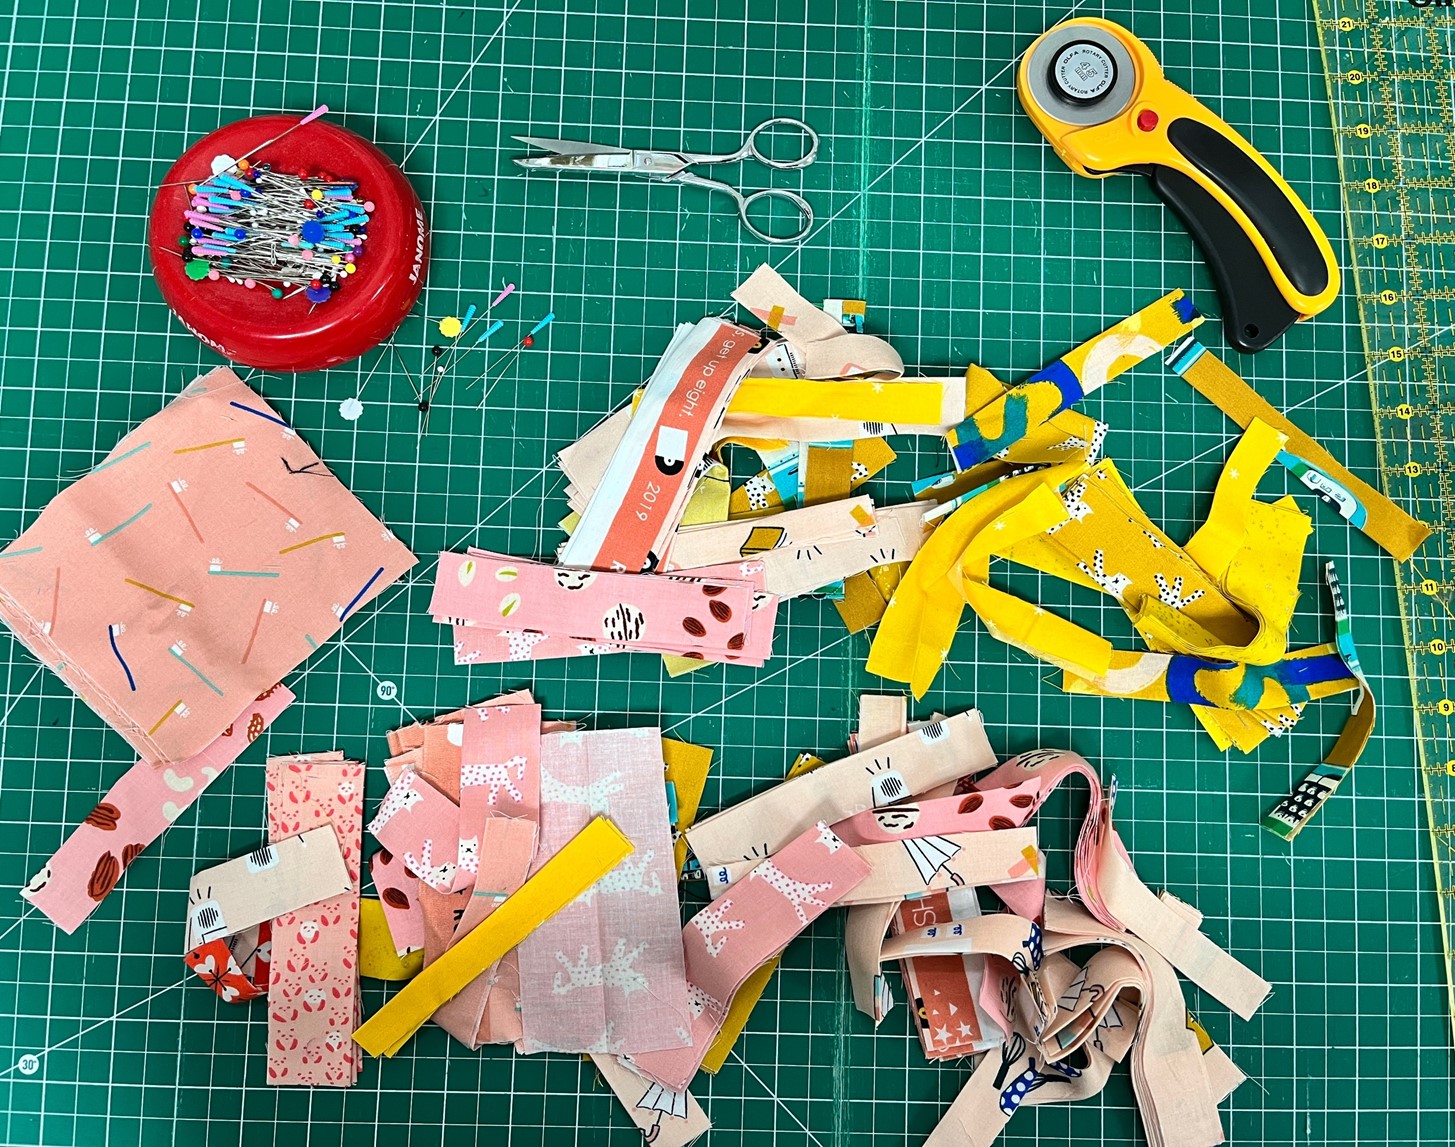
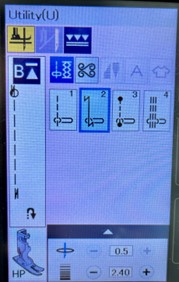
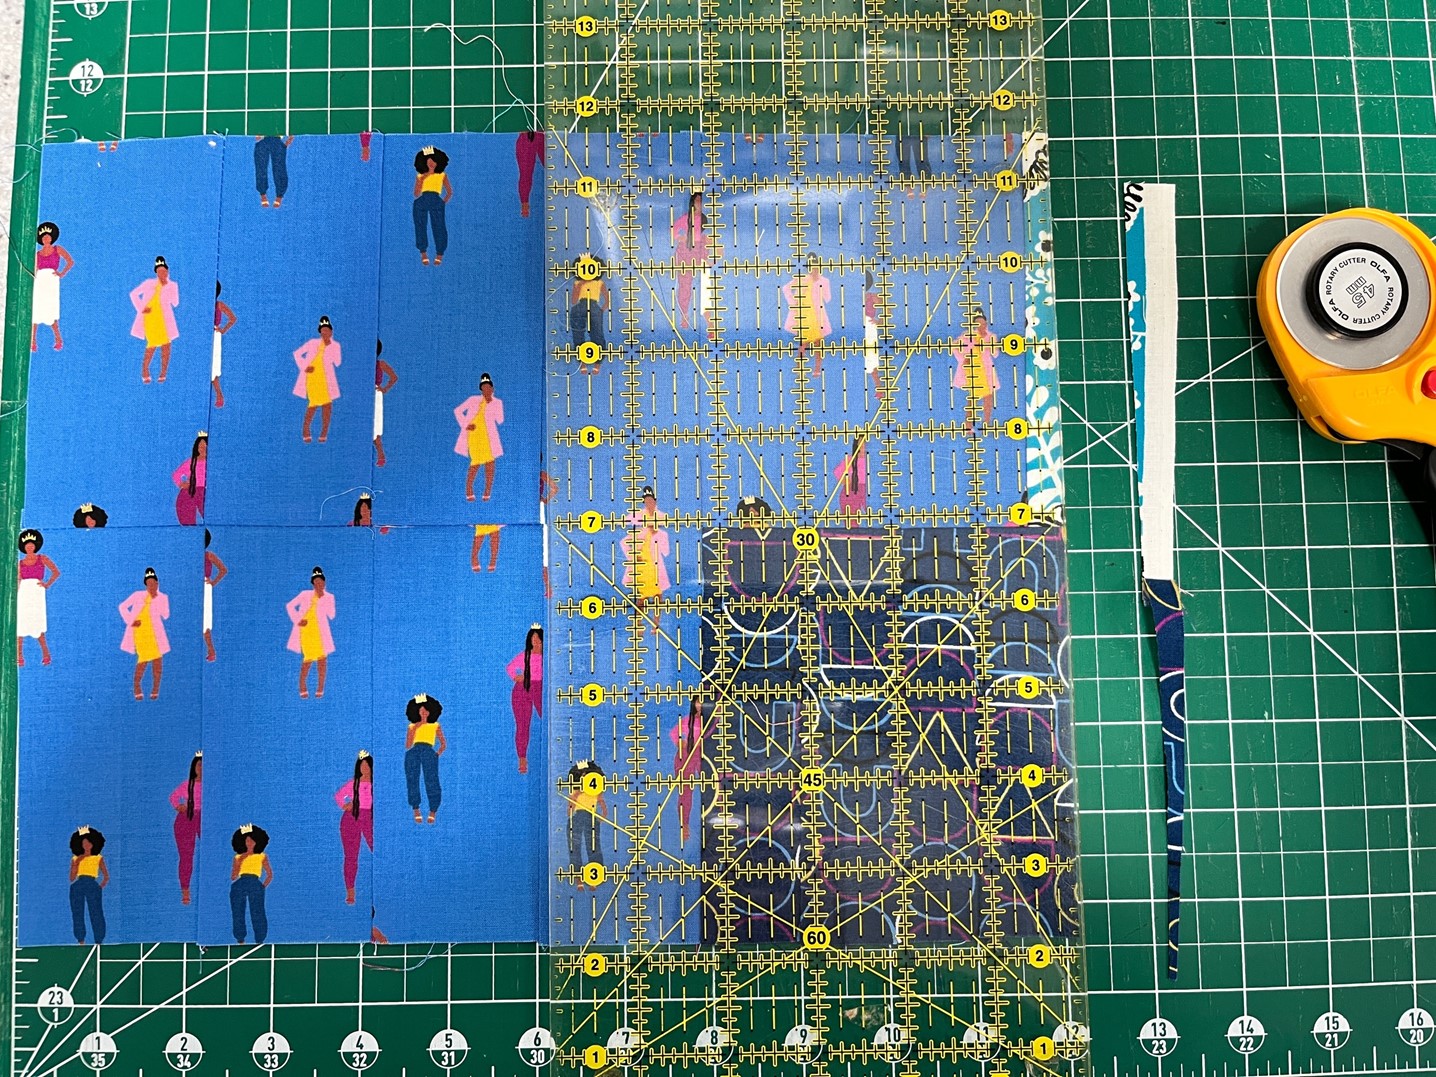
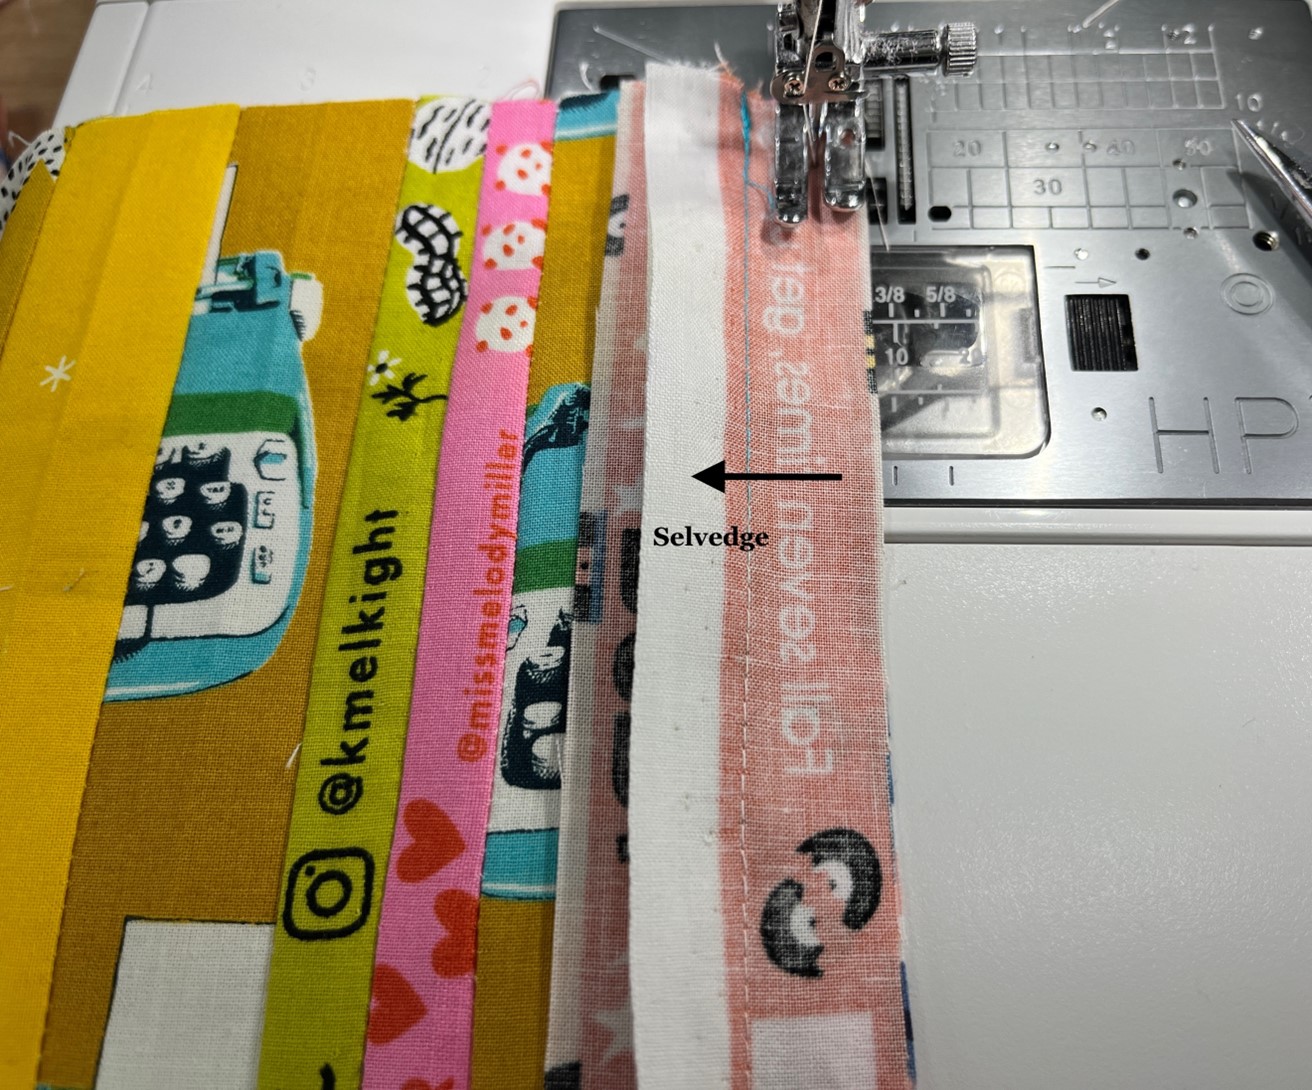
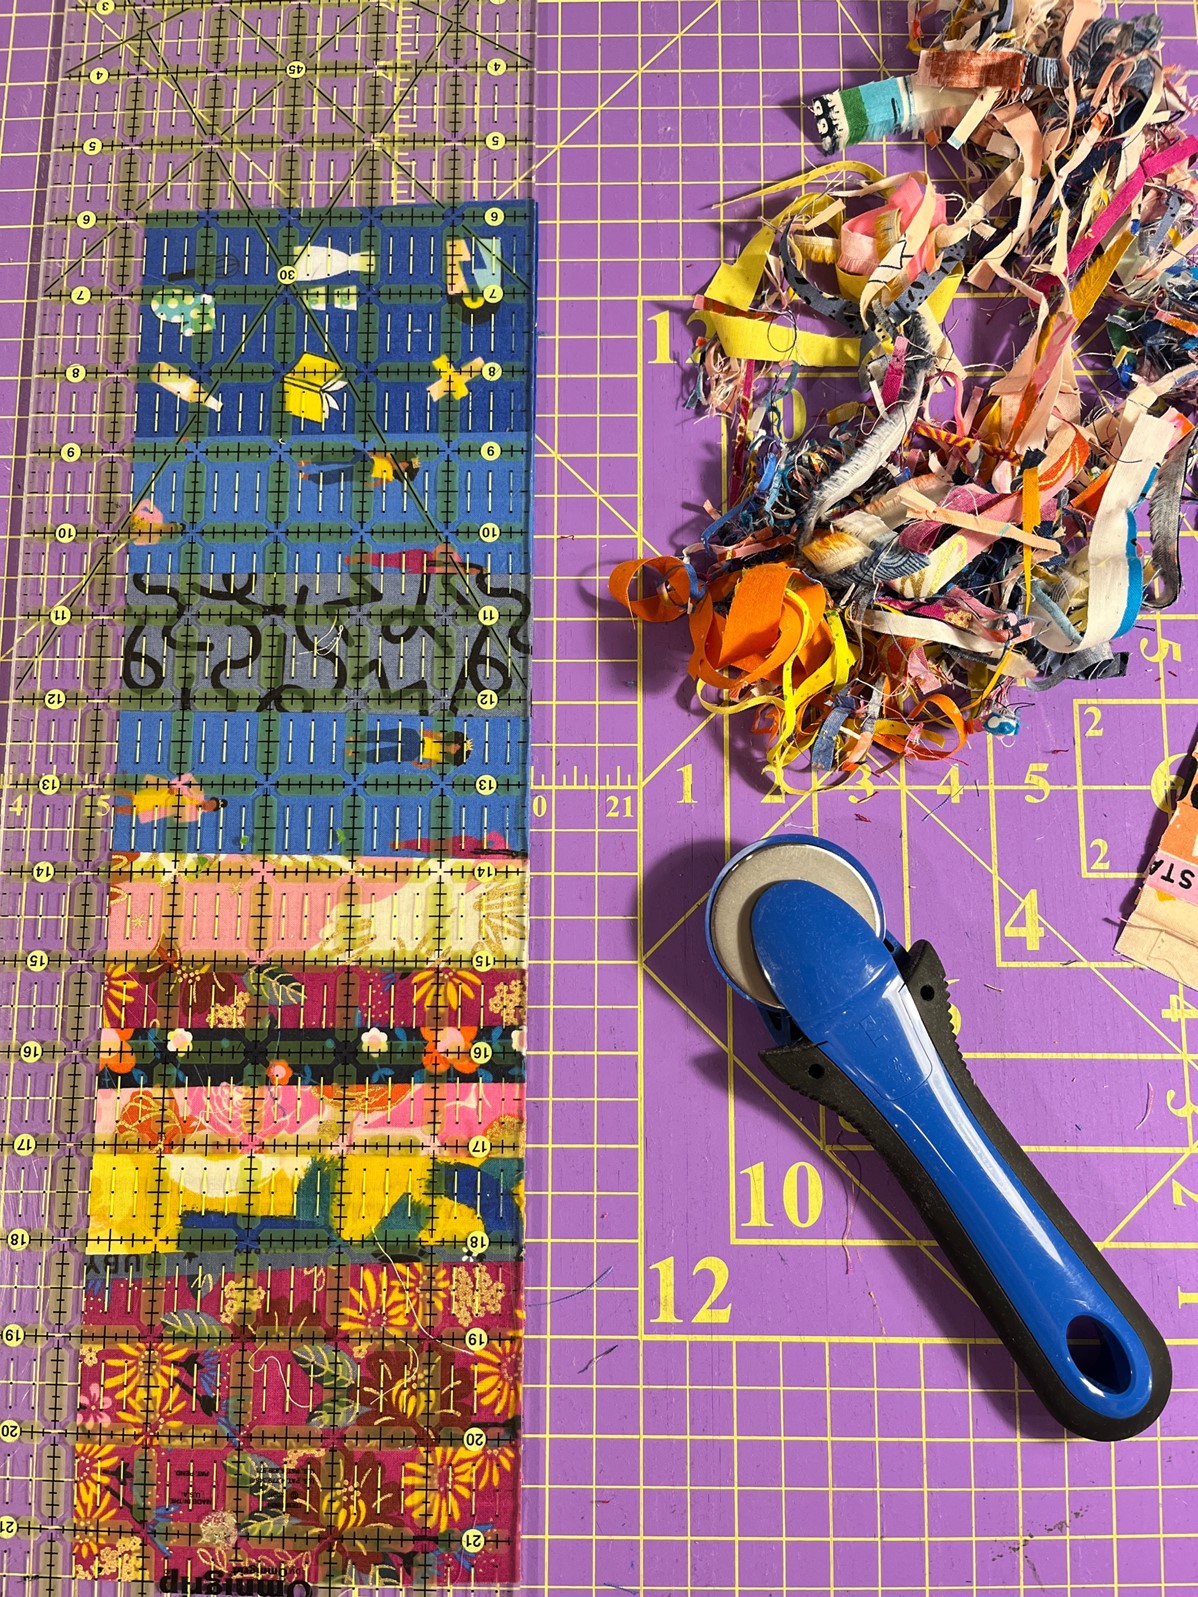
2. I used selvedges ranging in size from 3/4”x5” to 2”x5”. I selected the stitch below
(#2), to lock seams at the beginning and the end of the seam. If you are chain
piecing, select #1. Engage the button highlighted in yellow; it keeps the needle in
the downward position every time you stop sewing.


3. Using the hp foot was the most convenient given the narrow nature of selvedges.
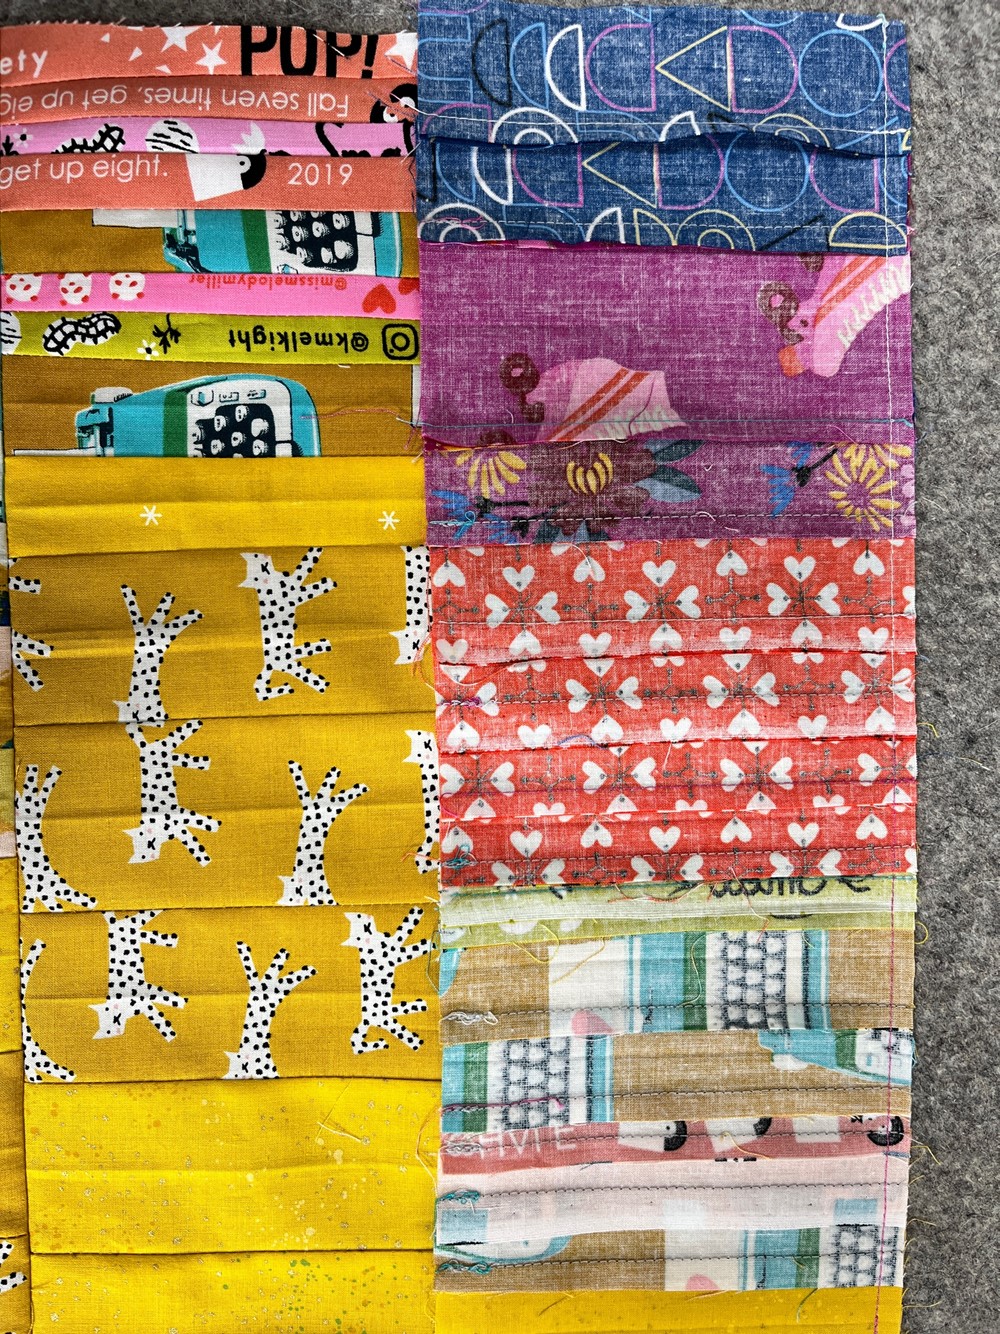
Start by piecing pairs together. I wanted my panel to feature “color blocking,”
selecting similar fabrics for a saturated effect throughout.


4. Pressing selvedges is also an important part of this process. Press seams to the
side.


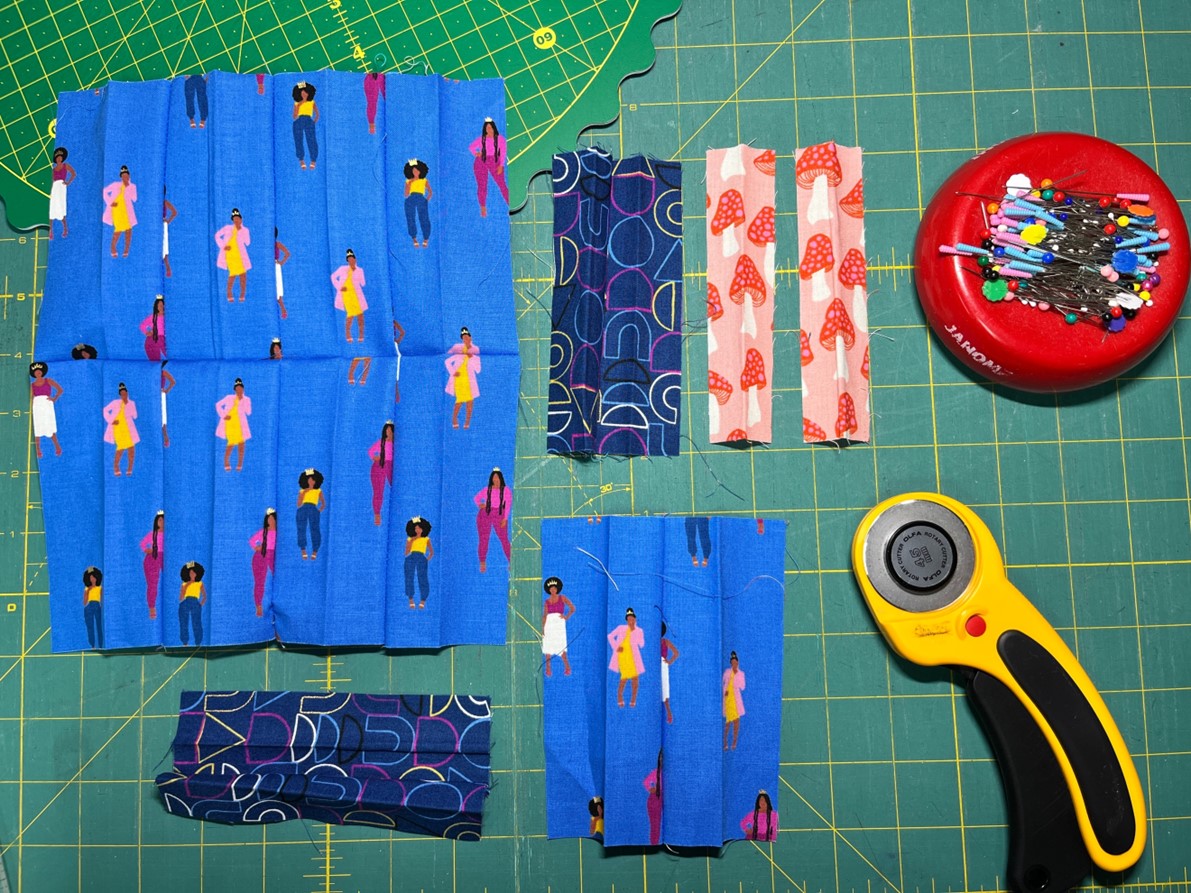
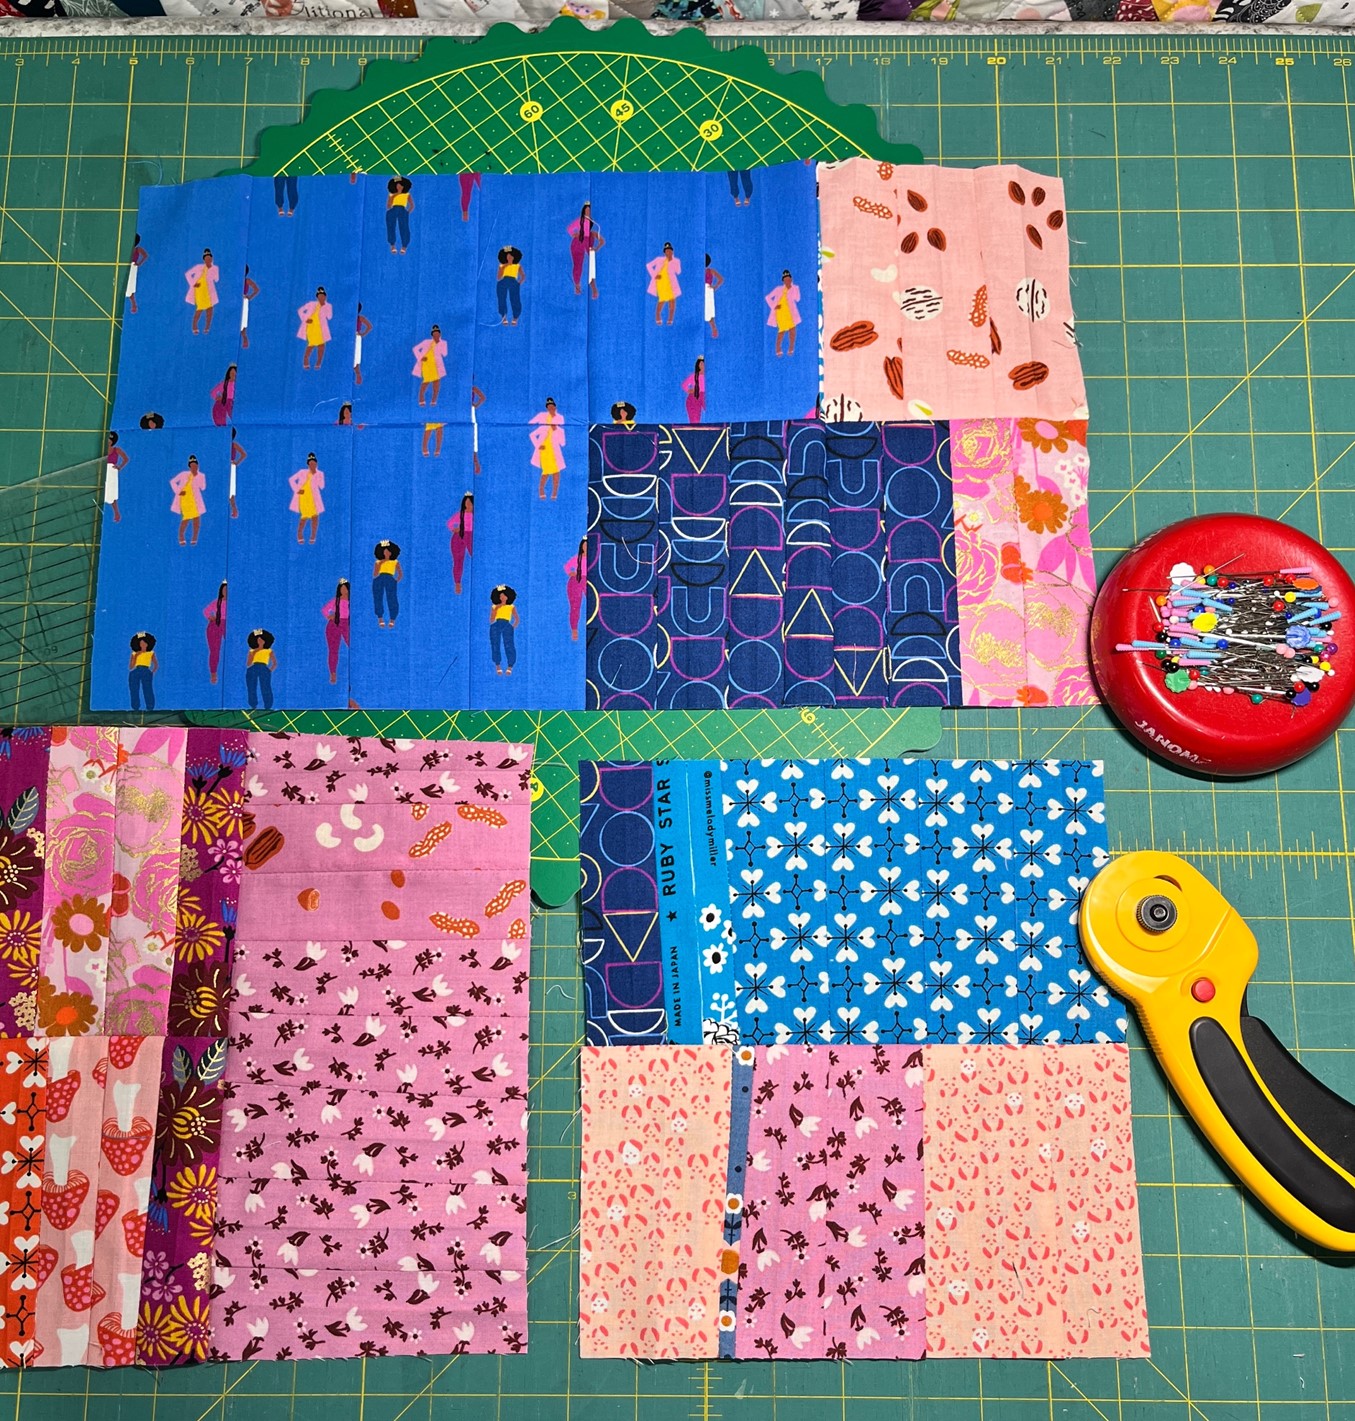
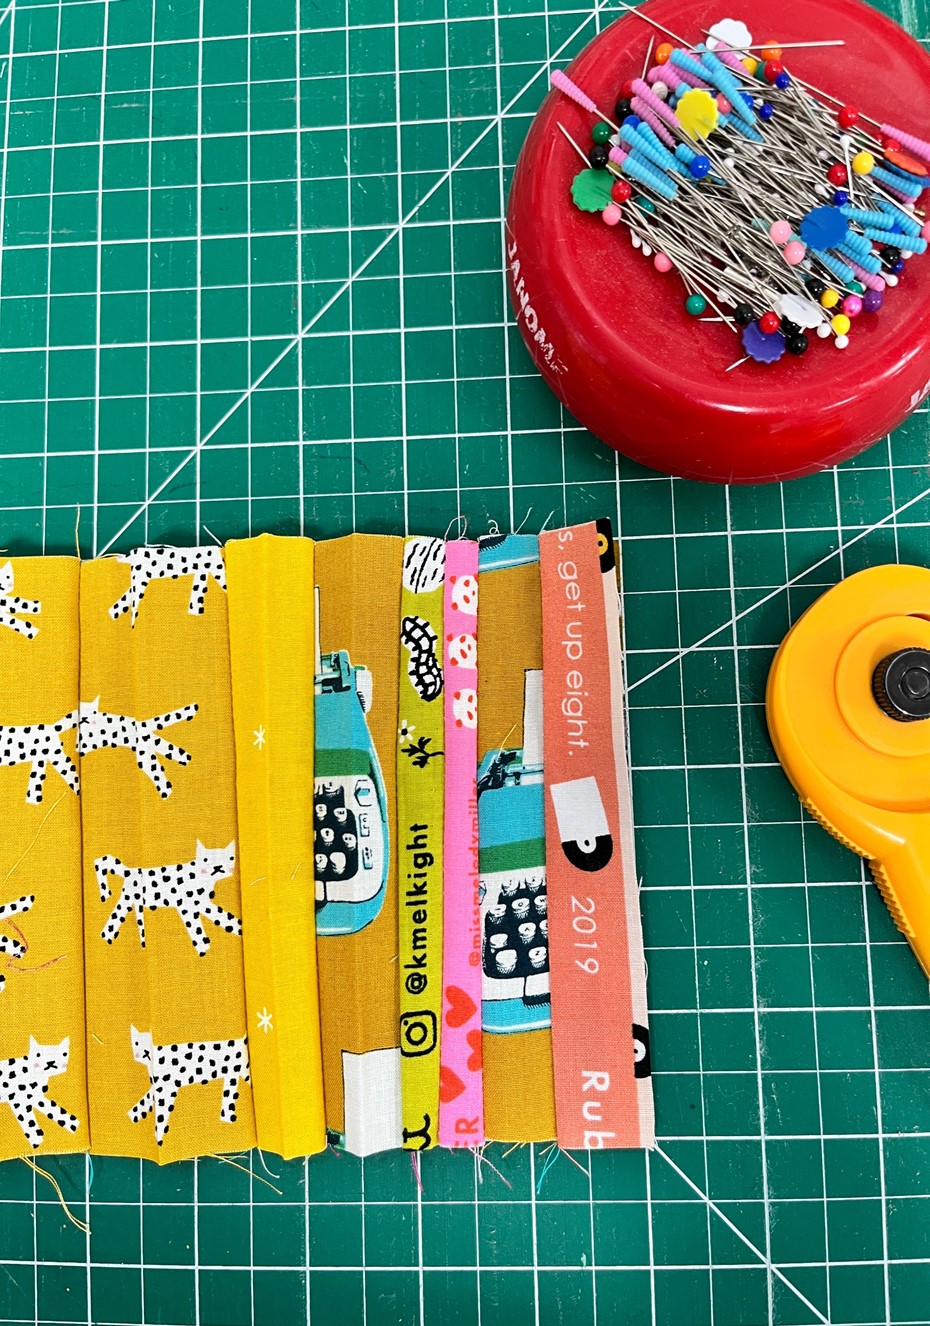
5. Continue piecing until you reach a consistent rectangle or squared piece to begin.
Trim the “white” selvedge edge. Later, I opted for sewing longer strips.


6. Planning design placement is fun, but chain piecing improv style, accomplishes
more! Feel free to grab random selvedges to sew together to continue building the
selvedge panel.


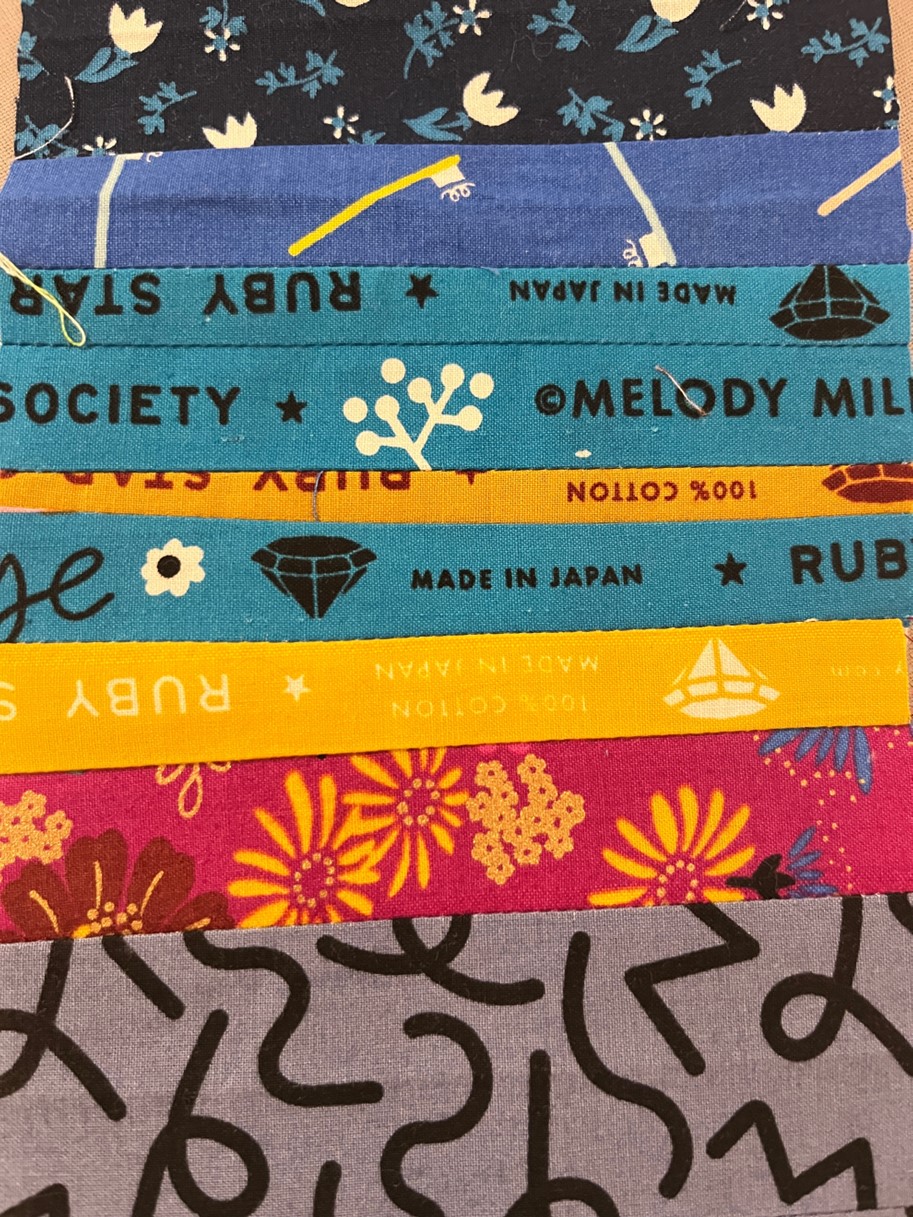
7. Part of the visual interest of selvedges is the text and design choices. Use this to
your advantage! Look out for selvedges containing frayed edges (trim those).


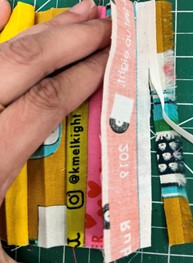
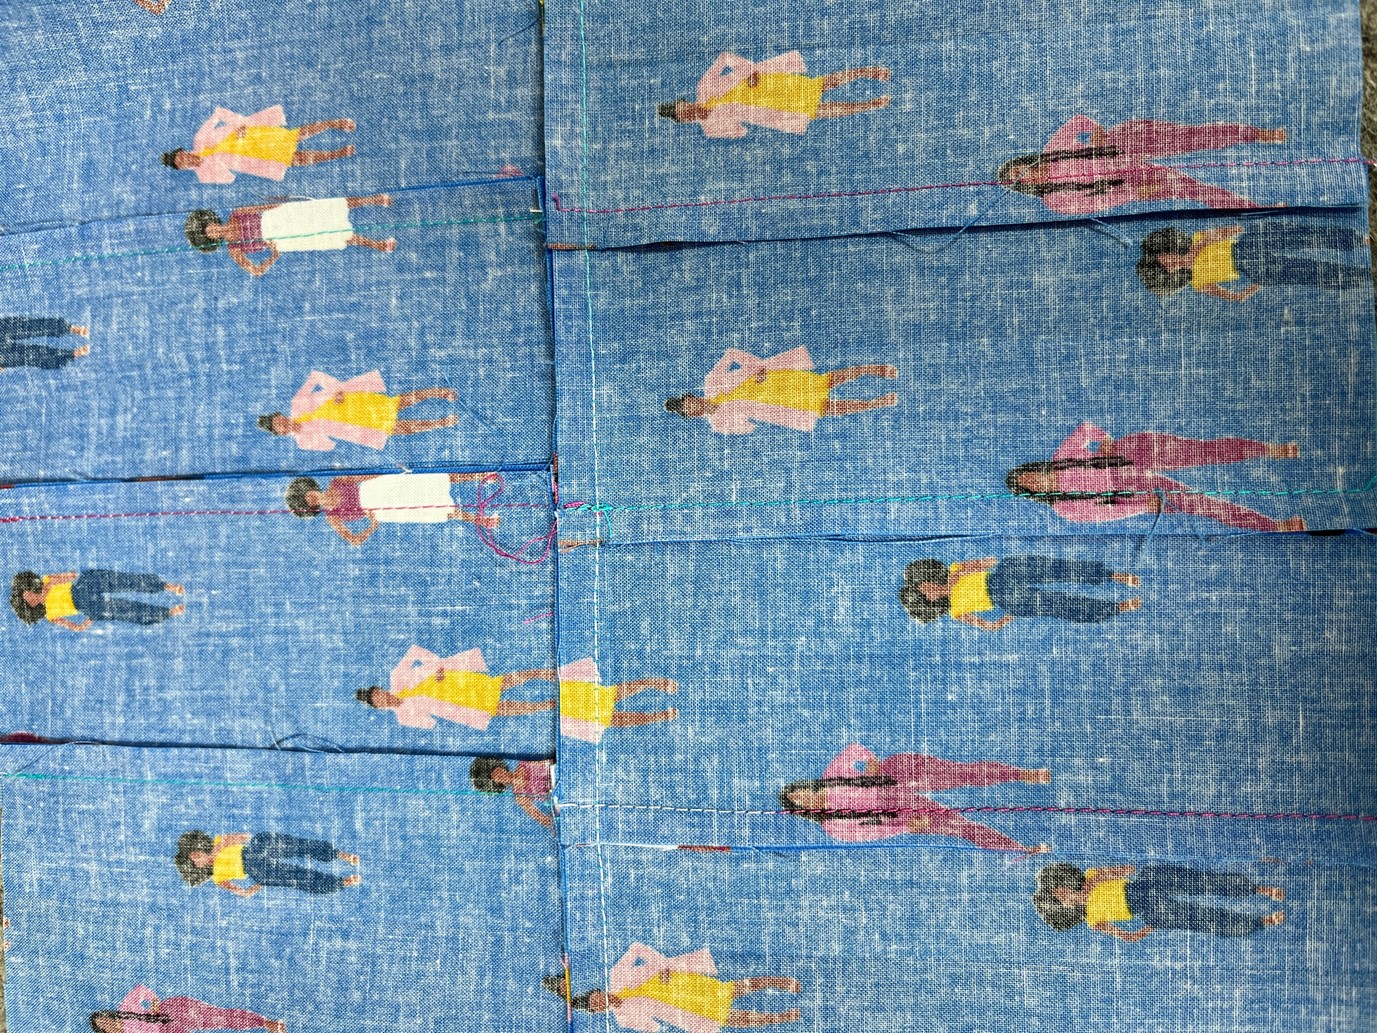
8. Note: when you are creating a seam, make sure that the stitch line extends beyond
the white border to create stronger seams. See below. Feel free to leave it (since
you are pressing seams to the side) or trim after stitching.


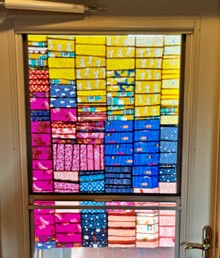
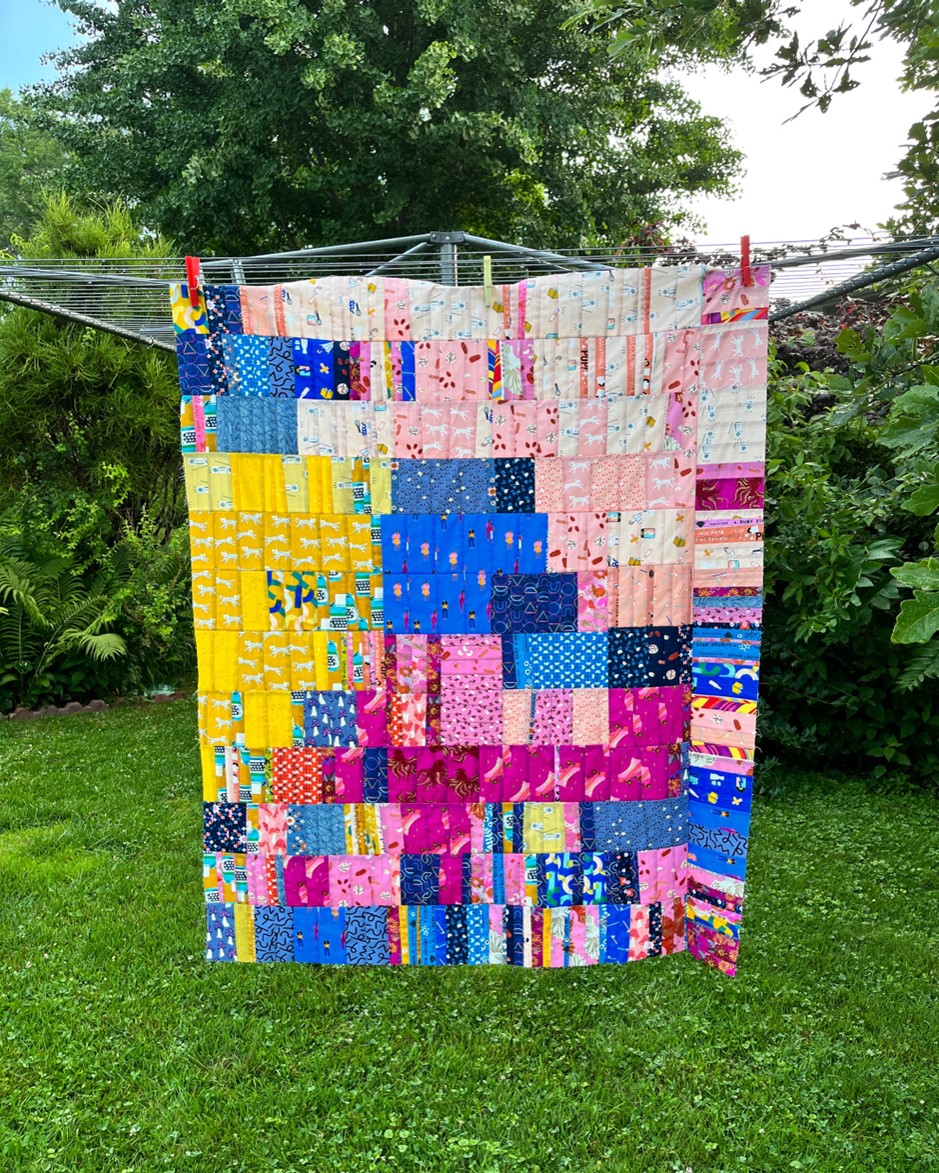
9. Check your progress by placing your panel on a sunny door or window. Instant
privacy with a stained-glass effect! Add more selvedge strips if you have them.


10. As with any piecing, careful pressing and stitching makes the dream work. This
becomes even more crucial as the panel grows and hundreds of pieces are joined.


11. Summer’s rich palette is the perfect complement to this panel. Take it outside and
celebrate your accomplishment. It took some patience to get here.


You have probably seen that creating jackets out of vintage quilts is very popular.
Well, what if we created garments using selvedge fabrics? You can add pieces as
they become available and be rewarded with yardage we did not know we could
build! It is always easier to discard little pieces of fabrics because they are so
readily available, but I invite you to give these little gems a try. It can become a
new sewing tradition while doing something that is good for the environment and
our wallets, with a pinch of patience and our trusted Janome Sewing machines.


I hope you have a joyful and inspiring summer! Share your sustainable sewing progress
with me anytime on Instagram.
Best,
Maday
www.sustainabletextiledesign.com

Everyone is Talking about Building a "Selvedge" Fabric Panel
Reviews


Tako
Beautiful
Wednesday, November 23, 2016

cpindzola
Around the Table Dresden Placemats
Saturday, December 17, 2016

I like the concept, but the directions are "sloppy." Nowhere in the supply list does it mention the felt or the batting (how much?). Also, I would never use a high loft batting in a placemat, or a table runner, as I think that it would be too unstable for a glass. The next time I make these, I will cut out the batting (I use flannel) and spray baste it to the wrong side of the Dresden plate before I put the Dresden plate on the felt to cut out. I have not yet washed the finished placemat, and am hoping that the single layer of felt does not curl up, or become distorted after washing/drying.
Txmaid
Fun Great Gift!
Tuesday, February 21, 2017

MargieARK
Teatime Quilted Tablecloth
Friday, February 24, 2017

I made this today but your cutting directions need to be changed. You only need 4 of color 1 and color 3 4.5 squares for the triangles. Also the inner border, you only need 2 cuts as WOF is long enough to cut each in half to fit the sides.
MickelSews
Great Machine
Wednesday, August 30, 2017

I've had this machine for only a week now. I bought it used from a lady who makes her own clothes, but she no longer needed the machine. During the purchase, she noted that she is almost sad that it's better to give it away because of how well the machine performed. (I also bought it along side a computerized machine of another brand.} She demoed the machine for us, showing it worked and gave us everything (including the box it came in!) She took amazing care of this machine. I have used it a few times now, and the directions for threading were easy to follow (albeit my hands are quite large so the lower looper was a pain, but that is no fault to the machine or brand.) And I recommend this machine to anyone who wants to learn to serge and wants a machine that can grow with them. I will happily use this machine time and time again.
rvstan
S9 Review
Sunday, February 25, 2018

I love, love, love my S9! It's sews and embroiders beautifully and it's simplicity of use amazes me. I would recommend this machine for both a beginner and an experienced seamstress. If I would ask anything of Janome it would be to upgrade the programming to run a larger hoop size. I understand that it can't get much wider but there is most definitely room for it to go longer. That is the only limitation of this machine.
pjmnana
PJMNana
Monday, February 26, 2018

I purchased a Memorycraft 15000 a few years ago and it was the best purchase I ever made! This machine can do just about anything you would would ever want! I love the capability of using the Acuedit app to set up my embroidery pattern on my Ipad and then download it to the machine! I love how my embroidery looks upon completion and I love all the good lighting it has to light up your workspace. That way you don’t need to worry about where to set up your machine. It also has plenty of room to do machine embroidery on any size quilts! There are many decorative stitches from which to choose that are outstanding! It’s hard to choose which one to use! There are so many great features it is hard to decide what I love the most. If you want to buy only one machine to last a lifetime, I would recommend this one!
KLWash
S9 Review
Sunday, February 24, 2019

The S9 is amazing. I learned to sew by hand when I was just 5 and in my grandmothers way as she was quilting. I took seeing classes in high school until they would no longer let me sign up. The S9 makes me appreciate my current skills as well as motivate me to want to learn more. This machine is awesome.
SewSueMe2002
Horizon Memory Craft 15000
Thursday, November 19, 2020

My Janome Horizon Memory Craft 15000 is fantastic! I love, love, love this machine! When I came across the Eye for and Eye embroidery design today, I wanted to make it. However, the embroidery file is missing. Nothing downloads when I select the download button. Please help!
Jillfmischo
Treat Bag fun!
Monday, August 16, 2021

I made the Halloween treat bag for my new granddaughter and I’m sure it will last for years. No embroidery machine so I appliquéd the lettering. Need a little more skirt fabric for a better gathered look, and I used thin double-bias tape for the skirt hem, over edge stitch on skirt sides. I’m pleased with my results!
elenaz
Very helpful tutorial
Wednesday, October 25, 2023

I want to say thank you for teaching me this method of applique. I was able to do it with a small letters. This method is the best so far from all of those I've seen and tried.
plonkar
So useful
Thursday, November 30, 2023

I'd like to express my gratitude for teaching me this appliqué method. I successfully applied it with small letters, and, so far, it's the most effective among all the methods I've seen and tried.

DEALERS
The TWO Closest Dealers to you are:
1900 CENTRE ST , WEST ROXBURY MA, 02132
(617)323-6200
443 MOODY STREET , WALTHAM MA, 02453
781-893-3331
Find Additional Dealers