We don't think so! Janome Maker Emily from Oh Yay Studio has a delightful zipper pouch for you to celebrate the 4th of July!!!!!
What’s better than a zipper pouch for those summer collections to stay collected?! Take them to the beach, to the parades, or even the backyard BBQ’s?!?! And ESSPECIALLLYYY when this zipper pouch has a bomb pop popsicle on it, it’s a CLEAR CHOICE that you need to make one!

Below you will find the full tutorial and pattern for how to make this bomb pop popsicle zipper pouch sewing project….and you can also catch the LIVE CRAFTING tutorial for this project over on the Craftsy page HERE!
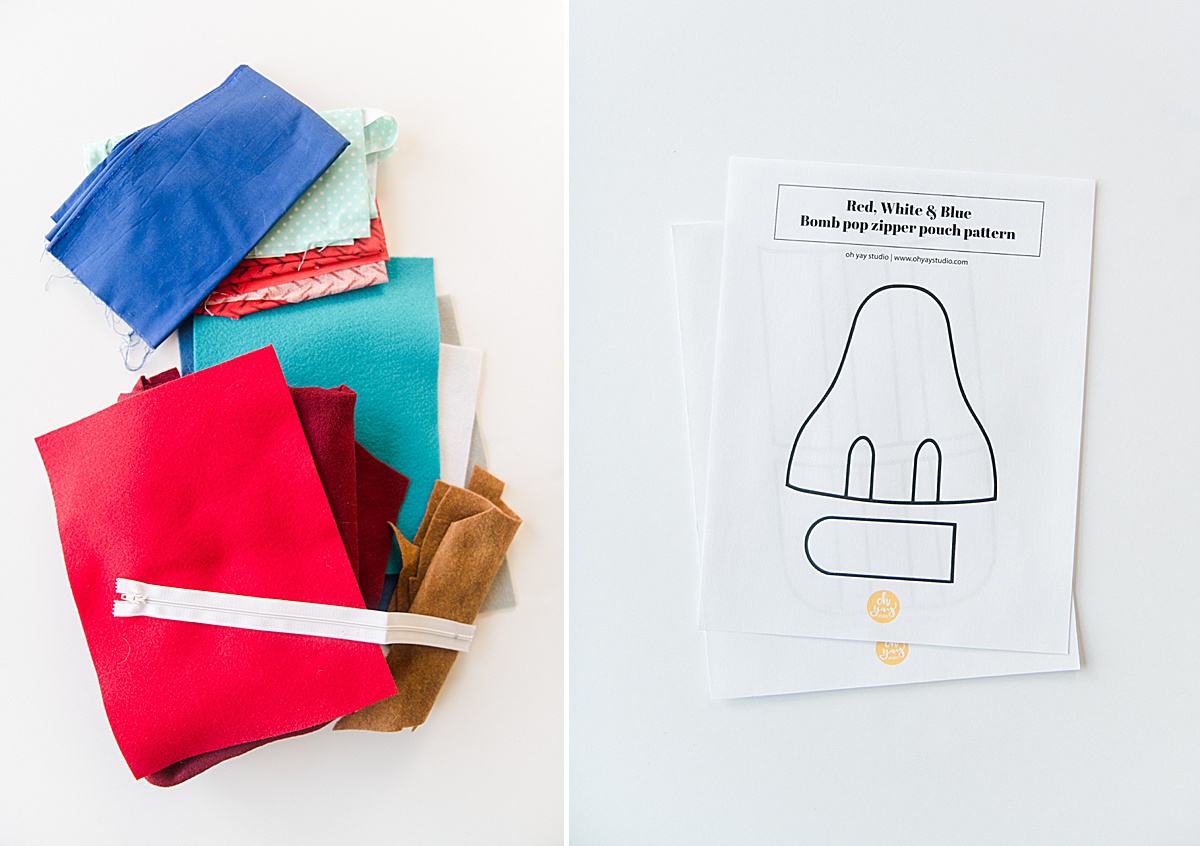
MATERIALS:
- Red, Maroon, White, Grey, Blue, Navy, and brown felt for the bomb pop popsicle (you can use something other than felt if desired)
- Outside (or background) fabric (I used an old tie-dye dishcloth that seemed very 4th of July Lining fabric of choice
- Sewing machine + coordinating thread
- Coordinating zipper 17.5” in length (or cut to length)
- Pins and/or wonder clips
- PDF pattern (download HERE)
INSTRUCTIONS:
1. Cut pieces
Use the PDF pattern to cut out the coordinating bomb pop popsicle pieces. Reference the photograph for where the colors lay on the bomb pop popsicle. Cut out the larger pieces first and then do the “shadow pieces” so that you only have to use one paper PDF pattern.
Then with your outside (background) fabric, cut 2 pieces that measure approx. 17.5” x 10”
With your lining fabric, cut 2 pieces that measure the same size as the outside fabric
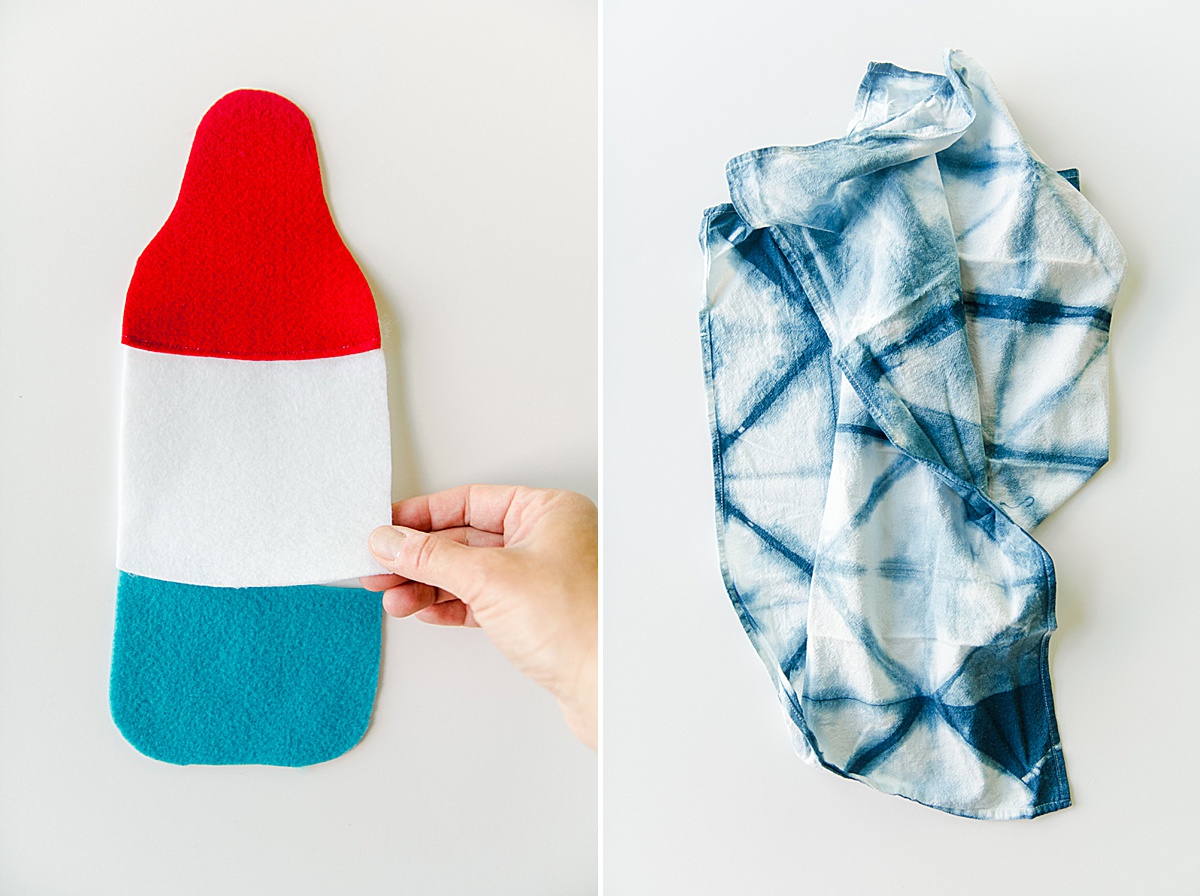
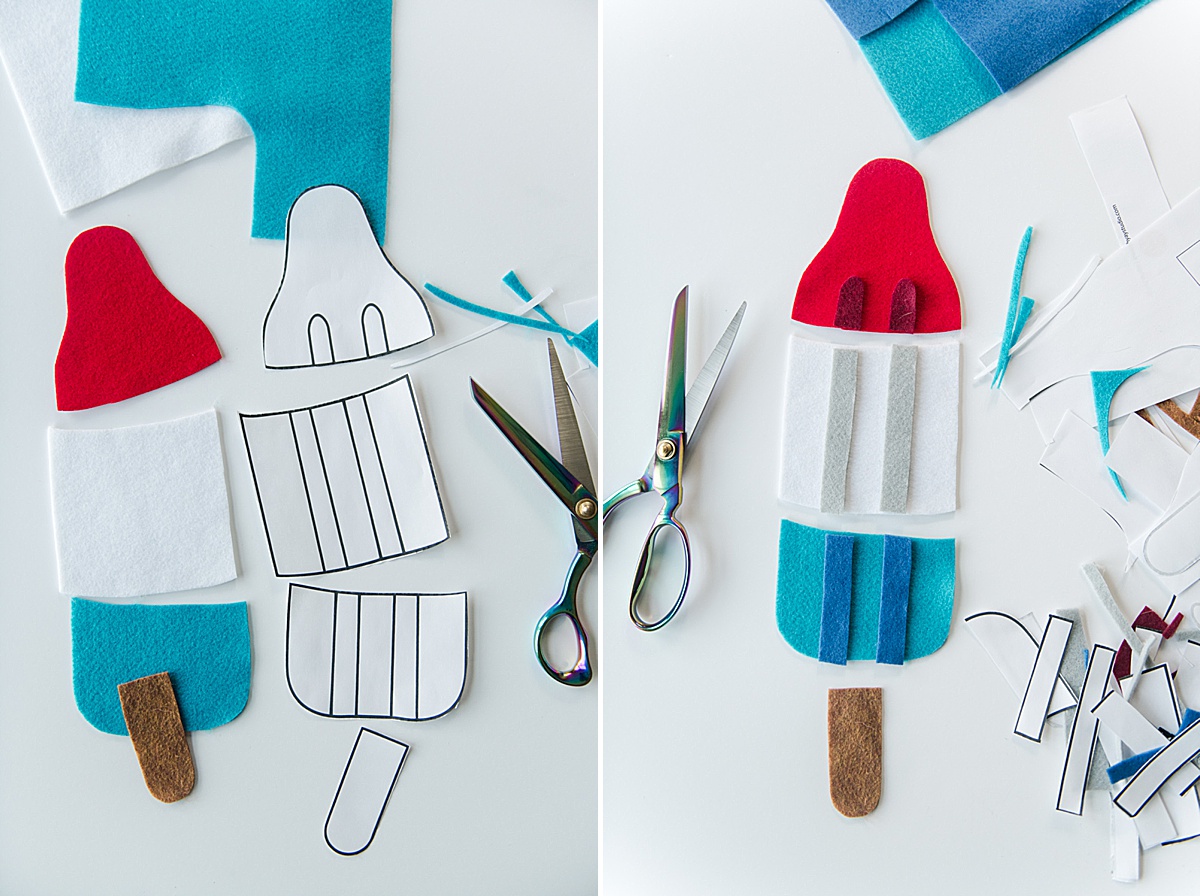
2. Assemble bomb pop popsicle
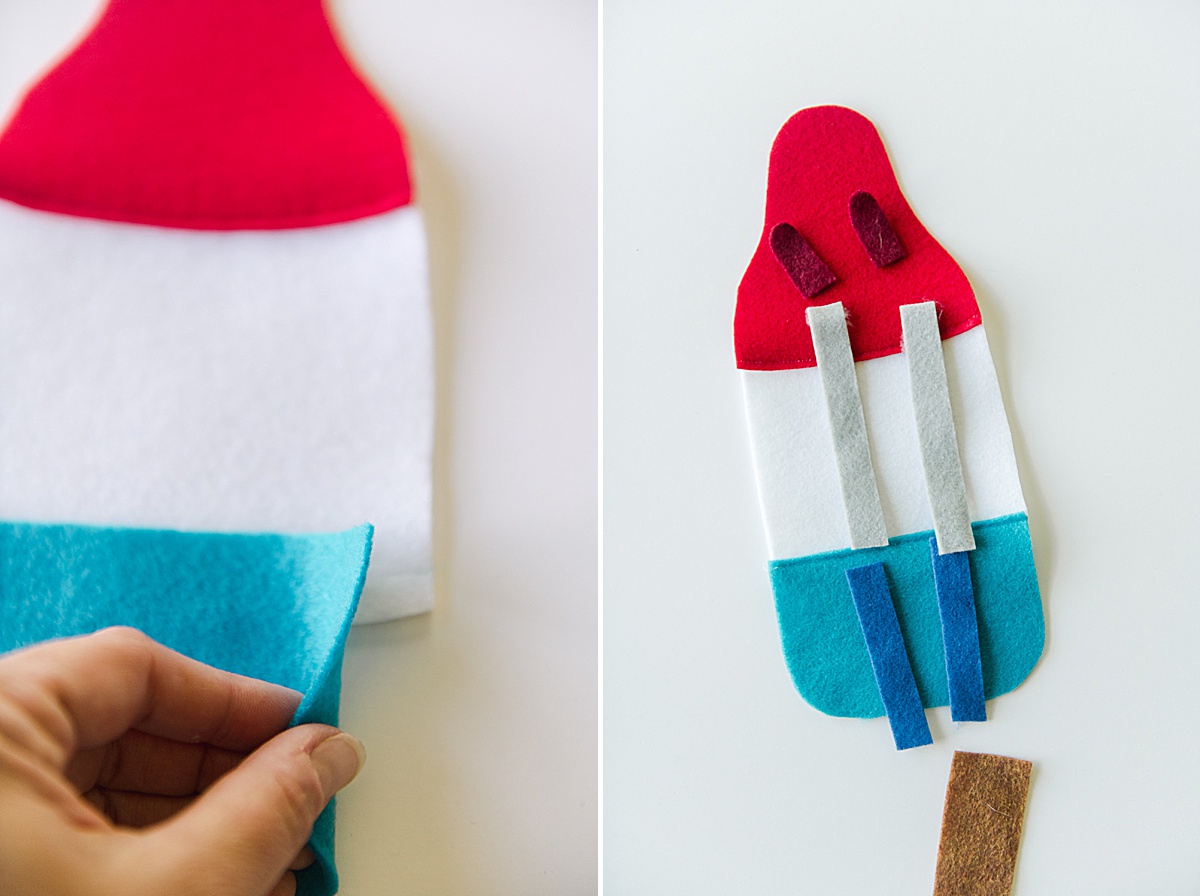
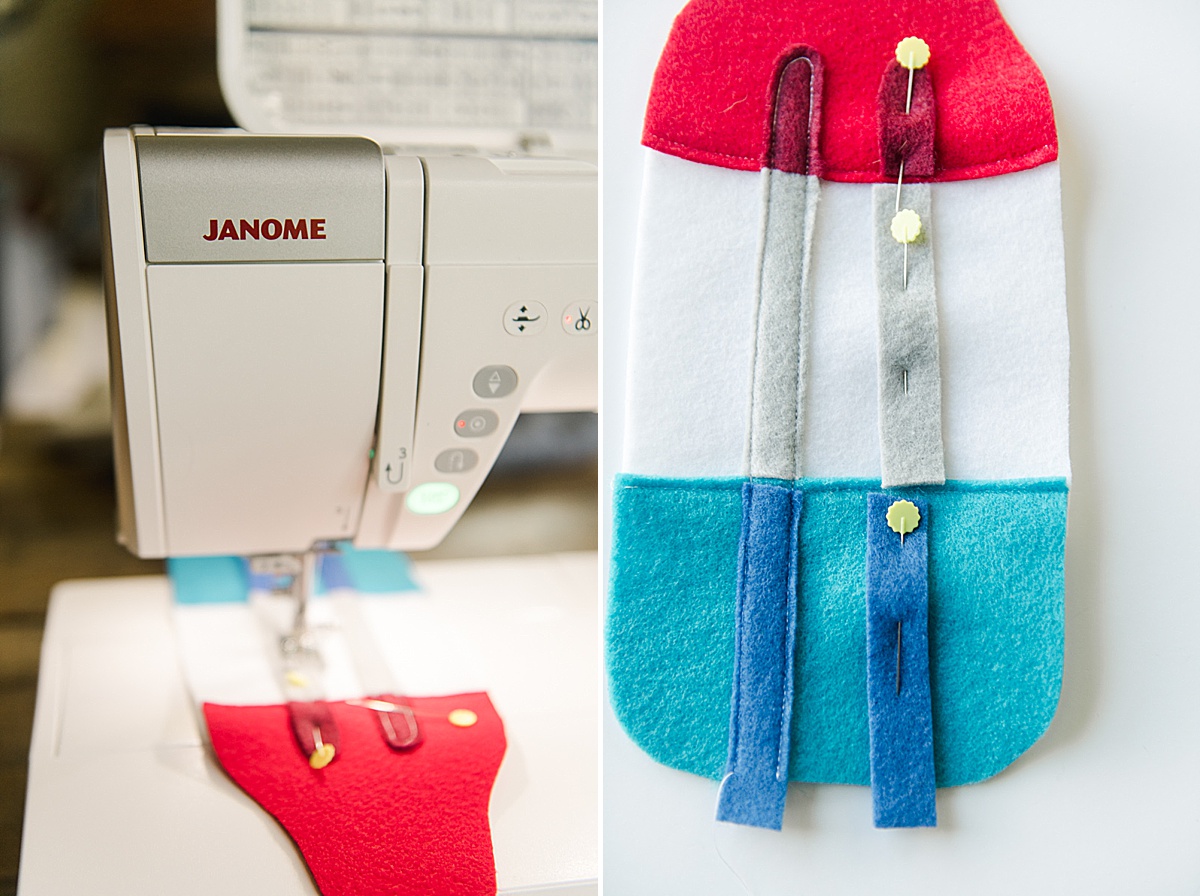
Sew the bomb pop popsicle together. Do this by laying the red layer on top of the white and stitching them together; then lay the bottom blue on top of the white and stitch together. Trim any parts of the popsicle needed after stitching.
You will then lay out the shadow accents on top of the corresponding color. You will want them to seamlessly flow into one another to look like one longer shadow rather than 3 separate chunks”, so do your best to line them up. (note: you will need to trim down the length of the shadows depending on how far you overlapped the red/blue onto the white and you may even need to trim the width so that they line up seamlessly). Pin in place and then slowly begin to topstitch around the outer edge of the shadows to secure in place.
tip: I used the tip of a pin to make sure each color of shadow stays in place as you sew shadow color on. This helps to make sure they don’t move as it is under the foot of the sewing machine. Be sure NOT to sew over a pin or any object other than fabric when stitching
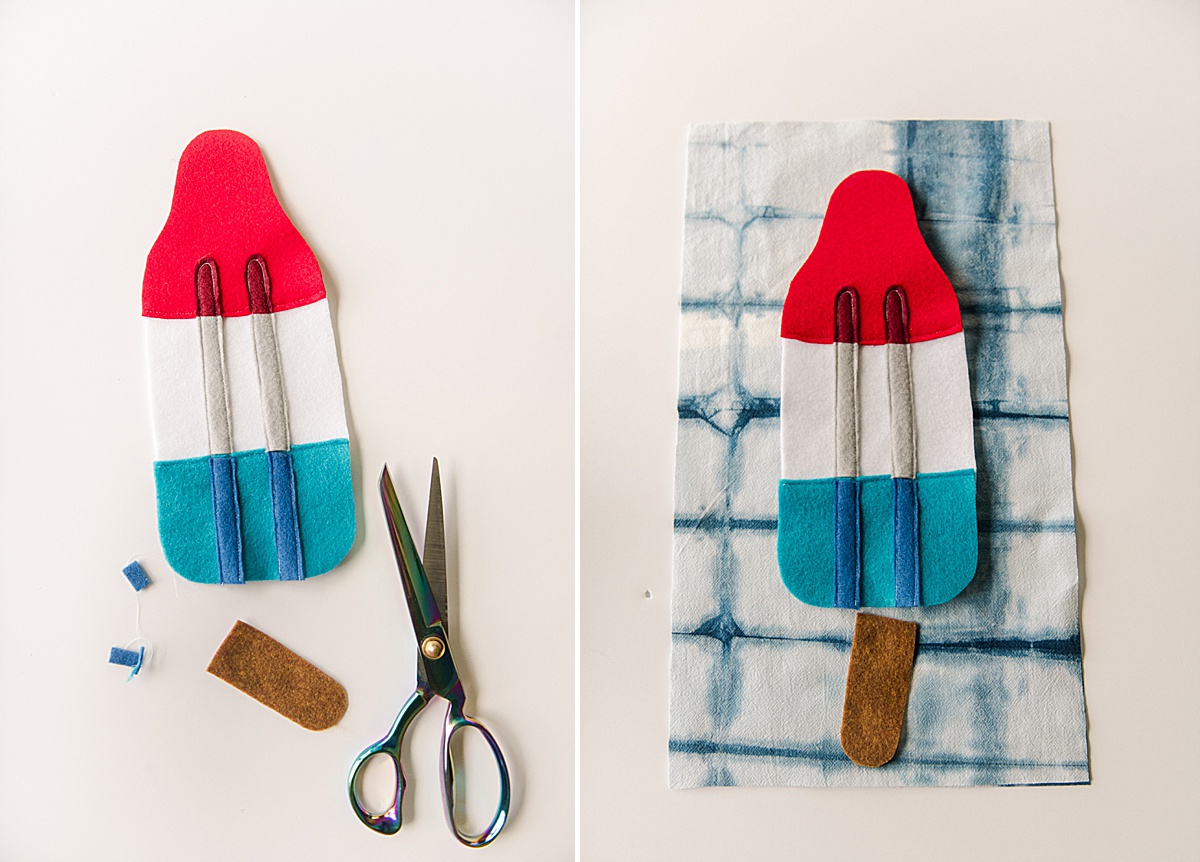
3. Sew popsicle to the outside front
Layout your finished popsicle onto the outside front (background) and position where desired. Fit the brown popsicle stick bottom in place, layering it underneath the blue portion of the popsicle. Pin all pieces in place and begin to stitch around the outer edge of the popsicle to secure to the outside. I decided to go around the popsicle part 2 times to give it a more “sketchy” look before finishing (this also makes it so your lines don’t have to be perfect.
4. Sew Zipper
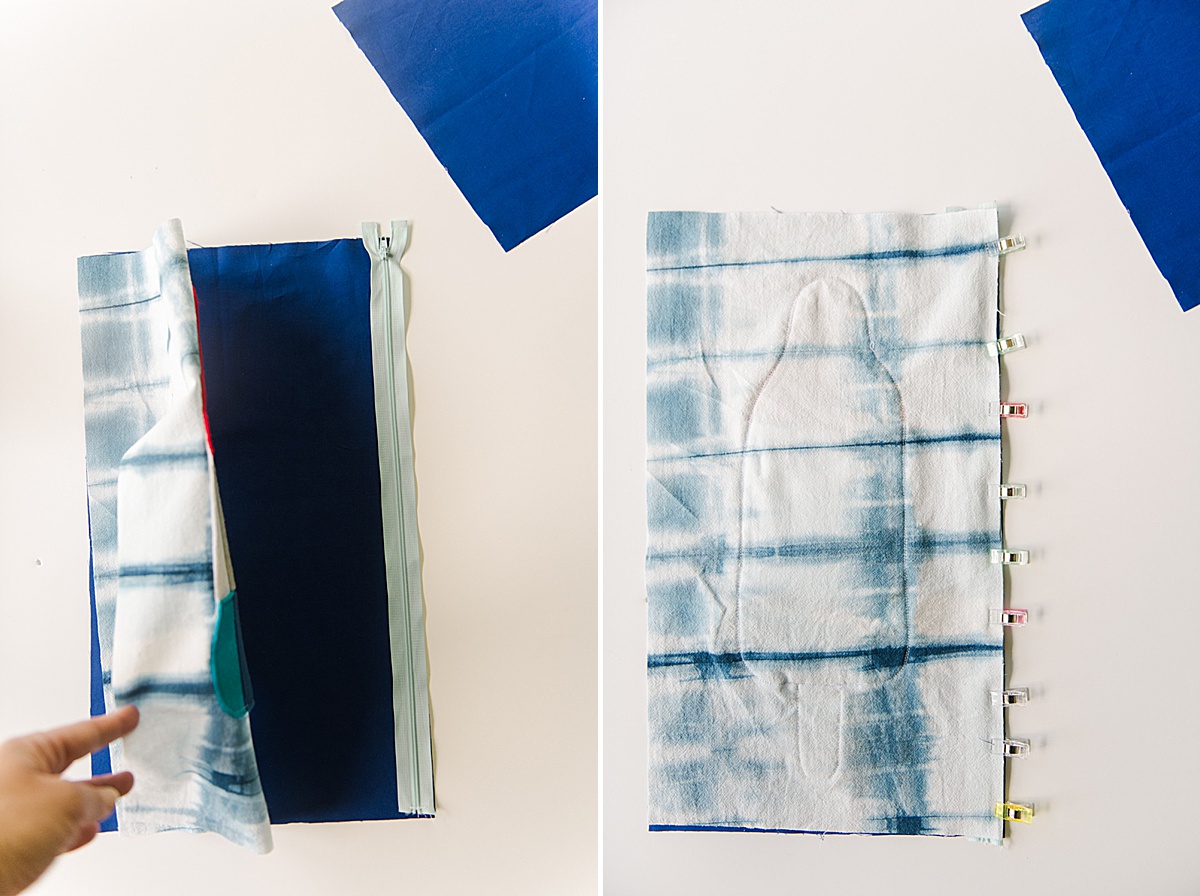
Layer your fabric with 1 piece of the lining fabric facing up, zipper, and then the outside top facing down. Line up the edges of your zipper and make sure all 3 layers are flush. Stitch your zipper in place using your zipper feet.
*Note: trim your zipper to 17.5 inches before you begin sewing the zipper if necessary! **Note: You can also choose to d your zipper on the short side of this pouch too, if you want the bomb pop popsicle to be right side up in the finished pouch Do the same with the outside back and other lining pieces.
**tip when sewing zippers: be sure to stop your stitching when you come to the “pull” on the zipper, put your needle down, raise your presser foot, and then zip the pull out of the way. If you don’t do this you will get a bulge or notch in your zipper stitch which will be obvious when you want the zipper to lay flat.
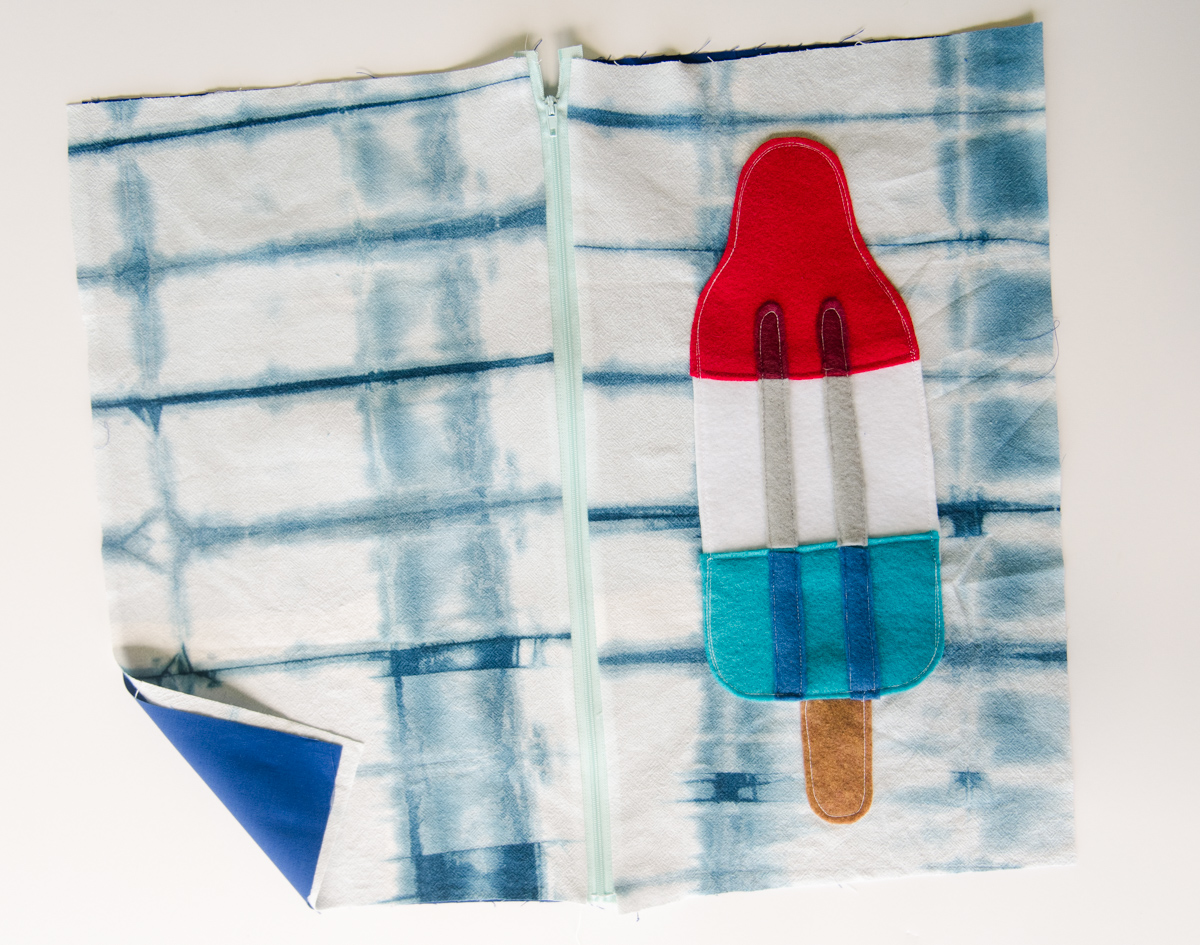
5. Iron the zipper + topstitch
With your iron, press the zipper flat (as best as possible) and pull your fabric + lining away from the teeth of the zipper. Then topstitch along each side of the zipper to keep the fabric laying flat.
6. OPEN THE ZIPPER!
This is *SUPPPPPER* important otherwise you won’t be able to open your pizza pouch! OPEN THE ZIPPER!
7. Stitch together
“Butterfly” open up your bag and then line up the 2 lining pieces with one another as well as the outside rectangle shapes with one another. Pin in place, being careful to line up the 2 areas where the zipper joins (this is important to make sure the zipper is straight across when finished).
Stitch all the way around the bag, leaving a large enough opening on the bottom lining portion to turn the bag.
8. Sew closed + finish
Trim the excess fabric off the 4 corners of the bag (you want this to lay as flat as possible and getting rid of this “bulk” will help)
Then turn the bag right side out and poke all of the corners and edges smoothly. The turn the edges of the lining opening (where you pulled the bag through) inward to mimic a seam allowing and topstitch closed.
Press the bag with iron and pack it in the car for your face 4th of July parade or BBQ!