We can always depend on our Janome Makers to come up with fantastic projects to make for ourselves and for others! Jessee created the most adorable little monster! You can make one or an entire rainbow of cuddly friends to brighten your day! You will learn how to sew with minky, how to create their sweet quirky faces using in the hoop embroidery, and best of all, bring joy to all the people you will be making them for in your life!
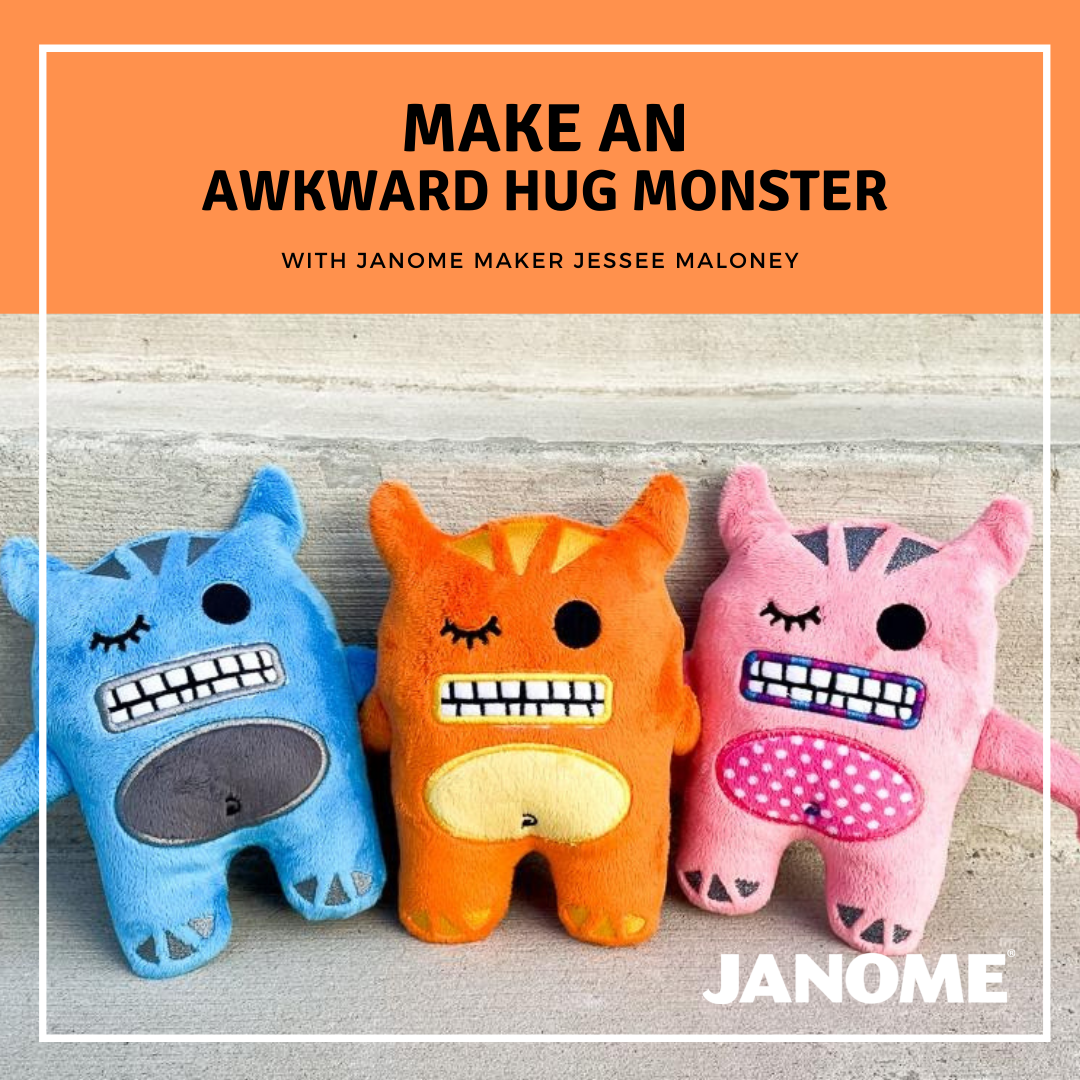
Hello! Jessee here from Art School Dropout with another super cute embroidery project!
This time around though we’re making something that is perfect for these trying times and a great gift to send to a loved one. Hint: It fits perfectly in a Priority Mail envelope!
I'm calling them the Awkward Hug Monsters. They are fluffy monsters with the most awkward smile you ever saw and short floppy arms that are just waiting to hug you.
The best part about this project however is that most of it is done IN THE HOOP! (Just pretend I'm saying that in an announcer’s voice). I'm serious though, the only part not done in the hoop is making the arms floppy, stuffing it, and sewing the hole shut. I love projects like this.
We have a bit to cover though, so let's get started...
Recommended Supplies:
-
An embroidery machine with at least a 230x300mm hoop (I used the Janome MC15000)
-
1/3rd yard of plush fabric for the body. (I used Shannon Fabrics Cuddle 3 for all of my examples, but other minky and fleece would work well too)
-
1/8th yard of plush fabric for the belly
-
Small piece of white fleece or felt for the teeth (or any color you want)
-
Polyfil Stuffing
-
Embroidery thread in Black for the eyes
-
Embroidery thread in a coordinating color for the stomach, lips, toes, etc.
-
Thread that matches body fabric for stitching the arms and body shut
-
Scissors
-
Tear-away stabilizer
-
Temporary spray adhesive (I used Odif 505)
-
Water-soluble stabilizer
- Embroidery File
-
Optional Supplies:
Now that we've rounded up all of our supplies, let's get started.
First things first, we need to get comfortable with the materials we are using. Plush fabric isn't like wovens or knits. It has a nap, and if sewn in the wrong direction it just doesn't look right. So what I do is I figure out how I want the plush to lay by brushing it back and forth until it looks like this...

This shows me which direction the nap goes. I want it so the plush basically goes down like a waterfall. I keep this in mind when cutting and when adding it to my hoop.
Once we have a handle on the nap, you will need two pieces of the main body color cut at 10x12.5 and one belly piece cut at 2.5”x4”. As shown below.

You'll notice a bunch of tiny plush dust on the edges, which is totally fine! Just shake the piece out a bunch and vacuum it all up later. It won't hurt you.
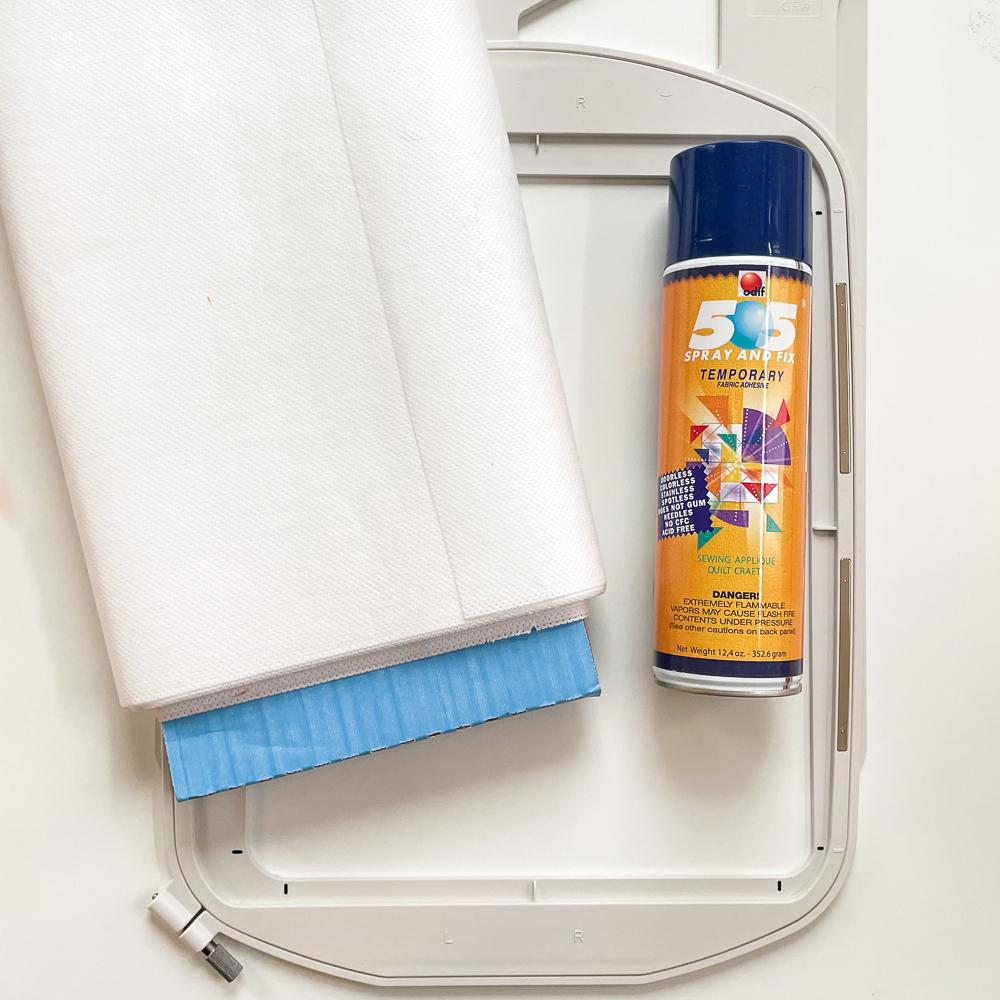
Now it's time to prep the hoop! Normally I'd use a sticking-backed stabilizer, but since I'm using a larger hoop, and I wanted to keep the cost down, I opted for some medium-weight tear-away stabilizer instead. Just cut it about an inch larger than your hoop and place it inside, without any fabric, the way you normally would.
Then spray the backside of one piece of plush, while still keeping an eye on which way the nap goes, and place it centered in the hoop. For the MC15000 and the GR Hoop, I had my nap pointed towards the right to go along with the embroidery file.

From here you will load up your machine with the Awkward Hugs Monster embroidery file, thread it up with the first color and hook up your hoop!

Special Note: Please make sure that your Stitch Stop is on for this project! We need all that extra trim time to make this as professional-looking as possible.

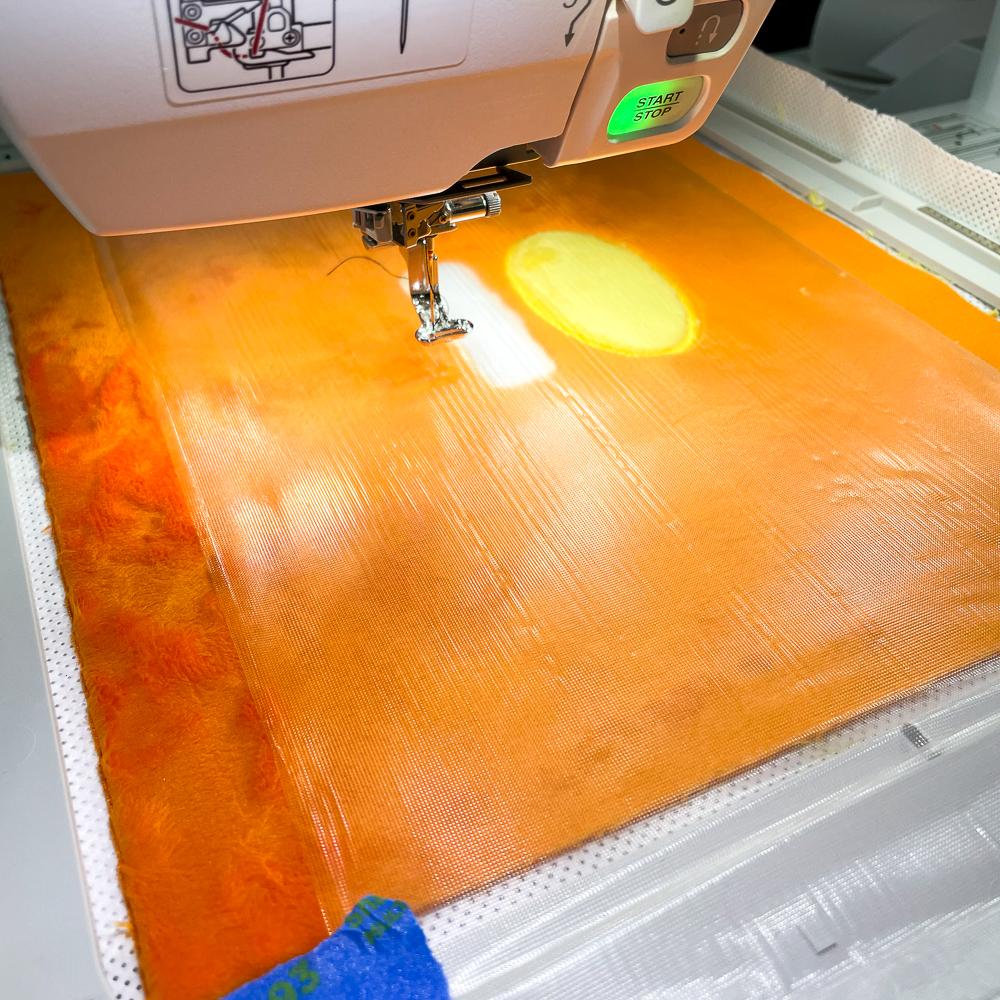
So the first set of stitches will be the outline of the belly. This file is set up to just place a piece of fabric on top of this stitch outline, let it do another outline, and then trim before it does an applique stitch all around.

As you can see from the above photos, I haven't added any Water Soluble Stabilizer on top yet. I know this is a big NO-NO for plush fabric, but I promise you I have my reasons!
So after the belly is stitched on, you'll want to add the teeth. This is a multi-step process that will go back and forth, so don't worry that you have colored zig-zag stitches all over your pretty new fleece teeth.
Side Note: I do not recommend using plush fabric for the teeth. I tried this in the first prototype and my daughter said it made it look like it had multiple rows of teeth and really “creeped her out”. Oops.
Once your teeth have been tacked down, now is the time to add the sheet of Water Soluble Stabilizer on top. I waited until now because of all the applique going on! If you had added it from the start, we would have several layers of the stuff by now. See where I'm going with this? Also, if you are new to plush fabric, you may be wondering why we use this stuff. Well. It's mostly to keep the nap of the plush down so it doesn't get caught up in the embroidery designs and looks weird. It gives everything a nice clean look in the end! Well worth the extra step and cost.
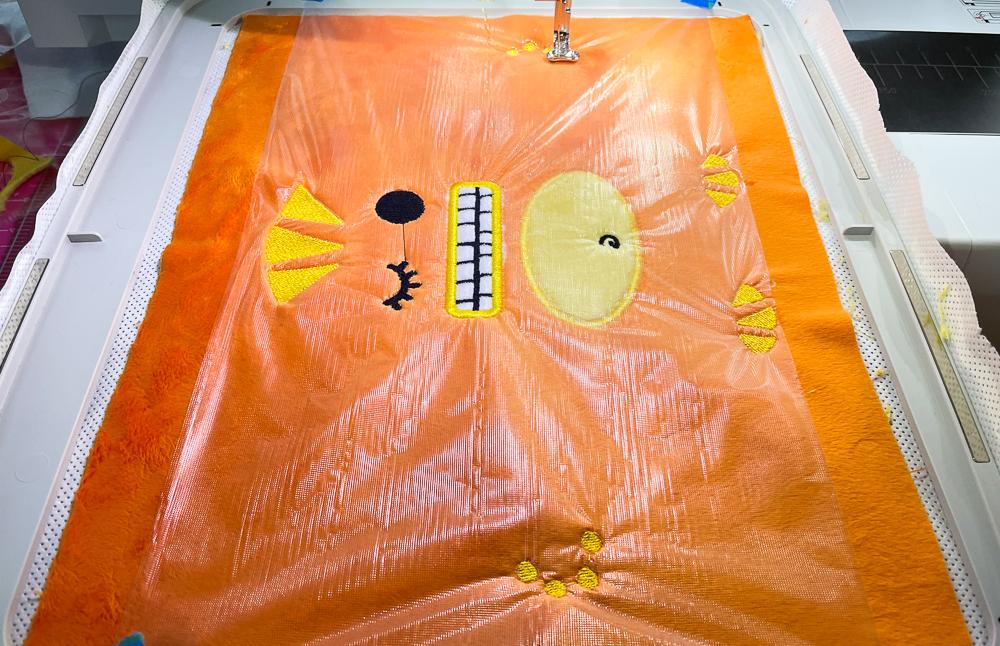
From here just follow the thread colors in the embroidery file and everything should look like it does above. Yes, you will be switching back to that first color after the black thread, but it was really the only way to get that beautiful monster smile to shine.
When you get to this point, you can go ahead and tear off the Water Soluble Stabilizer. I know it's meant to be soaked off, but the embroidered parts are so dense, it just tears off. Way easier. However, keep the design in the hoop still since there is one more IN THE HOOP step.
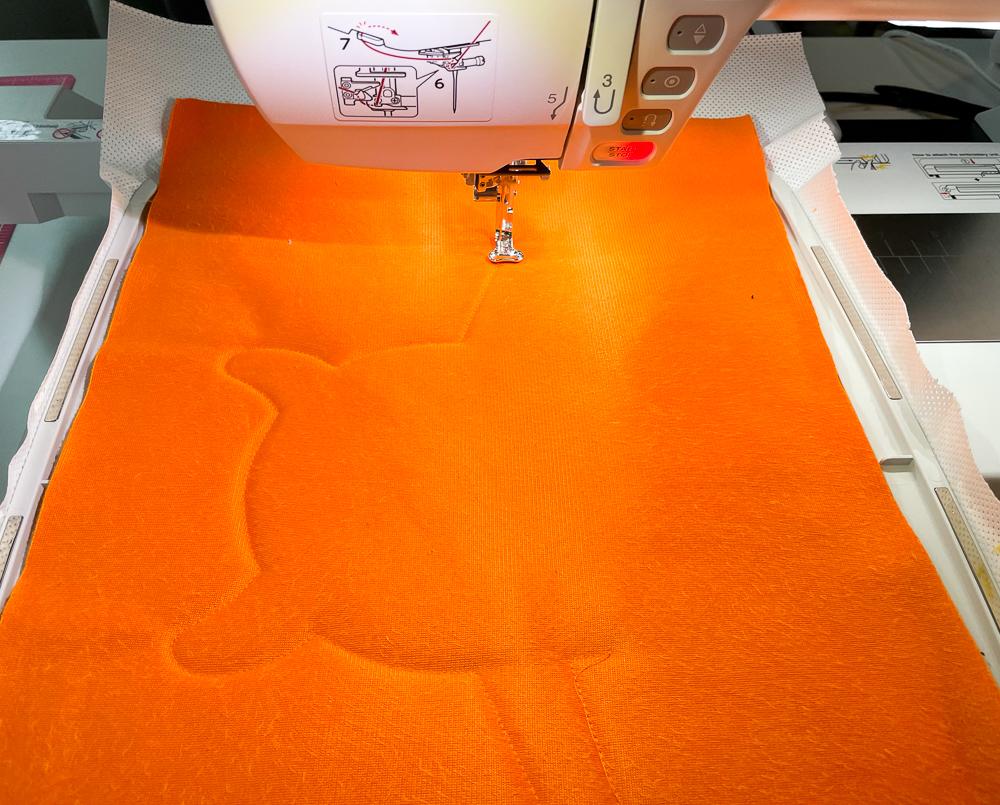
While still keeping an eye on which way the nap is going, place the second piece of plush fabric we cut earlier down on top of your newly embroidered monster parts. Make sure it’s plush side down too.
You could tape it in place, but I noticed it hardly shifts at all and I just keep an eye on it while the machine does the last outline stitches.
Once it has finished its laps around the body, you are ready to take the hoop off the machine and remove your inside-out monster! We are so close to being done!!!

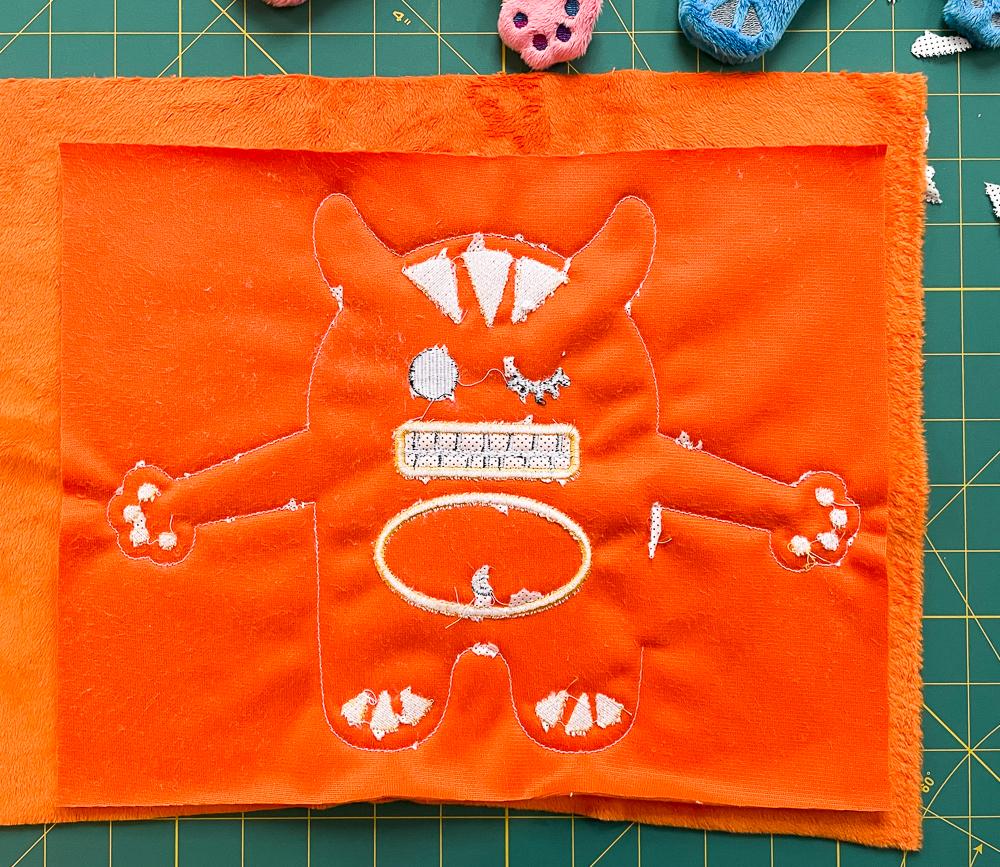
Next, you will need to cut them out, leaving at least a 1/4” seam allowance, though I'd much rather it be 3/8”. Your choice if you want to live on the wild side. While trimming, you'll need to cut slits anywhere there is an indent in the design. I included photos with loads of arrows to show the best spots.
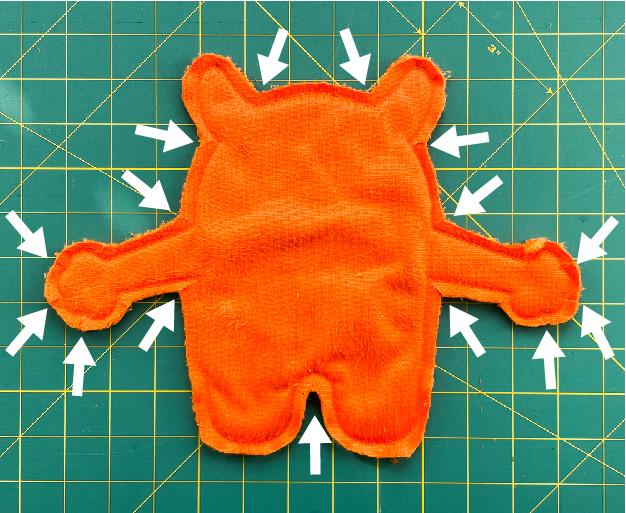
Now your monster is ready to be turned right side out! I found that turning the horns and arms first made it easier all around.

Look at that beautiful smile!

Remember, this monster is called the Awkward HUGS Monster, so we need to make sure these arms are ready for hugging!
To do so, just stuff each of the arms as much as you can. The using thread that matches the body, do a straight stitch through the arm, from the armpit to the shoulder, and then back down again. Locking the thread at the end. This allows for the arm to keep all its stuffing, and it adds a hinge! Repeat this for the other arm too.
Side note: I absolutely love “The Purple Thang” tool for stuffing plush figures. The square piece on the back grabs the Polyfil stuffing perfectly and moves it exactly where it needs to go!
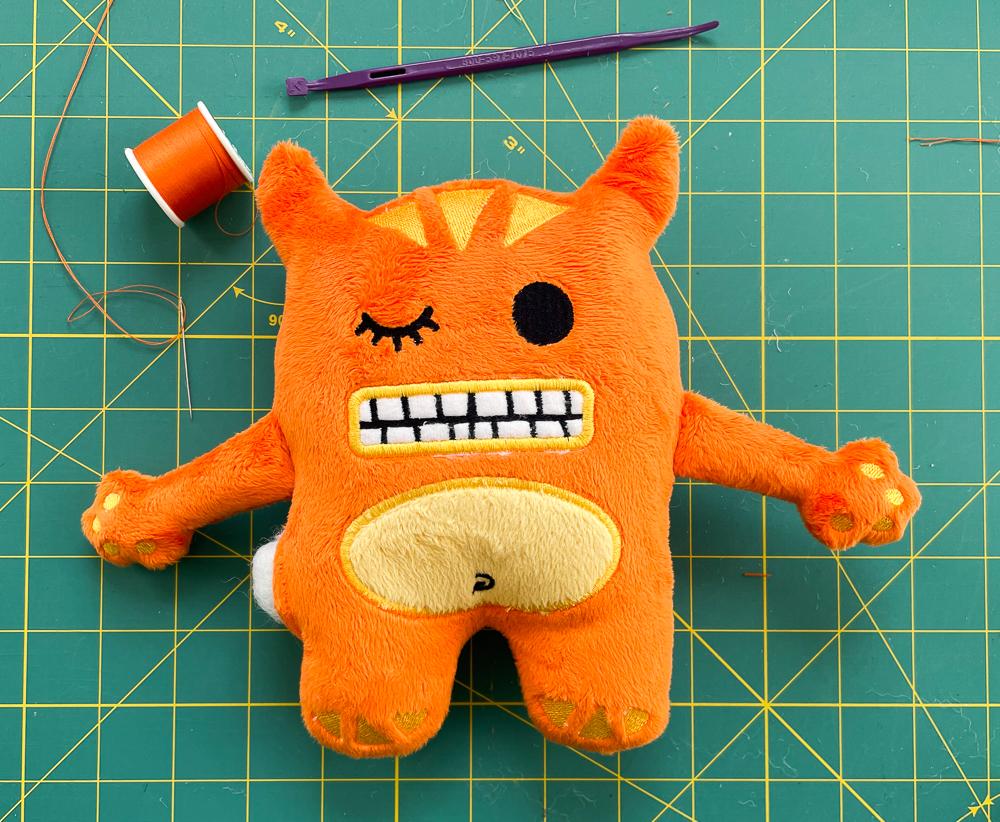
After you perform the arm hinge surgery, you will want to stuff the entire thing as much as possible. You will be using way more Polyfil than you ever thought you would. It's crazy, but I promise it will help you get the best-looking monster in the end.
Once your monster is nice and plump, you will want to stitch the open hole closed using a ladder stitch. If you don't know what that is, I highly recommend looking up videos. It is the best stitch ever for closing up plush toys and for adding darts when needed.
Technically at this point, you are finished...

BUT, I suggest one more thing! Place your monster flat on a hard surface with your palm on its stomach. Now move your hand around clockwise like you're kneading bread, and then do it again counterclockwise. This helps distribute the Polyfil a bit more and gets you a less clumpy monster. No one wants a clumpy monster!!!!
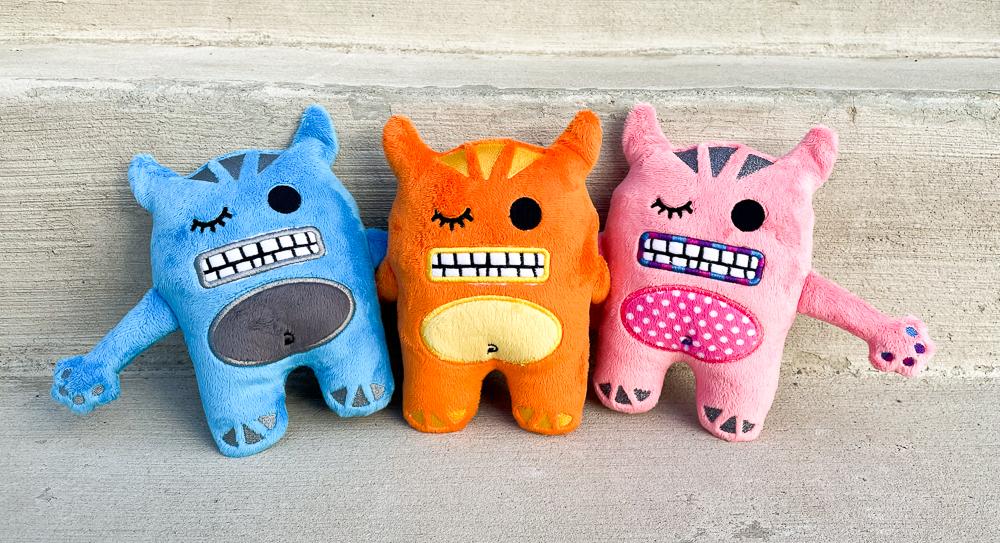
Ok, NOW you're done!! Woohoo!! Congrats!
If you are anything like me though, you may keep adding to your monster family! Each time trying out different threads and color combos. This is completely normal and encouraged. So please try out that weird holographic thread you bought 6 years ago but never tried, or that variegated pink and purple thread that just collects dust! You never know what the outcome will be and this is the perfect project to test it out.
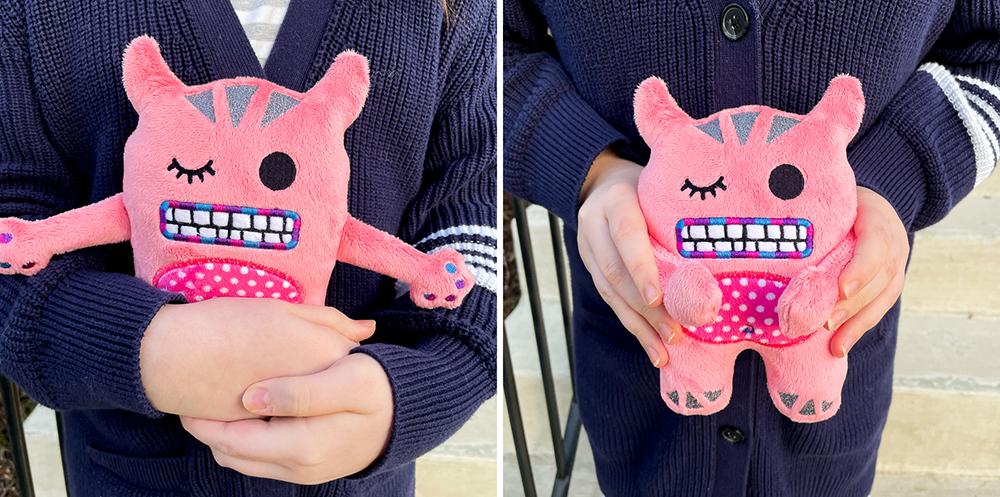
P.S.: If you do make your own Awkward Hugs Monster, please share it with us or hashtag it #janomeawkwardhugsmonster !! We would absolutely love to see them.
After you finish making your sweet monster, please be sure to snap a photo and share!
We don’t want to miss out so be sure to tag:
@janomeamerica
@jessee_artschooldropout
And hashtag:
#janome
#janomemakes