Preparation is Key
Like with practically every sewing task, we need to do a little preparation for this project before we begin. Because canvas is a heavier fabric, you're going to need to use a specific thread and needle for the sewing machine in addition to making several machine adjustments.

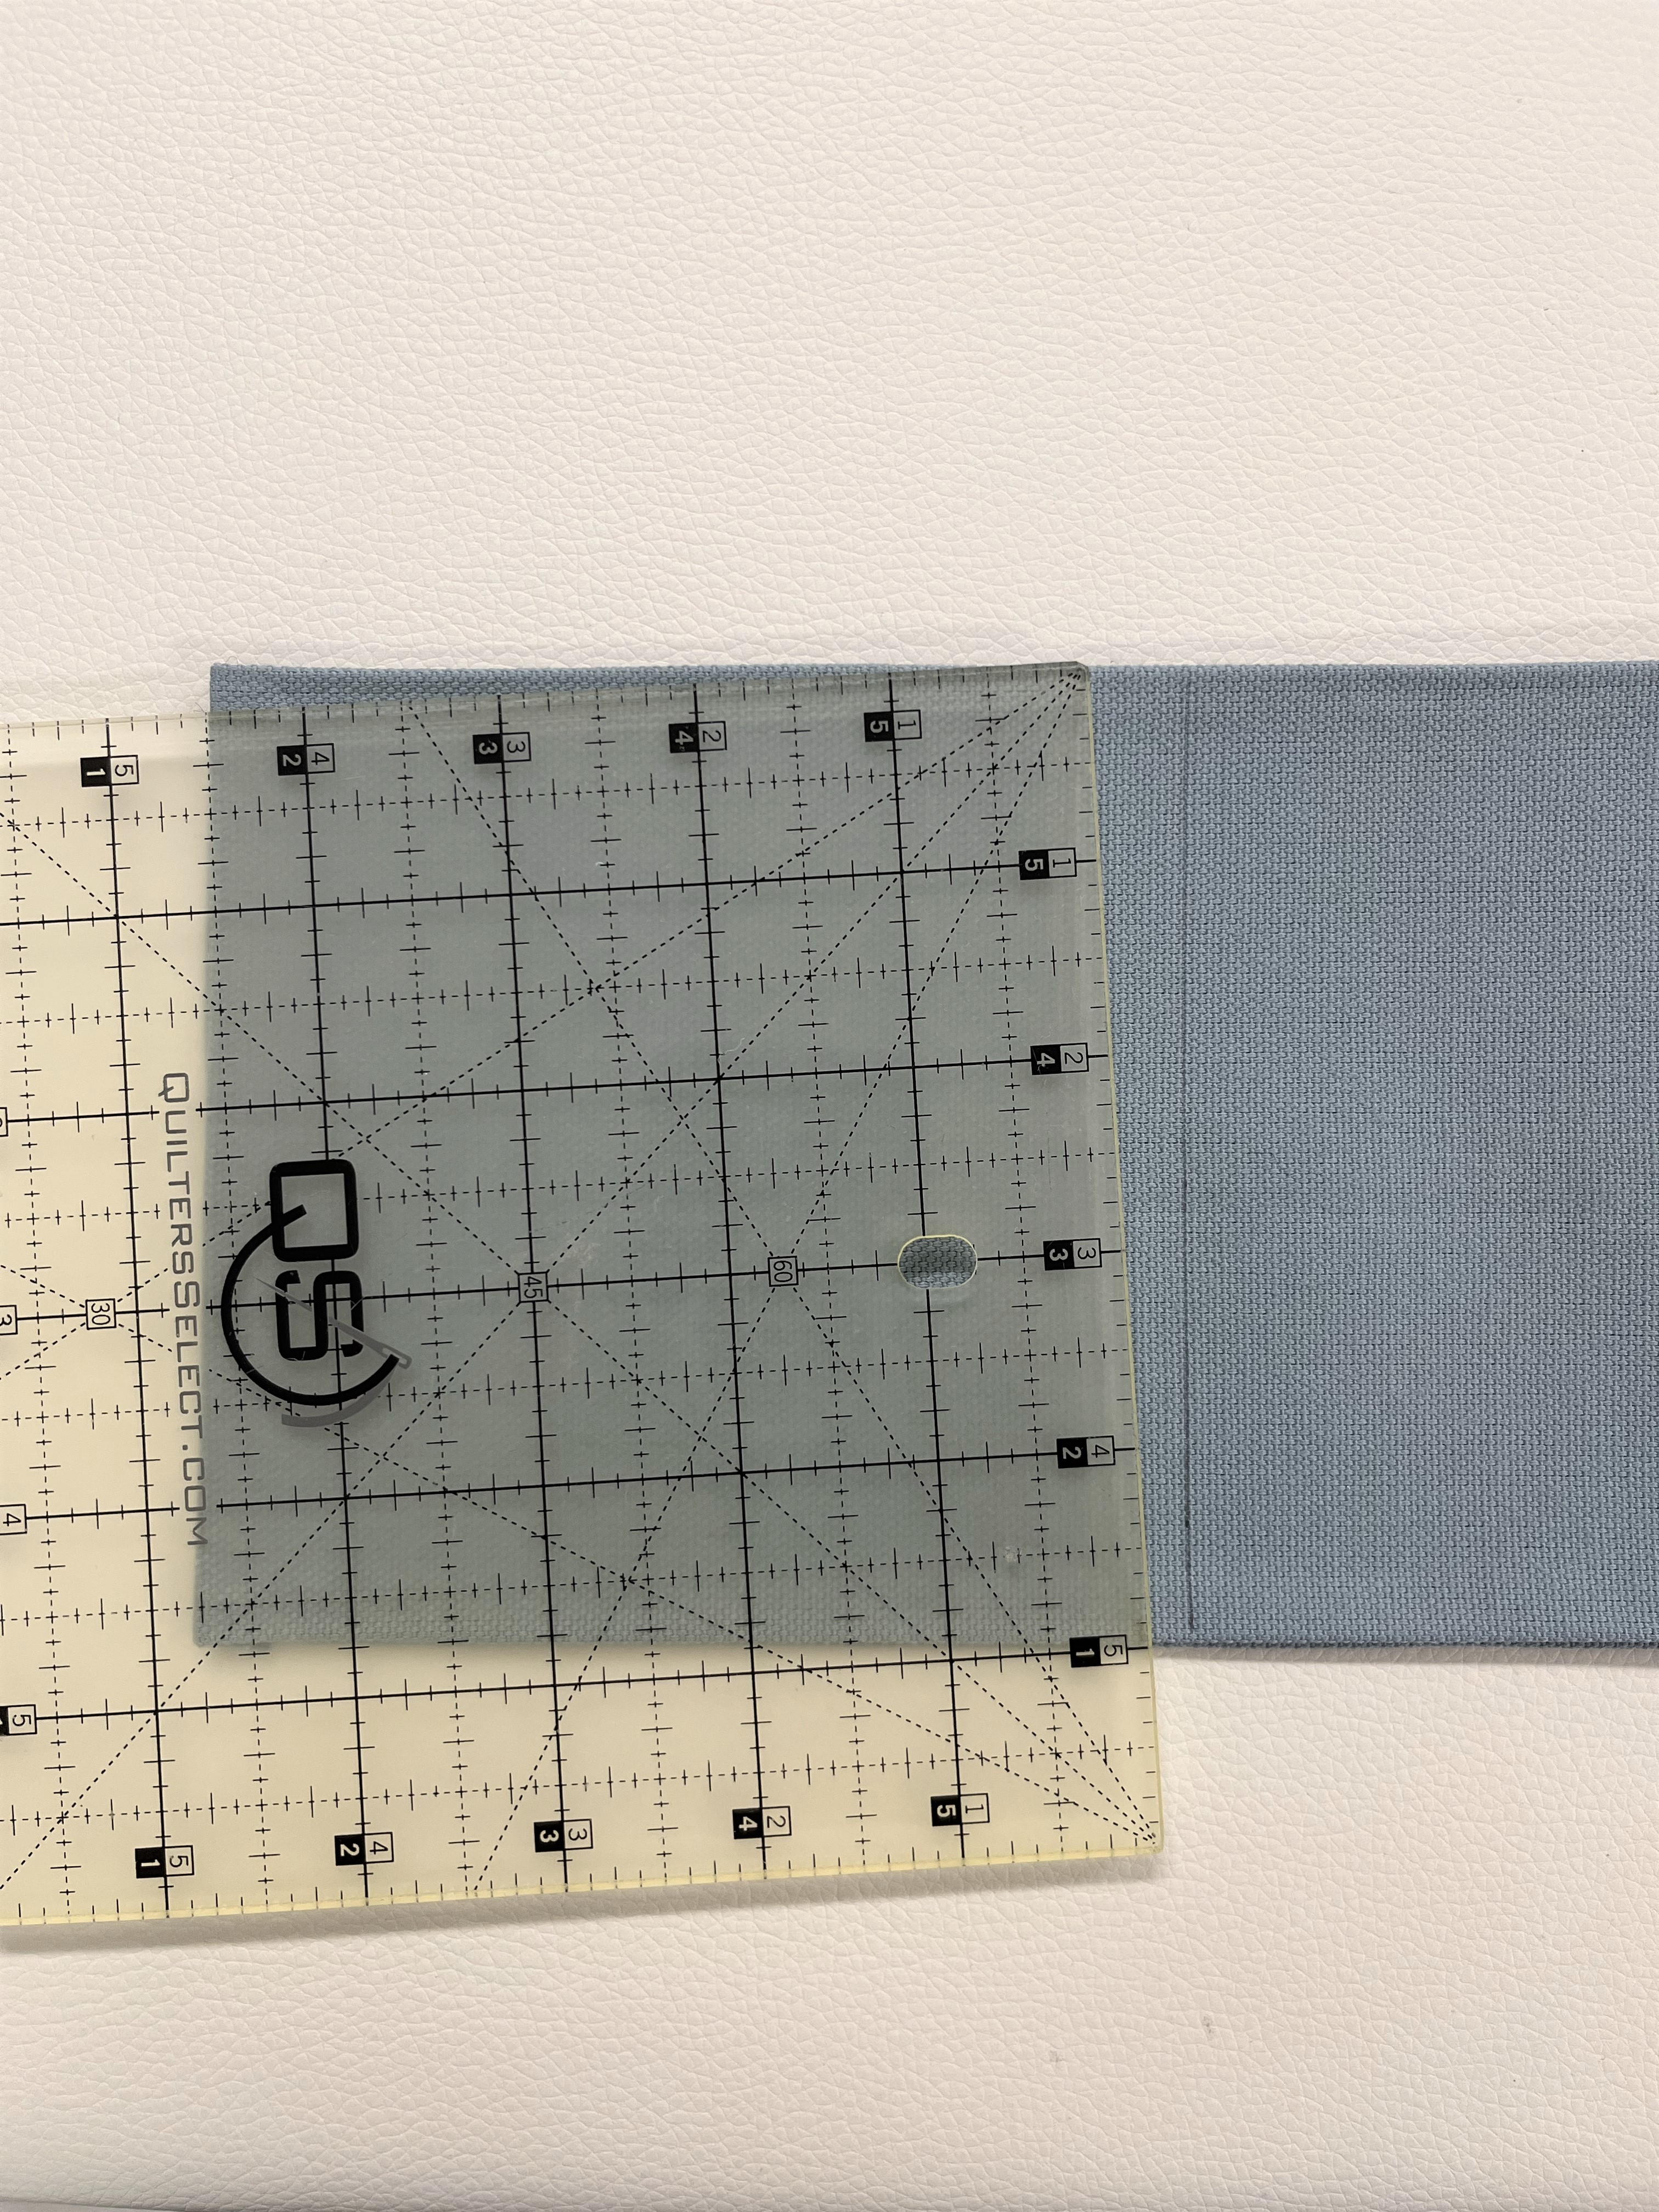
First things first, this design should fit most standard silverware sizes, but it never hurts to break out the measuring tape and make any changes to the pattern if needed.
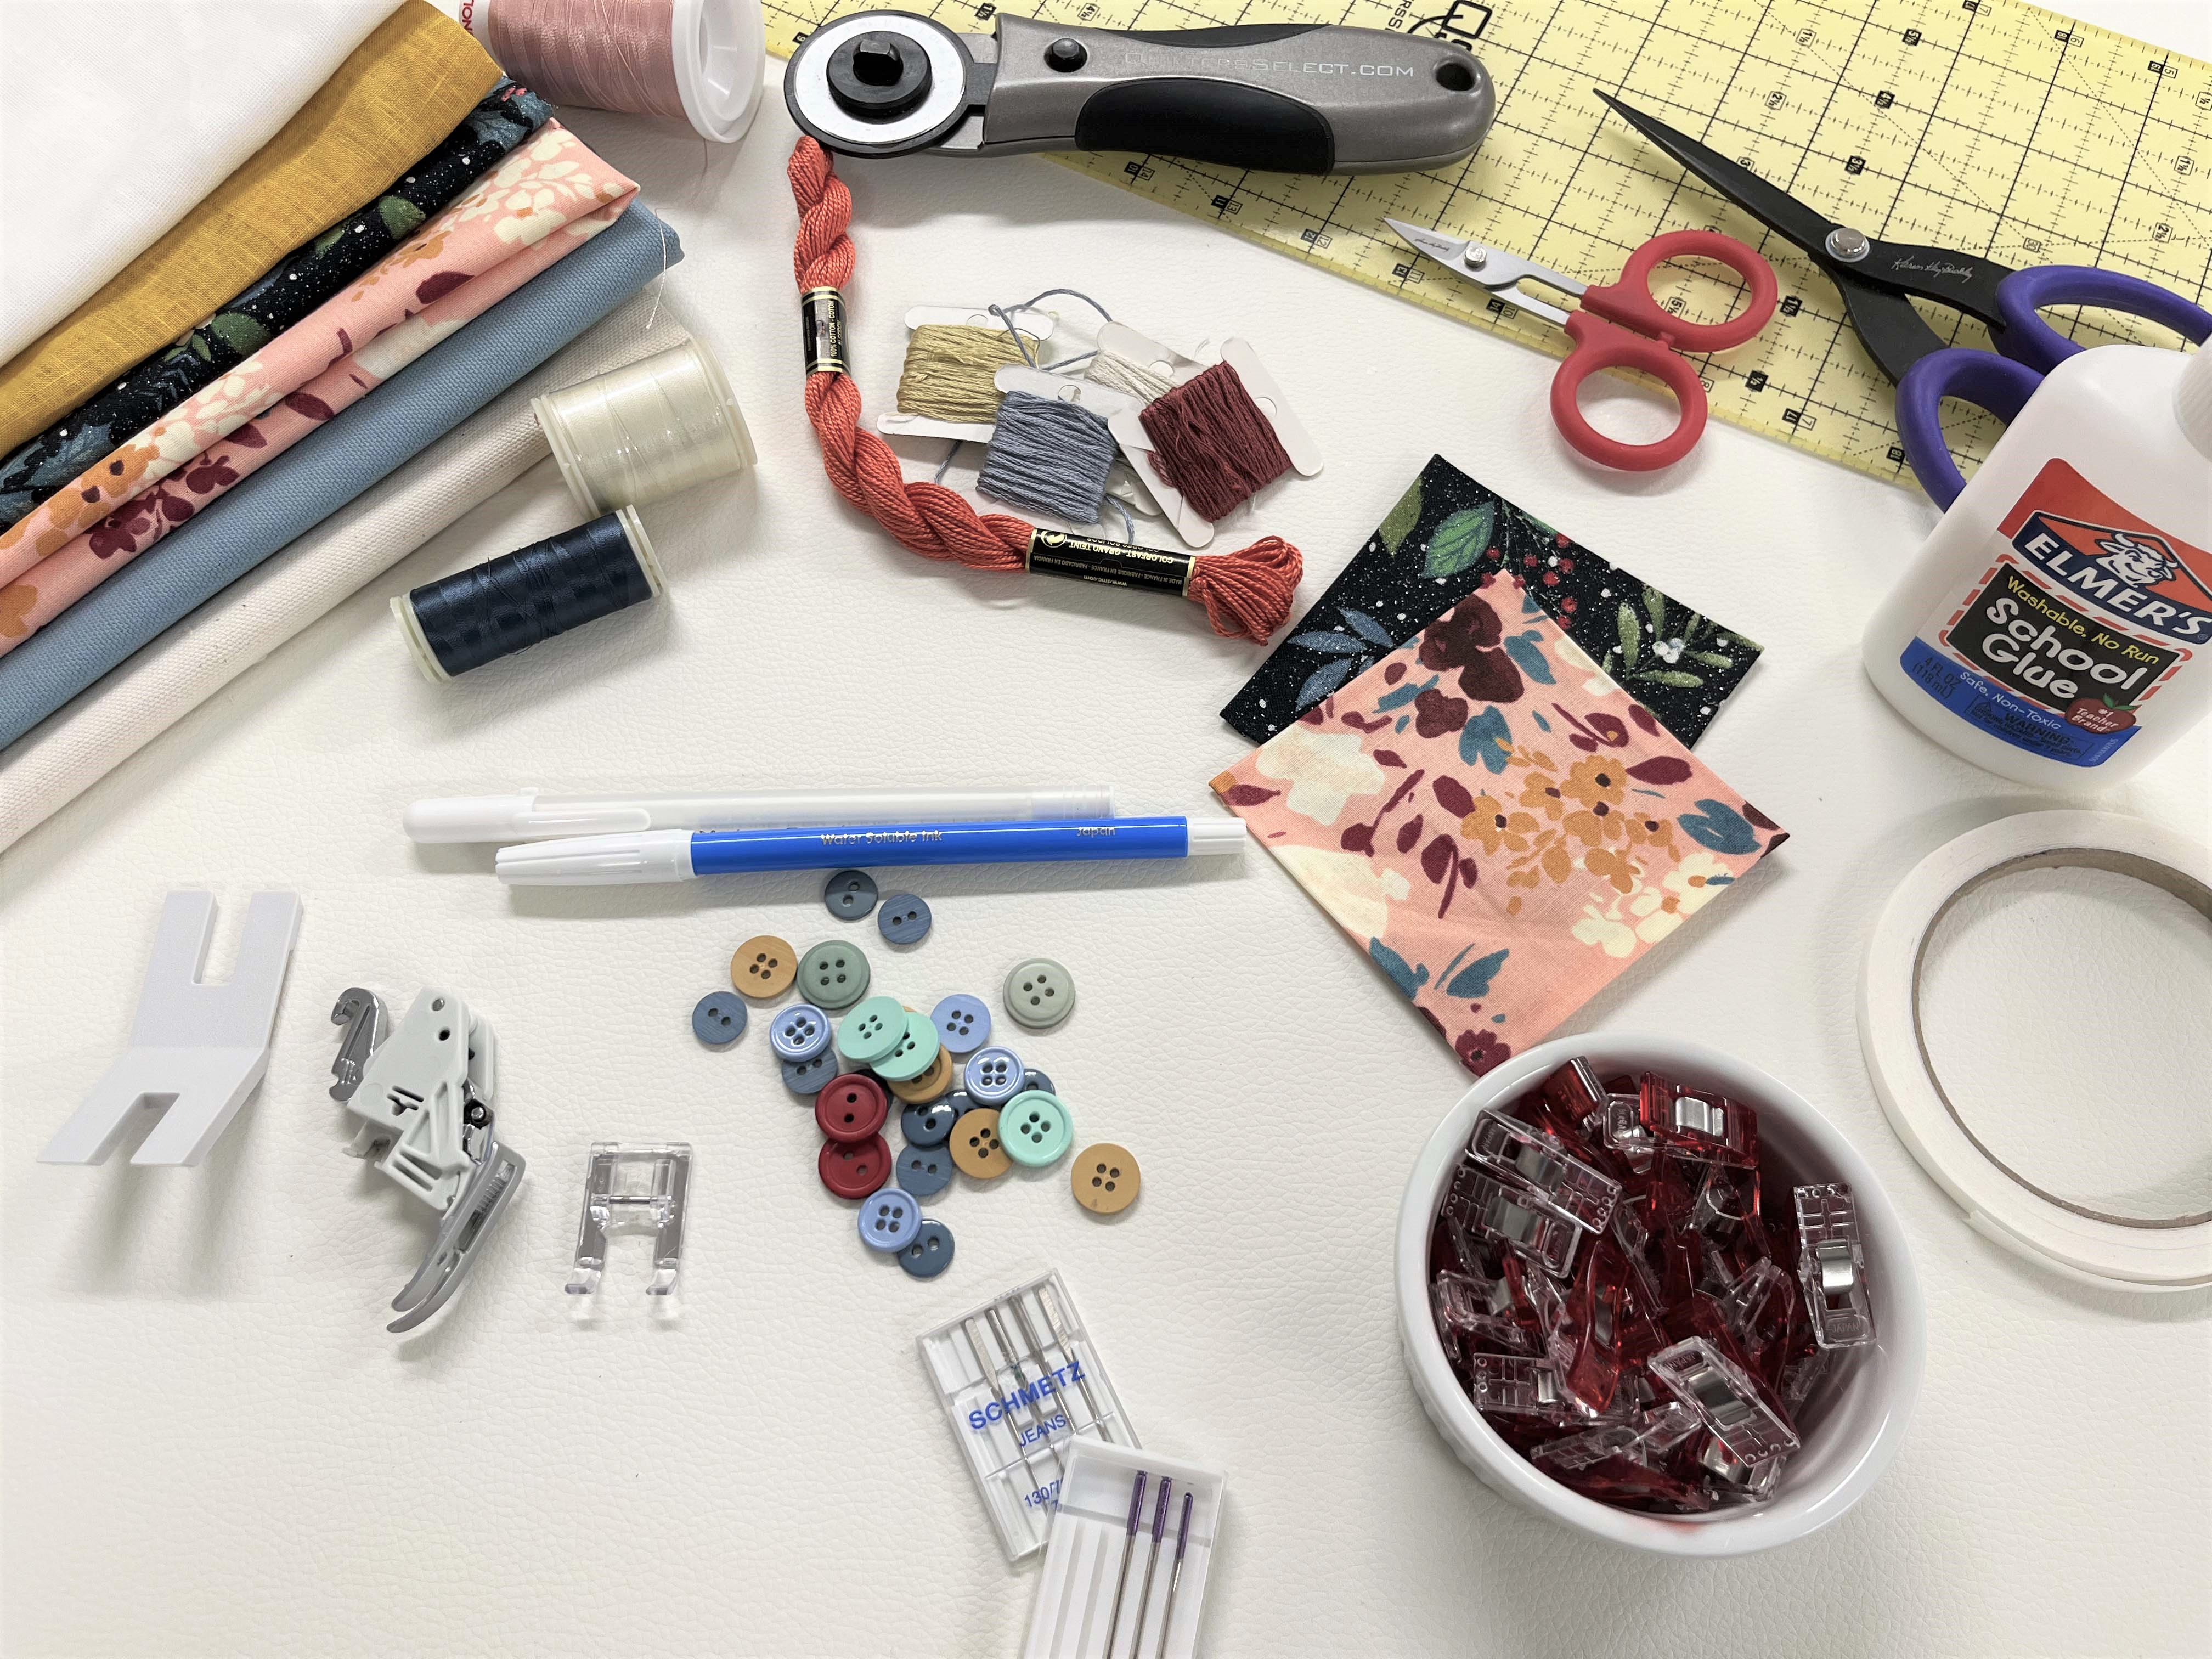
For this project we are working with a medium weight canvas which is similar to medium weight denim, a 40-weight cotton, polyester, or cotton-wrapped polyester thread will most likely be your best selection.
There’s no such thing as one needle that works for every type of sewing project. As with any thicker fabric, sewing canvas requires a stronger needle, one that has a stronger shank and a pointy, slightly rounded tip that can penetrate the fabric without bending, deflecting or breaking is essential. The eye of the needle also needs to accommodate the thickness of your thread. Jeans needles in sizes 90/14 or Janome's purple tip needles, are two nice choices.
My machine has automatic tension, which means it has built-in sensors that detect the thickness of the fabric and adjust the foot pressure automatically. If your machine does not offer an automated tension option, you may need to adjust the tension manually. Heavier threads and materials require significantly less tension, letting your fabric feed more smoothly through the machine. If your machine is having trouble feeding your fabric, the presser foot is probably pushing down on the fabric too hard, preventing the feed dogs from feeding the fabric. By reducing the presser foot pressure, you are releasing the feed dogs and letting them do their job.
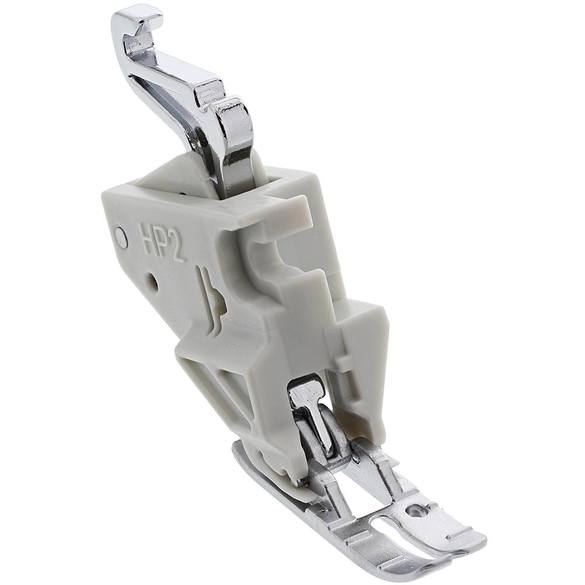
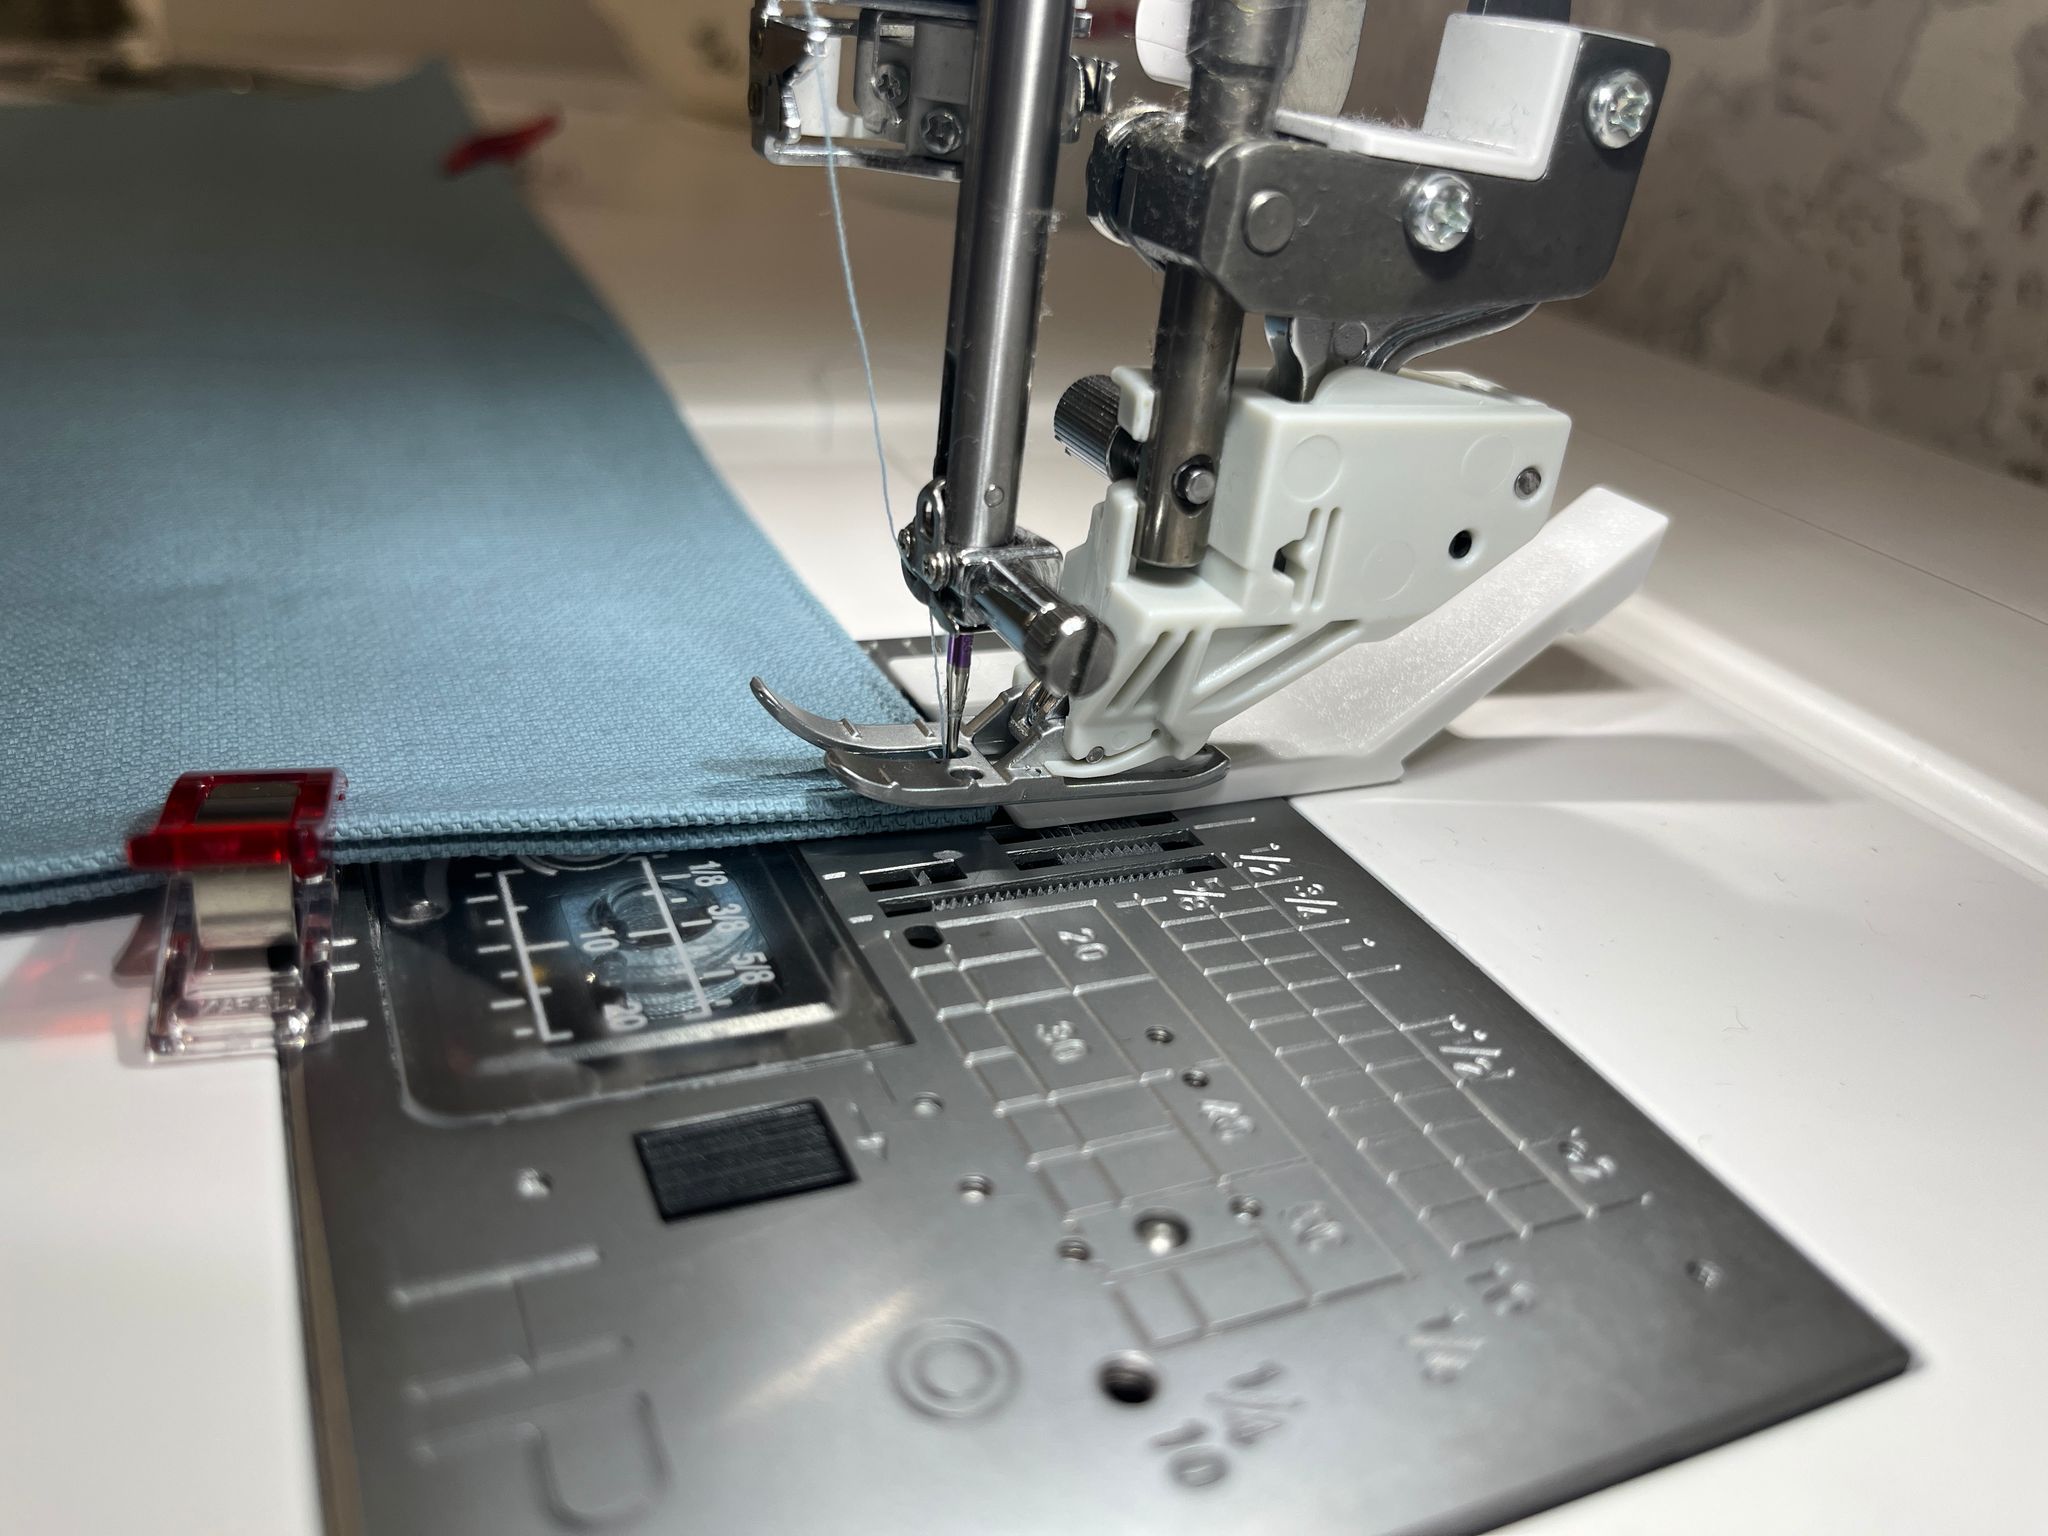
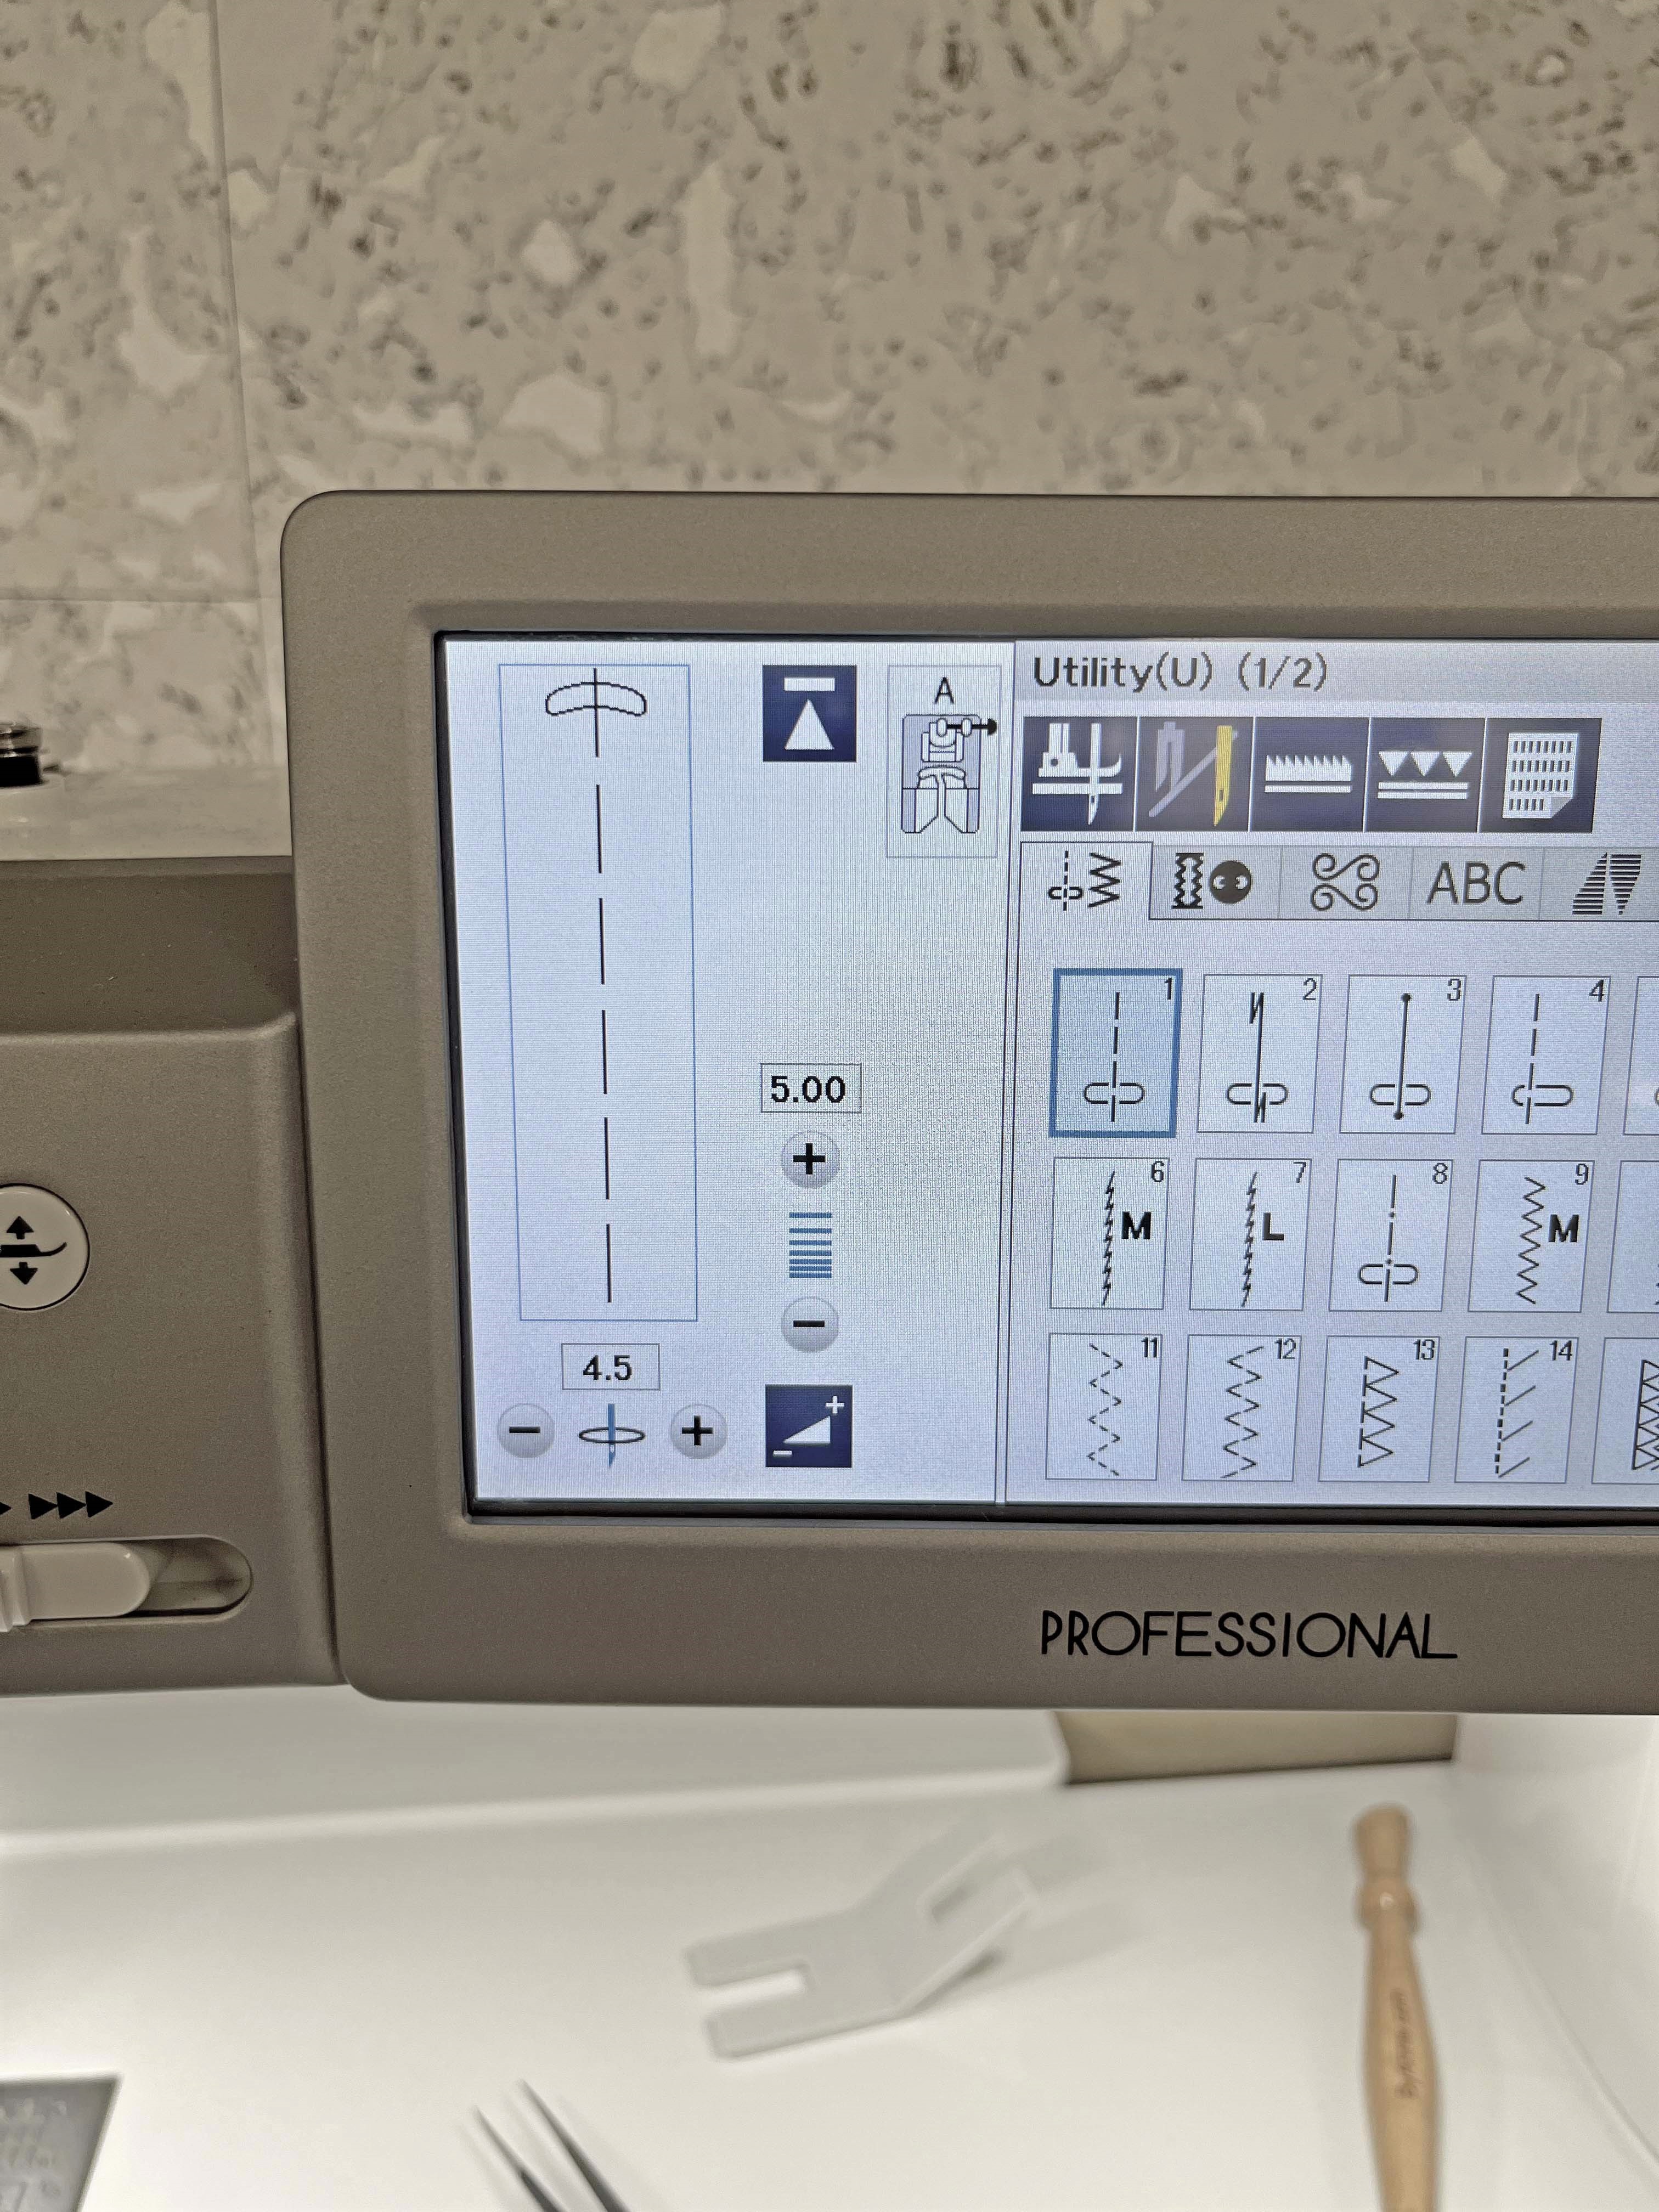
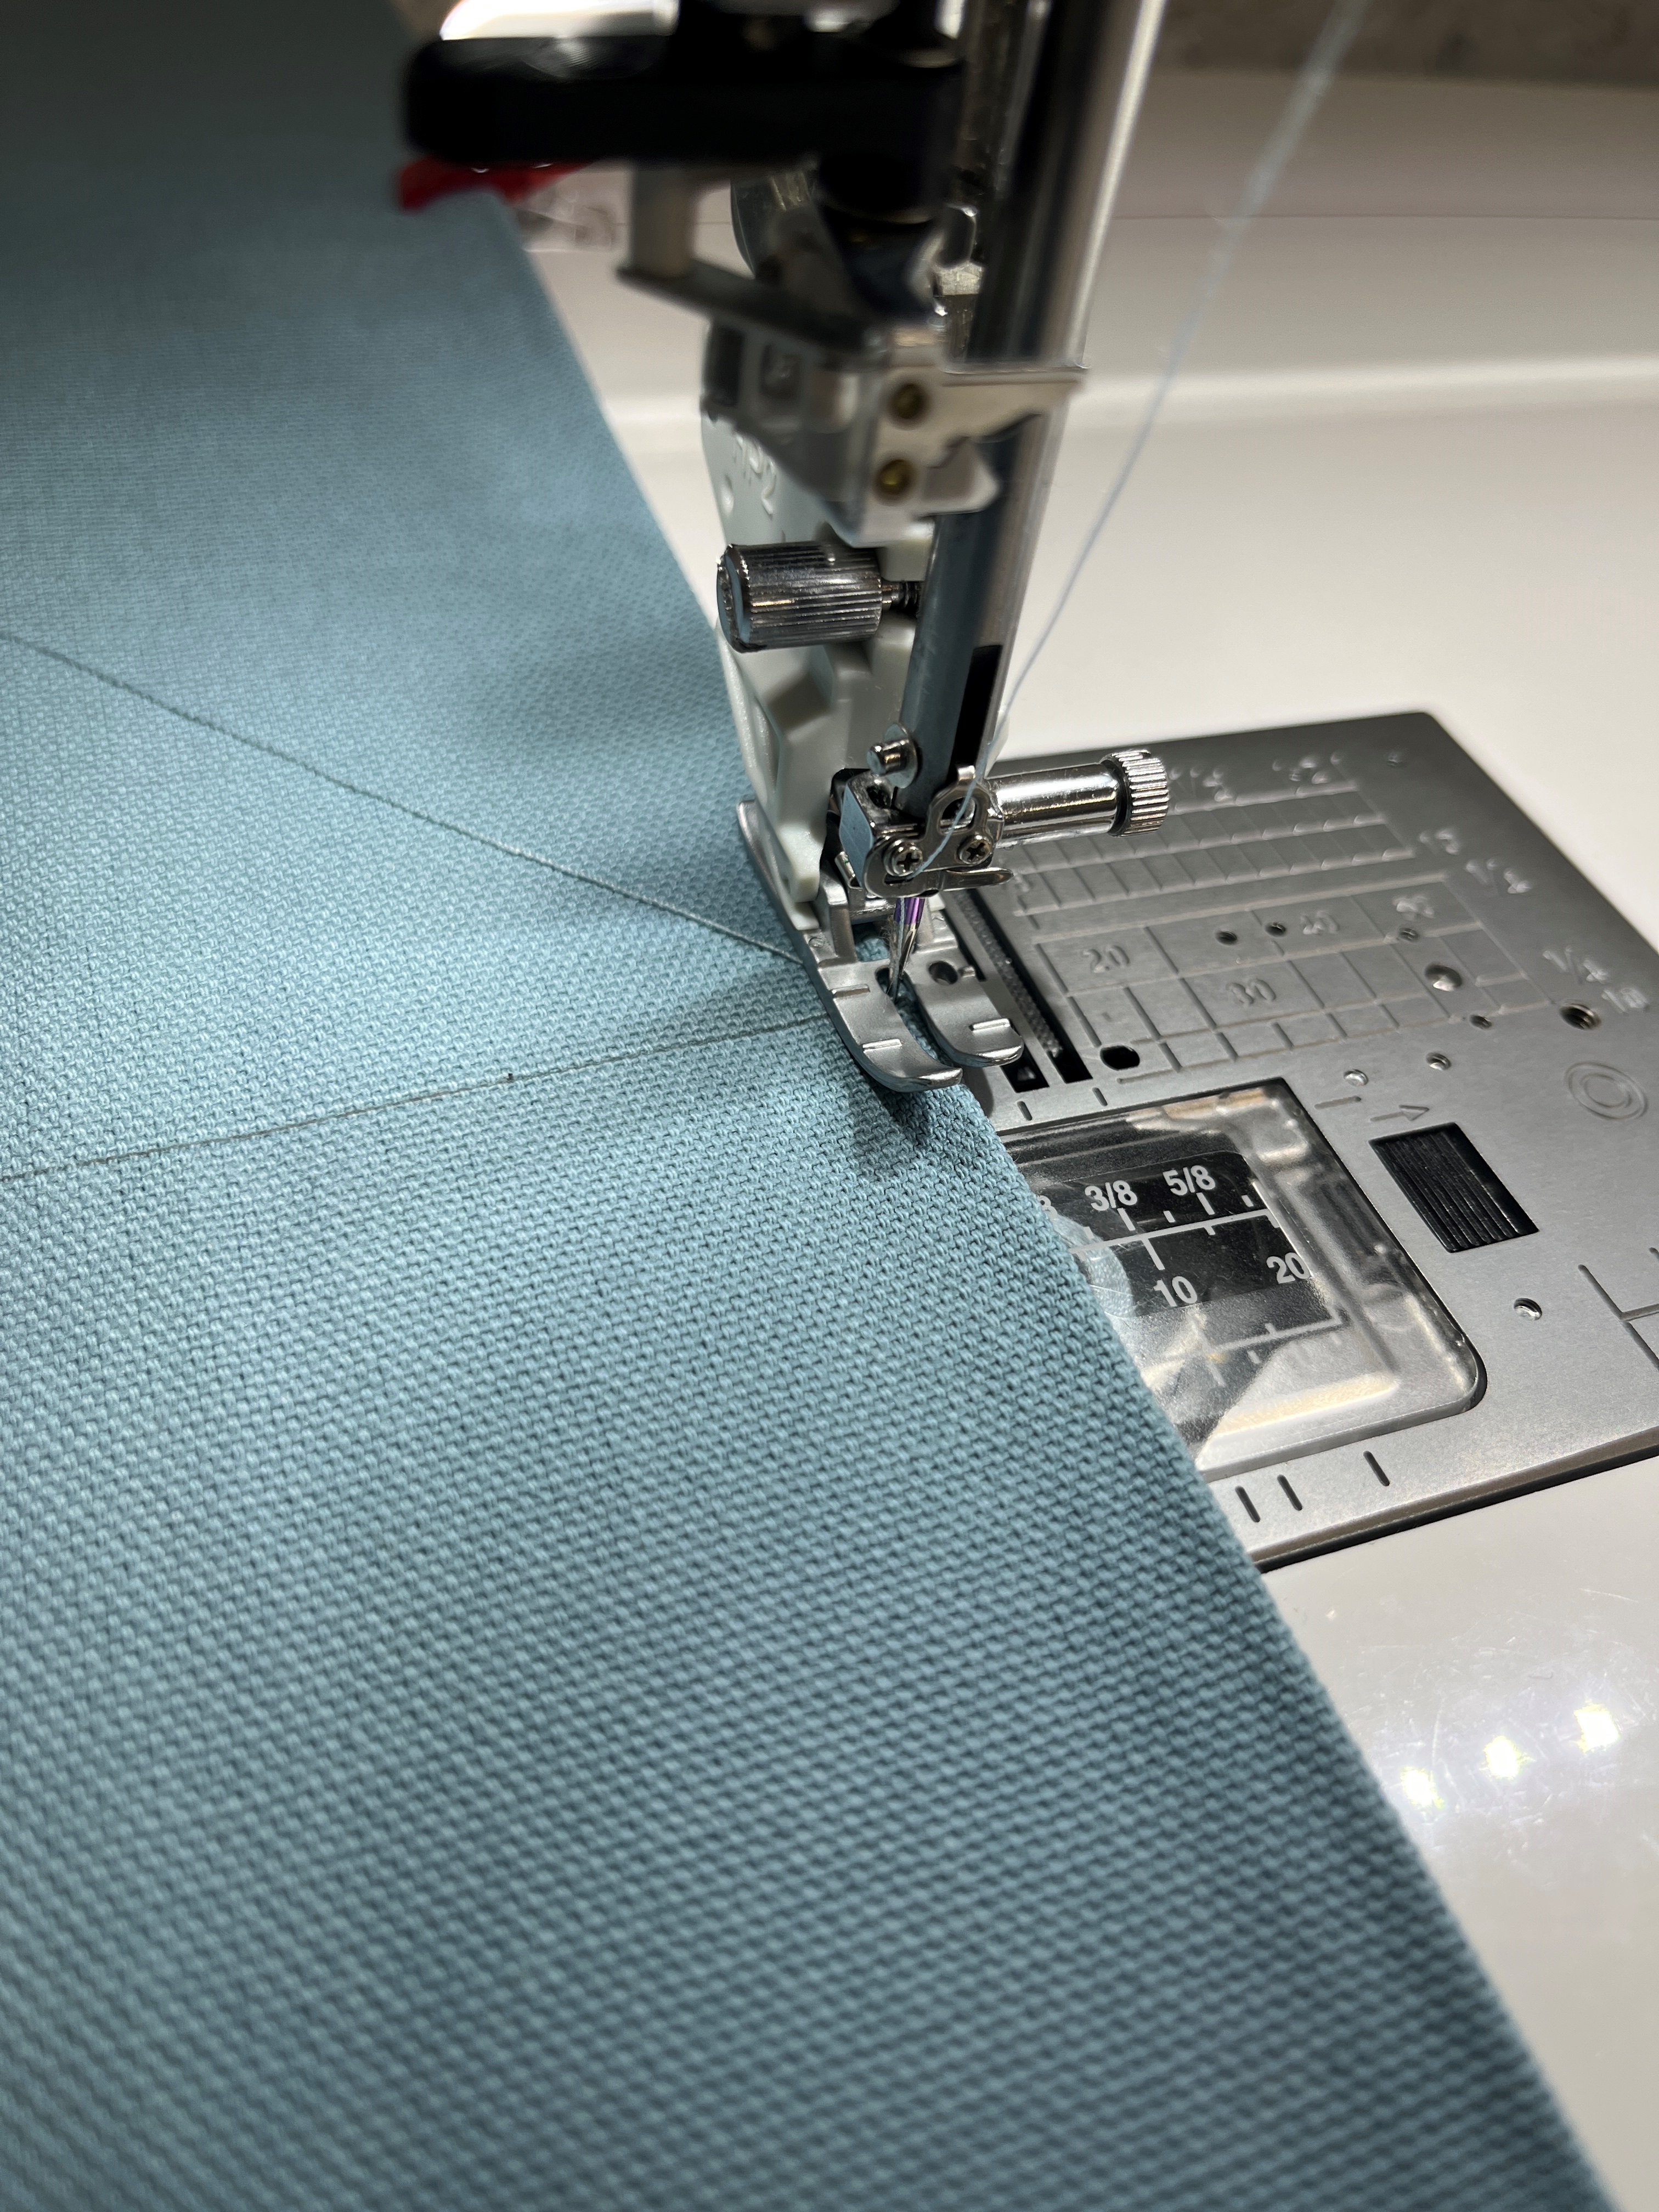
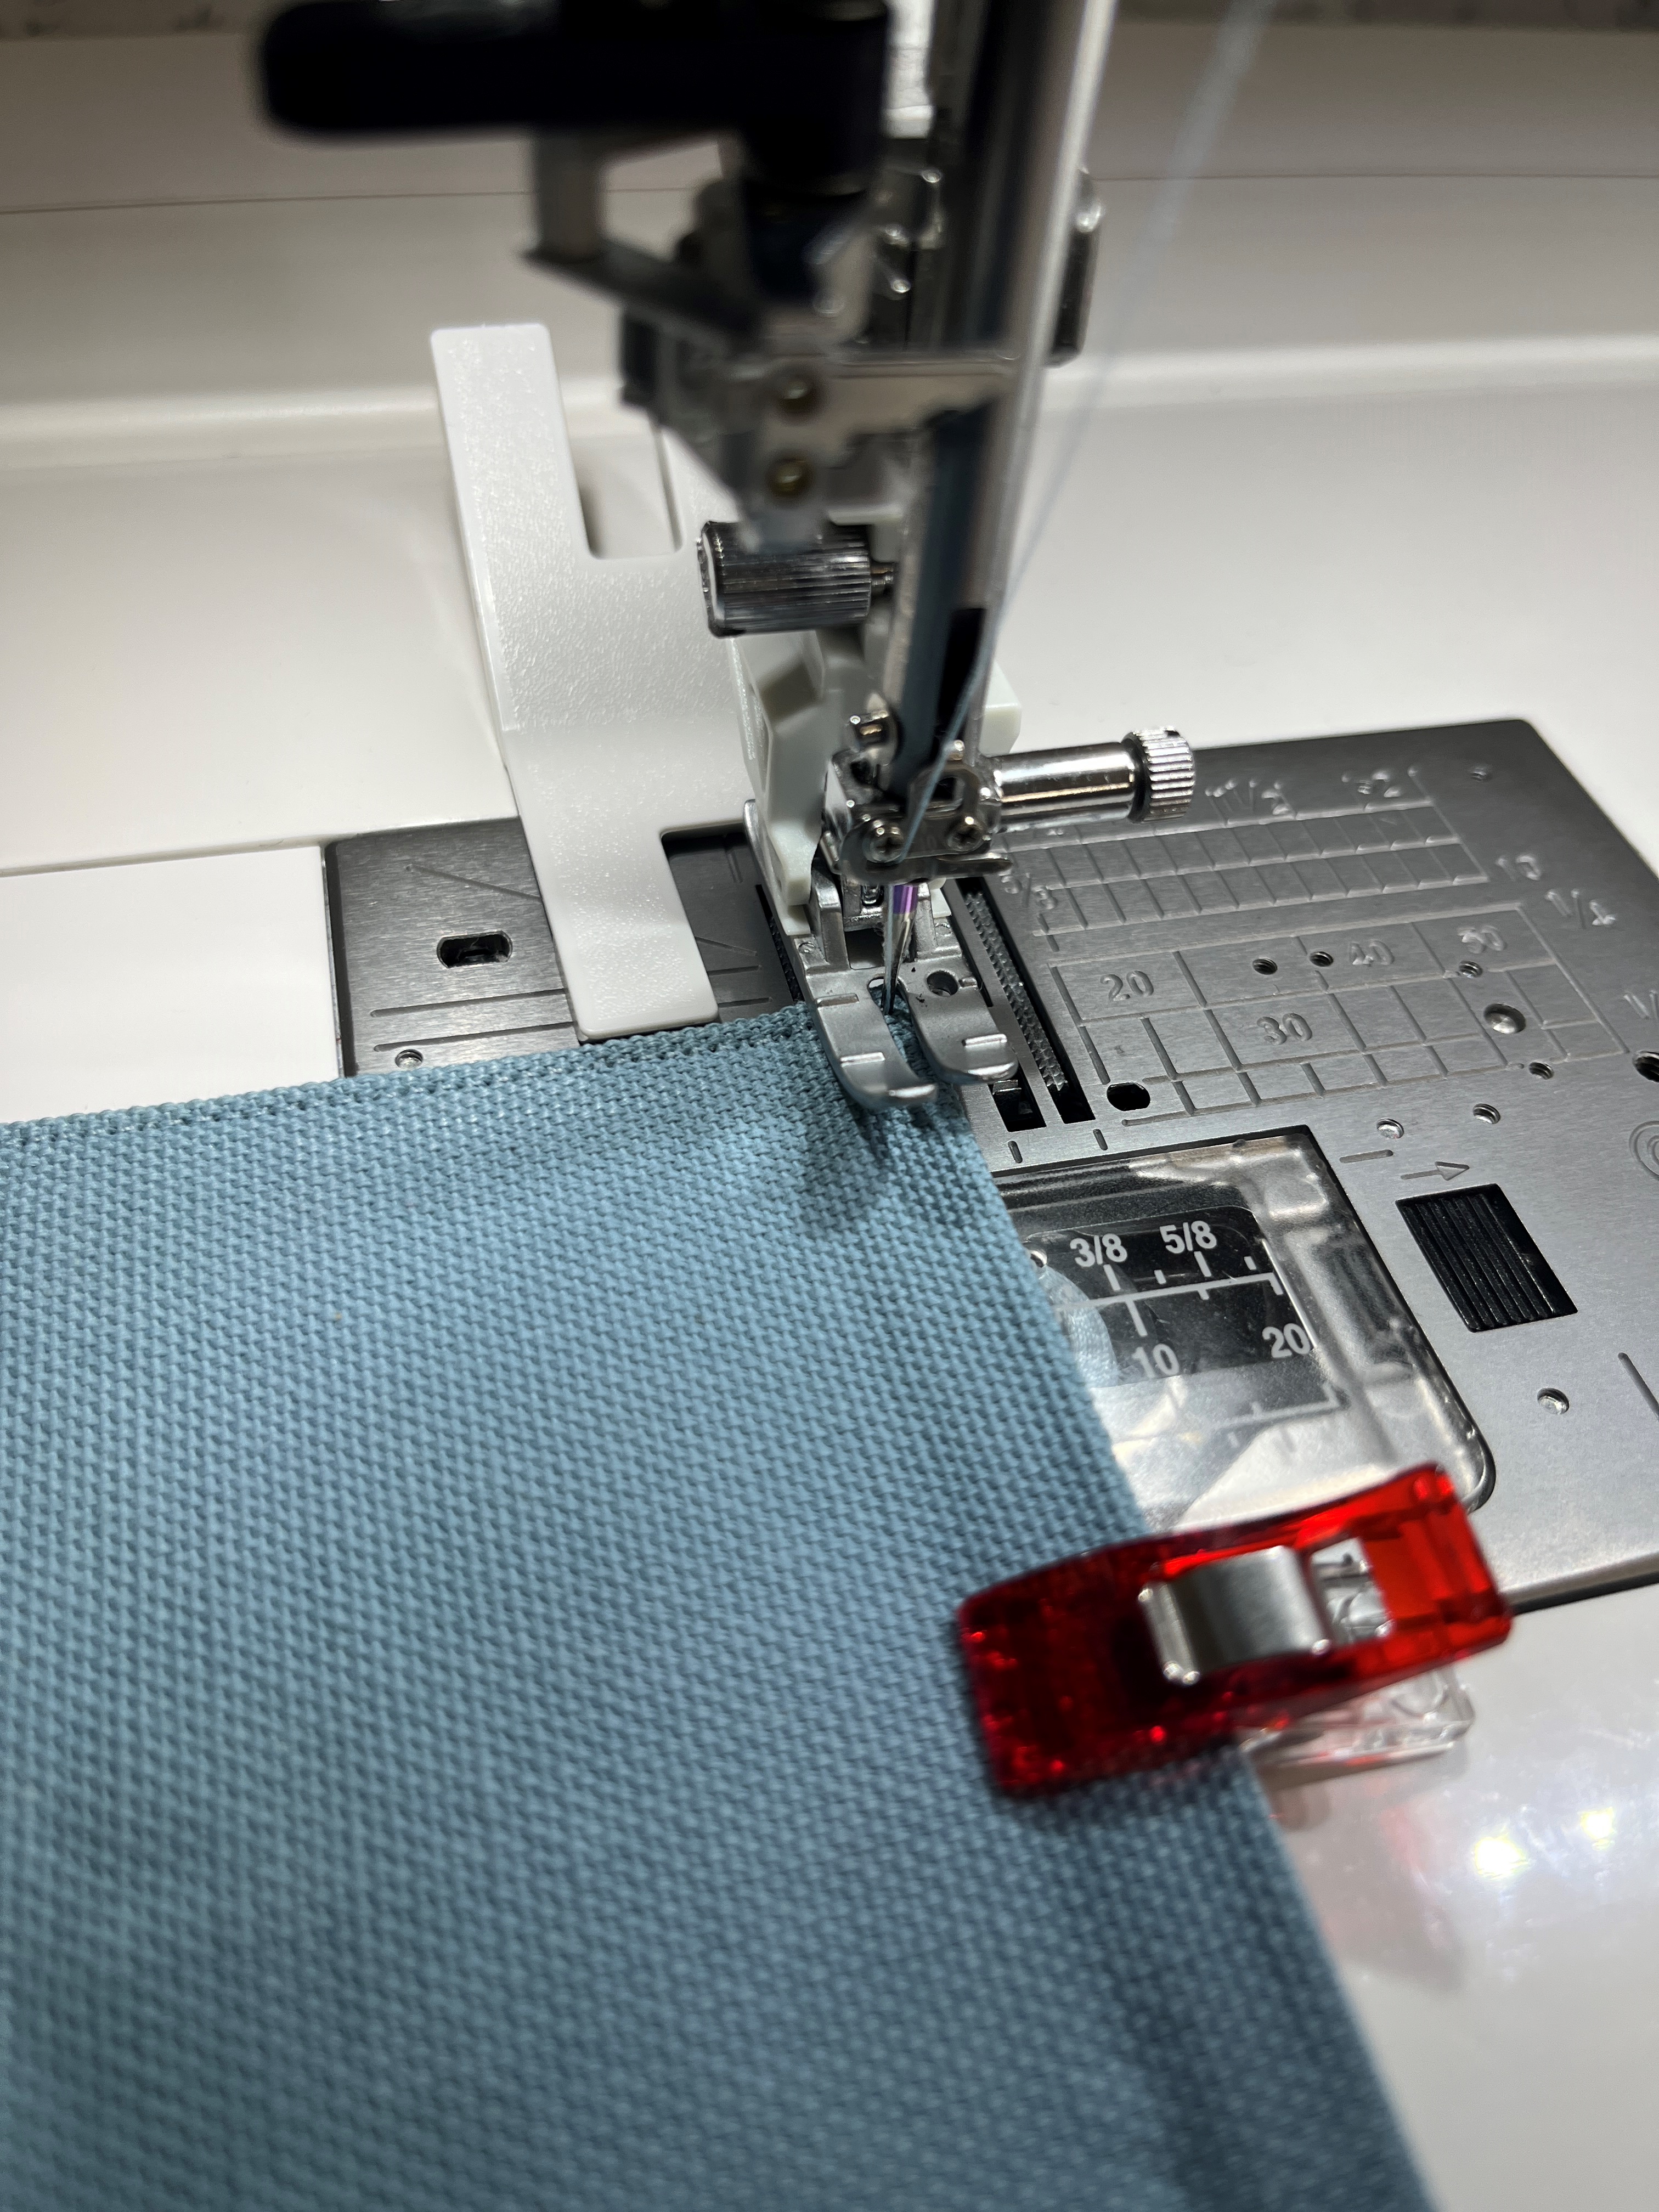
Because you are sewing through many layers of fabric, a walking foot is key. A walking foot evenly feeds your top and bottom layer of fabrics. I'm using a Janome Continental M7 sewing machine, which has a special system for uniformly feeding fabric from the top and bottom. It's called the AcuFeed Flex feeding system. Used with the HP2 foot, which has excellent visibility and is ideal for precise topstitching. It firmly holds the fabrics in sync with the feed dogs. It’s paired up with the Professional Grade (HP) straight stitch needle plate. By combining these sewing components, I am able to achieve perfect, professional looking topstitch results.
A hump jumper (a button shank foot) or even a wedge of folded fabric can become your new best buddy in no time. It balances your foot when beginning to sew heavier fabrics or when approaching a thicker seam. Because the front of the presser foot is already lifted when you start stitching thick material, place the hump jumper beneath the rear of the presser foot to level it from front to back. This will guarantee that you don’t get stopped or locked up as you take those first initial few stitches while also keeping the fabric moving underneath the foot.
Canvas is a tightly woven, heavier cotton fabric; therefore, a somewhat longer straight stitch length is needed. A stitch length of 3.0 to 3.5 can help keep the material moving without stopping the foot and stitching in one spot, as well as give you a nicer, more professional-looking finish.
After you've set up your sewing machine to sew, don't forget one of the most important steps is to slow the speed of your sewing way down and especially when you do back stitches. On some machines, you can adjust the speed manually with your foot controller, or there may be a slider level, dial, or setting on the sewing machine itself to reduce the machine's speed. And, of course, always perform some tests before you dive into making your project.

Pre-washing your canvas can prevent shrinkage and can soften the fabric somewhat, making it a bit easier to work with. Another great tip for storing canvas fabric is to keep it rolled rather than folded to prevent creases.
Keep in mind that while the simplest method for sewing this project may be stitching together two layers of canvas and turning the material right side out. Clipping and poking out the corners of a thick canvas or even a medium weight fabric can be challenging to produce really nice-looking results. Therefore, I have two recommendations for you: either continue using the canvas and try the technique I describe in the instructions that follow, or swap out the canvas with a lighter more pliable cotton fabric that has been interfaced.
Cutting the Fabric
Prepare 4 sets of the following:
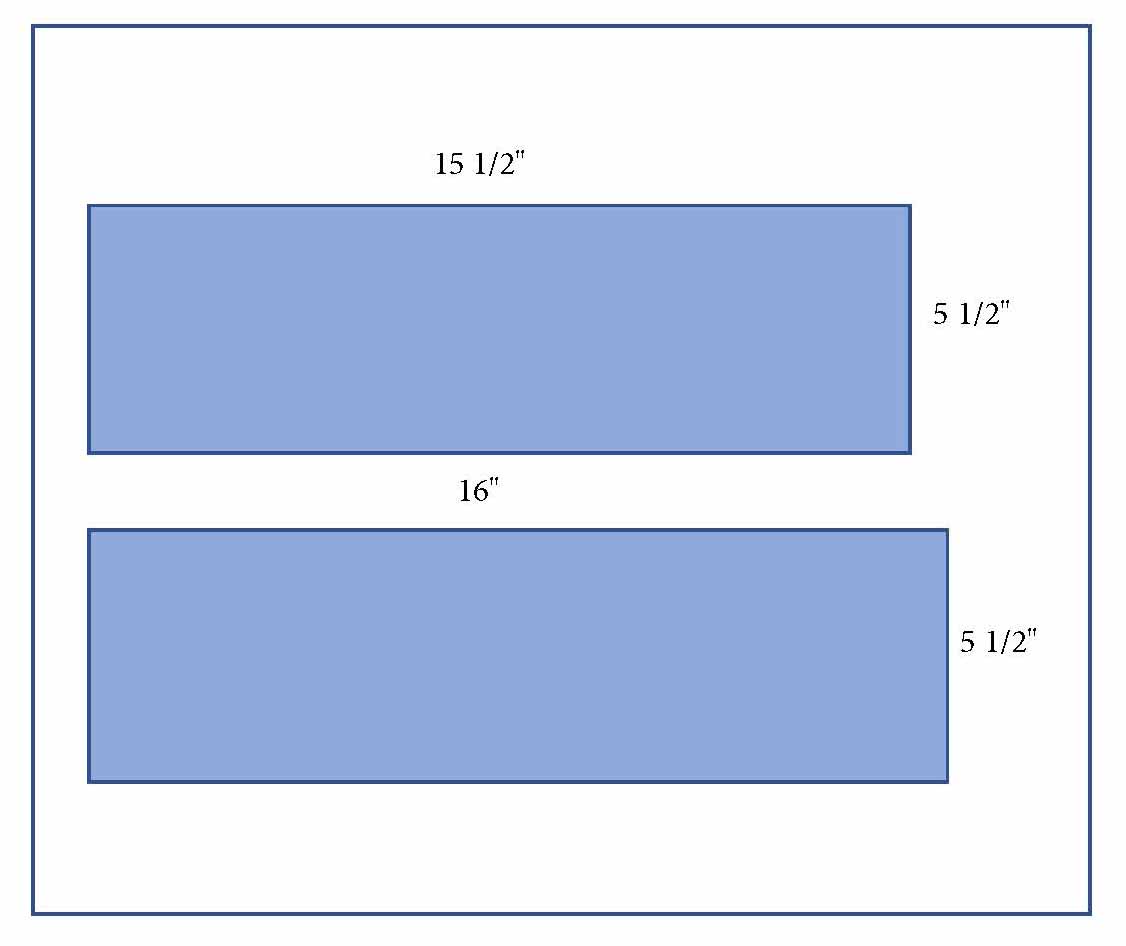
Cut 2 strips of canvas, one measuring 16″ x 5.5″ and the other 15.5” x 5.5”.
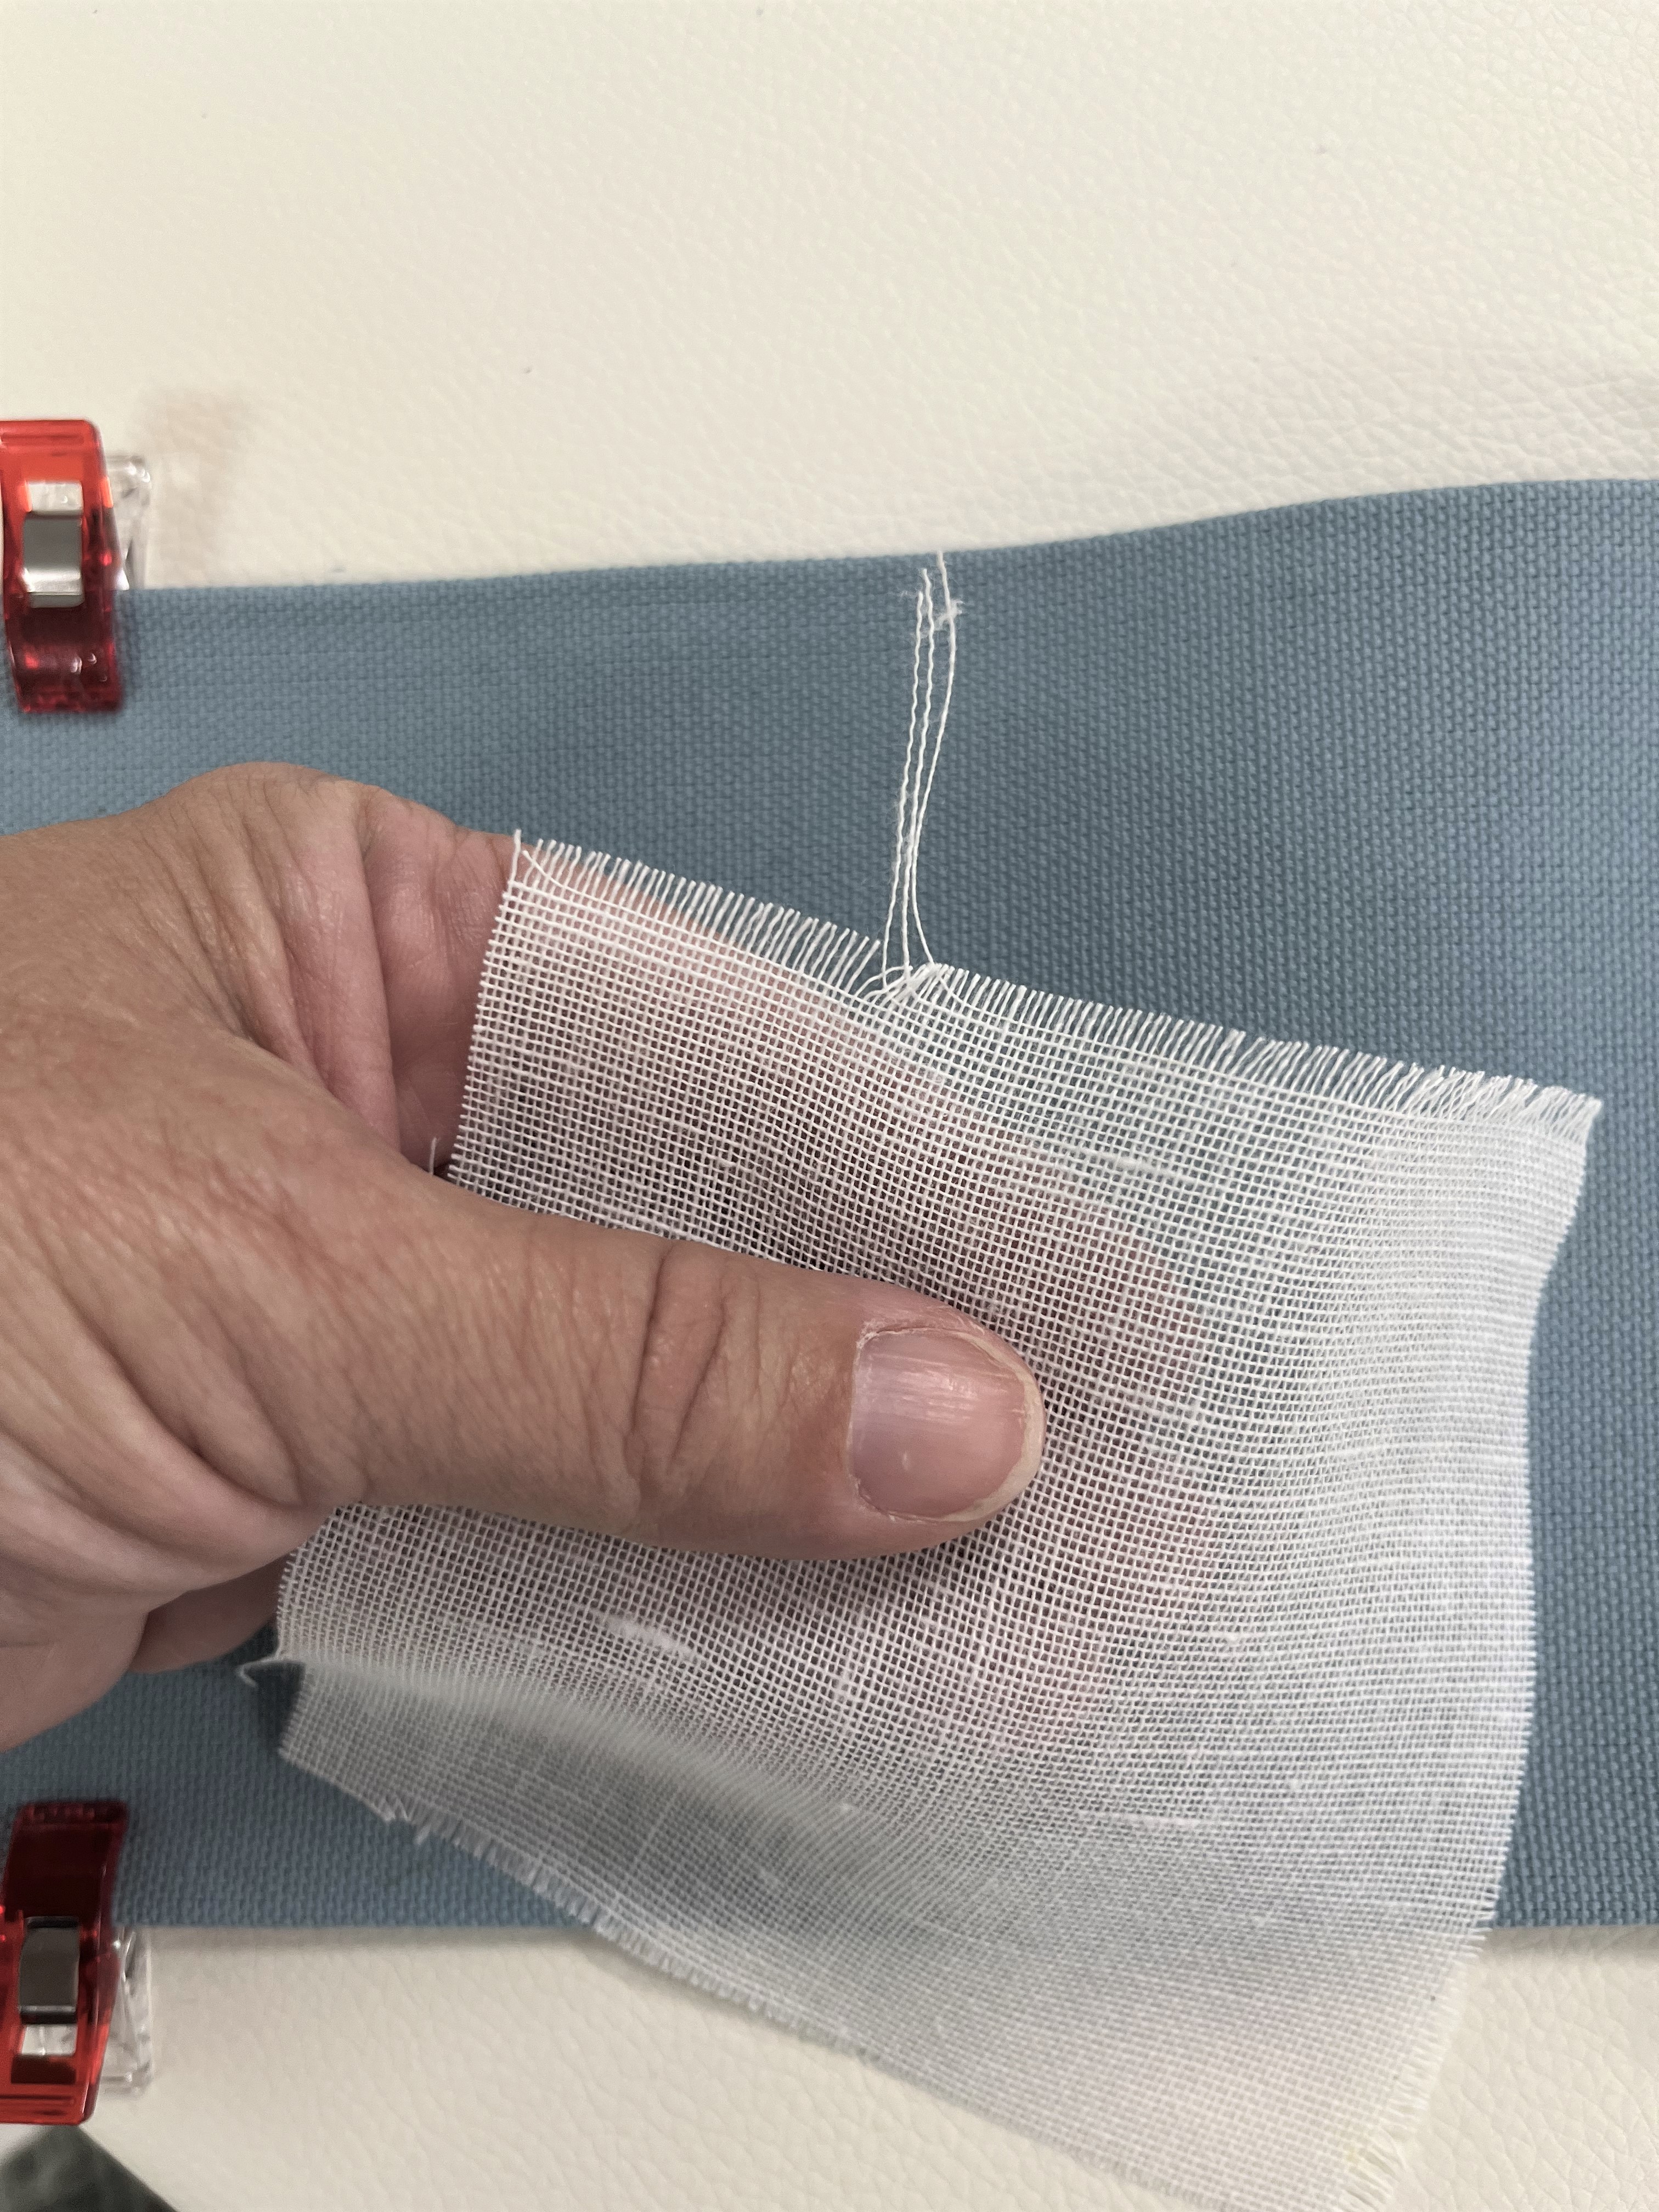
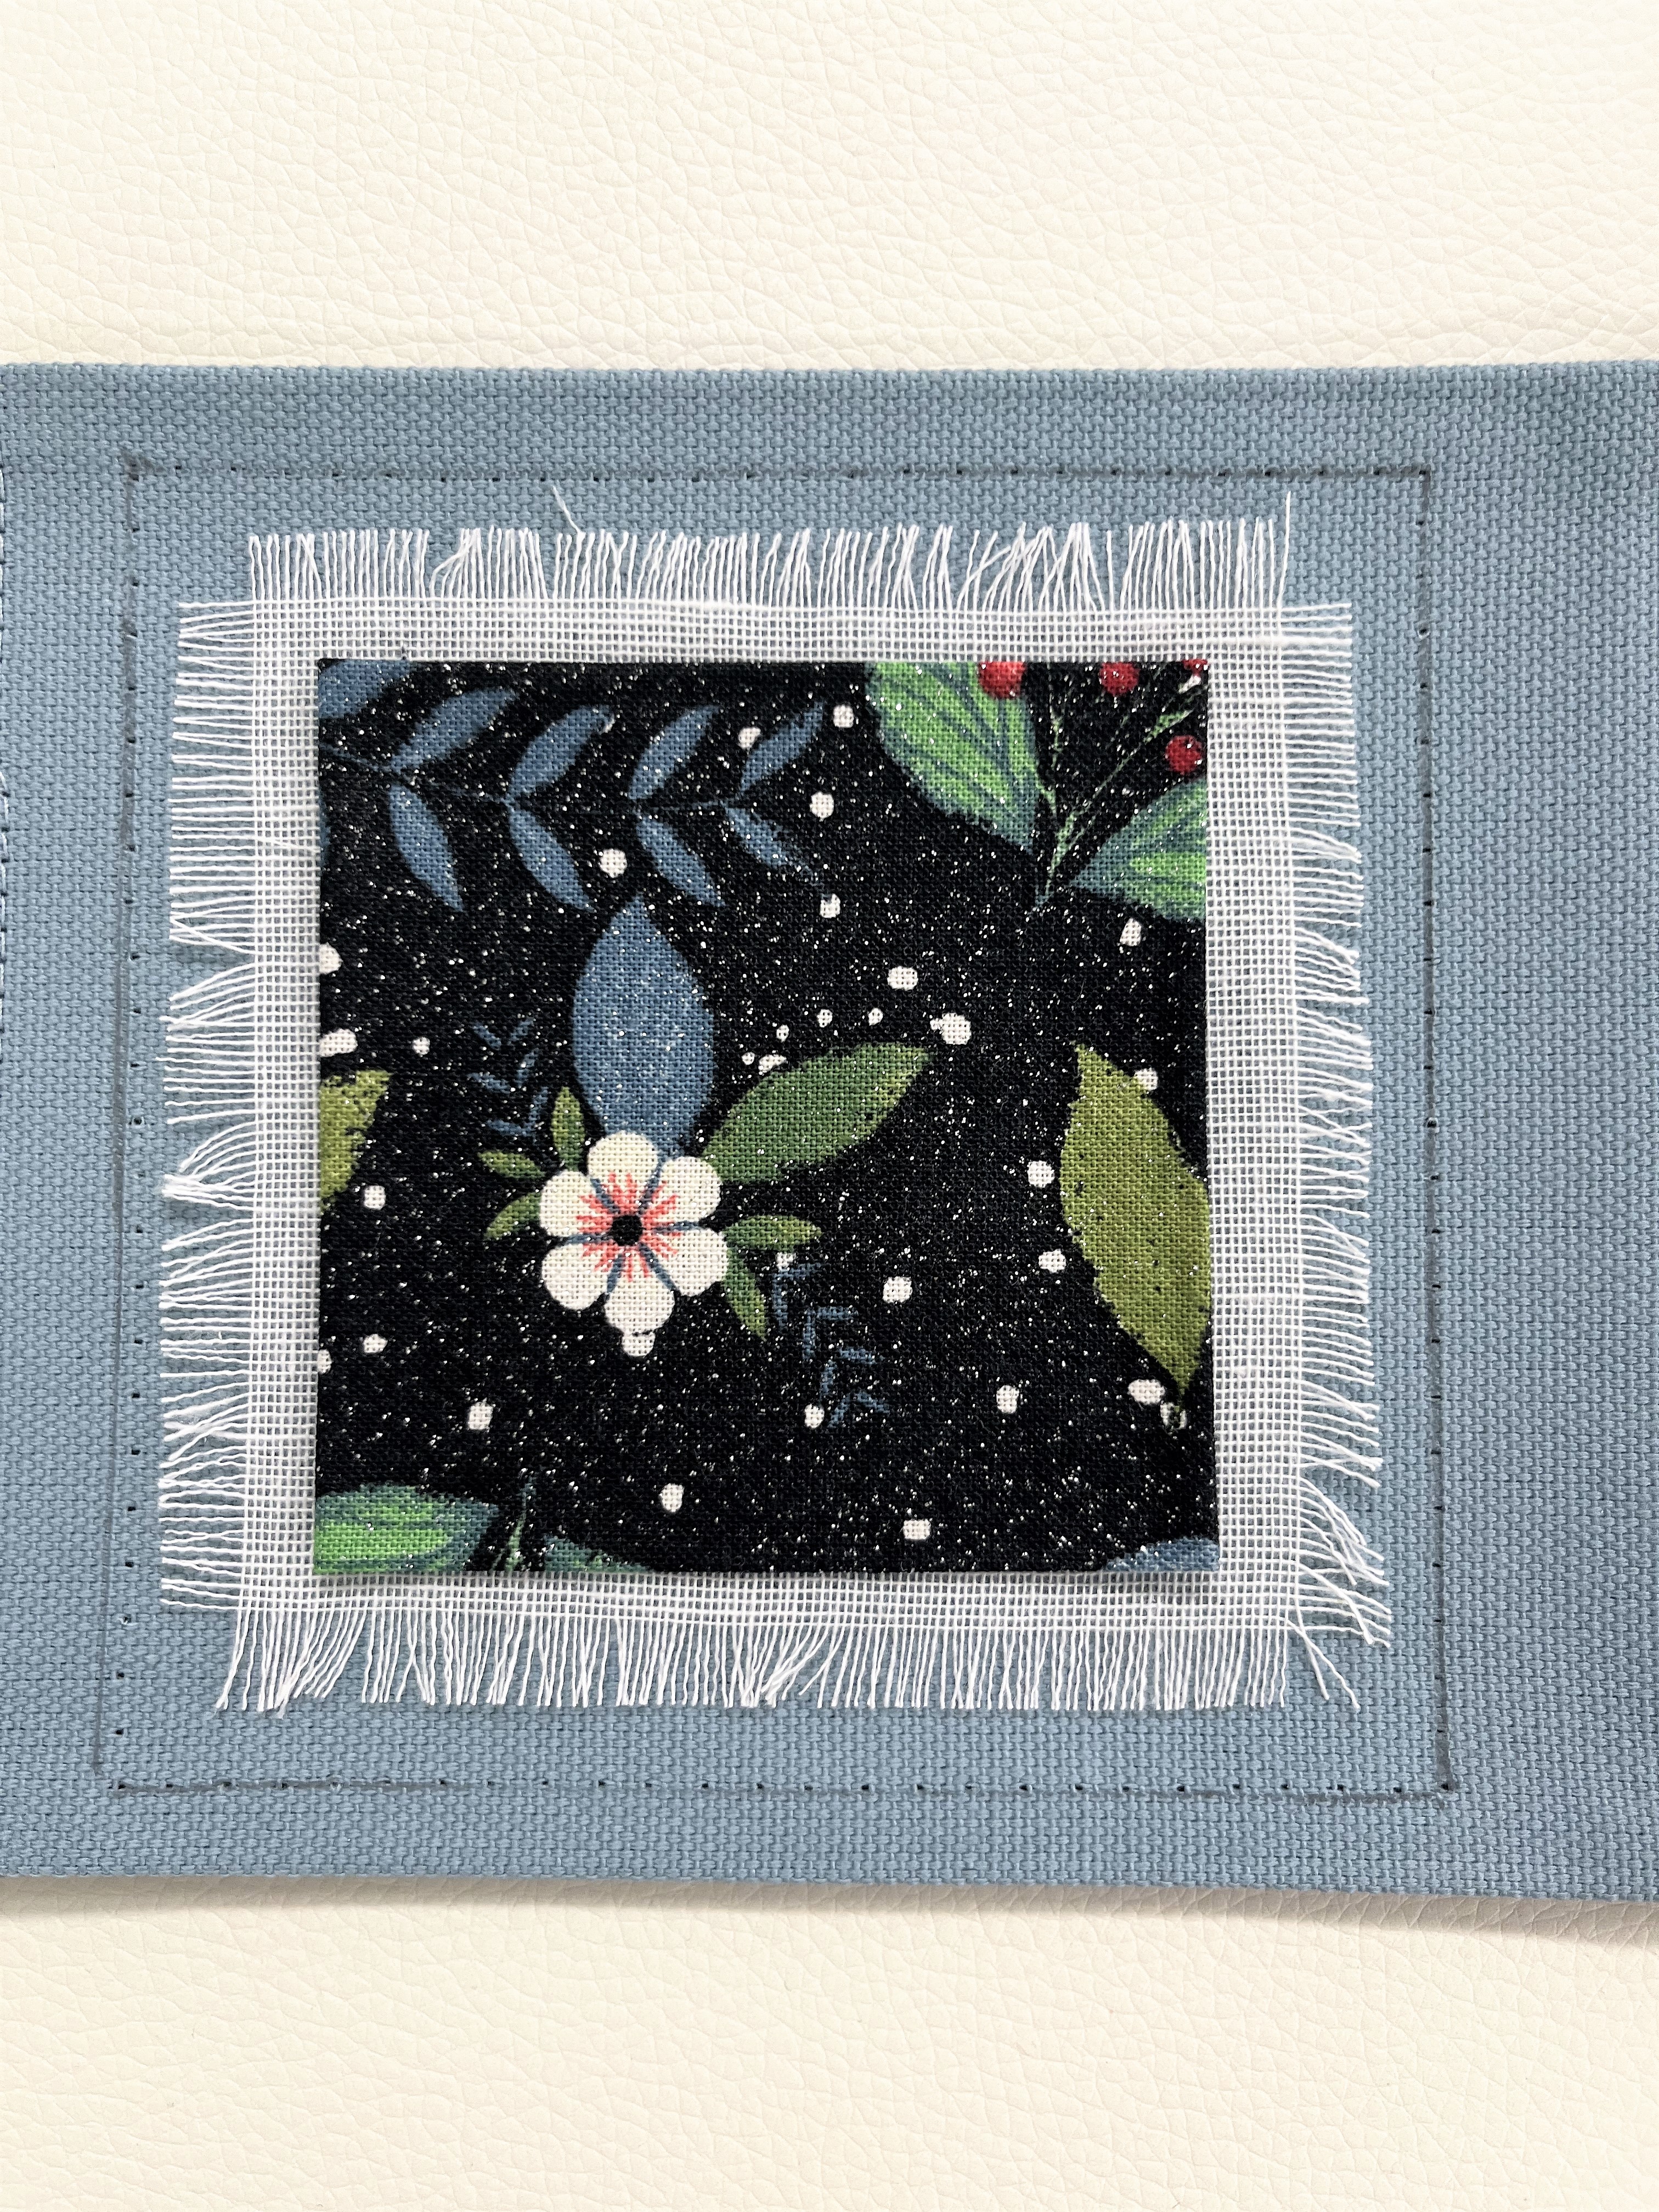
Cut 1 piece of 3.75” x 3.75” sheer linen fabric, straight and on grain for embellishment
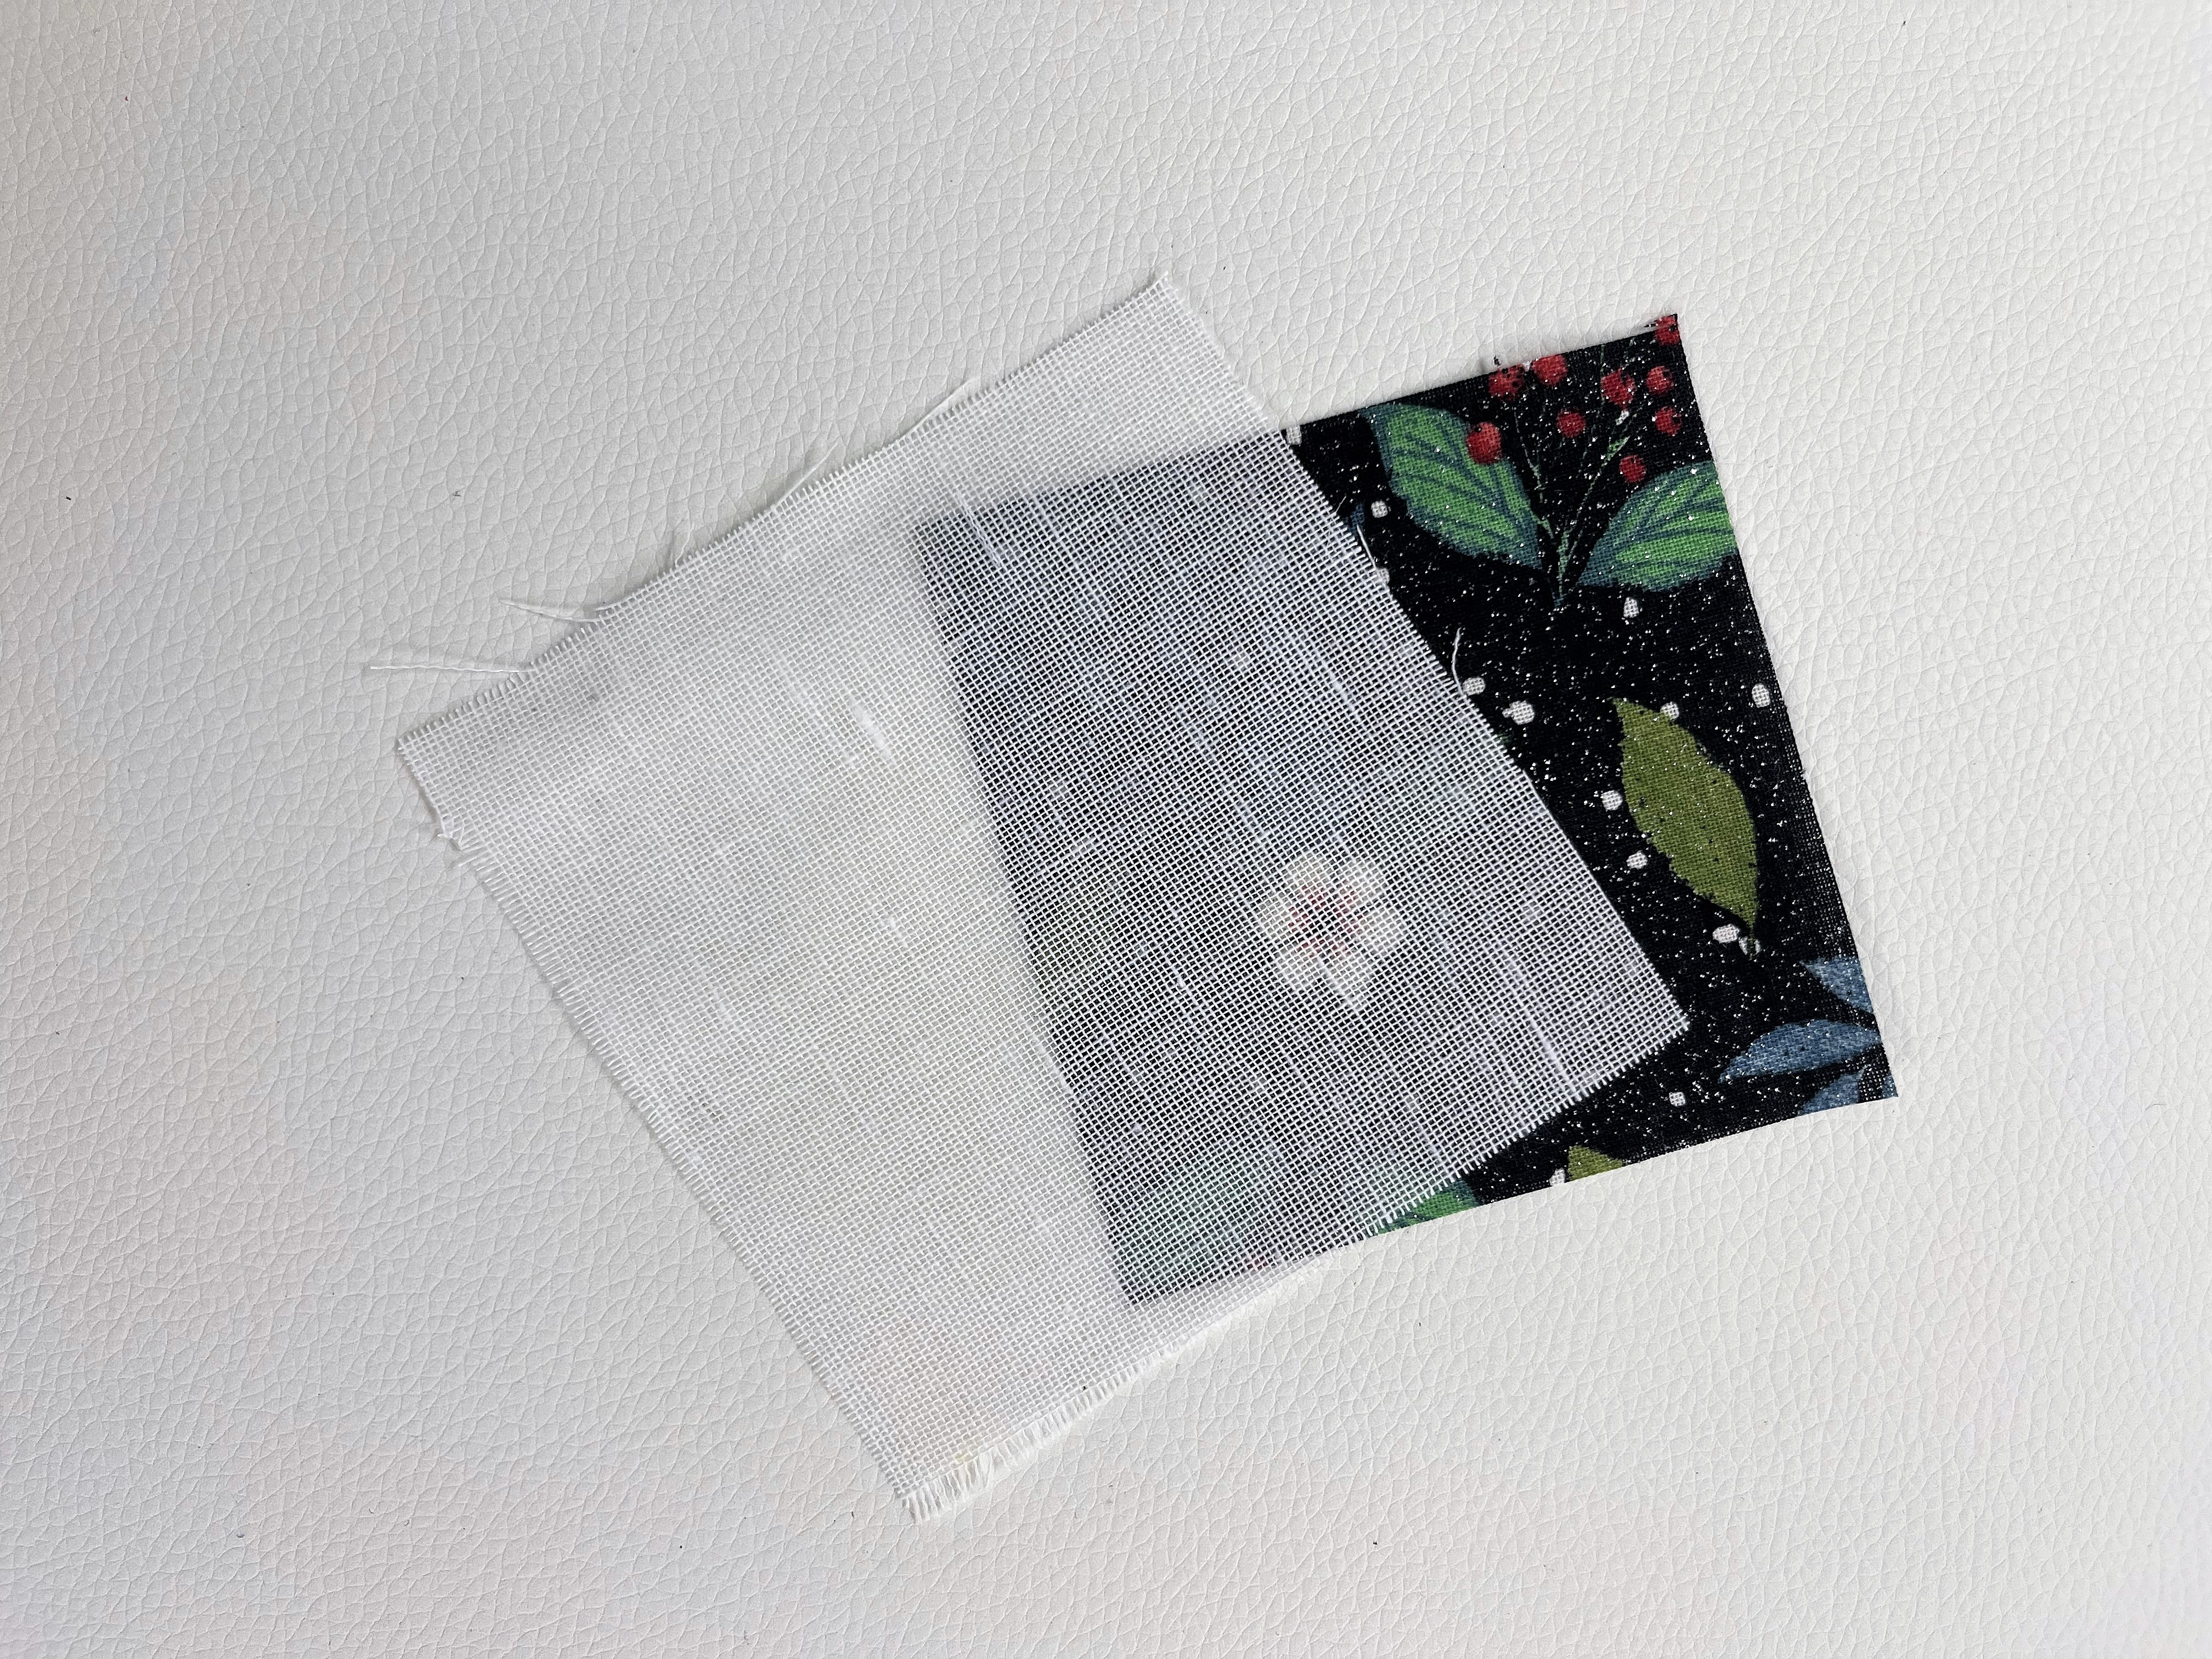
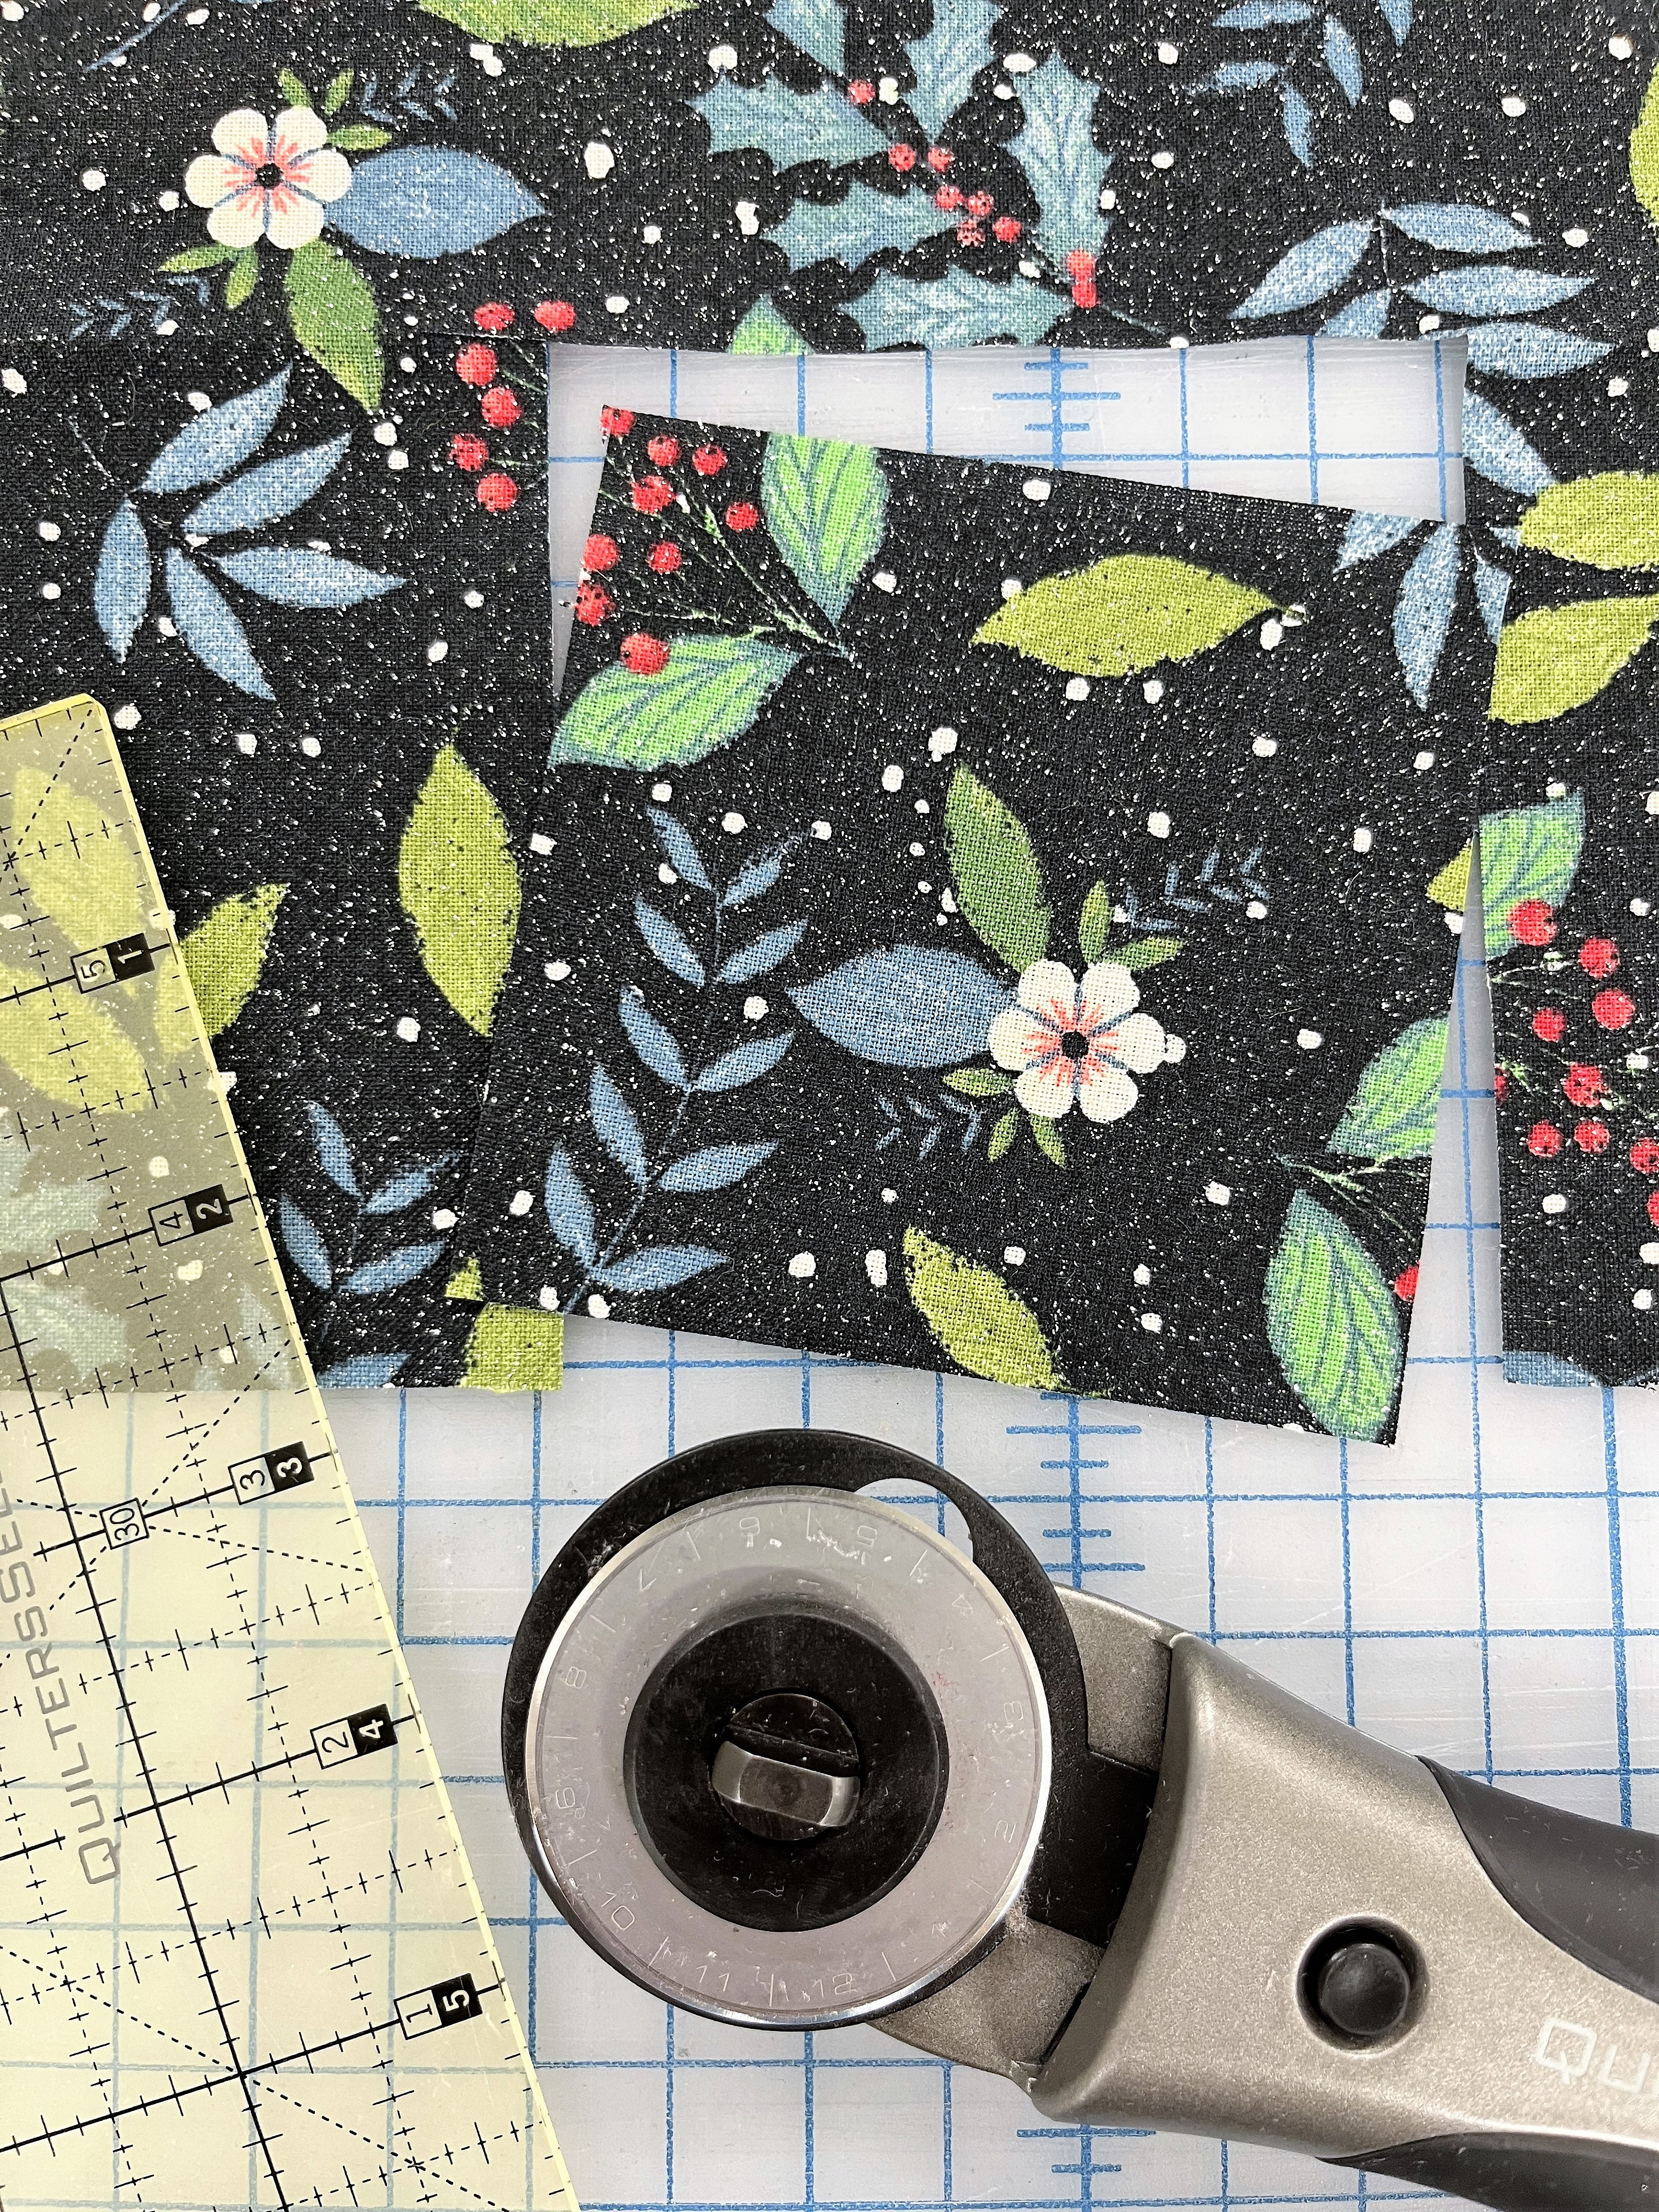
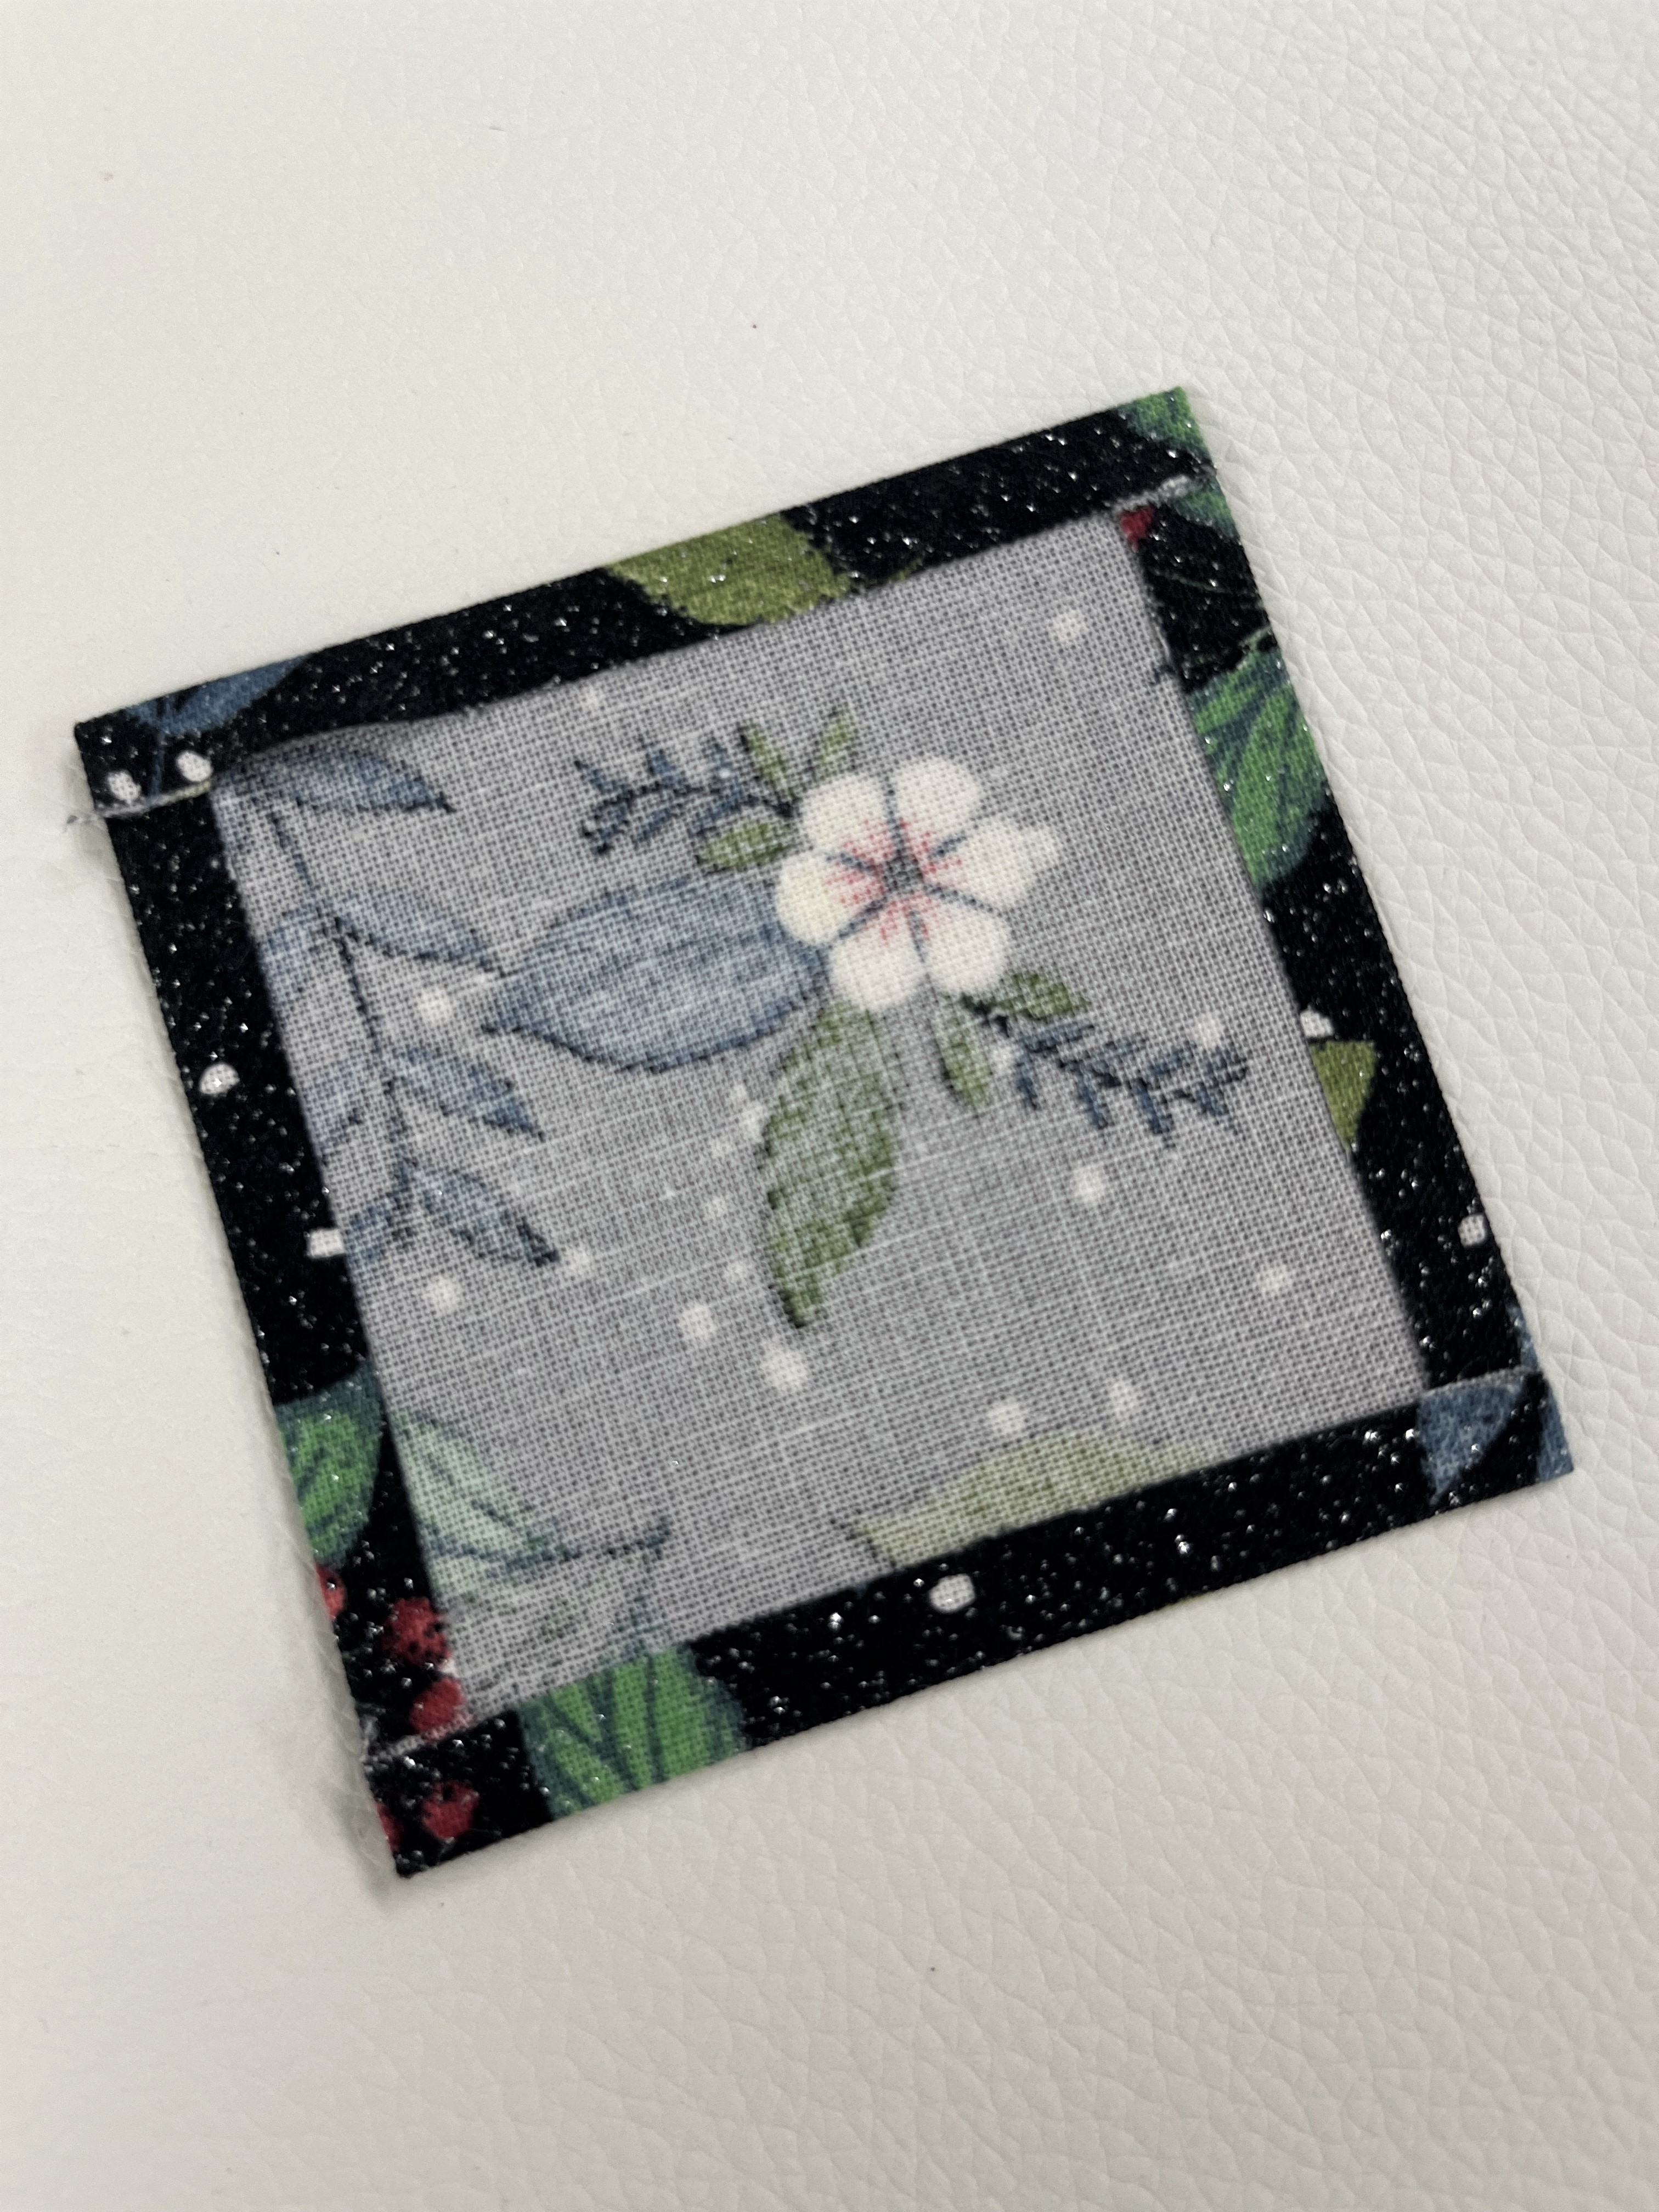
Cut 1 piece of 3.5” x 3.5” cotton fabric novelty print for embellishment
A good tip here! Use the transparency of your quilt ruler to fussy cut the perfect section of novelty fabric to use for your project.
Preparing the Canvas
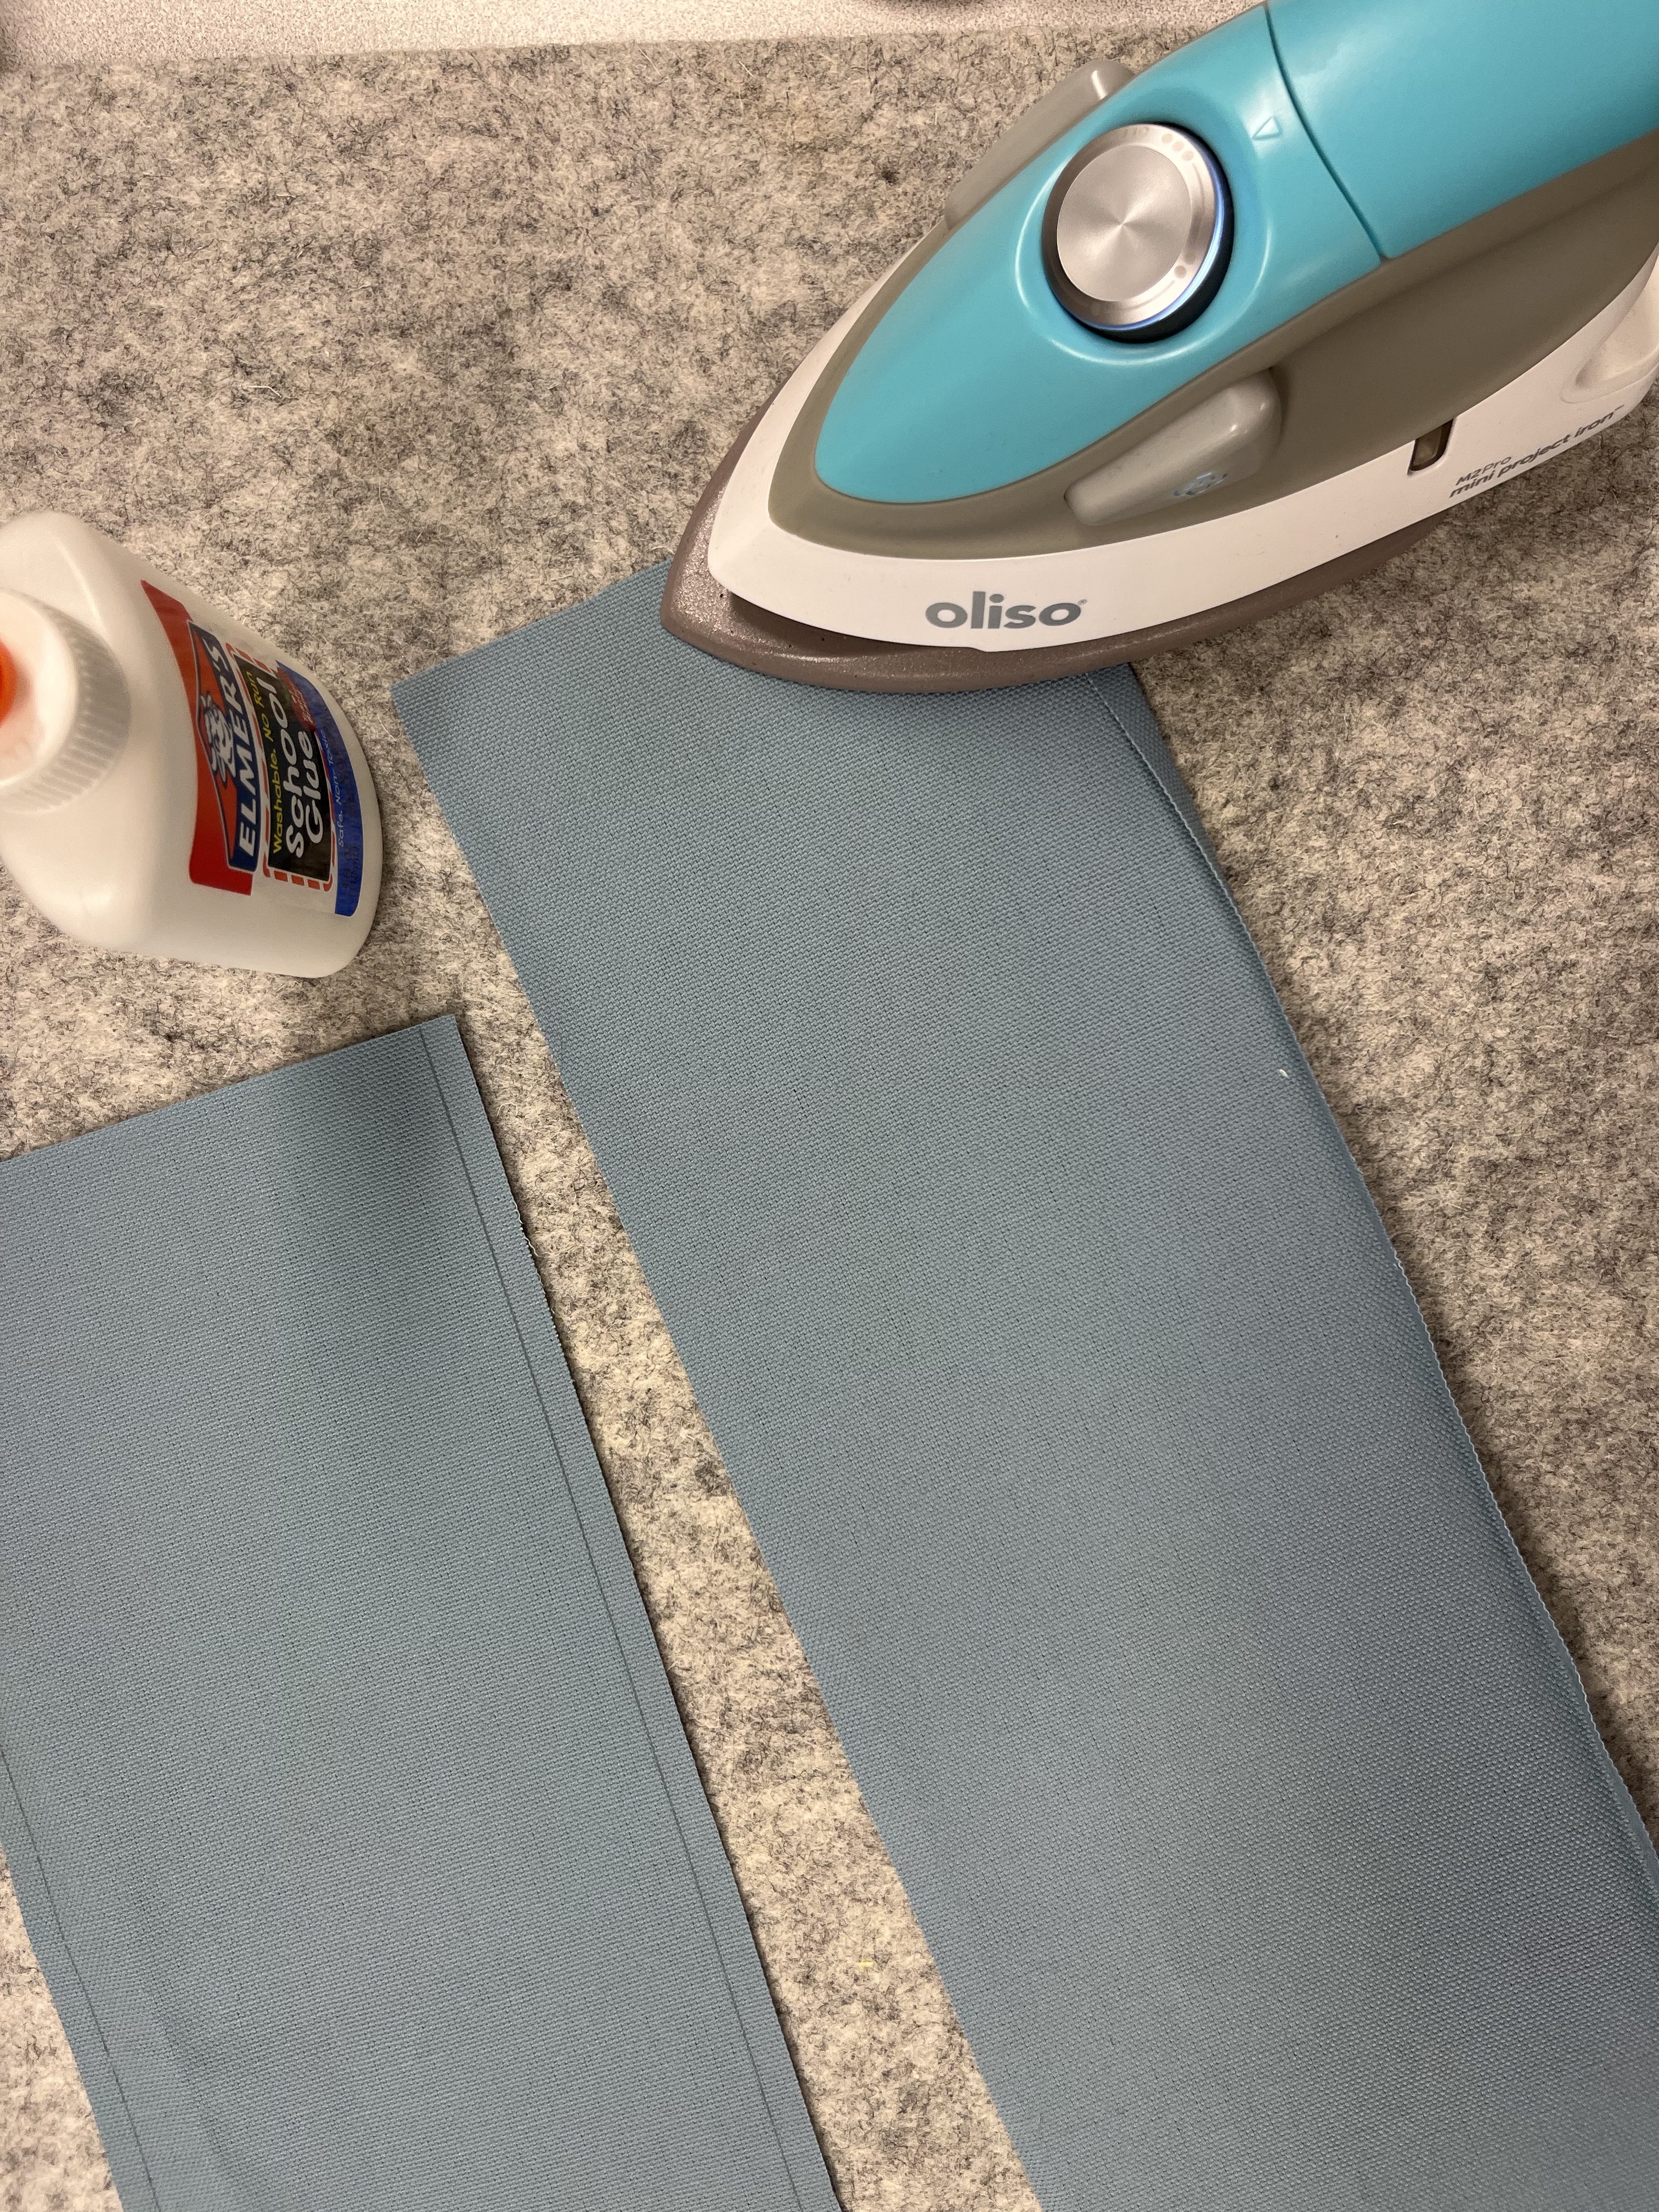
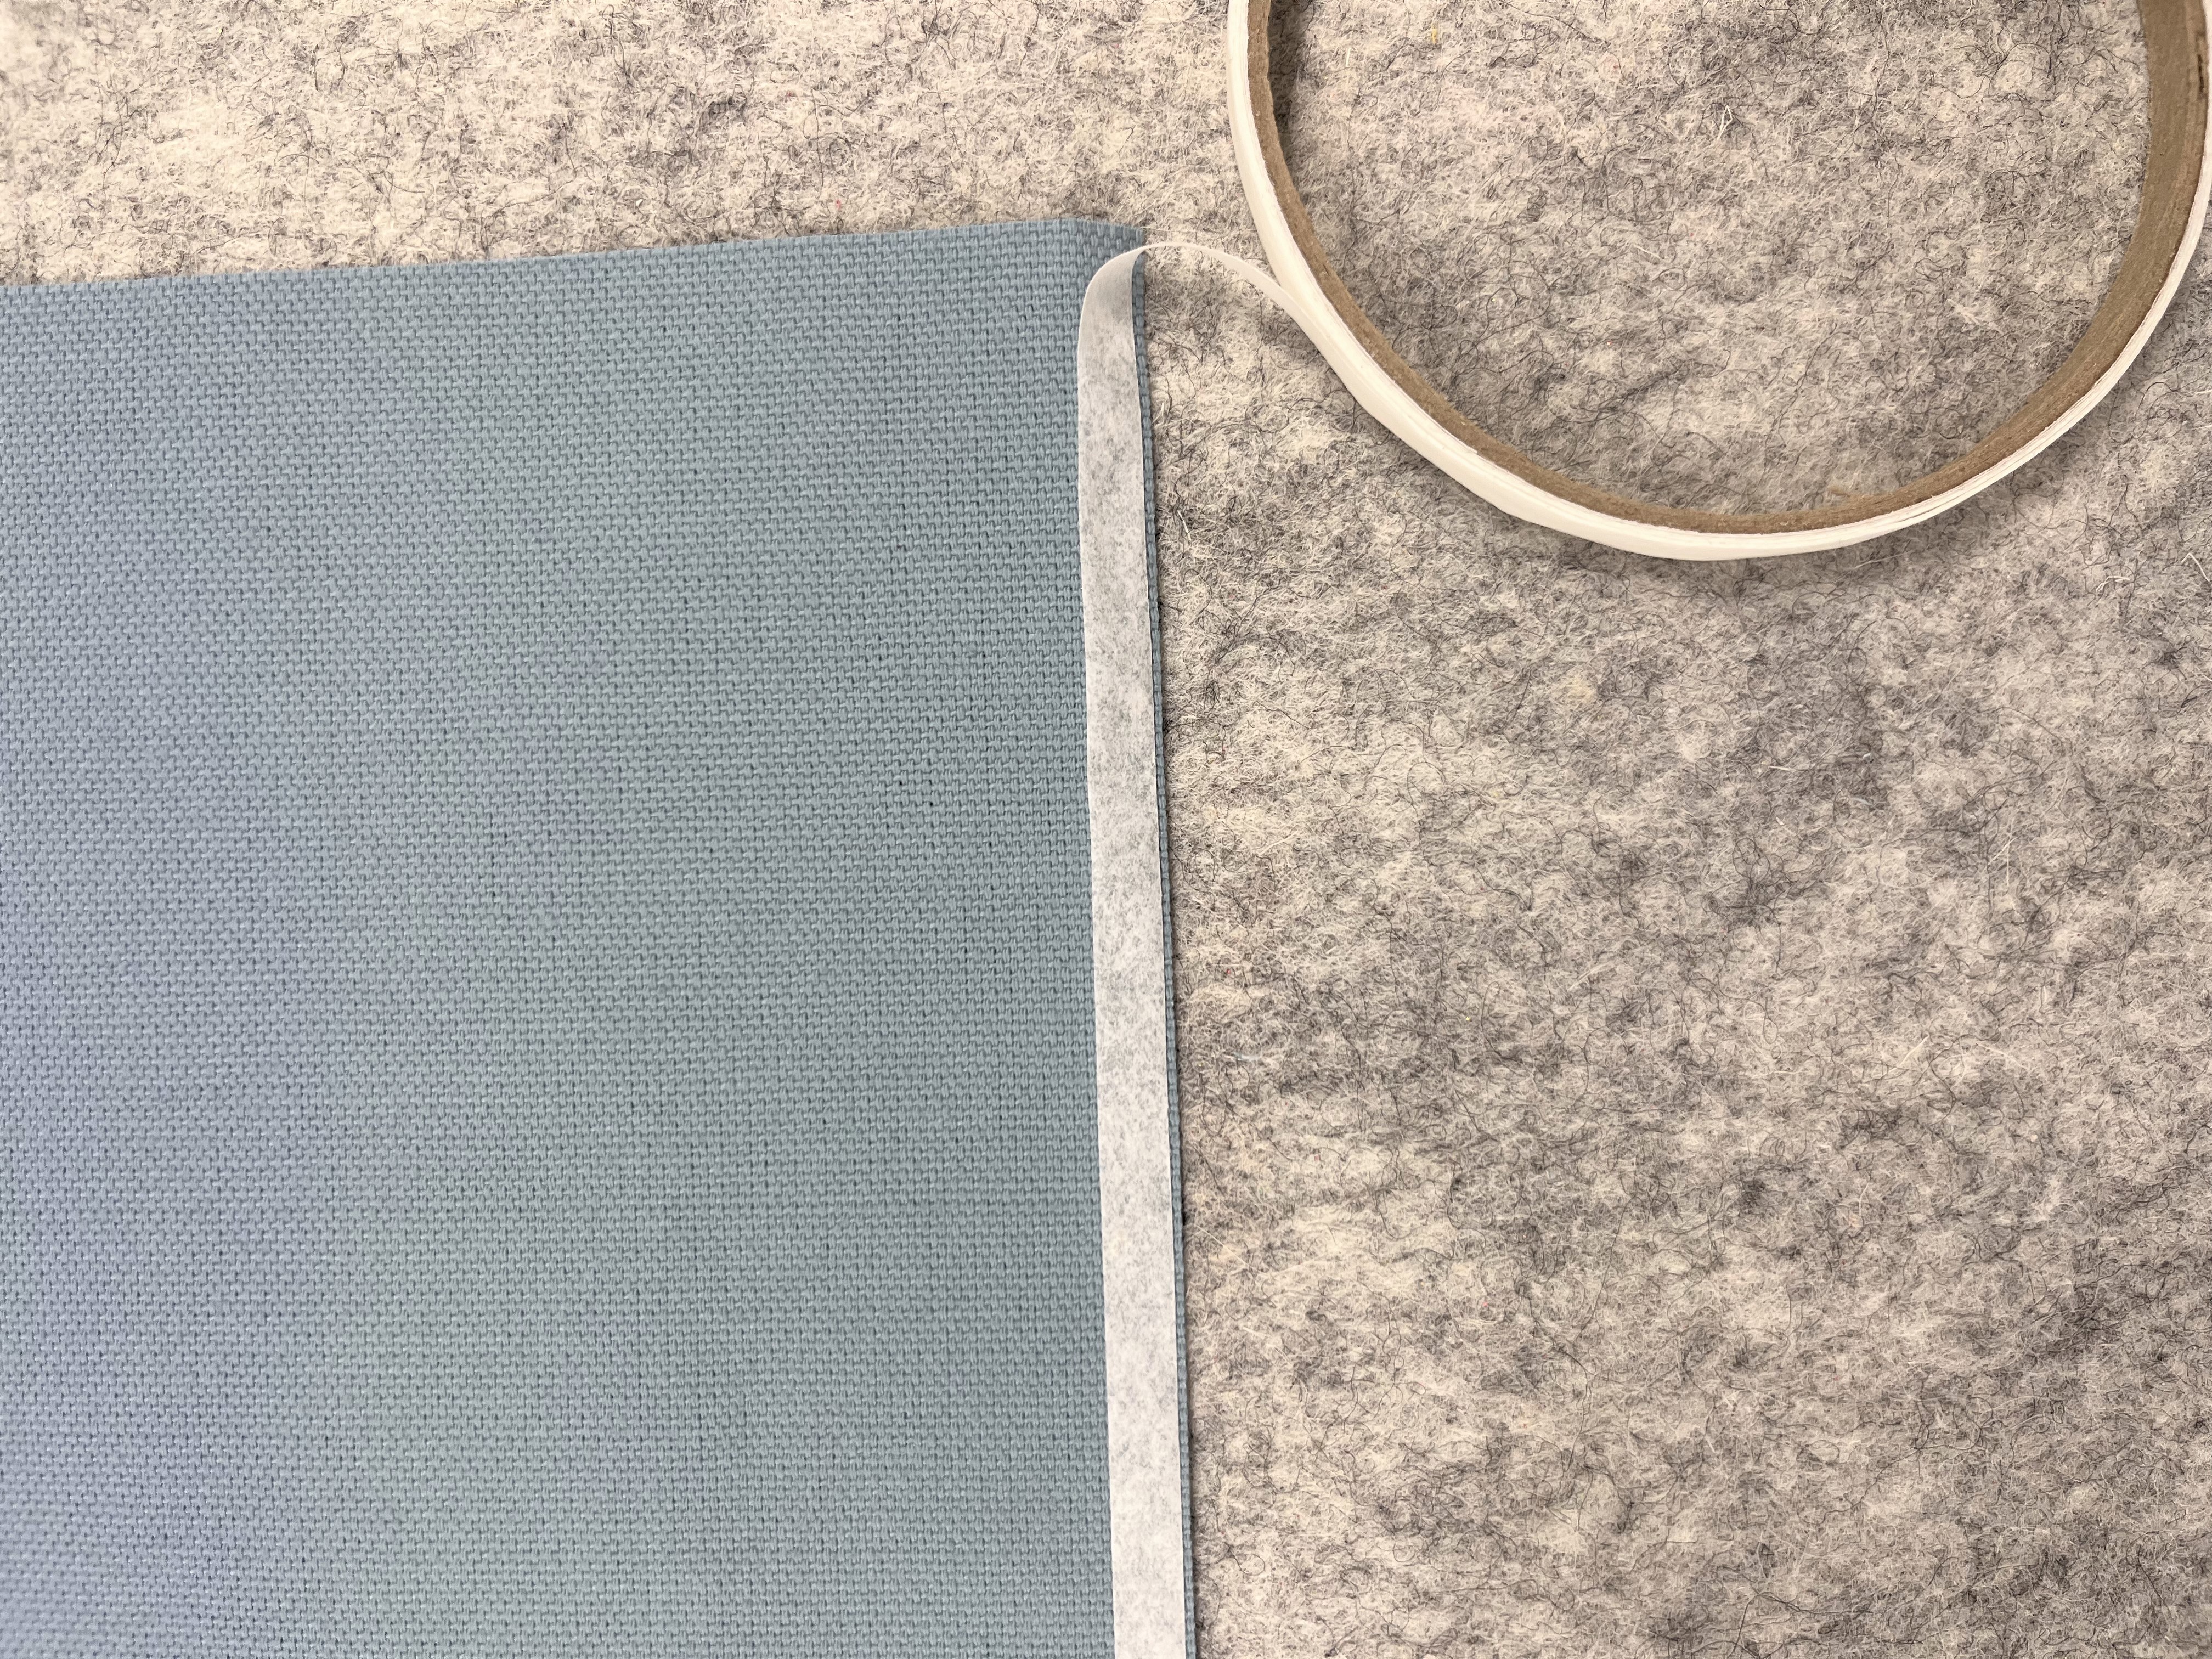
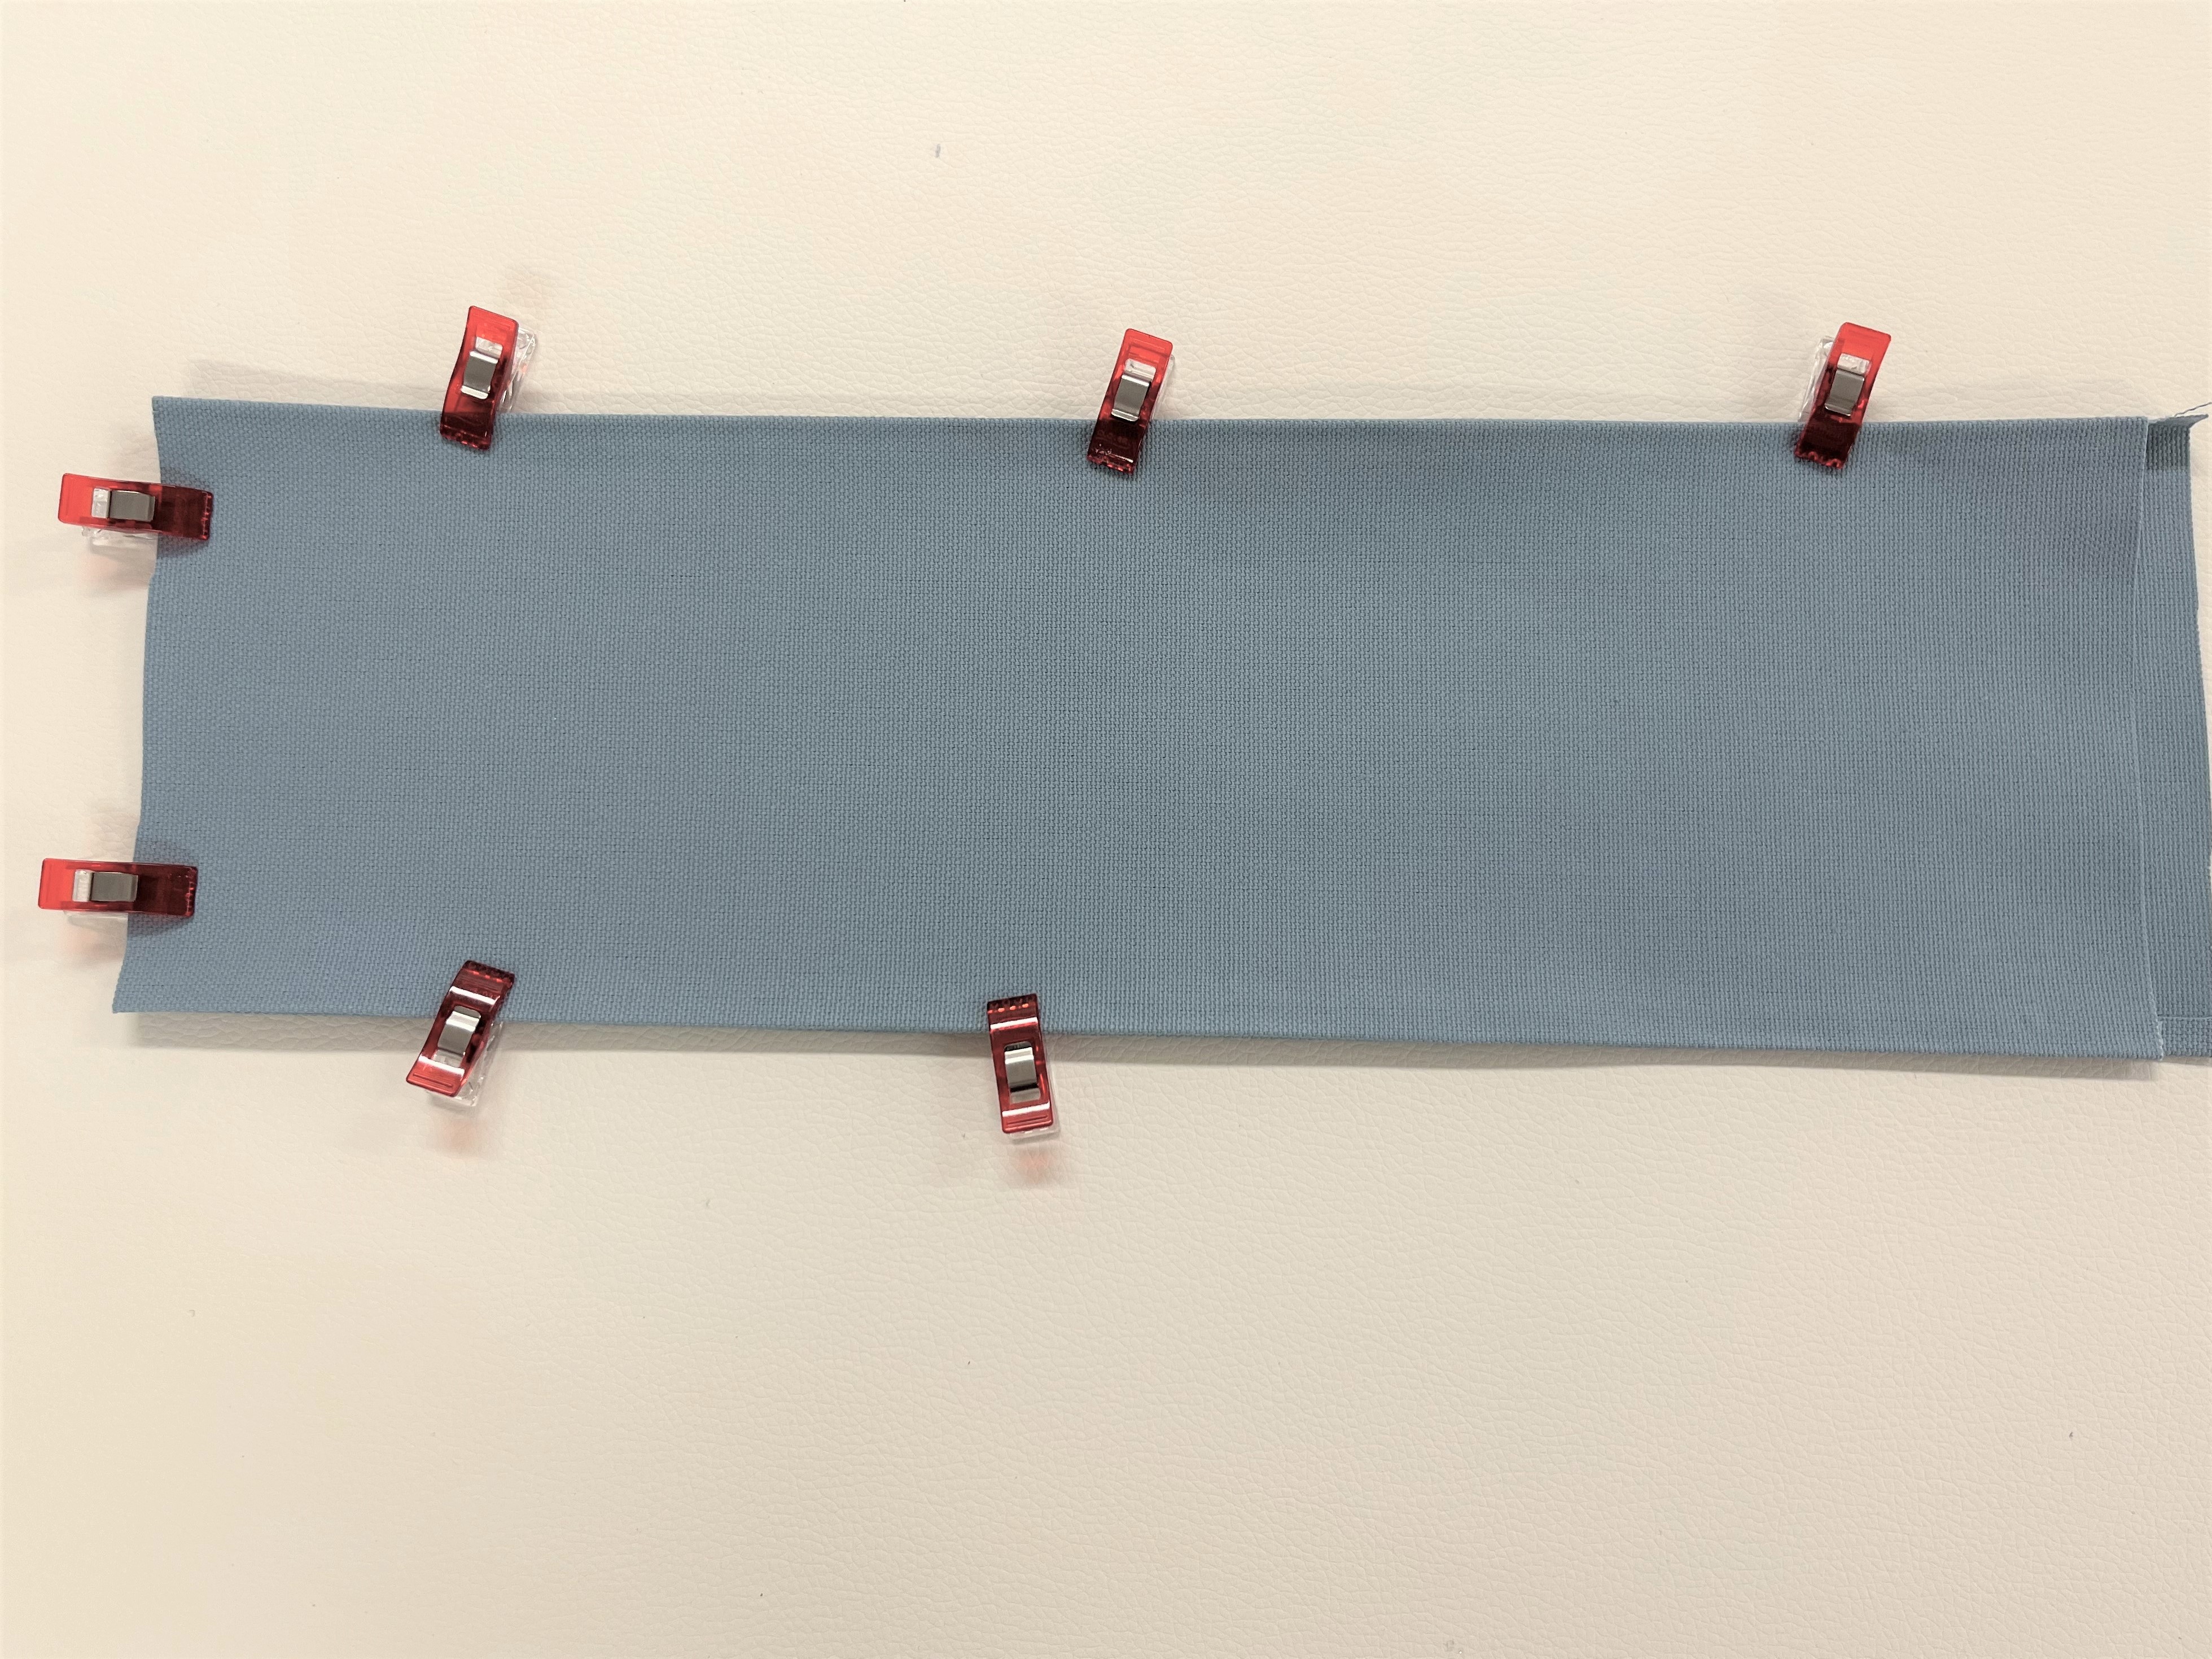
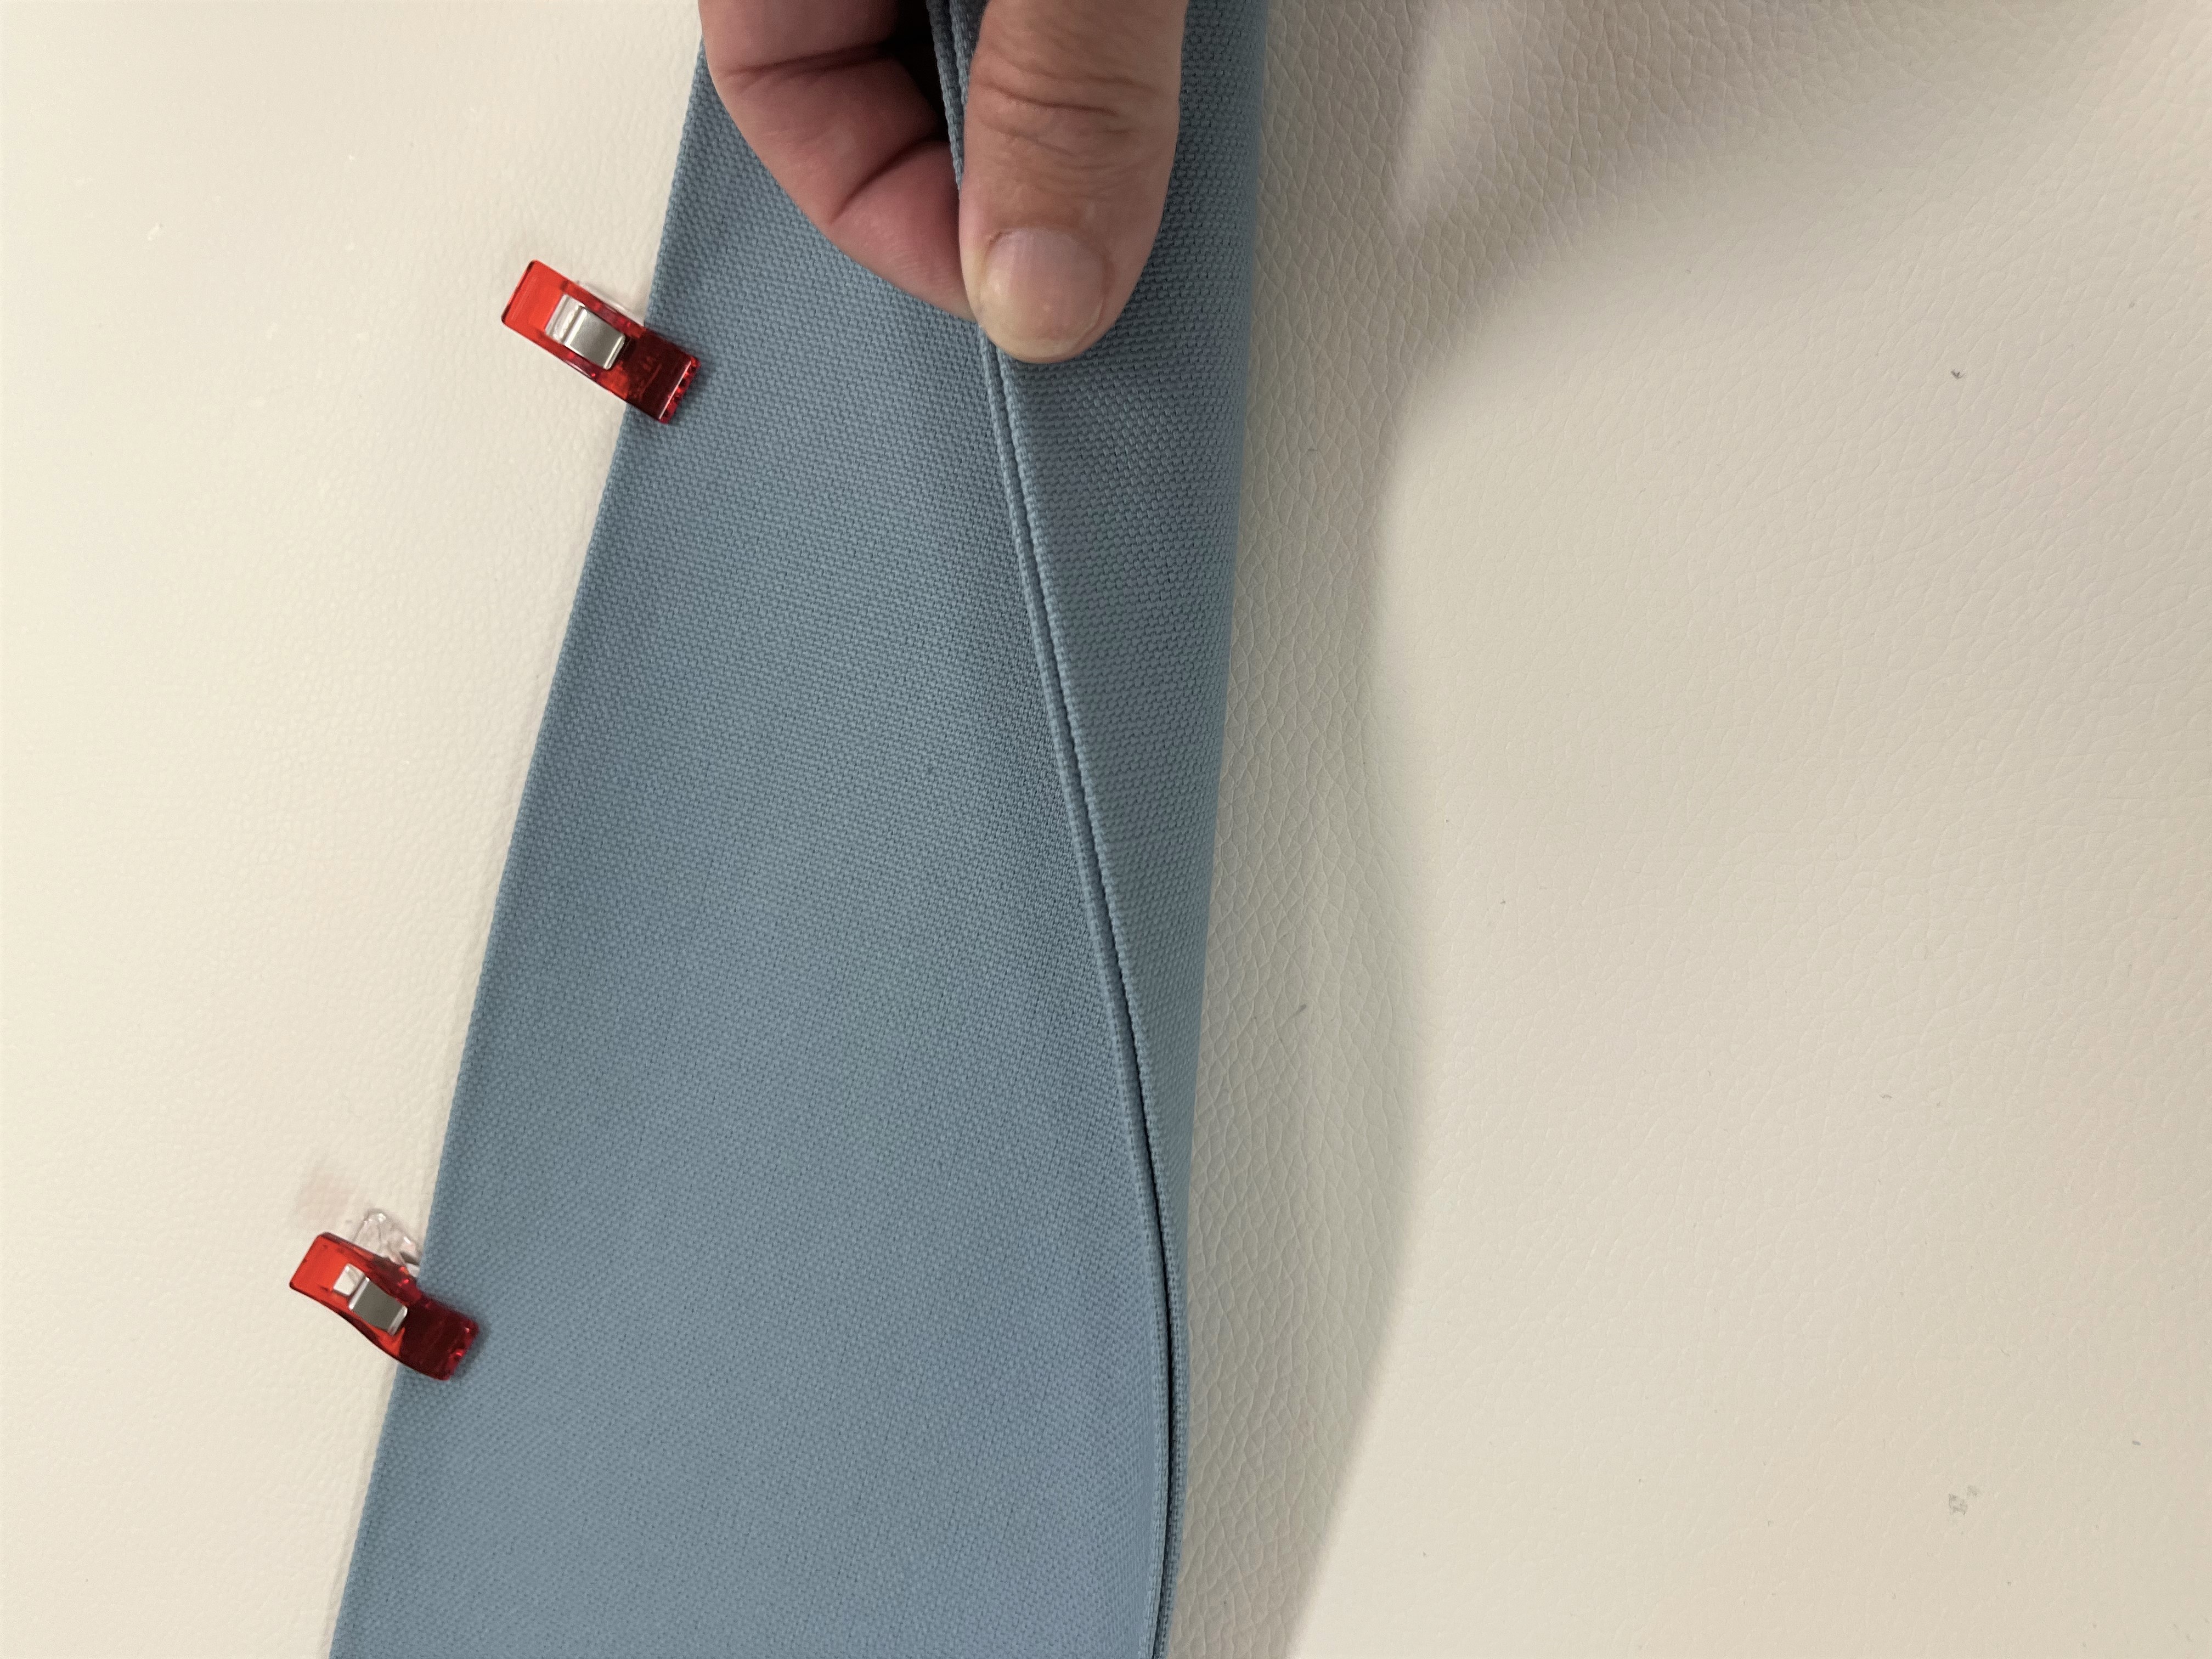
Using a fabric marking pen, mark a ¼” seam. Fold and press the lengthwise edges in ¼” for both pieces. Use mini clips instead of pins to hold the seams. You can also use small dabs of Elmer’s washableglue to set the seam or use some seam tape.
 Prepare one of the shorter ends in a similar fashion.
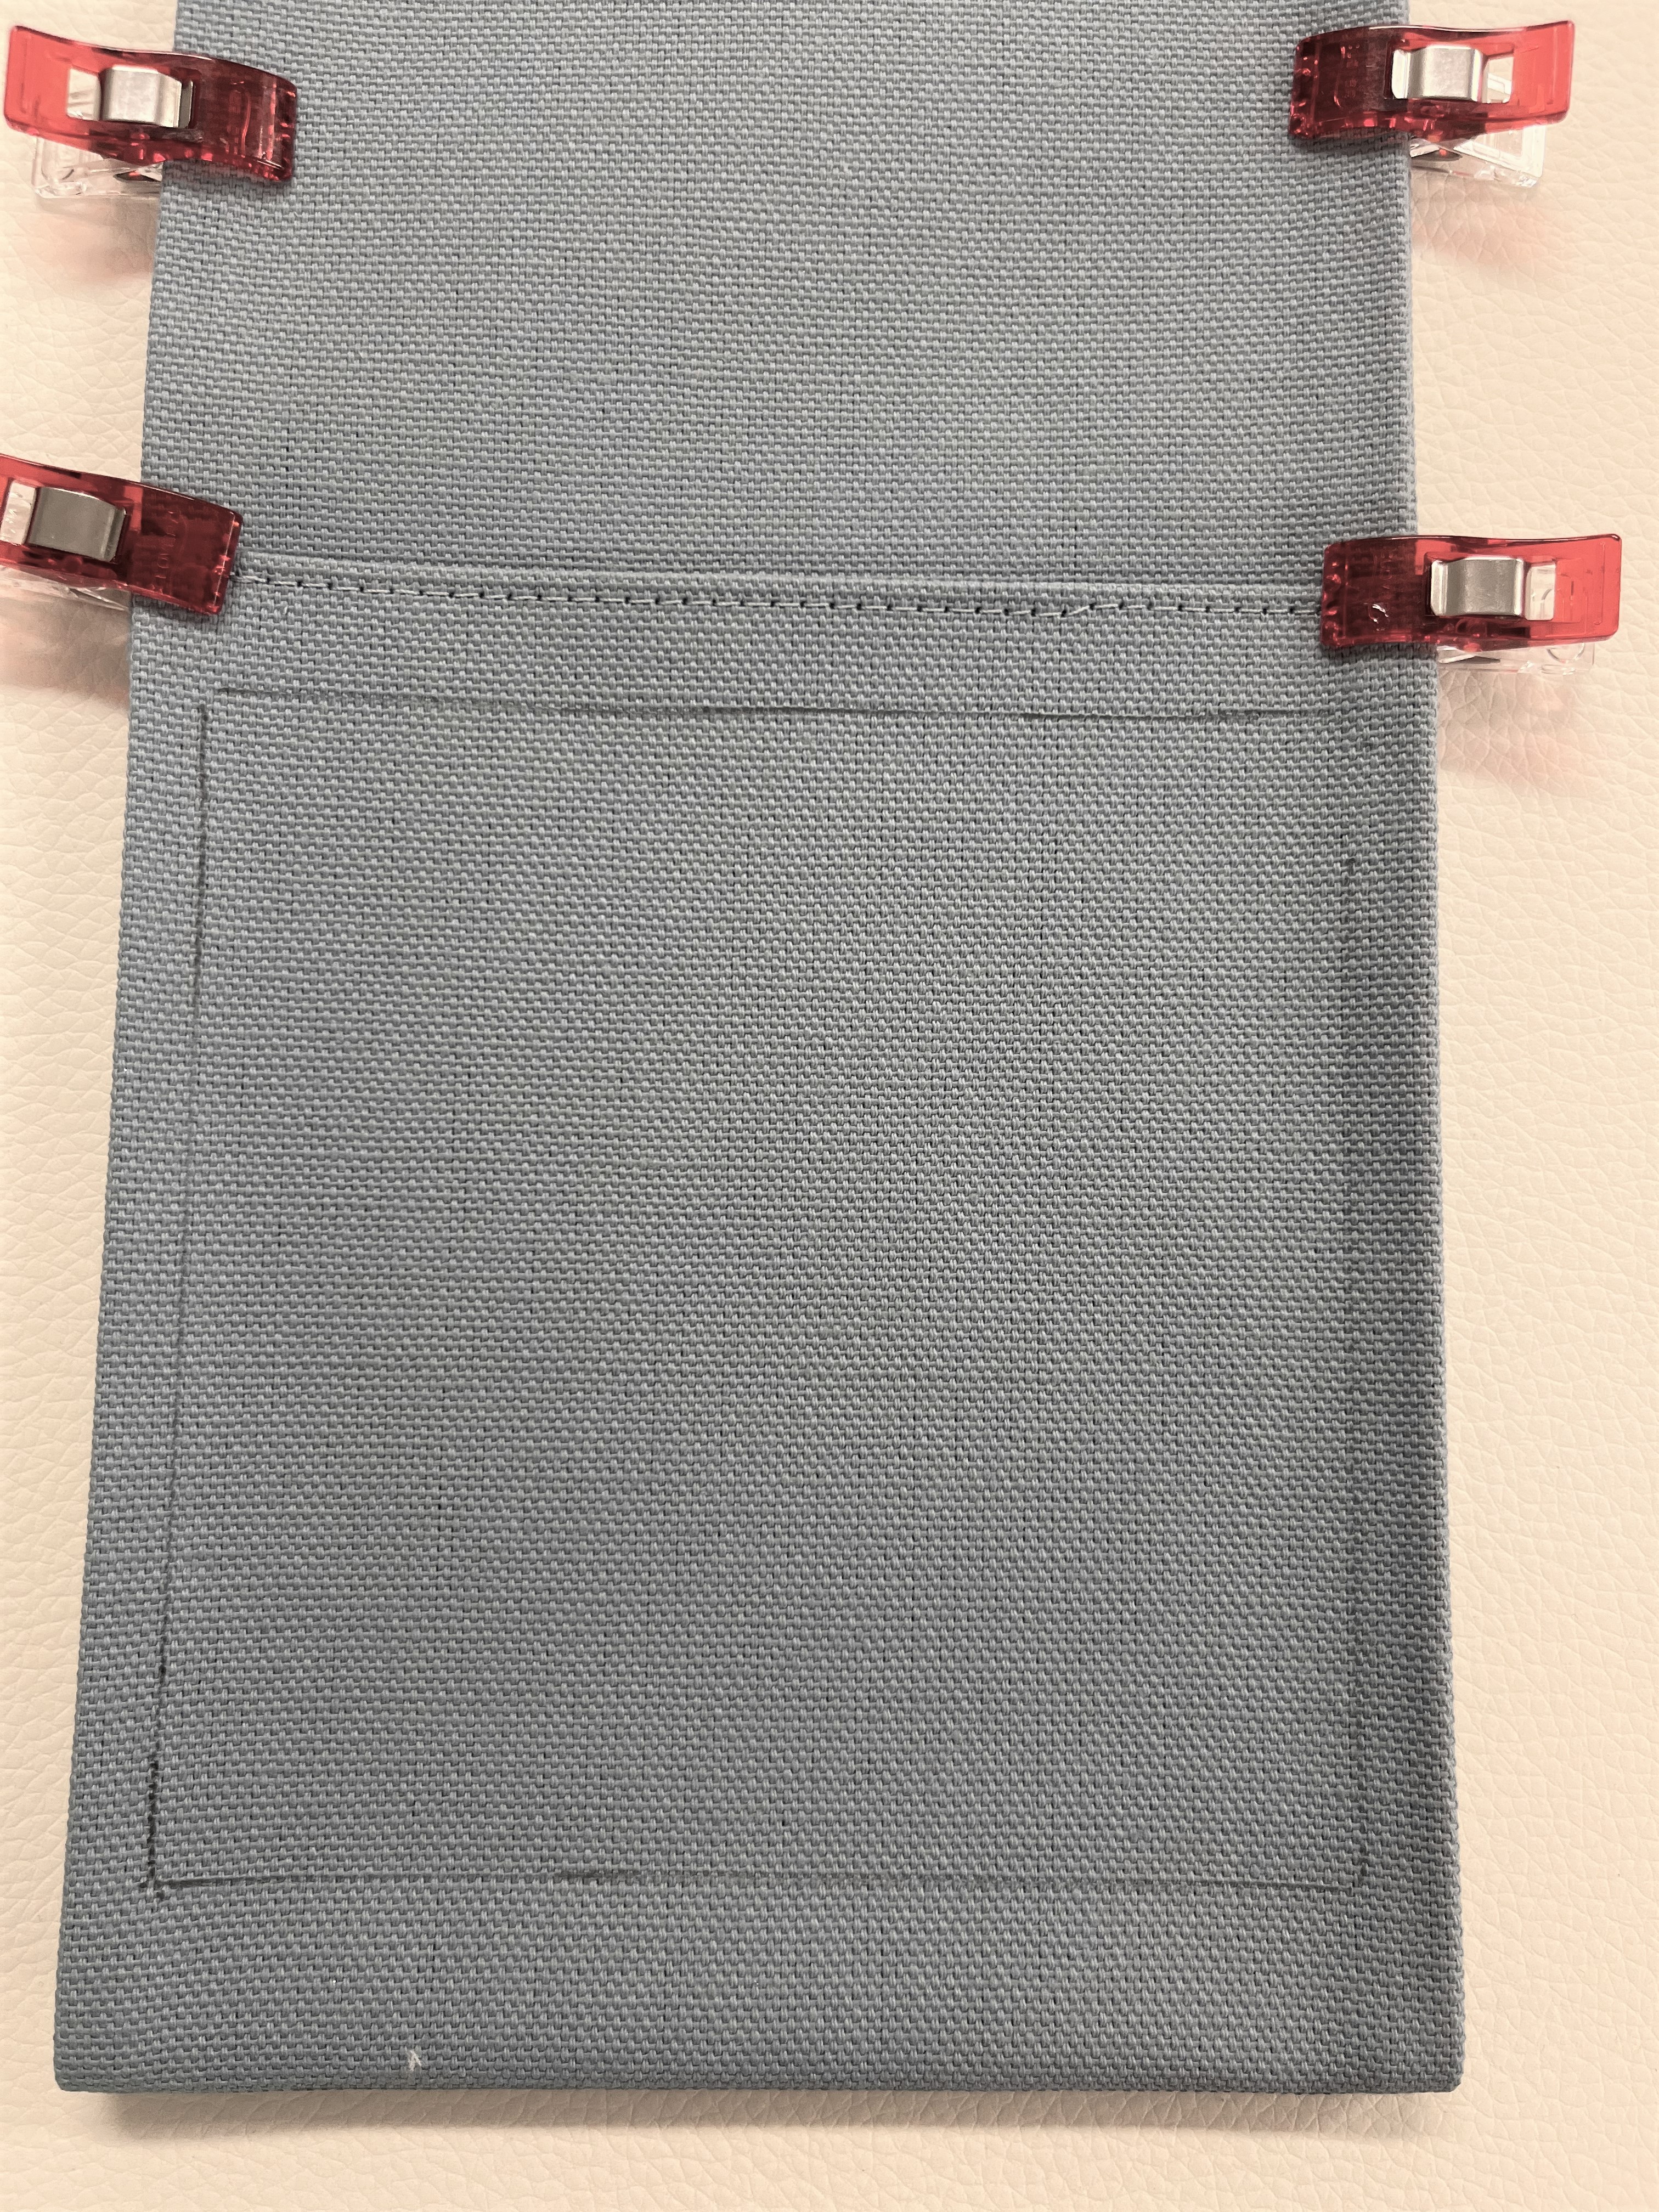
Take both canvas pieces, putting them wrong sides together and align the edges carefully and use mini clips to secure 3 finished edges.
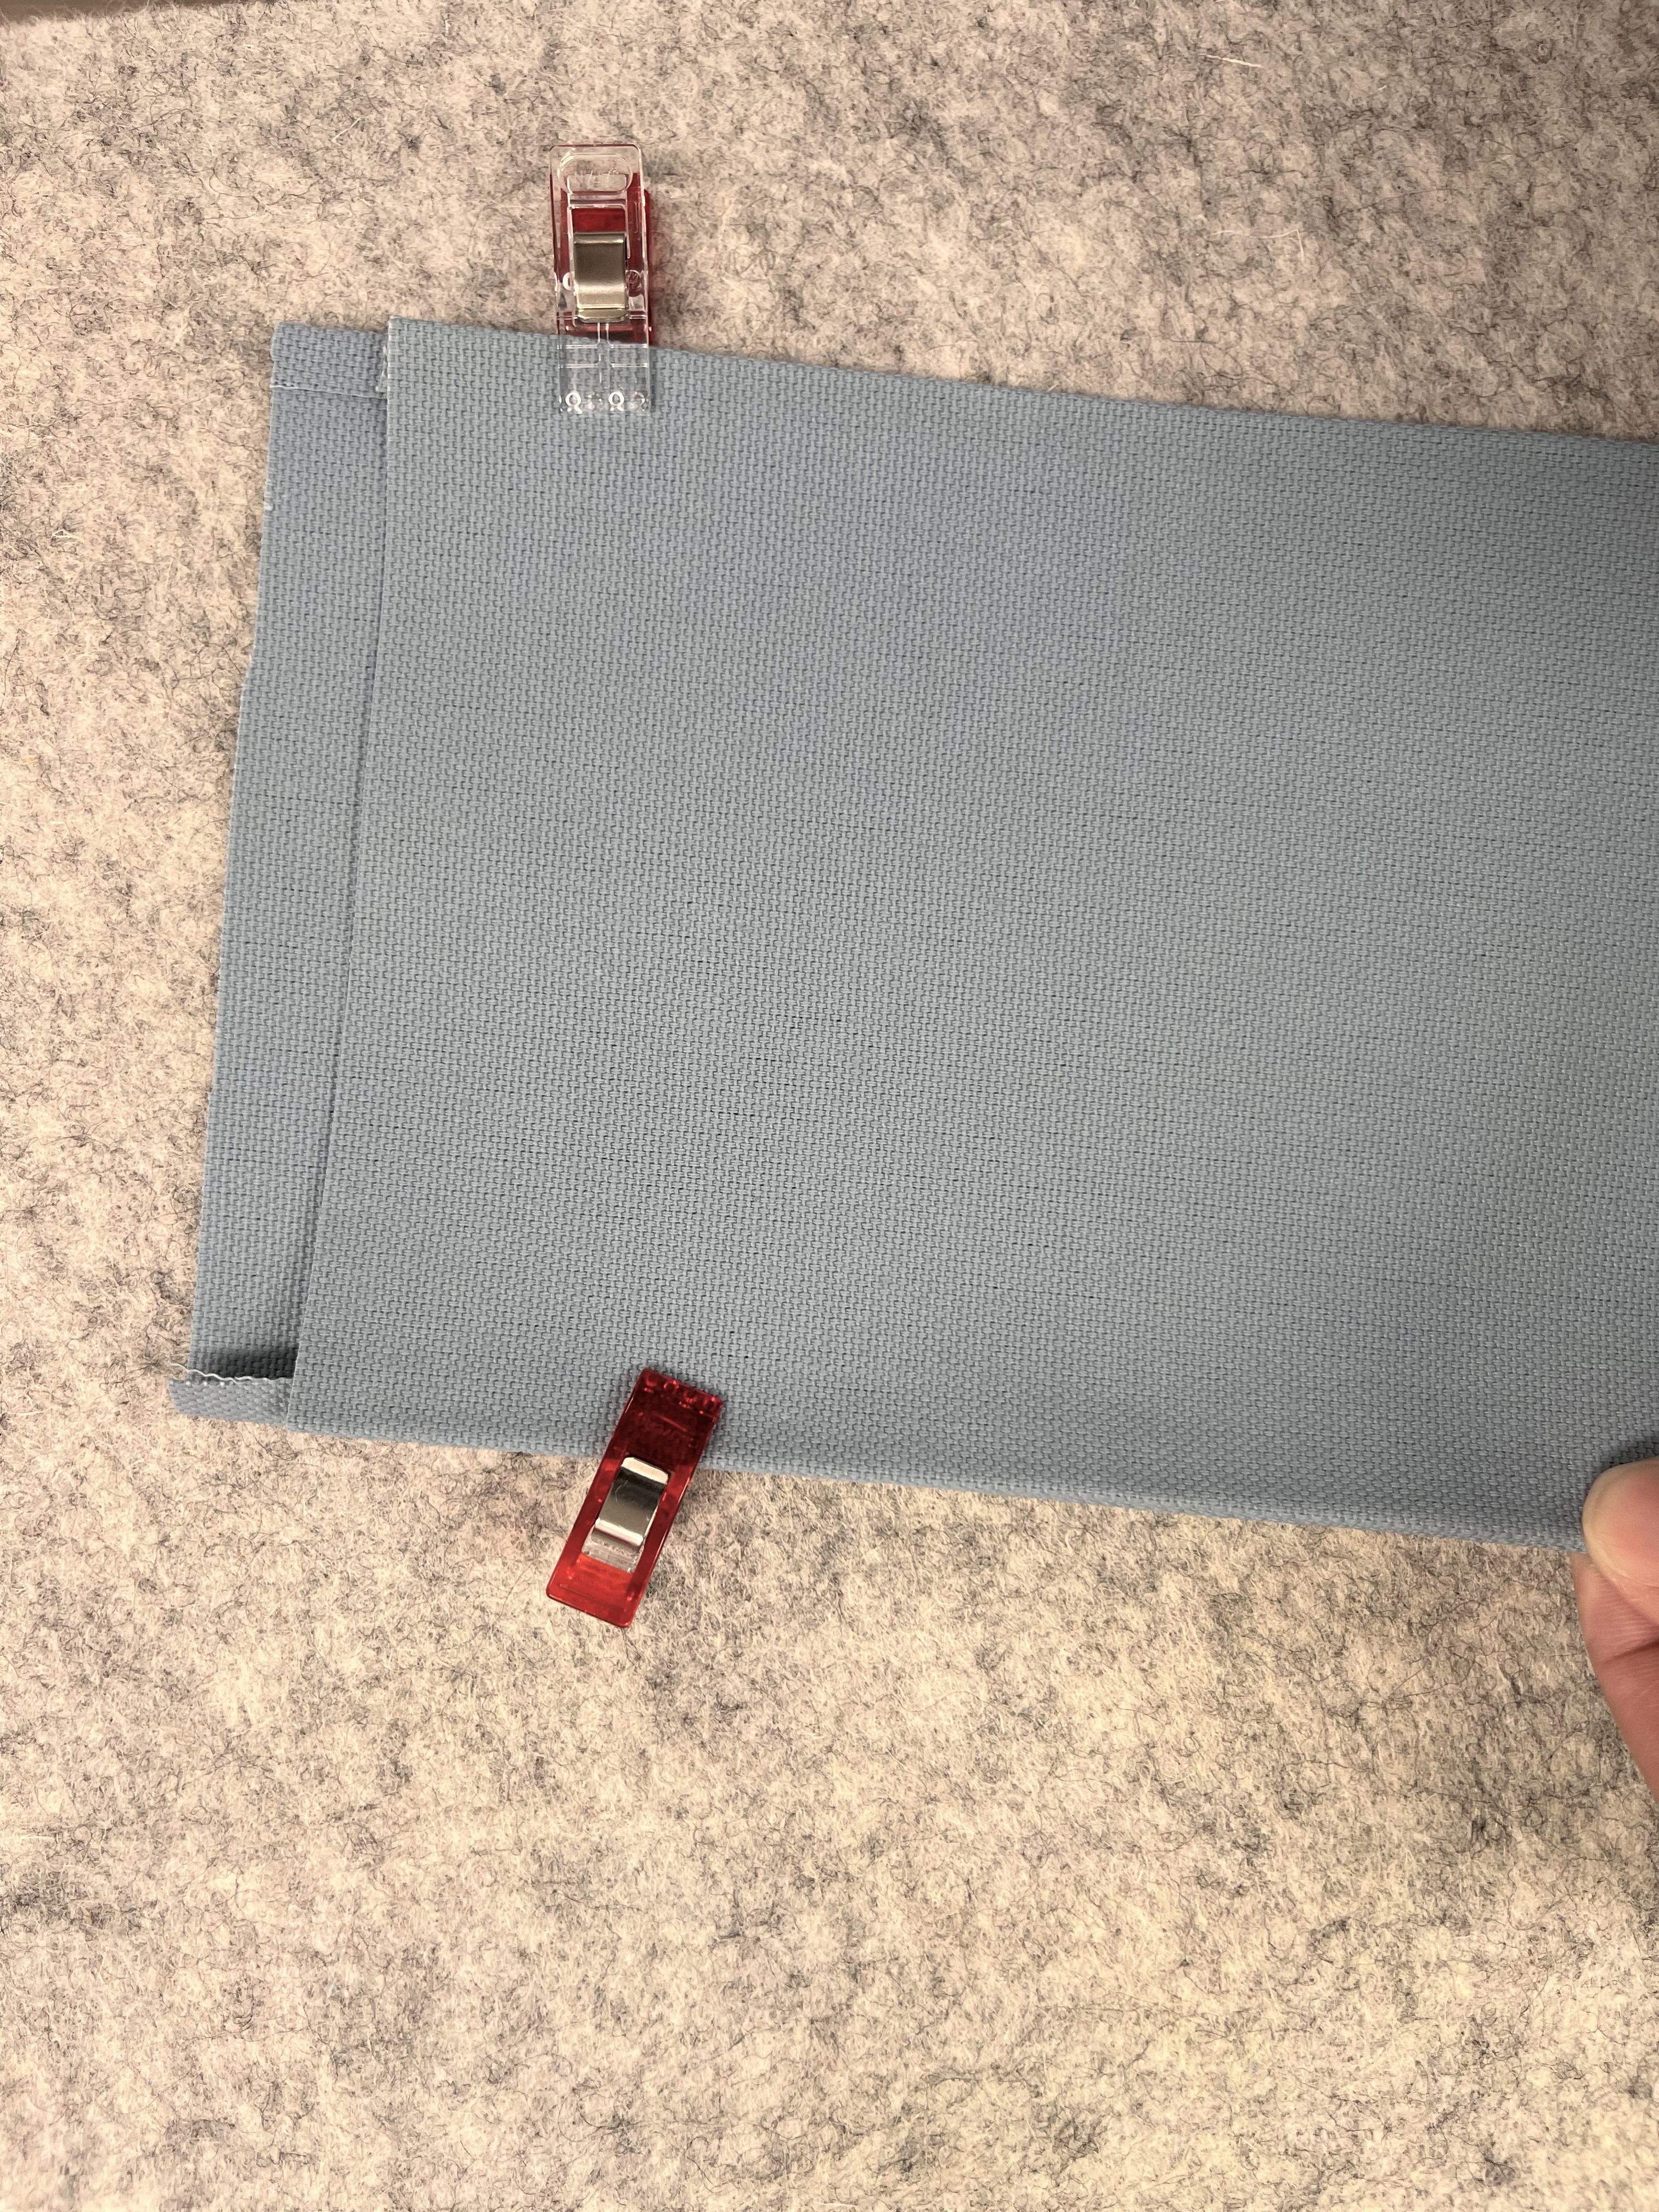
For the other shorter unfinished end, fold the ½” raw edge over the other raw edge, encasing it. Secure the end with clips and edge stitch.

On the shorter end you just stitched, measure down 5 ½” and using a fabric marking pen draw a line indicating where the fold will be.
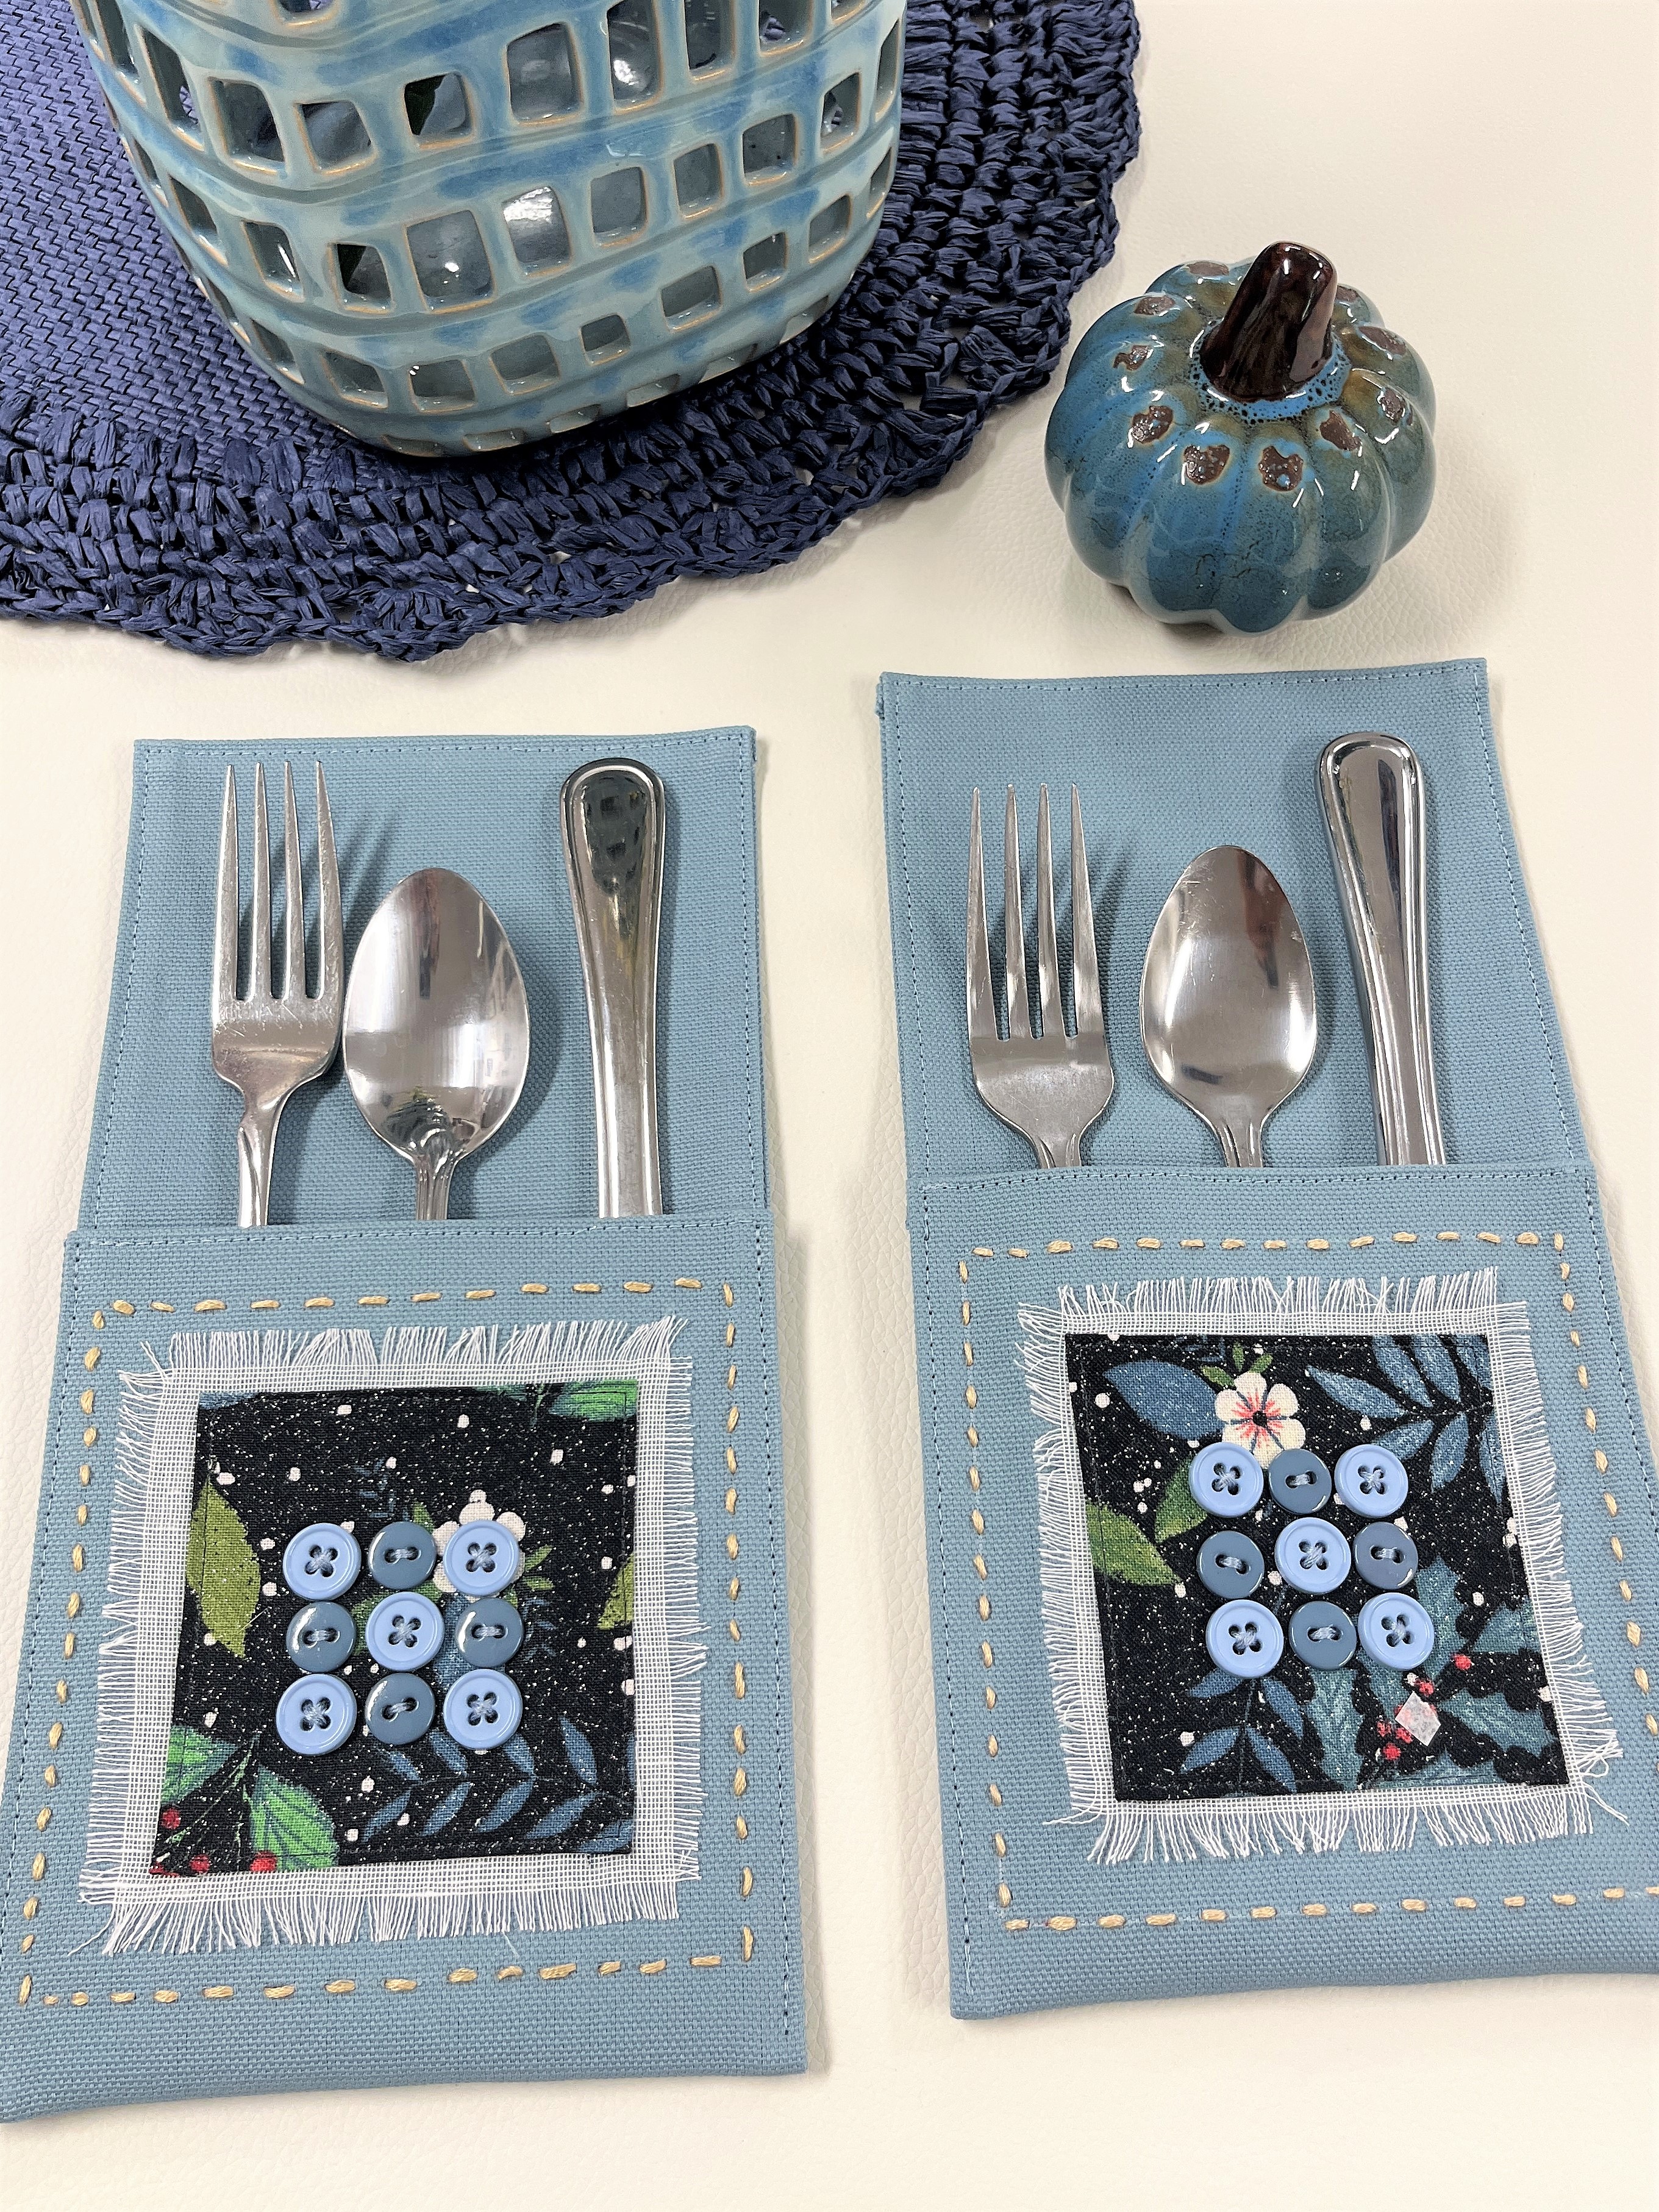
Preparing the Pocket Design
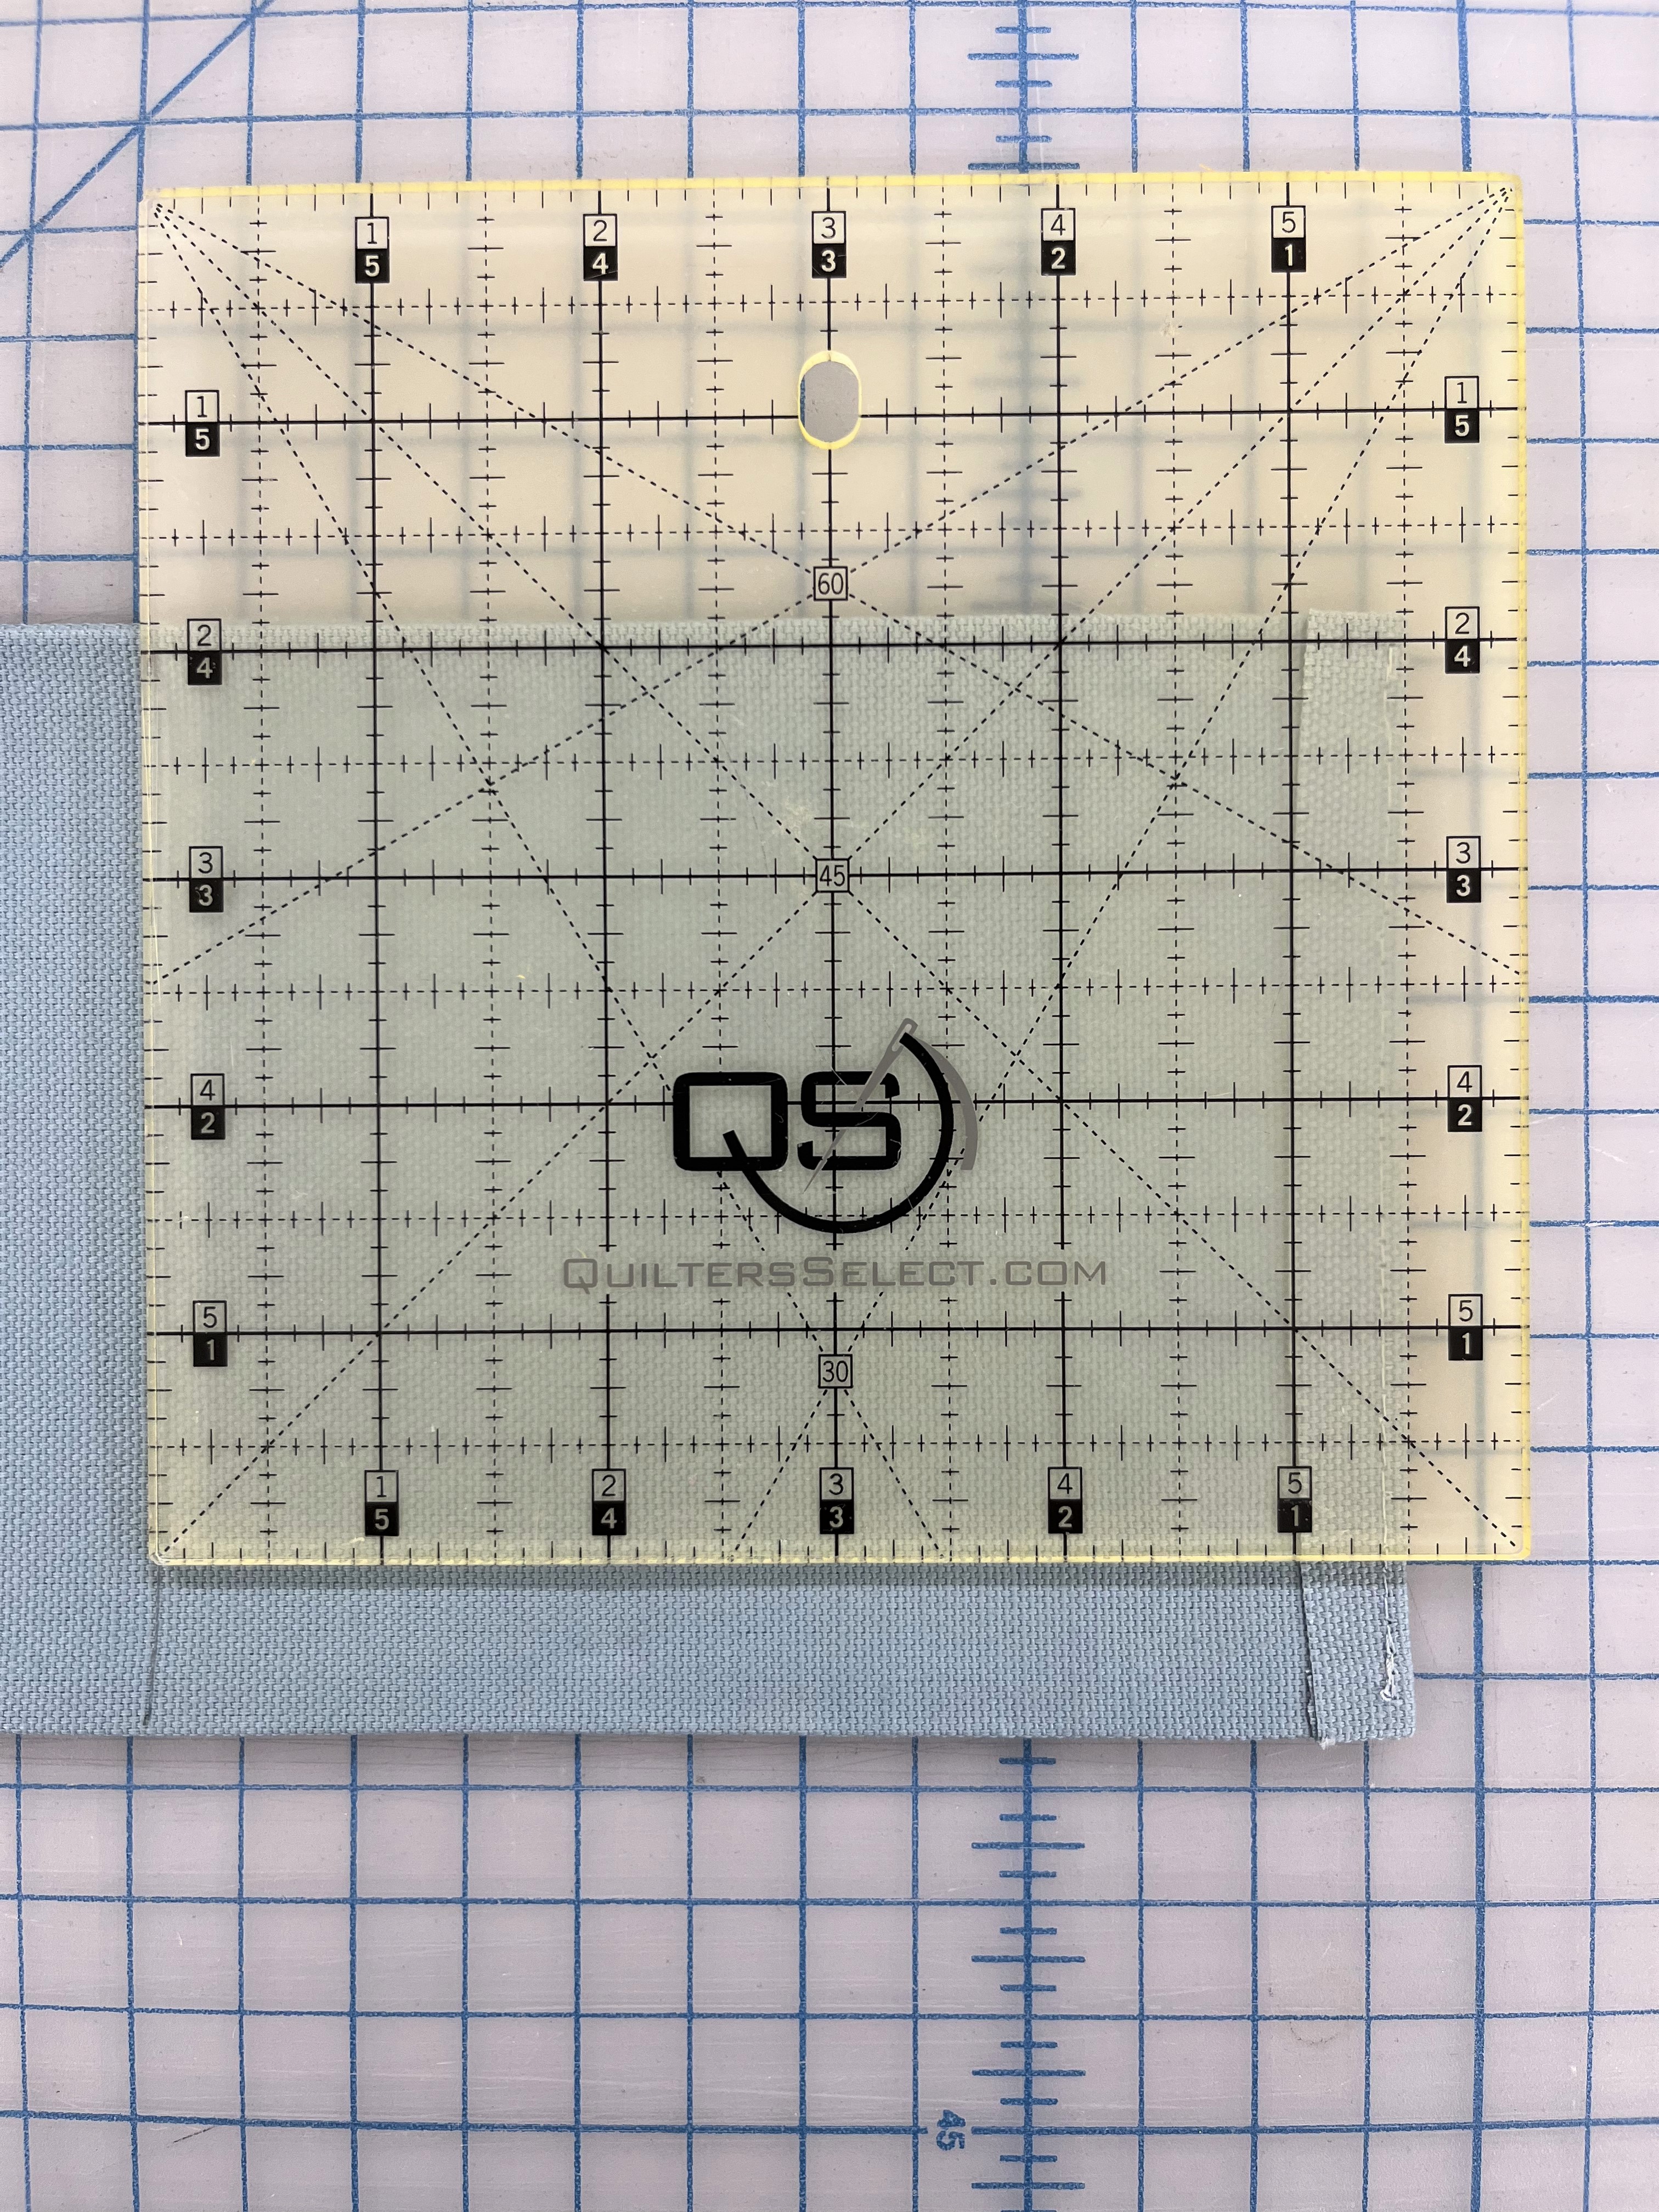
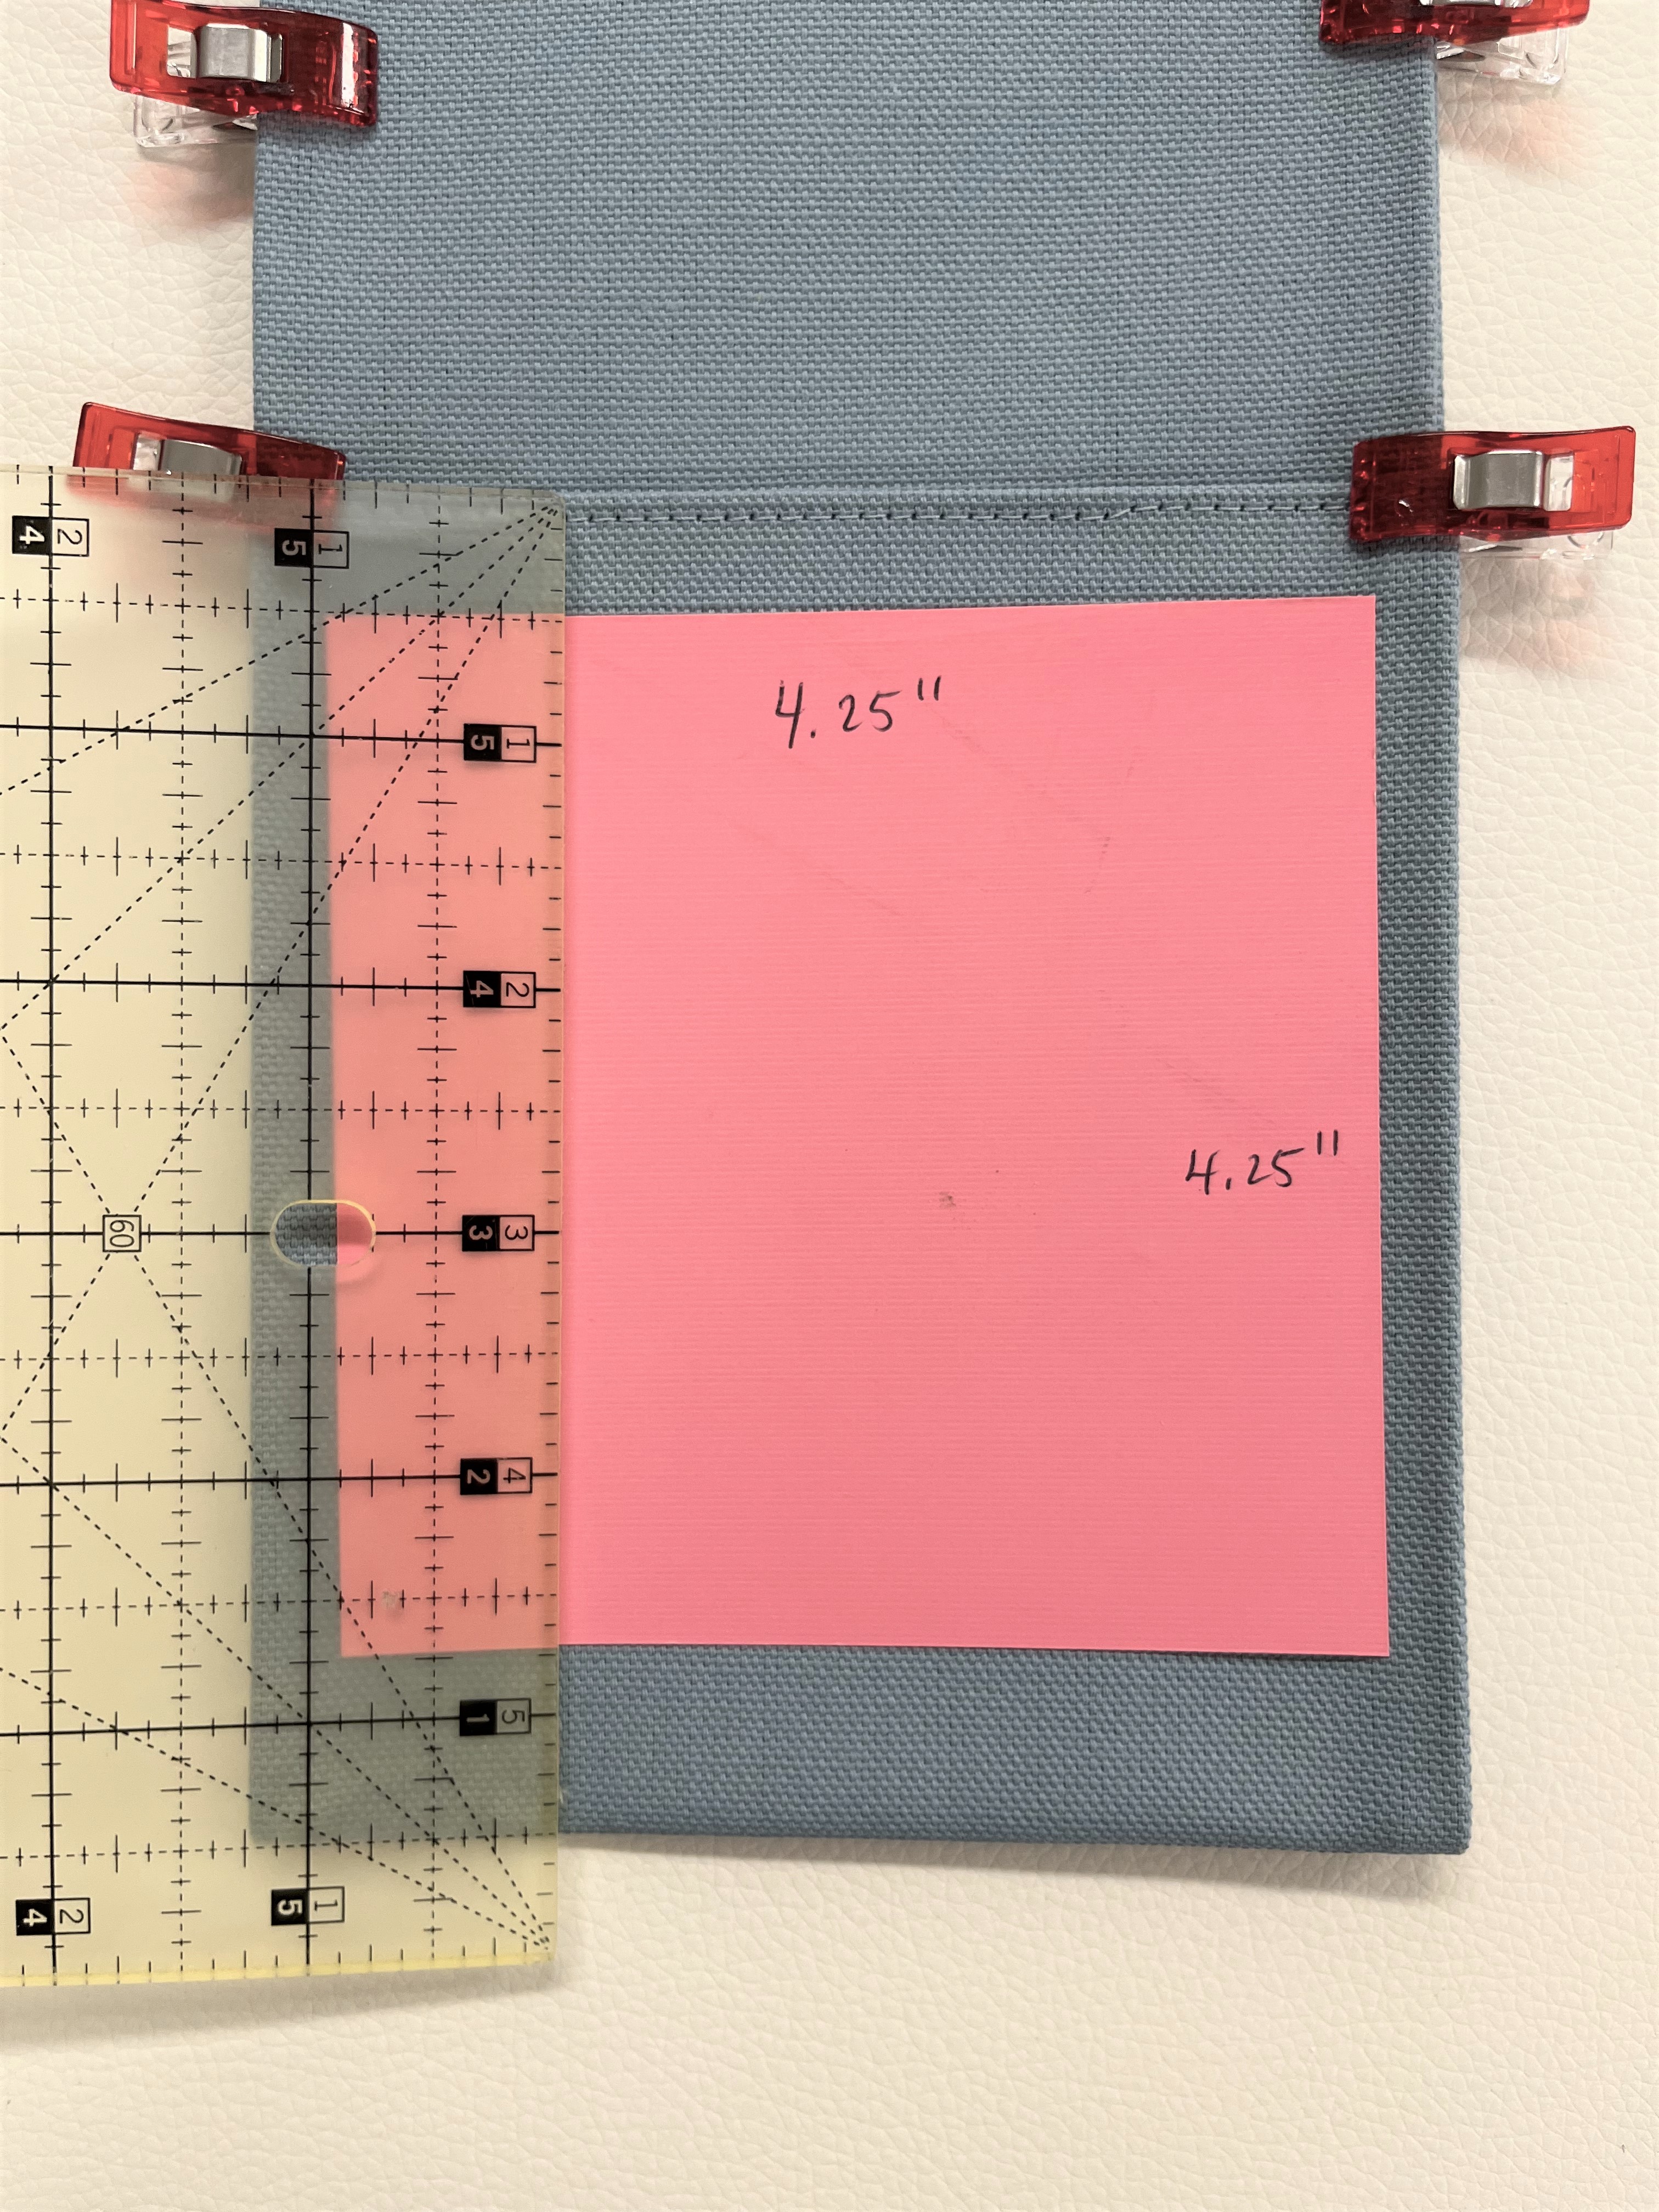
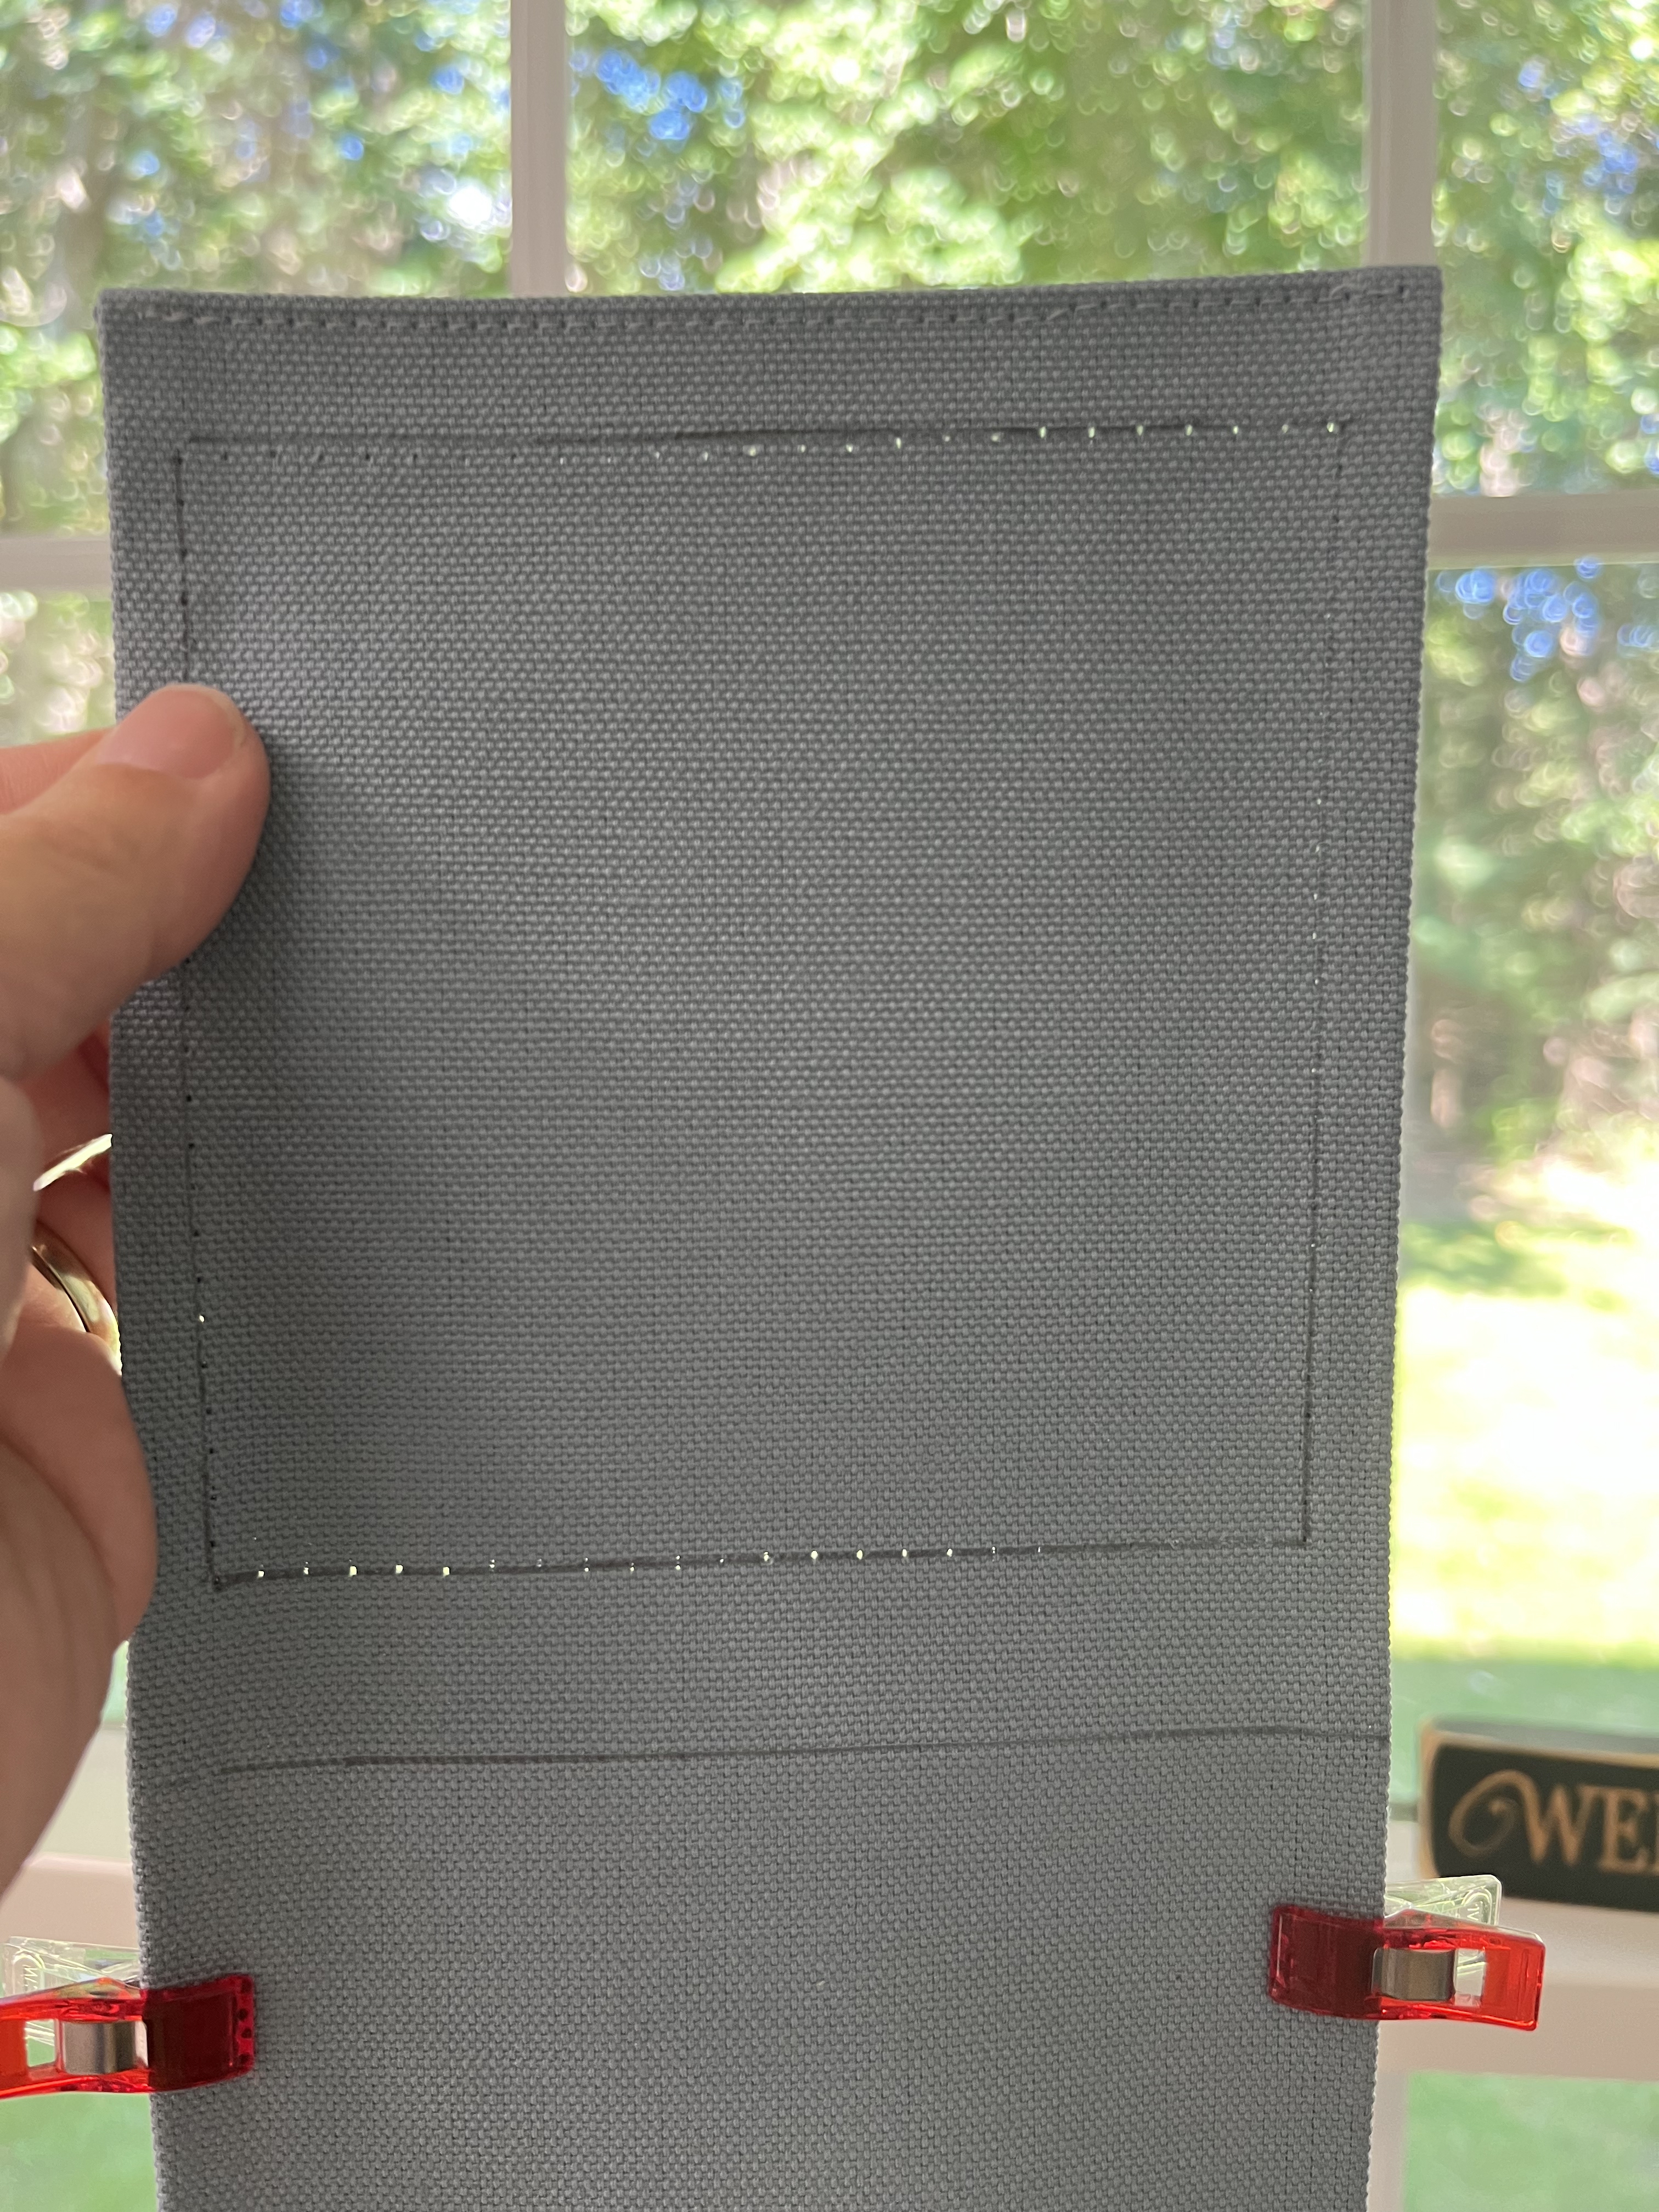
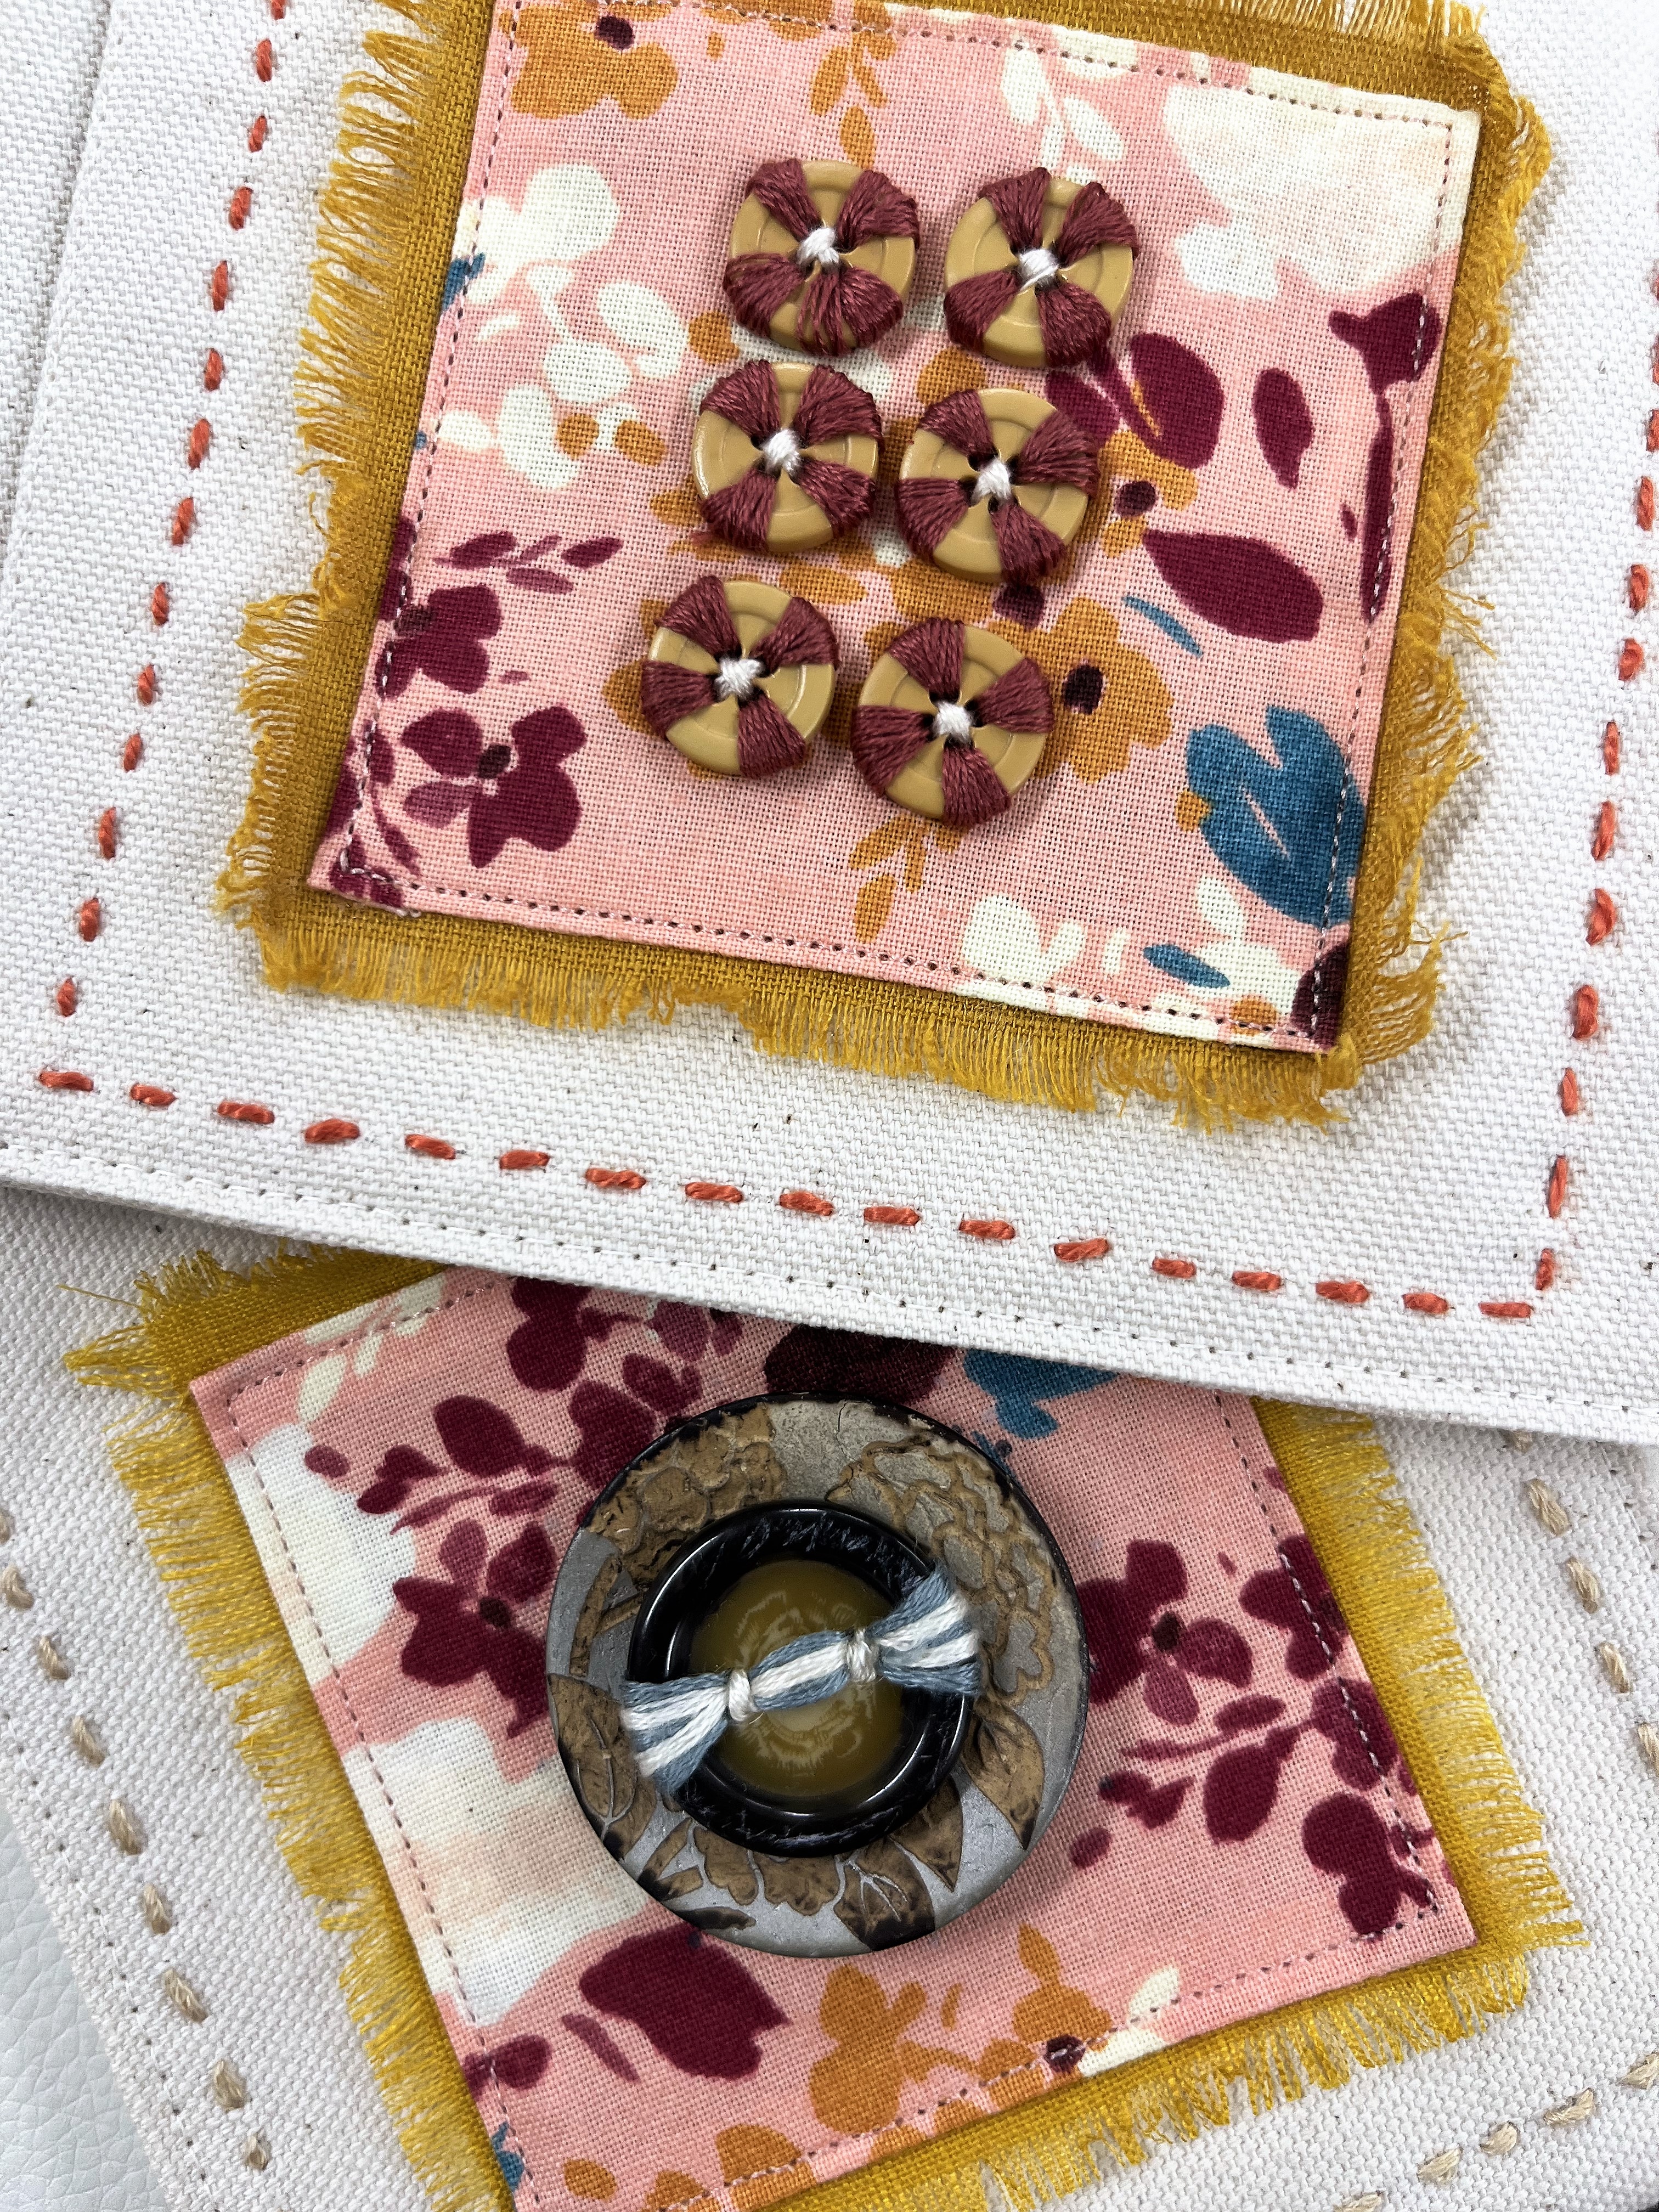
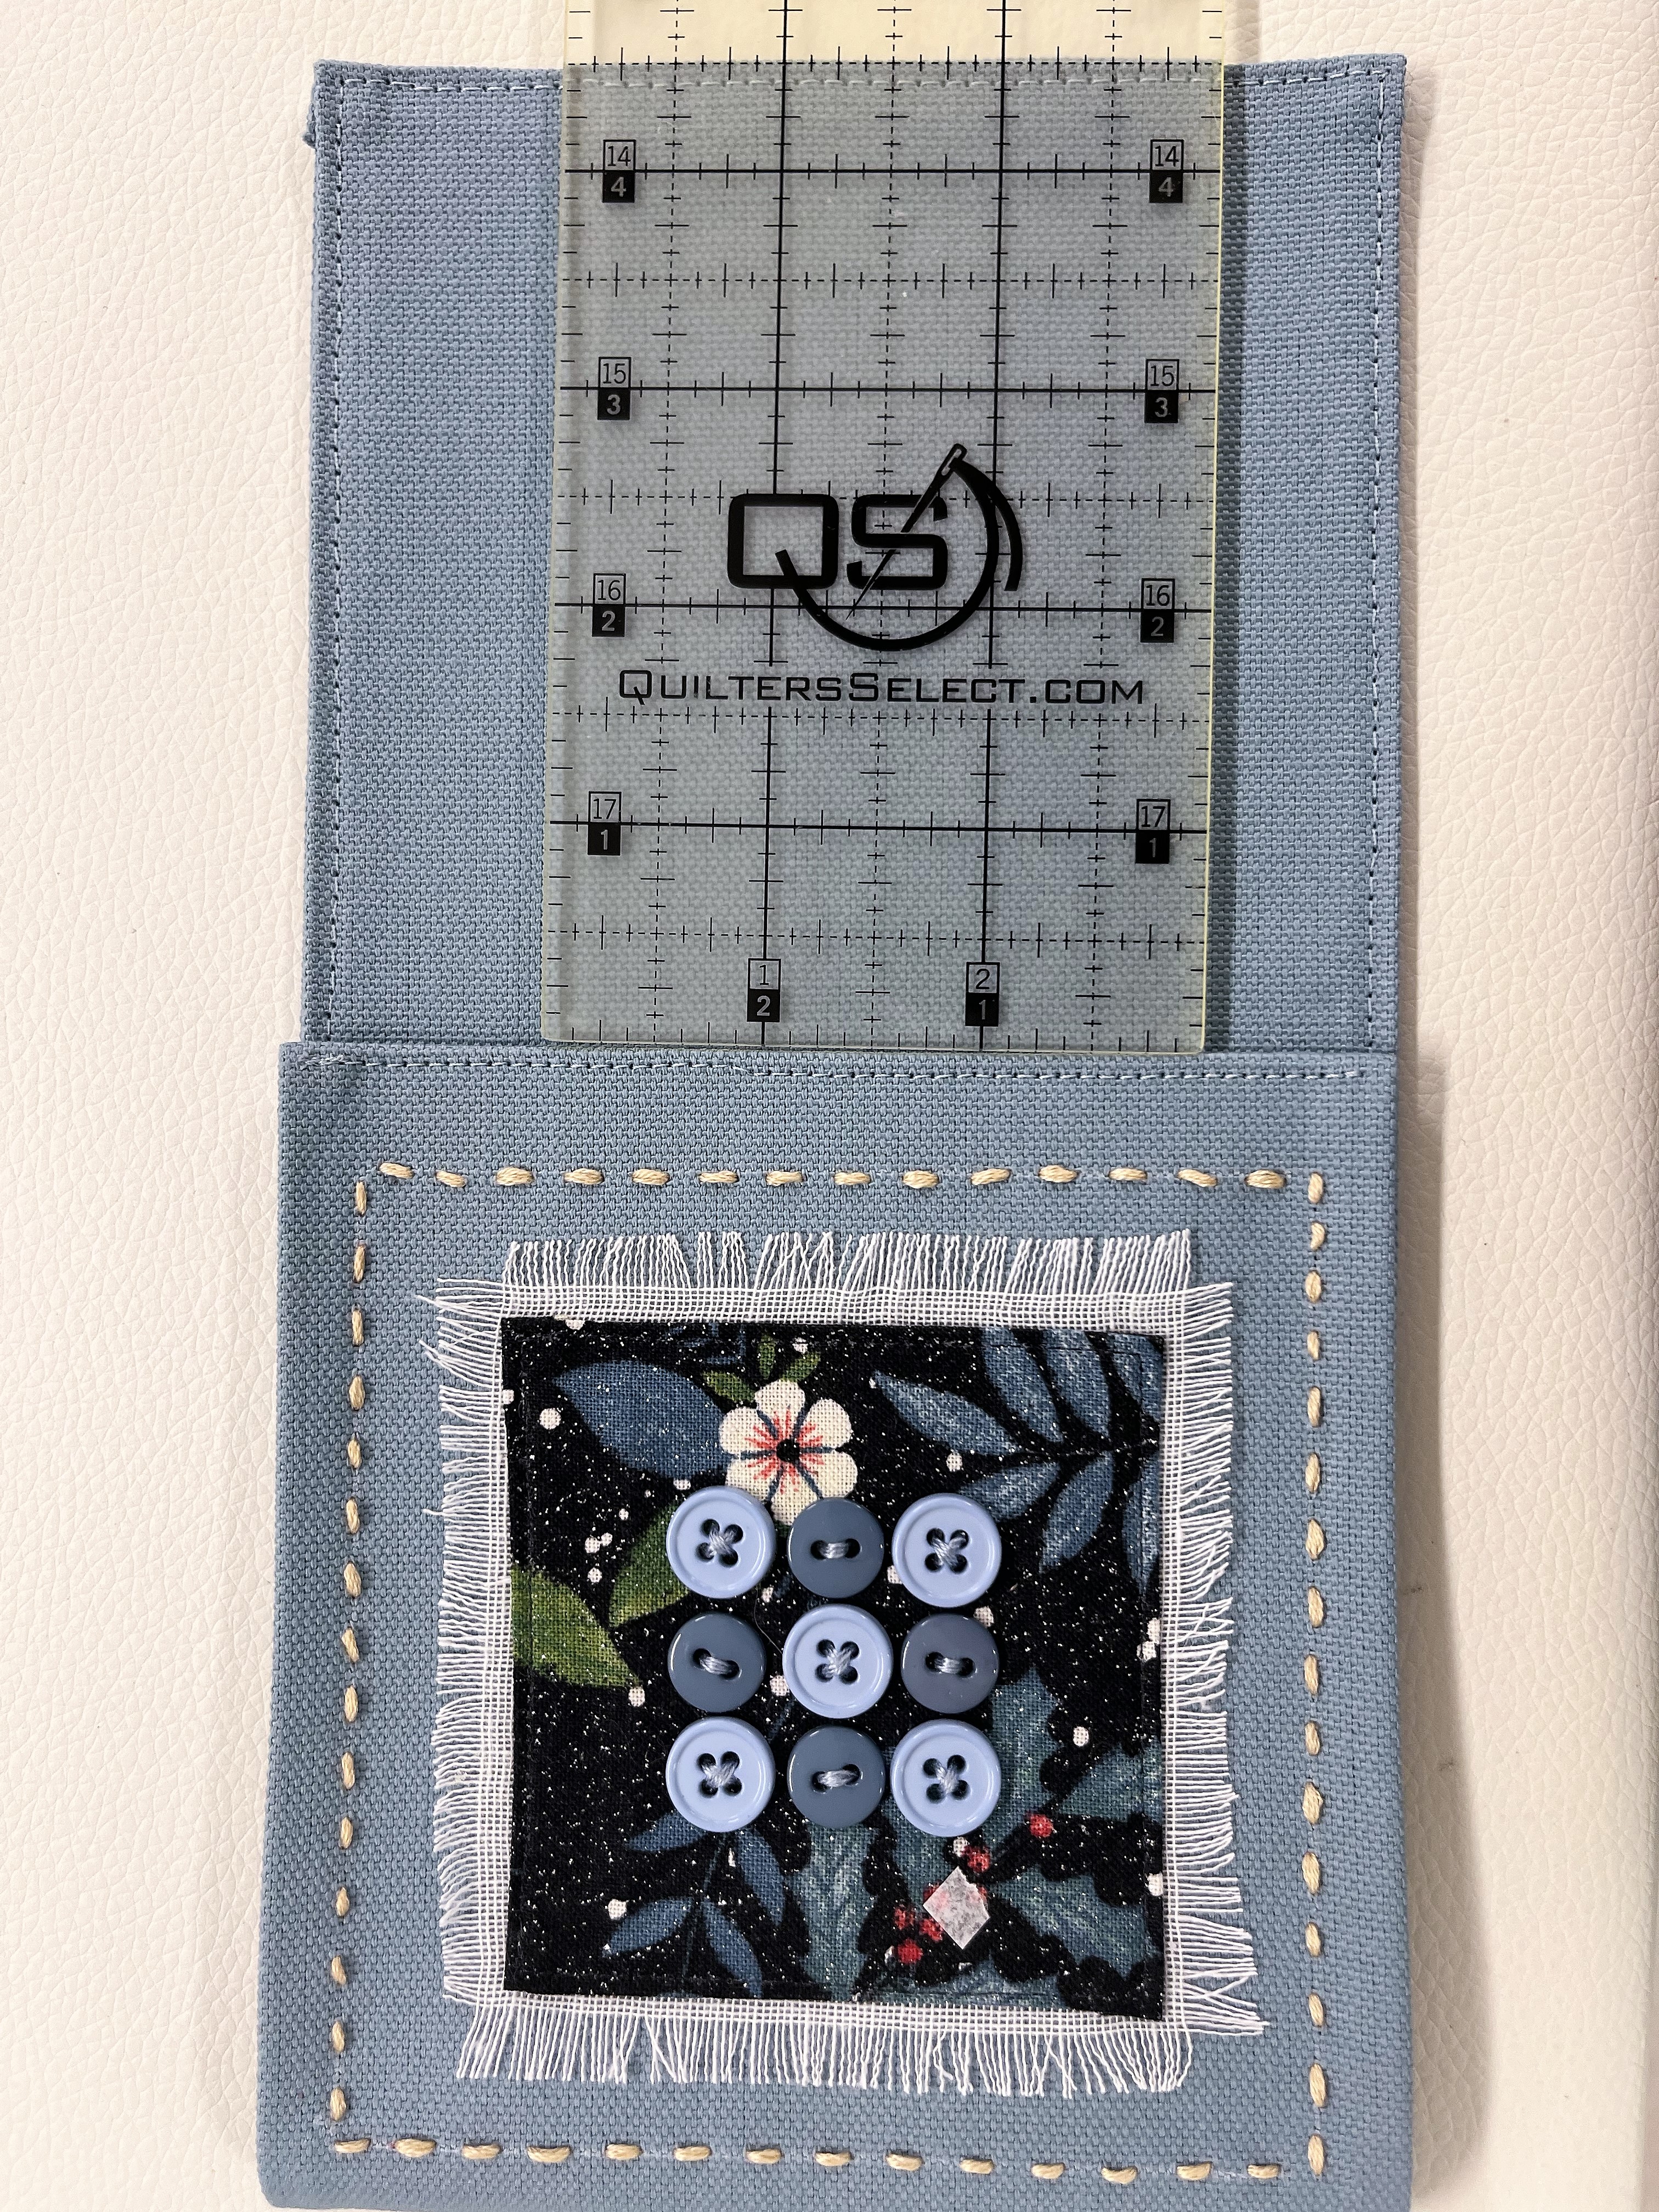
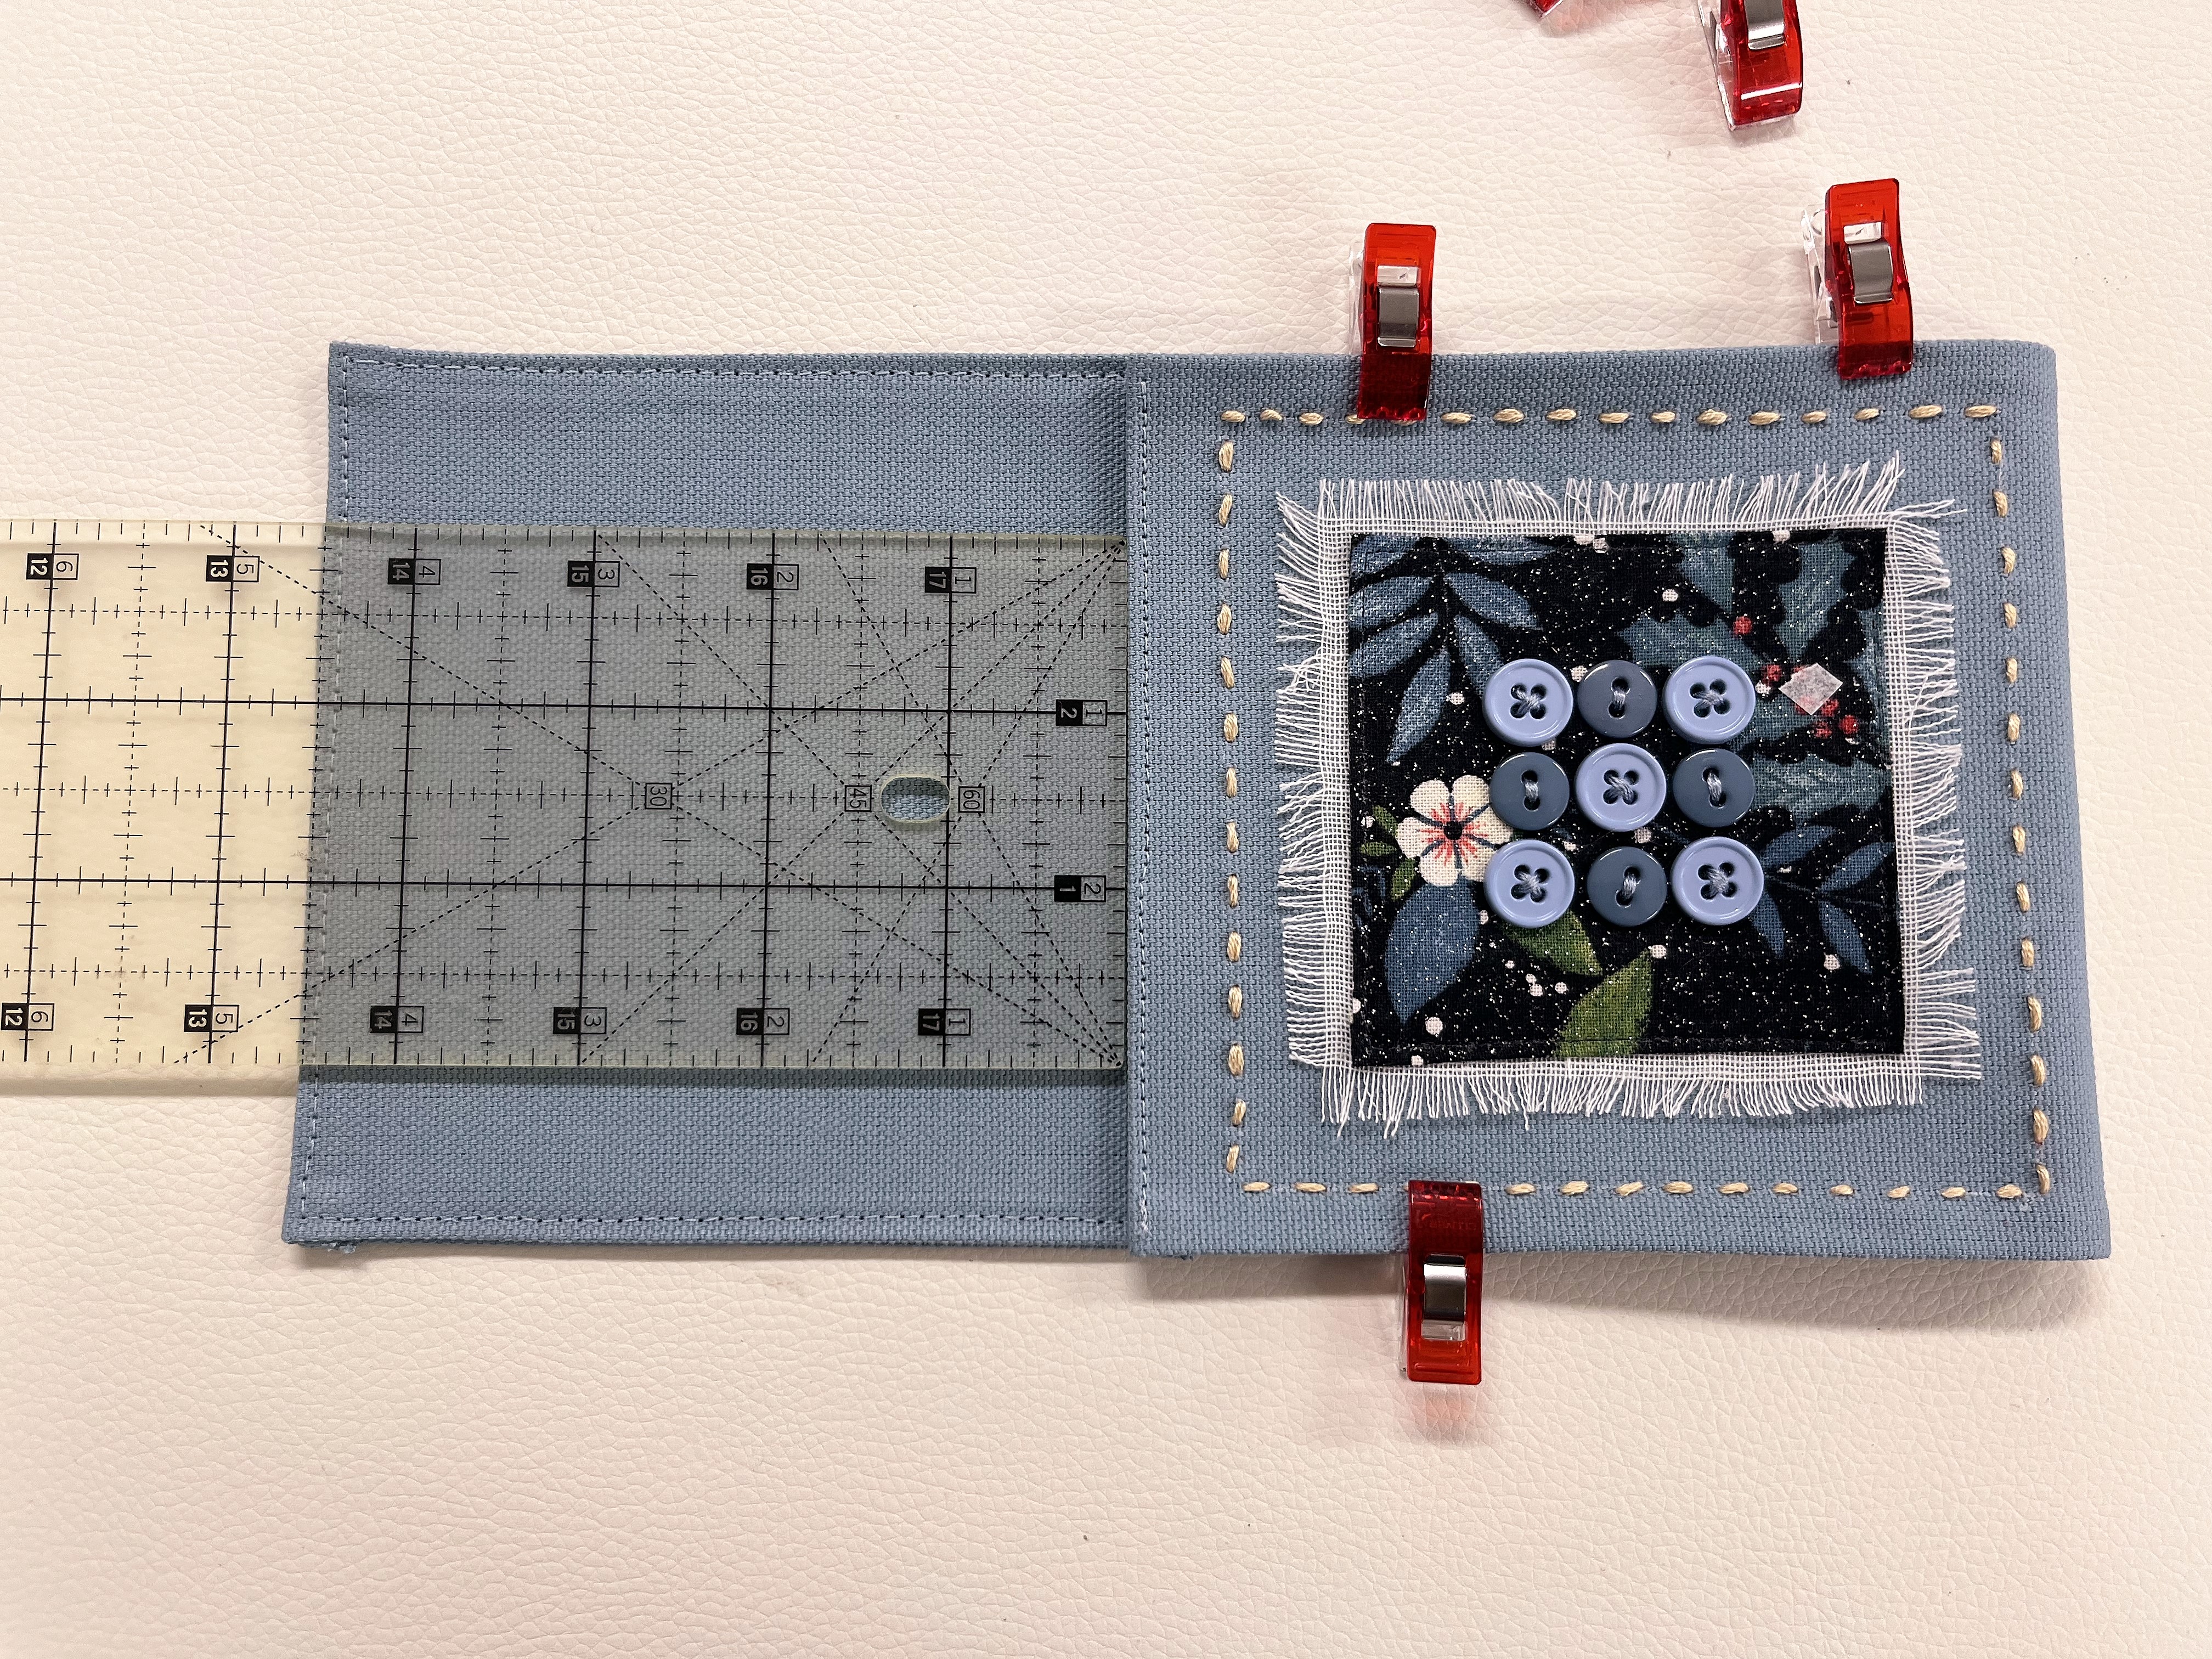
Measure and use your fabric marker, draw a 4.25” by 4.25” square on the right side or the front side of the folded pocket about ½” down from the edge stitching. You can use a piece of pre-cut cardstock as a visual template for positioning your desired layout.
To create the hand-stitched border accent, we will need 6 strands of embroidery floss, which cannot really be sewed using a sewing machine. However, here's an interesting technique to try: remove the top and bottom threads from your sewing machine. Next, install your walking foot or HP2 foot and HP needle plate, increase the stitch length to 5 mm. Stitch out your square starting with your needle positioned exactly in any of the four corners of your drawn square. The needle will leave holes in the fabric that you can now use as a guide to hand-stitch your border using thicker embroidery thread.
Using a size #3 hand sewing or embroidery needle, hand-stitch your accent border.
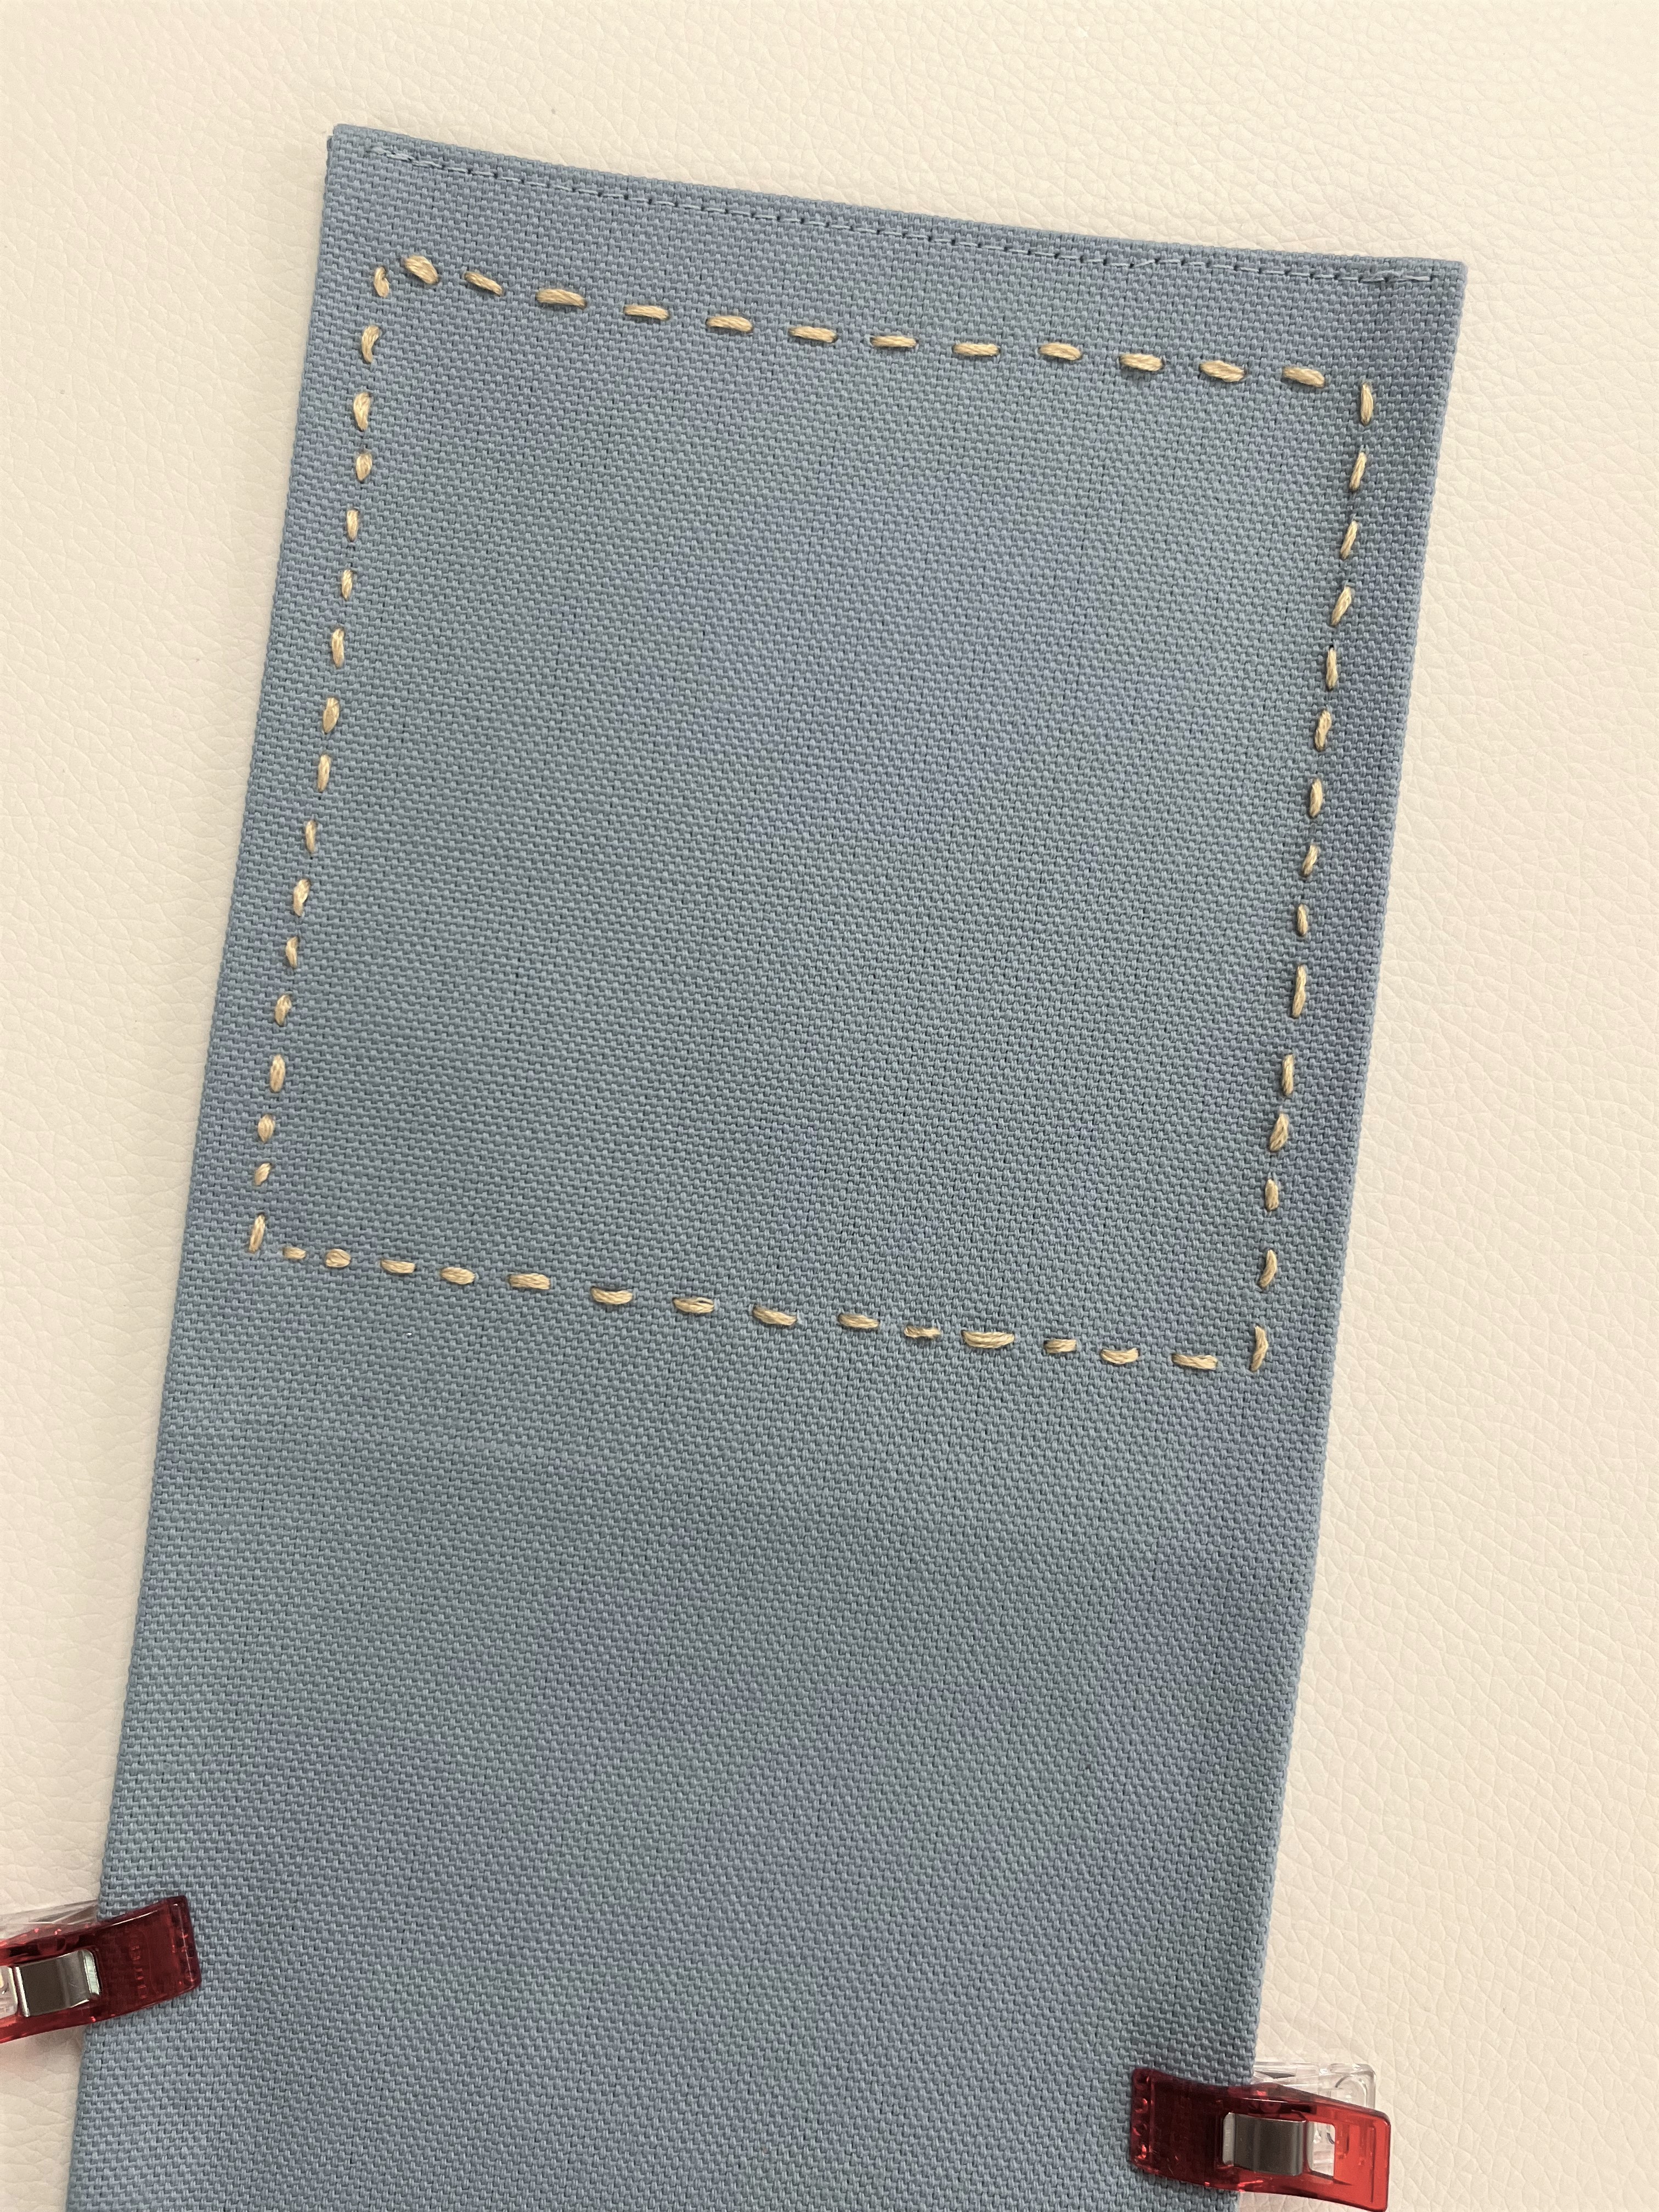
Here's another creative idea! Do a second inner border of stitched perforations and use both borders to then create a zigzag or Kris cross pattern for your hand stitched design.
Using your pre-cut novelty fabric, fold the edge in ¼” to the wrong side and press all four sides.
Using your pre-cut linen piece, pick and remove 1 or 2 strands of the thread at a time, until you achieve a frayed look about ¼” in on all four sides.
Center your frayed linen and novelty fabric onto the center of the marked square on the pocket. Pin in place. Use a standard presser foot or try the open toe satin stitch foot for optimal visibility. Set your stitch length to 1.8 mm. Edge stitch all four sides of the novelty fabric.
Hand sew the accent buttons. Being creative is a lot of fun here. Arrange the buttons as you see fit, far apart or close together. Use a variety of button styles, sizes, and colors to fit your project, or use matching buttons, try a larger and smaller button stacked together, or go crazy and decorate your buttons with thread! Isn't this a lot of fun?
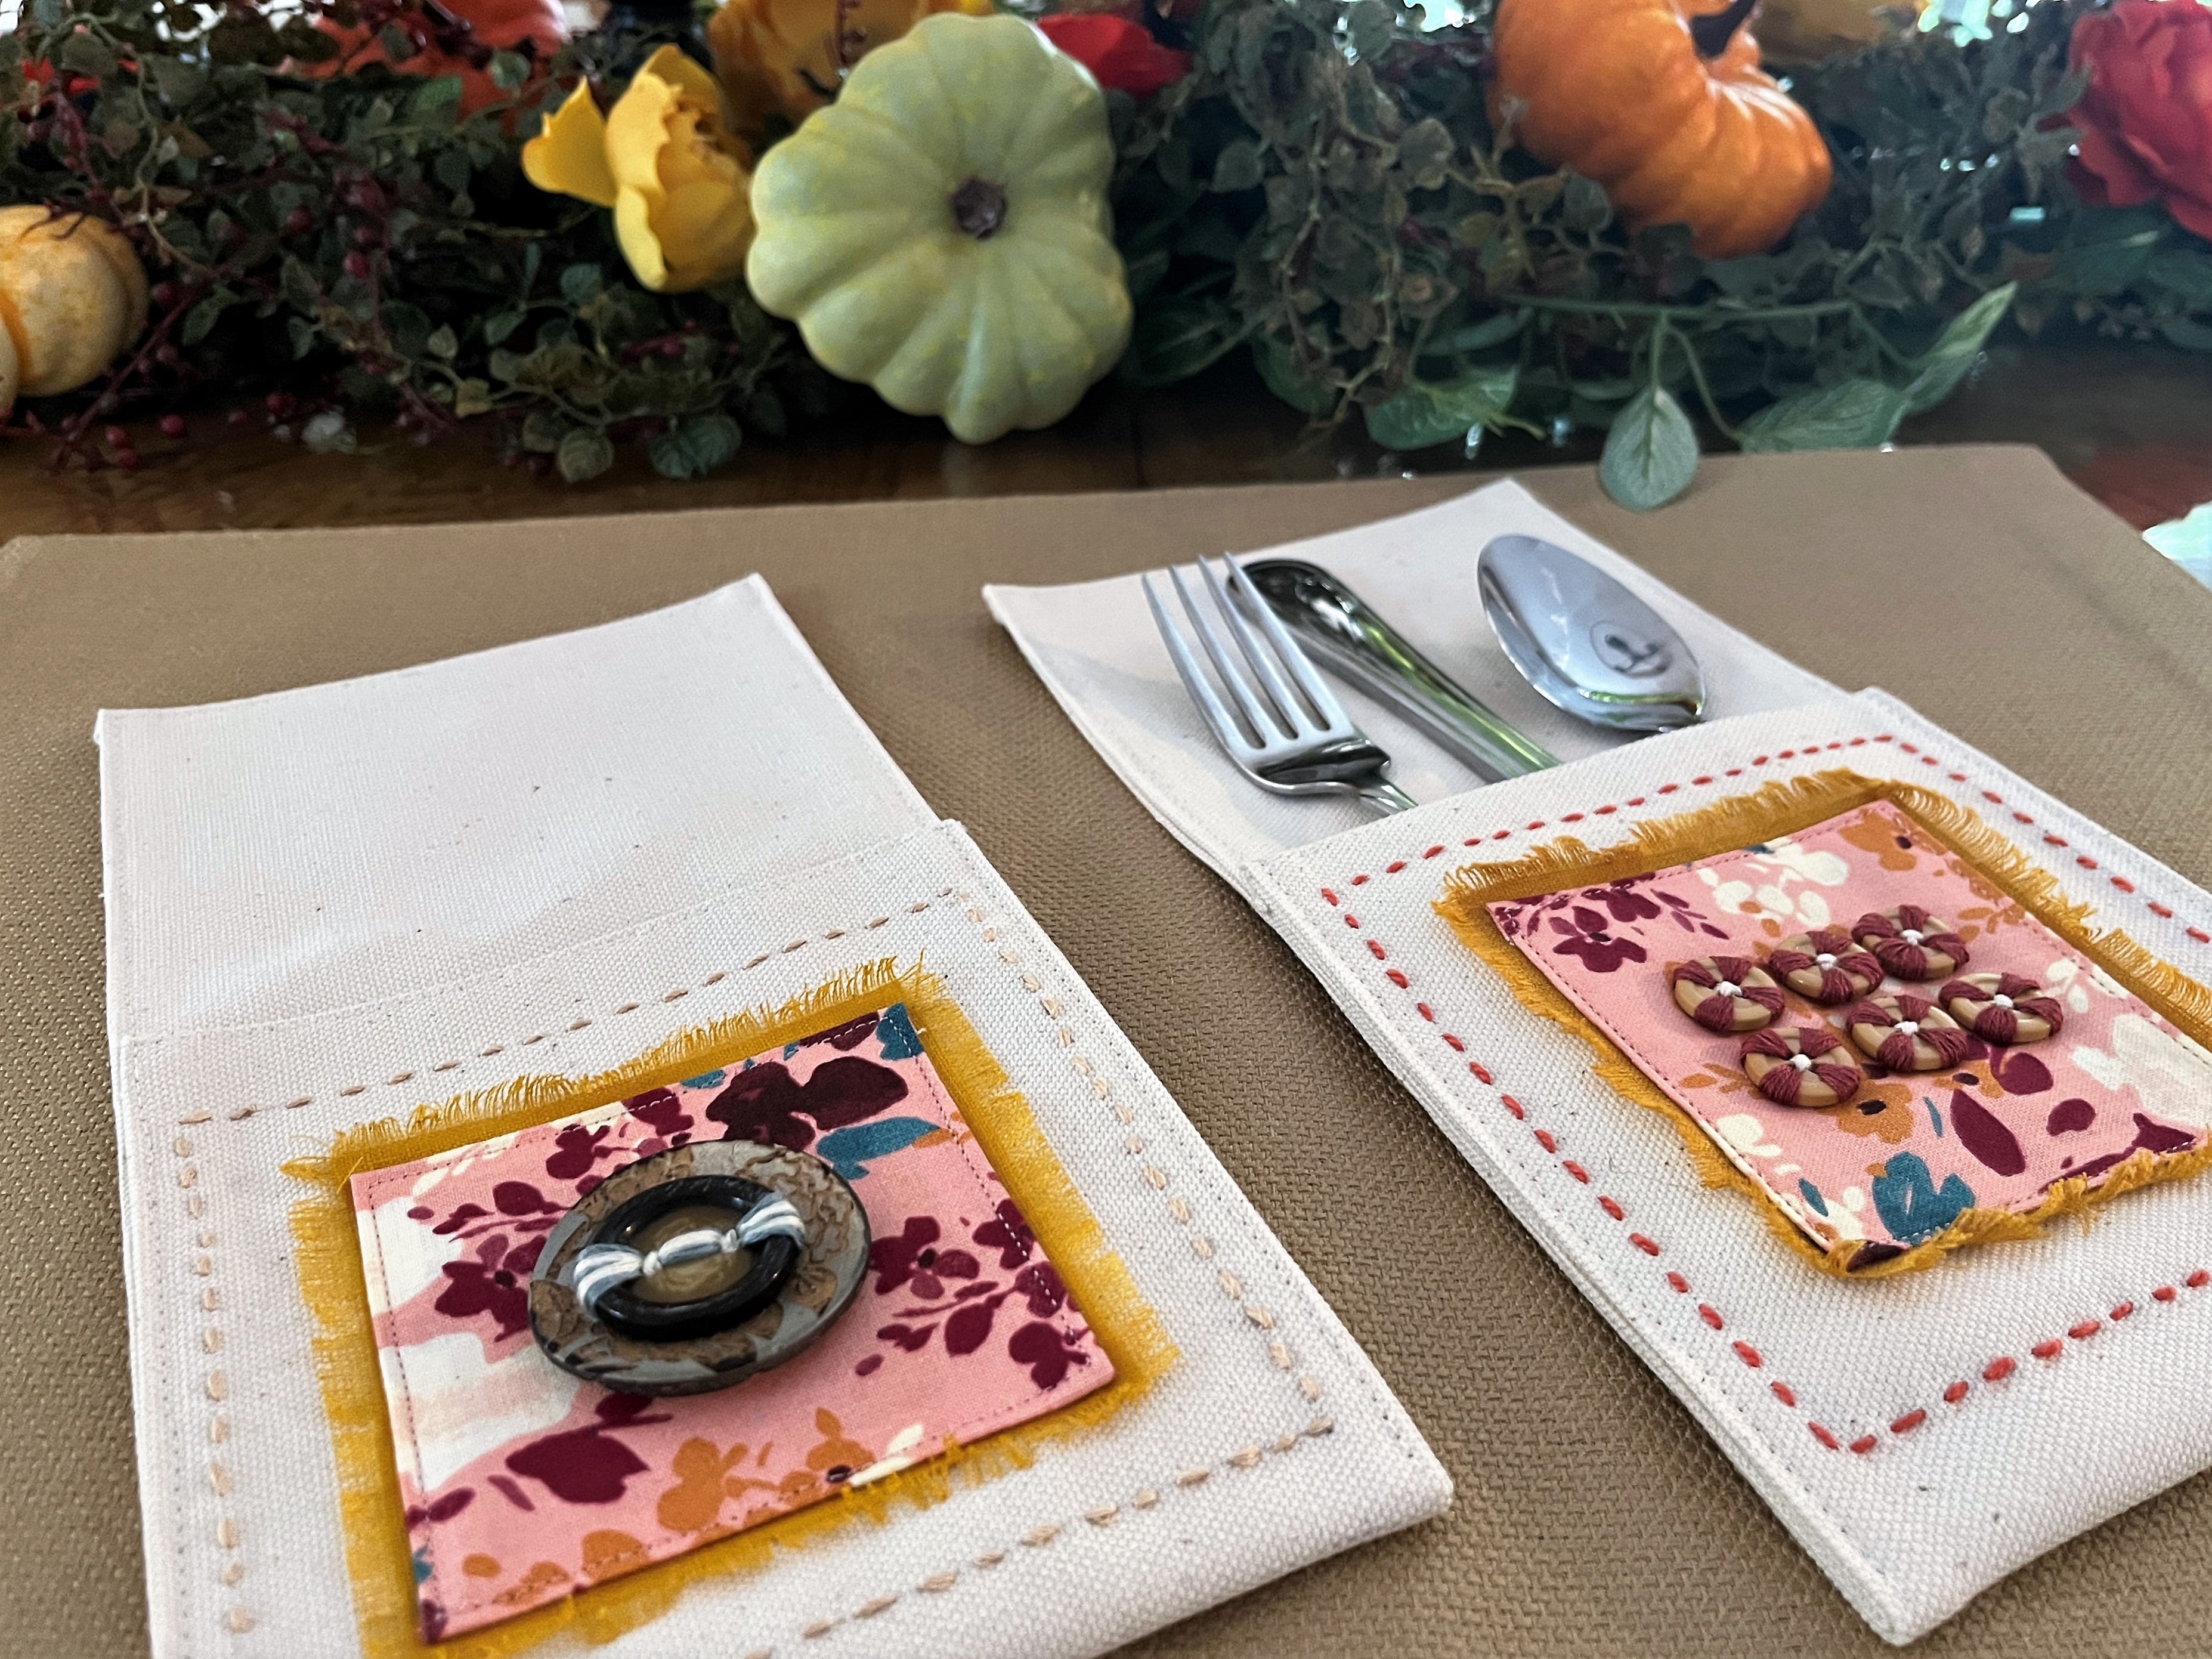
Finishing the Project
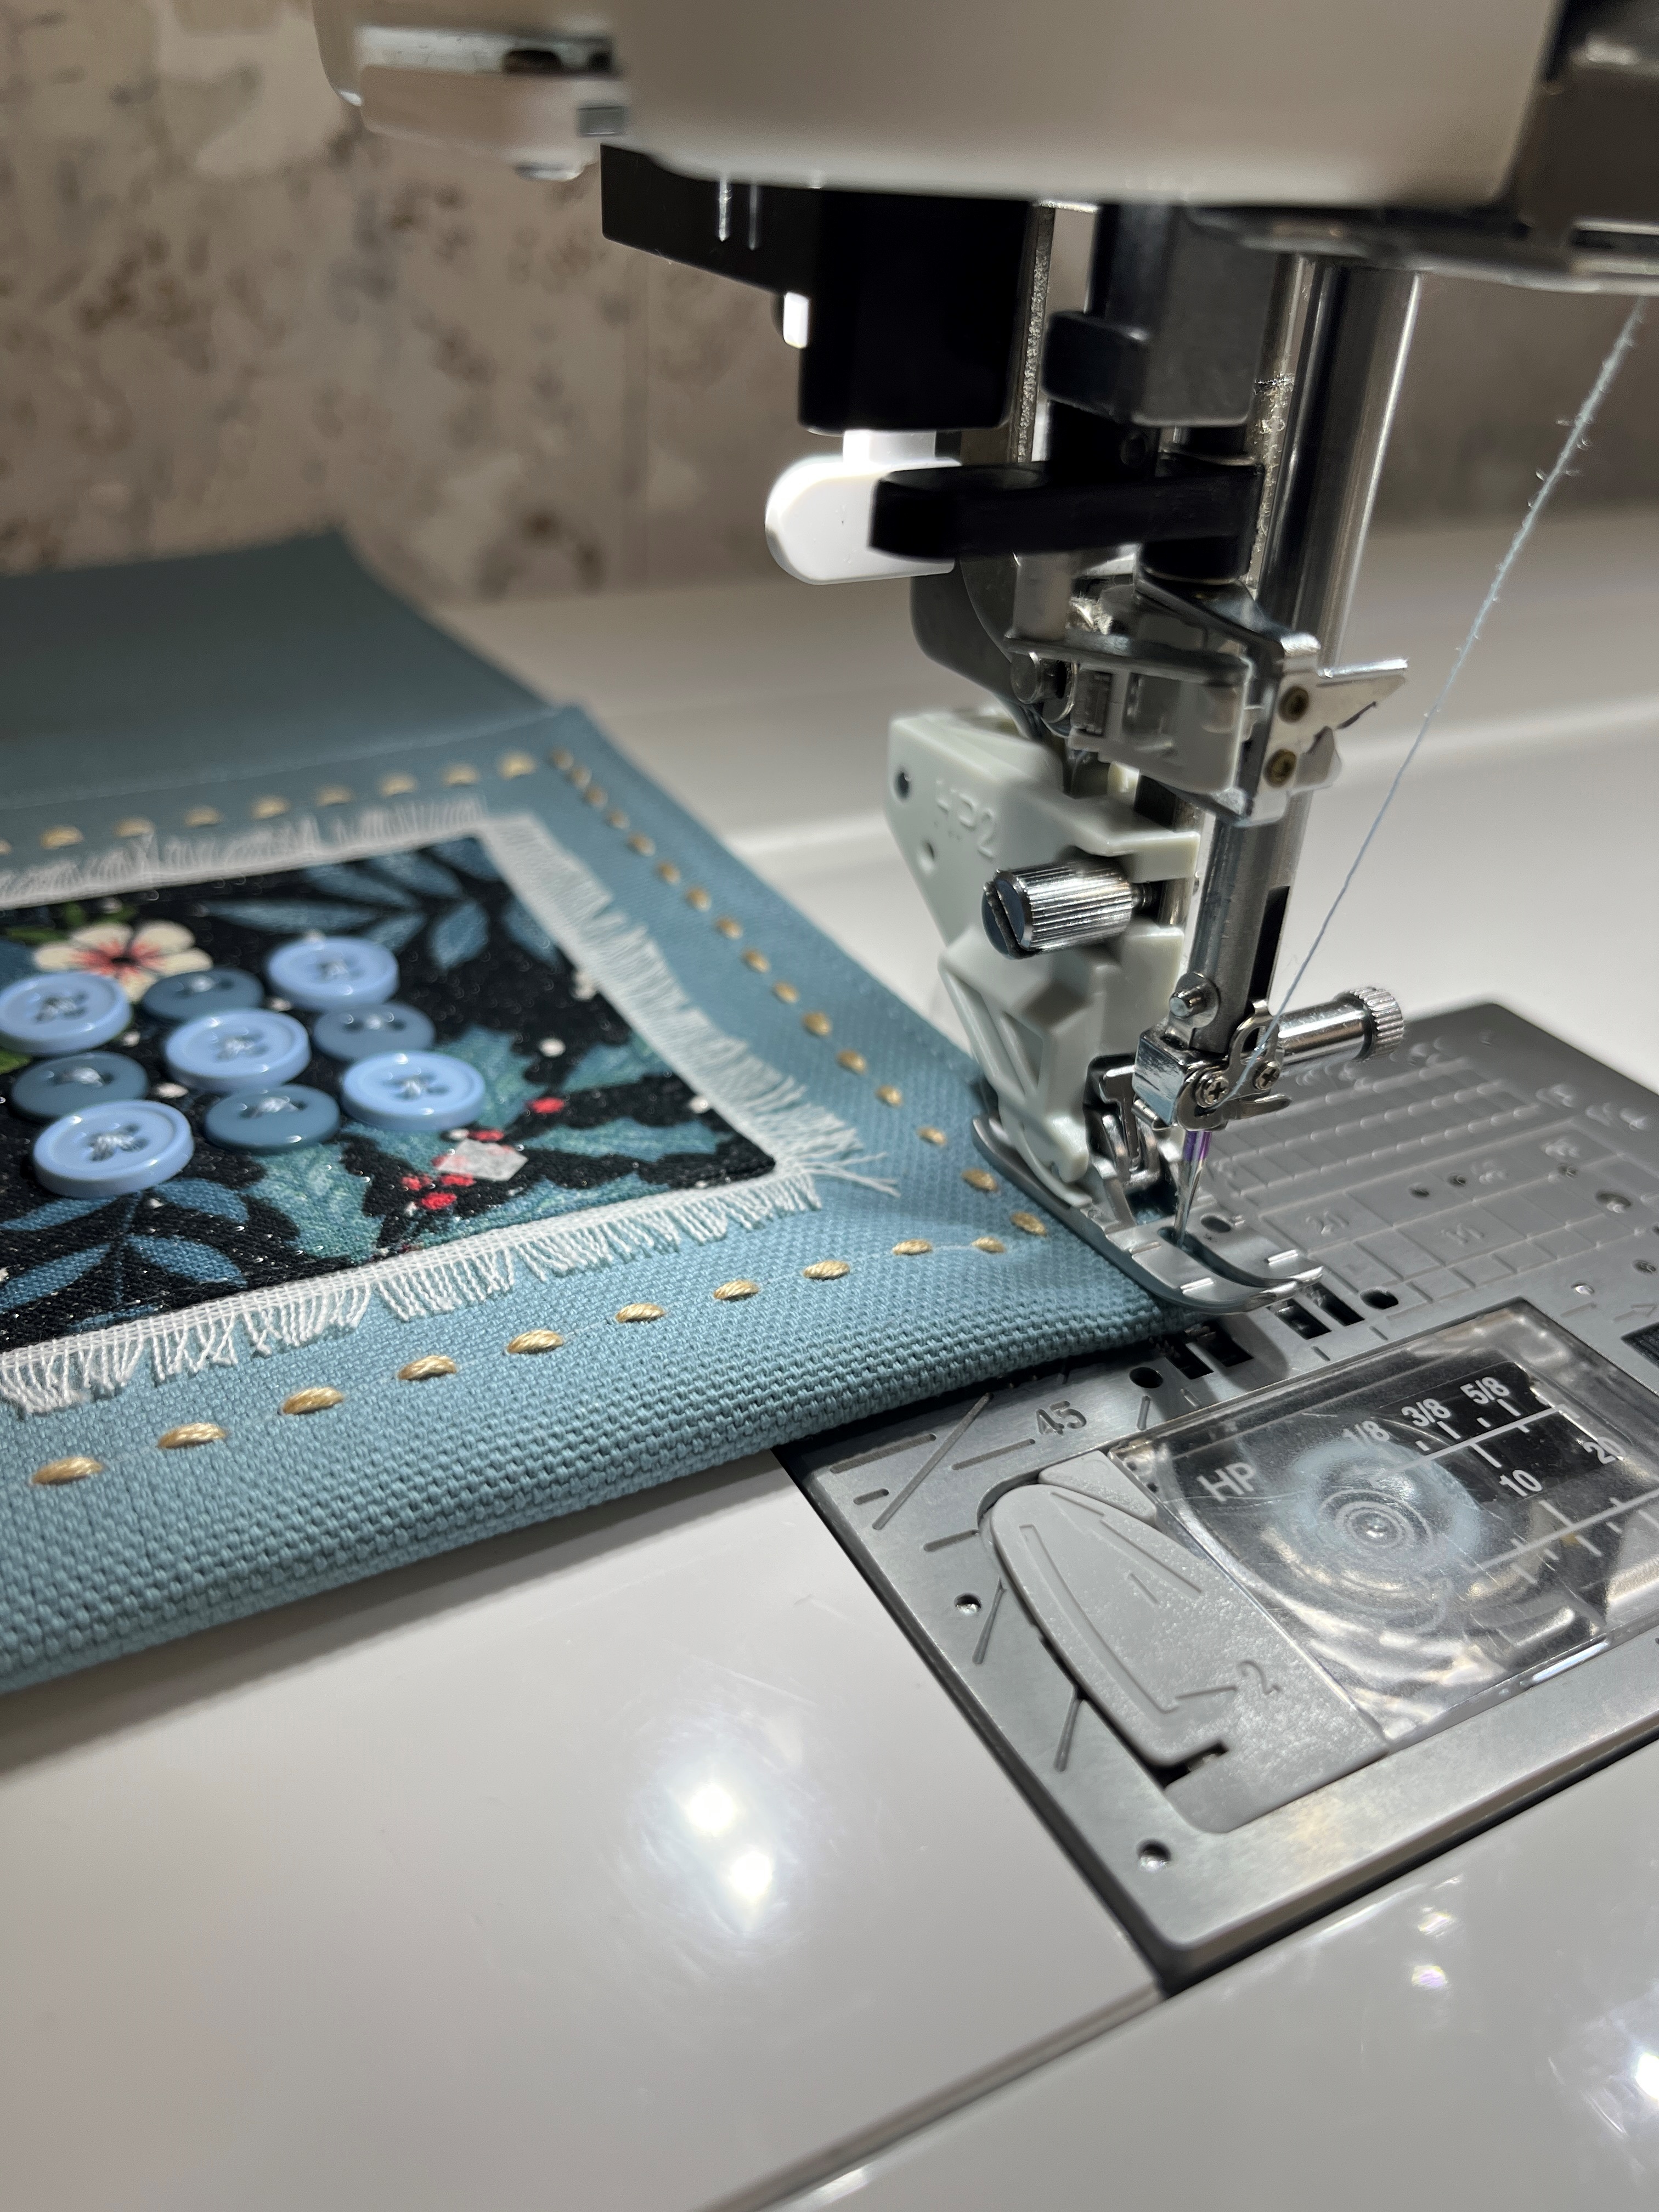
Fold your embellished pocket up about 4 ½” from the top edge. Look at the overall appearance of your flatware holder to make sure where the fold sits properly and looks nice. Flip the pocket open and out of the way, measure down 5” from the top shorter end, using a marking pen, draw a reference line.
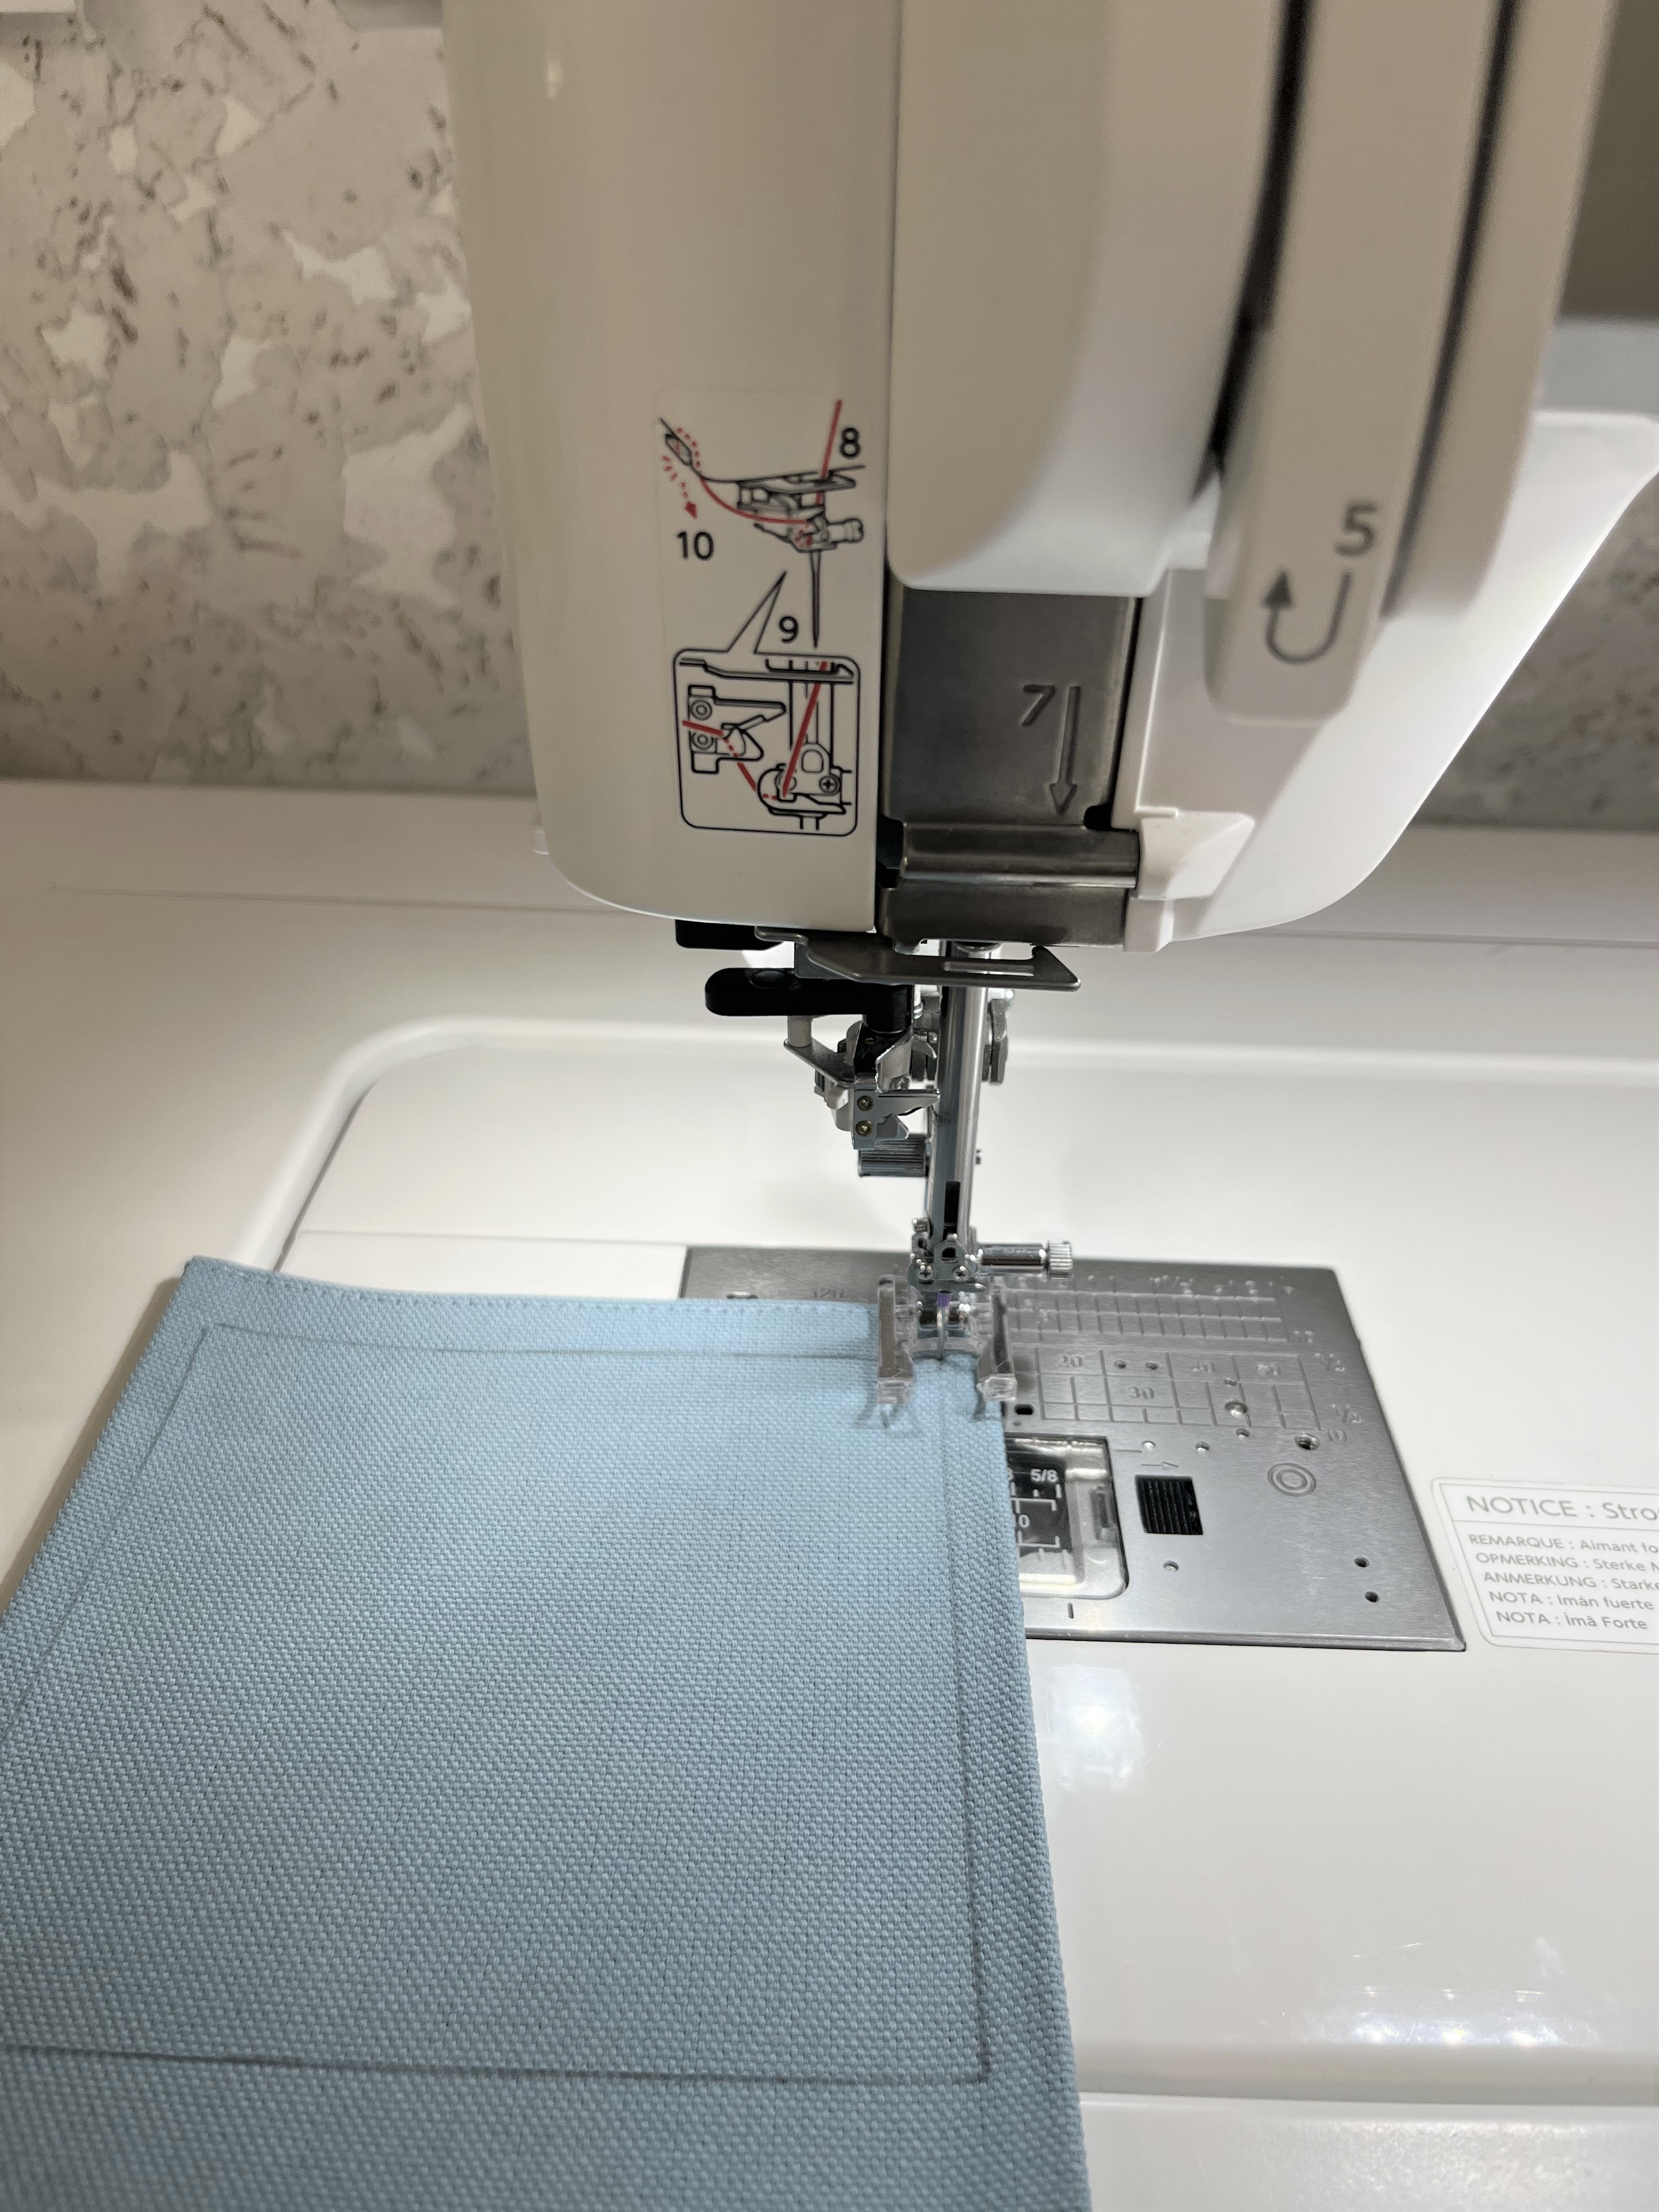
Switch back to your walking foot or HP2 foot and HP needle plate. Set your stitch length to 3.0, starting at the reference line. Align your foot with the edge of the fabric and, if possible, adjust the needle position to the right. As you reach the top edge, check the marks on the needle plate and on your foot (if you have them) to help you stop your needle at the perfect position to turn the corner. Leave your needle in the fabric and lift the presser foot, turn your fabric, place the wedge or hump jumper under the backside of your presser foot, this levels the foot, stitch those first few stitches with ease, remove the wedge and continue edge stitching across the top and up the other side ending at the marked line. Back stitch at the beginning and end.
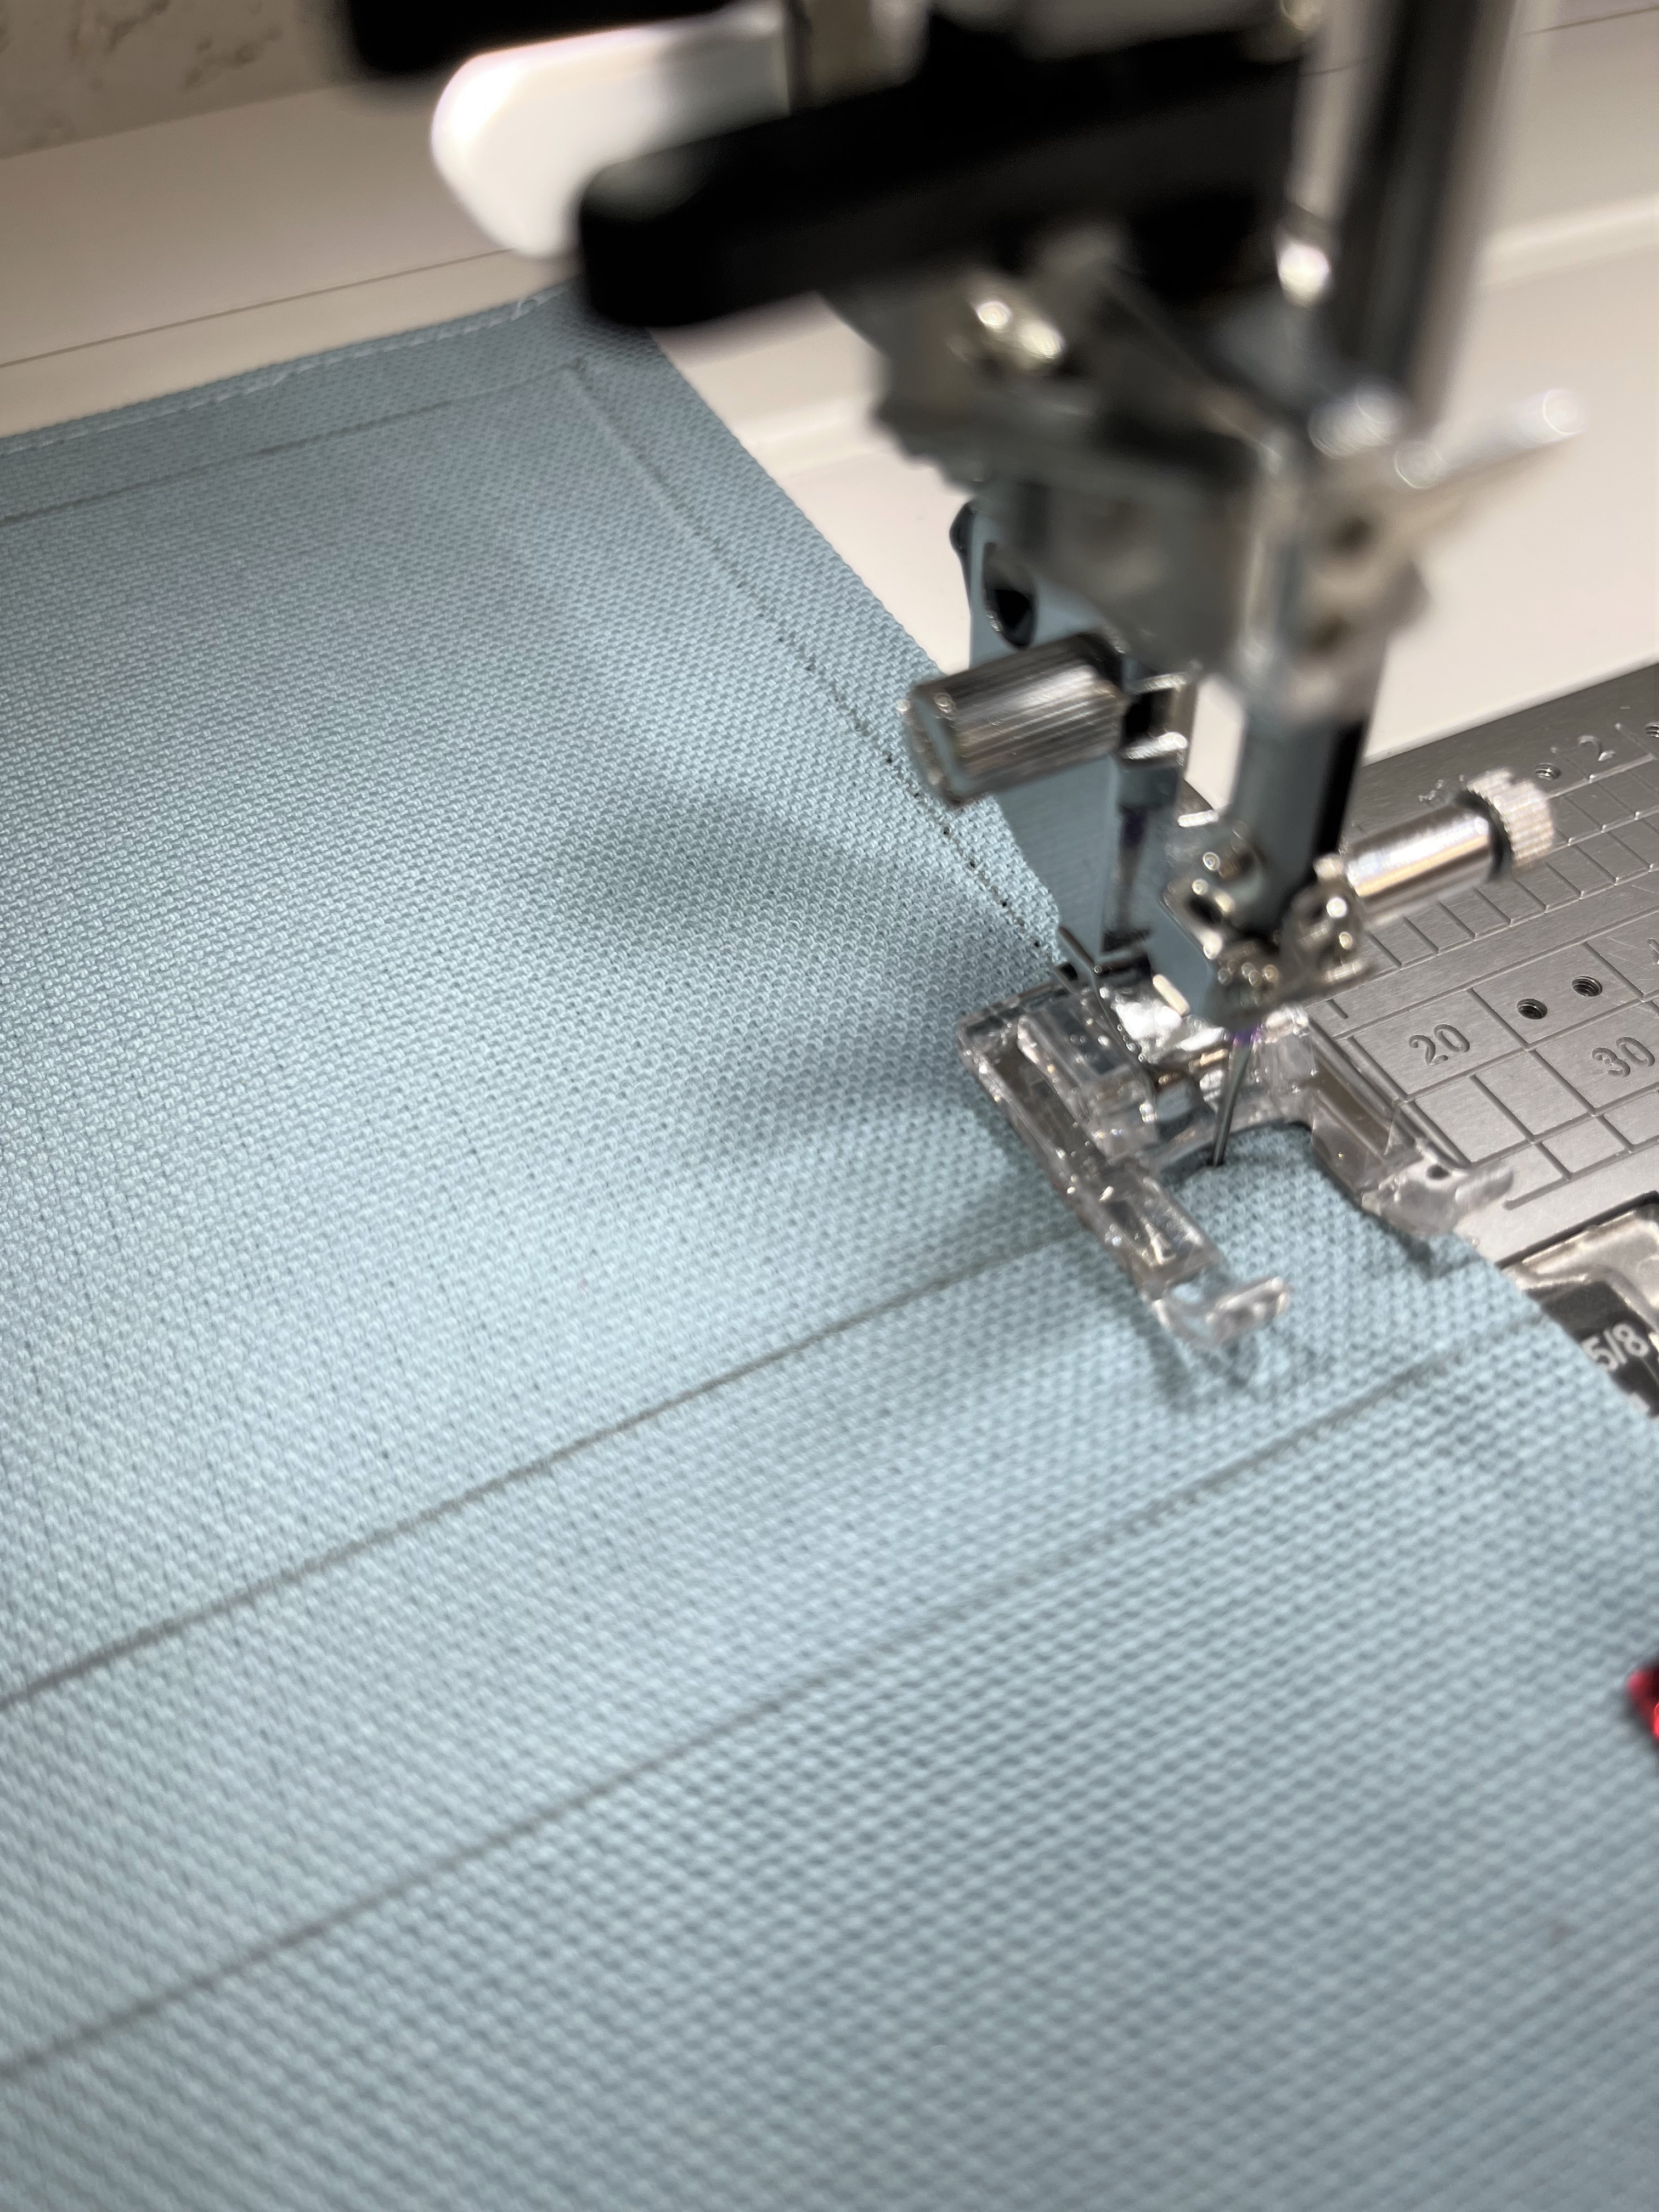
Fold your embellished pocket back into position again, 4 ½” from the top edge. Use clips to secure the pieces. Here is when the hump jumper's benefits and your sewing machine will truly shine as you stitch through a lot of thick layers at once. Once more, position the wedge behind the presser foot. Begin carefully edge stitching the pocket's three sides. Using the same backstitching and corner-turning techniques as before.
And you're finished! All that remains is for you to fill your beautiful flatware pouches with your pretty silverware and show your gorgeous work on the table. Your guests will be totally amazed that YOU made these!
Happy Sewing and Quilting!
Heidi