Projects

Kids Fox Dress Up Hoodie Tutorial

Created By:

Heather Petersen

Skill Level: Advanced

Halloween is right around the corner and I promised my fox-loving niece I would make her something foxy, so today I am going to show you how to easily sew a dress-up hoodie for kids.  I will be using the Mouse House Creations Dress Up Hoodie Sewing Pattern, sweatshirt fleece, my Janome AirThread 2000D serger, and my Janome S9 sewing machine for construction.  Let's get started!

Janome Supplies Required


Fabric and Notions Required
  • rotary cutter
  • scissors (for paper)
  • pins or pattern weights
  • printed & taped sewing pattern in the desired size for ears/tail - Purchase pattern here!
  • pen or pencil
  • thread matching body & accessories colors
  • small amount of fiberfill (or whatever you want to use for stuffing)
  • sweatshirt fleece knit
  • french terry knit (or whatever you select for accessories)

Instructions

Step 1 – Edit Tail Pattern

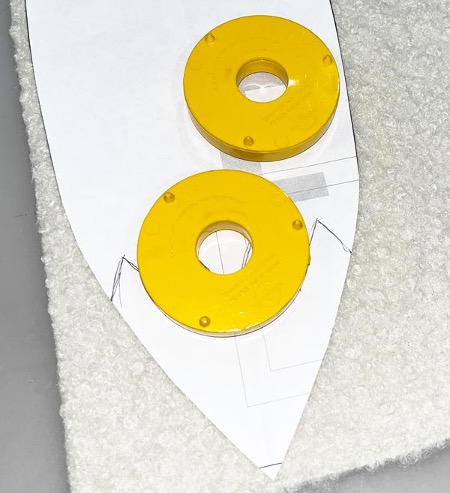
Once you have printed and assembled the pattern, to make the fox accessories print the deer ears pattern and the cat tail pattern (follow in instructions).  Before cutting out the cat tail take a pen or pencil, widen and curve the sides and draw a zig zag across the tip as shown below.


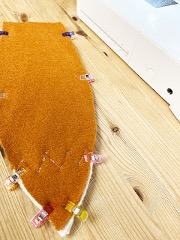
Step 2 – Cut Out Pattern

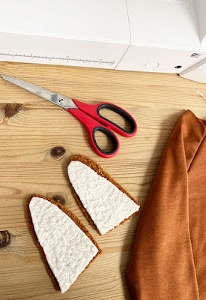
Follow the pattern instructions for laying out and cutting out the pattern.  For cutting out the tail pattern, cut the whole pattern first on your selected tail fabric and then cut the zig-zag bottom piece of the pattern on your selected fabric as shown.


Step 3 – Attach Front Pocket 

Follow the instructions for attaching the front pocket.  I serged the flaps and then used clips to secure the top and sides to the wrong side as the fabric is bulky and did not require pressing. 

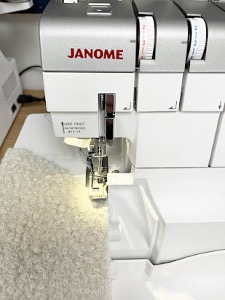
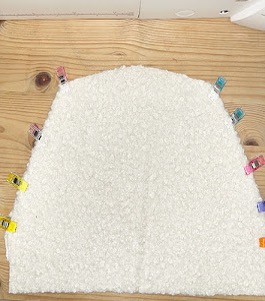
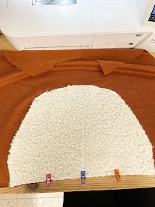
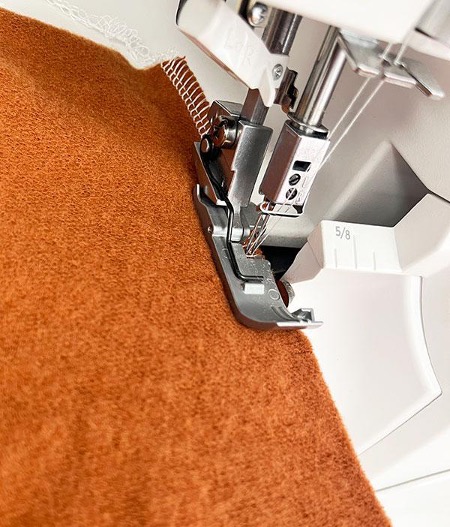
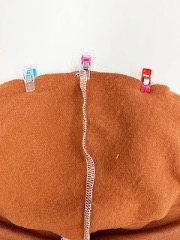
I used a medium zig zag stitch to secure the pocket to the front bottom pattern piece of the hoodie as shown.


Step 4 – Sew Raglan Sleeves 

Follow pattern instructions to sew the raglan sleeves together, taking care to match the sewing pattern notches for the front and back of the sleeve to the front and back pieces correctly.  I serged the sleeves, but you can sew with a regular machine as the sweatshirt fleece does not unravel.


Step 5 – Assemble Fox Ears & Tail 

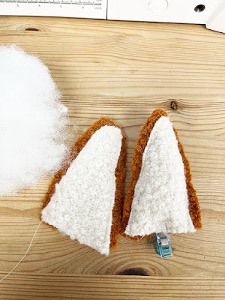
Lay the two earpieces on top of each other with the inside earpiece on top both right side out.  Cut around the inside earpiece to make it smaller than the outside piece (as shown).  Straight stitch around the inner ear to the outer ear leaving the bottom open.  Take your stuffing and gently stuff it into the ears until they are able to stand up on their own

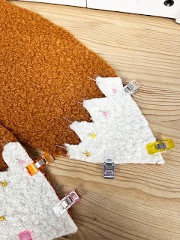
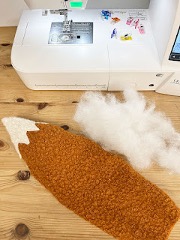
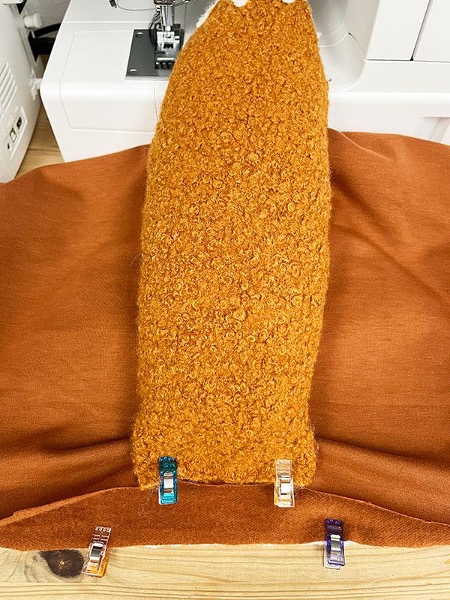
For the tail piece, lay the zig zag tip on the right side of the bottom of the main tail piece and pin the zig zag and secure the sides.  Straight stitch across the zig zags from end to end.  Take the two tail pieces with the tips attached and lay them right sides together and secure down both ends.  Straight stitch with a long stitch around the tail to the tip leaving the flat tail end open. Turn to right side out and poke out the tip so it makes a point.  Stuff as much as you like.


Step 6 – Assemble Hood

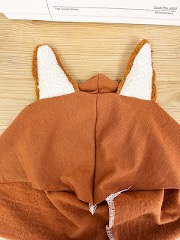
Follow the instructions for assembling the hood option with ears.  Sew the lining pieces first and then insert the ears inside, making sure they are facing the right direction.  Secure the enclosure making sure you are getting the ears in the seam, and then serge/sew the seam closed.


Step 7– Finish Hoodie

Follow the instructions for finishing attaching the hood to the body and then the body of the hoodie with cuffs and waistband, making sure to follow the instructions to attach the tail piece onto the middle of the back body piece when attaching the waistband.


You are done!

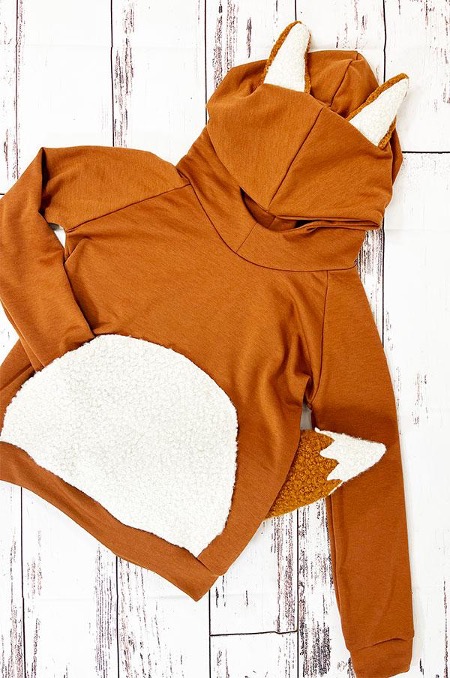
We hope you enjoy this tutorial! We love to see what you sew up so please tag us on our social media #girlcharlee #girlcharleefabrics #janome #janomeartisian.

Happy Sewing & Have a Great Halloween!

~ Heather


Everyone is Talking about Kids Fox Dress Up Hoodie Tutorial
Reviews


Tako
Beautiful
Wednesday, November 23, 2016

cpindzola
Around the Table Dresden Placemats
Saturday, December 17, 2016

I like the concept, but the directions are "sloppy." Nowhere in the supply list does it mention the felt or the batting (how much?). Also, I would never use a high loft batting in a placemat, or a table runner, as I think that it would be too unstable for a glass. The next time I make these, I will cut out the batting (I use flannel) and spray baste it to the wrong side of the Dresden plate before I put the Dresden plate on the felt to cut out. I have not yet washed the finished placemat, and am hoping that the single layer of felt does not curl up, or become distorted after washing/drying.
Txmaid
Fun Great Gift!
Tuesday, February 21, 2017

MargieARK
Teatime Quilted Tablecloth
Friday, February 24, 2017

I made this today but your cutting directions need to be changed. You only need 4 of color 1 and color 3 4.5 squares for the triangles. Also the inner border, you only need 2 cuts as WOF is long enough to cut each in half to fit the sides.
MickelSews
Great Machine
Wednesday, August 30, 2017

I've had this machine for only a week now. I bought it used from a lady who makes her own clothes, but she no longer needed the machine. During the purchase, she noted that she is almost sad that it's better to give it away because of how well the machine performed. (I also bought it along side a computerized machine of another brand.} She demoed the machine for us, showing it worked and gave us everything (including the box it came in!) She took amazing care of this machine. I have used it a few times now, and the directions for threading were easy to follow (albeit my hands are quite large so the lower looper was a pain, but that is no fault to the machine or brand.) And I recommend this machine to anyone who wants to learn to serge and wants a machine that can grow with them. I will happily use this machine time and time again.
rvstan
S9 Review
Sunday, February 25, 2018

I love, love, love my S9! It's sews and embroiders beautifully and it's simplicity of use amazes me. I would recommend this machine for both a beginner and an experienced seamstress. If I would ask anything of Janome it would be to upgrade the programming to run a larger hoop size. I understand that it can't get much wider but there is most definitely room for it to go longer. That is the only limitation of this machine.
pjmnana
PJMNana
Monday, February 26, 2018

I purchased a Memorycraft 15000 a few years ago and it was the best purchase I ever made! This machine can do just about anything you would would ever want! I love the capability of using the Acuedit app to set up my embroidery pattern on my Ipad and then download it to the machine! I love how my embroidery looks upon completion and I love all the good lighting it has to light up your workspace. That way you don’t need to worry about where to set up your machine. It also has plenty of room to do machine embroidery on any size quilts! There are many decorative stitches from which to choose that are outstanding! It’s hard to choose which one to use! There are so many great features it is hard to decide what I love the most. If you want to buy only one machine to last a lifetime, I would recommend this one!
KLWash
S9 Review
Sunday, February 24, 2019

The S9 is amazing. I learned to sew by hand when I was just 5 and in my grandmothers way as she was quilting. I took seeing classes in high school until they would no longer let me sign up. The S9 makes me appreciate my current skills as well as motivate me to want to learn more. This machine is awesome.
SewSueMe2002
Horizon Memory Craft 15000
Thursday, November 19, 2020

My Janome Horizon Memory Craft 15000 is fantastic! I love, love, love this machine! When I came across the Eye for and Eye embroidery design today, I wanted to make it. However, the embroidery file is missing. Nothing downloads when I select the download button. Please help!
Jillfmischo
Treat Bag fun!
Monday, August 16, 2021

I made the Halloween treat bag for my new granddaughter and I’m sure it will last for years. No embroidery machine so I appliquéd the lettering. Need a little more skirt fabric for a better gathered look, and I used thin double-bias tape for the skirt hem, over edge stitch on skirt sides. I’m pleased with my results!
elenaz
Very helpful tutorial
Wednesday, October 25, 2023

I want to say thank you for teaching me this method of applique. I was able to do it with a small letters. This method is the best so far from all of those I've seen and tried.
plonkar
So useful
Thursday, November 30, 2023

I'd like to express my gratitude for teaching me this appliqué method. I successfully applied it with small letters, and, so far, it's the most effective among all the methods I've seen and tried.

DEALERS
The TWO Closest Dealers to you are:
19 PUTNAM AVENUE , PORT CHESTER NY, 10573
914-934-2934
196 Boston Post Road , Orange CT, 06477
203-878-1654
Find Additional Dealers